Kids Camouflage Desk
As an Amazon Associate, I earn from qualifying purchases.
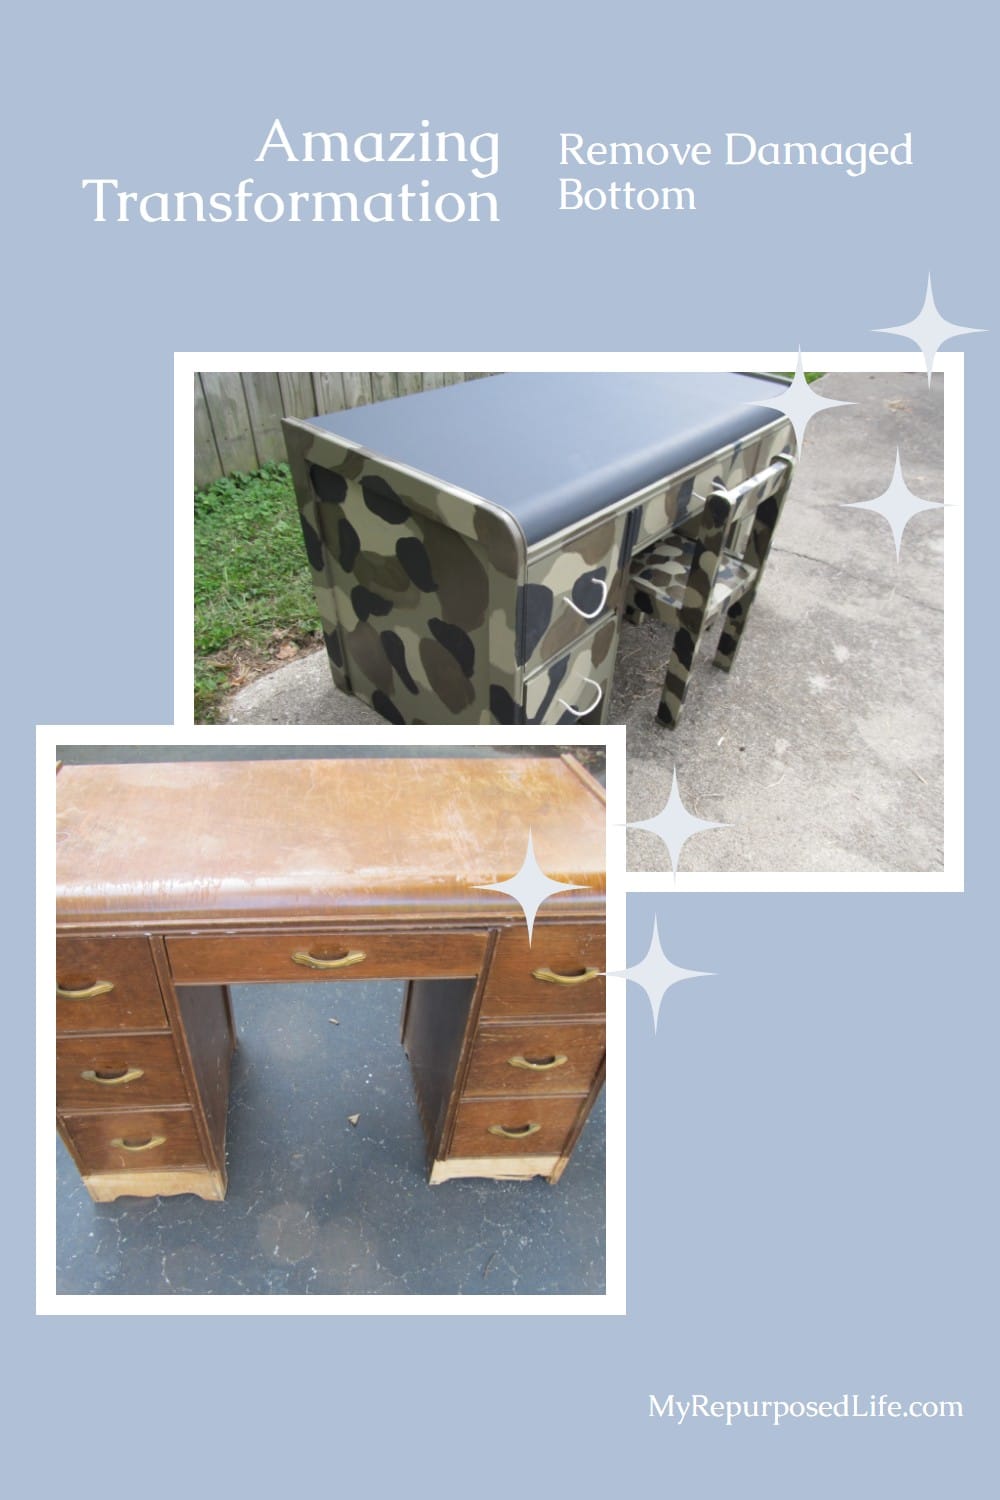
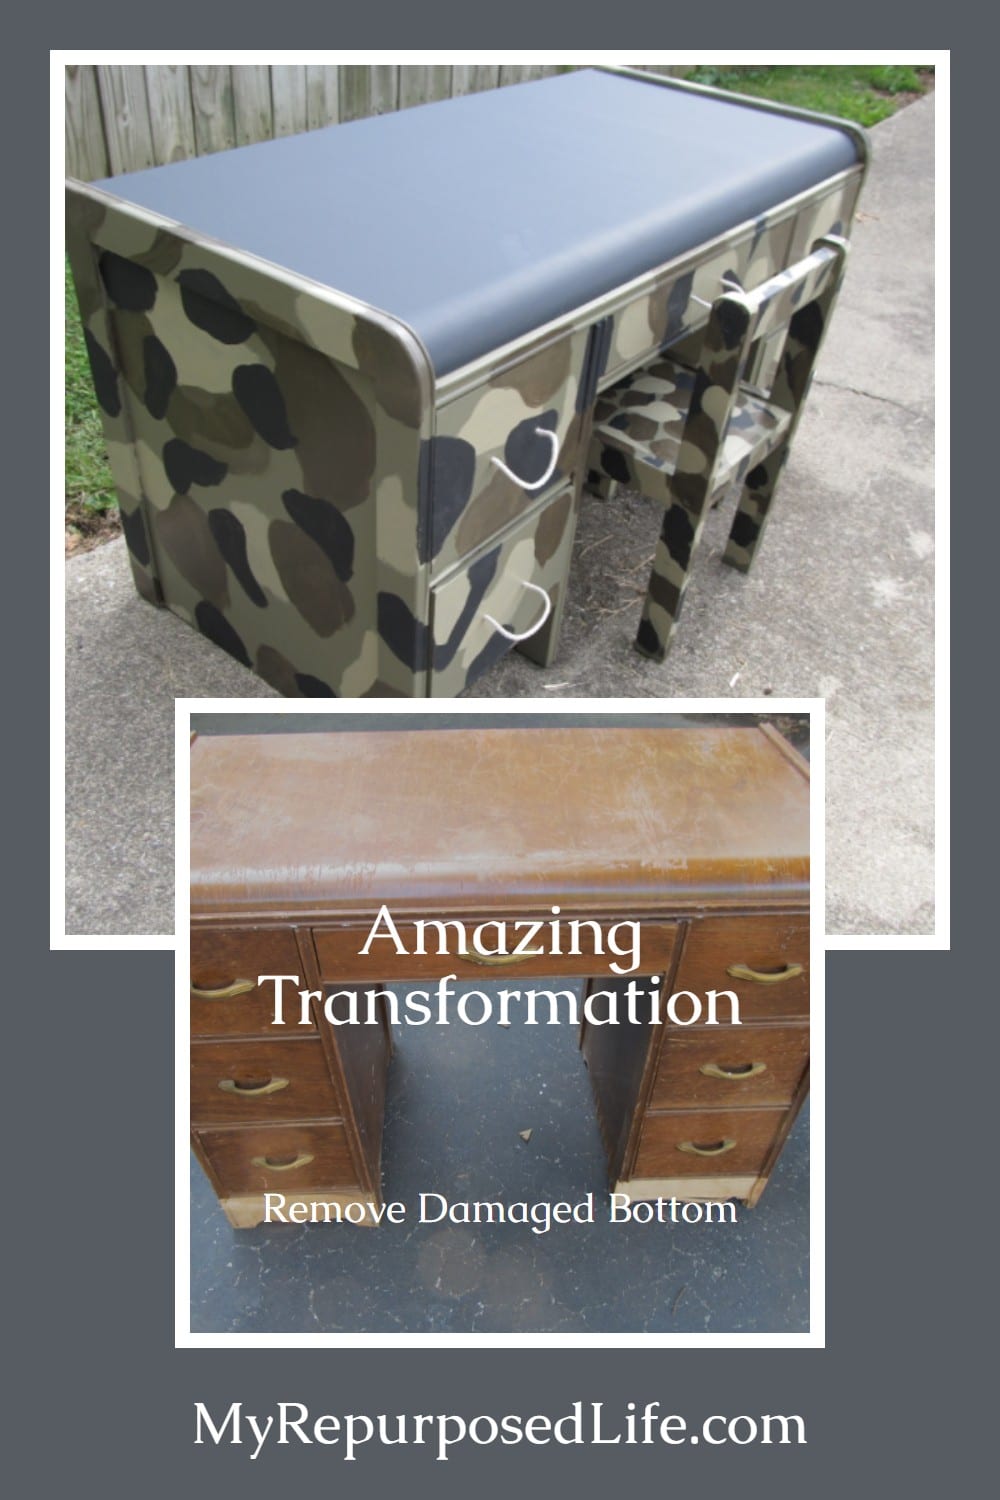
Transform an ordinary piece of furniture into a one-of-a-kind camouflage desk that any adventurous kid will love! This budget-friendly makeover transforms a simple waterfall desk into a rugged, stylish workspace with a fun military-inspired design. Whether for homework, art projects, or playtime, this DIY project is an easy way to give new life to an old desk while adding a unique touch to a child’s room.
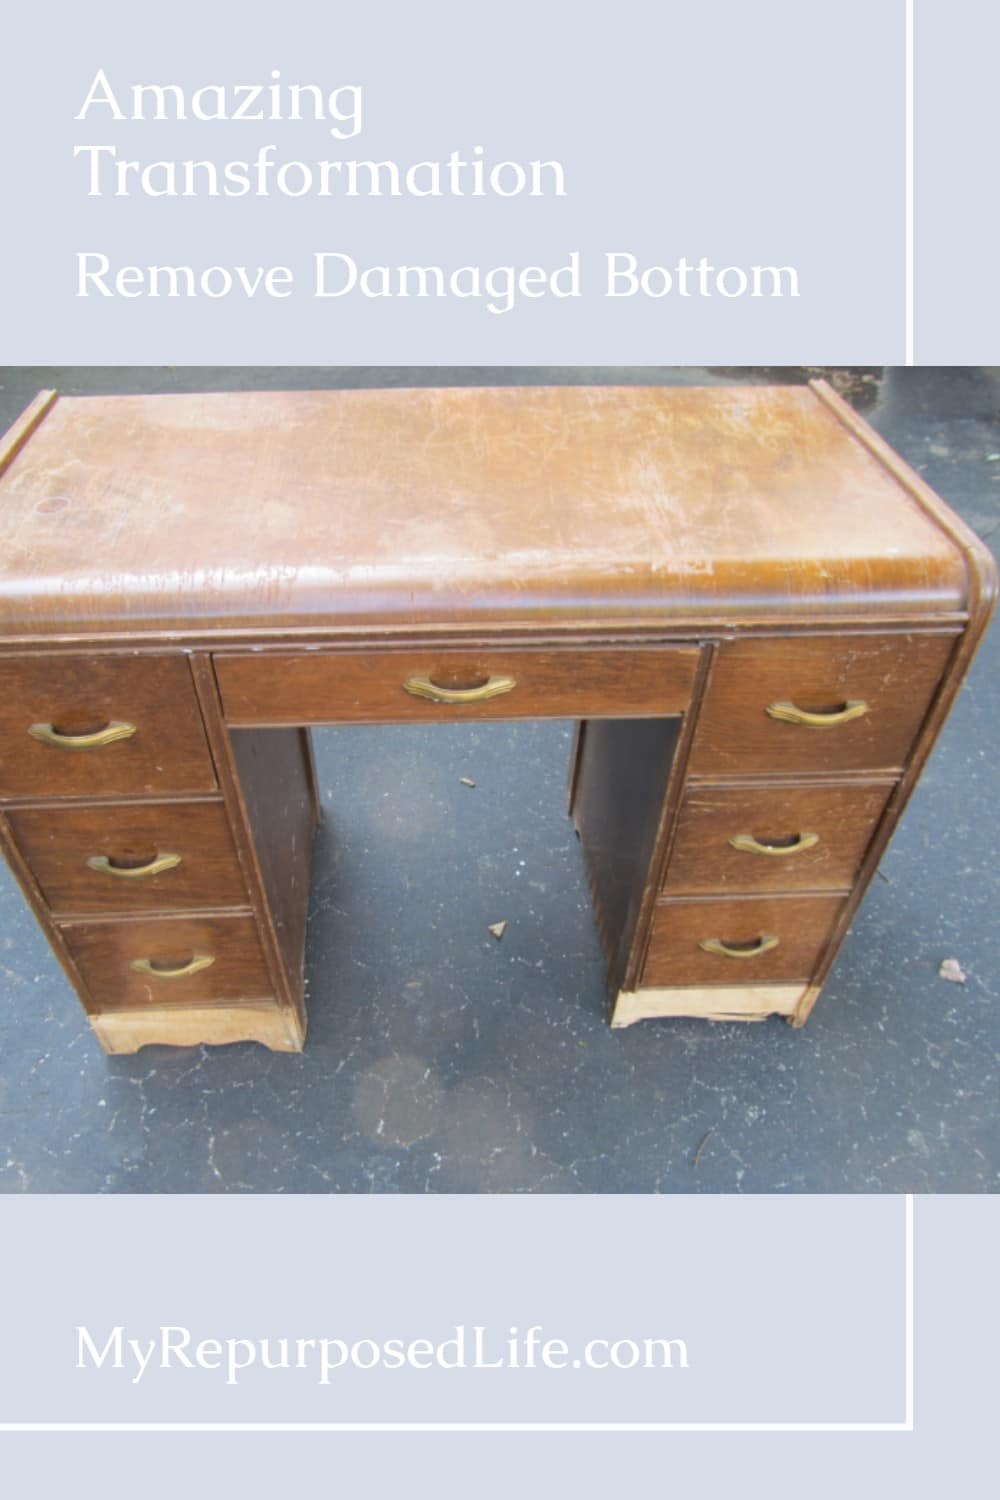
Damaged Vintage Waterfall Desk
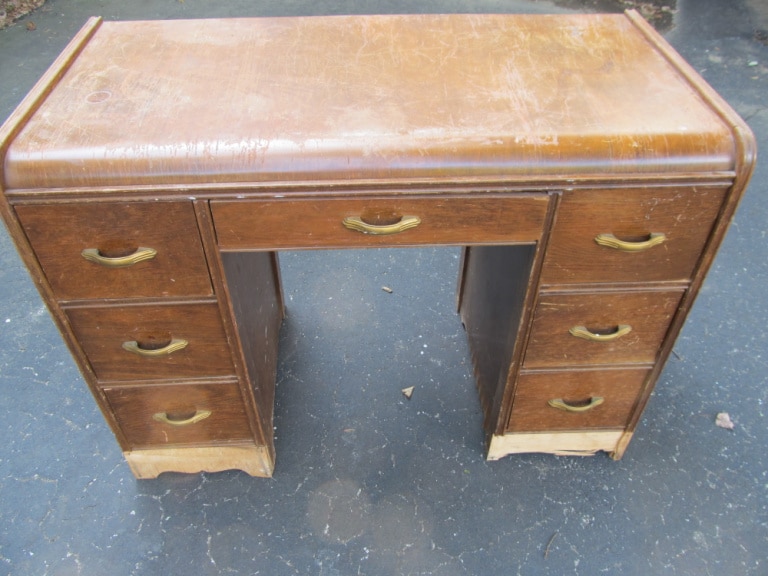
I got this vintage waterfall desk from my cousin Terry. Her dad, my Uncle Roscoe, curbed the desk years ago. You can see it has some problems.
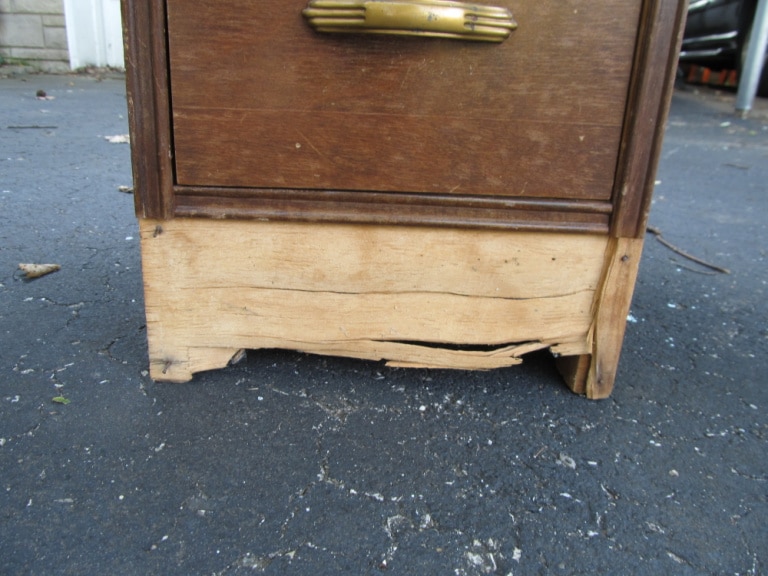
The damage on the bottom of the desk was probably due to water damage and beyond repair.
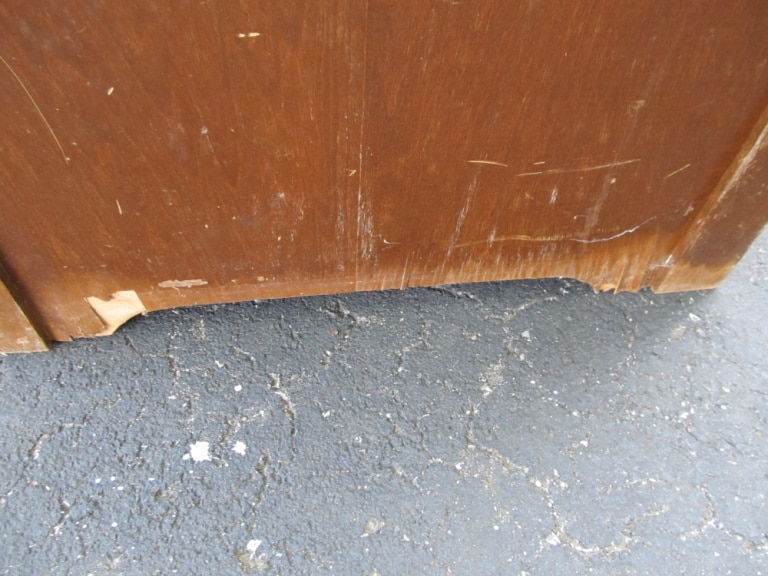
A view of the side reveals more veneer damage. No fear! I had a plan!
Bring Out The Jigsaw
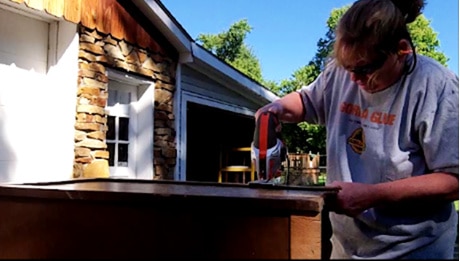
I could have used a circular saw or even a reciprocating saw, but chose to use a jigsaw. Why the jigsaw? Because it was enough to do the job. There’s no need to bring out the primary power tools when a friendly jigsaw is enough.
I hope you will see that you don’t have to have a lot of power tools to do a desk upcycle.

Voila! Gail and the jigsaw completed the job! It is a very satisfying feeling to saw furniture to keep it out of the landfill.
The Waterfall Desk Is Ready For Its Makeover
First, I needed to ensure my chair was the correct height for the new shorter desk.
Looking For The Perfect Color
Anyway, I was thinking about finding the best color for a kid’s desk while looking at my paint stash. And suddenly it came to me, I guess the paint spoke to me.
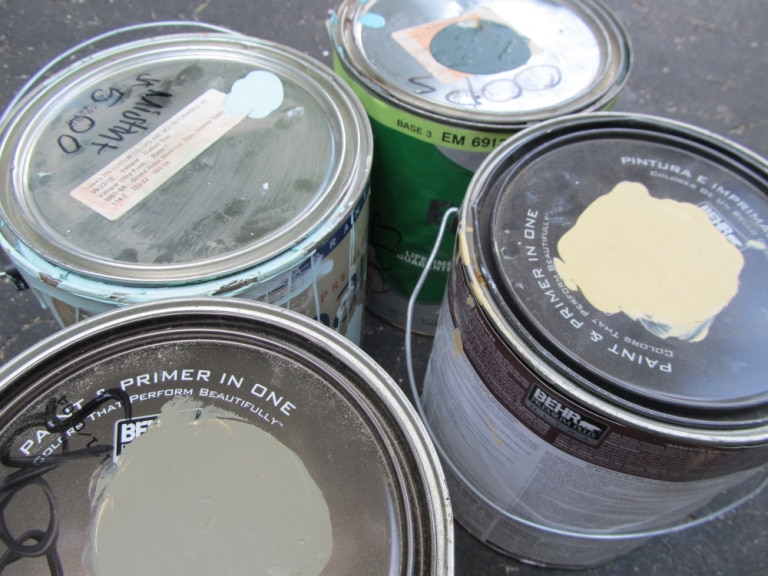
These are the paint colors that spoke to me.
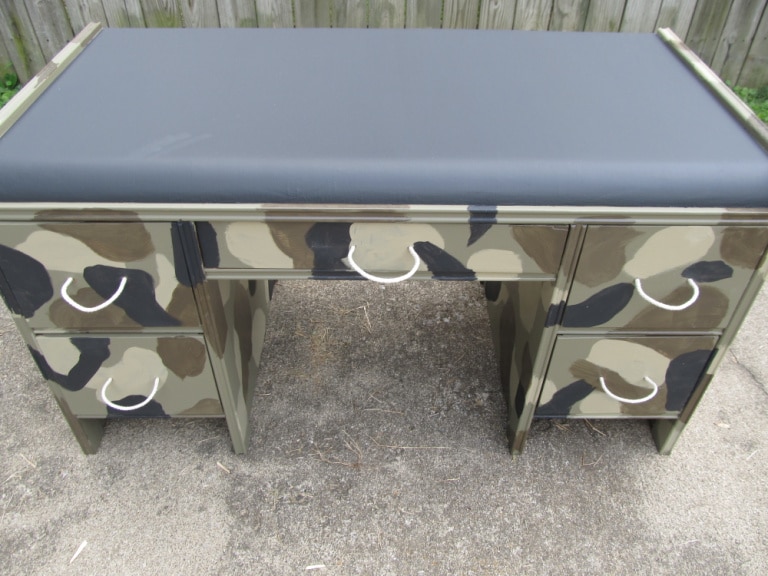
Painting a Camouflage Pattern on a Desk
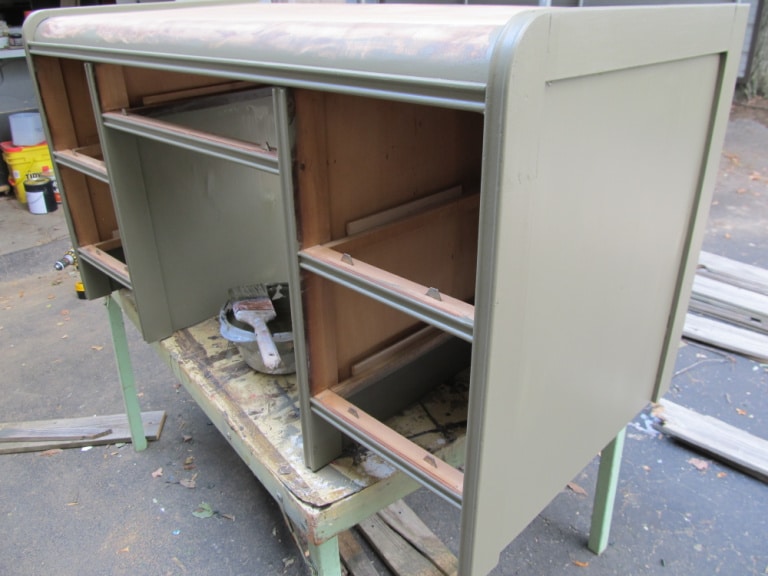
I started by mixing some Plaster of Paris and water and adding it to the primary color of the camouflage desk. This photo gives you a good idea of where I cut the bottom off the damaged waterfall desk.
It originally had three drawers on each side, but now it has two. The key to sawing a vintage waterfall desk is to remember that the bottom drawer should not rest on the ground. This photo shows how I left “feet” for the desk to rest on.
I gave everything at least two coats of this homemade chalk paint.

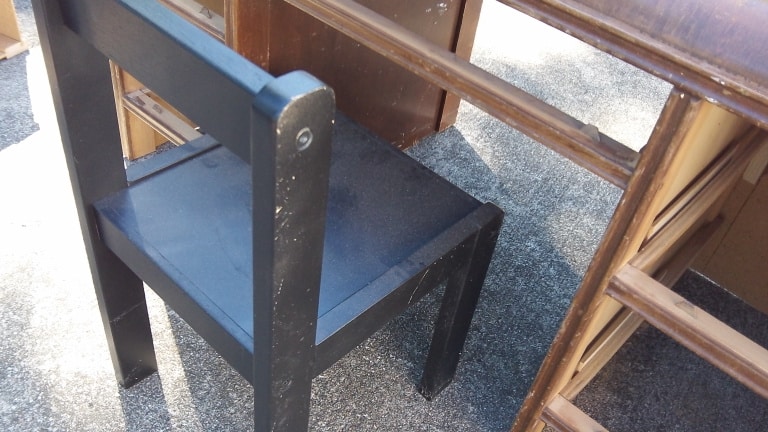
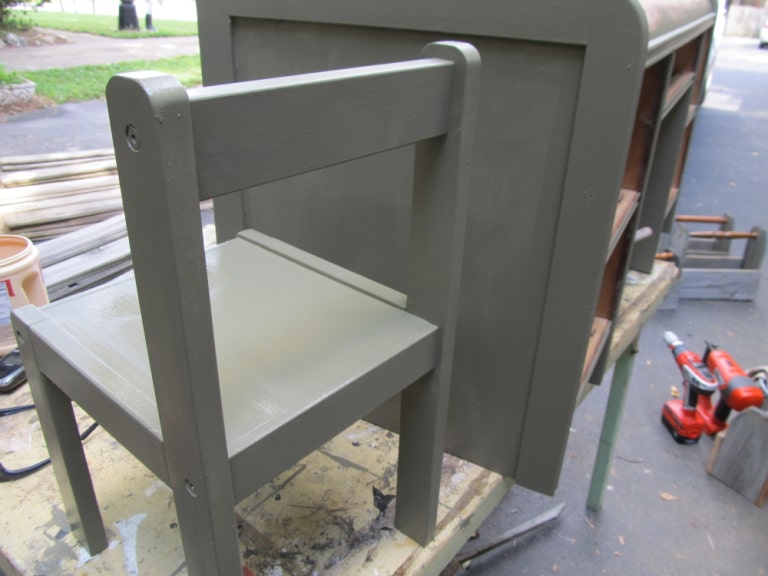
I had no idea how to paint a camouflage pattern, so I thought I should let the chair be my guinea pig.
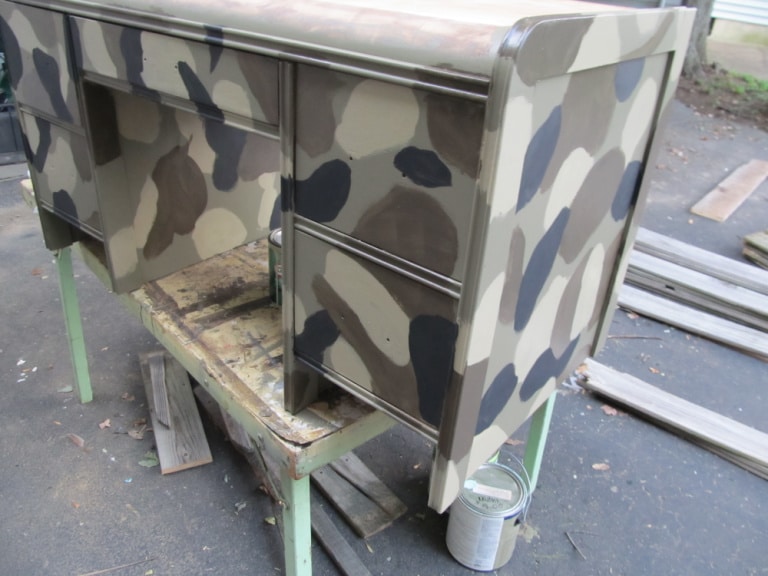
I then began working on the desk. Although I wasn’t thrilled with the progress, I kept on.
As an overall look, I’m sure it will be fine.
Painting a Chalkboard Top For The Camouflage Desk
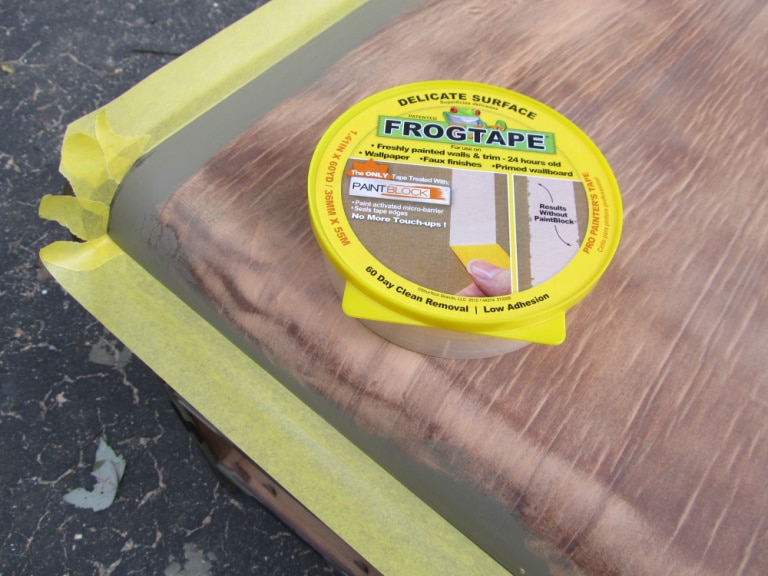
I don’t usually tape off when I do chalkboard paint, but I wanted a good crisp line on this piece.
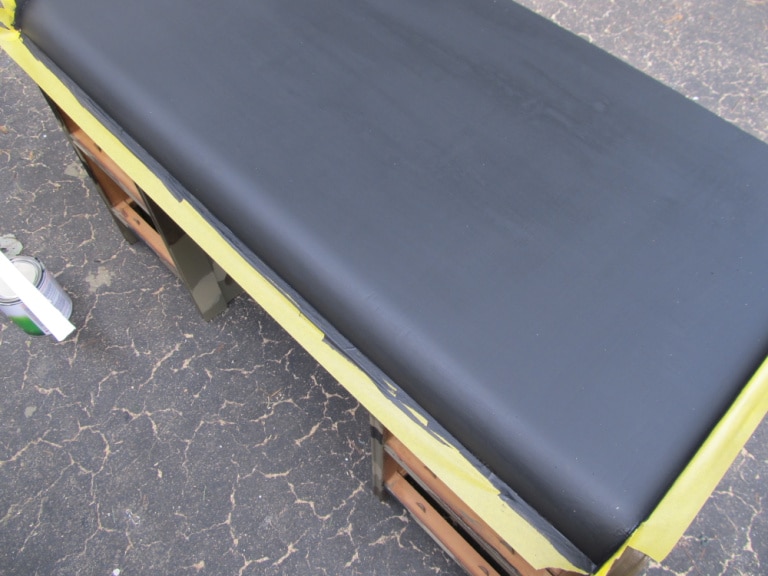
I applied three coats of brush on the Rustoleum chalkboard paint. I always do three coats, the first going east to west, the second going north to south, and the third, however I think it needs to go. This being a former waterfall desk made it the perfect candidate for a chalkboard top.
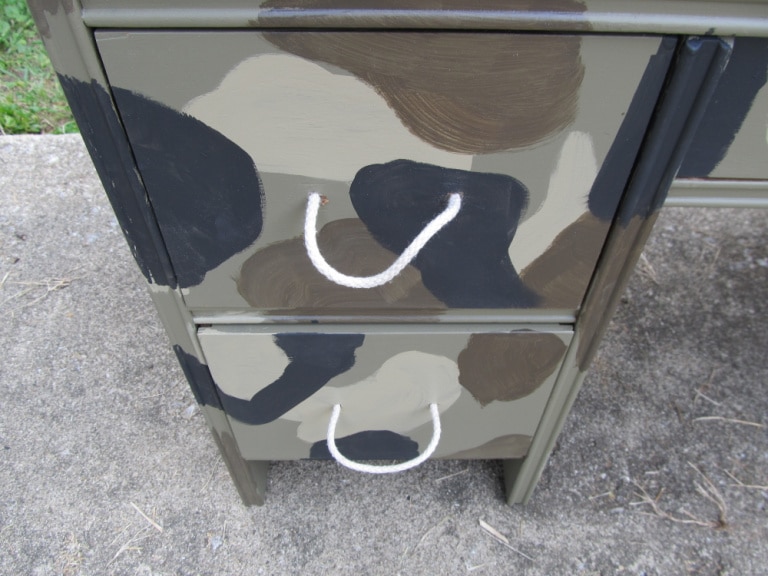
I let the desk sit for a day to decide if I liked it. I decided it was okay, so I thought about what color to paint the handles. I was going to go for black, but then I wondered what else I could use instead of the vintage handles that were on it originally. R-O-P-E! I don’t know how it came to me; sometimes, thoughts pop into my head.
I had to go to the hardware/post office store to mail an Etsy package and buy some bolts for the Display Easels, so I picked up some rope while I was there.
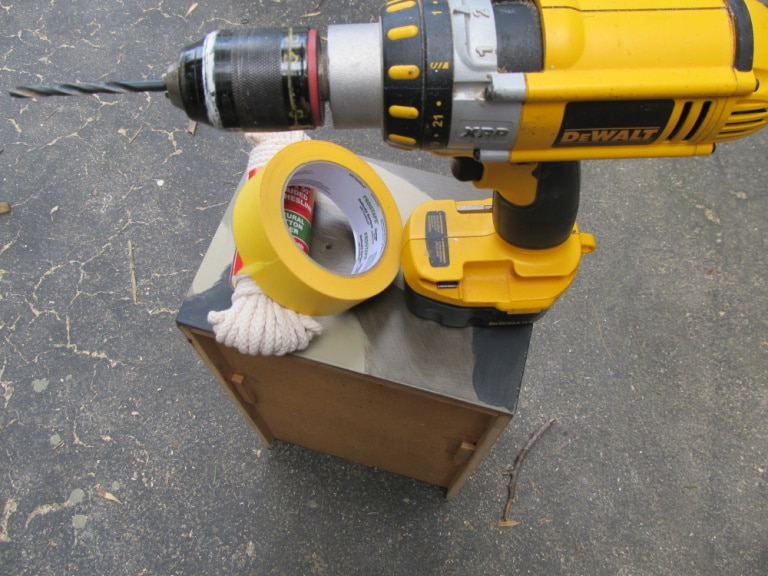
I gathered everything I needed to modify the handles on the waterfall camo desk drawers.
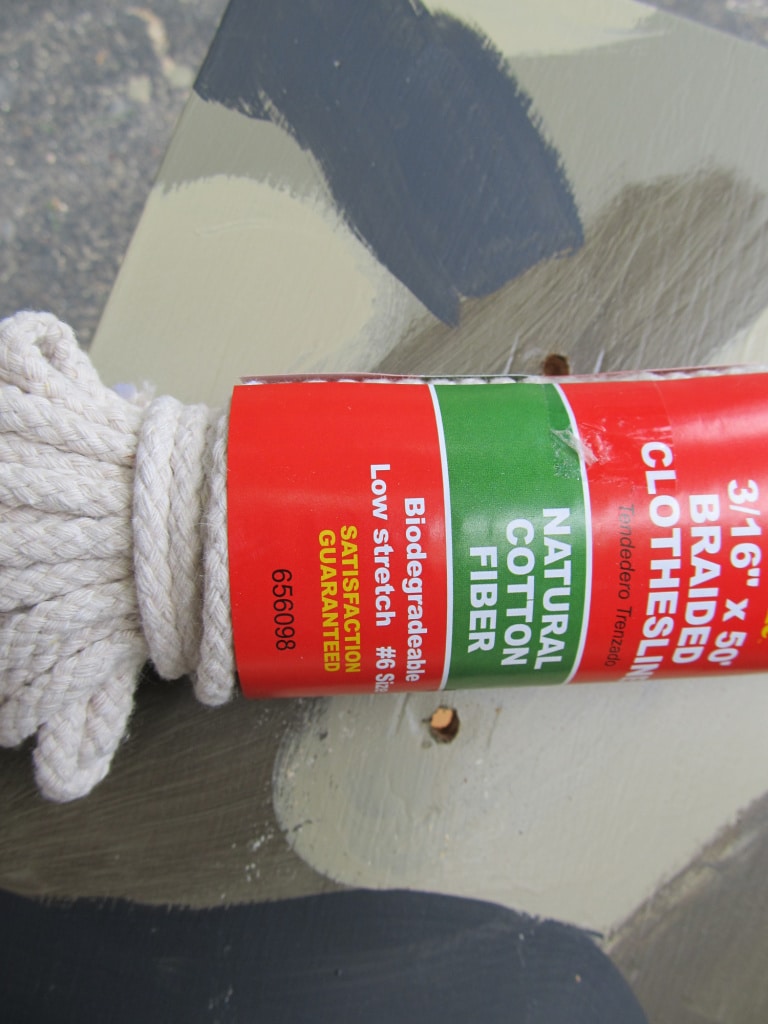
The rope is 3/16, so I drilled my holes the next bit larger. I should write these things down. I always think I’ll remember, but I don’t.
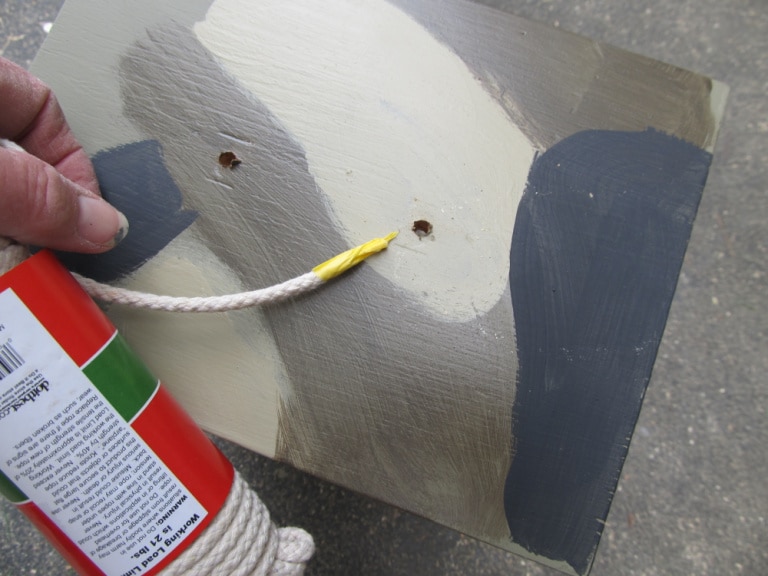
I used an old teacher trick to get the rope through the holes without fraying. For now, I just left them long inside the drawer and knotted them end to end. I’m not sure how I’ll finish them off.
Old Waterfall Desk | New Camouflage Desk for Kids
Here you have it! One wonderful Camo Kid’s Desk!
See how the extra height I left gives it the look of an actual desk?

The rope handles were left adjustable so the new owner could decide how large they should be.
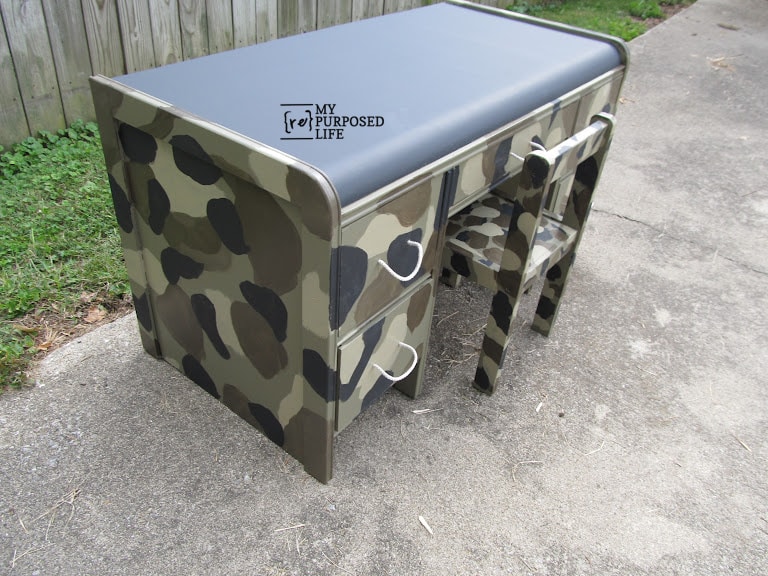
Wow! It’s even better than I could have imagined. I think my Uncle Roscoe would approve.
Related Content: Modify the Depth of a Desk
Love the camo desk. Great idea for rope drawer pulls
Thank you so much Lynette for your comment. It’s truly appreciated.
gail
I know this is an older post but I feel inclined to say something just in case. First allow me to say I absolutely ADORE your projects and have found inspiration on your site. I also follow your craft on Facebook. This camo desk is adorable and I will have to try it soon as I find a piece to cut up 🙂 . My concern is the rope handles. I would do it, it was a very creative idea! But please please please be sure to make the rope like an actual handle size so a child cannot fit their head in it. Sorry to be long winded , that was my only concern !!
Amy,
I appreciate your concern, thanks for pointing that out. (about the rope handles)
I’m happy to have you following along on Facebook!
gail
Another idea for the handles: 550 cord.
Great job! My son is loving camouflage lately, maybe there’ll be a similar project in my future. Thanks for the inspiration!
So fun! I just found your blog (love it!) and am your newest follower 🙂
Susan
I missed this yesterday, busy day! I LOVE it! Great job with the camo! Some boy is going to be in heaven!
Gail,
You did it again. Love the camo and of course those great rope handles.
Good job!!!!!!
My boys would love it and I think we might have a project on our hands!
My boys would LOVE this! As a fellow Kentuckian I always say, you can’t go wrong with camo 🙂
It came out ADORABLE! Some little guy is gonna just love it to death. Hey I found out something interesting a few weeks ago, adding plaster of paris to exterior grade paint made the plaster set up immediately! (oops, I did’t know that!) Did you? Never happened to me with interior paint…
Wow, what a great organization you will be helping! I just read their blog and it just makes me so proud that Home Depot helping Stiggy’s Dogs. What a great thing to be a part of.