Kitchen Hutch Makeover | Remake
As an Amazon Associate, I earn from qualifying purchases.
I have a great kitchen hutch makeover to share with you today. It’s not so pretty in it’s former state, but I hope you love it’s new look!
 Back in January I found this old hutch at Vendors’ Village. Well, truth be told, Terry actually found it and talked me into buying it. It was way over my limit at $70, but it was 50% off, so I bought it for $35. I expected that I would just give it a quick paint job and flip it.

The first step to any updated furniture is to remove the old hardware. I removed the hardware from the top of the hutch and the drawers.
Kitchen Hutch ReMake

Instead of just painting it, I decided to remove the lower two drawers to make the old hutch look more like a piece for the kitchen instead of a bedroom dresser. I used some 1×10’s on the lower portion.
 I secured the shelf boards with Gorilla Wood Glue.

It was time to paint with my Homeright Finish Max and some of my favorite DIY Chalky Paint Primer. I used Behr interior flat in Polished Pearl as a primer.
 I raised the bottom up on my easy diy sawhorses so that I could easily paint on the inside of the lower section.
 This is after 2 coats of primer on everything but the doors. I had forgotten the doors on the first round of priming.
 For the top coat I used a pure white semi-gloss in my Finish Max.
 Not shown in pictures—the ONE large drawer was modified on the table saw to make it look like four smaller drawers. More like what a kitchen hutch would have. It sort of mimics the drawer in the upper portion of the cabinet.
Special thanks to Rodney for modifying the drawer for me.
 I used some aerosol Citristrip to remove the paint from the old hardware. It was during a cool spell, and I actually ended up spraying the hinges, wrapping them up in the plastic garbage bag overnight. The next day all of the paint rinsed right off.
 The area behind the original drawers is “handy board” and didn’t paint up very well. I decided to wrap a piece of foam board with fabric to disguise the not so pretty board.
 I used some awesome red knobs from my friends at D. Lawless Hardware . . .
 . . . along with these great handles.
 I’ve always loved white hutches with red hardware, especially since I saw Elizabeth and Co.’s makeover a couple of years ago.
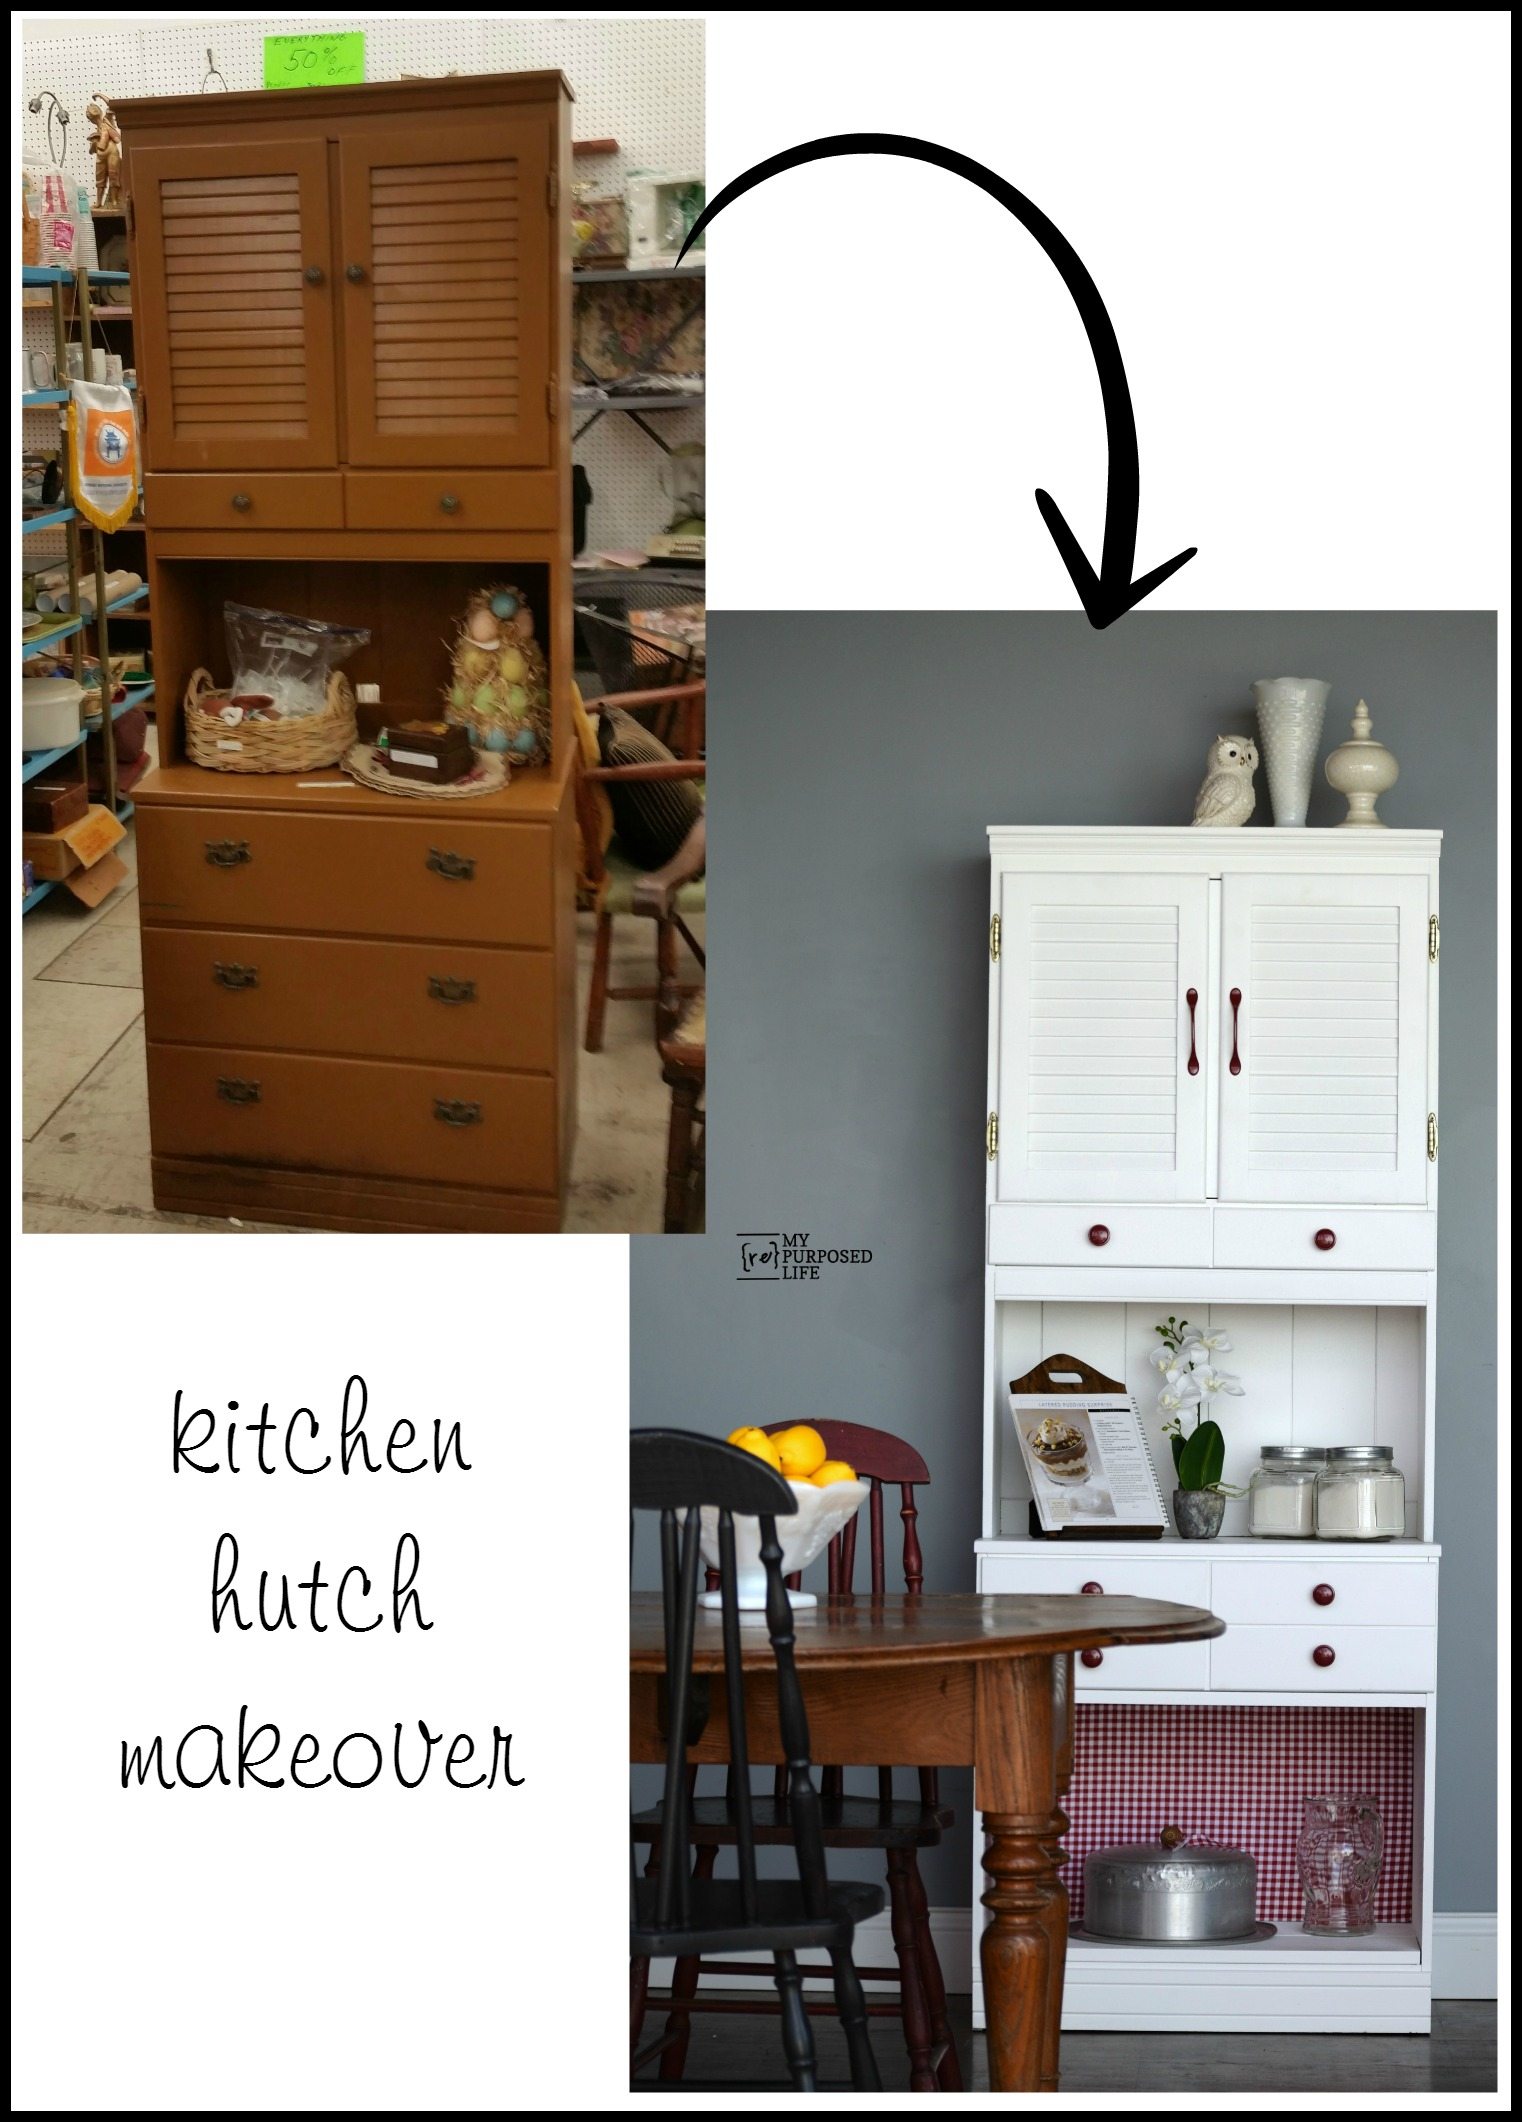


It’s difficult to tell, but it’s sort of petite in size, perfect for an apartment, condo or galley kitchen.
 Even though this white hutch is small, it offers a lot of storage options. Do you love the red hardware as much as I do? If you do love this project, I’d appreciate you sharing it on Facebook or Pinterest.
I haven’t taken it to the booth yet… but probably will this week.
I am curious as to why you used the interior flat paint as a primer. My first thought was that perhaps you were just using something extra that you had on hand. Then I began to wonder if it works better in some way. I will understand if it is your specialty and you would rather not share. Thanks
Sonja,
I generally use whatever I have. But prefer using the flat paint for my own mixture of diy chalky paint primer. No secrets here. The mixture I use will stick to anything, and it allows me to use whatever color I want as a primer. Painting something red? Use that red paint to make your own primer. Makes painting so much faster and fun!
gail
I just discovered your blog and I am just love struck! I love repurposing furniture and this blog is HEAVEN and a treasure trove of ideas for me! I wish I would have discovered your blog years ago because I would not have looked past many things thinking they are just “junk” and what would I do with them! Now with all the ideas you have shared, OMG…I am going to go wild! Thank you so much for sharing your talent, vision, and know how!
Sandy
I am so happy you found My Repurposed Life! It sounds like you love doing what I do, but just didn’t know HOW to do it. 🙂 Have fun looking back at the years and years of projects.
I’m here if you have any comments or questions.
gail