Lazy Susan Makeover
As an Amazon Associate, I earn from qualifying purchases.
Hello everyone! My name is Angie and I blog at Knick of Time, and I’m excited to share a lazy susan makeover, my first post as a contributor. I want to thank Gail for inviting me!

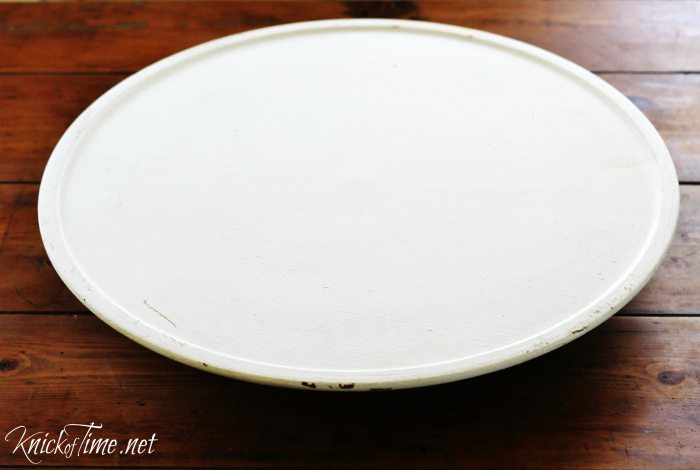
Thrift stores and yard sales always have lots of wooden things. You can find shelves and spice racks that have outdated looks. These projects can be easily and inexpensively updated. I picked up an old lazy Susan for just a few bucks that was dinged up and really just needed a fresh coat of paint. But I wanted to give it some vintage character as well.
It’s an easy project, and the process can be used on lots of other pieces you’ll find while going to garage sales this summer. Here’s how:
Select an image that you’d like to use
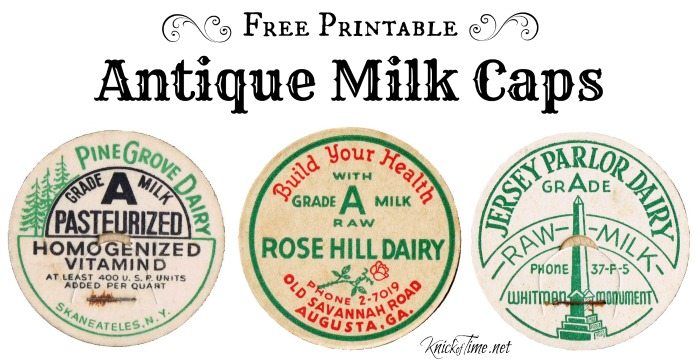
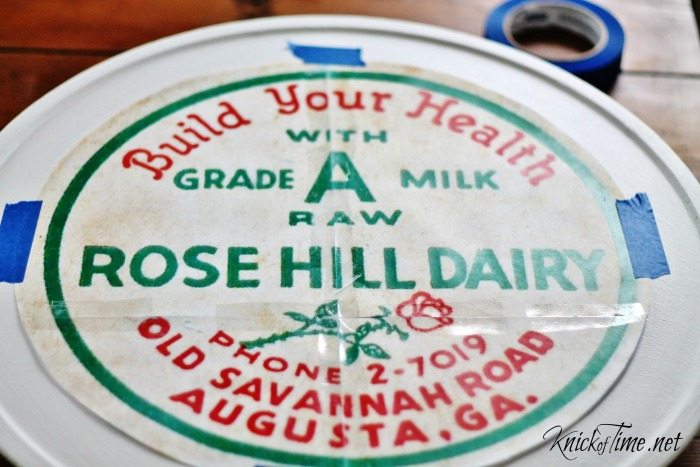
I wanted to add a graphic to it, and an antique milk cap image was the perfect choice to fit the shape of the lazy Susan. My farmhouse kitchen has a green antique stove in it, so I wanted to pull green in as an accent on the lazy Susan. I have 3 milk cap images with green on them (printables here), and picked the Rose Hill Dairy one for this project.
Determine the size you need your image to be
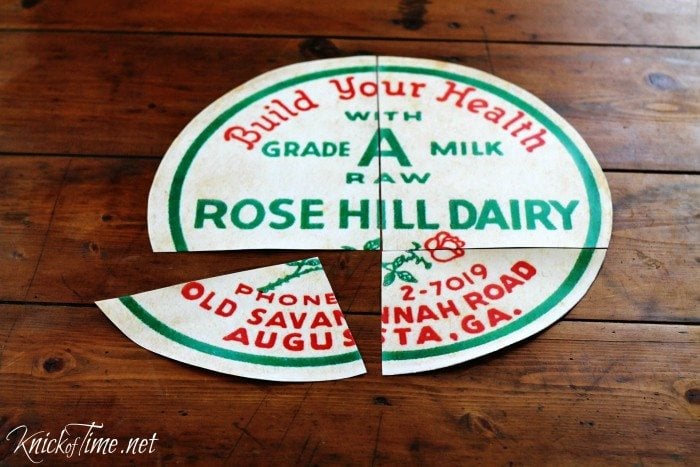
I needed my milk cap image to be about 17″ in diameter so a regular size sheet of paper wouldn’t be big enough, so I enlarged it to print on multiple pages at blockposters.com, which is a free resource. The number of pages you select for your image to print on determines how large the overall image will be. Four pages were needed to get the size I wanted, which was about 17″ in diameter. Here are the 4 sections once I cut them out.
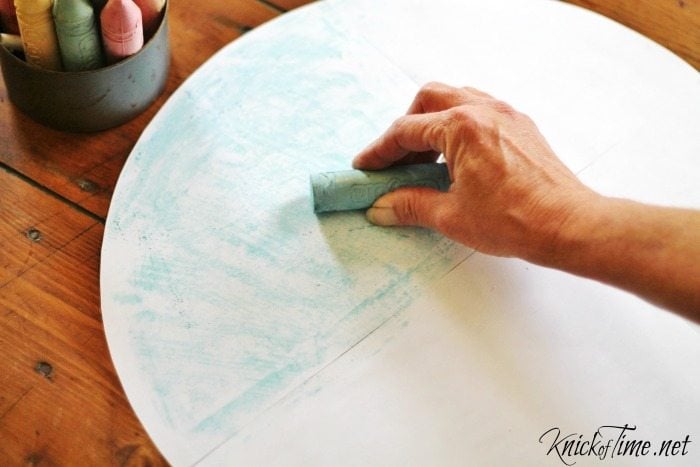
Tape sections together
Tape sections on the front. Then rub the back side with chalk. I used colored sidewalk chalk.
Position the image on your piece
Use painter’s tape to hold your image in place.
Transfer image to lazy susan
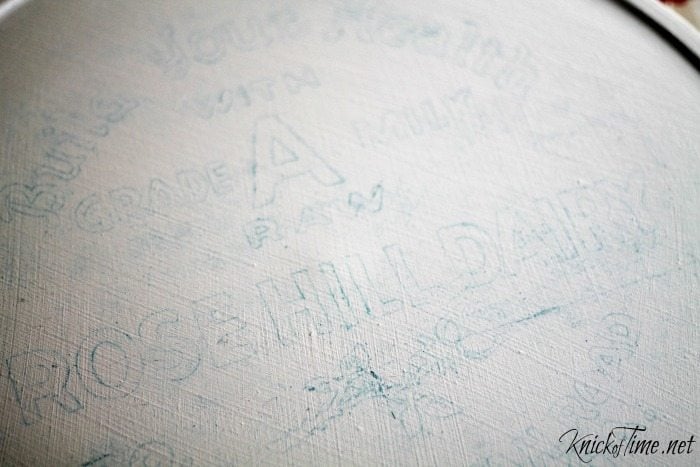
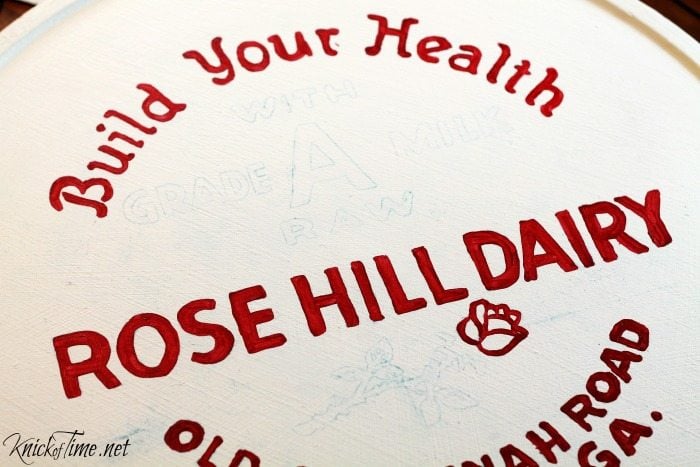
Use a ball point pen or stylus to trace around each letter.
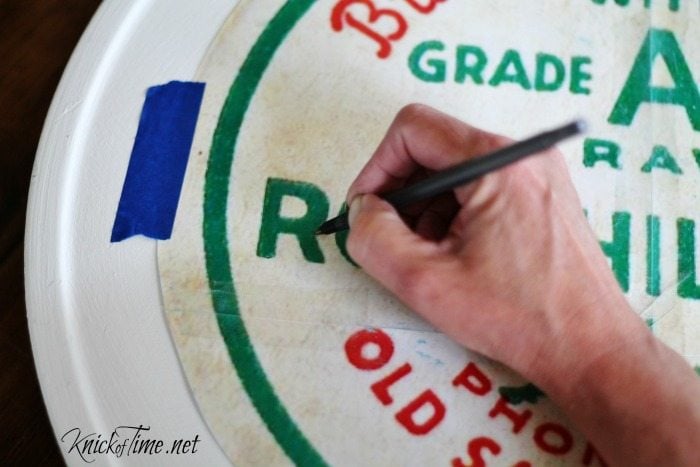
This will transfer the chalk onto your piece and give you outlines to paint.
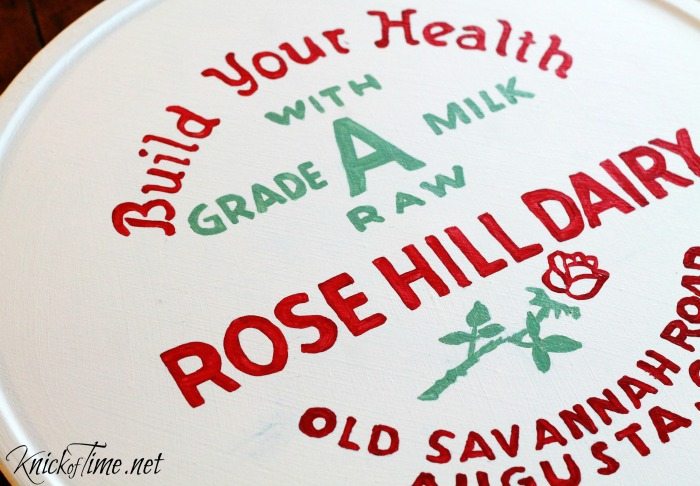
Paint the image you transferred
Select appropriate size brushes and begin painting the letters.
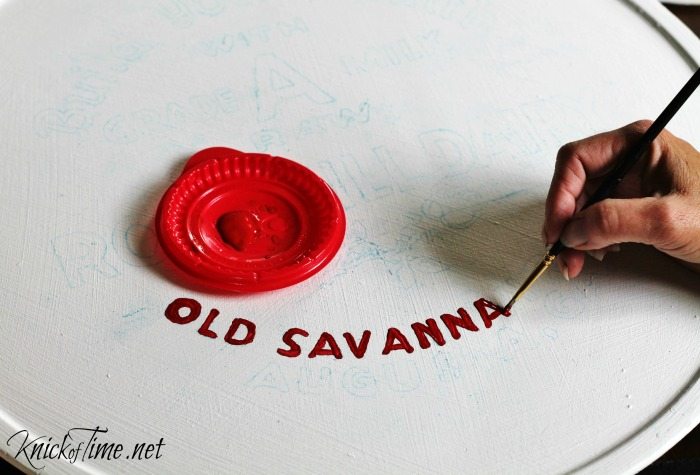
Here is the painted image all finished.
Optional: add finishing touches to the lazy susan makeover
If desired, lightly sand the finished design, and seal with wax, or a non-yellowing sealer.


Do you love how it turned out? It makes a great conversation piece, is useful, and is a beautiful way to display a little milk cap history.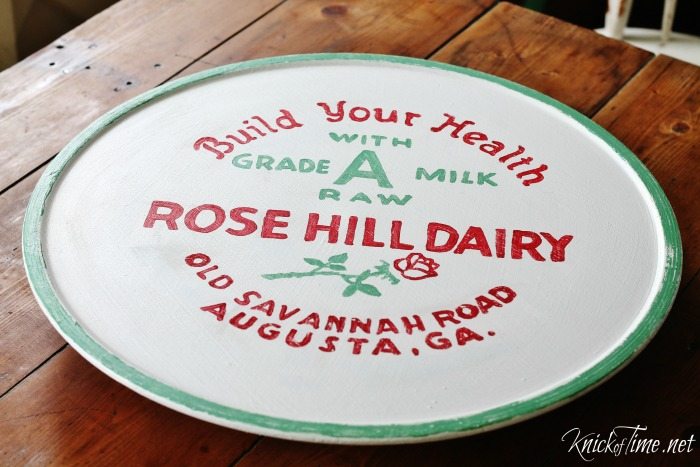

I hope you’ll drop in and visit me at Knick of Time, where I share my farmhouse home remodel, DIY projects, and free printable antique graphics!
see more Image Transfer Projects here
Oh how I love this! Thanks so much for sharing the how to. I see this in my future! Following you on Facebook now. 🙂 Jane
It’s awesome like just about every single thing Angie does.
What a truly beautiful transformation! I actually think the “Rose Hill Dairy” part looks better red, too! I’d love to try this, but I don’t think I have the patience required nor the still hand. I love the milk cap images, though, and will use them as transfers as that is a lot less work…hehe! This demands to be placed right smack dab in the middle of the dining room table!
This turned out beautifully and I love the simple transfer technique. Thanks for the tutorial and the heads up on the website, too!
Wonderfully painted tray and two of my favourite bloggers together, Angie and Gail!
awww thanks Julie!
I’ll be on the lookout for a wood lazy Susan now because I just love this project!
Angie,
Great job on that milk cap replica on your lazy susan. You did a wonderful job painting it. I have one of those in my stash, I should get it out and do something with it. I’m not sure I have the patience to hand paint it though…. I’d probably have to cop out and do an image transfer. 🙂
Thanks for being part of the team here! I look forward to more of your creative projects.
gail
I love your lazy suzan Angie! Great tutorial, and thanks for the tip about printing enlarged images, I have always wanted to try that, now I know where to go!