How to Make an Easy Garden Flag
As an Amazon Associate, I earn from qualifying purchases.
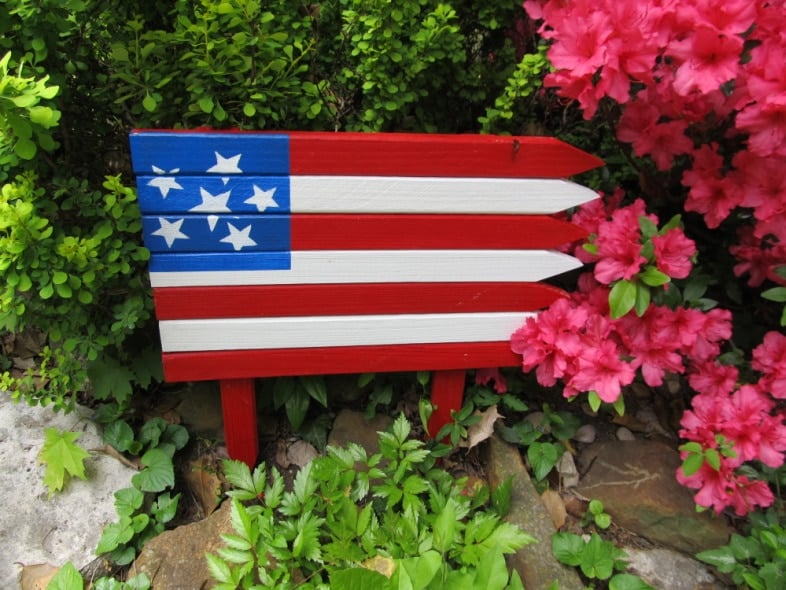
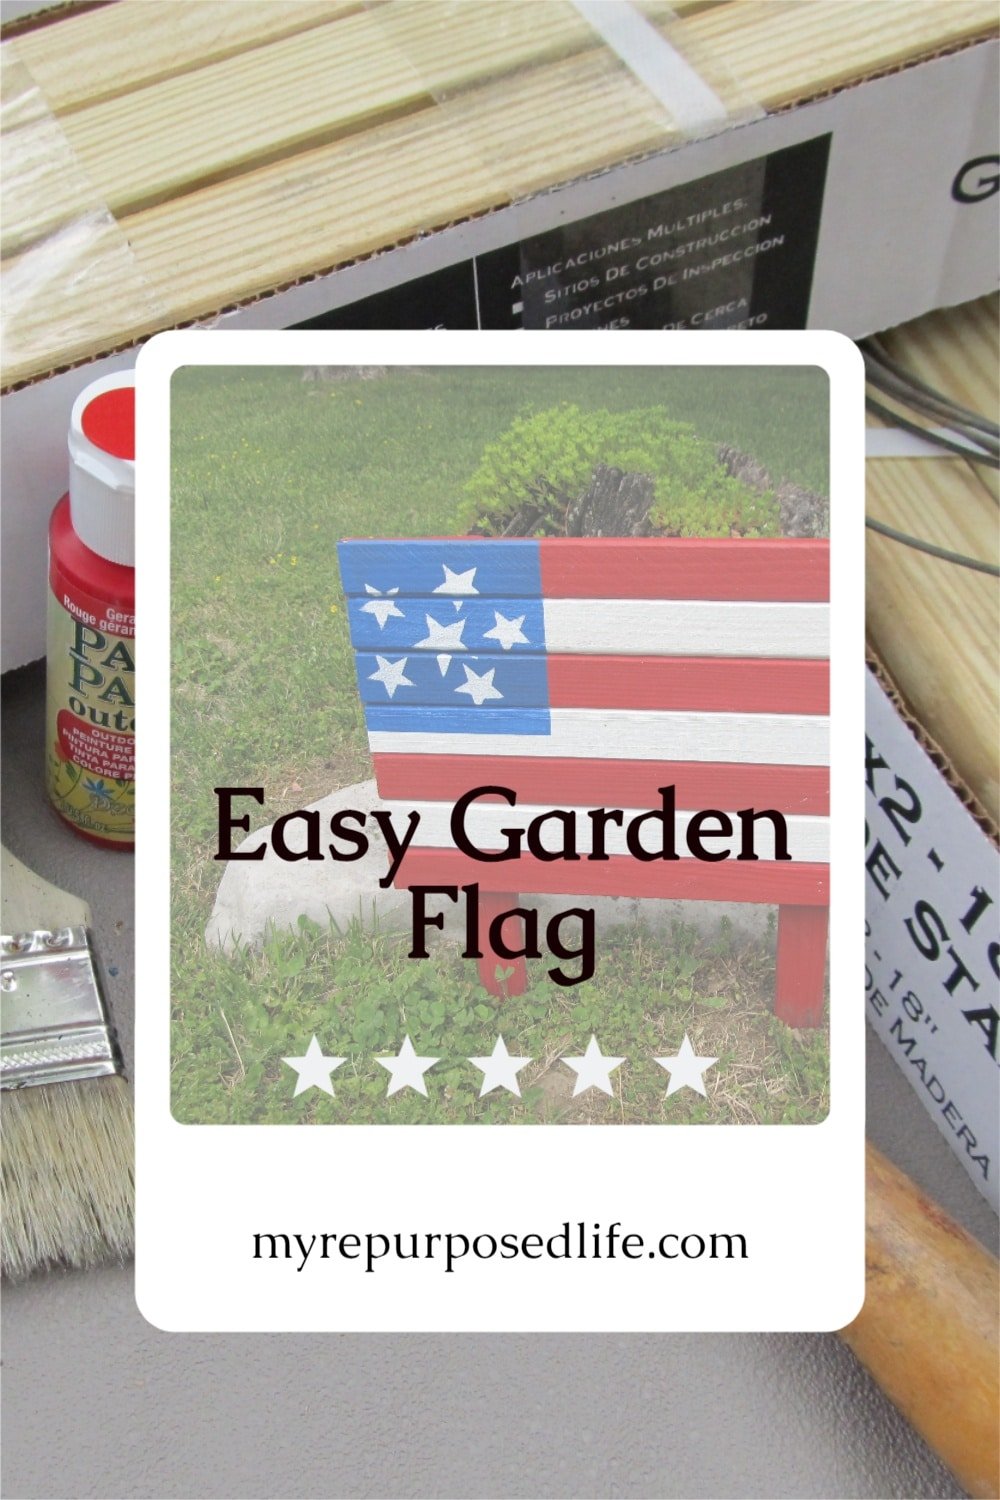
Looking to add a little patriotic flair to your garden this summer? This easy DIY Americana flag is perfect for that! Made from simple wooden garden stakes and cheerful red, white, and blue paint, it’s a fun afternoon project you can complete with kids or friends—no power tools, no fuss. In just a few steps, you’ll have a charming flag to brighten your outdoor space for Memorial Day, Independence Day, or any time you want a bit of star-spangled style.
I love repurposing old and weathered fencing. However, if you don’t have access to such materials, you can still make a great Easy Garden Flag for your flower bed or patio. I will show you exactly how you can make this easy project.
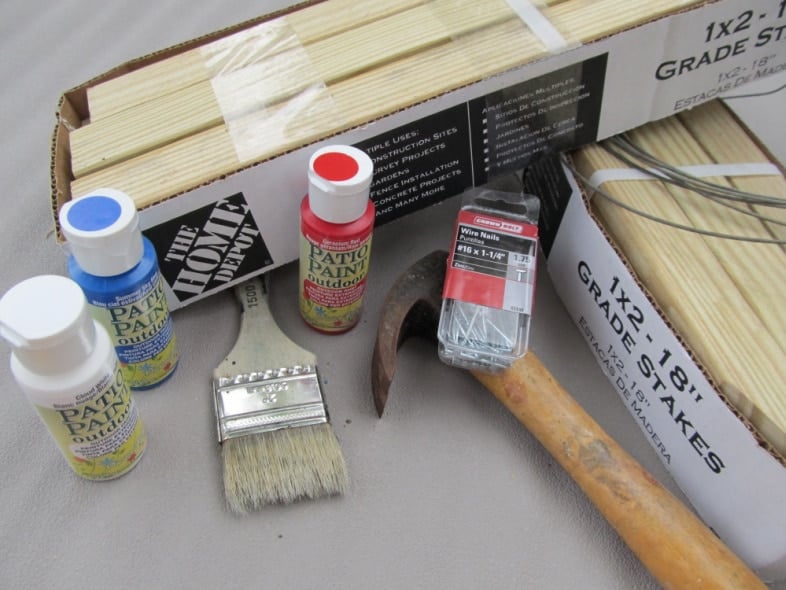
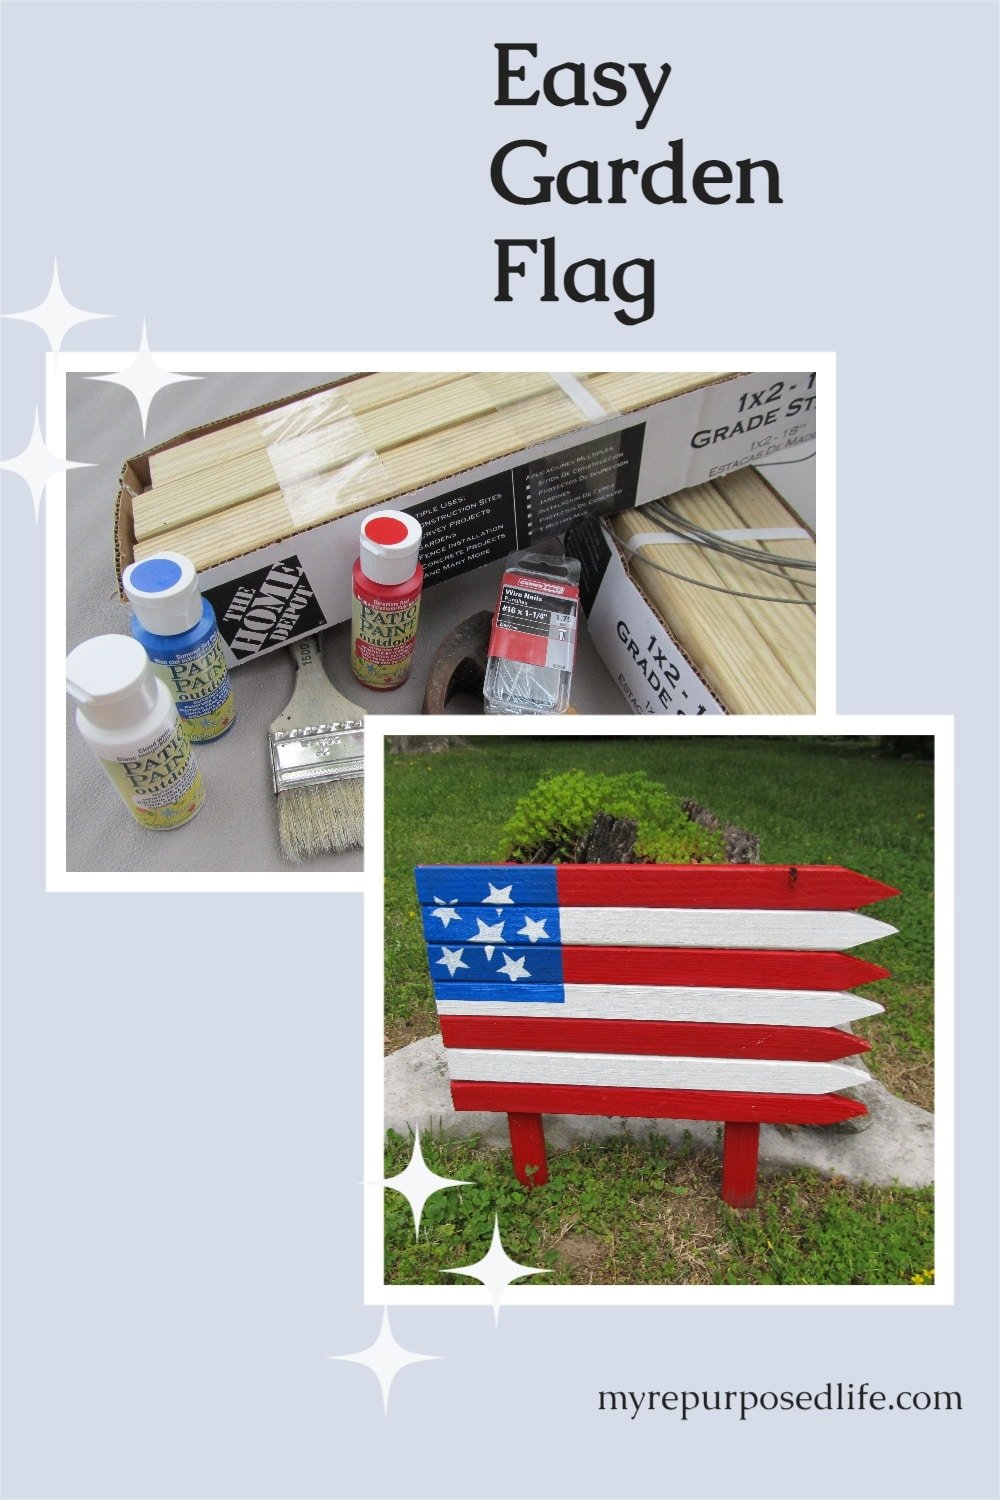
The supplies you will need to make your Easy Garden Flag:
Wooden garden stakes
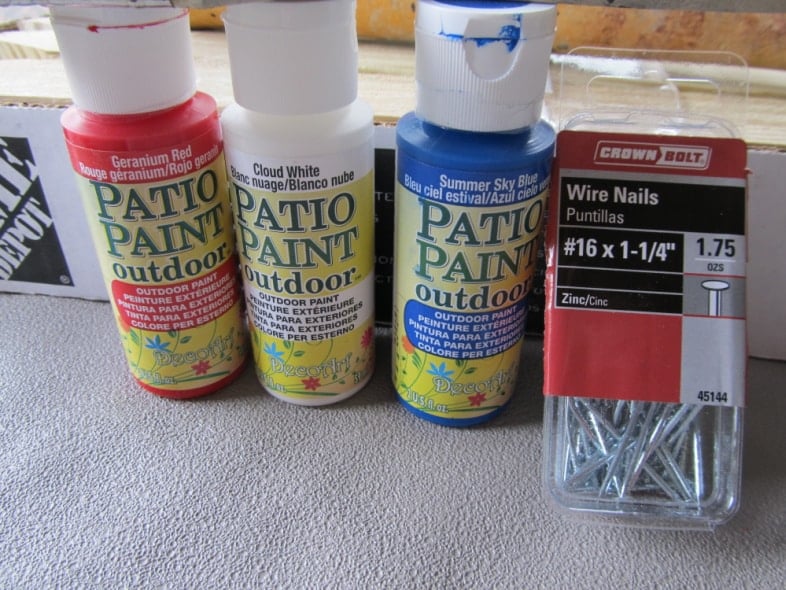
DecoArt Patio paints-Geranium Red, Cloud White, Summer Sky Blue
1 1/4″ brad nails
gorilla wood glue
Hammer
Paint Brush
craft knife or scissors
tape measure
star template
painter’s tape
You can choose to use screws, but using nails makes this an excellent project for kids to help with. Children will enjoy hammering in the nails after an adult has started them. (always supervise children when using tools)
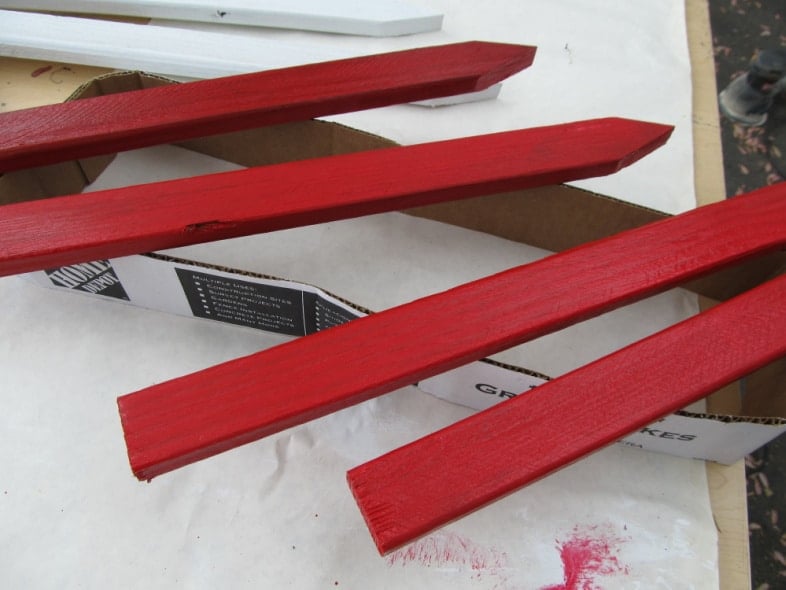
Lay Out Wooden Stakes
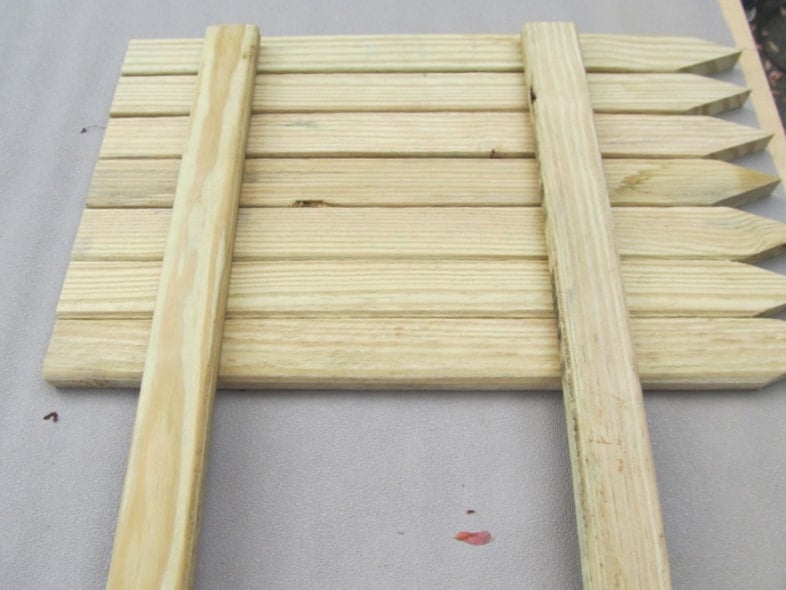
The stakes come in a package of 12, I chose to use seven for the stripes, and two for braces/stakes.
Paint Three Stakes White
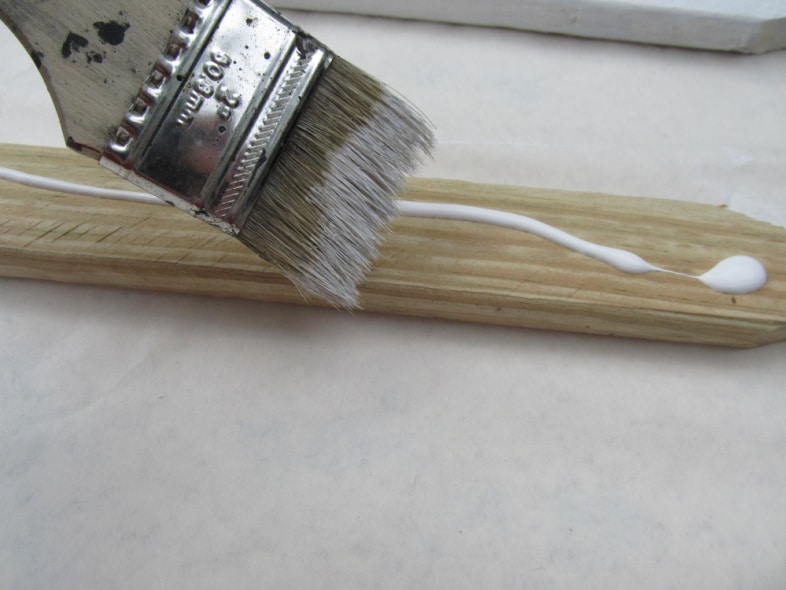
These tiny paint bottles are easily used by squirting the paint on the stake. My paintbrush of choice is a small, cheap chip brush.
Paint Six Stakes Red
I painted the red stakes in the same manner.
Secure Stake Boards to the Back of the Flag

To help secure the boards on the back, I use wood glue in addition to the nails. (NOTE-if you want your easy garden flag to point to the right, be sure to make sure it points to the left during this step)
Tack Stakes With Brad Nails
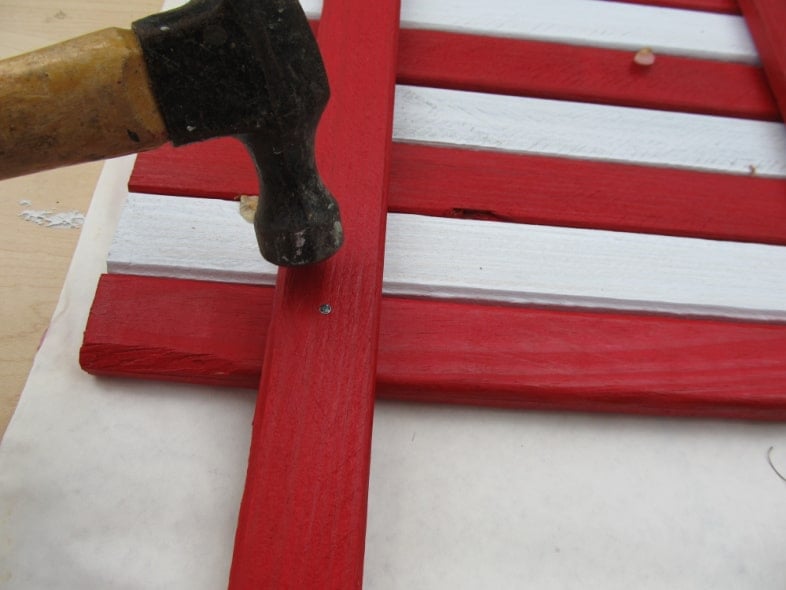
I nailed the top and bottom boards in place first so the boards wouldn’t shift. I continued using one nail for each board.
Mark Off Blue Area for Stars
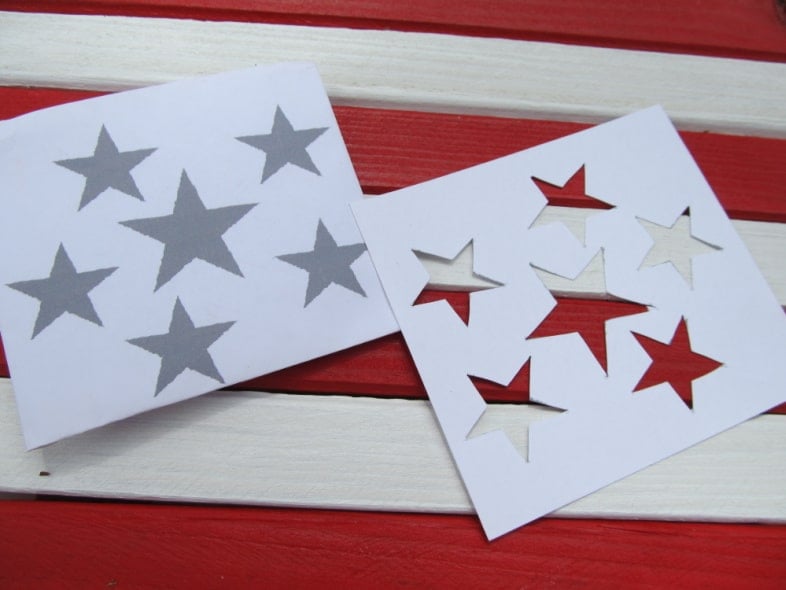
Print the star template on your computer and carefully cut out the stars with a craft knife (scissors).
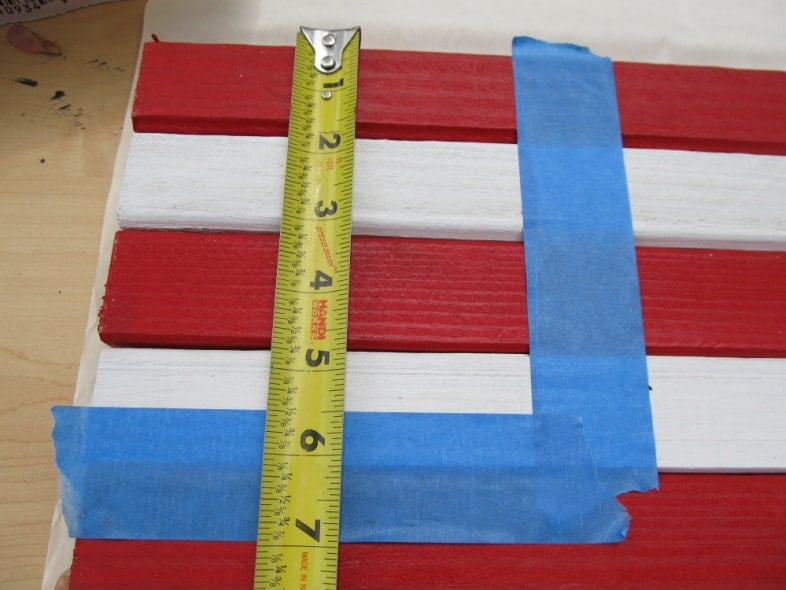
Tape off the top left blue section. I made this one 5.5 x 5.5

Paint the square using the Summer Sky Blue Patio Paint.
Stencil Stars for Americana Flag
Download and print the file on cardstock paper, and cut out the stars.
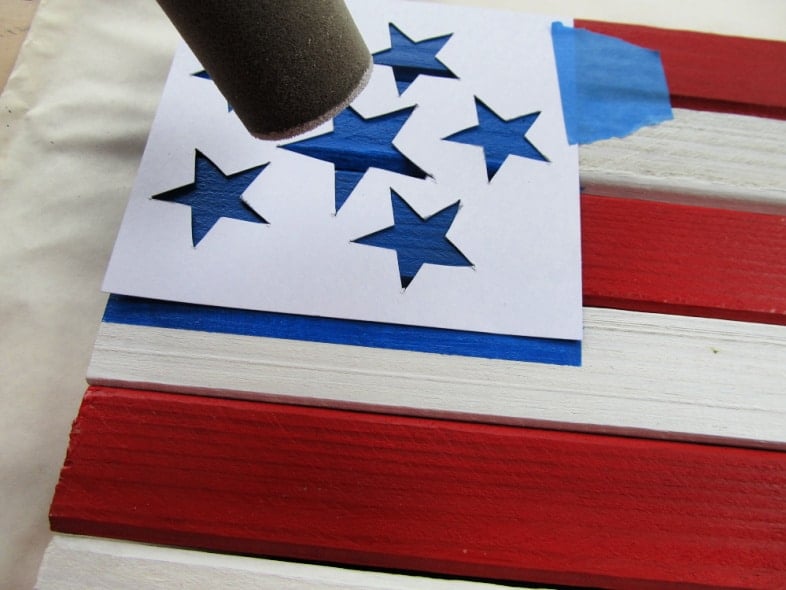
Use painter’s tape to hold your stencil in place and a foam pouncer to stencil the Cloud White Patio Paint.
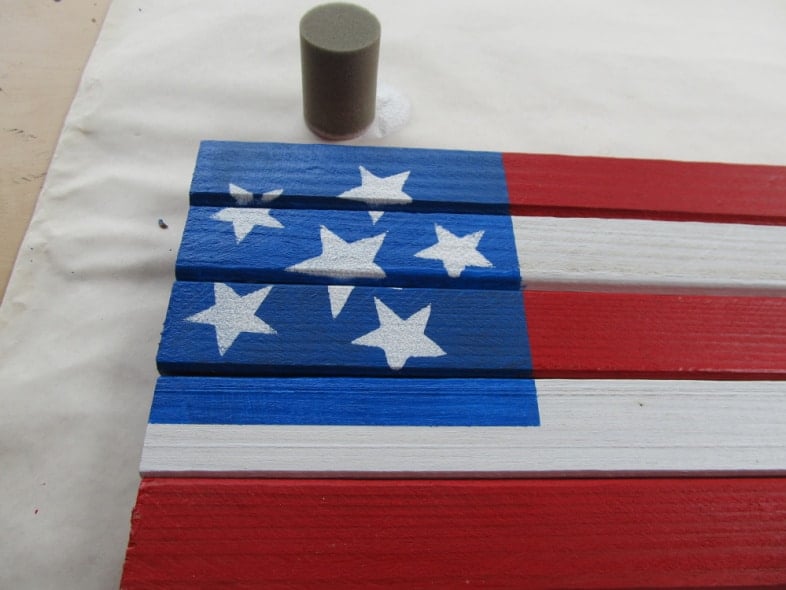
If you’re a perfectionist, you can fill in the stars that fall in the cracks.
Display Your Easy Garden Flag
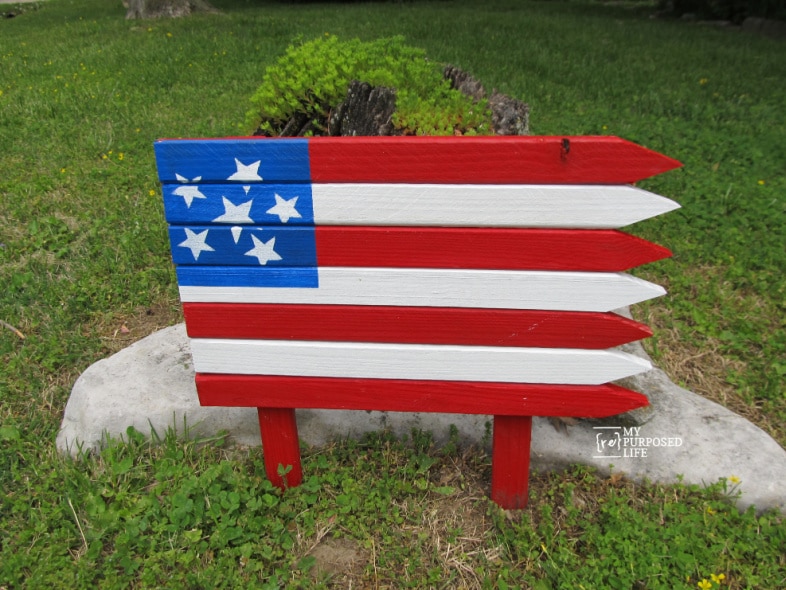
Voila! You’re done! Proudly display your new flag in time for the 4th of July!
If you want to make a larger, more to-scale American Flag, you can buy the longer 24” or 36” stakes. You can leave your new flag out year-round or store it during the colder months. It will hold up for years with no issue, even left out in the weather all year.
Voila — your DIY garden flag is ready to stand proud among your blooms! Whether it’s marking a memorable holiday or bringing everyday charm to your patio, this project proves that quick, budget-friendly crafts can make a big impact. Feel free to personalize it by sizing up with longer stakes or adding more stars, then display it in your flower bed, planter, or flagpole. Above all, have fun with it—and let your creativity shine beside your garden’s green!
gail
See more American Flag projects here.
Hi Gail.
I’m looking at an older post of American Flag from wooden stakes.
Can’t seem to find where I can print the stars stencil. Help please. Also, I think its great!!
Gonna try and do it. Brenda
Thank you for reaching out Brenda. I will be emailing you the file. However, I have updated the article to include a downloadable file for you to print out the star pattern. Thanks for bringing that to my attention.
You got this!
gail
I love the look of the sign with the pointed edges – almost like it’s waving. This sign seems so easy to make. I am pinning. Thanks!
Thanks for Pinning Alexandra! Much appreciated.
gail