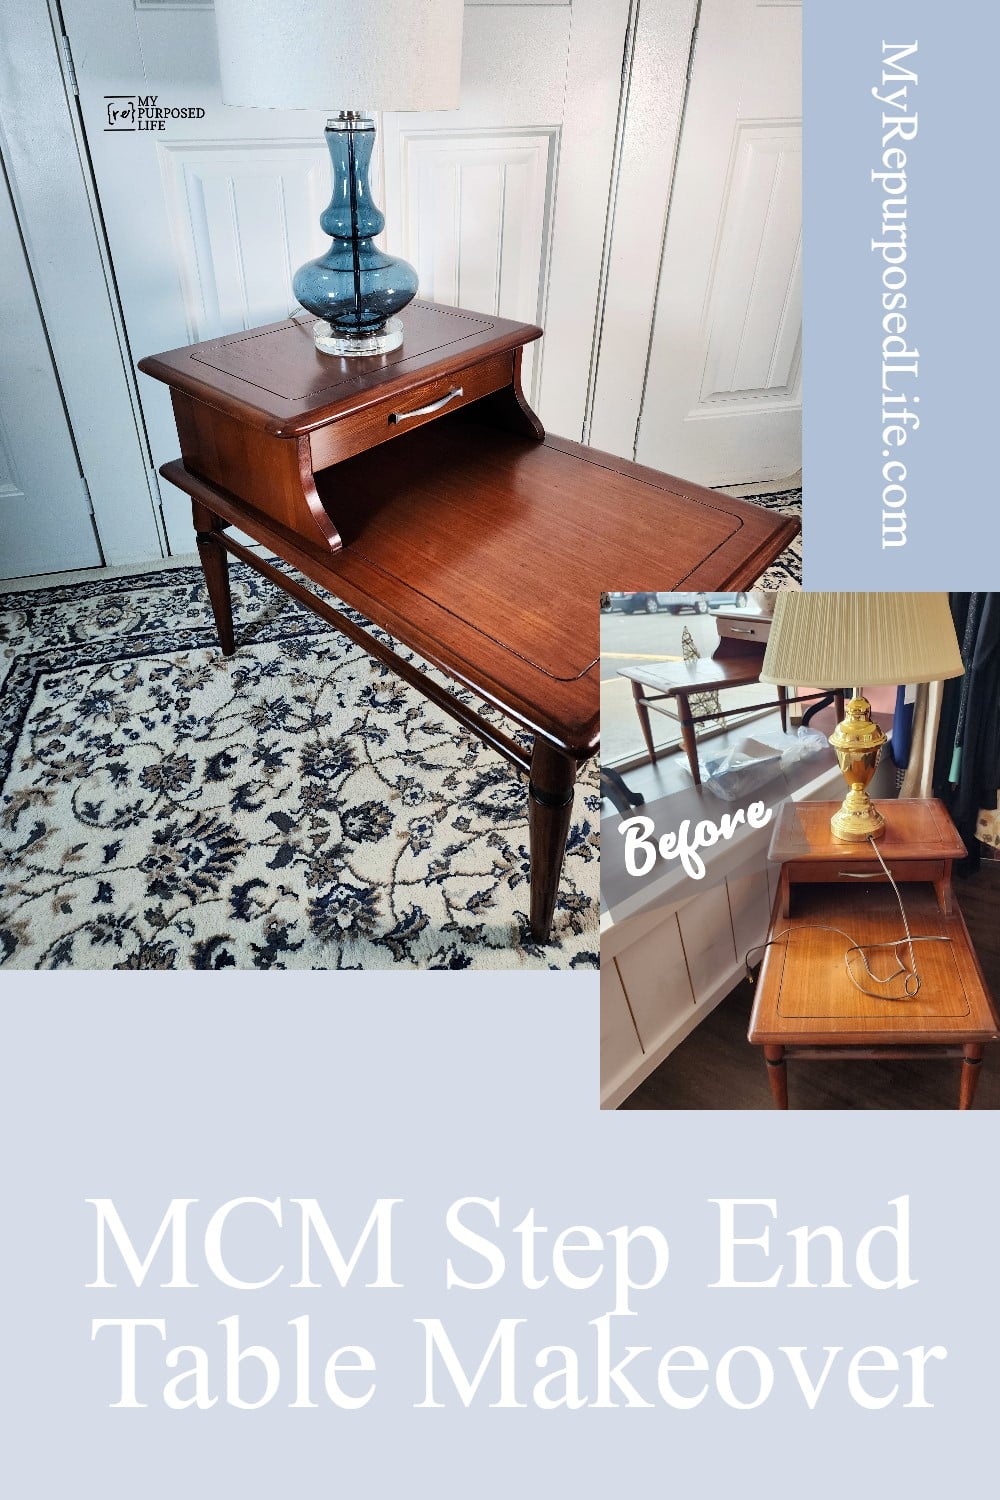
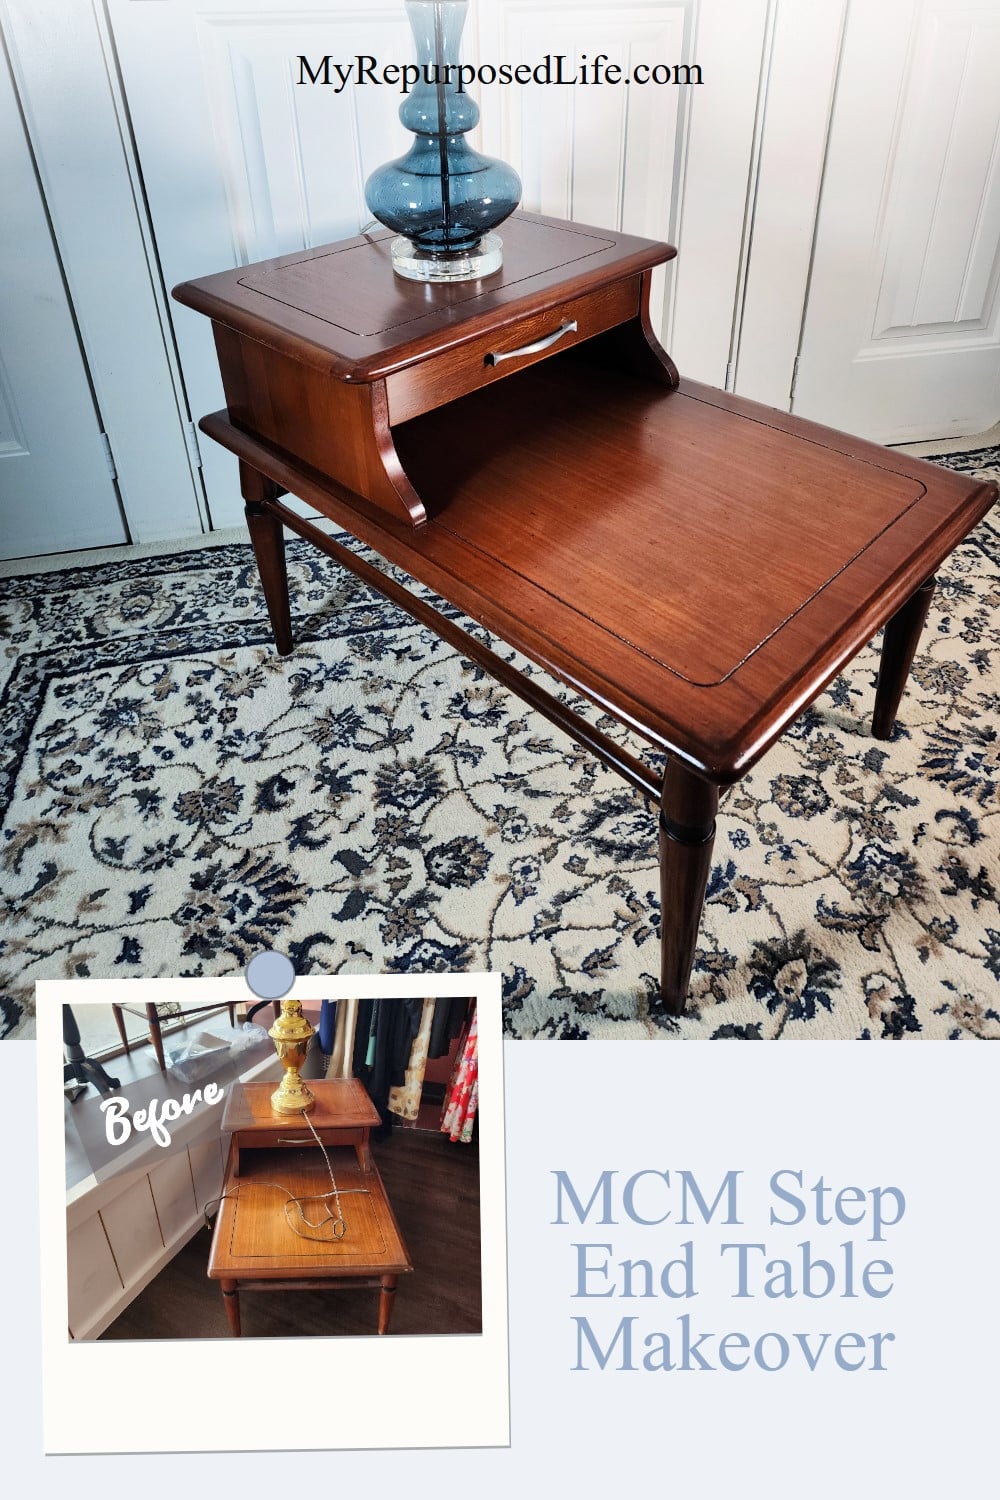
MCM Step End Table Makeover
As an Amazon Associate, I earn from qualifying purchases.
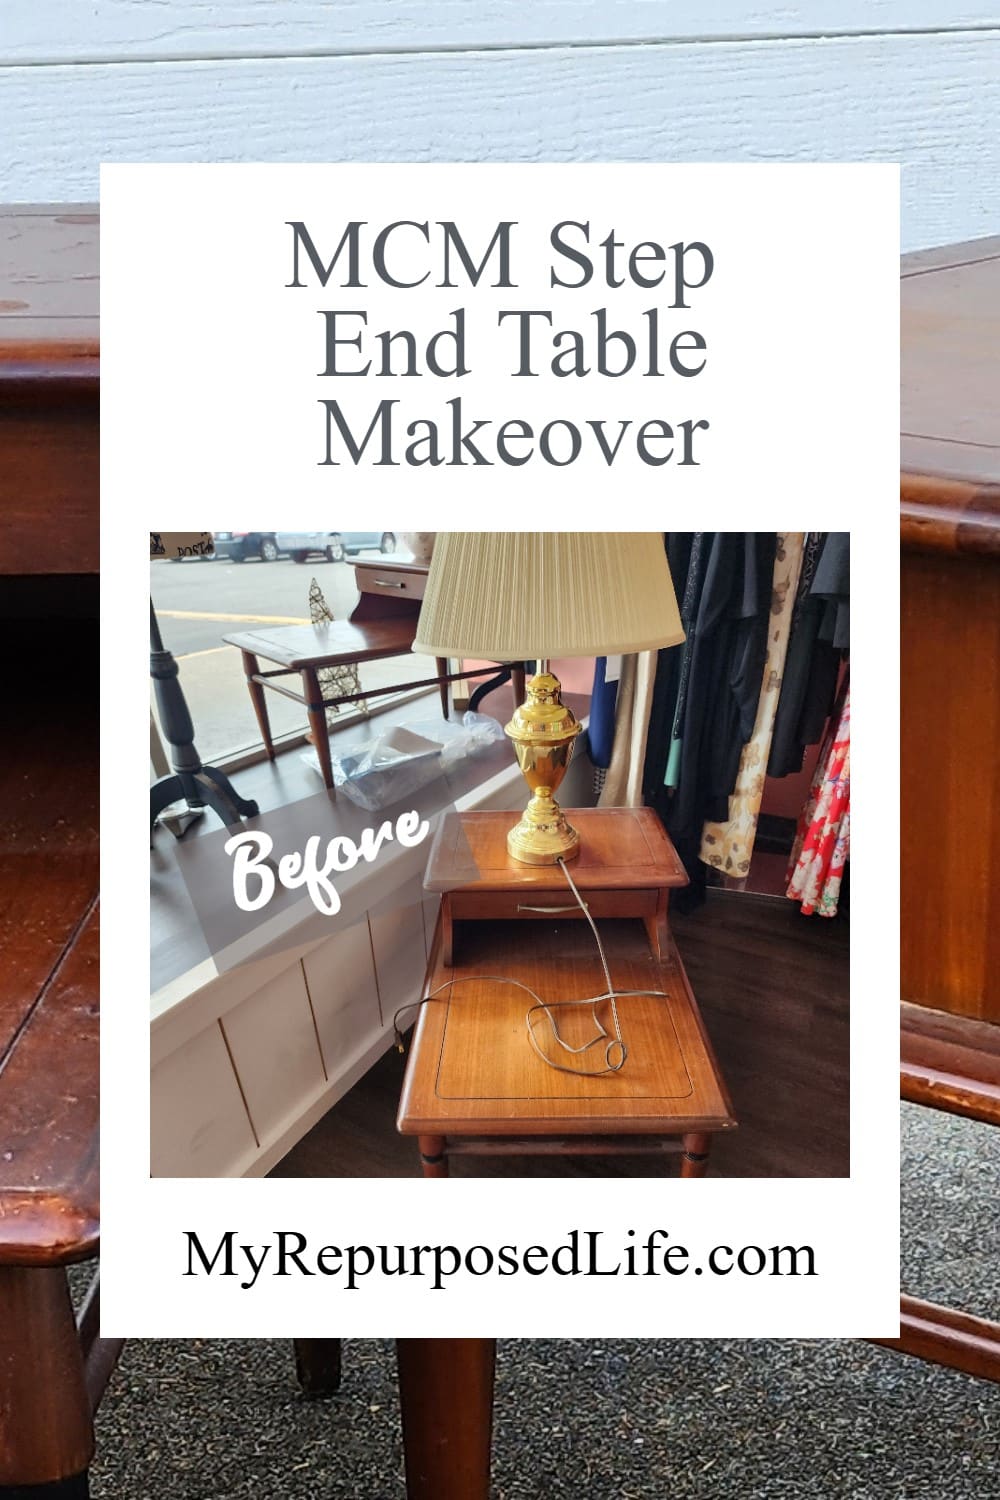

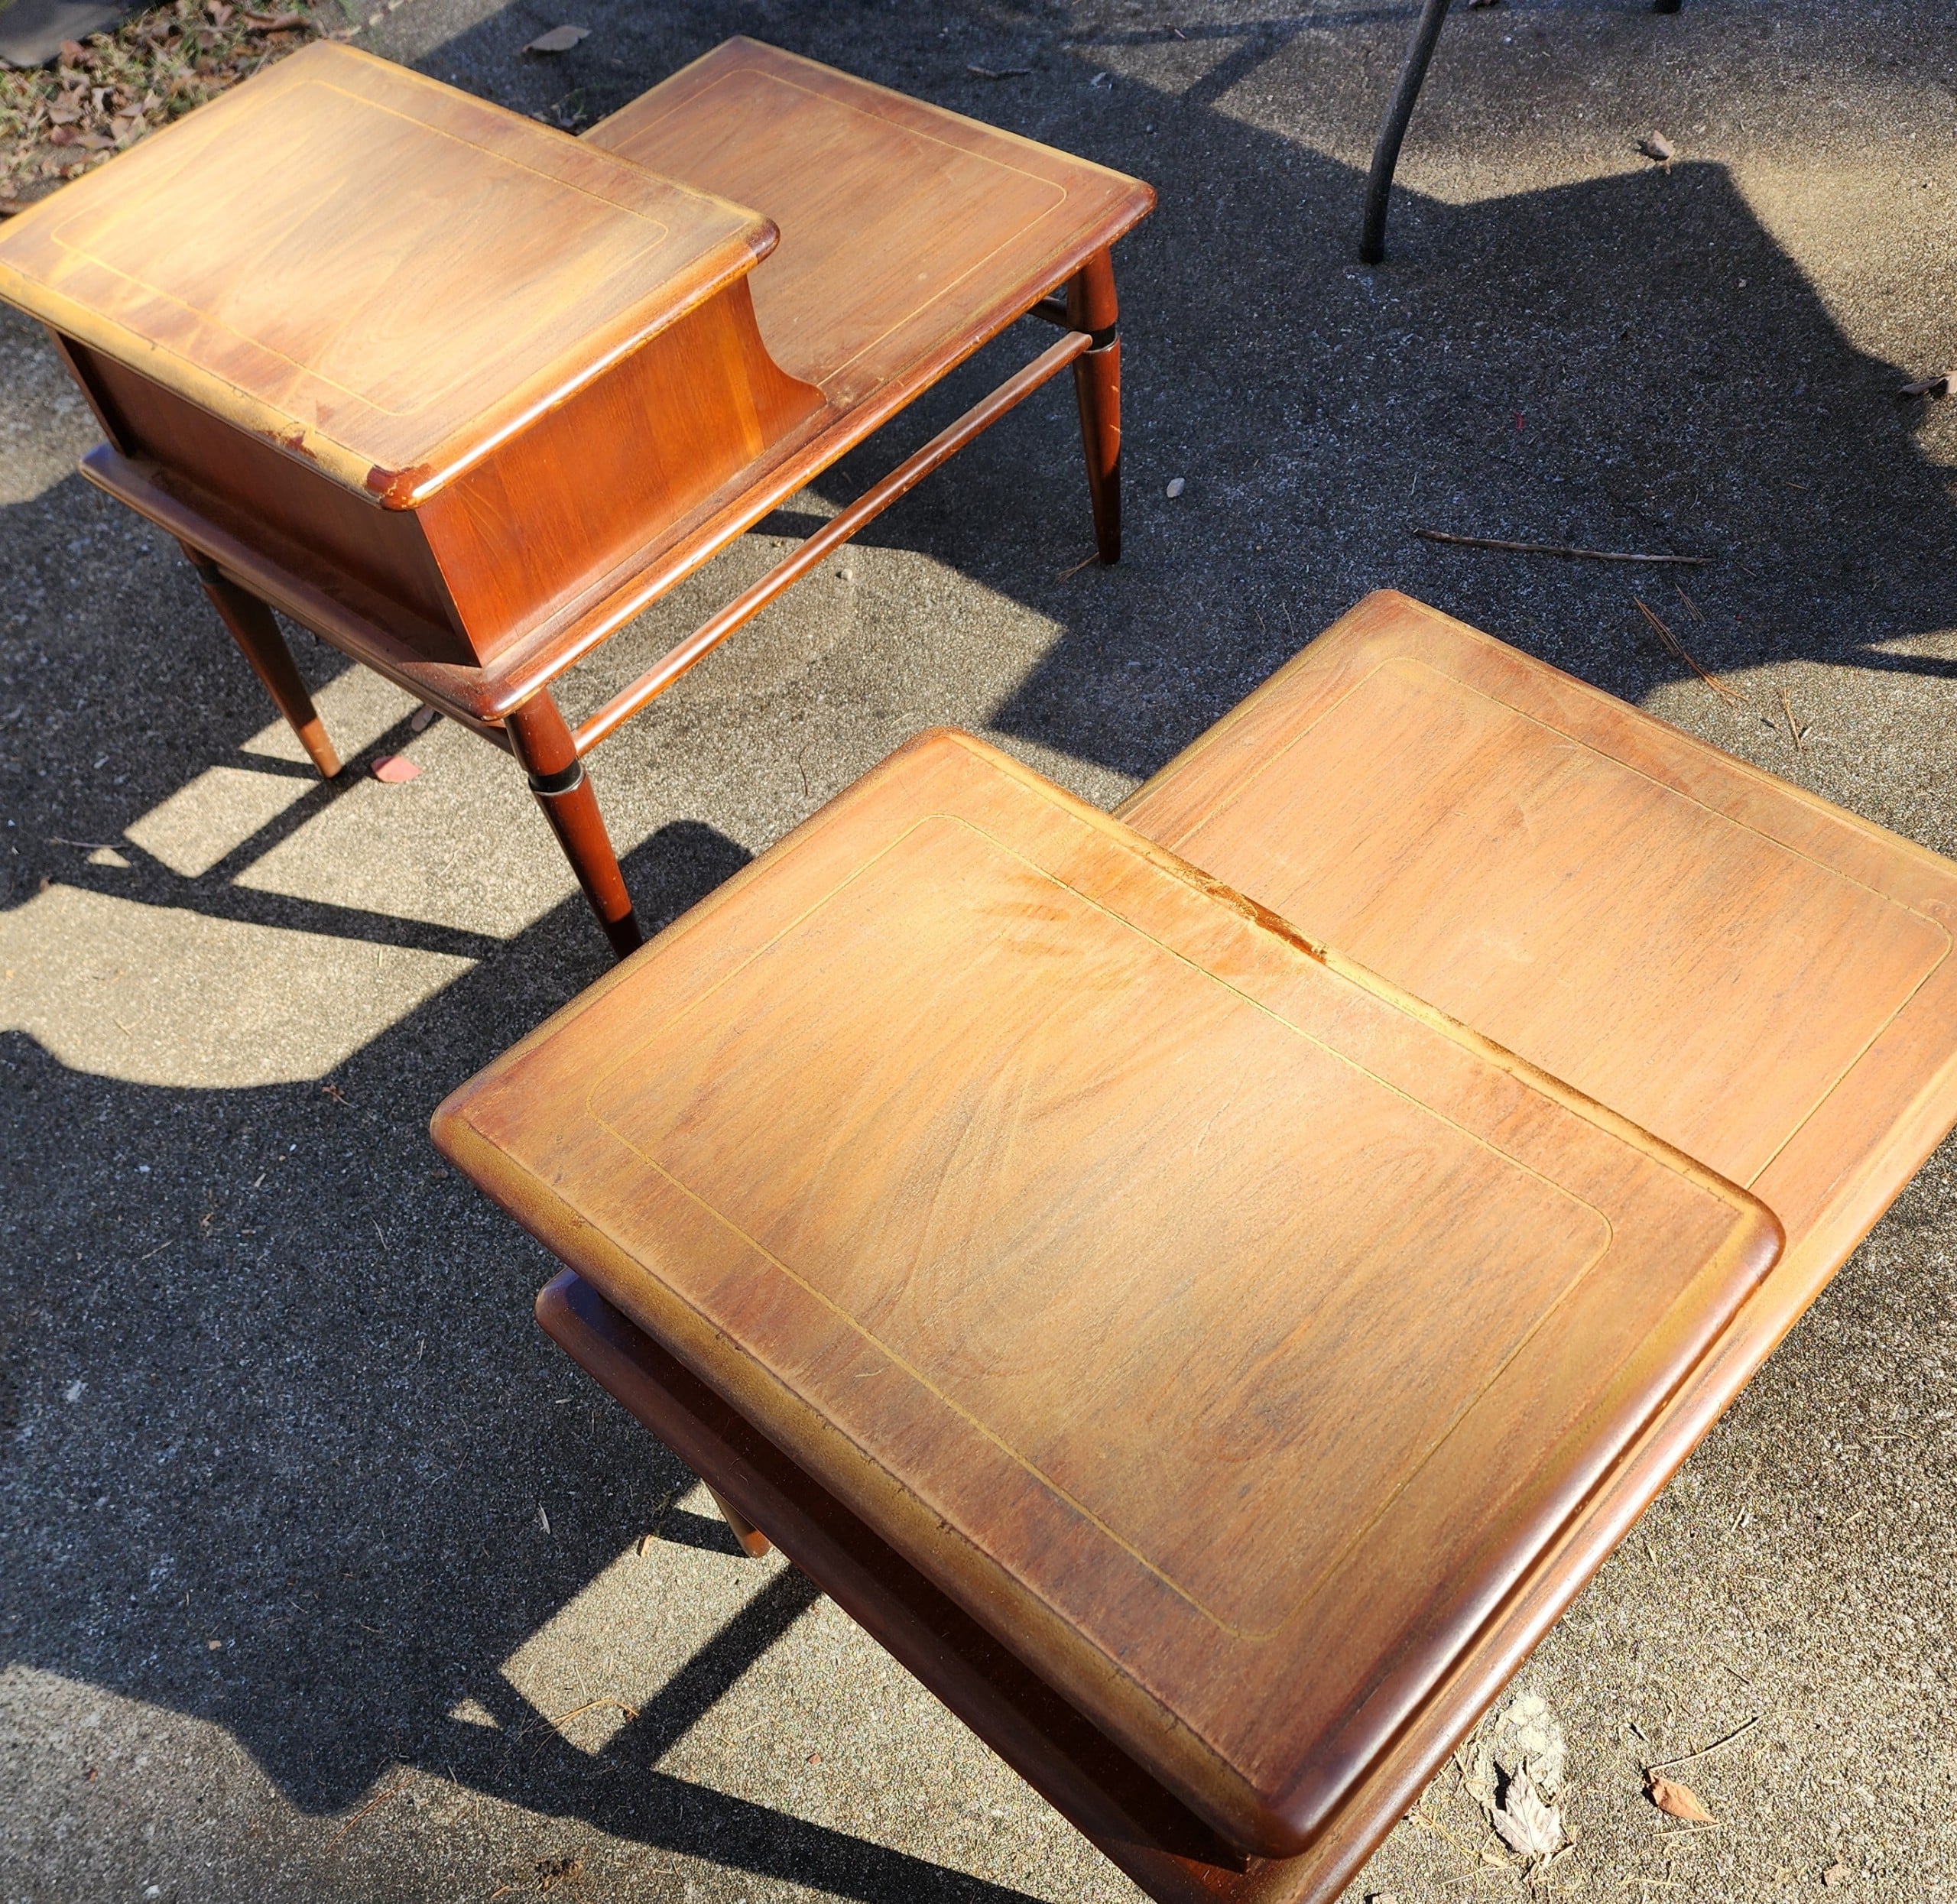
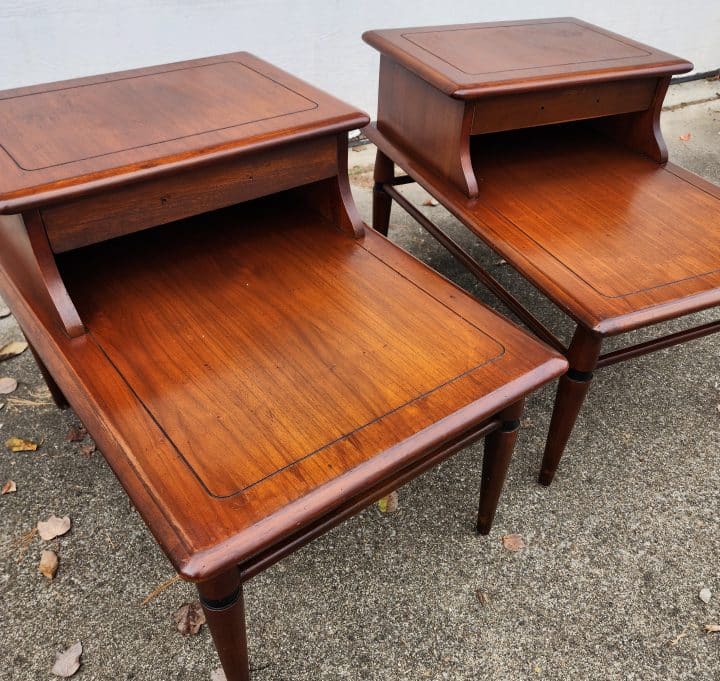
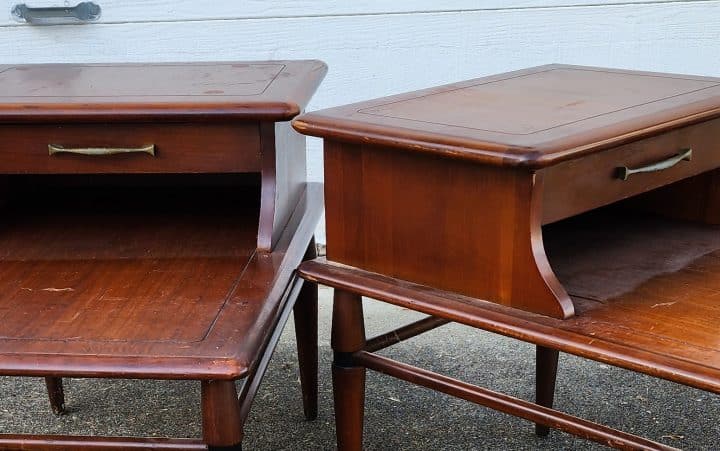
The first time I saw the MCM Step End Table set, I passed it by. However, when I returned, the furniture was on sale for 50% off. That’s a deal I couldn’t pass up. That was nearly six months ago. They have been waiting in the storage garage ever since. Fast-forward, and suddenly, it’s time for the Furniture Fixer Upper tour: a week early. I scrambled around to decide what I should tackle.
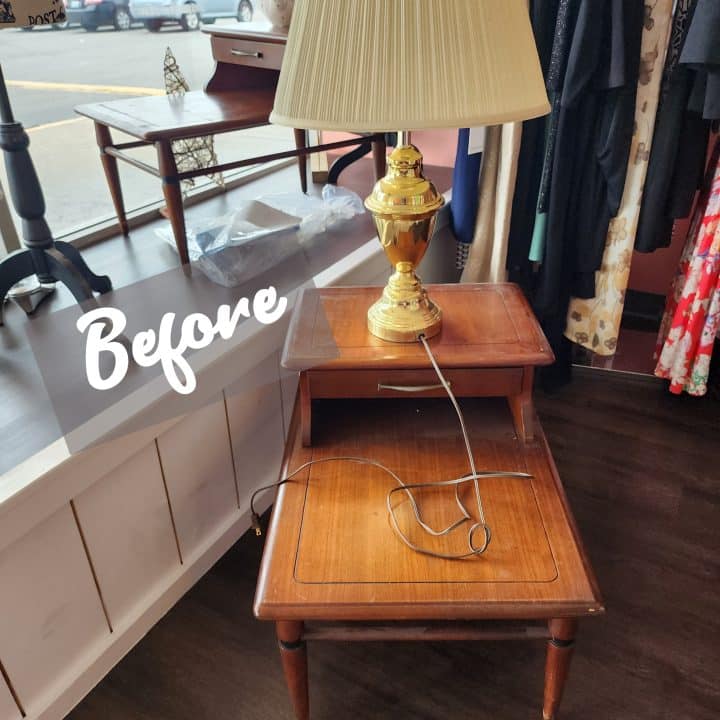
This is the photo I shared with the group and with my daughter. I wanted to know if she would be interested in the MCM step end tables. I wouldn’t be painting them if she wanted them because she would prefer their natural wood finish. Her answer was no, thank you, I don’t have a place for them. That left my paint options wide open.

It’s Furniture Fixer Upper Tour Day! Be sure to visit my friends’ projects at the bottom of this post.
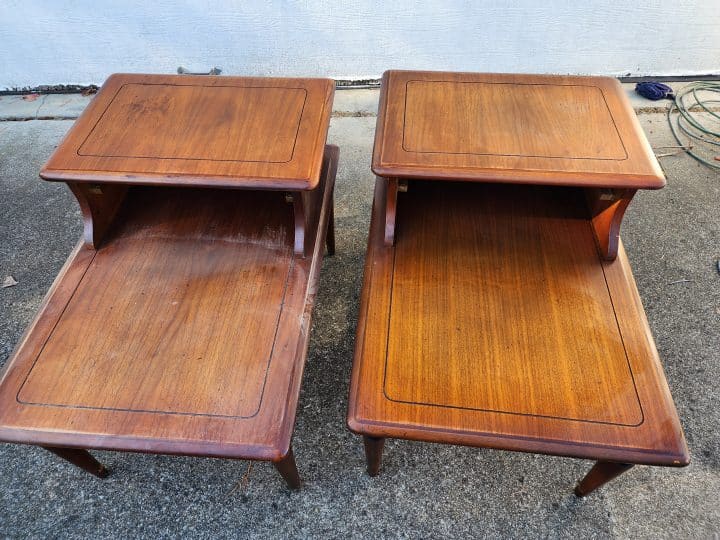
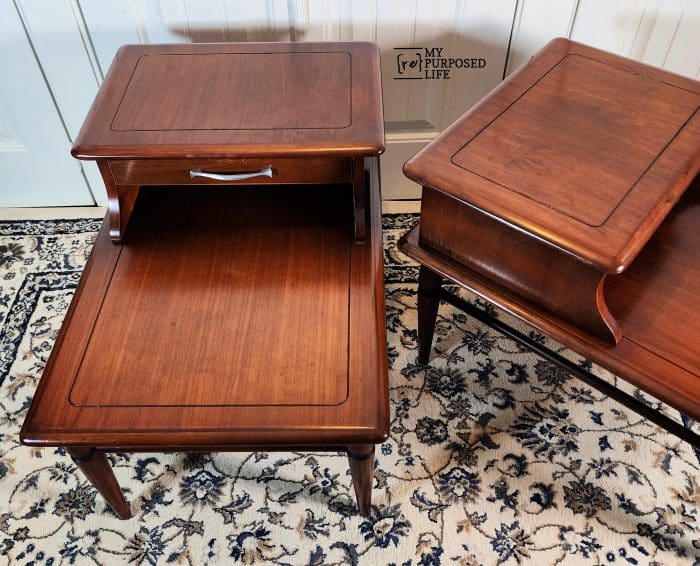
MCM Step End Table Set
I love the two tiny drawers on the end tables. Don’t be fooled by the picture; these tables are monsters. They are a struggle for me to carry any distance.
Who is the Manufacturer?
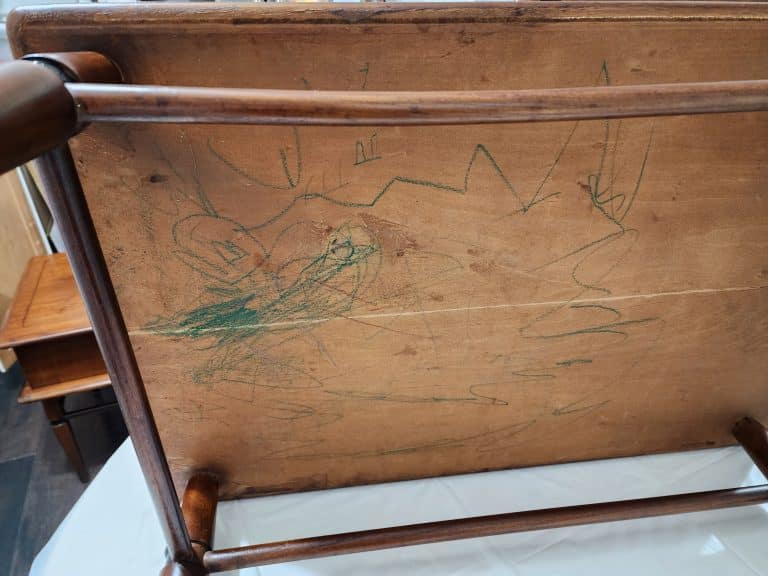
When I flipped the tables over to find a manufacturer’s stamp, this crayon scribbling was all I saw. I left it “as is” because I wanted to preserve the tables’ history.
Repair Drawer Guide
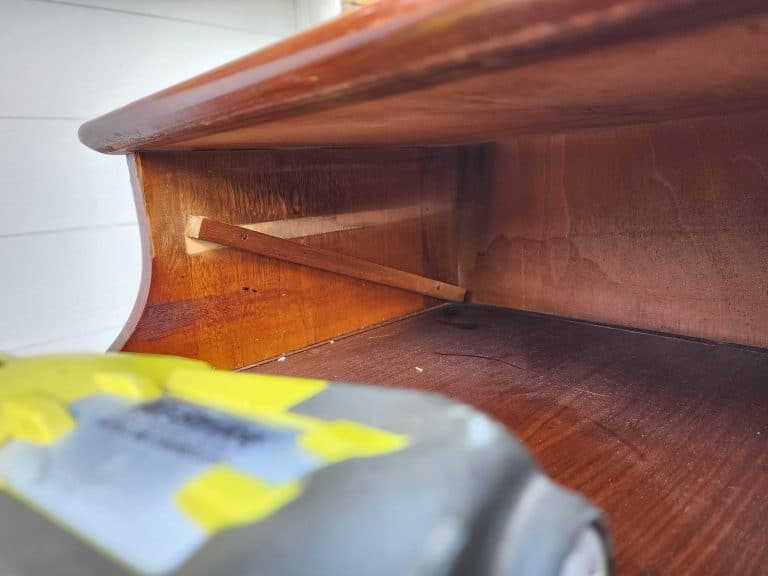
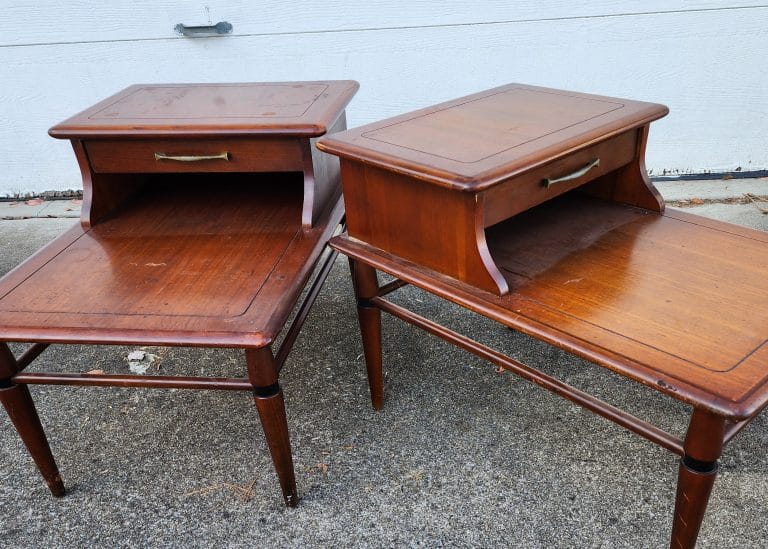
Because the MCM step end table set was such a good deal, I didn’t bother to inspect it very well. If you’re spending a lot of money, I suggest you do this at the store before purchasing. I noticed the guide was broken when I tried to reinsert the drawer. I fixed it with a nail gun. For good measure, I shot brad nails into all the guides. Otherwise, my project was good to go!
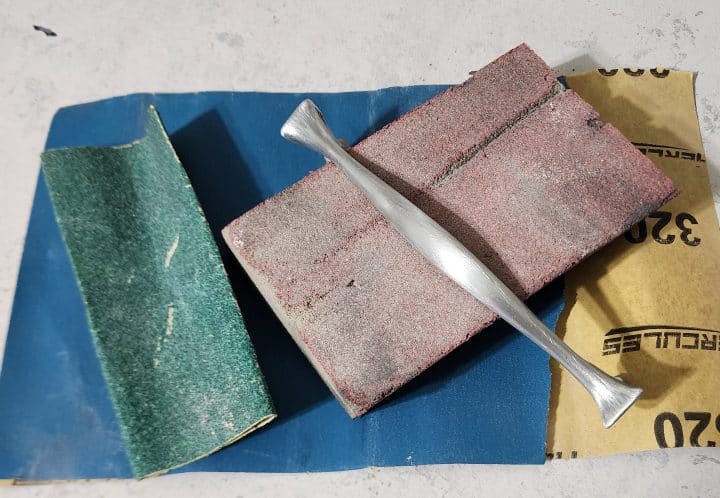
Sand Wooden Tables
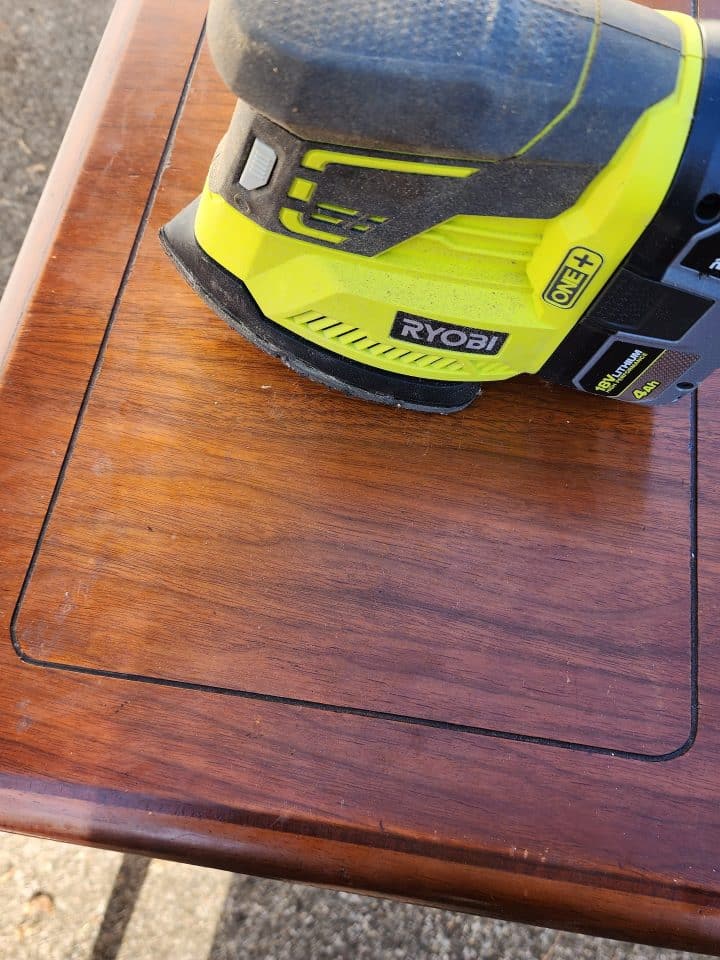
I do a lot of projects at my vacation home, and consequently, many of my tools are in another state. At home, I had two sanders: a mouse sander with 60-grit sandpaper and an electric orbital sander that needed the sanding pad replaced. I began with the mouse sander using a light touch.
Then I used the orbital sander, careful not to damage the MCM step end table! In the end, I also used a sanding sponge.

A sanding sponge was used on most of the table legs with damage.
Remove Hardware
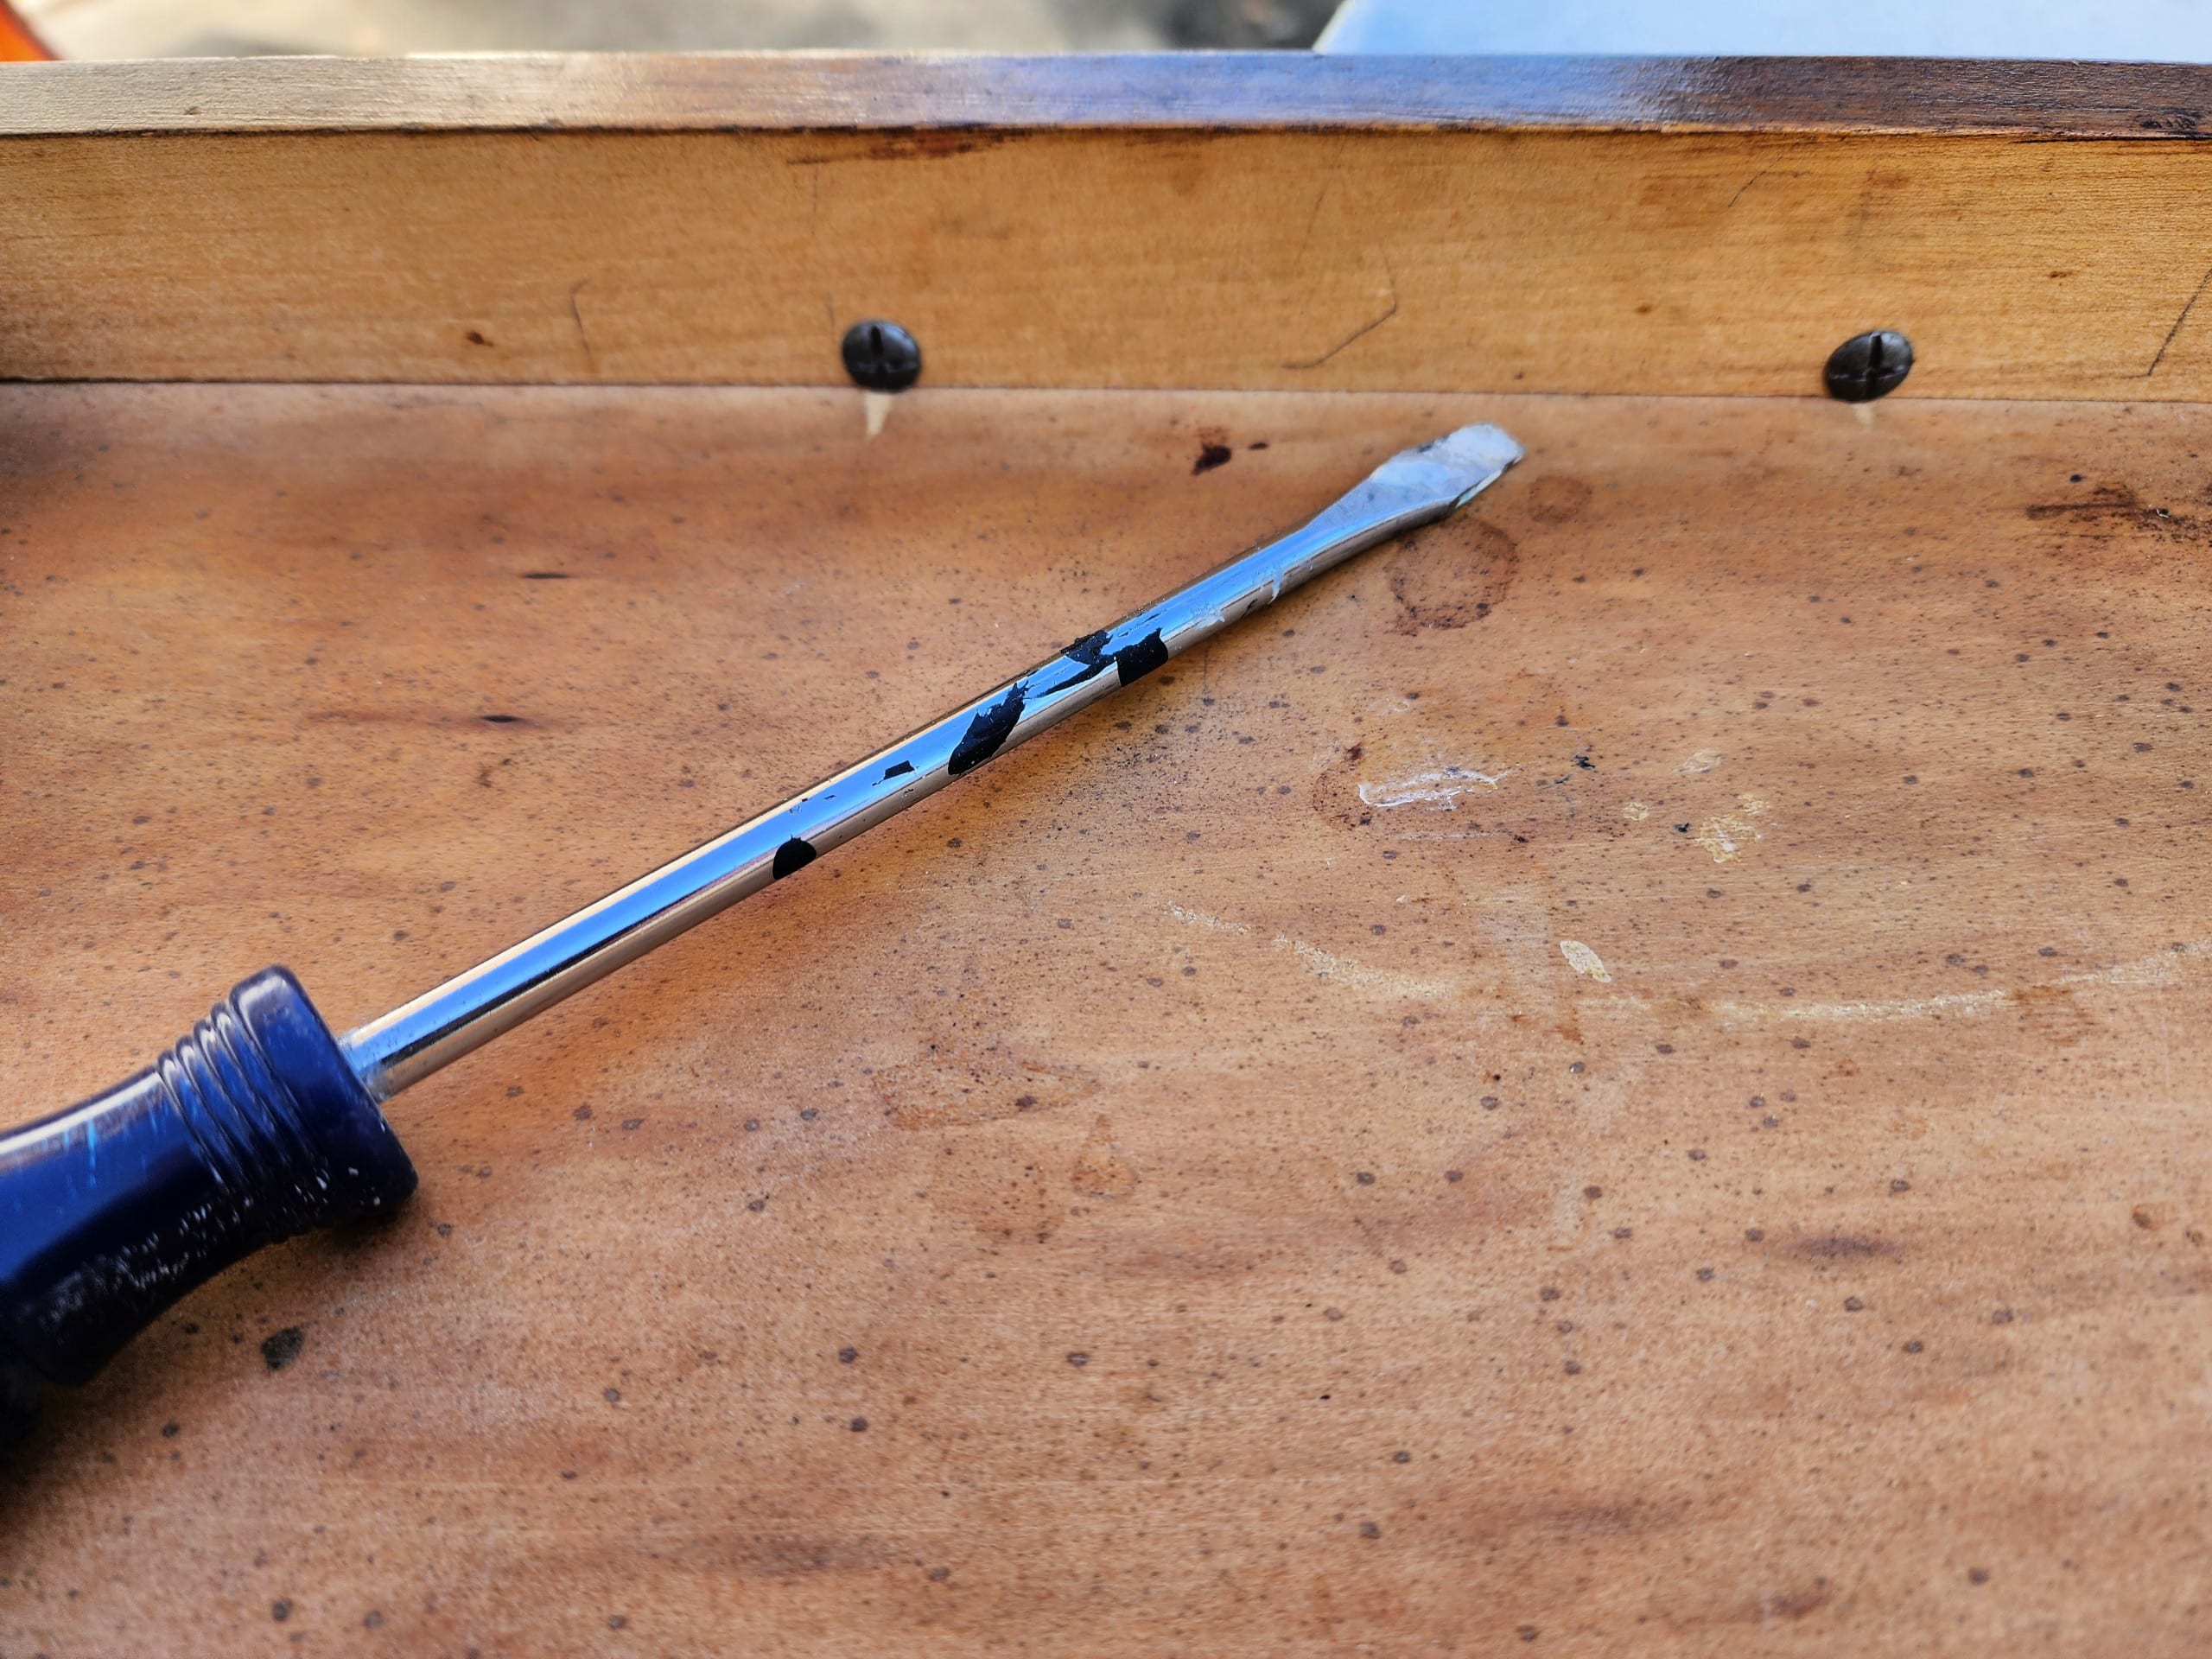
Even removing the hardware was a challenge, as it took me three tries to get a flathead screwdriver that was thin enough to fit the screws. Notice that the drawer is yucky.

A sanding sponge was used on the interior of both drawers to freshen and smooth out the wood.
A Chip Brush Dusts Recessed Areas
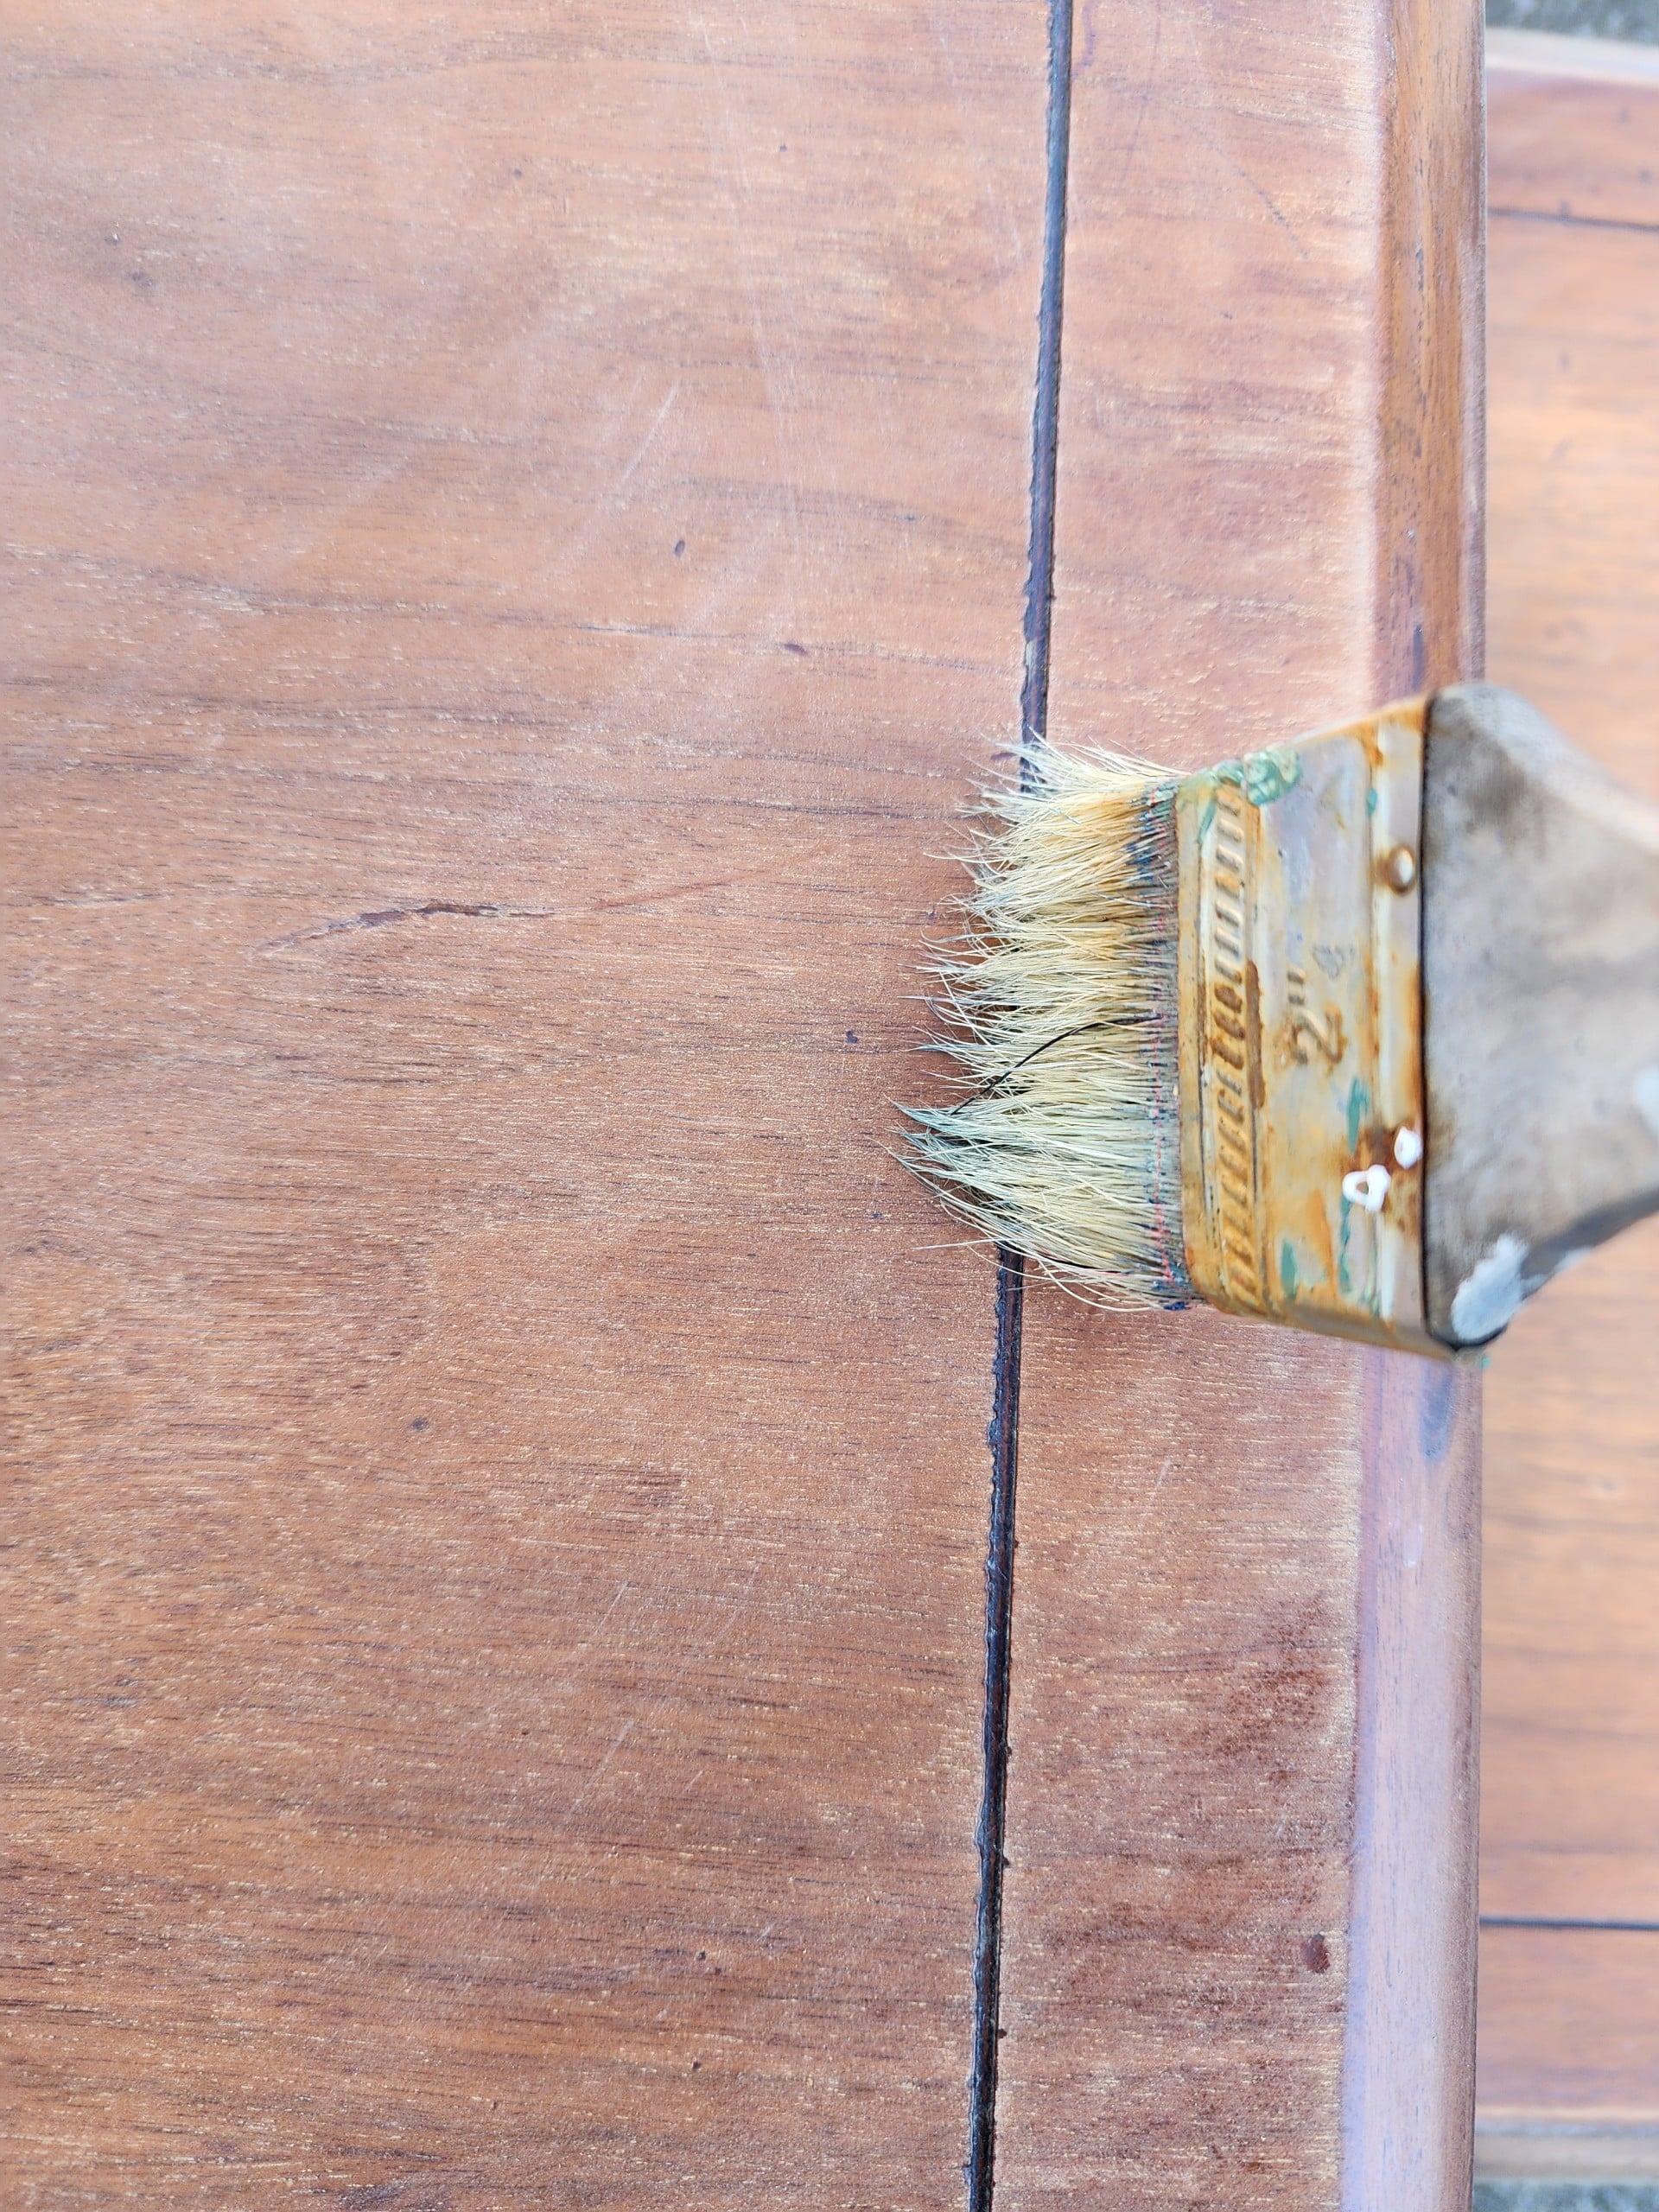
A chip brush was used to clean the sanding dust out of the recessed parts of the wood.
Clean the MCM Step End Table Before Painting
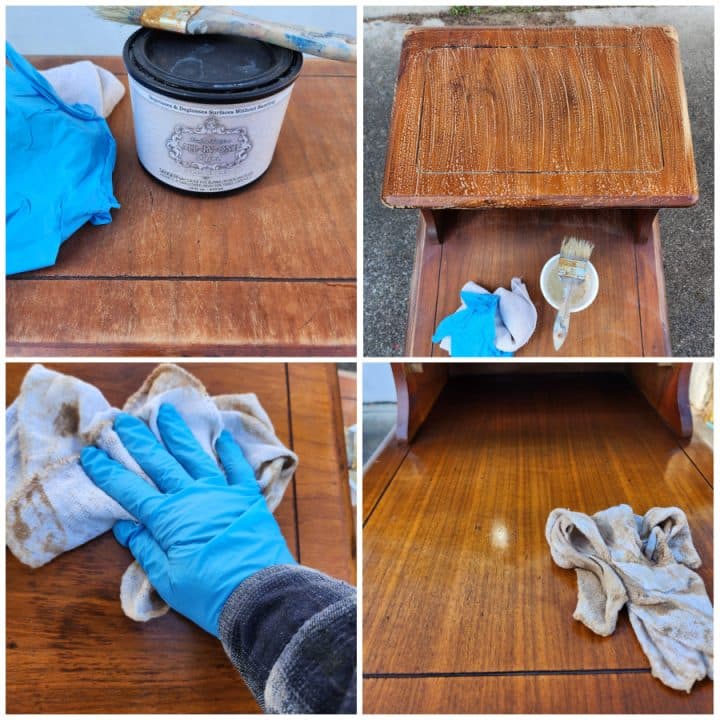
I used HTP Surface Prep to clean and degloss the mid-century modern furniture. I brushed on the cleaner and wiped away the grime.
The table on the right has been wiped off.
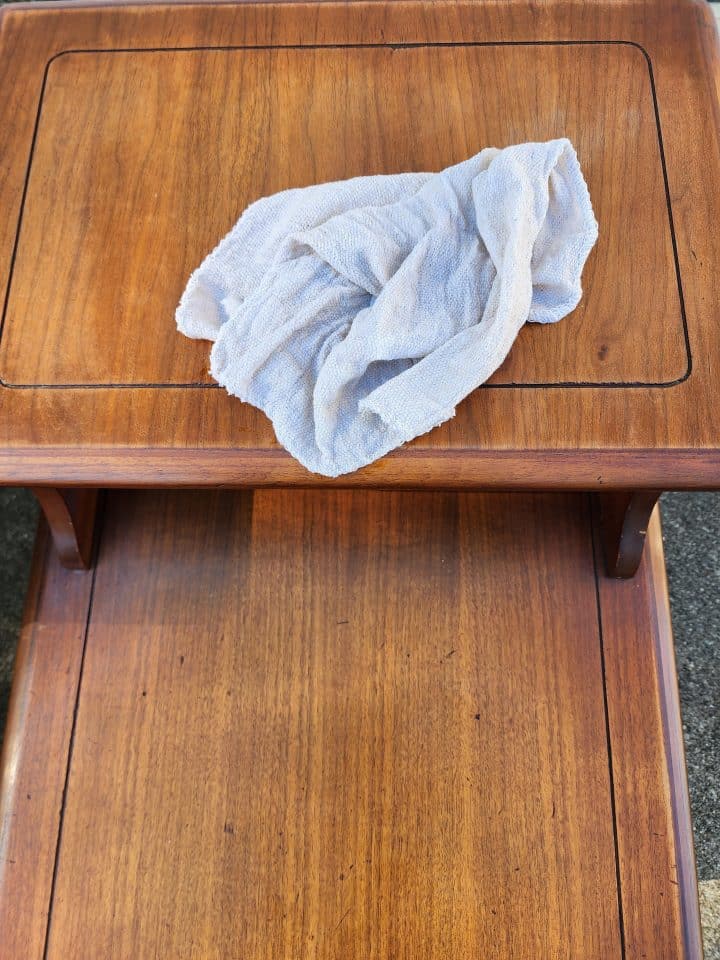
I did something I don’t usually do: I wiped everything down with a clean, damp cloth. This removed more grime, and look how pretty the table looks now. At this point, I’m wondering if I should actually paint the MCM step end table set!
I weighed the pros and cons of paint versus stain. Paint would be easy enough with a roller but would take at least two coats. If I opted for gel stain, I estimated I could get away with one coat. I last used gel stain on the small pew makeover and had a few issues. I was under pressure on a deadline.
And The Winner Is
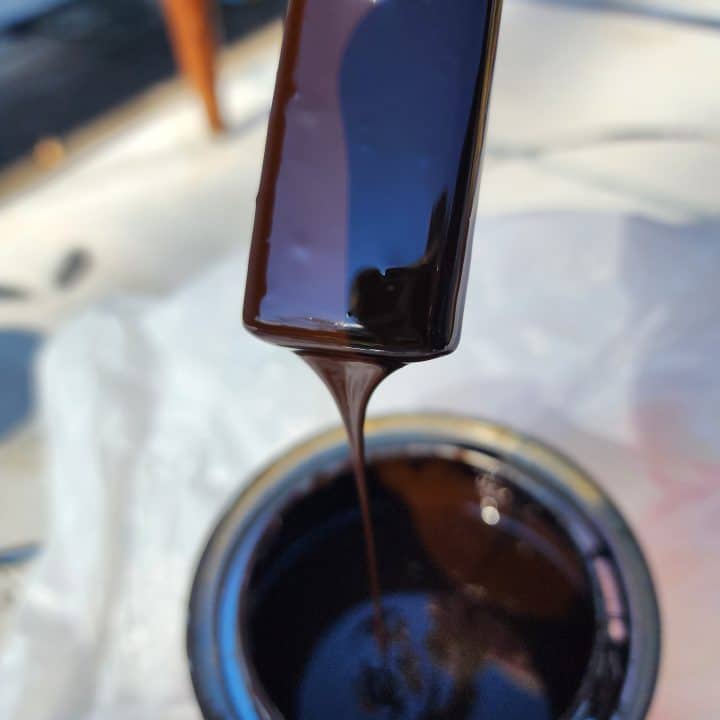
After searching my stain inventory, I found Minwax Hickory Gel Stain. I stirred and stirred the gel stain; it was so smooth. That was the problem with the church pew. I didn’t stir it. Let’s see if this works better.
Read and Follow the Directions
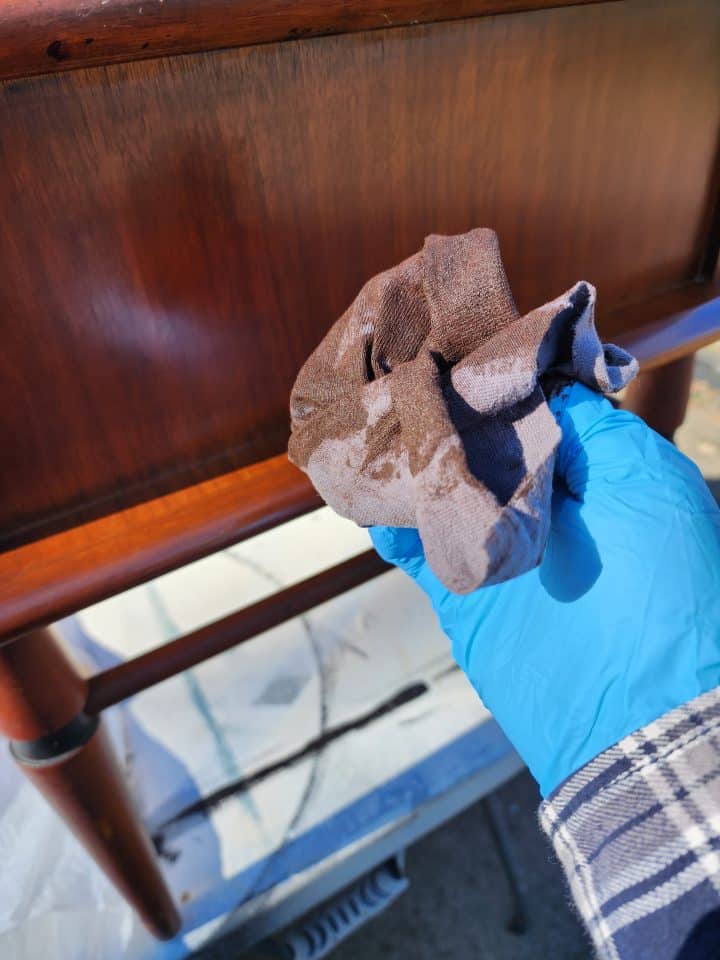
The directions on the gel stain label recommend starting on an inconspicuous area. So, I began on the back of the step table using a t-shirt cloth.
It’s nearly impossible to take pictures while applying stains and wearing gloves.
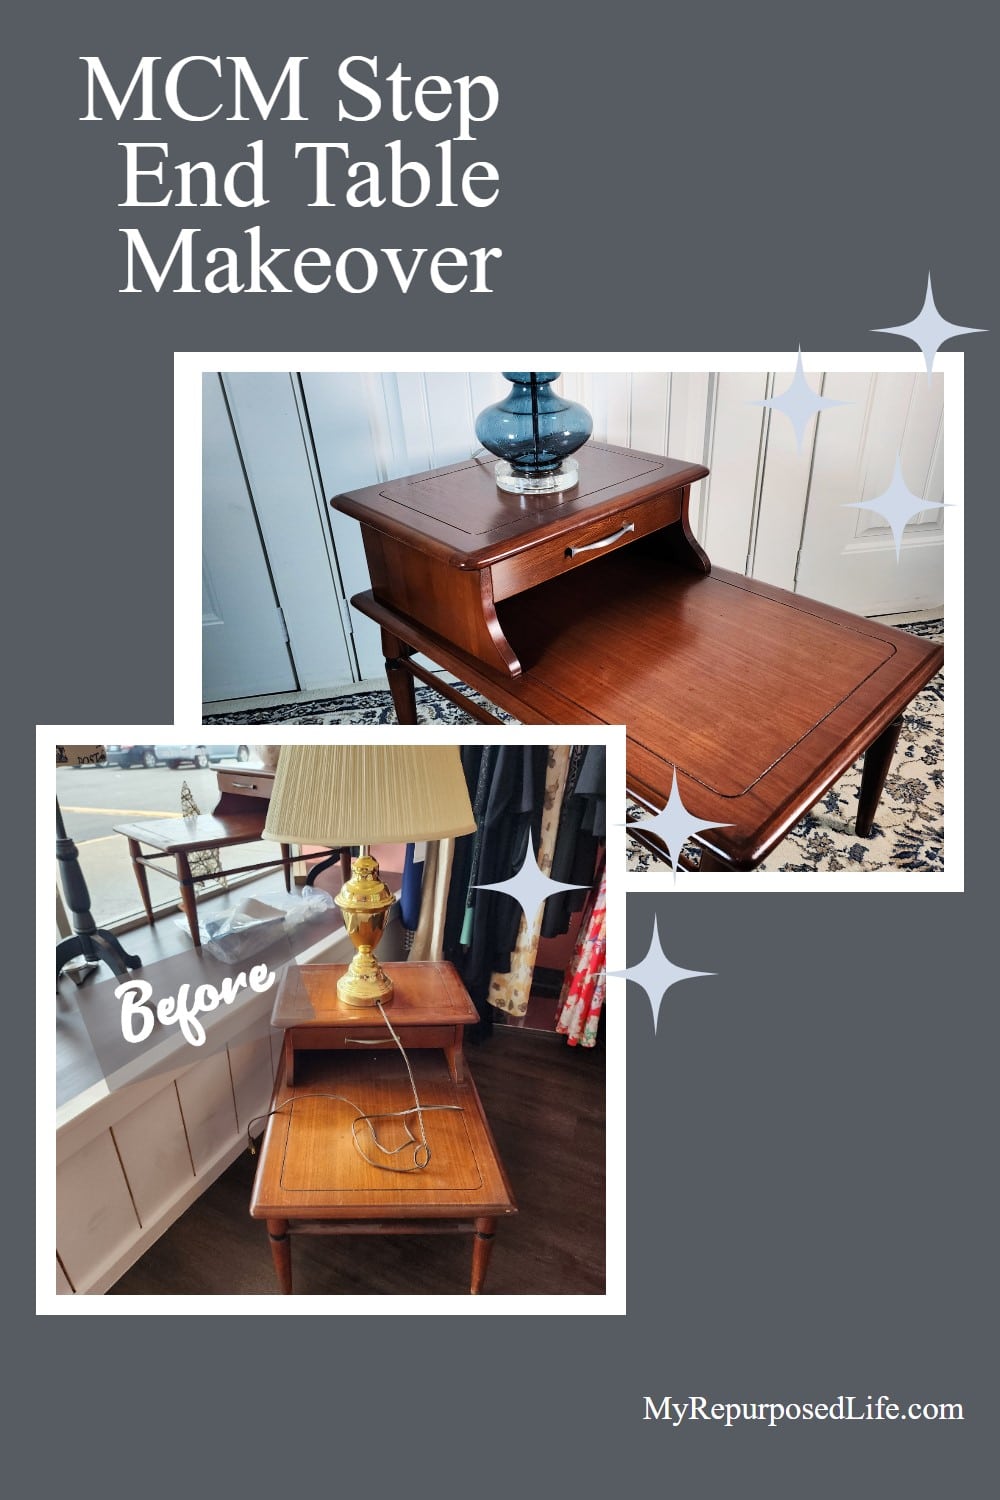
MCM Step End Table Set After Gel Stain
The tables are not perfect. I wasn’t going for perfection. I hoped the wooden end tables would reflect the years of stories they could tell. Does that make sense?
Polyurethane or Wipe-on Poly?
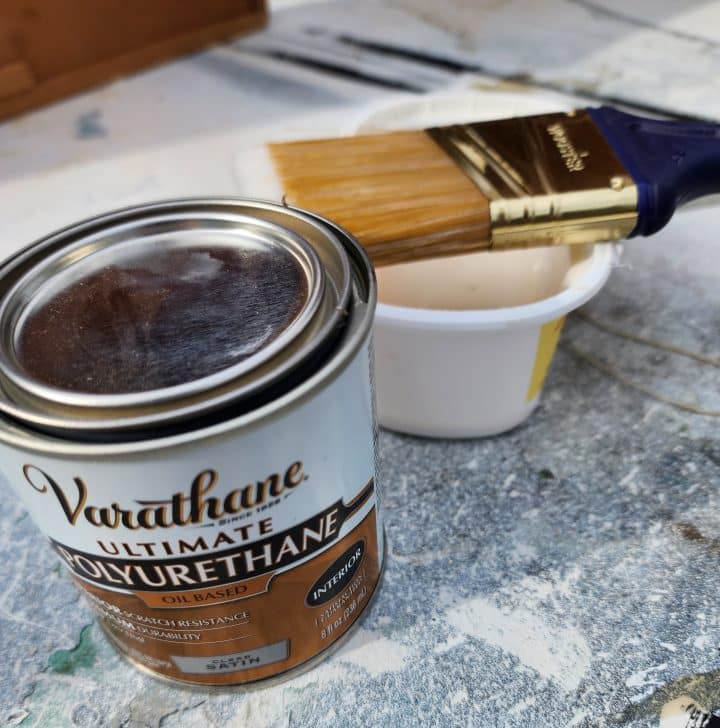
I went to The Home Depot and picked up polyurethane, a new brush, mineral spirits, mouse sandpaper, and an orbital sander pad. Remember when I tested the gel stain on the back of the end table? I did the same thing with the poly using the paintbrush. It sort of “dragged” onto the wood. I panicked and knew that I didn’t have time to start this project over. So, off I went to Lowes to buy Wipe-on Poly. It’s all I used to use, and I loved it. I looked for it at Home Depot, but they didn’t sell it.
Fast Drying Wipe-On Polyurethane
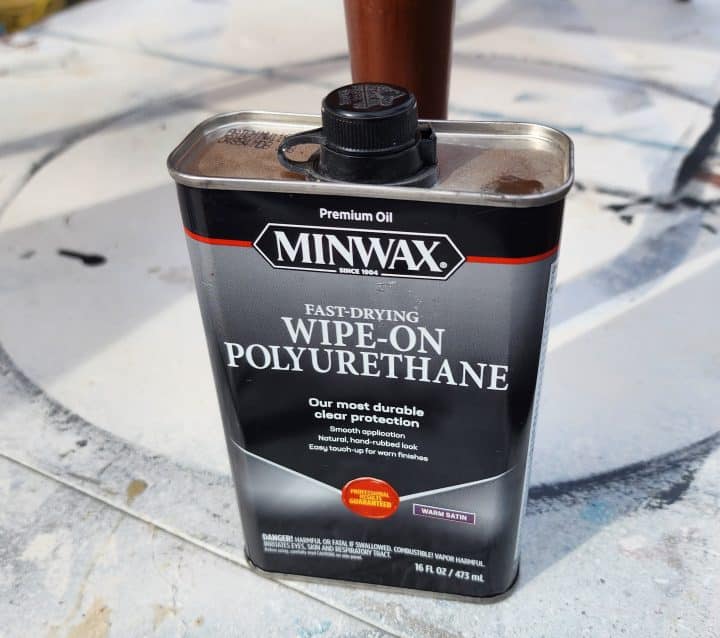
Going back to the store was definitely worth the time and effort.

The application process was so easy.
Sand In Between Coats of Poly
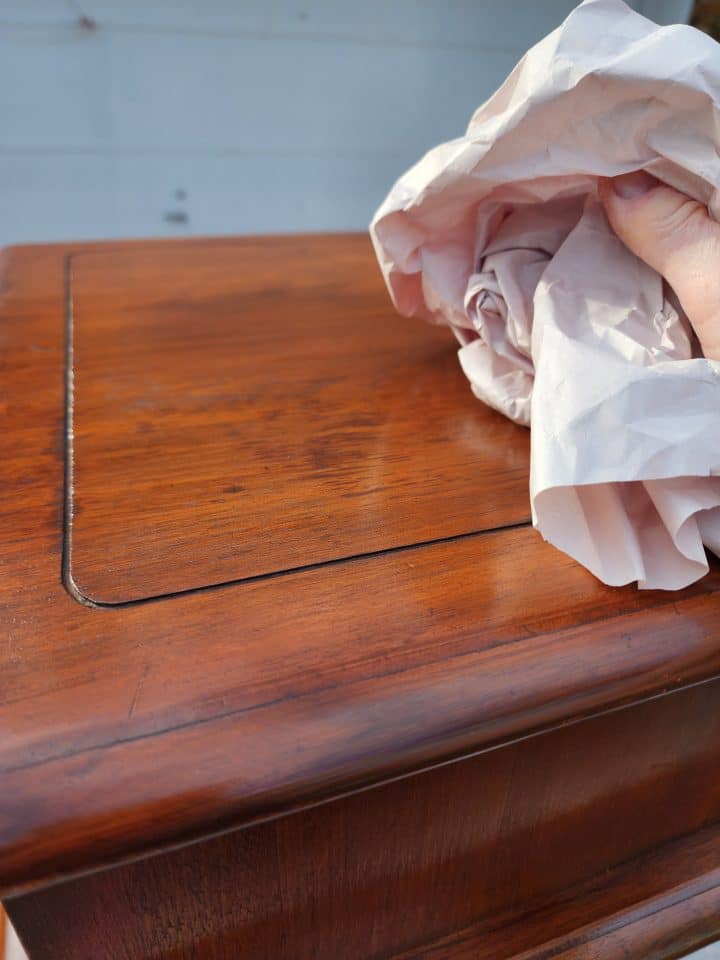
Sanding between coats of poly is recommended. I used craft paper to burnish the finish after the first poly coat before applying the second coat.
Refresh Drawer Hardware
Here’s a closeup of the hardware.

The finish on the drawer hardware was chippy.
I started with 60-grit, then 320-grit sandpaper, and finished with a sanding sponge to smooth out the end table handles. I thought about painting them black to match the black trim on the table legs.
Refresh Trim
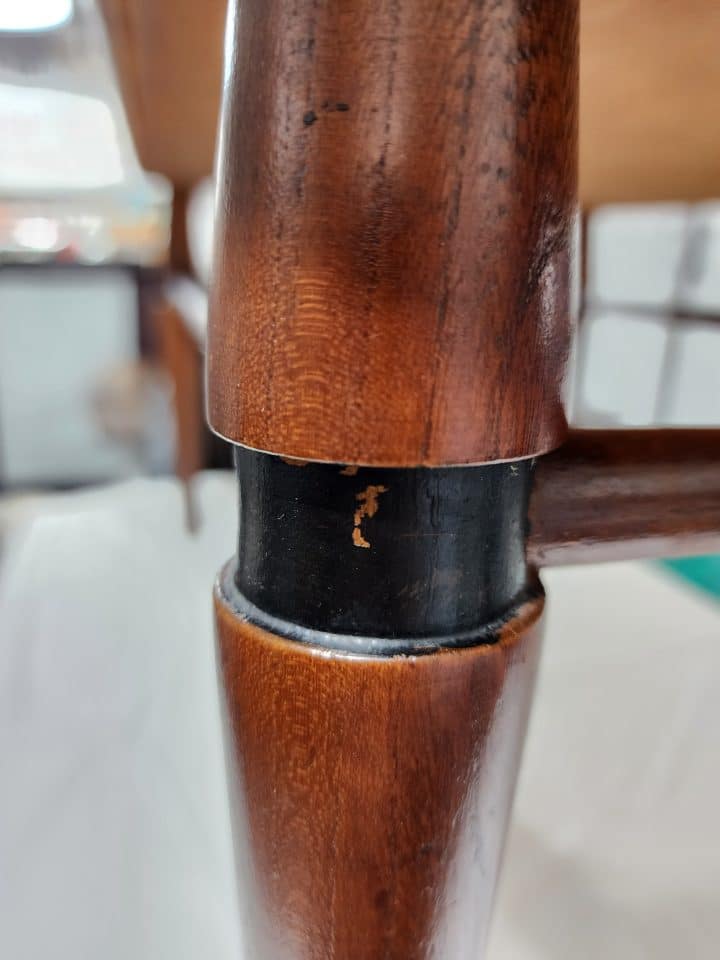
I like the trim on the legs, but it needed some touch-up.
Store Small Paintbrushes in a Pencil Pouch
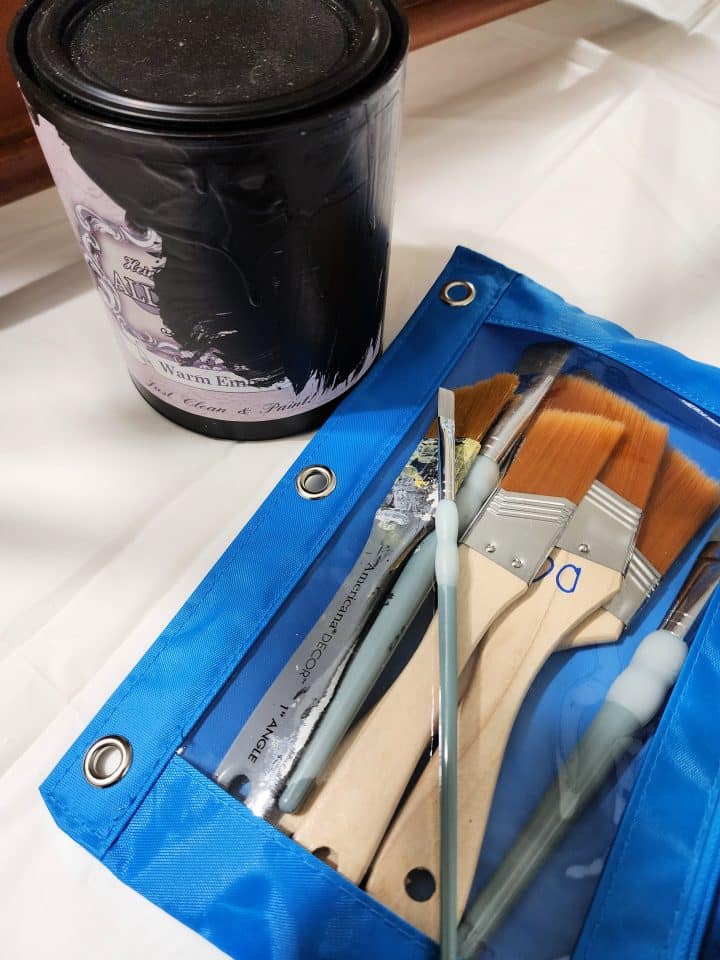
Storing my small paintbrushes in a transparent window pencil pouch has been a game changer for me.
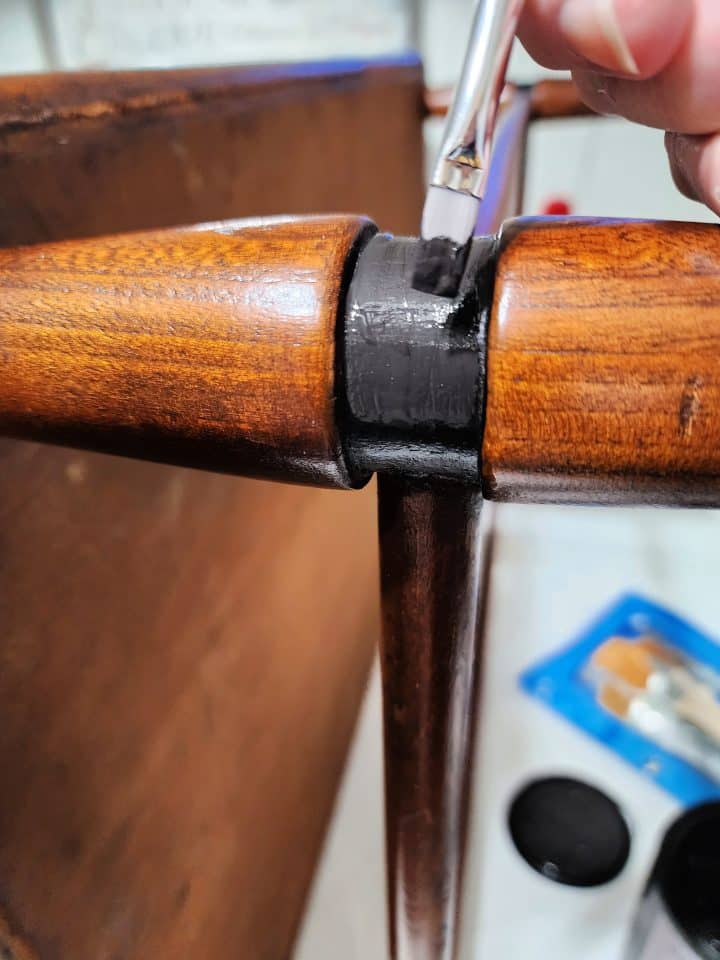
Small artist brushes make detail work much easier. The color I chose is Warm Embers.
MCM Step End Table Set | After
I am so pleased with how the mid-century modern step end table set turned out. Do you agree that they appear well loved over their many years? That’s the look I was going for.
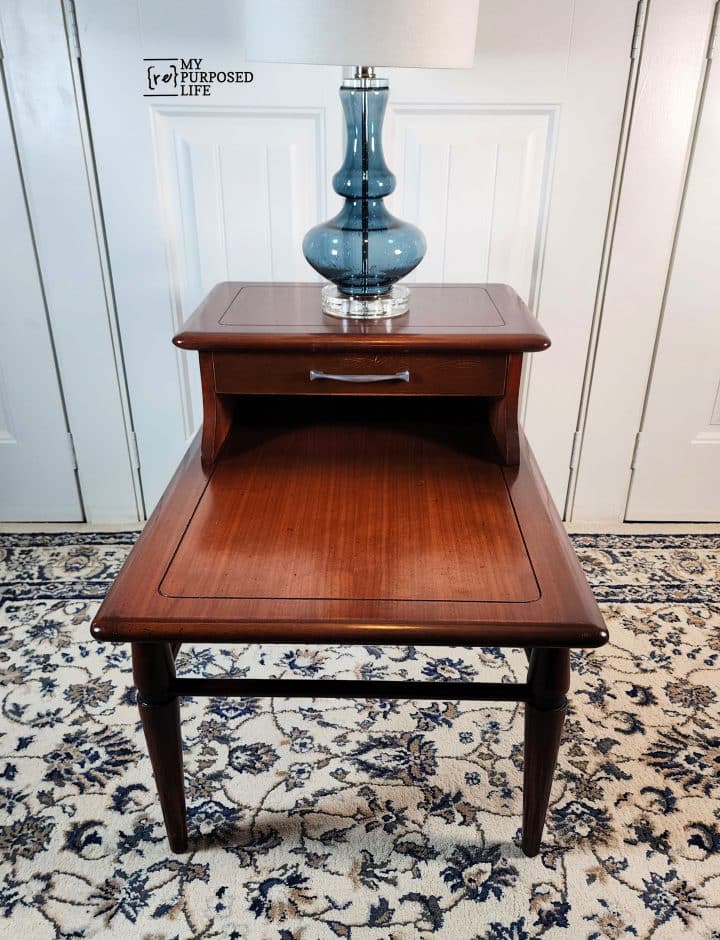
How do you feel about the drawer hardware? Should I paint it or leave it natural?
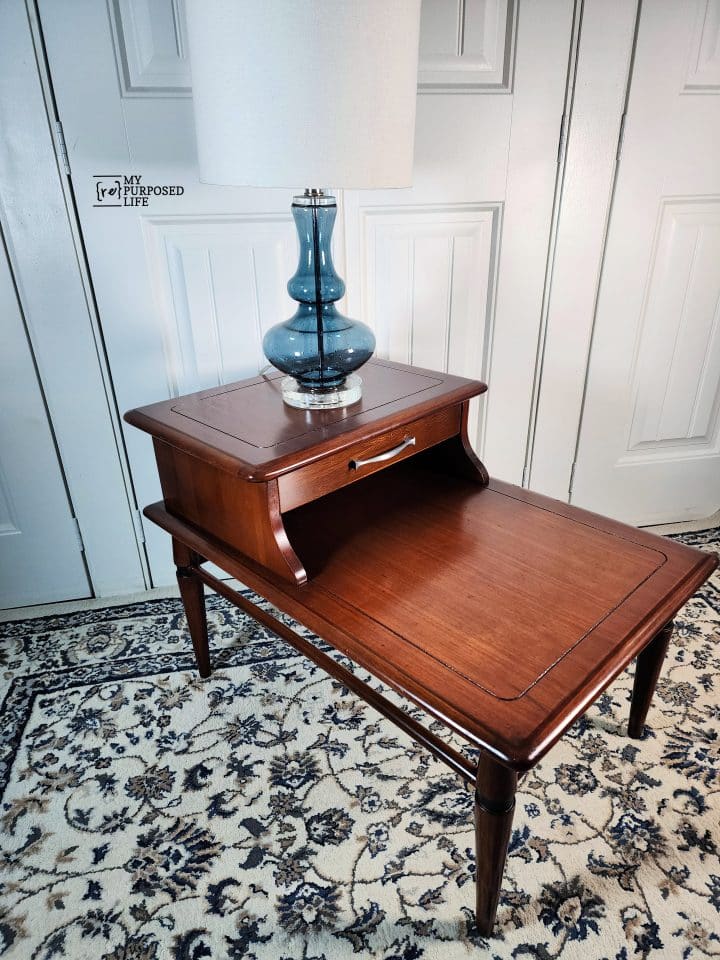
These beauties will be taken to my booth to re-home.
Let’s see what the rest of the team worked on this month!
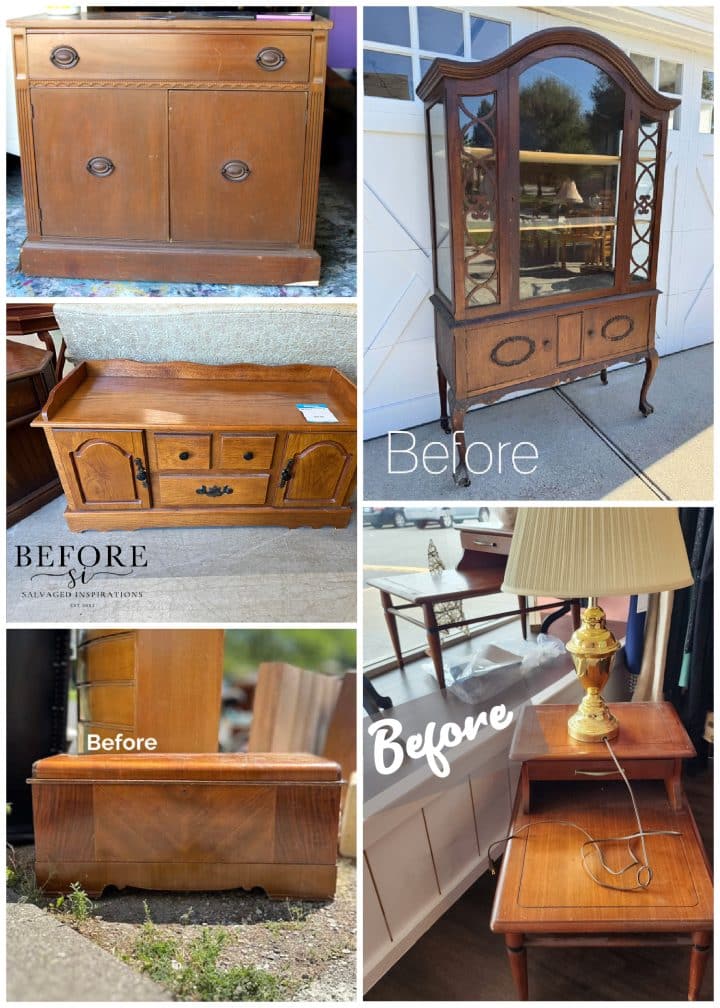
- Rice Paper Decoupage on Painted Furniture
- Antique China Cabinet Makeover
- Painted Cedar Chest
- Waterfall Cedar Chest Makeover
- MCM Step End Table Set (You are here)
Furniture Fixer Upper Tour Projects
If you love seeing old furniture get a second chance, be sure to visit more Furniture Fixer Upper Tour makeovers. Each project starts with good bones and ends with a fresh new story.
See more Furniture Fixer Upper makeovers here
You will find everything from small side tables to large statement pieces, all transformed by talented DIY bloggers who believe in saving furniture rather than replacing it.
What does the MCM mean?
Bonnie,
It’s an easy way to describe MID Century Modern furniture, it generally refers to furniture from the 50’s and 60’s.
gail
Do you have any recommendations for a table like this w/leather on the top? The leather finish is not in great shape. thanks
Deborah,
I think I know the kind of table you’re talking about. Is the leather damaged, or just sort of dry and cracked? Can you try to moisturize it with some coconut or mineral oil?
gail
Leave the hardware natural. You did an excellent job on the endtables. Love them!
Thank you so much Dee! I appreciate your input on the hardware. 🙂
gail
I thought they looked great after prepping, Gail, and agree that staining them was the right choice. The new finish really glows. I don’t think that’s the original hardware, so I say do whatever feels right – black hardware would be stunning.
Marcie,
I did a google image search and couldn’t find a match for the end tables. Since there was no manufacturer stamp anywhere, I have no idea what the original hardware looked like. Thanks for your kind comment.
gail
Definitely paint the hardware black. Silver looks out of place. These are beautiful and I’m glad you decided not to paint them.
Thanks Jackie, it really seemed like the easiest road to take. I hope they find a good home after I get them to my booth.
gail
Beautiful Gail! I’m happy you didn’t decide to paint them. I think you have a quick seller.
I sure hope so! Maybe they will end up on someone’s wish list. 🙂
gail
I’m not a fan of Mid Century modern, but I have to say you did a beautiful job on these tables. Kind of reminds me of my Moms old furniture. I’d probably paint the handles black just to update it one step more. I always enjoy seeing your projects. Love seeing the old stuff coming back to life.
Barb,
Your sweet comment brought a smile to my face, thank you!!!
Gorgeous rich wood now Gail! You brought these MCM side tables back to life. I’m sure they will be a quick seller! Pinned XOXO
Thanks for pinning Denise! I’ll get them to my booth eventually!
gail
They turned out so great! Normally I’m a paint everything but glad to see you didn’t paint them. I might paint the hardware black.
Thanks for stopping by Julie and taking the time to leave a comment. I rarely strip and refinish furniture-but this was easy enough.
gail
Love that you stained it! Gorgeous table now. 👏🏻
Thanks Natalie!!
Very pretty makeover.
Thank you Cheryl, I appreciate you stopping by!
gail
Great refresh on these tables, Gail! I know that a MCM enthusiast out there will love that you opted to stain them! XOXO
Yeah, it was the path of least resistance. I’m really glad I didn’t paint the MCM tables.
gail