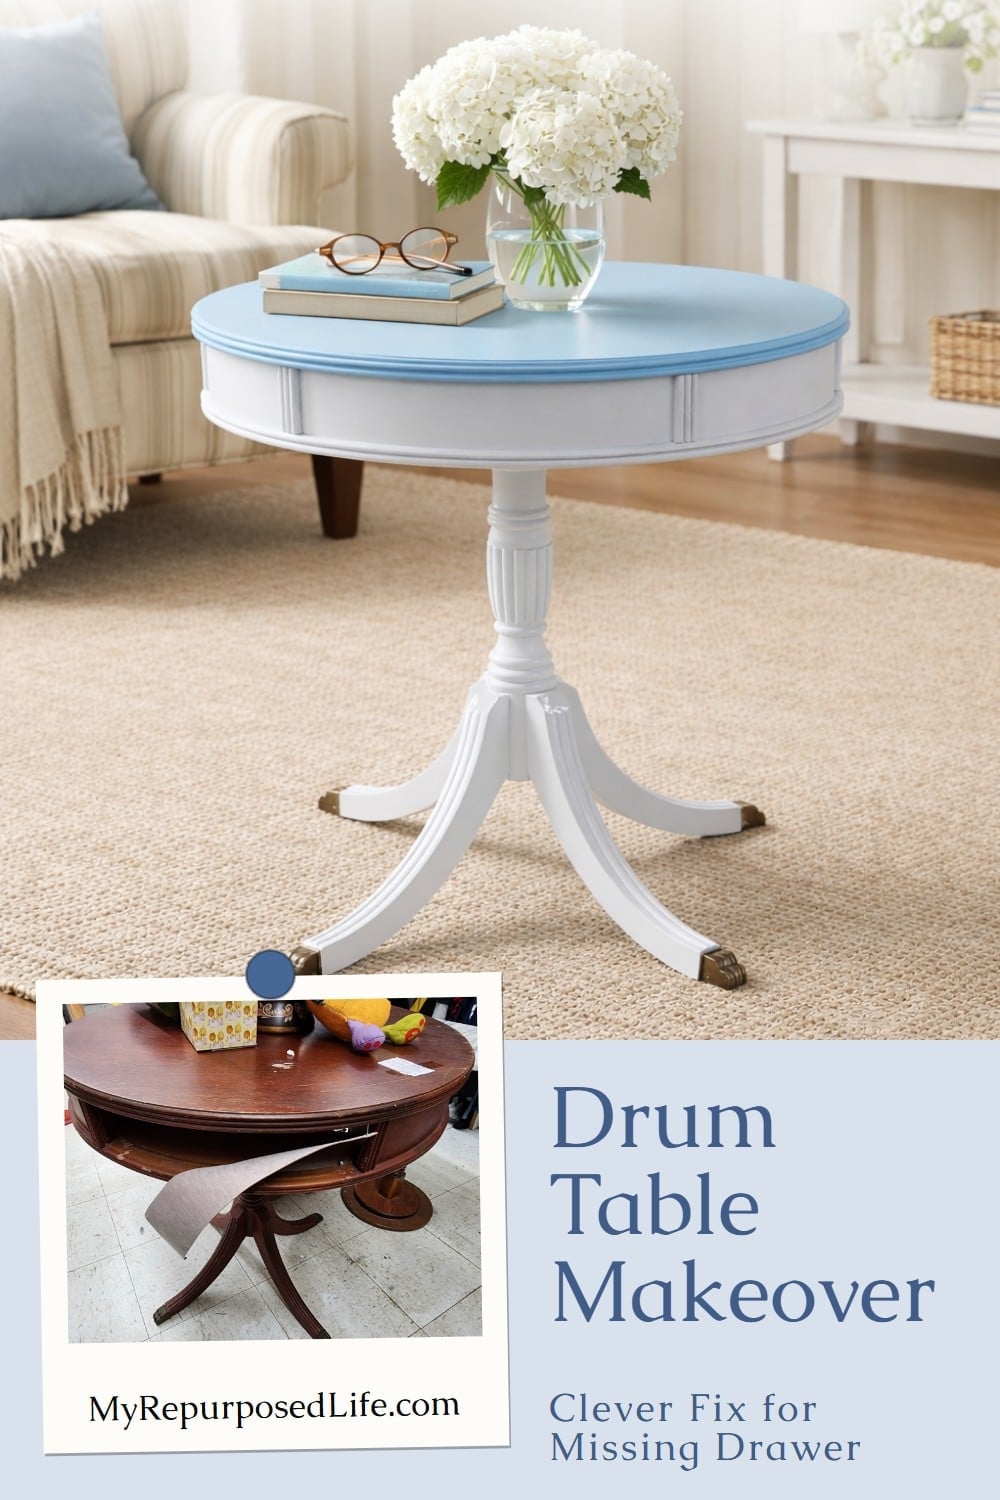
How I Fixed a Missing Drawer in This Vintage Drum Table Makeover
As an Amazon Associate, I earn from qualifying purchases.
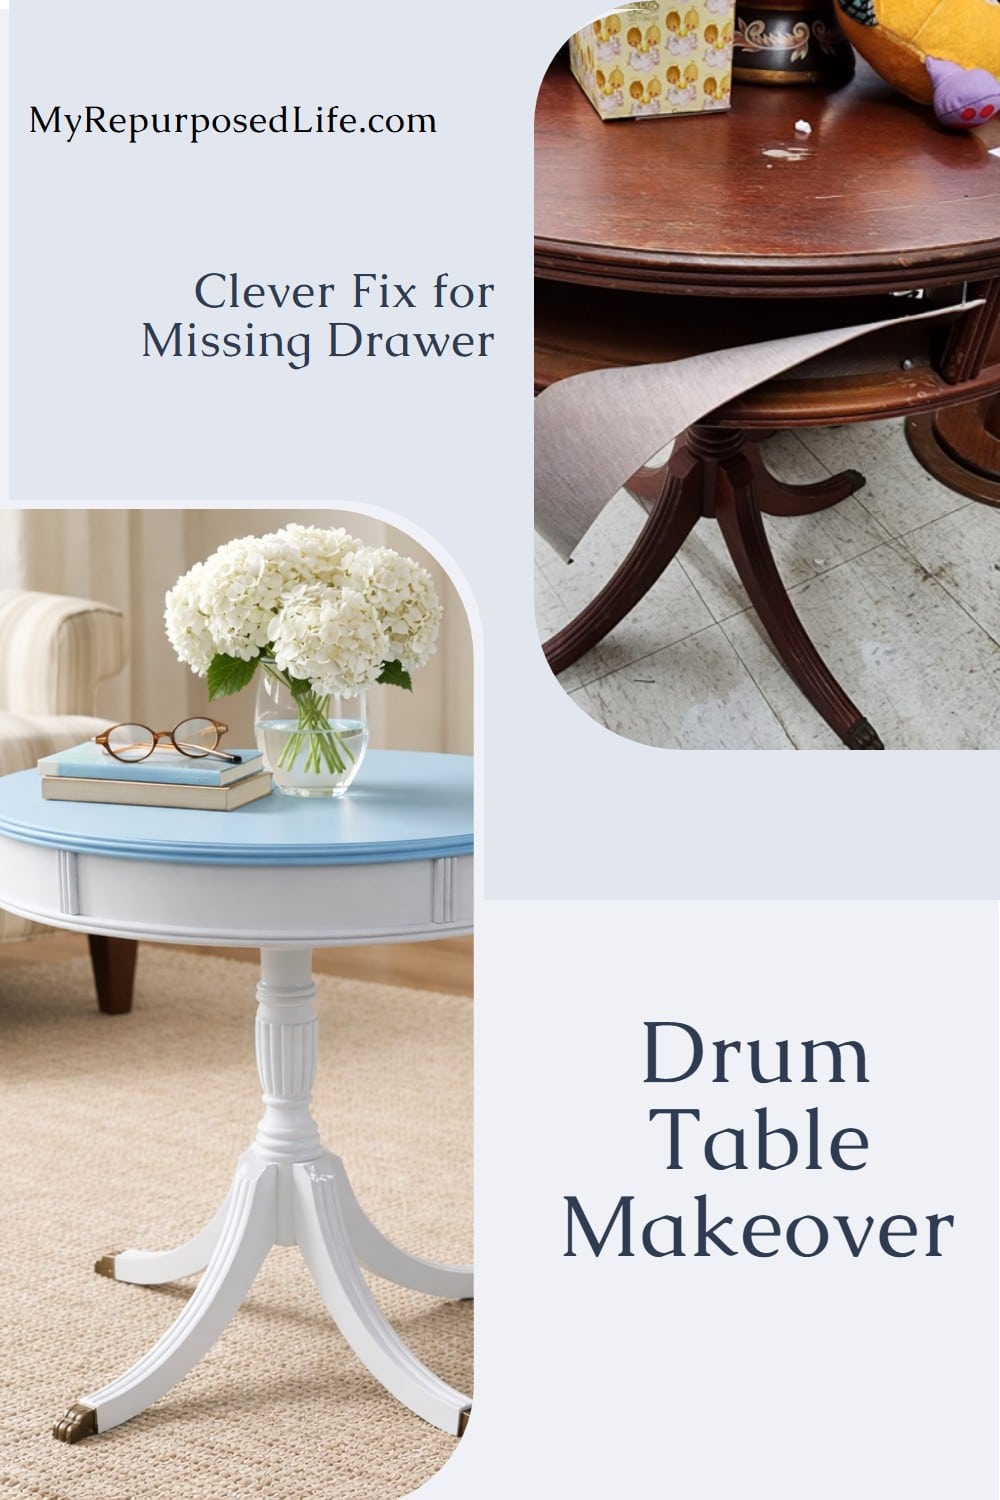
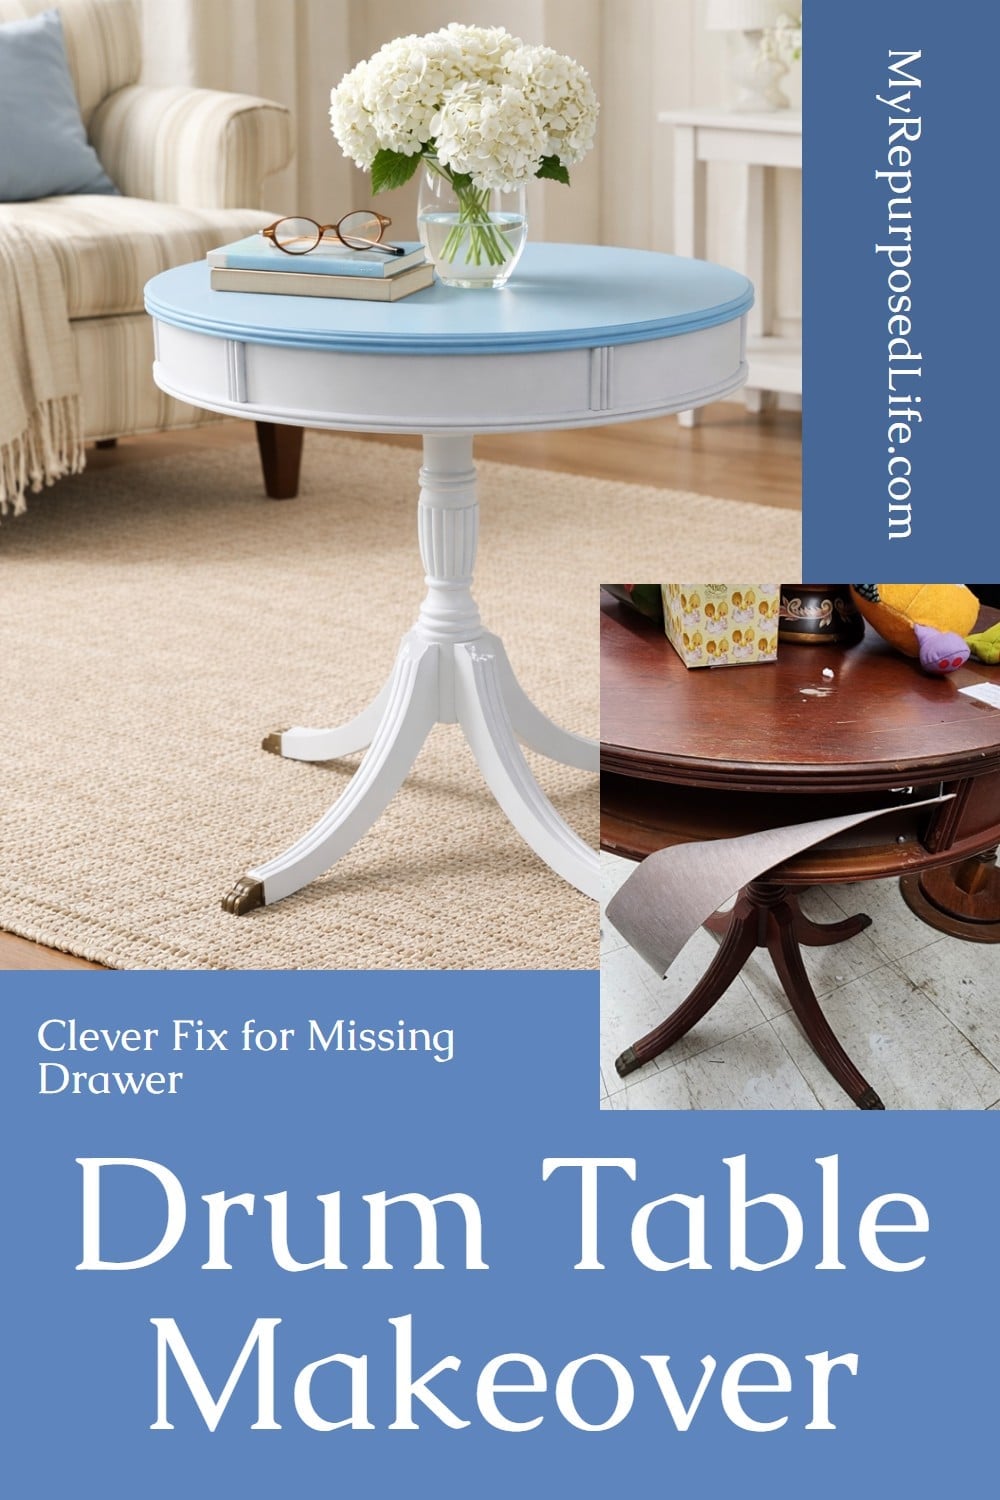
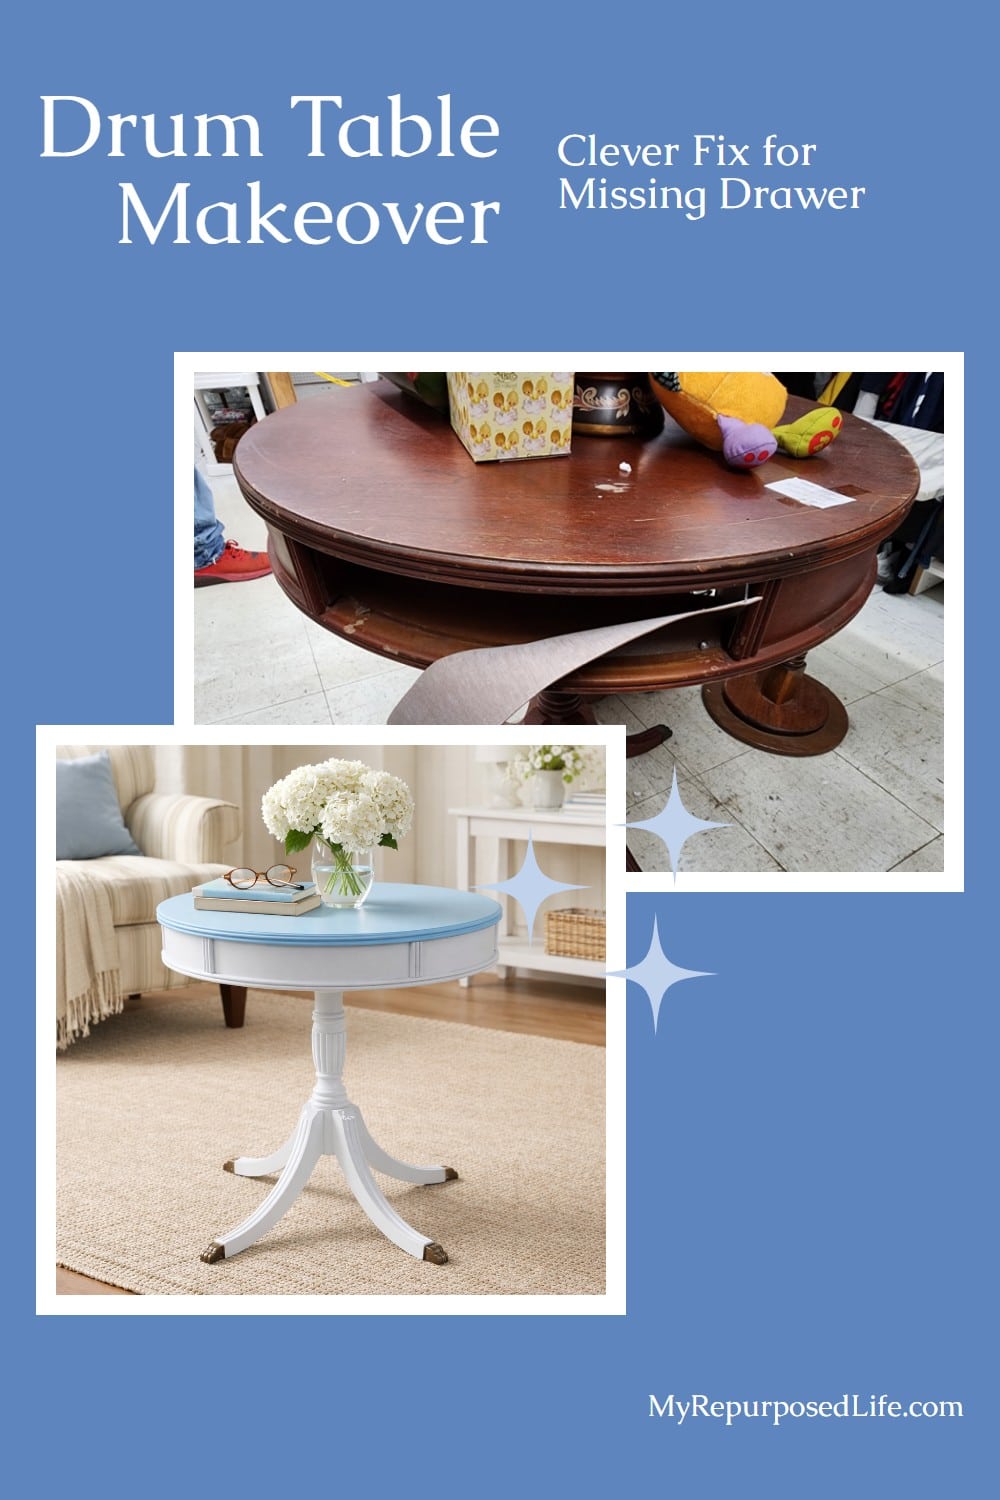
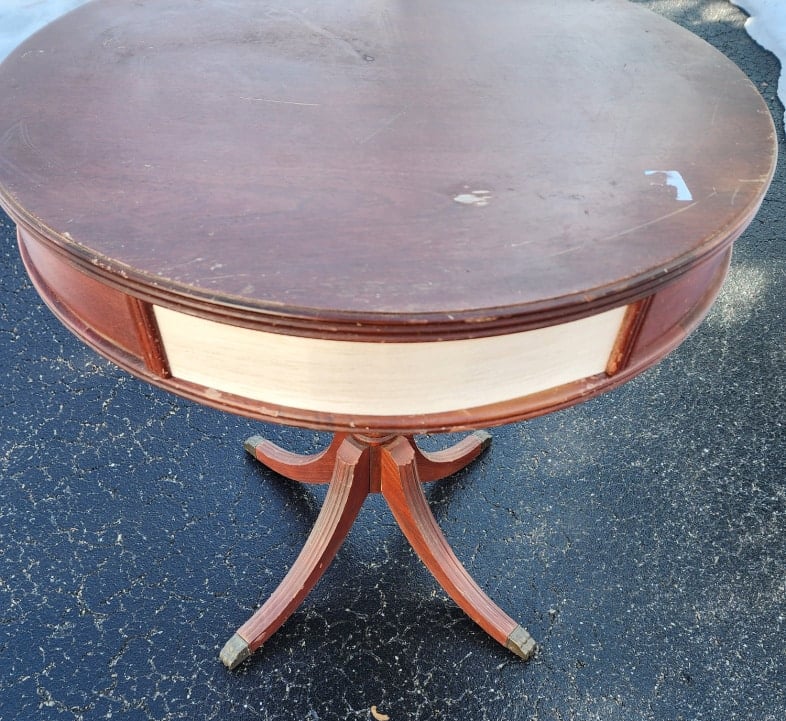
This drum table makeover started with good bones and one big problem. The original drawer was missing, leaving an awkward gap that could have easily ended this piece’s story. The price was right at just $10. Instead of walking away, I decided to reimagine it.
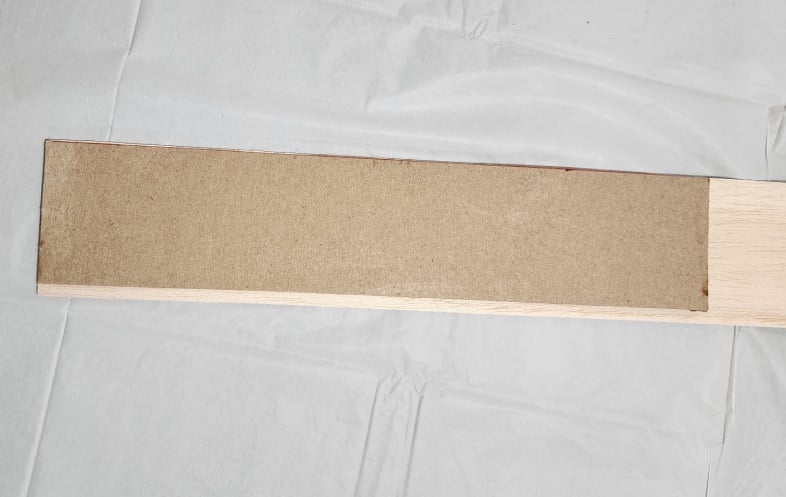
Thrift Store Drum Table with a Missing Drawer
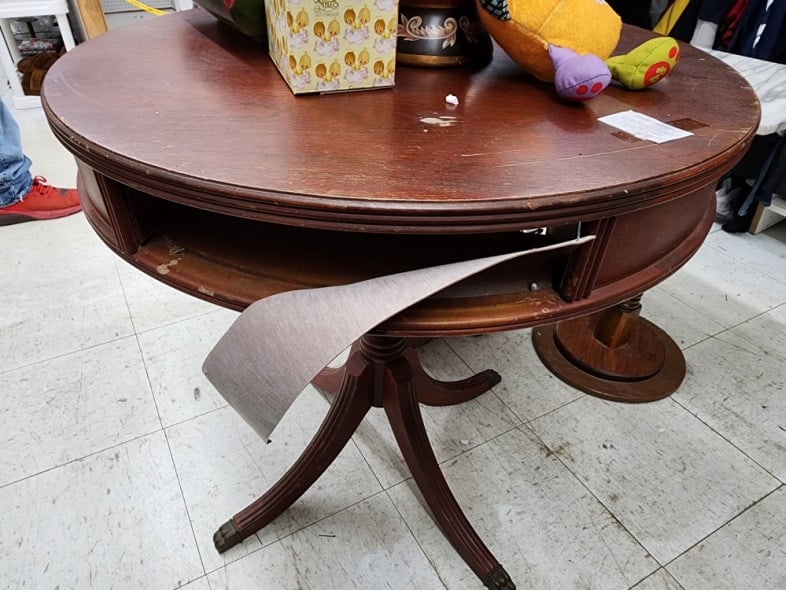
When I shared this photo on my Facebook page, asking friends if it was a yay or nay, the overwhelming response was grab it. But immediately I thought to myself, “What am I going to do about this drum table’s missing drawer?” Because it was in good shape, and she had all four of her metal shoes, I figured, I’d deal with it somehow, even if I had to put a basket where the drawer was supposed to be. Anything was better than what the previous owner had done, adding a piece of pleather with small screws!

This photo shows more of her good side. But I still wonder what happened to that drawer? Was it lost, or damaged? Why didn’t someone just put her bad side toward the wall? In a worst-case scenario, that’s what I would do if I were going to keep this beauty.
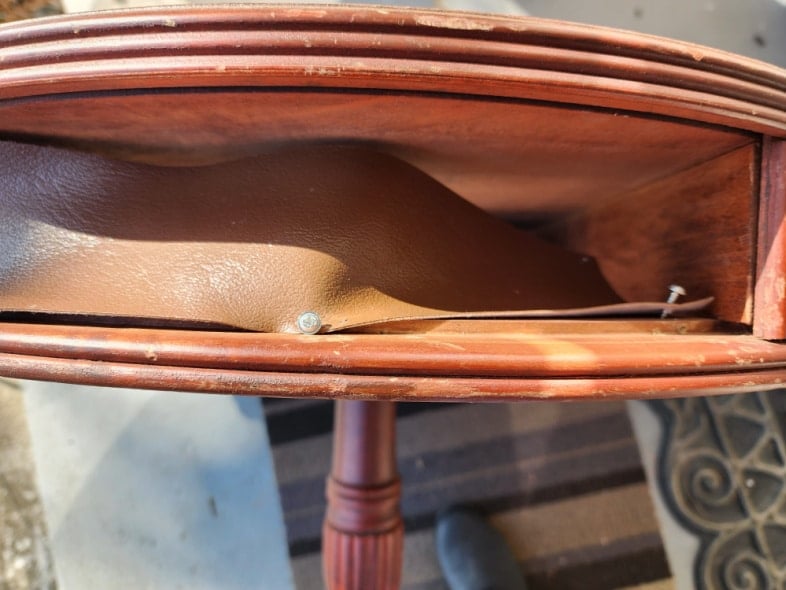
Seriously, who thought this was a good idea? After many thoughts ran through my head, making no sense, I decided to add a fake drawer panel where the missing drawer was supposed to be.
Note: the indentation of the table at the top, where a new wood panel will be placed.
Drum Table Makeover | Replacing Drawer with Wood Panel
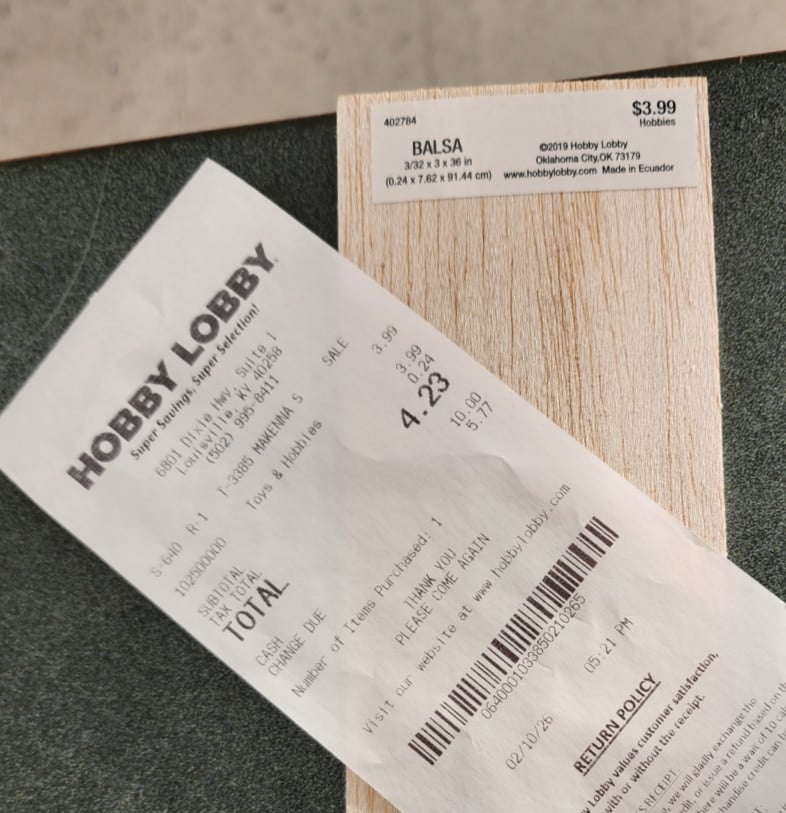
I went to my local Hobby Lobby to see what options I could find. Their craft wood section had a wide selection of balsa wood. I had already checked my garage for thin plywood, and it was too thick to bend.
When I measured the missing drawer panel, it was approximately 2.75″ x 13.5″. I was happy when I found this piece measuring 3×36 with a thickness of 3/32. I would have two chances to get it right!
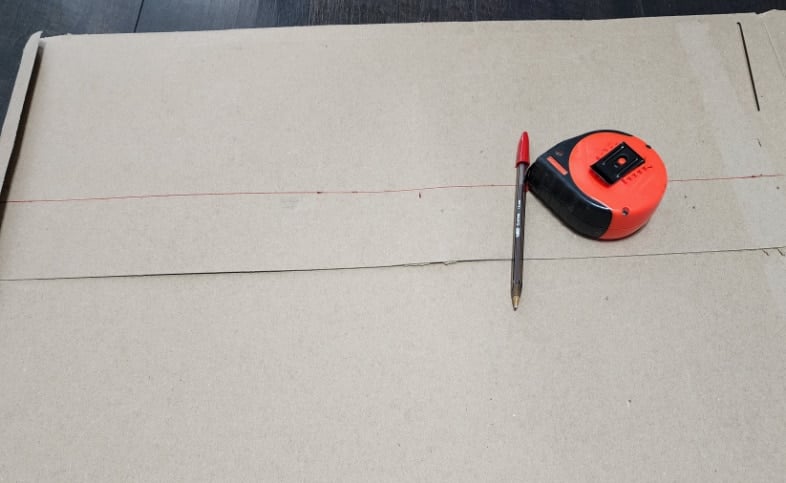
I used a piece of non-corrugated shipping cardboard to make a pattern using my measurements.
The cardboard was slightly too long; it slipped right into place after I trimmed it a bit. I think my missing drawer repair might be easier than I thought.
I traced the pattern onto the long piece of balsa wood with a red pen.
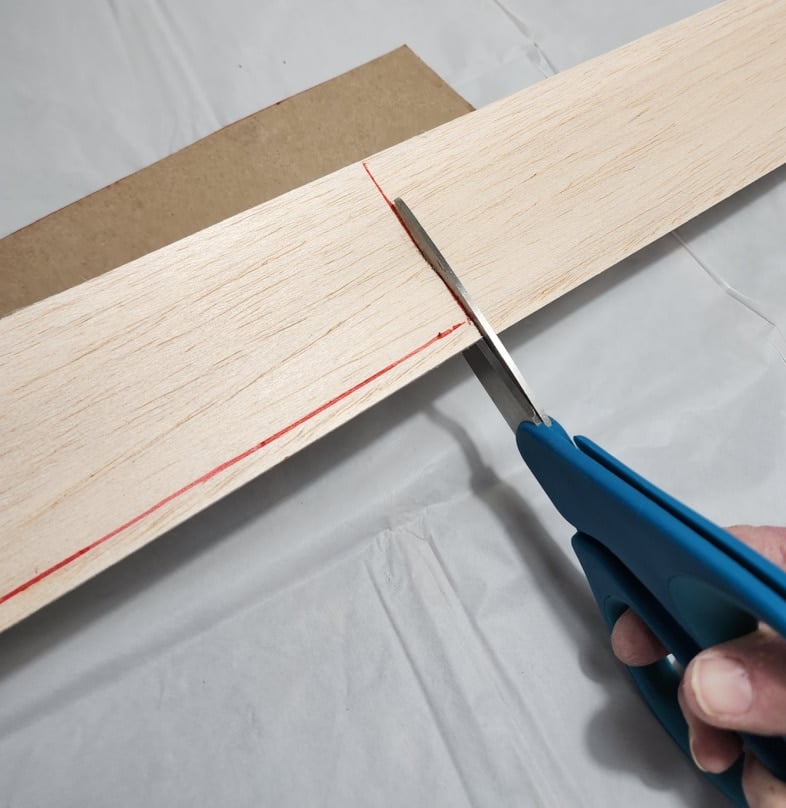
A heavy-duty pair of scissors cut across the narrow board with a bit of effort. Cutting down the grain was a breeze, but not the best option. More on that later.
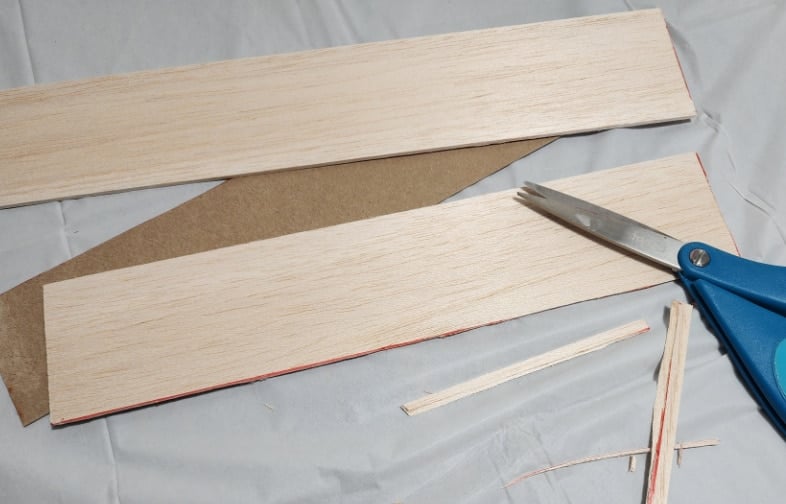
I was ready for my first attempt to fill the void left by the missing drawer.
Not shown: I was unsuccessful. The fit was too tight, and I put my thumb right through the wood panel. It was very difficult to install the panel side-to-side while trying to insert it into the top slot. I wasn’t really in the mood for taking pictures at that time.
I briefly considered dismantling the table, but decided that would be a lot of work to keep all of the other panels in place.
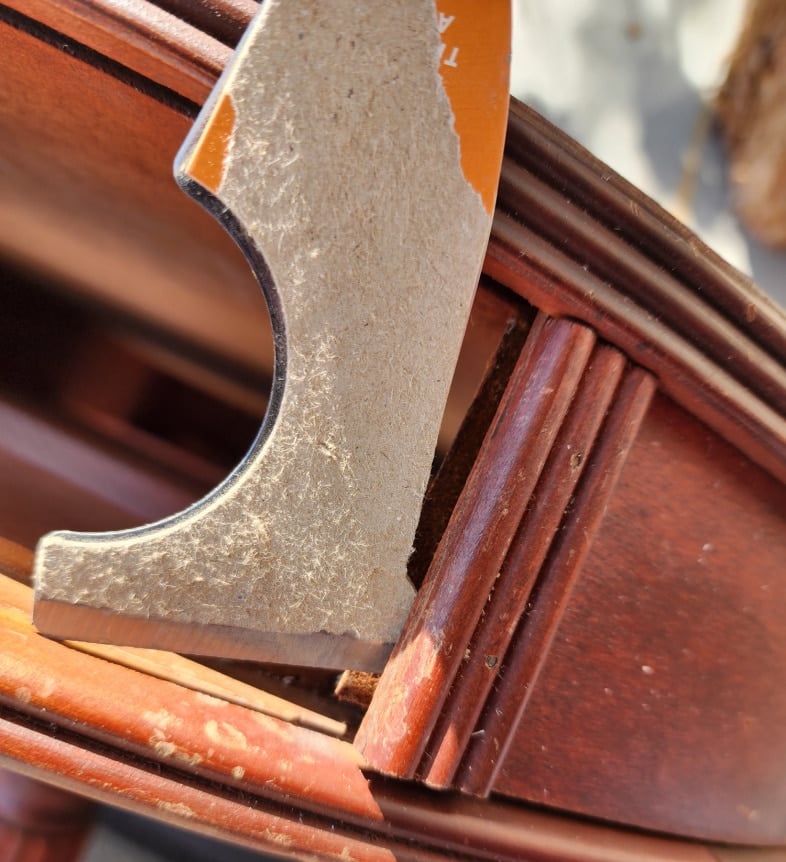
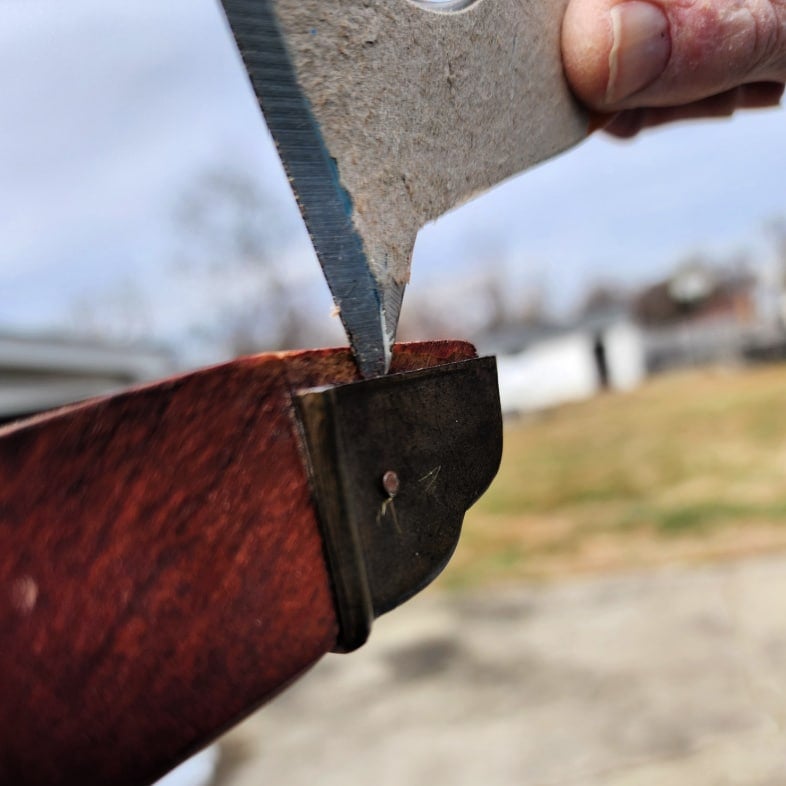
While using a small piece of wood to make sure it fit on the difficult side, I noticed that the trim lifted away easily with my painter’s tool.
This drum table makeover is testing my patience. Let’s try this again.
Scoring Balsa Wood with a Painter’s Tool
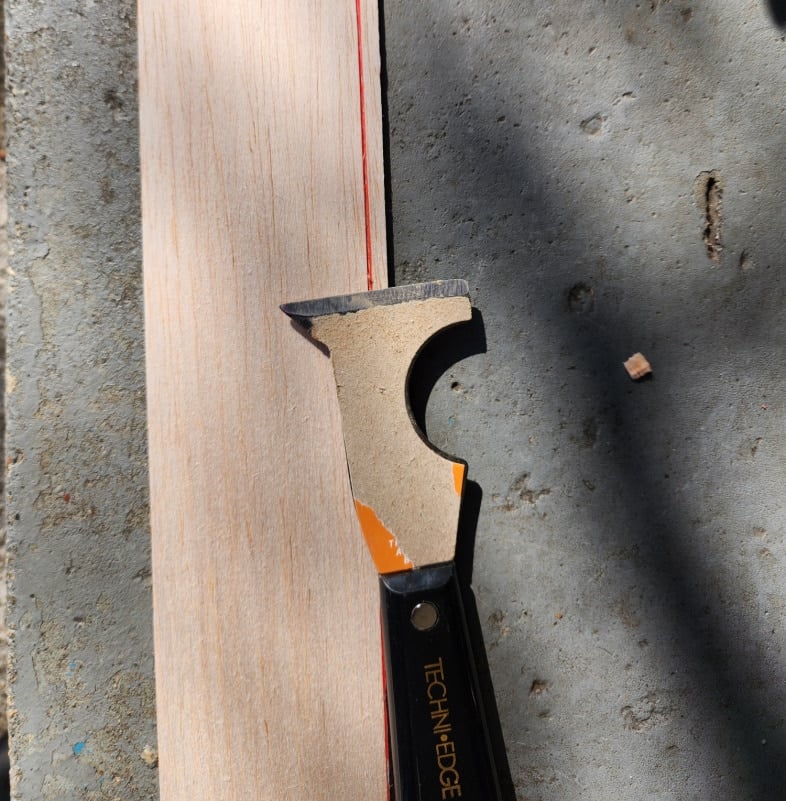
For the second try, I cut across the panel with scissors, but since I had my painter’s tool right there on the porch, I used the pointed side to “score” down the balsa panel twice. The small strip fell away easily.
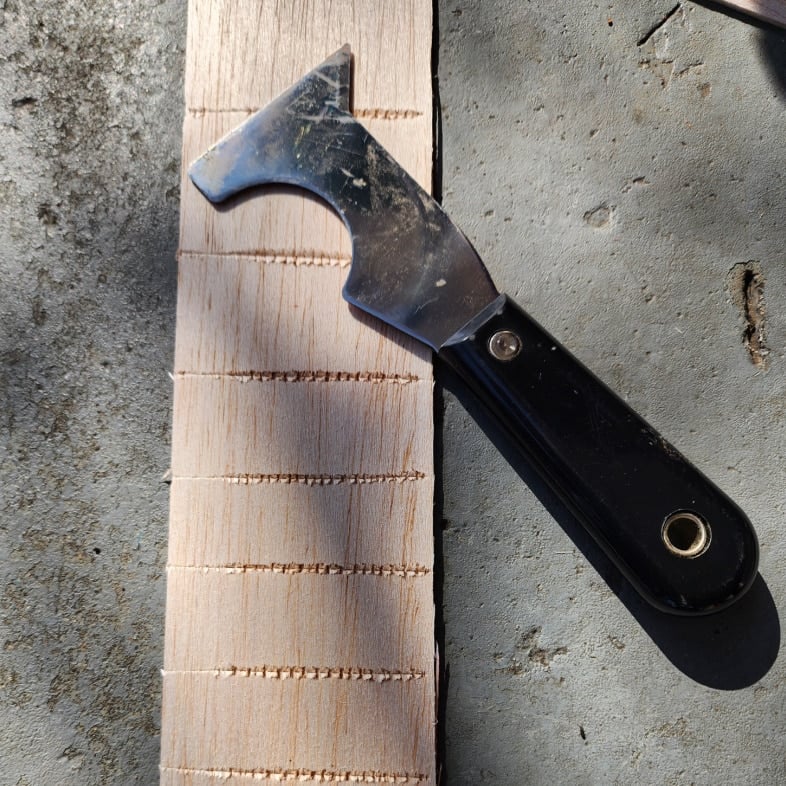
To help the wood bend to the curve of the drum table, I used a painter’s tool to score a perforation down the entire 13+ inches.
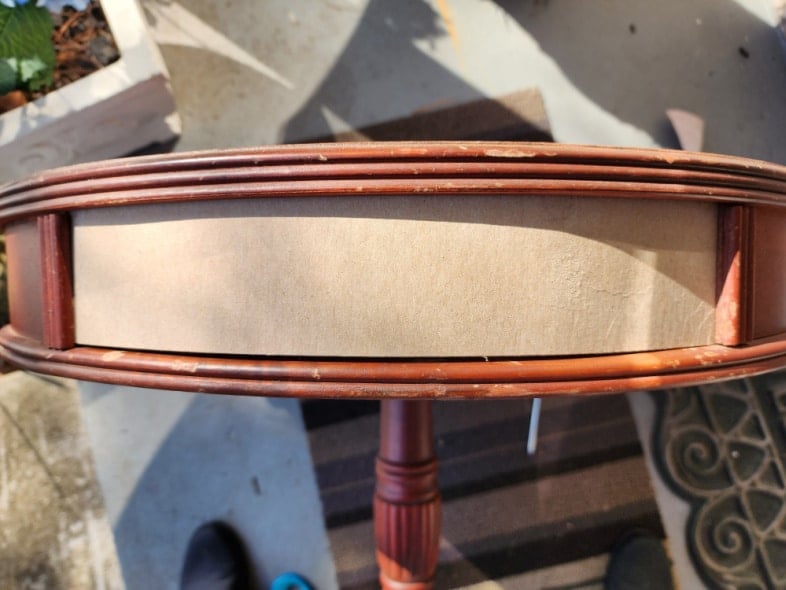
Missing Drawer Fix
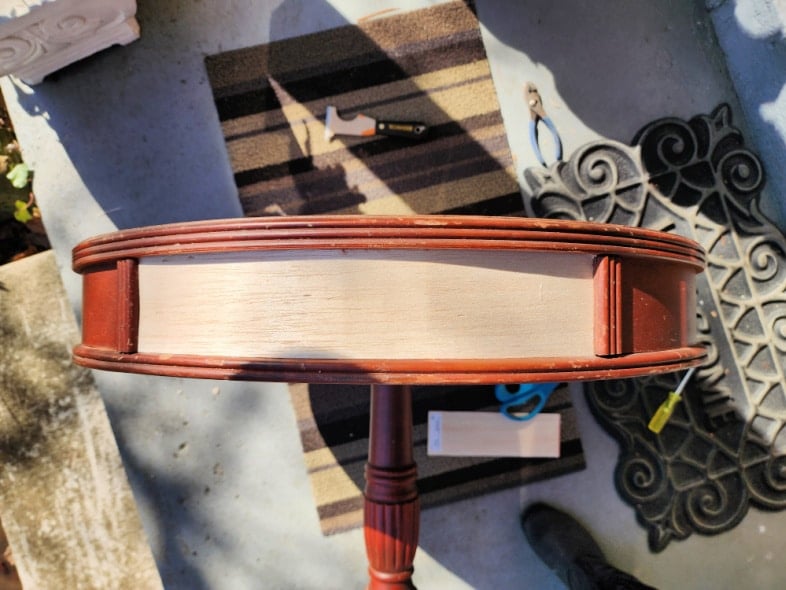
Voila! The panel was tight, but I got it in place using a lot of patience. After securing it in the right position, I pushed the small trim back into place. This furniture drawer fix is complete, or is it?
Wood Panel Replaces Missing Drawer
After tapping the new wood panel and then the original wood panels, I was a little concerned that the new panel wasn’t strong enough.
DIY Wood Hardener
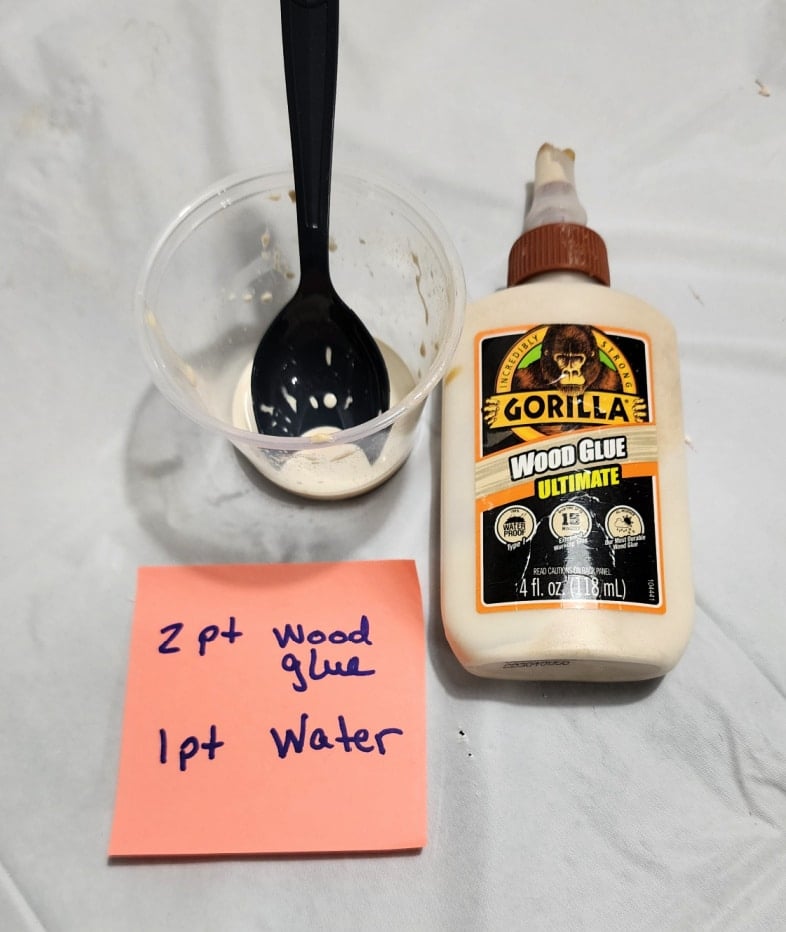
Did you know they make a wood hardener? I searched for “strengthening balsa,” and I discovered that you can purchase products. But then I found a DIY solution, so I went with that. I mixed the wood glue with water a little differently than it was recommended. The ratio online was 1:1, but I felt that was too thin. I added more glue, bringing the ratio to 2:1.
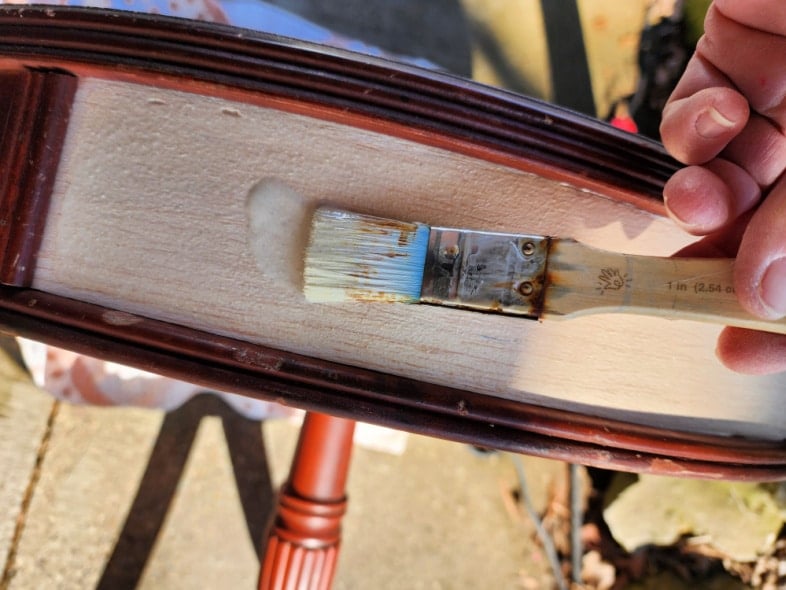
I brushed a generous amount of wood glue onto the faux drawer wood panel and let it soak in. I’m not giving up on the drum table yet.
Prep Table for Painting
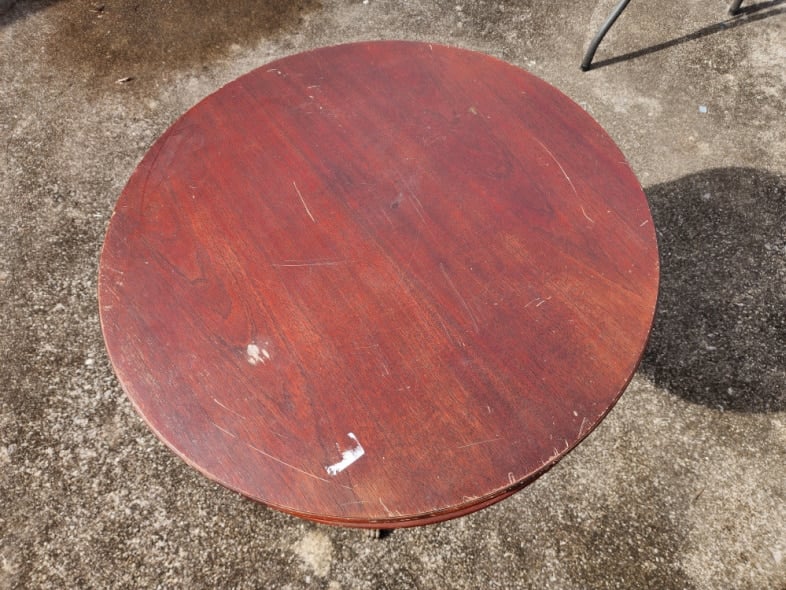
The top of the drum table was in decent shape, and I wanted to stain it. But then I began sanding it.
There was no wood grain because it’s a veneer. Another hiccup in this furniture makeover.
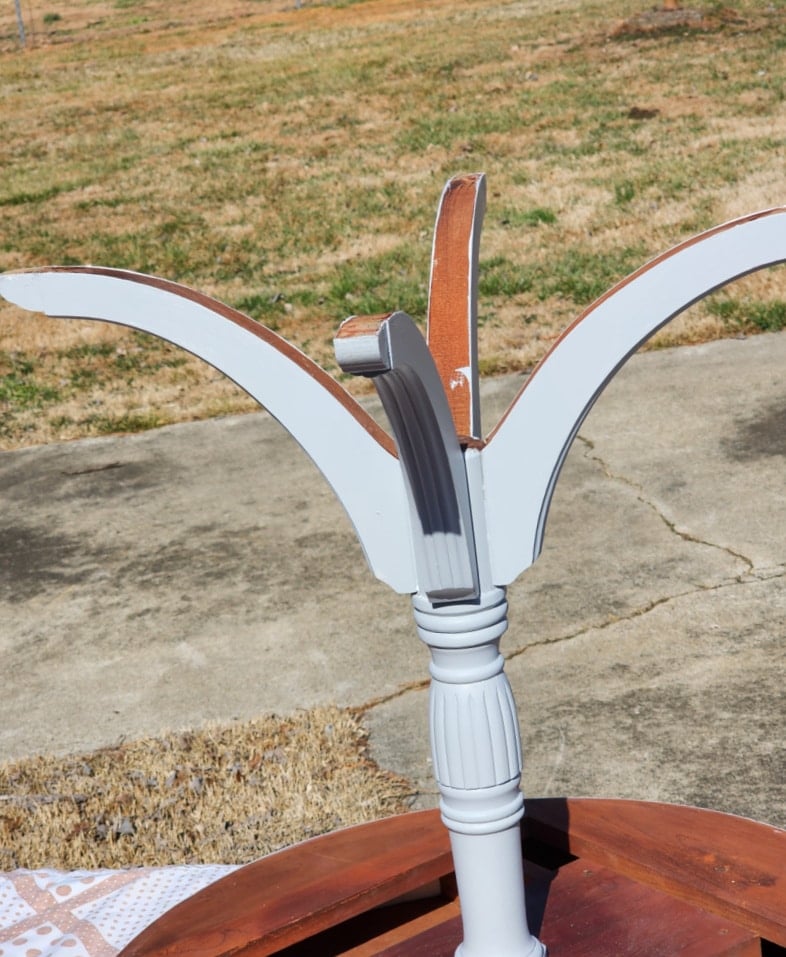
Most of the nails were set tight on the metal claw feet. A painter’s tool helped pry the metal foot away from the wood.
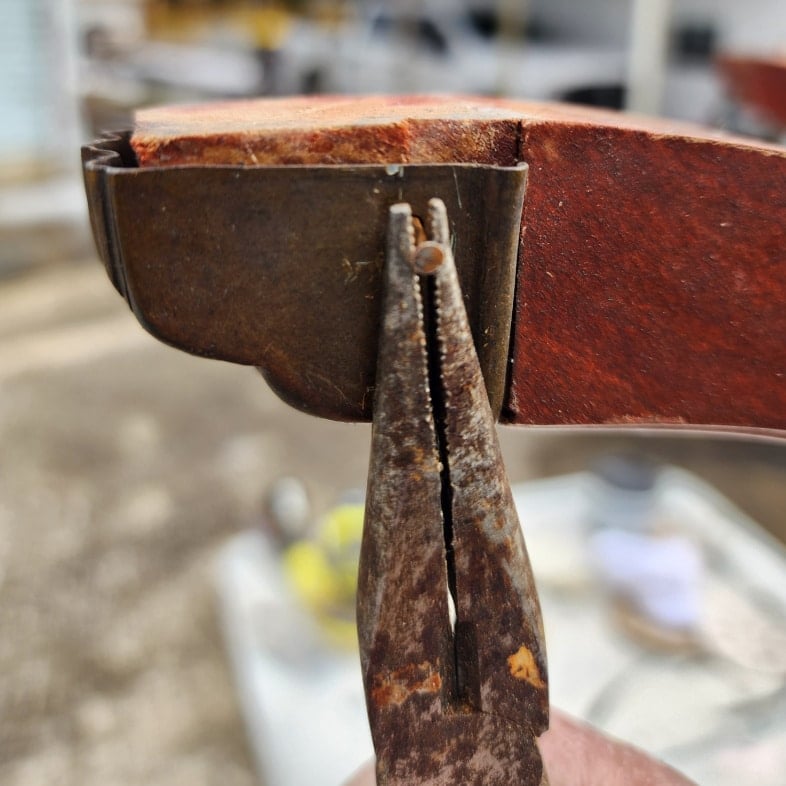
After the nail was away from the foot, I used the painter’s tool to pry it far enough to allow room for the needle-nose pliers.
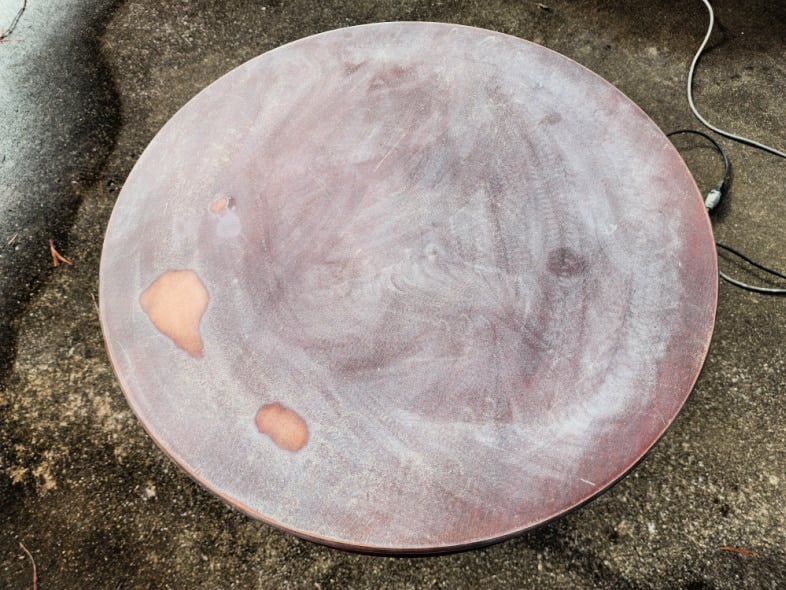
Clean and Degloss
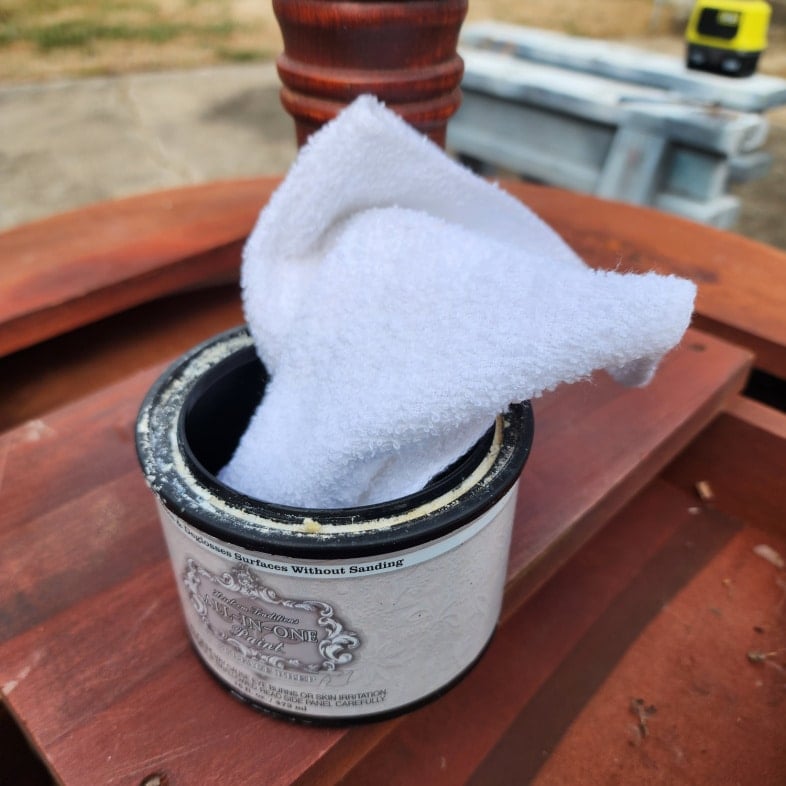
I used HTP surface prep to clean and degloss the drum table.
Sand the Wooden Panel
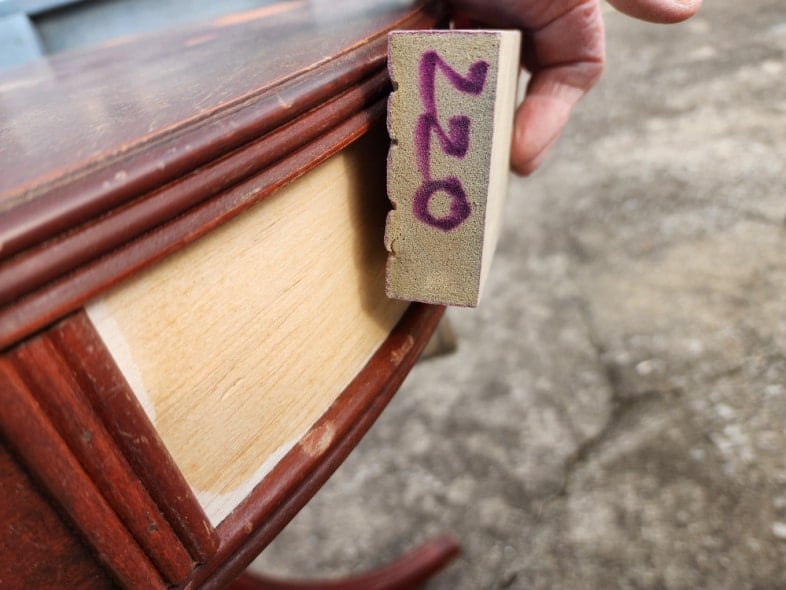
The diluted wood glue left the wood panel (used to fill in for the missing drawer) feeling rough. I used a 220-grit sanding sponge to smooth the surface.
Dixie Belle Bonding Boss
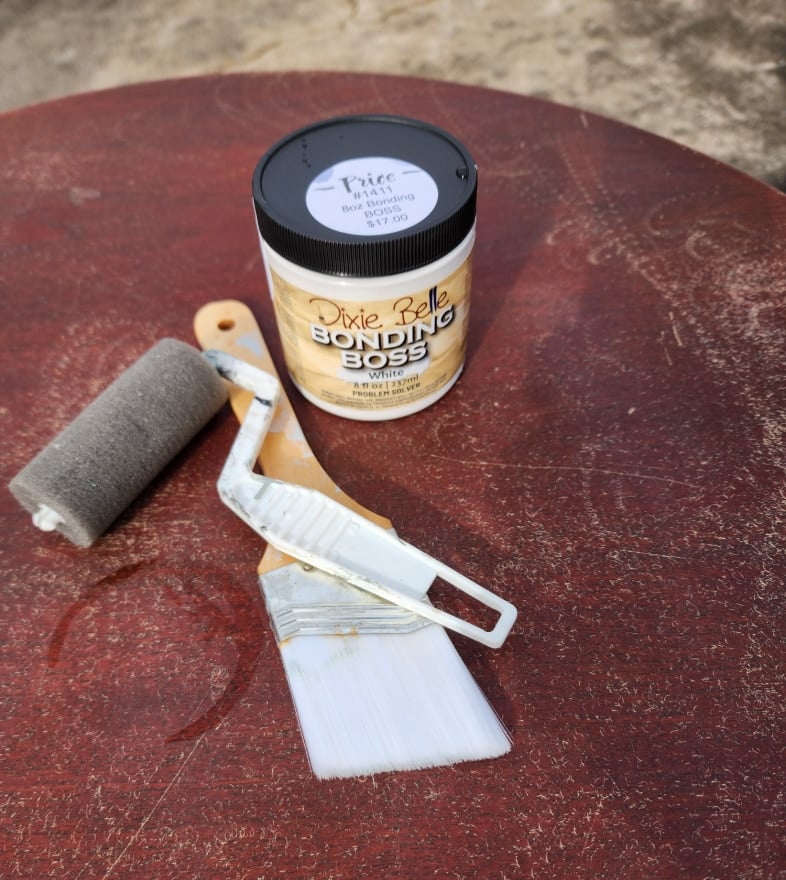
Although the table has a lot of sanding swirls, the top is very smooth to the touch. Because of the color, I expect significant bleed-through on this drum table makeover. This is my first time using Dixie Belle’s Bonding Boss. I will switch between using a roller and a paintbrush to apply the primer.
Priming with a Paint Roller
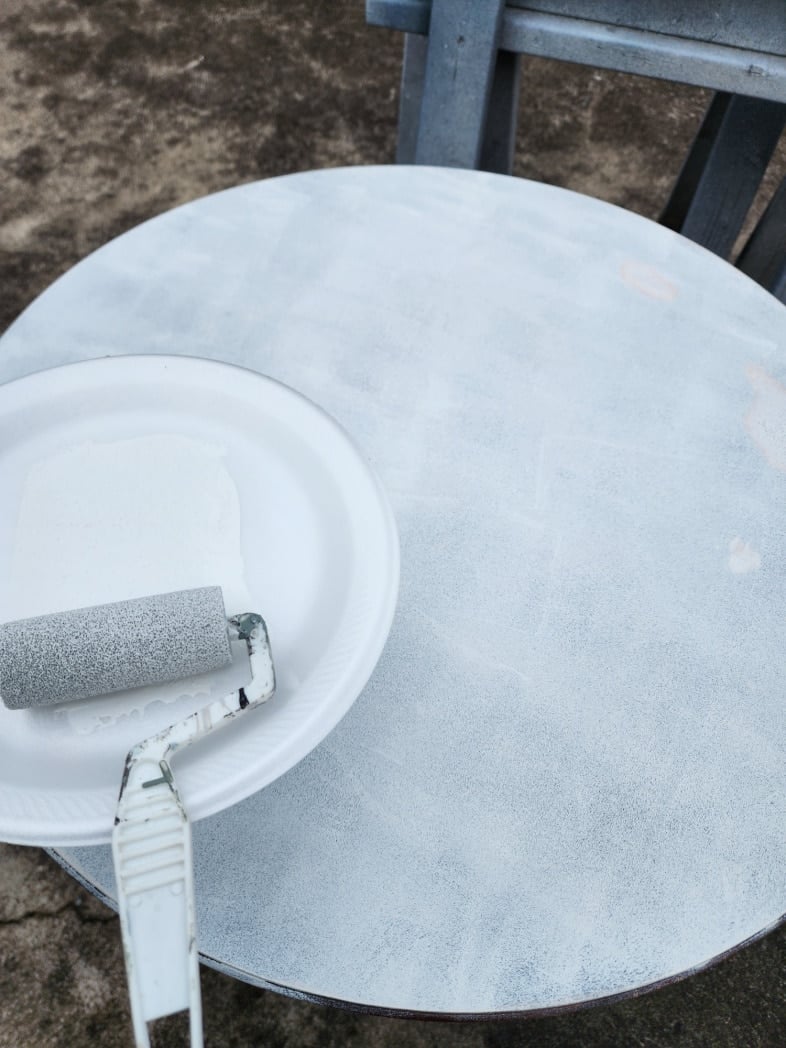
My regular painting routine includes a styrofoam paper plate and my favorite roller from Heirloom Traditions. As I said, this is my first time using Bonding Boss, but I’m assuming an ugly first coat is sufficient.
Priming with a Paintbrush
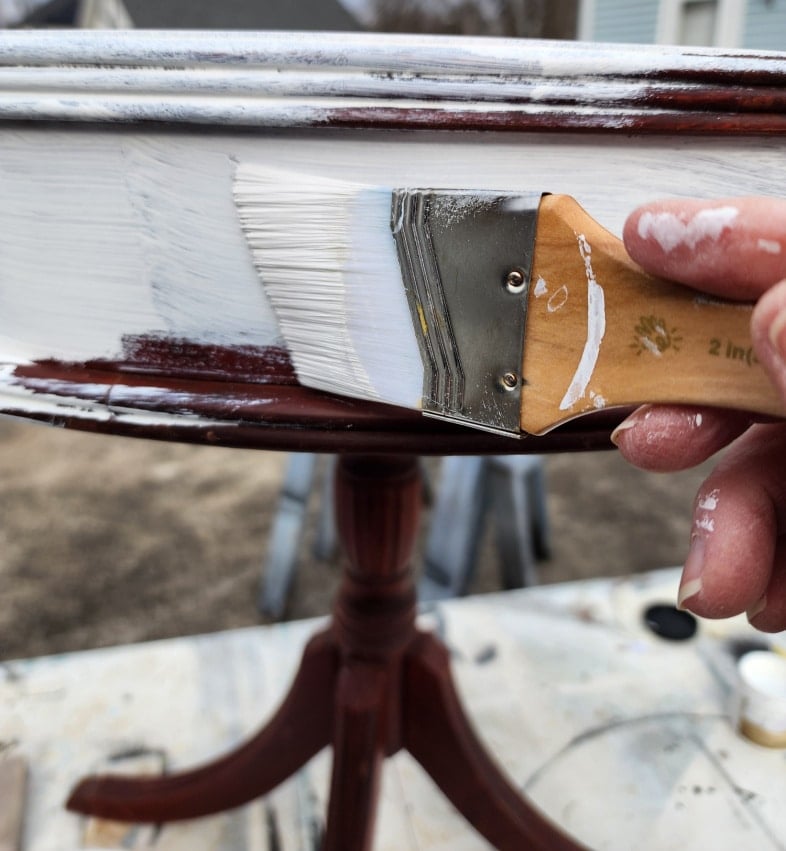
The entire base of the table was painted with this 2-inch brush. I didn’t take many pictures because it was cold outside and I just wanted to be done. The Bonding Boss recommends waiting 24 hours before painting the top coat. It suggests 2-3 coats. Because of the weather, I may not have the luxury of time for the full treatment.
I used the surface prep to clean the grime off the metal claw feet. They are cleaner, but I’m not sure if I’m calling them done at this point.
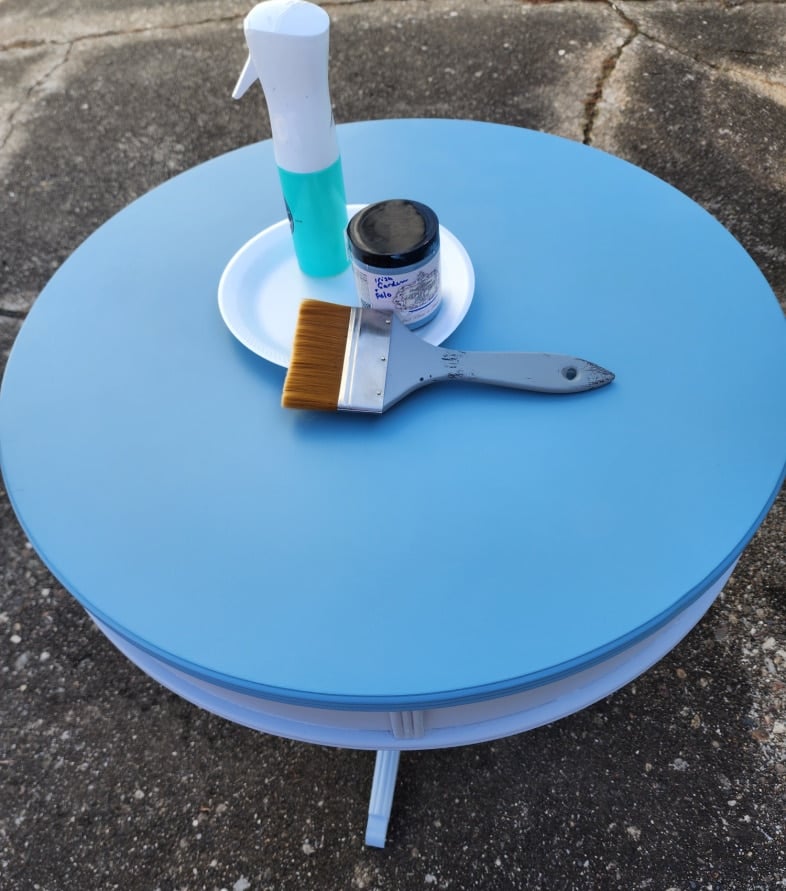
Mixing Paint Colors
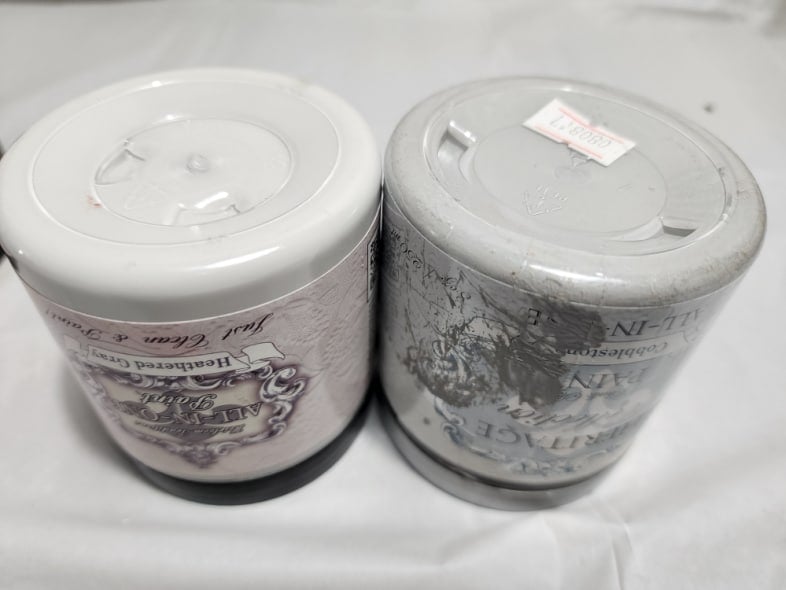
I wanted to paint the table base gray. Being low on paint, I chose these two shades of gray, Heathered Gray and Cobblestone.
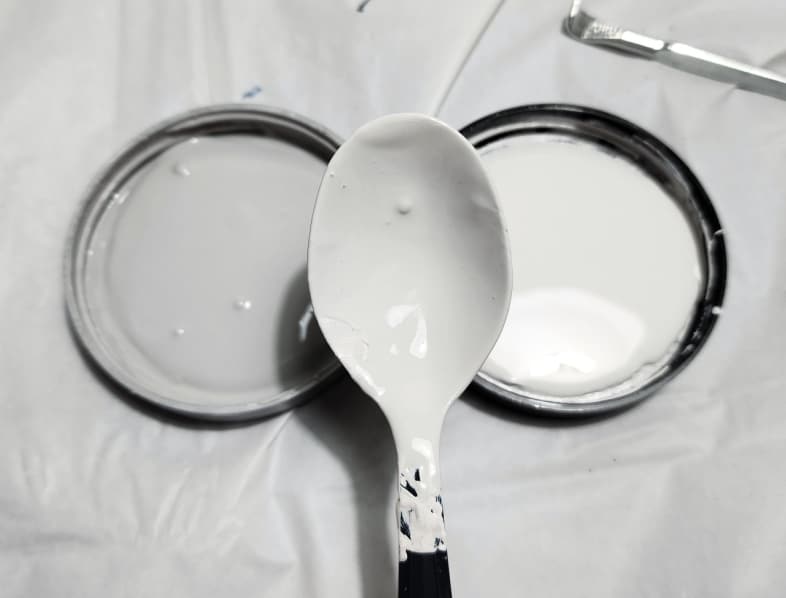
Mixing the two half-empty sample containers, I got the perfect shade for the base of the drum table.
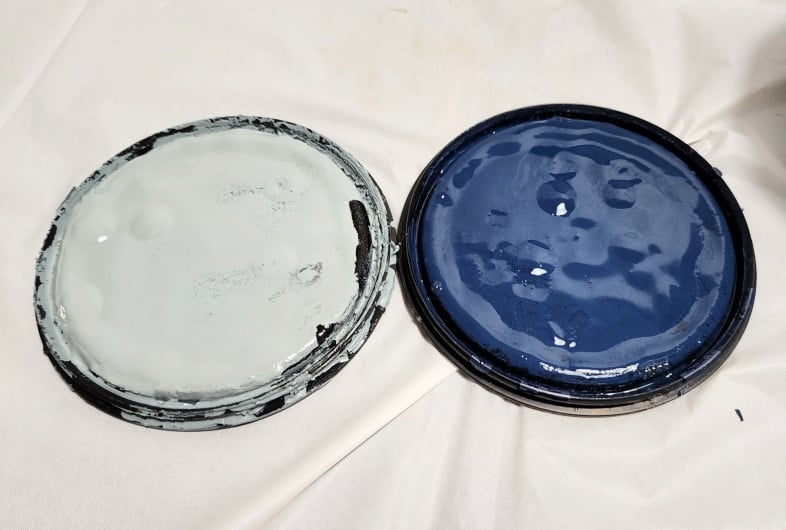
For the top of the table, I was searching for a pretty blue. I had about 1/3 of a can of Irish Garden on the left. I began adding a little of the dark blue Polo until I got the perfect shade of blue.
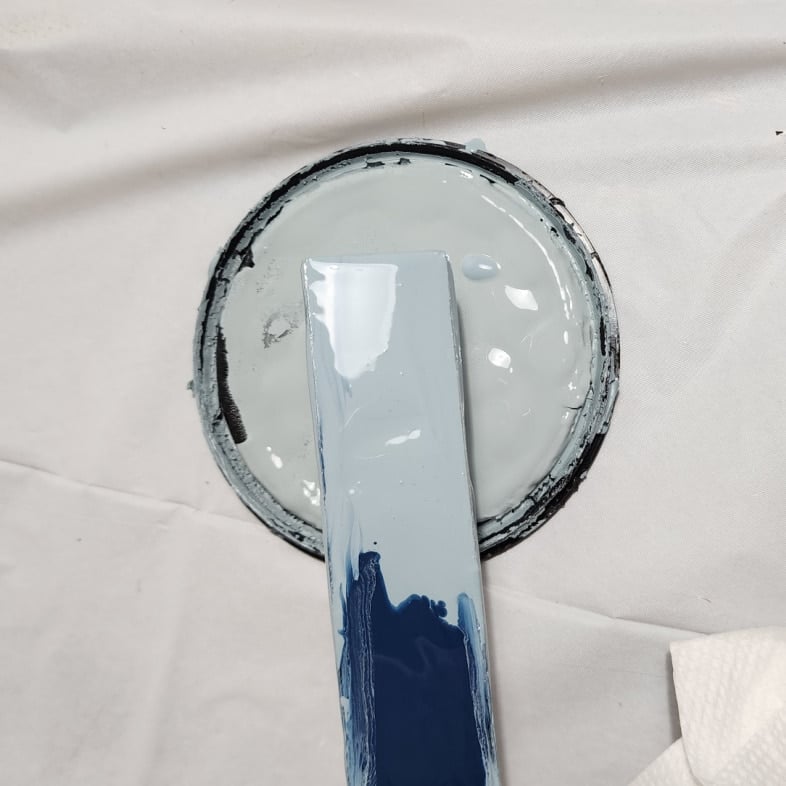
In this photo, you can see the original color on the paint lid and the new color on the paint stick.
Paint Supplies
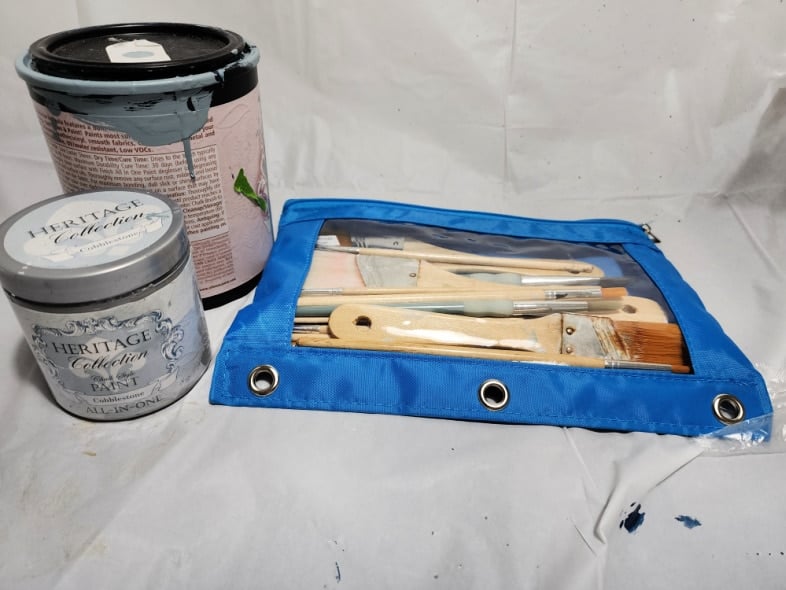
Now that I have my colors mixed, I grabbed my pouch of small paintbrushes and headed outside.
Small Paintbrushes are Perfect for Details
I was so excited to get started that I forgot to take a picture of the table with primer on it. One coat of the Bonding Boss was sufficient.
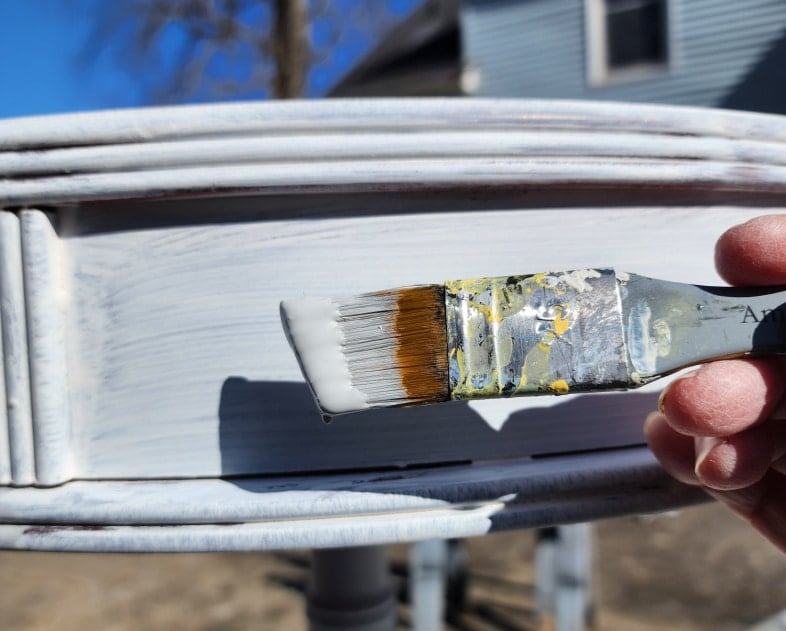
This small brush is my all-time favorite. It is from Deco-Art, and I can’t find it for sale anywhere. You may think it’s too small for painting furniture, but using it gives me great coverage and a lot of satisfaction for a job well done.
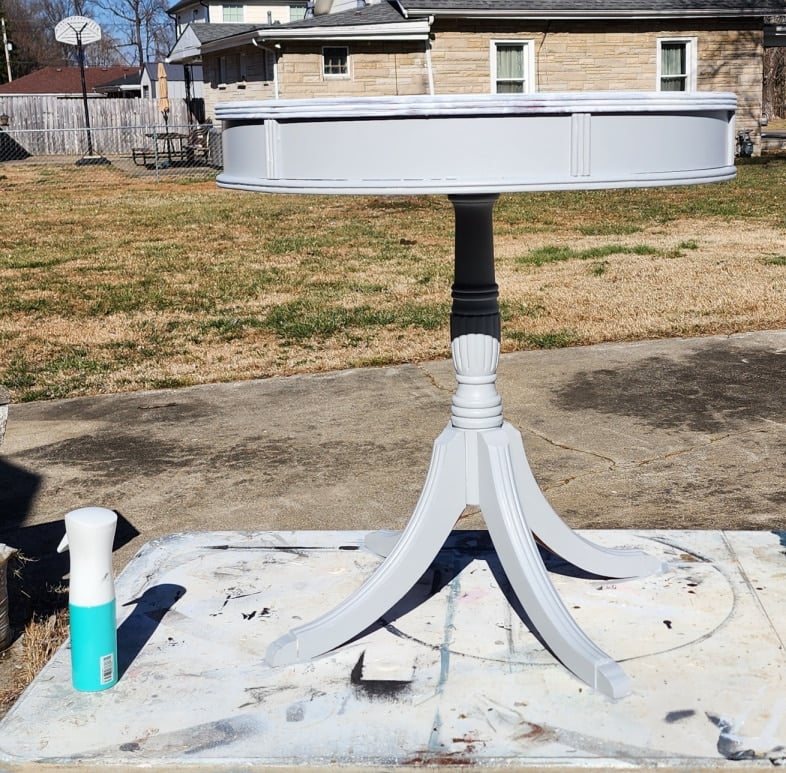
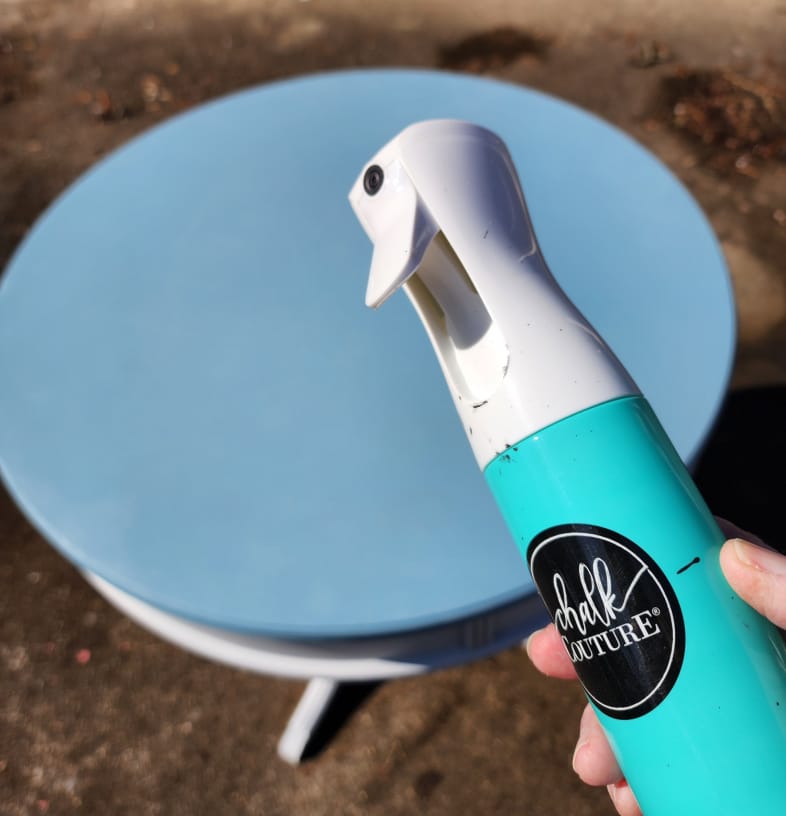
The entire table base was finished with that small brush, and I’m so pleased with how it’s looking after the first coat. It was a cool afternoon, and the paint was a little thick. The mister was the perfect companion while painting the table base.
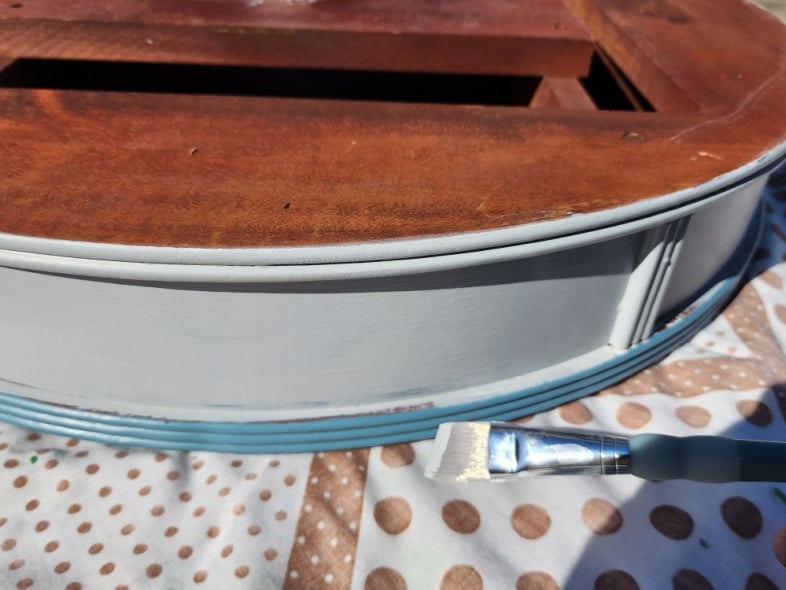
The missing drawer wood panel fits right in with the original panels. I can’t even tell which is which.
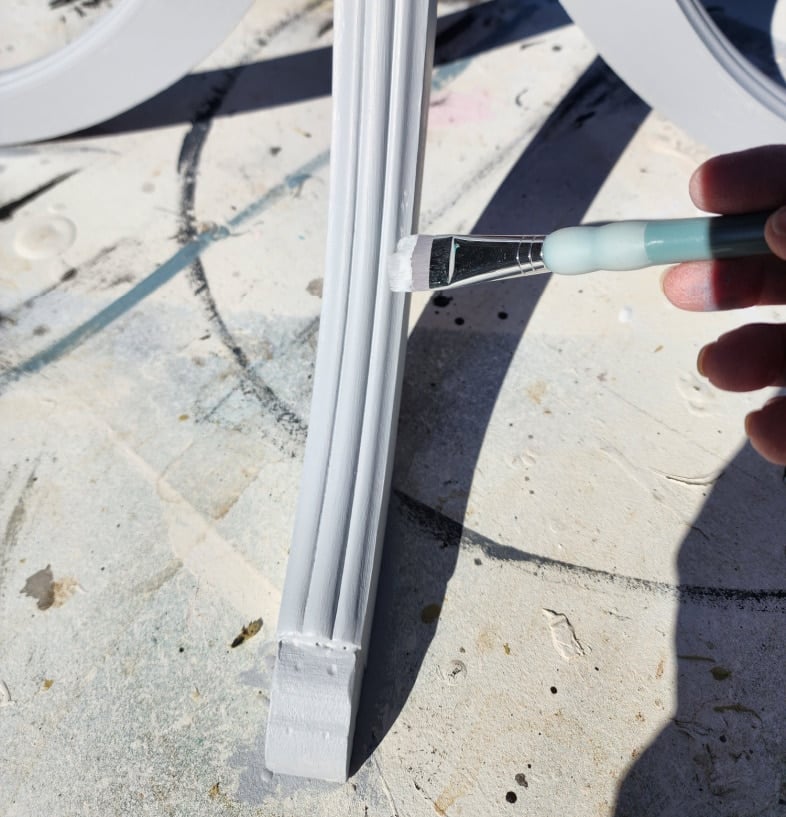
I used the mister on the table legs to lightly dampen them so the paint would “fall” into the fluted details using the small brush.
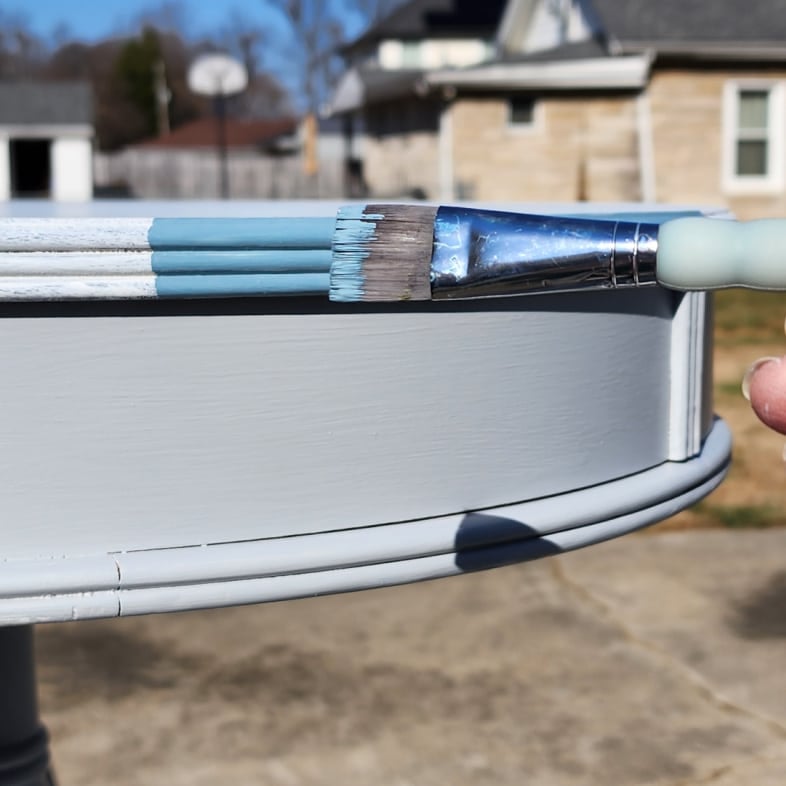
I chose an even smaller brush to paint the table’s detailed rim. This small brush also gave great coverage.
The first coat looks great!
Paint Flat Surface with Small Foam Roller
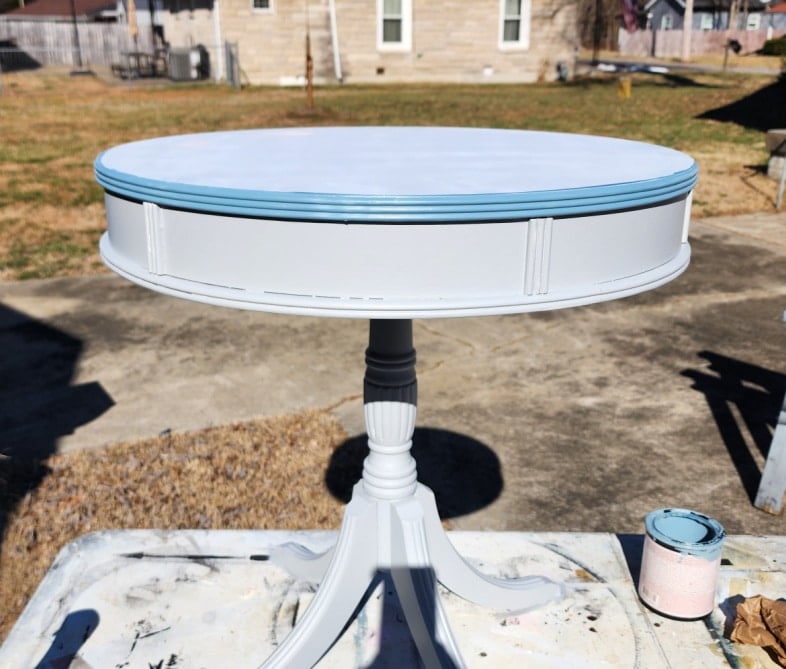
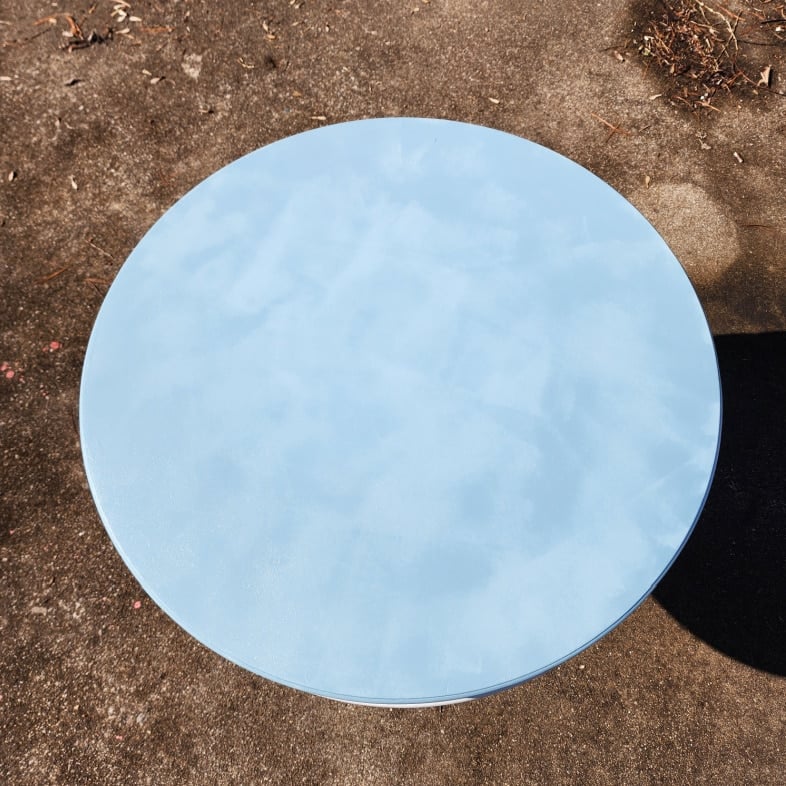
I used my favorite small foam roller to apply the first coat of blue paint. It looks a little bright in this photo, but it is much prettier in real life.
Using Brown Craft Paper In-between Coats of Paint
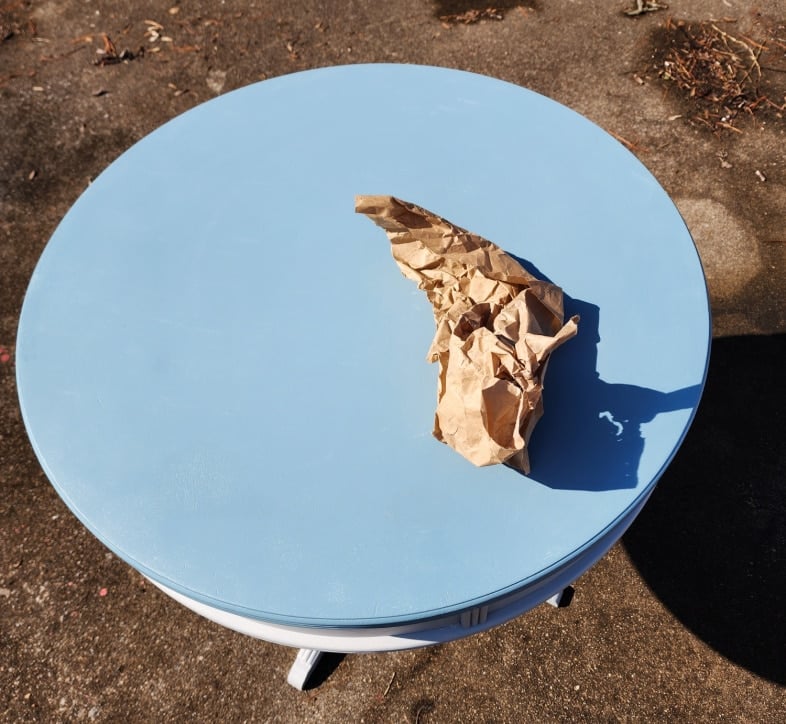
Sometimes, a small lump or bump may appear after painting a flat surface. I like to use crumpled brown craft paper to sand in between paint coats. Quickly wipe away anything with a soft cloth after this process.
Continuous Spray Bottle
I first used a continuous spray bottle on a painting project in last month’s FFU project, Black Wash Console Table Makeover. It is a game-changer. If your paint tends to be a little too thick, this is a great option to add a light spray of water to your surface just before you start painting.
Add a Second Coat of Blue Paint

I used a small foam roller and a styrofoam plate to add a second light coat of blue paint to the tabletop.
A foam roller may leave some worrisome marks, but HTP All-in-One Paint levels out.
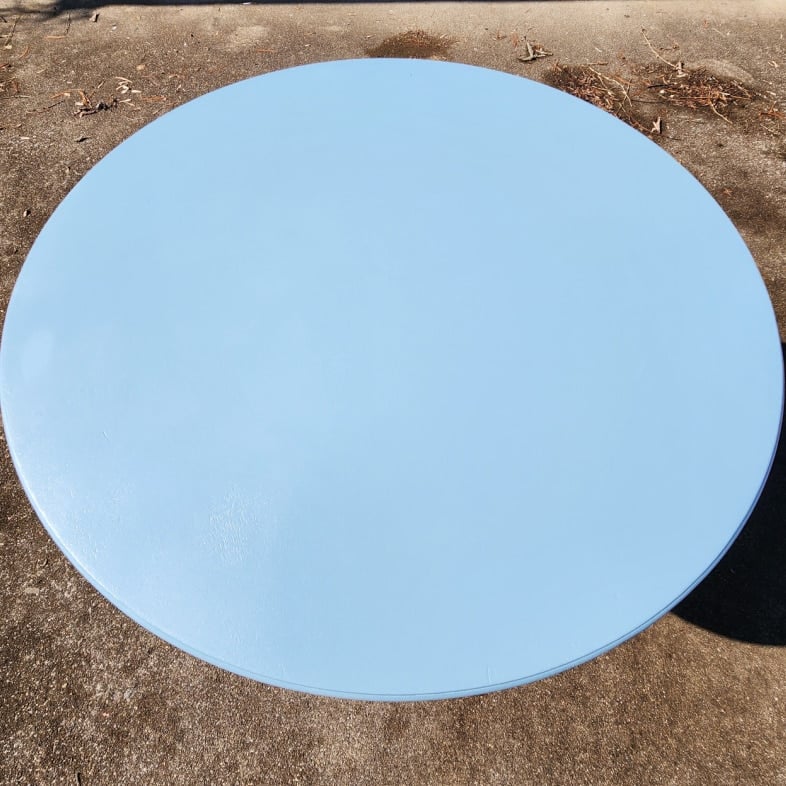
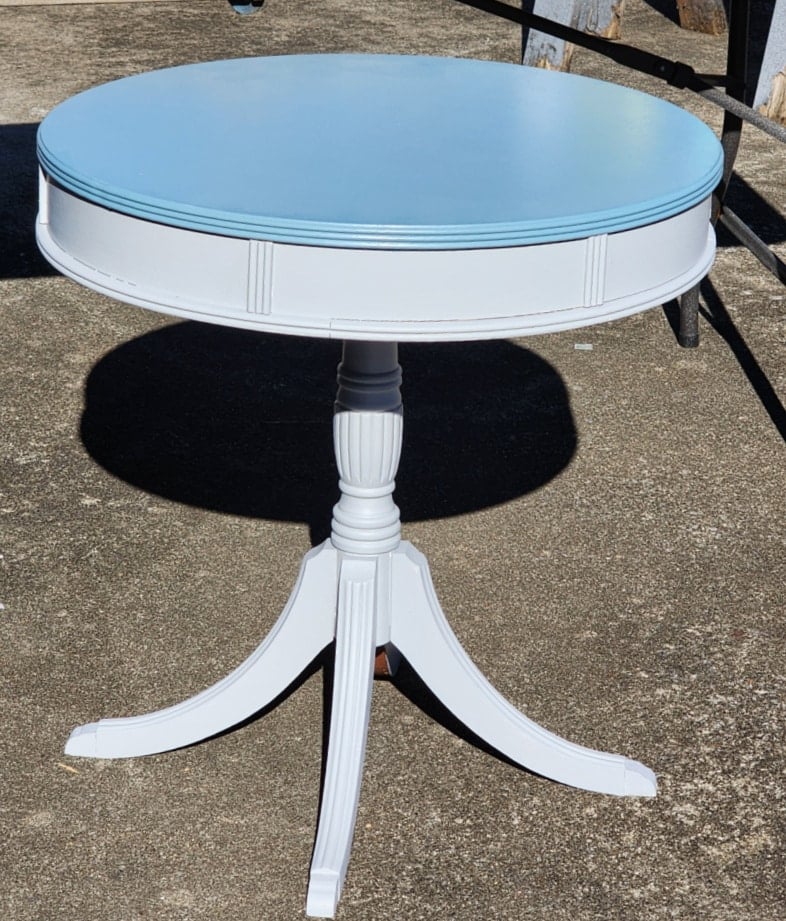
This is after the light second coat. Two to three light coats of paint will adhere to your table and last for years.
Paint the Underside of the Table Legs
Small things can make a big impact. Paint the underside of the legs of a pedestal table; they are visible when the table is upright.
While the table was upside down, I noticed the table rim needed some love. A small brush made this task quick and easy. I have the table resting on a small quilt to protect the tabletop.
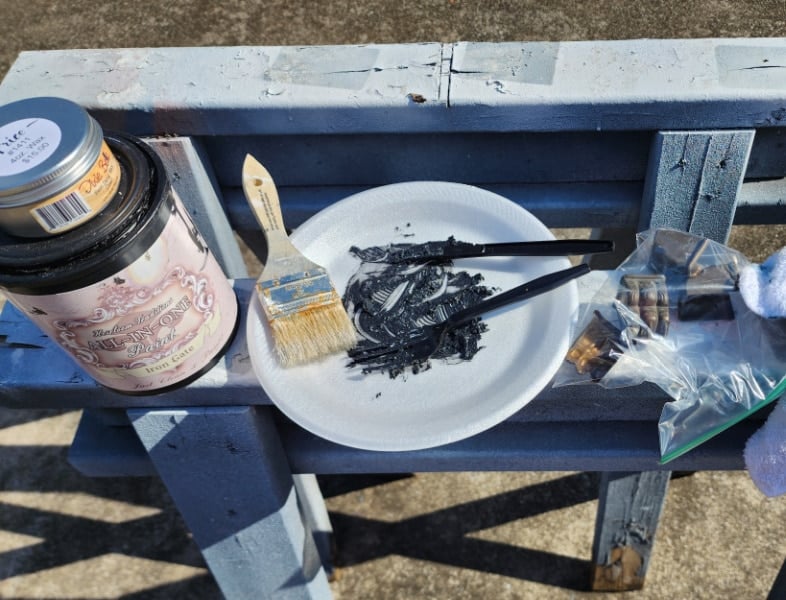
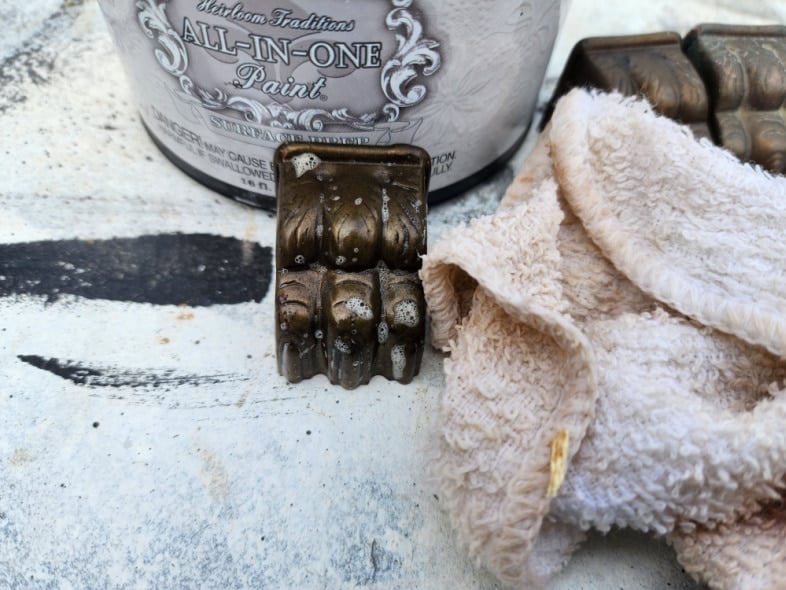
It’s time to address her little “shoes”. I didn’t want to paint the small metal claw feet, but they definitely needed some attention. I added a bit of black paint to some Dixie Belle Best Dang Wax and applied it with a chip brush.
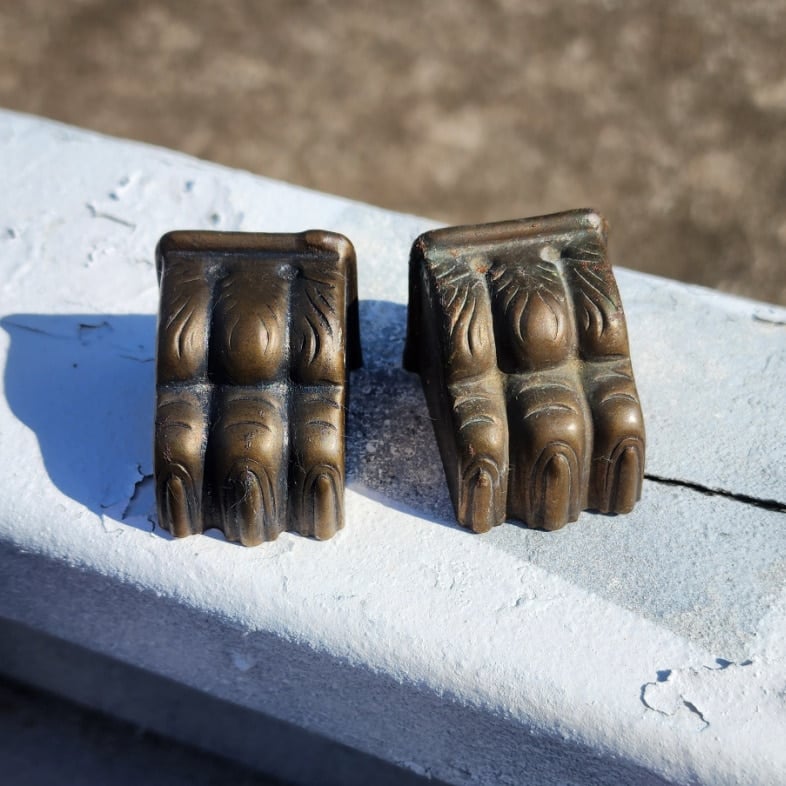
The one on the left has had a light coat of the black wax applied. I later did a heavier coat on all the feet, let them dry, and buffed them a little.
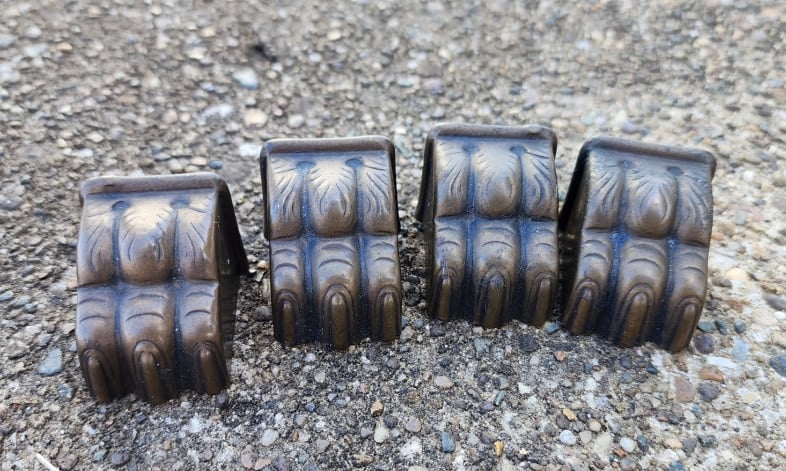
The small claw feet are ready to be put onto the drum table legs. I didn’t take pictures because it was very challenging, and I was trying to finish them before it started raining. I used a small block of wood to push the nails as far as they would go, then used the block on the other side as I hammered the nail in the rest of the way.
Preparing for the Third and Final Coat of Blue Paint
For the final coat of paint, I chose a wide, soft paintbrush. An ample amount of paint was poured onto the styrofoam plate. I used the continuous sprayer to dampen the tabletop and my paintbrush. It was a warm, windy day, and the paint would dry too quickly to get good coverage. Therefore, there are no pictures. The plate would have flown away if I picked up my phone to grab a shot. Paul Blankenship of Heirloom Traditions paint taught me that you need to keep a “wet” edge when painting a larger surface. The small amount of water the sprayer adds is perfect.
Gray and Blue Drum Table Makeover
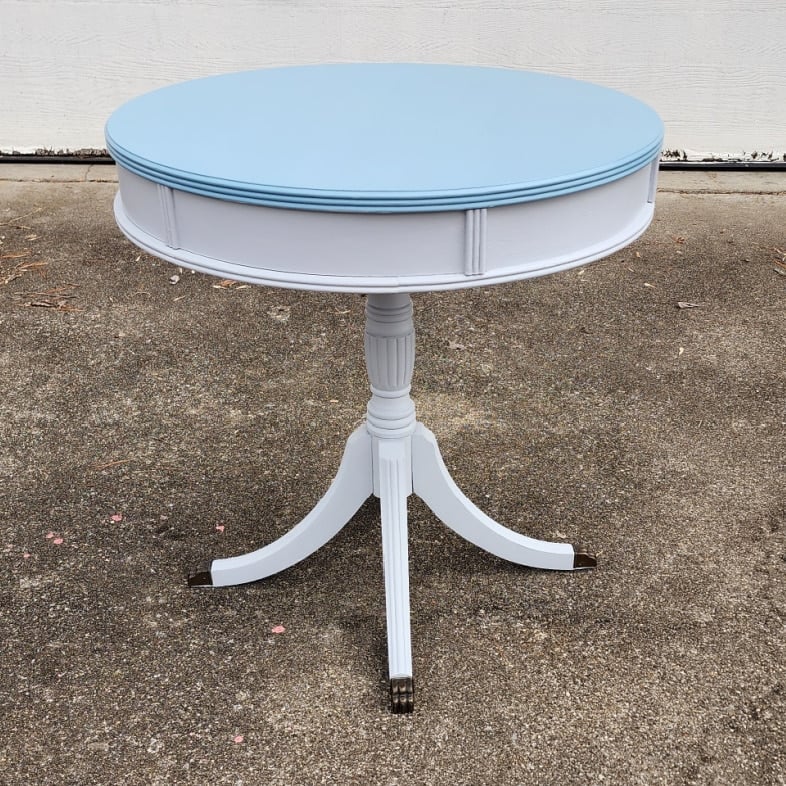
Isn’t it difficult to believe it’s the same table?
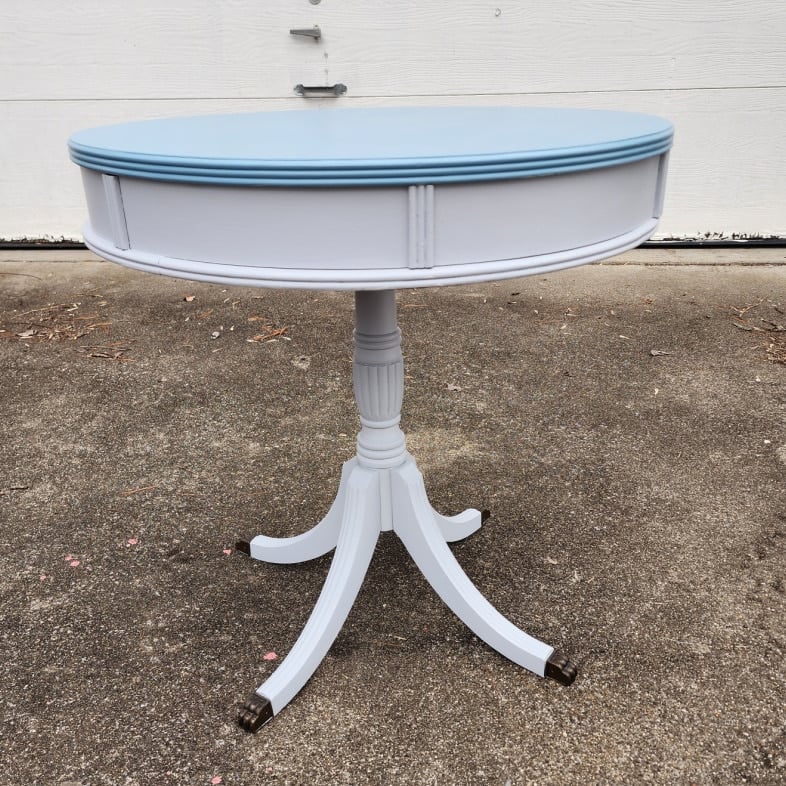
Aren’t her “shoes” perfect?! Did you know that blue and gray are my favorite colors? Do you like this two-toned drum table makeover?
The missing drawer? I don’t even know which panel is the new one.
Let’s look again at that before!
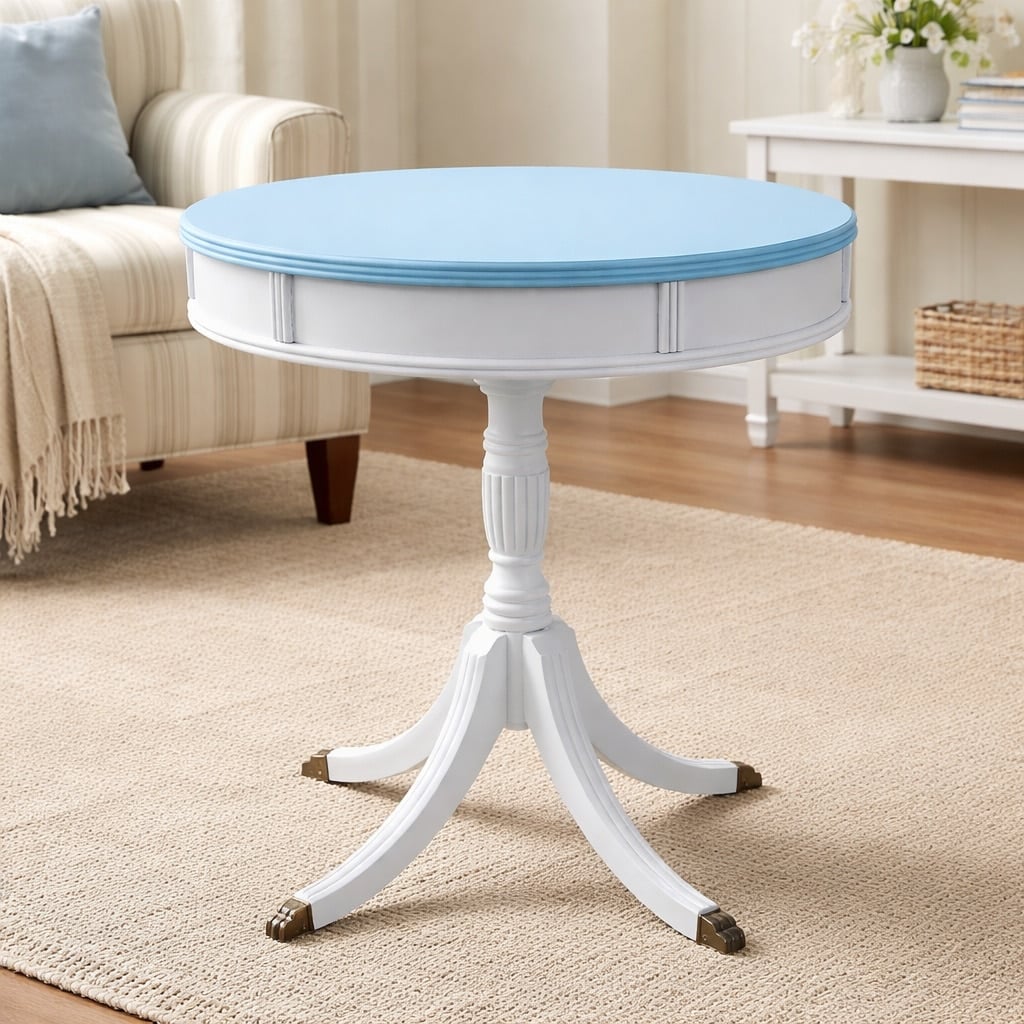
I’m so happy I mixed the custom colors for this drum table makeover.
Styling Suggestion for a Pretty Vintage Drum Table
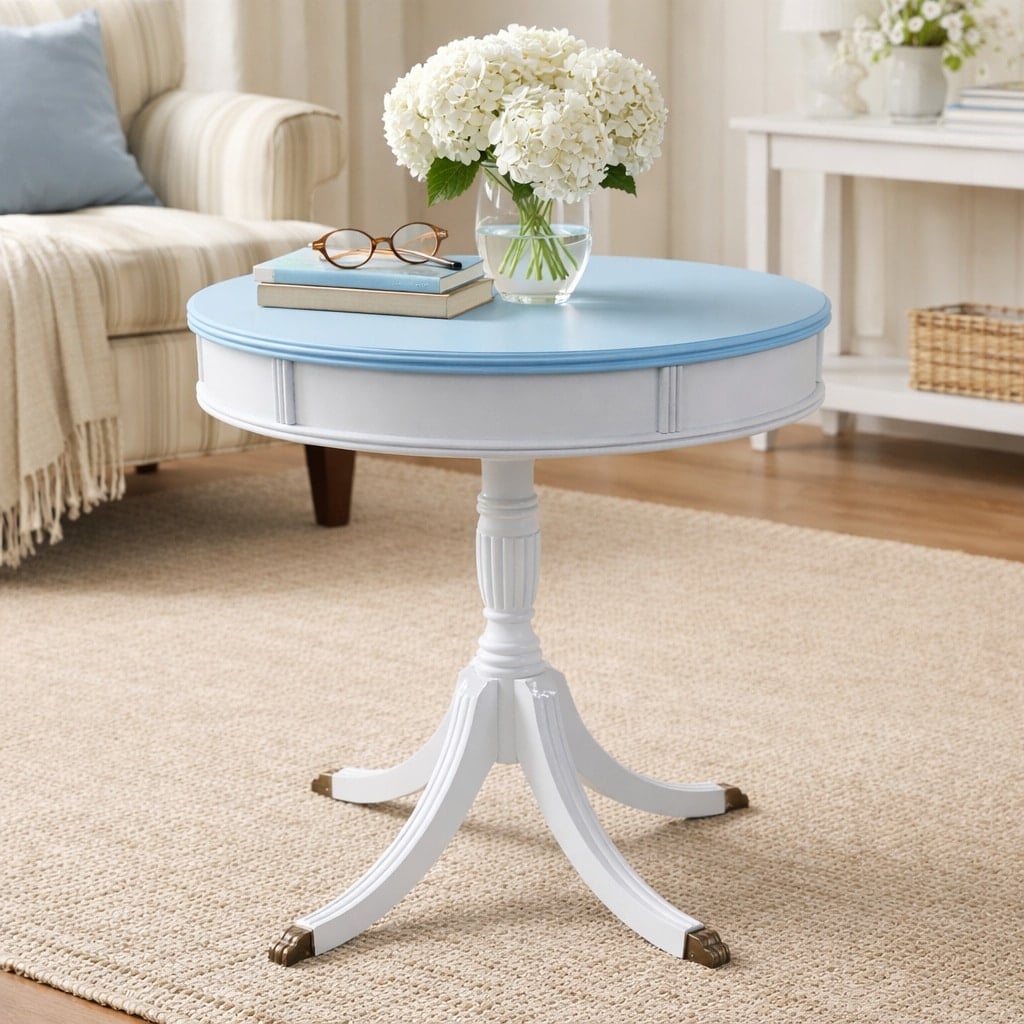
I’m so happy that I didn’t let a missing drawer deter me from picking up this table.
Real furniture. Real makeovers. Real second chances.
Today’s project is part of the Furniture Fixer Upper Tour. The collage below shows the starting point for each makeover. Scroll down to see how every piece was reimagined.
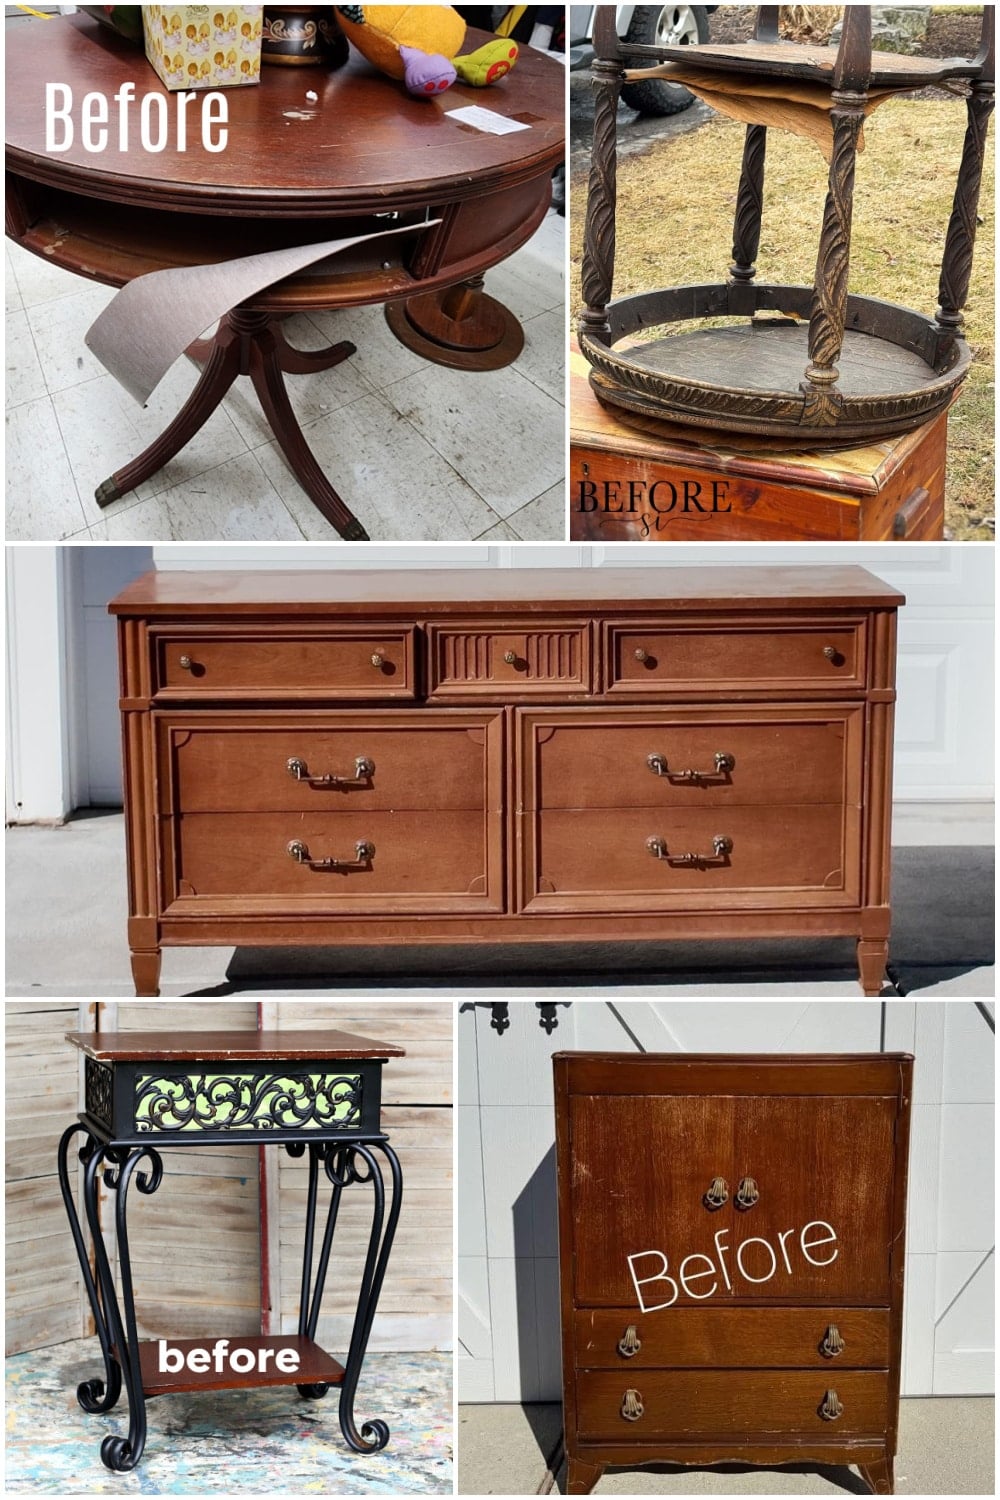
- Drum Table with a Missing Drawer (You are here, thank you)
- How to Fix a Warped Table Top
- How to Paint a Dresser in One Day (Beginner-friendly)
- Dry-brush Technique on Metal and Wood Furniture
- Gentlemen’s Dresser Makeover
Furniture Fixer Upper Tour Projects
If you love seeing old furniture get a second chance, be sure to visit more Furniture Fixer Upper Tour makeovers. Each project starts with good bones and ends with a fresh new story.
See more Furniture Fixer Upper makeovers here
You will find everything from small side tables to large statement pieces, all transformed by talented DIY bloggers who believe in saving furniture rather than replacing it.

Amazing repair, my friend! I would have passed this right on by, and now you can’t even tell where it was repaired! Love the two-tone look, and I only use one coat of Bonding BOSS too…the key is the 24 hr dry time! XOXO