Modern Shelf (glass)
As an Amazon Associate, I earn from qualifying purchases.
Cathy and I curbed some glass shelves a couple of years ago. They have been hanging around in my garage ever since. I saw a project in a new publication called, My Home My Style. (updated to add–the publication is no longer in circulation, but you can check out their website.

The glass was shipped in plywood pieces.

This is what I found upon opening that plywood box. Two very heavy duty tempered glass shelves.
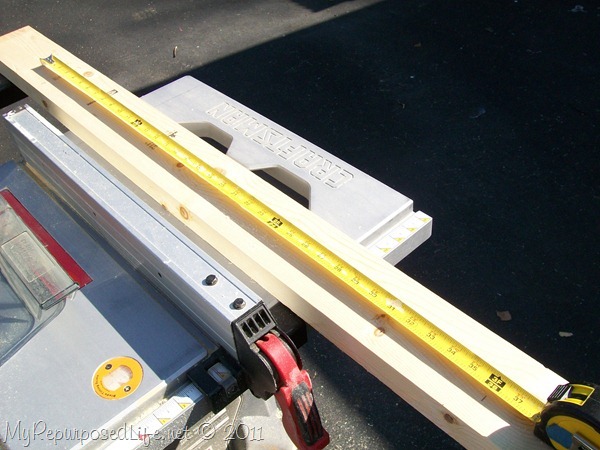
Rip 2 x 6 on table saw

Because this shelf is modern, the boards needed to be squared off. I removed some of each side of a board (2×6?) I really can’t remember. Do you see that green paint? .51 cents at Home Depot.
Looking at the picture of the shelf in the magazine, there was a little extra space at the top and bottom of the “support” piece.

I needed a square board to place on top of the support piece. I was going to go with a 4×4 but it was too large. My table saw will not rip such a large board, so I went with plan b.
Cut and glue two 2 x 4’s

I ripped a couple of 2×4’s and glued them together with Gorilla Wood Glue as though they were one board.
Clamp 2 x 4’s

I clamped them using quick clamps and allowed them to set.

If you look closely you will see that I have a scrap piece of wood between my board and the clamp. This wood is soft. If I had tightened the clamp on my board, it would leave a dent.

I used some more Gorilla Wood Glue to attach the “new” square boards to the support piece.
Add support boards

This is the support piece with three “square” boards glued in place.
")
Soap screws for easy application
 After the glue set up, I turned the piece over and screwed some screws through the support piece into the “squared” boards. TIP-soap your screws for ease. You won’t hear that dreaded SQUEEK!!!!!
Paint modern shelf black
 Can you see that the “squared” boards resemble 4×4’s? Hindsight 20/20 I would have used 4×4’s and then made the support piece wide enough that the 4×4’s would have worked. I spray painted it with my el cheapo primer.

I painted it black with some oops paint.
Insert glass shelves

Now you can see how it all came together. Very modern floating shelves hanging on a privacy fence for staging.

The gap between the boards was a little difficult to pull off. The gap had to be just wide enough for the piece of glass to slide in.


I think it looks pretty neat hanging on the fence.

I put some little candle holders on the shelf to help the shelf “show up”.

These glass shelves are very thick and very heavy. I have attached two “D” rings on the back for hanging. However I think I will have to make a slight change. I have them centered from side to side, 24 inches apart. Because the “D” rings are centered, the piece sort of goes wibble wabble while being hung on the fence.
Cost? zero! Although there was quite a bit of work involved since I really didn’t know what I was doing. There were plans in the magazine, but they didn’t fit the materials I had. You know I’m a use what I have kinda girl!
Do you like it? or is it too modern to suit you? I highly recommend this magazine. I subscribed to it as soon as I saw it. There are no advertisements and I read it cover to cover. That is something I rarely EVER do.
gail
I used a large piece of free glass to make a top for this pallet sofa table.
Funny I JUST picked up some glass off of freecycle yesterday! I can’t do anything like this yet, but hopefully one day. I’m deciding what to do with the pieces (3) they are that smoky glass off of the old entertainment centers/ coffee tables. One of them has metal brackets on the corners. I had a plan in mind when I got them, but since they look different than I expected I’m mulling 🙂
Good job.
-Stefanie
2ndChanceCreations.etsy.com
The shelves look great, Gail! They’ll be fun to accessorize, too.
Thanks for the tip about the new magazine. I love that there are no ads!
I like it! You do such a great job explaining how you make things. I think I’d like it with wood shelves. Great job!
Holly
Great shelf Gail… good job. I think if I was hanging that I would screw it directly to the wall.
Hugs, Deb
oh great,, i went back and read the comments where you said it may have been wood,, should’ve read that first..lol
great job,, i really couldnt tell where you were going with it and since I dont really have a set style or know what my style is,, I love it. Wonder if this same basic idea could be used for wood shelves instead of glass??
I like it! I’m always impressed that you just work with what you have. I can see it with a more rustic look too if it was lightly stained and roughed up a bit. Maybe even using 2 supports for a longer piece of glass. Lots of variations with this. Also agree with Rose about the hanger 🙂
You are a beast! (in the BEST way possible!)
Yes – I like it too!
It looks great and I’m sure you would have no problem selling it. I think Rose is right with the suggestion of the keyhole hangers on the back.
I like it too! Not my style, but I like how it looks. Not sure about the d rings, do you mean you attached them at the top and bottom? Maybe it would sit better with a couple drilled out keyholes to hang it from? I can see that it must be pretty heavy!
Oh I definitely like it!! It looks professionally made, great job!!!