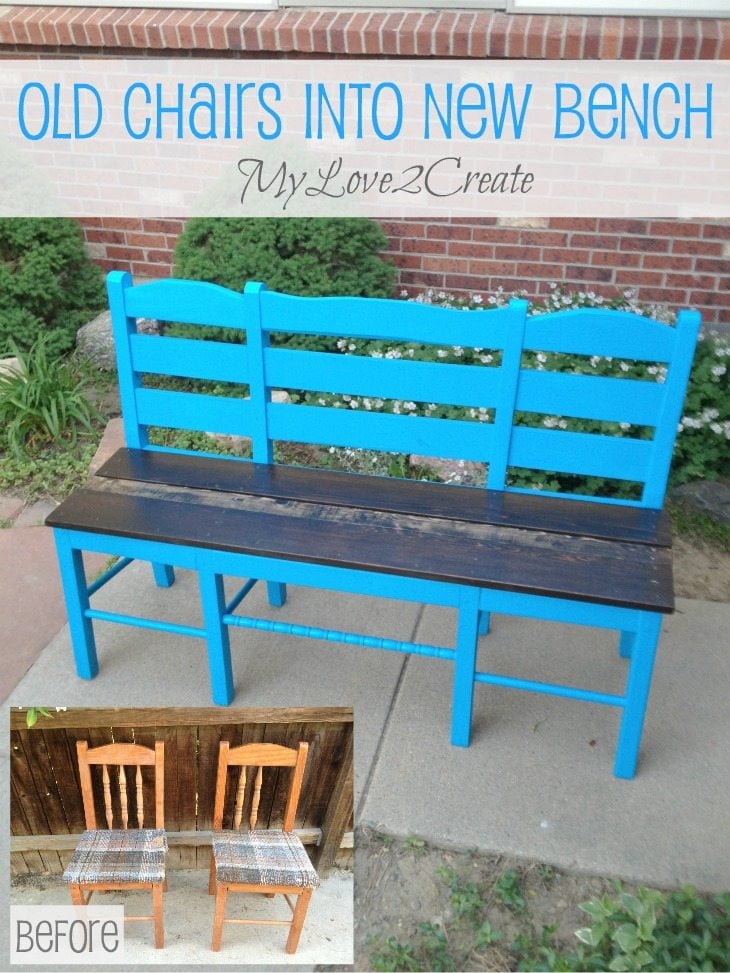
Old Chairs into New Bench
As an Amazon Associate, I earn from qualifying purchases.

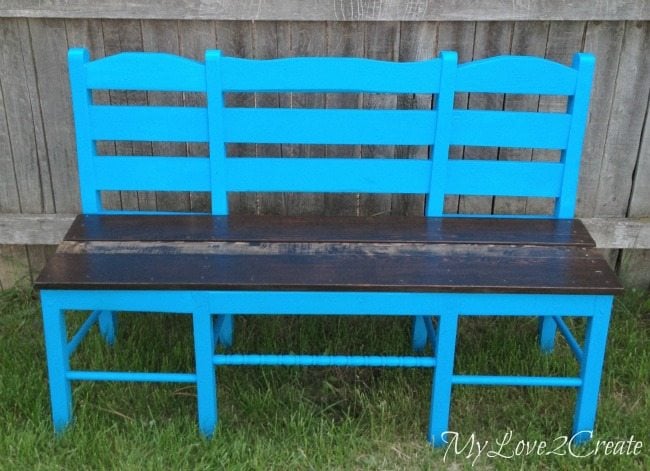
See! Fun!
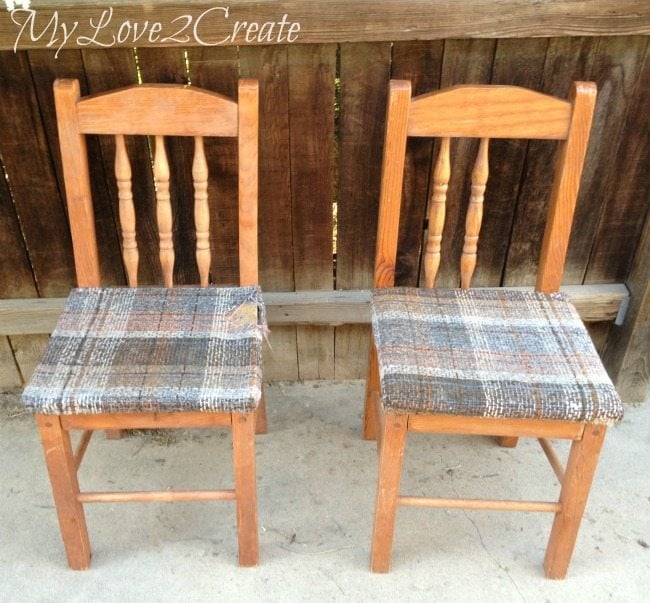
I picked these up last year on the curb for our city’s spring clean up. Obviously one spindle was missing, and the seats were…well UGLY, and gross.
I have made a promise (to my husband) to clean off the back patio, which is filled with free furniture I have collected. I sold a bunch for dirt cheap last week and saw these poor little chairs and decided it was time to make them awesome.
this post contains affiliate links
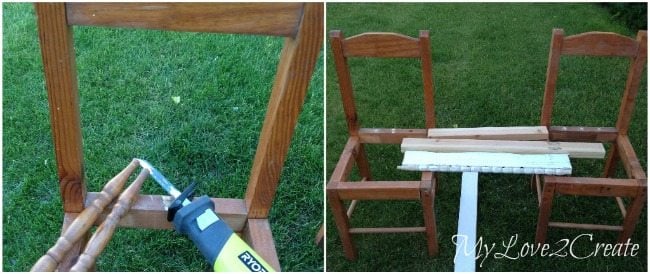
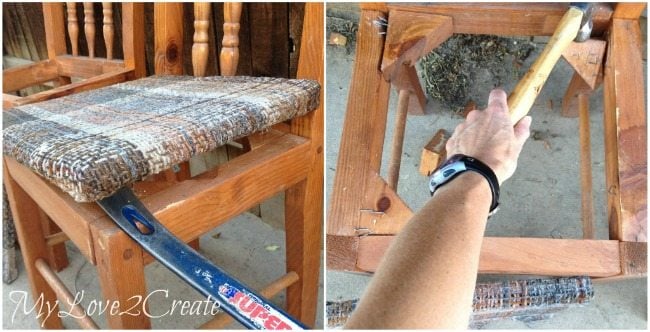
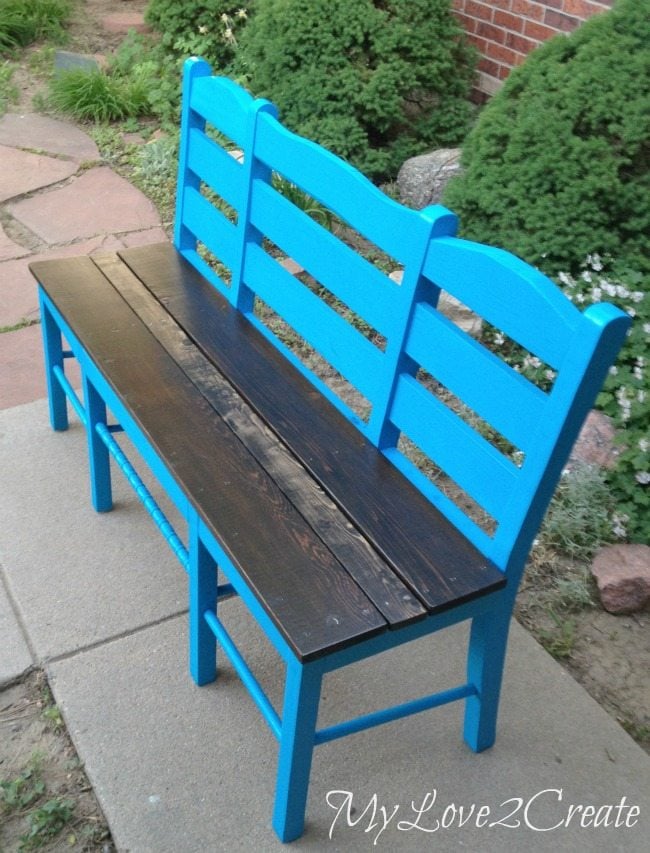
After some thinking, I decided that since I couldn’t replace the missing spindle, I would cut them all out and do something else in their place. I used my Roybi Sawzall and they were off in seconds. Then I gathered some scrap boards to make a bench!

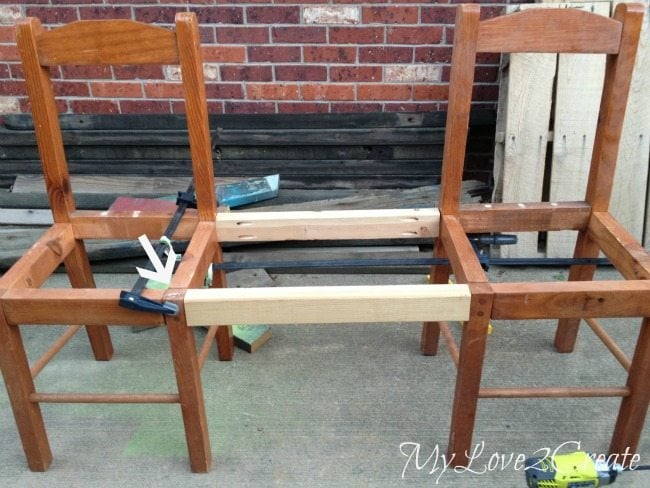
The top board was also added with pocket holes. I originally was going to use a piece from an old crib, but I accidentally cut it too short (figures), so I traced the pattern on a scrap 1×4 and used it, I liked the slight wave it has.
I then cut slats for the back of the chairs/bench and drilled pocket holes. This wood was a left over shelf support board from my Master Closet Makeover, glad I kept it!
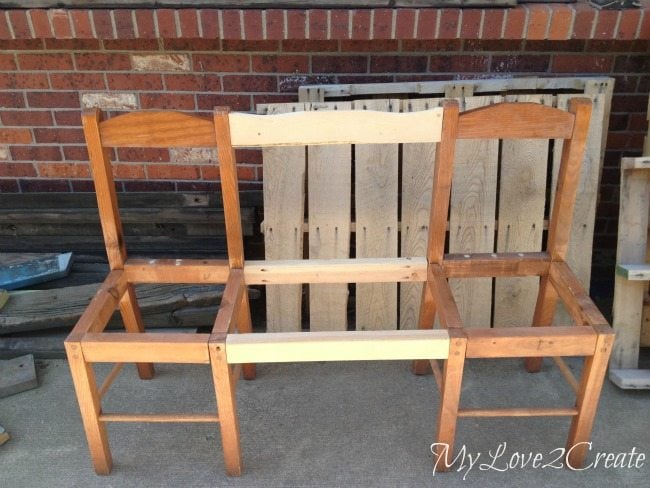
It was getting so hot outside that I decided to build in the kitchen. 🙂 I glued and screwed the boards in place, trying to keep them level and even. One chair was a little askew so it is not perfect, but hey that is ok! I have long since learned that perfection in projects is almost NEVER, and I am just fine with that.
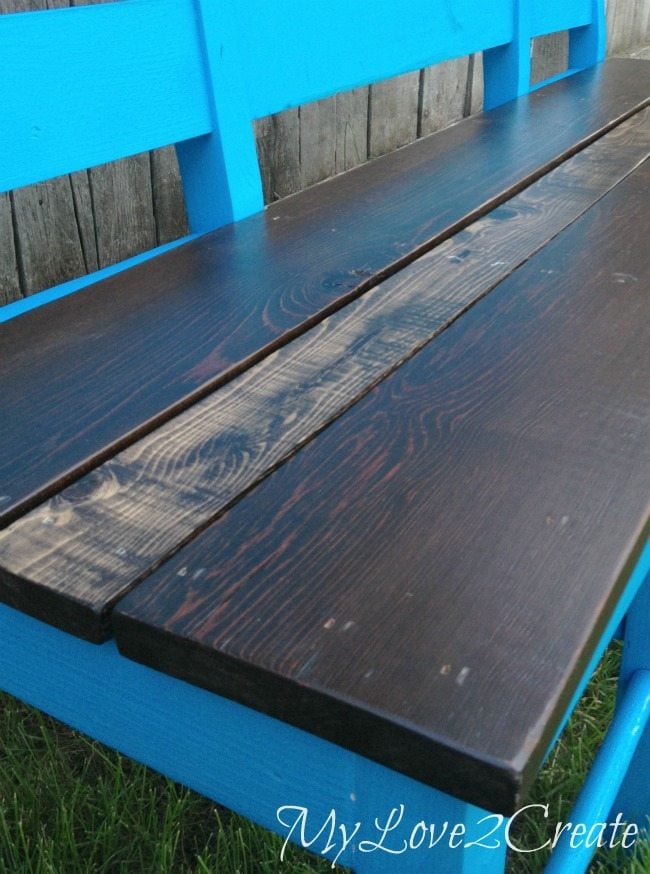
I filled all the cracks and holes with spackle, and brought it outside to find boards for a seat. A few months back I scored some reclaimed wood from a 1940’s garden/nursery in Boulder, I took as much as I could! I used a couple of 1×6’s from that stash and a 1×3 I had in the garage. Then I cut them to size.
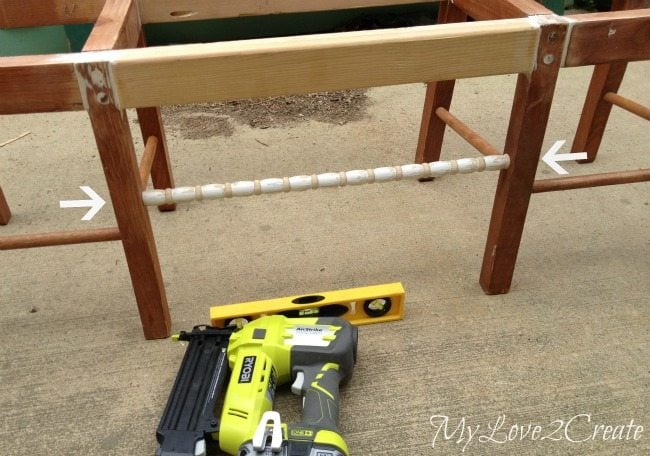
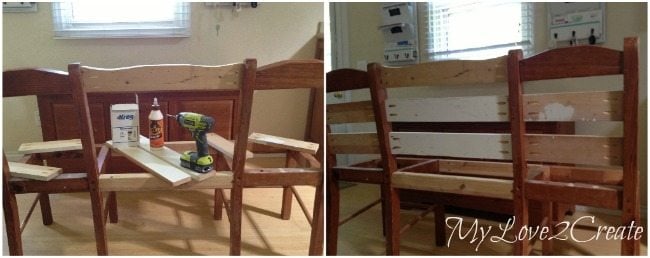
I had a spindle left from the crib I mentioned, I thought it would look cute in the front and help bring the piece together. You might recognize this spindle… I used some on my Repurposed Hook shelf into Book Shelf which happened to be my first contributor posts here. Using my Roybi air strike nailer I nailed it on using 2 inch nails, from the sides of the legs, right where the arrows are pointing.
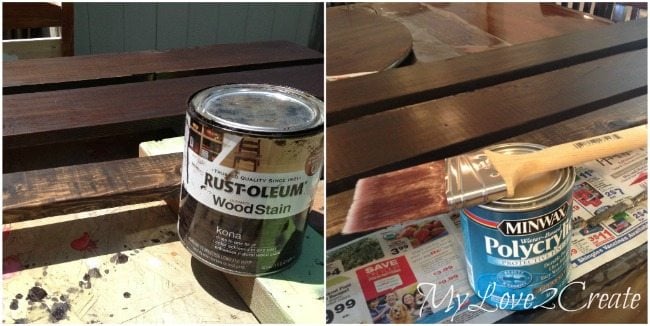
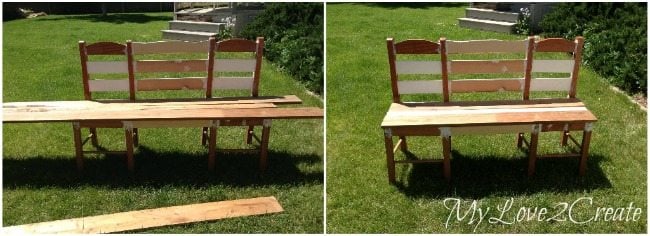
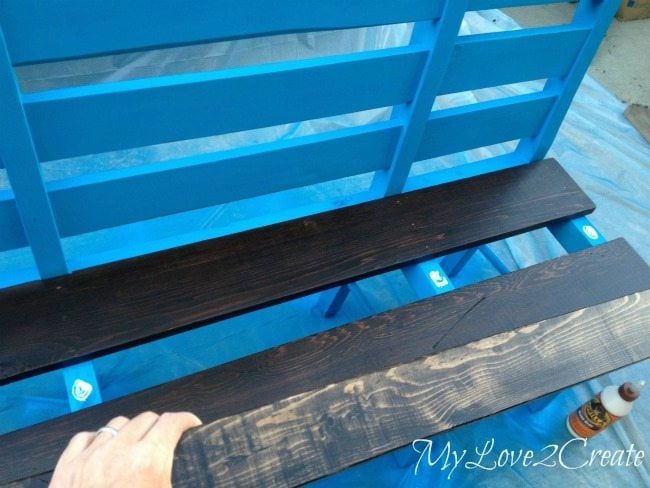
The boards got some stain and poly. I guess I am still stuck on the dark wood…I did almost use the weathered gray that I used on my Old Deck Wood Laundry Crate, I tried a sample of each stain on the back of the boards, but I liked the dark better.
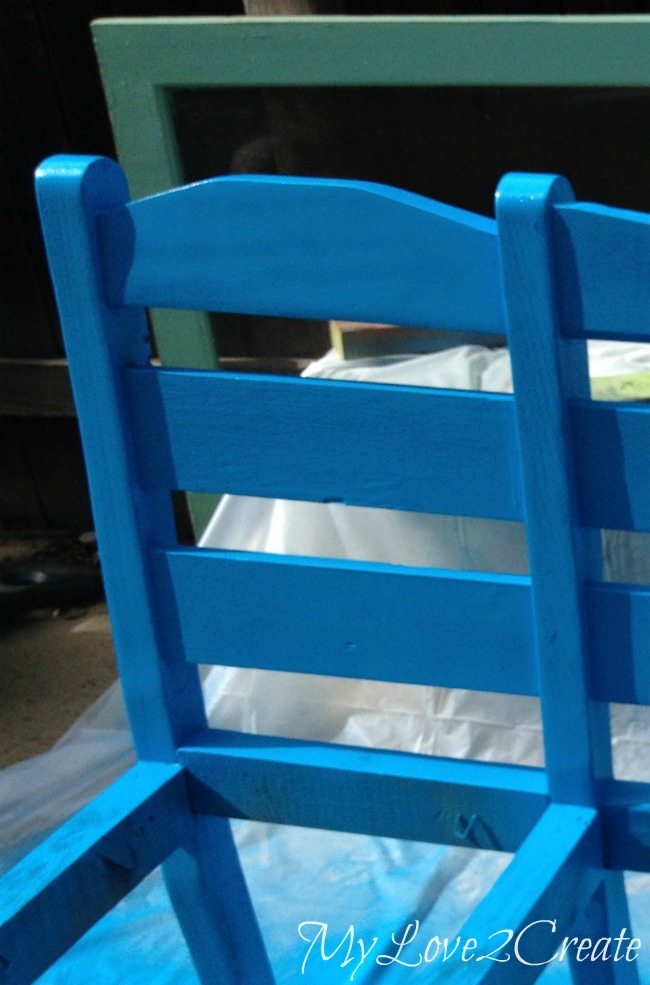 While the poly was drying I did some spray painting. I stared with the bench upside down, and then ended with it standing upright. I used about 1 and a half cans. I was in a hurry and painting this bench by hand would have taken forever…so this bench was about $8 total, that is the cost of spray paint, with a half a can left, not bad!
Hi Gail!
I love the idea of making a bench with 2 chairs. It´s great!
I have 3 old chairs and I think I´m going to give them a try with your idea.
On the other side, I have made a bench with a headboard. I´ll be very please if you want to visit my blog.
Lovely to found your lovely web.
Many thanks!!
I´m so sorry for my confusion Mindi! I´m double please then, because from now on I´ll be following both of your works. 😉
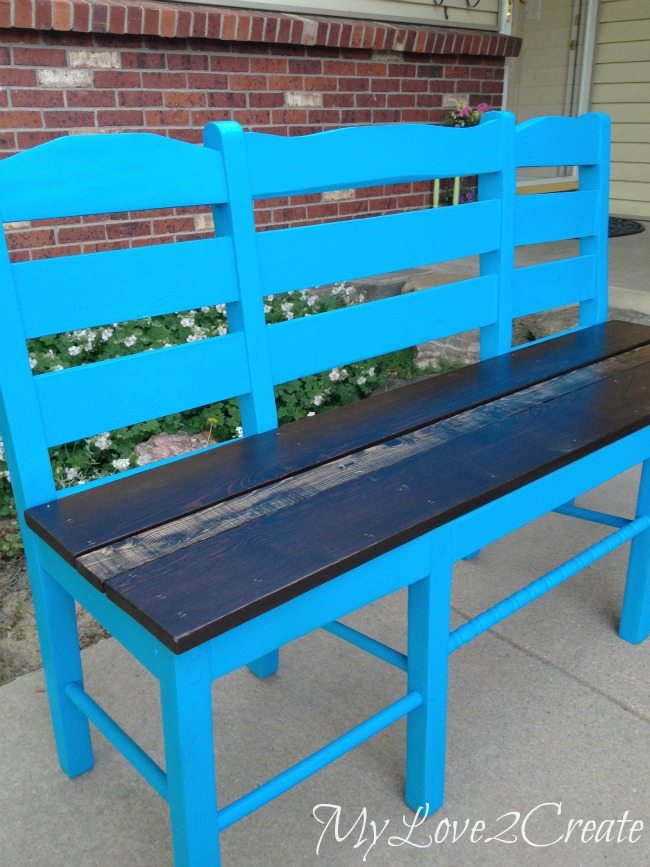
can you remember what color the paint is?
Hi Diane,
I used Rustoleum’s Oasis Blue Spray Paint. Hope that helps!
Mindi
Just gorgeous! I wish I lived next door to you -I would do the painting if you would show me how you make everything! 🙂
Hi Gail
Love the new bench.
I have a question for you. What would be the best kind of wood fill for same cabinet doors? The doors are MDF but will be painted.
Mindi,
I LOVE this bench. I have two chairs, and you can bet I’ll be doing my own version using yours for inspiration!
thanks for being such a great contributor to MRL!
gail
Adorable!
I just love this bench. I made one out of 3 chairs. It’s not perfect– but it’s mine, I made it!
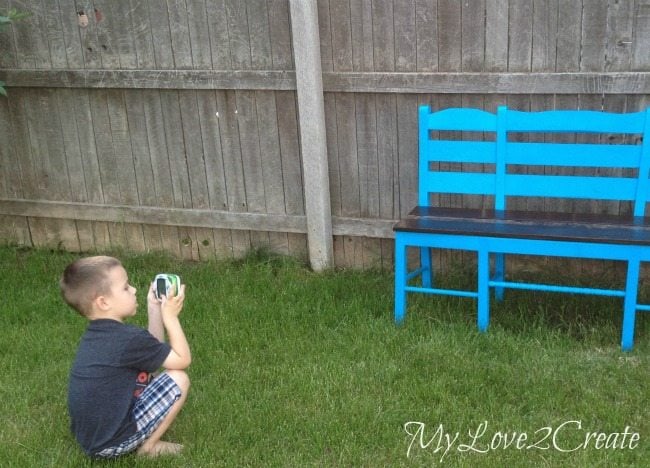
Loved seeing your little boy following all your footsteps in the process.
Have a great weekend! Pat