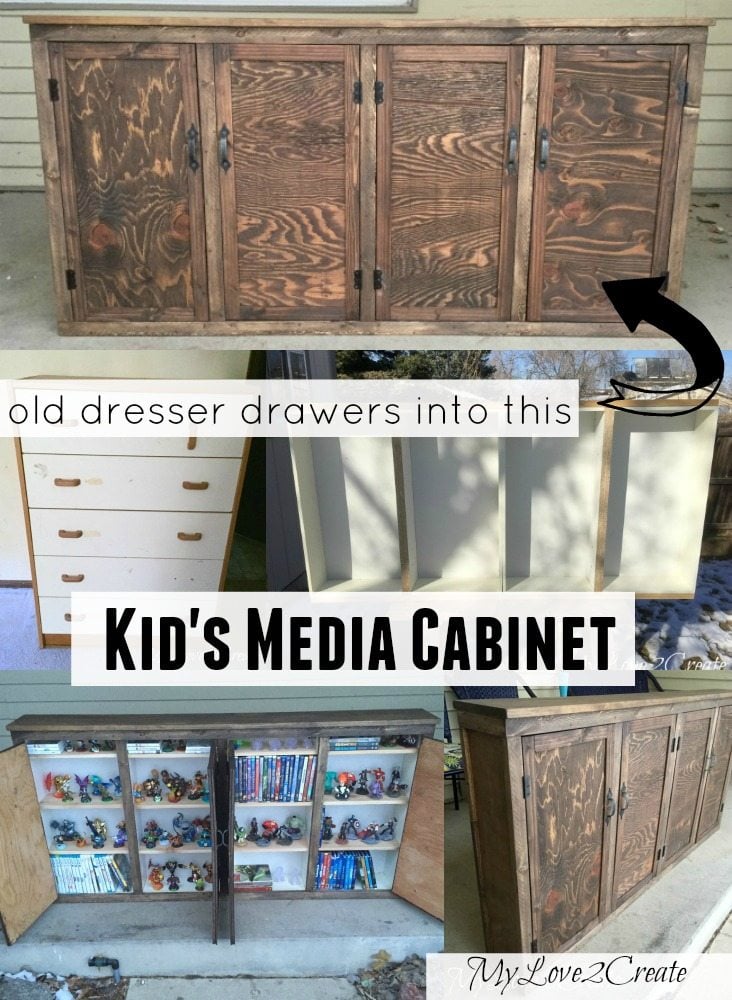
Kid’s old drawer media cabinet
As an Amazon Associate, I earn from qualifying purchases.
Anyway, this is one of those ideas…

My older boys have this old beat up cheapy dresser that I got for free on craig’s list a long time ago.
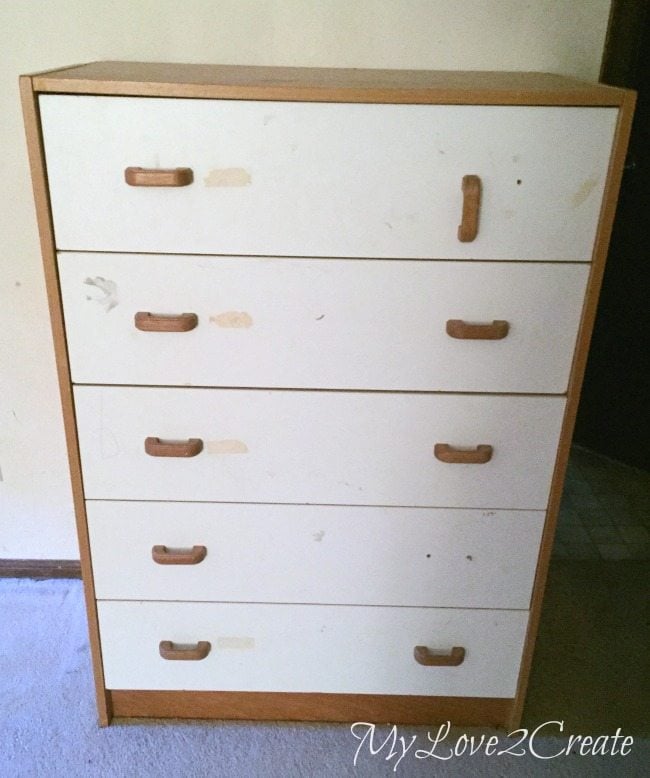
Pretty ugly, but useful.
They were sick of it and wanted it gone, so months later I decided to see if it would work for what I wanted, a place to store my kids media. I am done tripping over wii games and skylander guys!
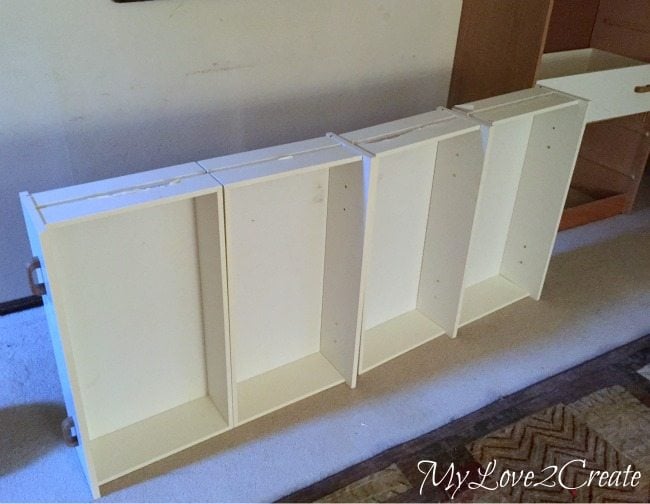
I pulled out four drawers and lined them up, it was going to work! The best part is that the drawers were exactly the right depth to store Wii games and DVD’s. Perfect!
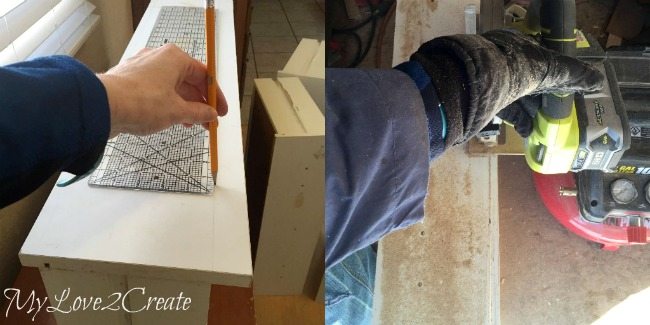
In order to attach the drawers together I had to get rid of the “extra” on the drawer fronts to make them the same on all sides. I measured, marked, and then went out to the shed and cut them with my Ryobi circular saw.
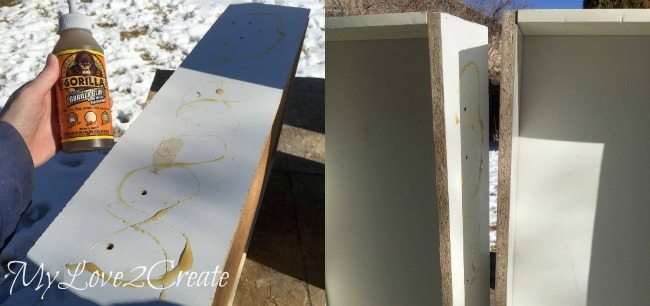
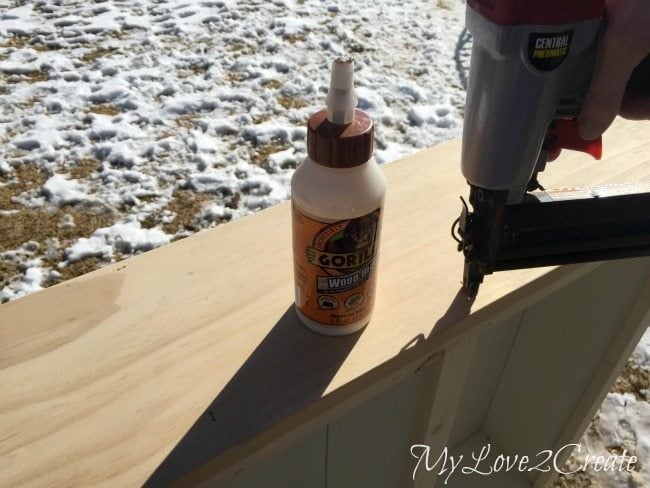
Once they were all cut I grabbed some Gorilla glue to attach them together. Since they were covered with some kind of covering I wanted this glue to really hold them, I wet both sides of the drawers, added glue, then attached them together.
Instead of clamping I used my nail gun to secure them with finish nails.
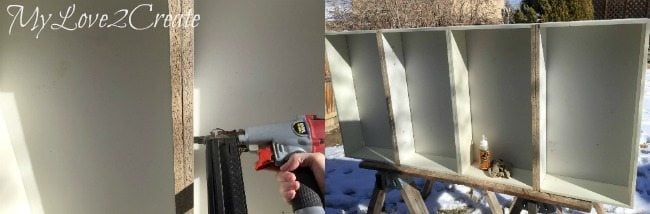
With the drawers all attached together I grabbed some scrap 1×2’s to glue and nail to the top and bottom of the drawers. I got these scraps off the side of the road in someone’s garbage on our city clean up day. They were cut up from some kind of furniture.
Here you can see the 1×2’s on the top and bottom. If you want another great idea for repurposing drawers I did a similar thing with my Under the bed storage.
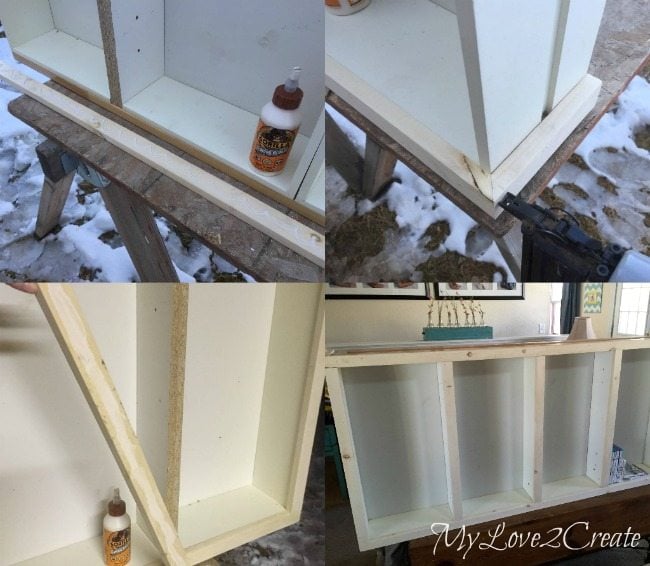
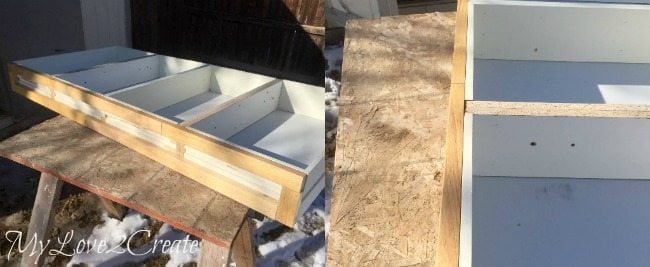
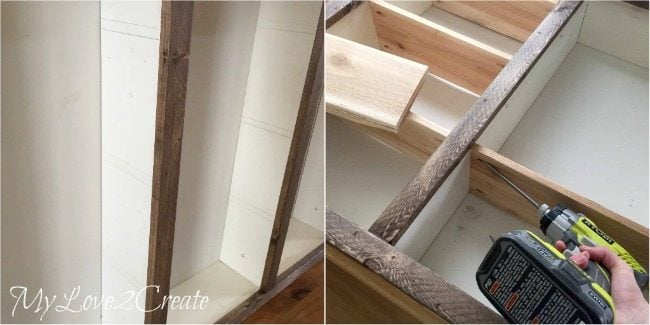
Now to make this pretty! I used 1×2 furring strips to add trim on the top, bottom, and the seams where the drawers attached together.
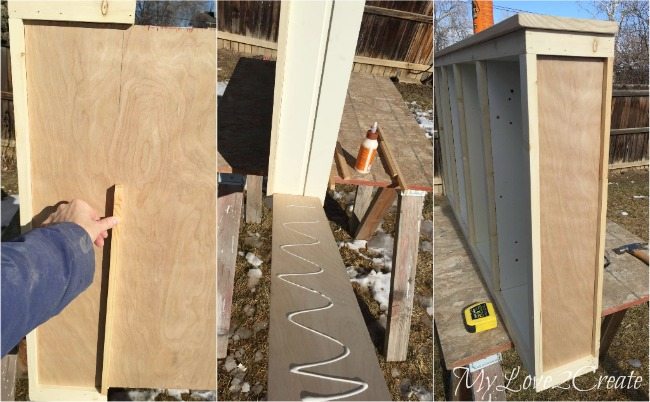
The sides needed to be covered and I had some scrap 1/4 plywood that I cut and glued on. I also added some scrap pieces to add trim to the back, I didn’t have any pieces long enough so I cut two and put them on top of each other. If you look closely in the right photo you can see the seam.
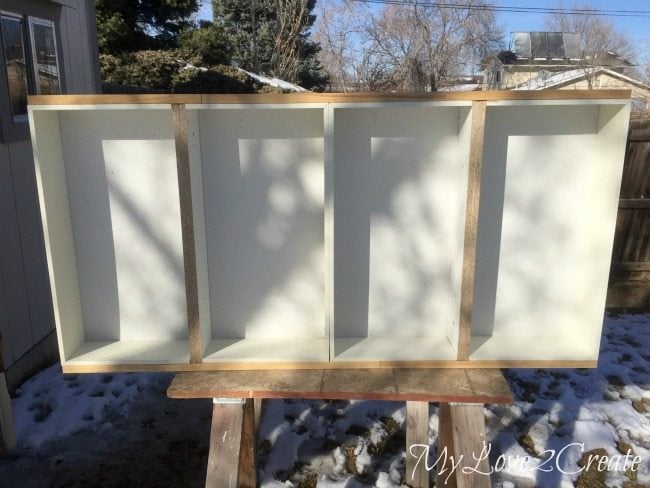
Oh yeah, for the top I had a 1×8 board in my garage that needed to be used so I glued and nailed it on.
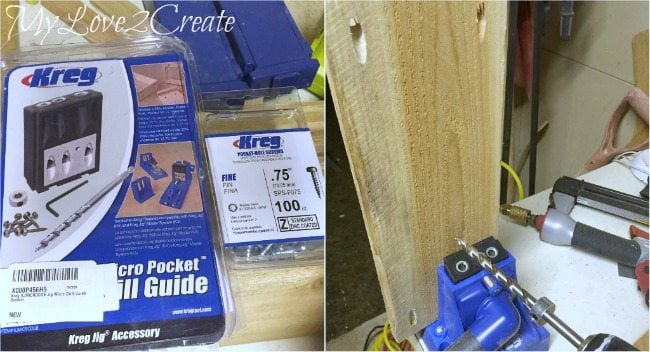
Since I was using this for media storage I needed shelves and I happened to have some 1×6 cedar fence wood that was perfect to fit inside the drawers. Since it was 1/2 inch thick it was time to bust out my new Micro pocket hole drill guide that a very dear and awesome friend gave me. 🙂 It drills smaller holes for thinner wood, and it rocks!
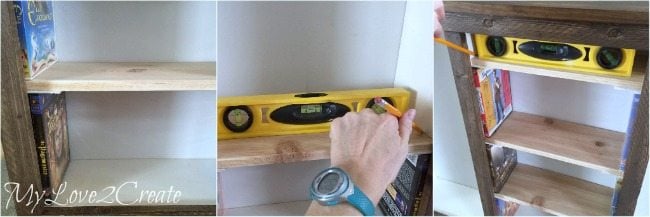
I used DVD cases to measure and space my boards. In order to make sure I had a bit of wiggle room I put a piece of cut up blind on top of the case before I set the shelf on it (top left). Then I made sure it was level and marked the sides.
On the left photo above you can see my markings. I put the cabinet on it’s back and drilled in the pocket hole screws to attach the shelves. It would also be nice to drill holes and put in shelf pins to make the shelves adjustable.
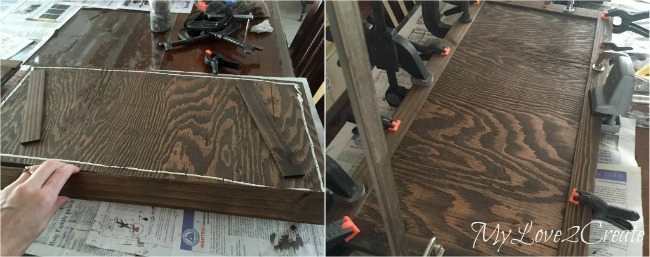
Did you notice that I stained my trim boards. I filled the nail holes with dark wood filler, sanded them down, use pre wood stain conditioner, and then Rustoleum’s Kona. Sorry no pictures I did this late one night and totally spaced it.
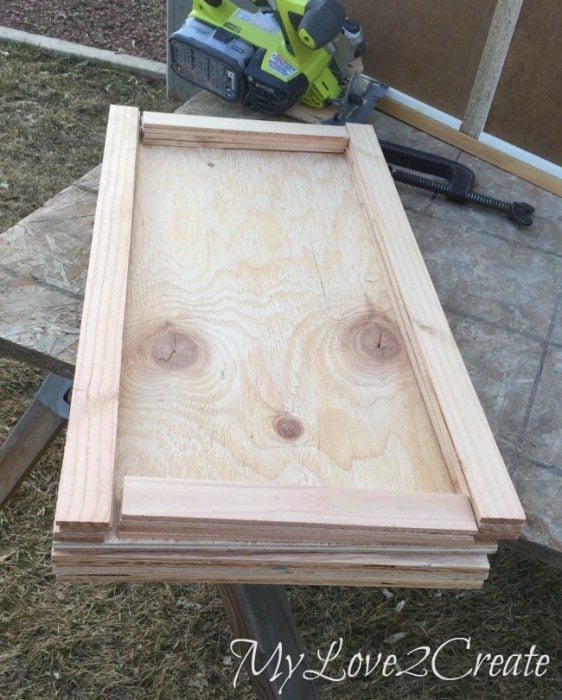
To trim them out I got some lath wood at 35 cents each and cut them to fit the edges of the doors. After sanding I stained them to match the trim.
I used wood glue to attach them to the plywood and clamped them for half an hour. When they were done I attached all the doors onto my kids new cabinet. I spared you photos because I am less than expert at this part. But, I will say, I am much better at it now than I was before. 🙂 Practice makes perfect right! Ha ha!
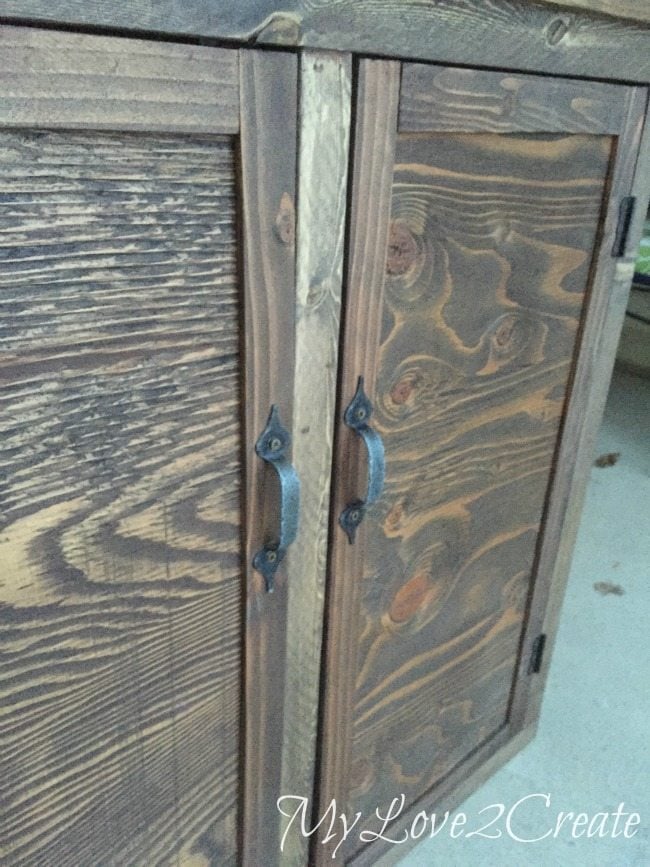
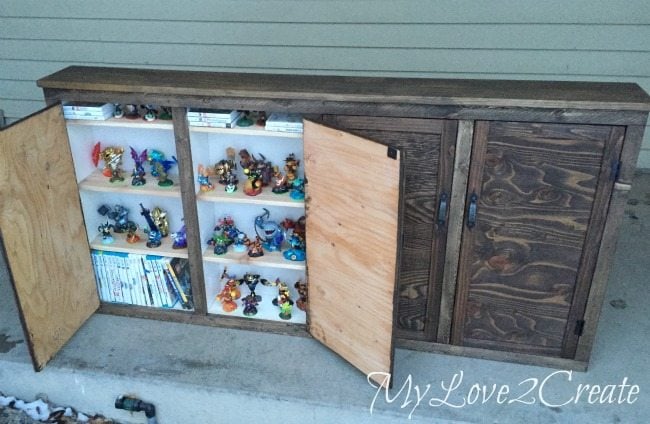
I had four matching handles that I had gotten from the restore a while back, they are not the best but they work.
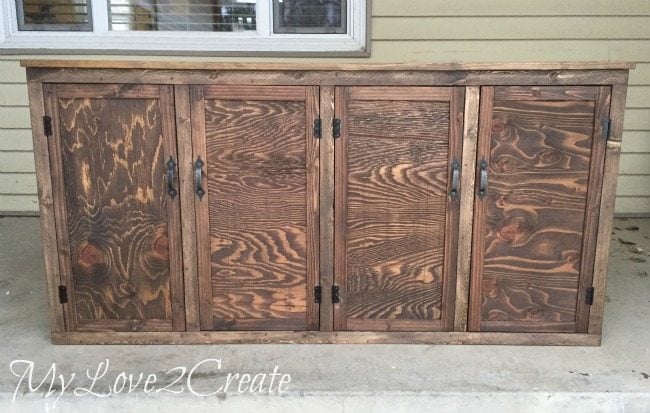
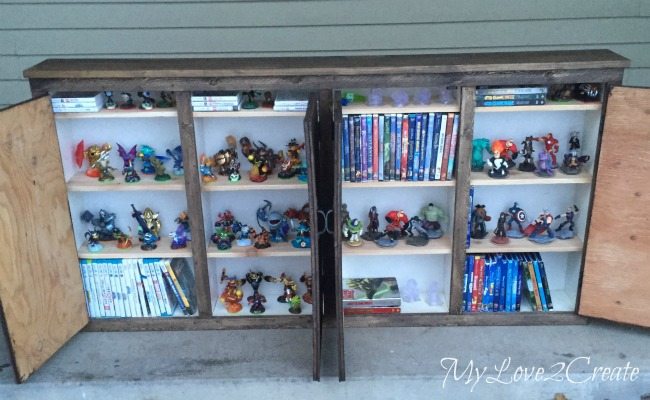
A full front shot. Yes it needs feet, or casters. I had some casters but they were huge and didn’t fit so I will have to get some smaller ones. Or, do you think some nice legs or feet would look better? I am kind of torn, but it does need something…
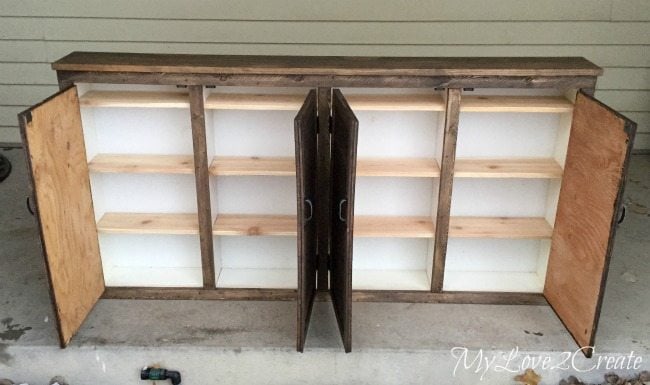
Inside there is a lot of storage space! You can also see I added magnetic door catchers at the top, not sure what they are called.
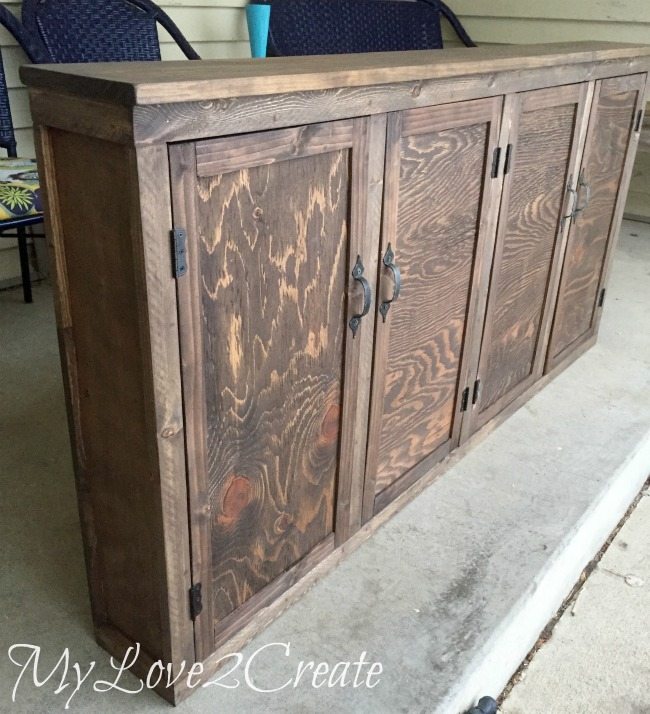
I love that this cabinet will not take up a ton of space. Look how narrow it is, 7 1/2 inches total!
This is the moment I have all been waiting for….finally! I took photos outside to get better pictures, but it was getting dark.
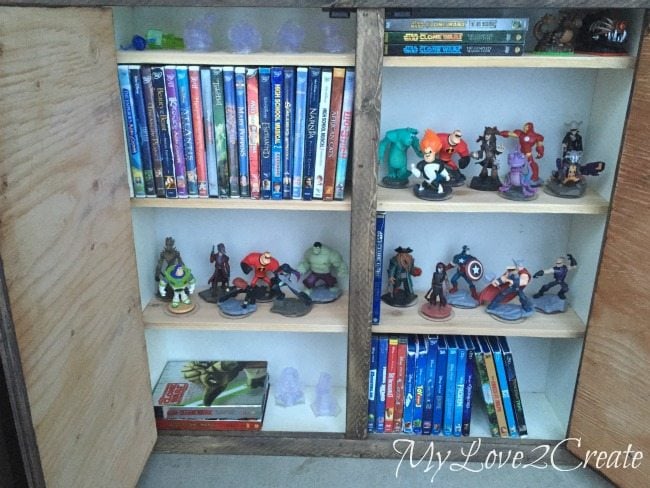
It can hold movies and lots of Disney’s Infinity game characters…
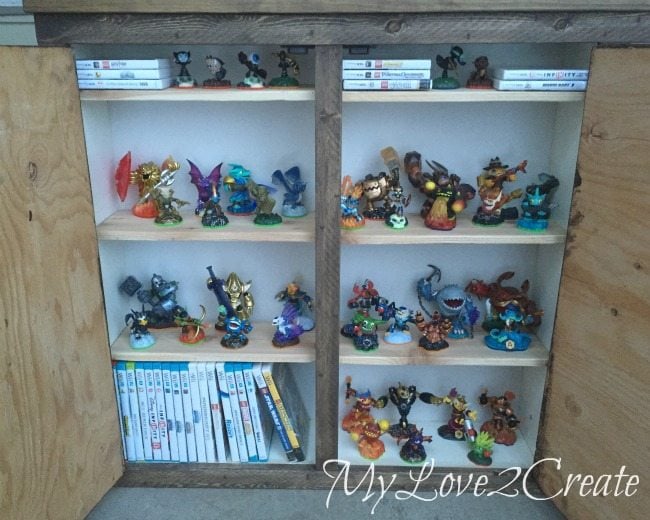
And Skylander guys, and wii games. I am just glad they will be hidden away when not in use.
It is good to accomplish one of my “ideas”!
Thanks for stopping by, and let my know if you think this Kid’s Old Drawer Media Cabinet needs casters, legs, or feet?
Hugs!
Mindi
see more of Mindi’s posts on MRL below:
[categorythumbnaillist 274]
Wow…wonder piece, well maybe not to begin with but for sure when you finished!
Looks awesome and what a great idea! So what did you use the dresser shell for?
Thanks Kris! I still have the dresser shell, I haven’t used it for anything yet, but I am sure someday I will find a purpose for it! 🙂
The closet turned great! It looks fantastic! Great job! Greetings, Storage Mottingham Ltd.
What a great idea to make something so narrow with shelves! I agree with Gail and would put a toe kick all the way around. I’d just use scrap whatever-you-have and build a shallow “box” that is narrower than the cabinet dimensions by about an inch or two all the way around.
… or since the cabinet is so narrow, maybe even with the back, but an inch or so in from the front and sides.
I’d use it as is (except for anchoring to the wall). For kids rooms (especially boys), I opt for furniture that is flush with the floor – no hiding space for legos and dirty socks.
Mindi, you are an AWESOME, gifted woodworker! I love your projects! You sure inspire me! Unbelievable – the stuff you come up with…Your love to create shows in your beautiful (functional) creations. Thank you. Tali
This is a really awesome way to use that dresser! How ingenious!
I love it! I think some of those small casters would look cute on it but I agree with Gail, you’d still need to hold it to the wall and the casters would be for looks only. I think it looks great the way it is now. 🙂
Very cool.
Oh my gosh Mindi! I love how your brain works. 🙂 I cut furniture apart, and you glue pieces together. This is a great project to repurpose old drawers. I have tons of drawers in my stash. I’m not sure that you should raise it, because it is so narrow, I’m afraid it my be tipsy. Before you mentioned how narrow it is, I was thinking maybe it could be raised a little sort of like a base kitchen cabinet, with a small “toe kick” area. Just a thought, but still think you may need to secure it to the wall if you do that.
Thank you for sharing another great project with our readers.
gail