Painting the Basement Floor Then and Now
As an Amazon Associate, I earn from qualifying purchases.
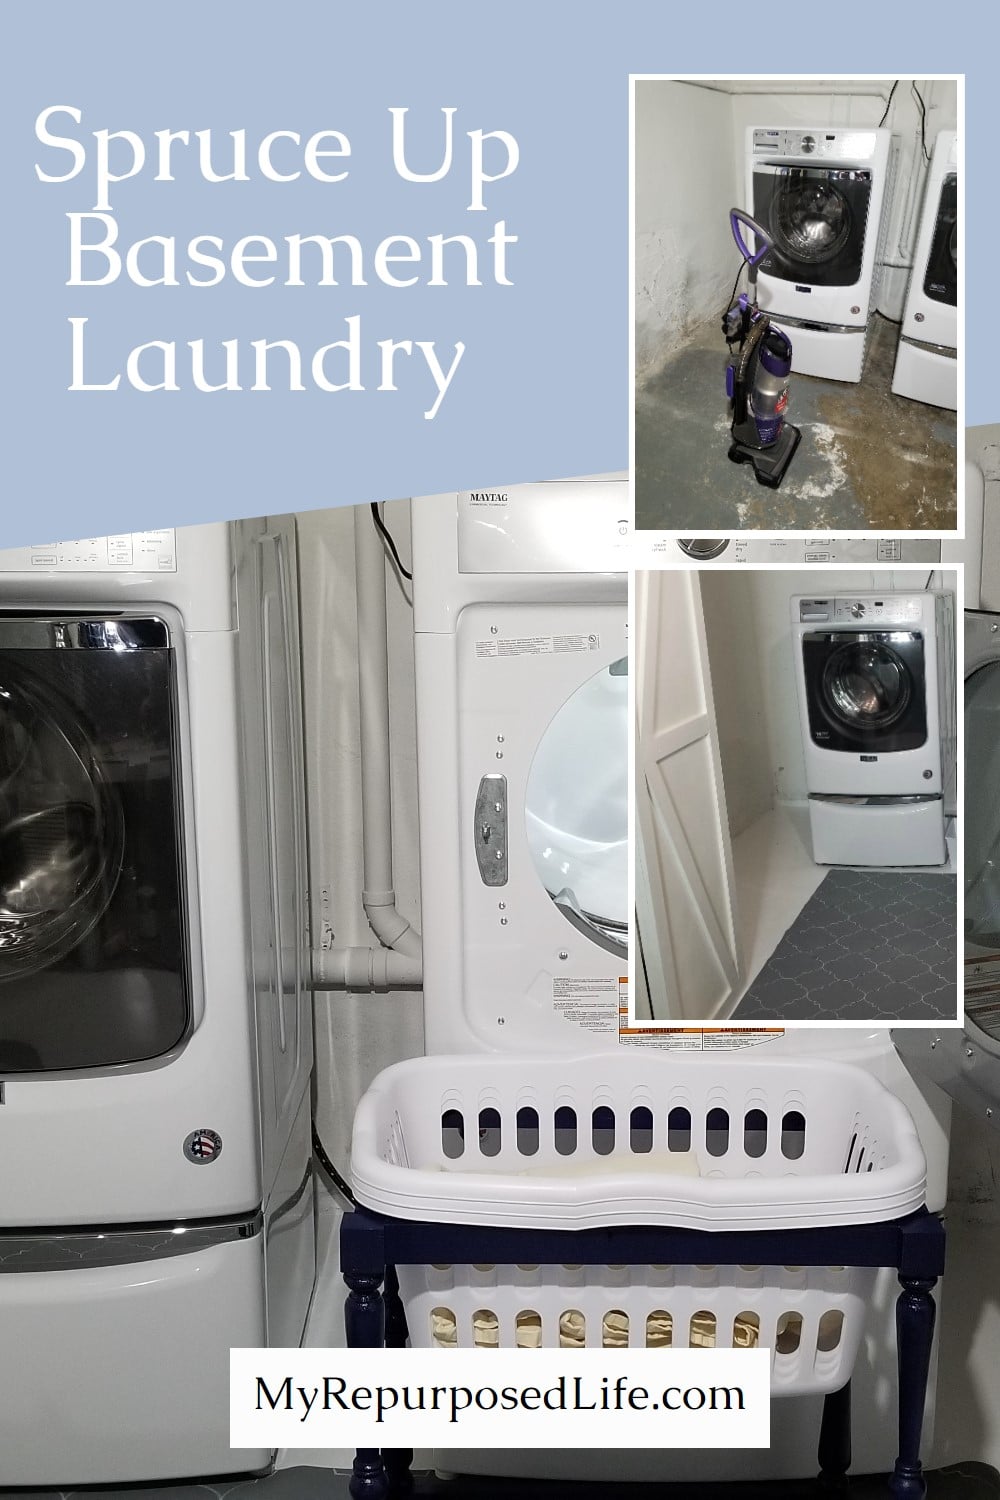
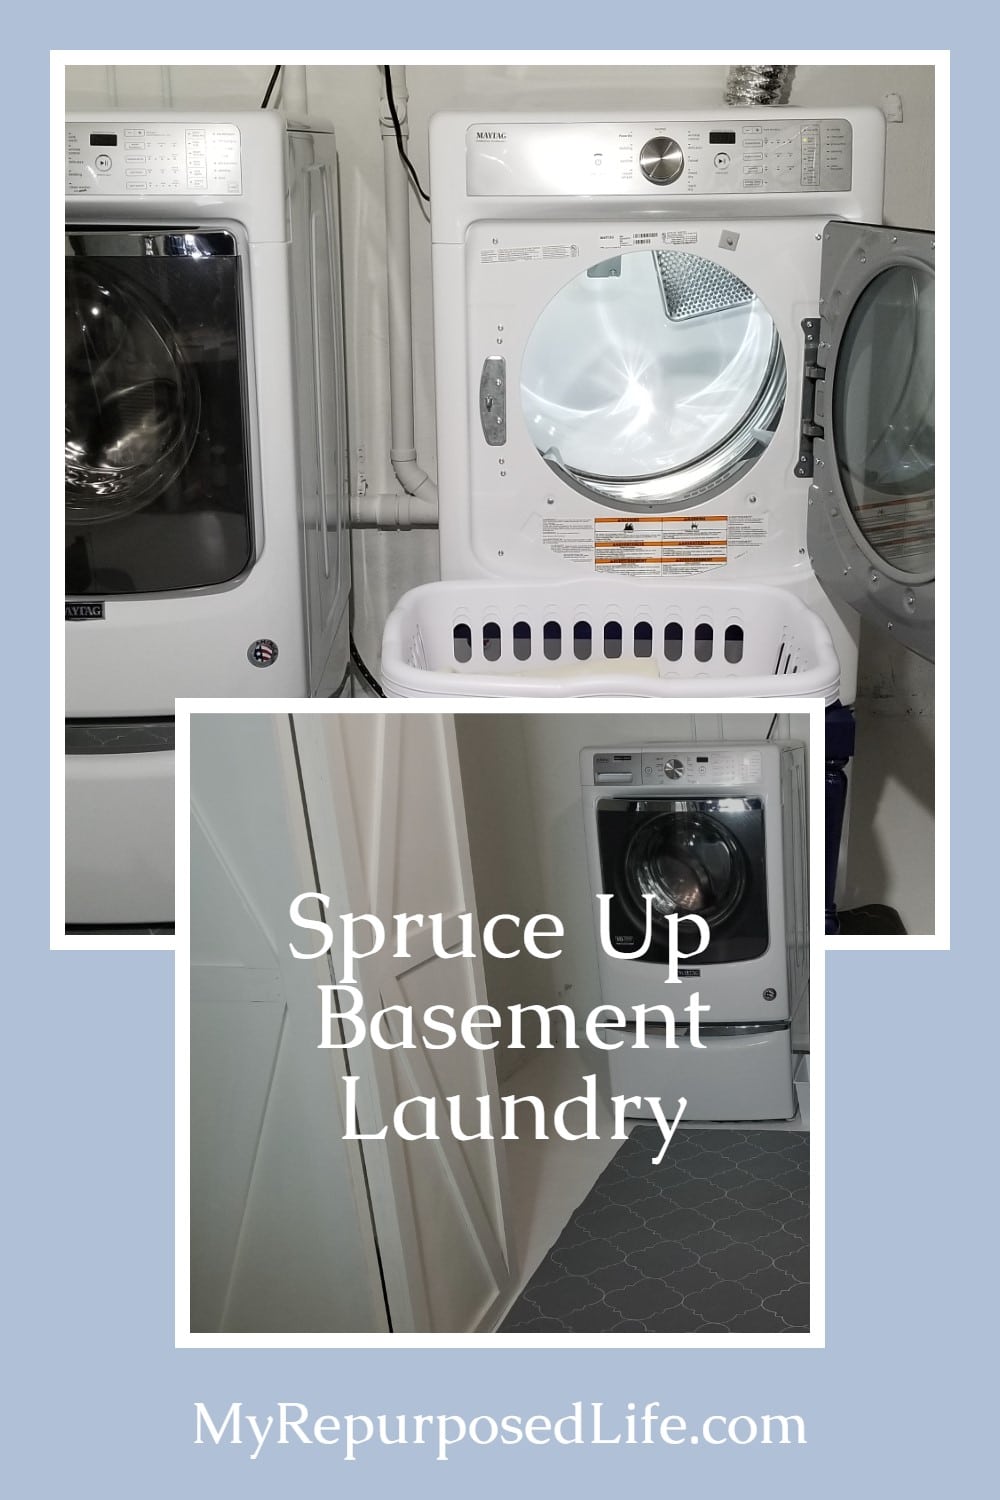
I’m still working hard on my basement laundry area. Who knew painting the basement floor would make such a difference in the space? Last month, I showed you how I painted the little corner of the basement where I do laundry. My new Maytag washer and dryer are finally getting the space they deserve!
Let’s see how this rough space is coming together.
New Appliances Spar Updates

I was only going to paint the small corner of the walls. You can see on the right where my plastic ended on the original paint job. While getting ready to paint the floor I also decided to do that space to the right.
Cleaning is Essential Before Painting

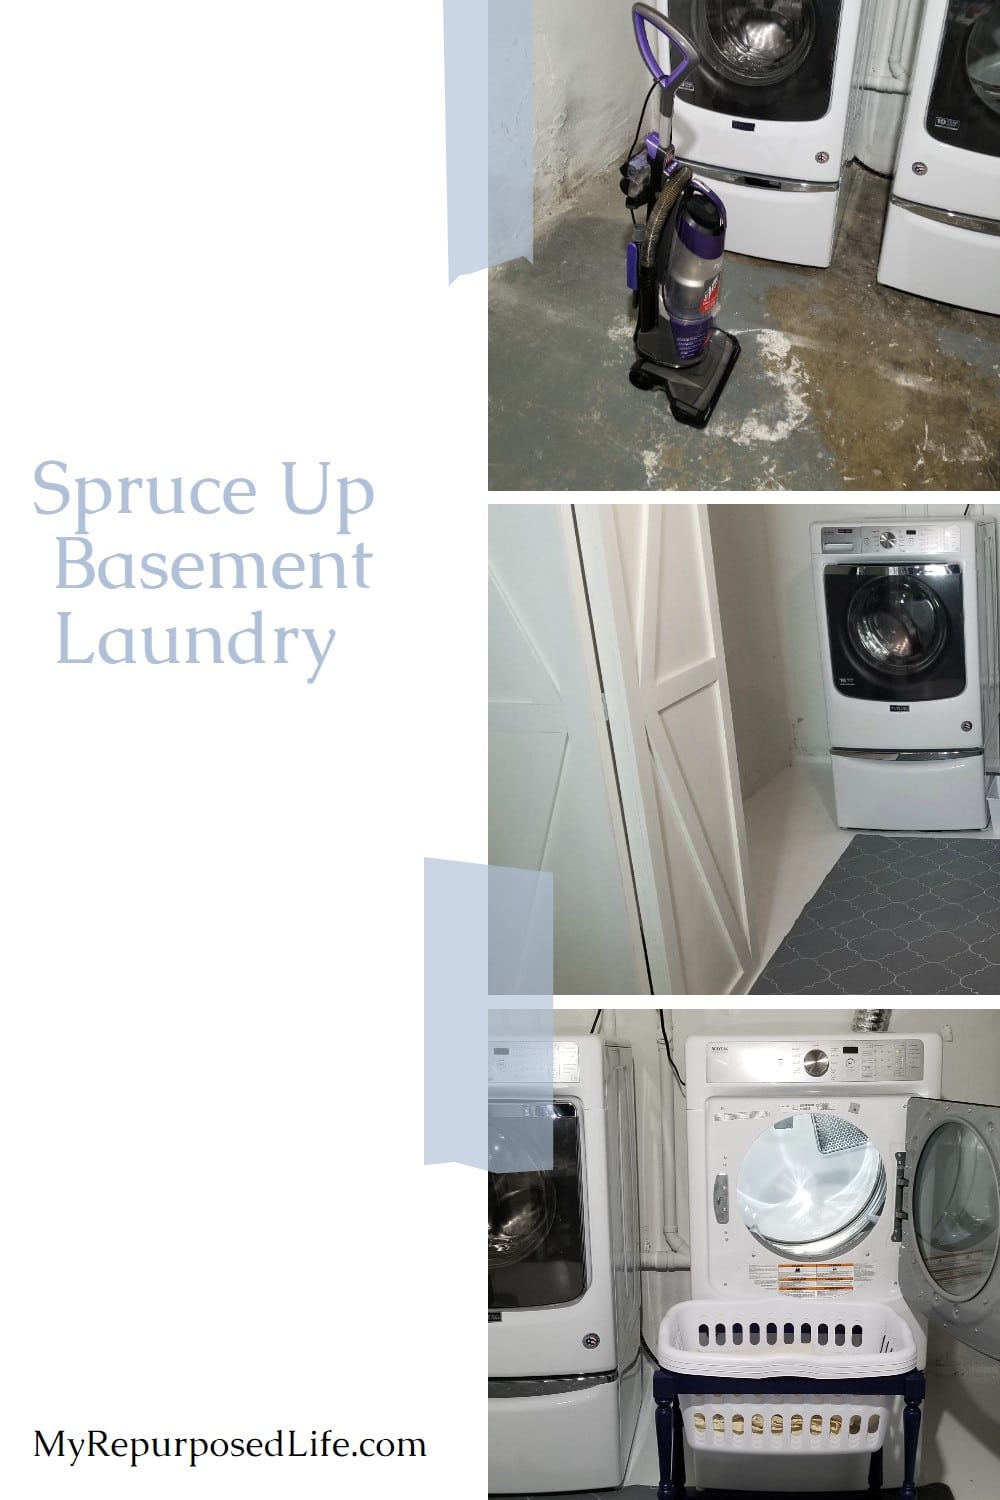
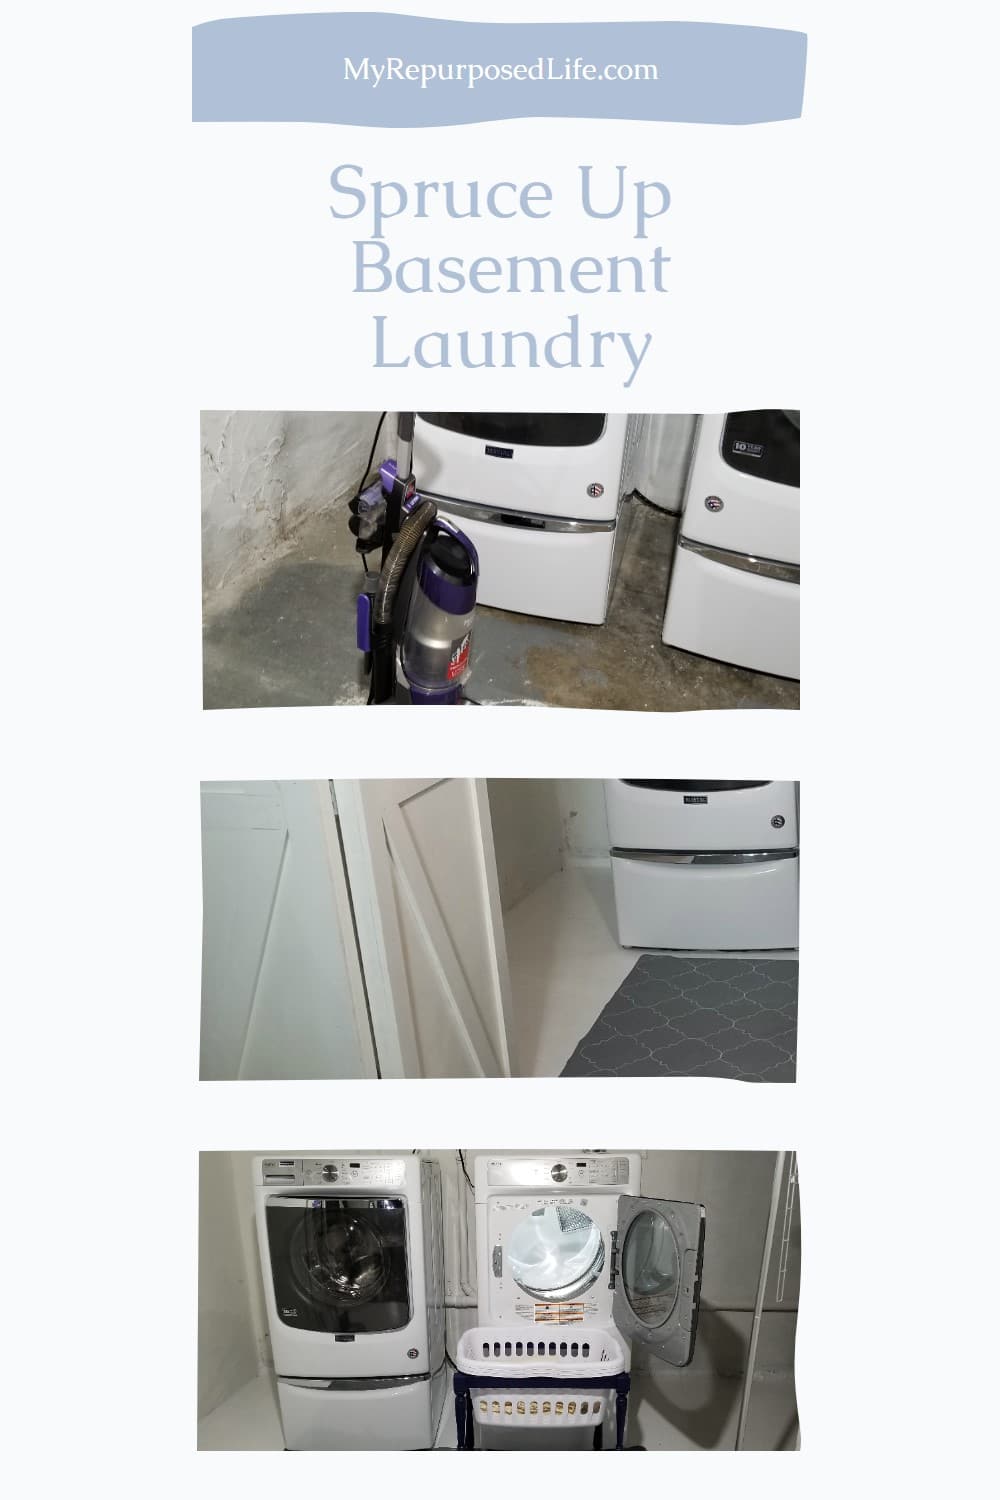
Paint’s worst enemy is dirt and dust. The very first step before painting the basement floor is cleaning! I had swept it twice, but because the floor was so rough, it just wasn’t working. I brought out the vacuum to ensure the entire area was dust and debris-free. Mopping would also be a good option, but I didn’t want to wait for the concrete to dry.
Roller With Extension Handle

I rolled on two coats of primer all around the floor. You can also see that I’m working on the area to the right of the dryer.

You will notice I moved the dryer to the right so I could reach the area between the washer and dryer. I used a tiny roller to apply paint around the edges of the appliances.
Store the Paint Roller in a Plastic Bag
Do you wrap your rollers in plastic grocery bags? It works so well and cuts down on wasting paint by washing the cover between coats. This roller was wet with primer for over a month, waiting for me to finish this job. I suppose it helps that it is very cold in the basement. I know some people store their covers in the freezer between coats.
TIP: I didn’t use a paint tray, I poured the paint on the floor as I went.
Semi-gloss Paint for the Basement Floor

After two light coats of the primer, I applied one nice coat of the same semi-gloss paint I used when I painted the wood trim and baseboard. You can see how the semi-gloss paint looks better against the primer’s background. I also did coats around the dreaded sump pump. More about that in a future post.
This project took several days because I wanted to make sure I let the paint dry thoroughly between coats.
Now that the floor looks so good with the semi-gloss, it shows how sad the walls look. The space is so much brighter, and I’m so happy with how it’s all coming together.
New and Improved Basement Laundry Space

When I say I really LOVE doing laundry now, I mean I’m actually giddy about it. But the space is still a work in progress, and more updates will come.

I also stenciled a new “rug” for the space and built a handy laundry cart that I love!
Over the years, I’ve done a lot of loads of laundry. My best tip for you is something I learned years ago. Don’t be tempted to throw your wet laundry from the washing machine to the dryer. I find that the clothes dry faster and better if you separate the clothes/sheets so that they aren’t tangled in a big ball. I move the laundry and shake it out as I put it in the dryer.
I love my Maytag dryer’s PowerDry cycle—it gets the job done and evenly dries my largest loads. I also use the timed dry function and rarely have to set the dial higher than 30 minutes.
I love having a fresh, clean space to use my Maytag appliances – it makes doing a dreaded chore enjoyable!
It’s a new year with a new space; it’s all about then and now.
gail
Related Content:
Gail, painting that floor made such a huge difference it brought a smile to my face. Amazing what a coat of paint can do right?! Great job!
YES, I totally agree! Painting the walls was also a big help. 🙂
gail
Oh Gail it looks amazing!! That paint on the floor worked wonders!! You washer and dryer looks so pretty and your stenciled rug and awesome laundry crate are perfect!! You rocked this space! It makes me smile to see it!
Thank you Mindi. I appreciate you taking the time to stop by! I’m loving both my new spaces in the basement.
take care,
gail
My laundry room is in the basement as well. I love the floor and the wall transformation.
Gail, did you use masonry paint on the walls? it looks great!
No, I didn’t use masonry paint. I’m a use what I have kind of girl. 😉 I thought about buying it for the floor, but again I went with what I had on hand.
I really should do another coat on the wall, it doesn’t look so good now that I did the floor. lol
gail
Awesome job it is coming together so great. I just got a new maytag washer and dryer(first new ones in my life) I am so proud of them.Love the tips you are giving, we are what you would call silent helpers, right there with you cheering you on lol!
Ohhh Bonnie. Your comments always make me smile. Congrats on the new laundry suite! I’m sure you’re as giddy as I am to be doing laundry. The new features these days are really amazing. I’m loving that laundry detergent dispenser!
gail
Your floor turned out great!
Thank you Terry. I’m really loving it so much. To be honest, I’ll be glad when all the projects are done. But are we really ever done? heheheh
gail
Wow. Everything looks so clean now!! I wish I would have though of this in a previous house I lived in. I absolutely hated having the laundry in the basement with the ugly cement floors.
Thanks! White just makes everything look so much better.
gail
Press and Seal my friend~Press and Seal!
It encapsulates the wet roller comPLETEly—even around the metal roller handle.
Same for a paint brush! Can’t count the painters I’ve converted with this great product!
Your laundry is looking FABulous and going to deserve a chandelier! ; D
Catherine
I hear ya Catherine. I use press and seal for other diy stuff, but those grocery bags have yet to fail me. This one was in there about 2 months and it was perfect when I unwrapped it.
Chandelier? That’s what my daughter Jamie said. BUT, the ceiling is much too low. I suppose I could swag it and hang it over the washer and dryer. Anyplace else, I’d be banging my head on it. lol
gail
It looks great! Next a folding table with a hanging pole. I thought that was an excellent idea for my garage laundry. Then I thought where would I put it when I’m not doing laundry? Still thinking about something that will fold down. Maybe a gate leg.
That’s a great idea. There is a table down there that has been here long before I arrived 42 years ago. I’m just not sure I have room for it. I may need to take a saw to it. lol
I love gate leg tables.
gail
Nice job! I am paying close attention to this Gail. I have a basement laundry too! I love the cart for the laundry baskets too! We painted our floor years ago and it is time to do it again. Thanks for all the inspiration.. mine will be next!
Oh Susan, I am loving that cart so much! It really has changed the way I do laundry. It’s the little things that make me smile. Who knew laundry baskets could change my life?
gail