Painting Mason Jars | Paint Sprayer
As an Amazon Associate, I earn from qualifying purchases.

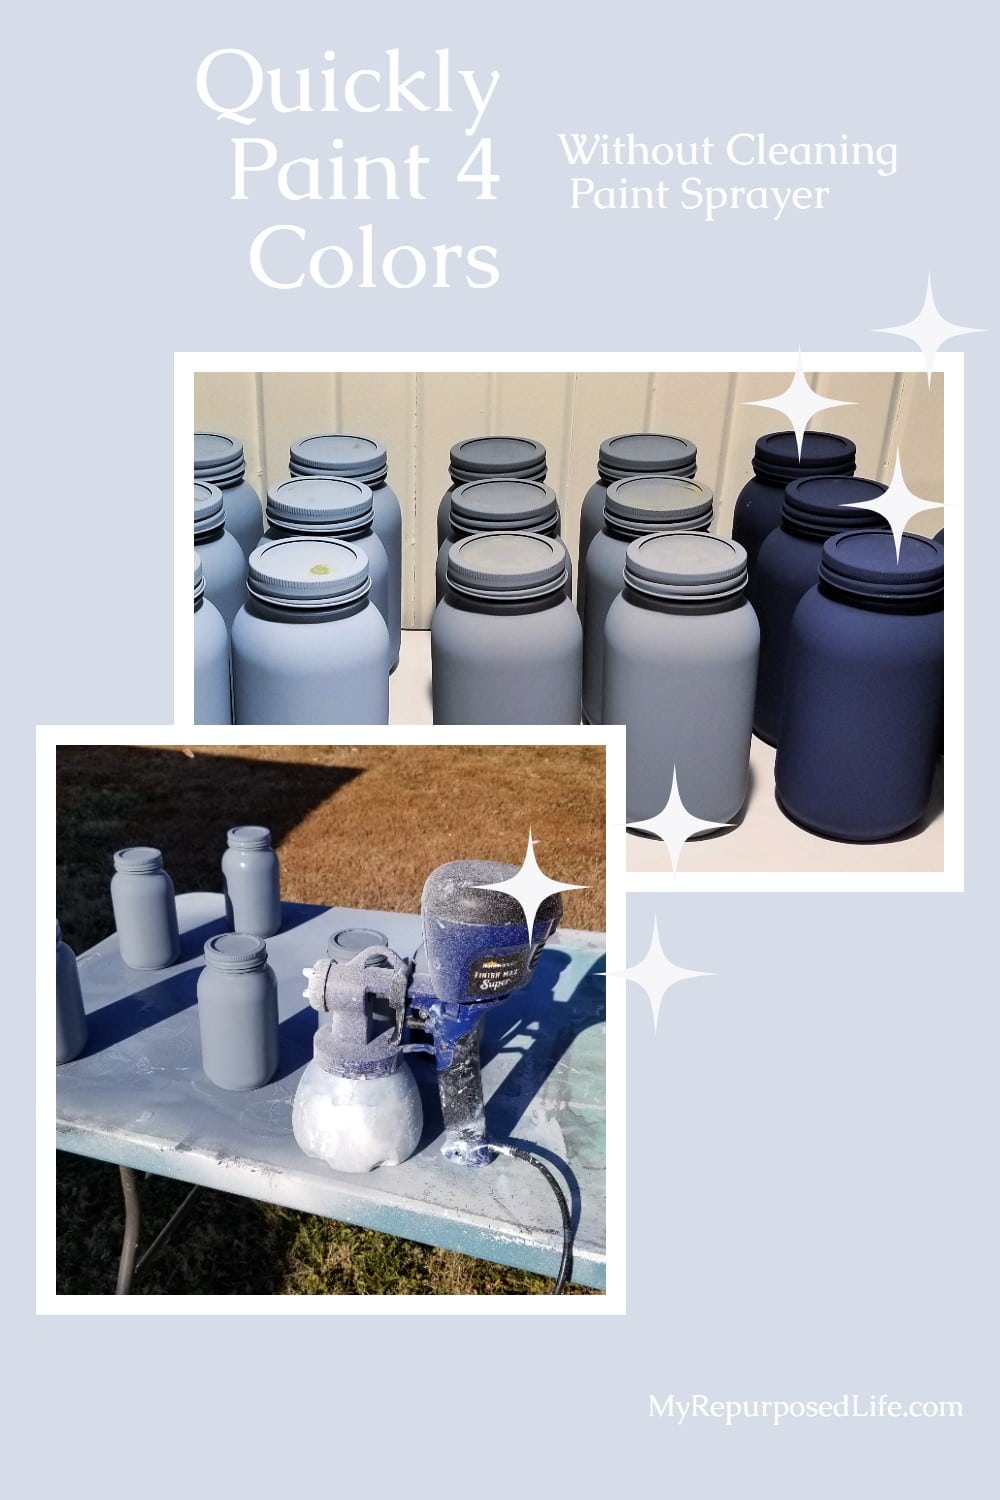
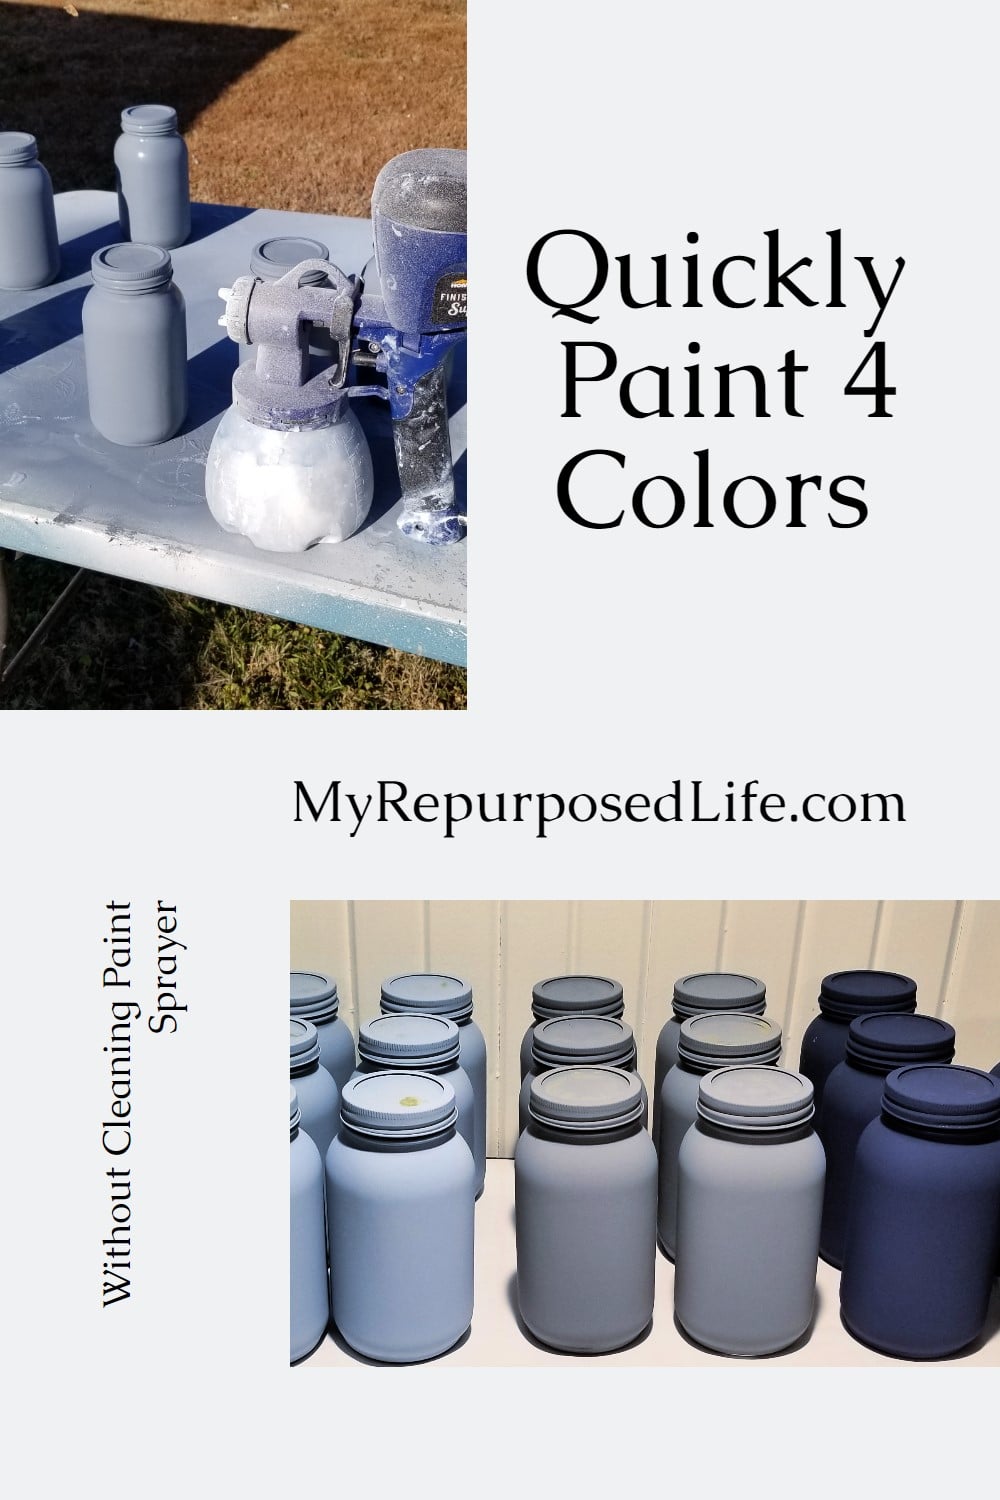
For this Mason Jar Tissue Holder project, I’ll show you an easy way of painting mason jars FOUR different colors without changing out your paint cup or cleaning your paint sprayer. That makes this project go very quickly.
Painting Mason Jars

In all, I painted twenty-three mason jars with four different colors of paint with my Super Finish Max paint sprayer. These are the supplies needed. The mason jar tissue holder makes great teacher and neighbor gifts.
- Super Finish Max
- Quart Mason Jars
- Alcohol
- Paint
- Canvas
- Tissues
- Vinyl or stickers
Prep Mason Jars for Painting

Before painting glass mason jars you must clean them with alcohol. I used a paper towel, and you can see how dirty they were by the residue on the paper towel.
Use a Paint Sprayer

For this project, I chose the green tip (2.0 mm). I used chalk paint in each of my four colors. Some of the paint has been around for a while, so I used mesh paint strainers. Old paint tends to have clumps.

It’s a good idea to dial the flow control knob down until you see how the paint flows onto your project. I chose to leave the caps in place so the jar rings would match the jar color. The lids helped keep the paint from getting inside the jars. You will use the lids when you assemble your mason jar tissue holder.

To keep from emptying your cup or cleaning your sprayer, start with your lightest color to ensure you get good coverage all around the mason jars because you won’t be able to do more coats later. I prefer to do 2-3 light coats. They dry quickly this way.
Painting Mason Jars in Different Colors

Paint color #2 is a light blue. I poured it directly into the white paint and stirred it well.

Paint color #3 is a medium gray, which I poured into the blue paint. Be sure to stir the paint.

As I get to this point, I’m trying to figure out which color is my favorite!! Keeping your aiverticallysition gives you a lovely horizontal spray pattern, perfect for getting great coverage on the mason jars.

As I was ready to move on to my last color, I noticed there was quite a bit of gray left in the paint cup. I grabbed a water bottle and poured the excess paint into it for another project.
Do I Have to Clean the Sprayer Between Colors?

Without cleaning the sprayer between colors, the final color was navy blue. When it was time to clean the sprayer, this is what my pickup tube looked like. Because the Super Finish Max sprays down to nearly the last drop, there’s no need to fill up the paint cup. You can see by the paint on the tube, that there wasn’t much navy blue paint in the cup.
You may also see why I had to pour out some of the gray paint before adding the navy blue.
 I can’t imagine how long it would take to paint these jars by hand! I think I like the navy blue mason jars the best.
Paint Sprayer | Painting Mason Jars
Check out my post Mason Jar Tissue Holders to see which tissues work best, and all my other tips and trips to make these the easiest gifts for neighbors and teachers!
Happy Painting!
gail
How did you cut the hole in the lid & what shape is the hole
I didn’t use the lid, but instead opted for a piece of canvas. For that I just made a slit north and south, and east and west. 😉 Or up and down and side to side.
I hope that helps!
gail
I did the pour the next color in when I did ombré on a chest of drawers. It was for a friend, so I didn’t pick the colors. She cut the feet off so it would be kitchen island height. The first color is a really dark lobster and it got to about the color of shrimp on top. She has green cabinets and blue backsplash. It’s bright.
Awesome way to do an ombre! I’ve yet to paint anything truly in an obmre pattern.
Thanks Jennie!
gail