Pallet Wood Tree Collar | Simple Design You Can Make
As an Amazon Associate, I earn from qualifying purchases.
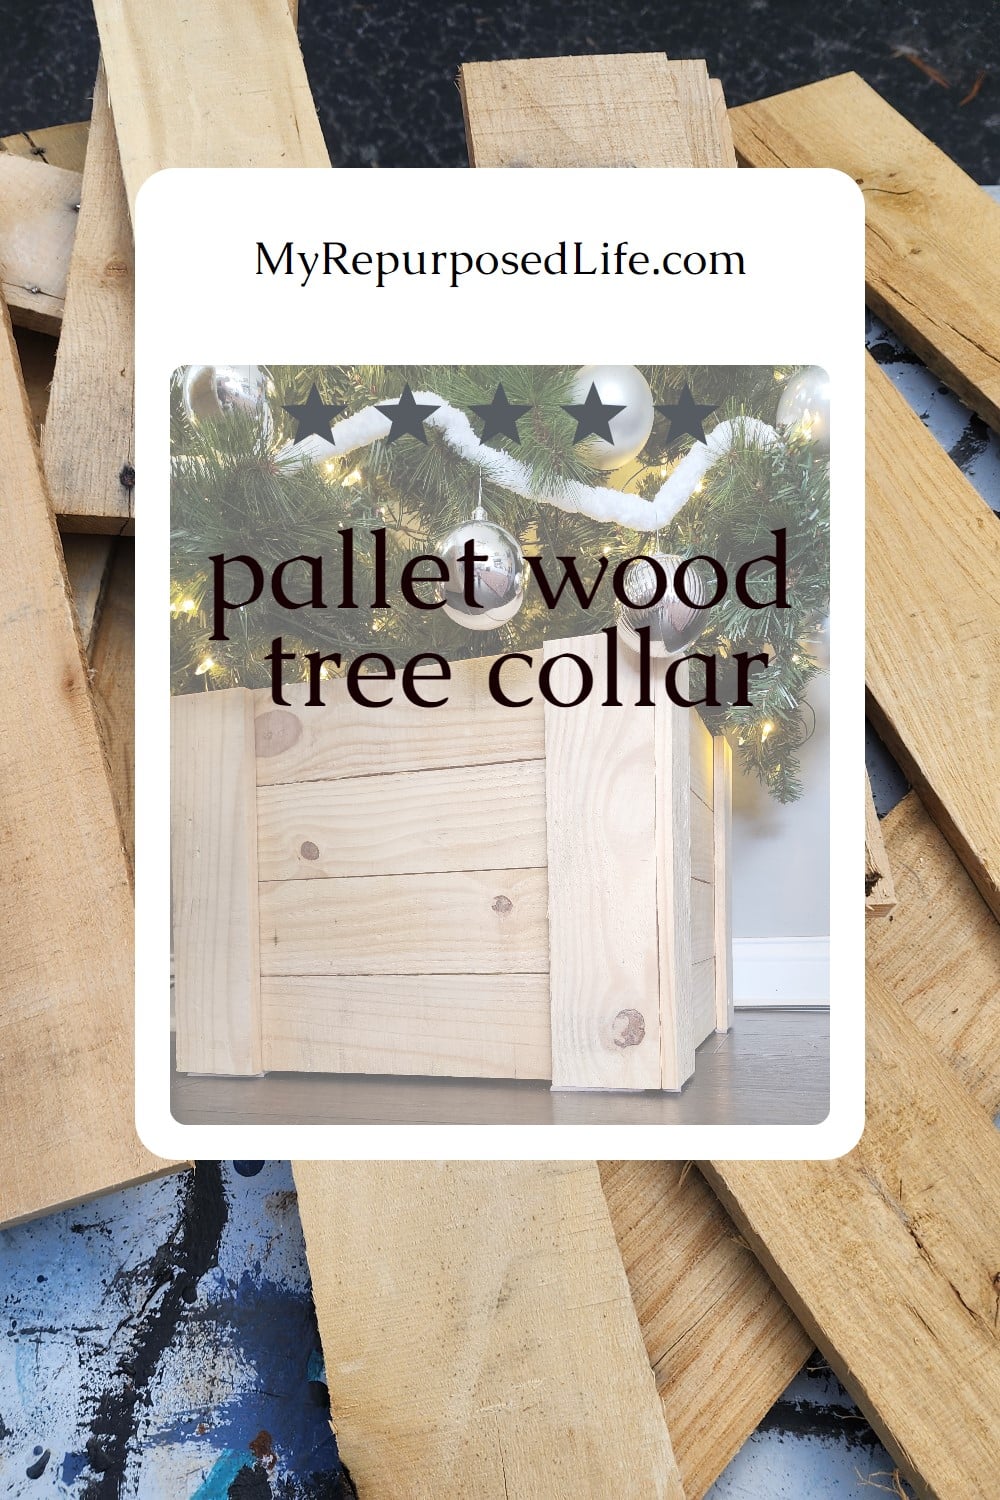
Store-bought tree collars rarely fit just right, especially for smaller Christmas trees. This DIY pallet wood tree collar allows you to build a custom size from free or low-cost wood, and the simple panel design accommodates whatever boards you have on hand. It gives an artificial or real tree a rustic crate-style base that hides the stand and adds farmhouse charm without a big holiday budget.
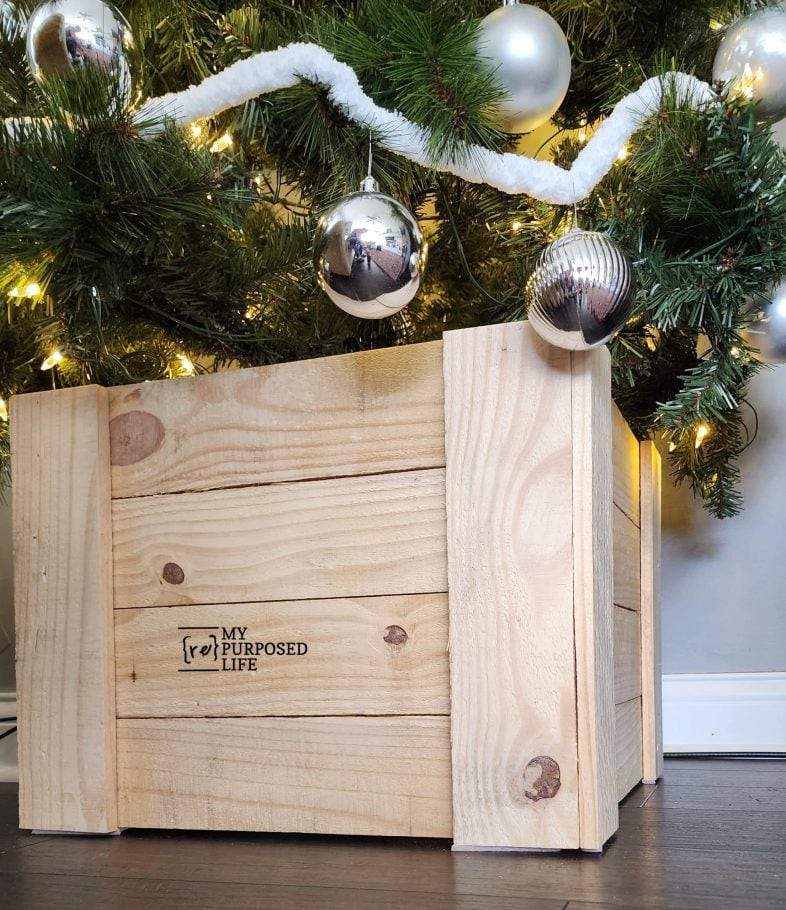
This handmade pallet wood tree collar was designed for my smaller Christmas Tree. I made a Christmas Tree Stand Box that folds flat for storage, but is too broad and too tall for my new tree.
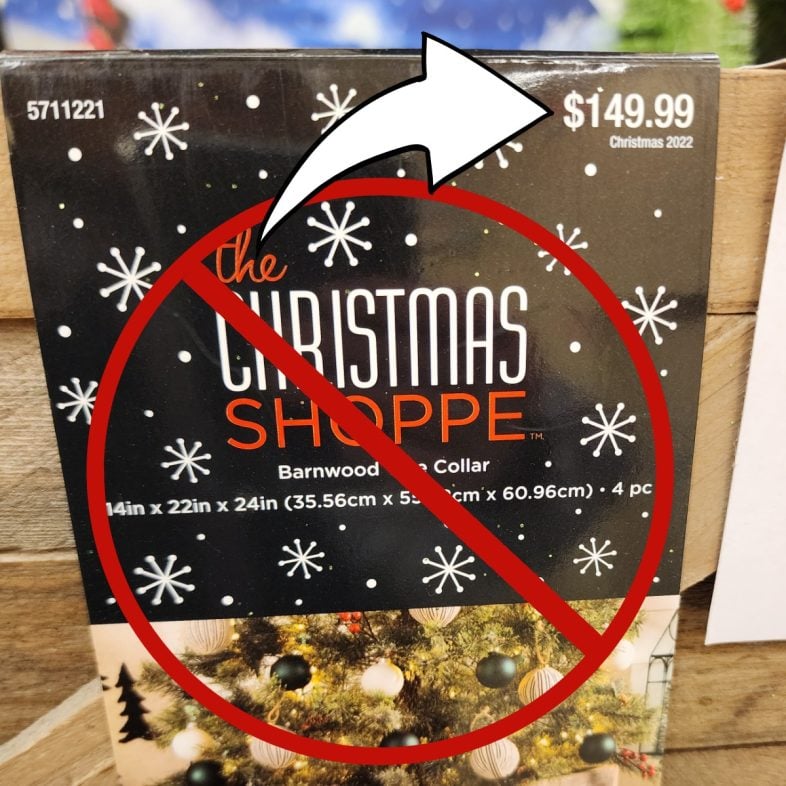
While shopping for garland at Hobby Lobby, I saw this barnwood tree collar. First, it’s way too expensive, even on sale. Second, it’s too large. So, what’s a gal to do? Make one herself.

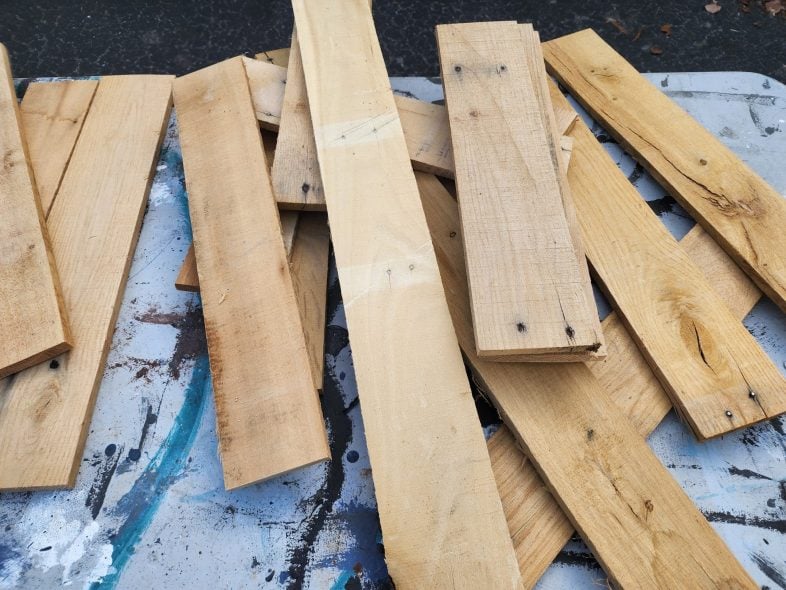
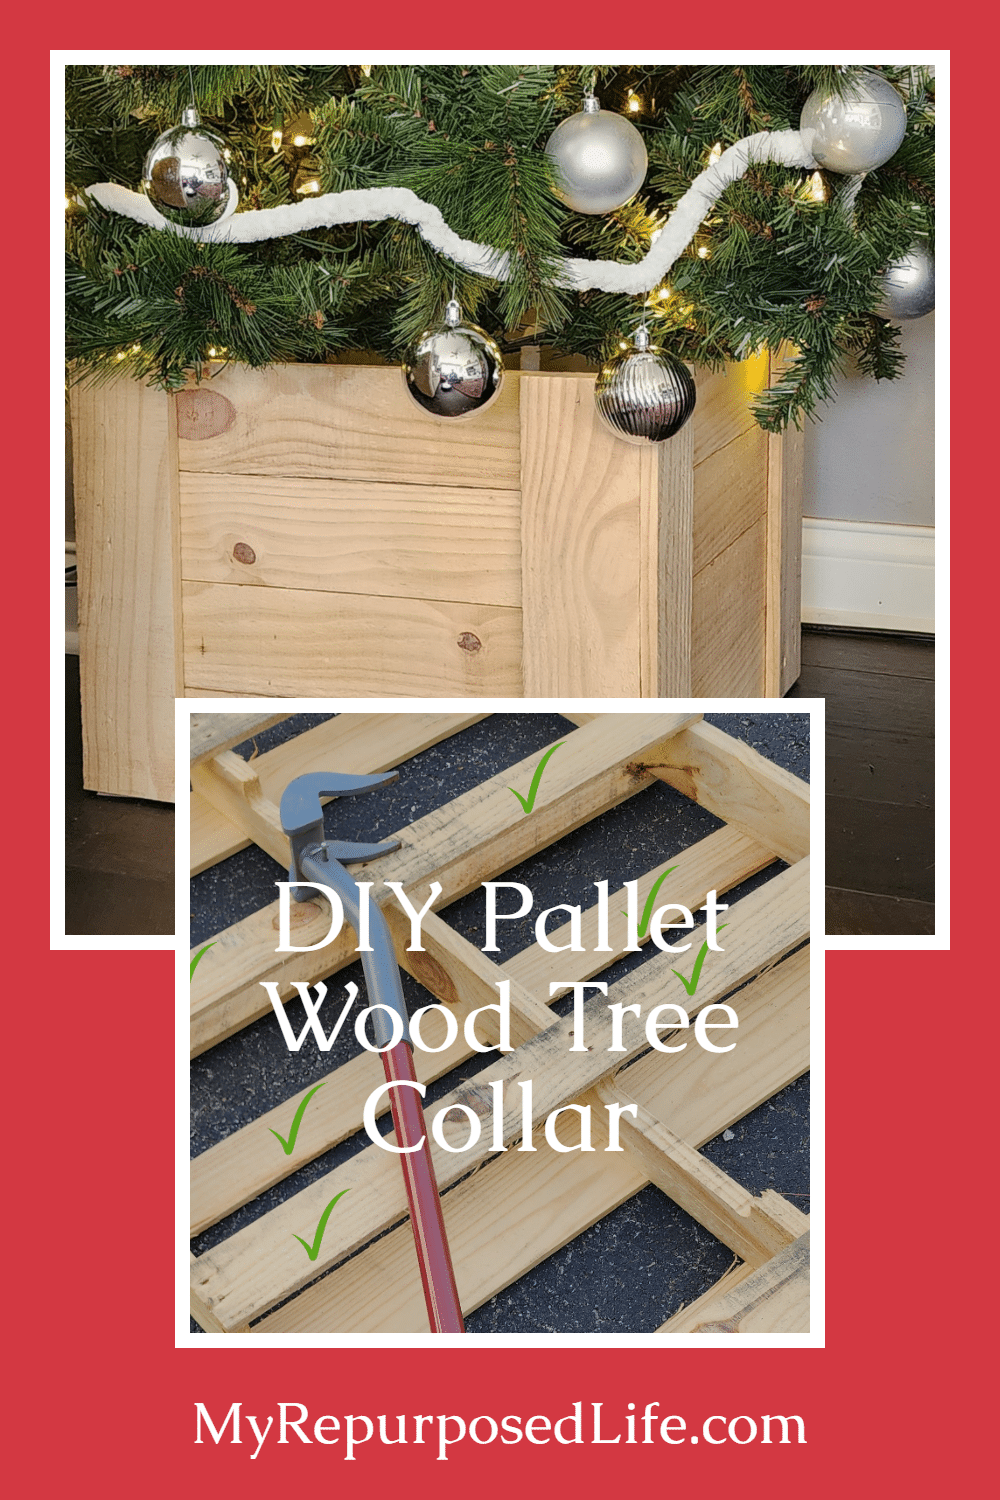
I grabbed two pallets from the neighbor’s garbage pile and dismantled them using my Duckbill Deck Wrecker. You may have noticed that there are narrow boards on one side and wider boards on the other. I used the narrow boards for this pallet wood tree collar project.
How Do I Determine the Correct Size Tree Collar to Use?
To answer this question, I measured the distance from one leg to another on the existing metal Christmas tree stand. Then, I measured the height from the floor to the lowest branch.
The panel size for my Christmas tree collar should be approximately 17″ wide and 14″ tall. So, my cut list consisted of the following:
- 12 narrow pallet boards 17″ long
- 6 narrow pallet boards 14″ long
My narrow pallet boards were approximately 3.5″ wide, so the four narrow boards netted me about 14″ in height. This is basic information for you, as the boards you use may differ. You may need a different-size tree collar to fit your Christmas tree. If you need a slightly different size, consider leaving a gap between your boards, similar to how a “crate” looks.
I tried to use these boards that were already cut short, but they weren’t the proper size. So, I had to cut the pallet boards from the dismantled pallet.
Related Content: Primitive Paint Stick Stars
Use What You Have
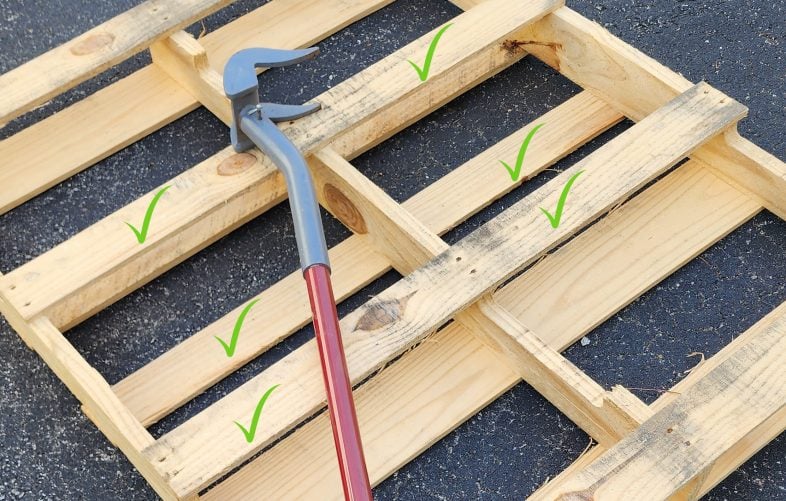
I didn’t take pictures of the process, but I used my compound miter saw, being extremely careful to avoid nails. While dismantling the pallets, some nails came out, others stayed in the narrow boards. The green check marks represent which boards I used.
Assemble Pallet Wood Tree Collar Panels
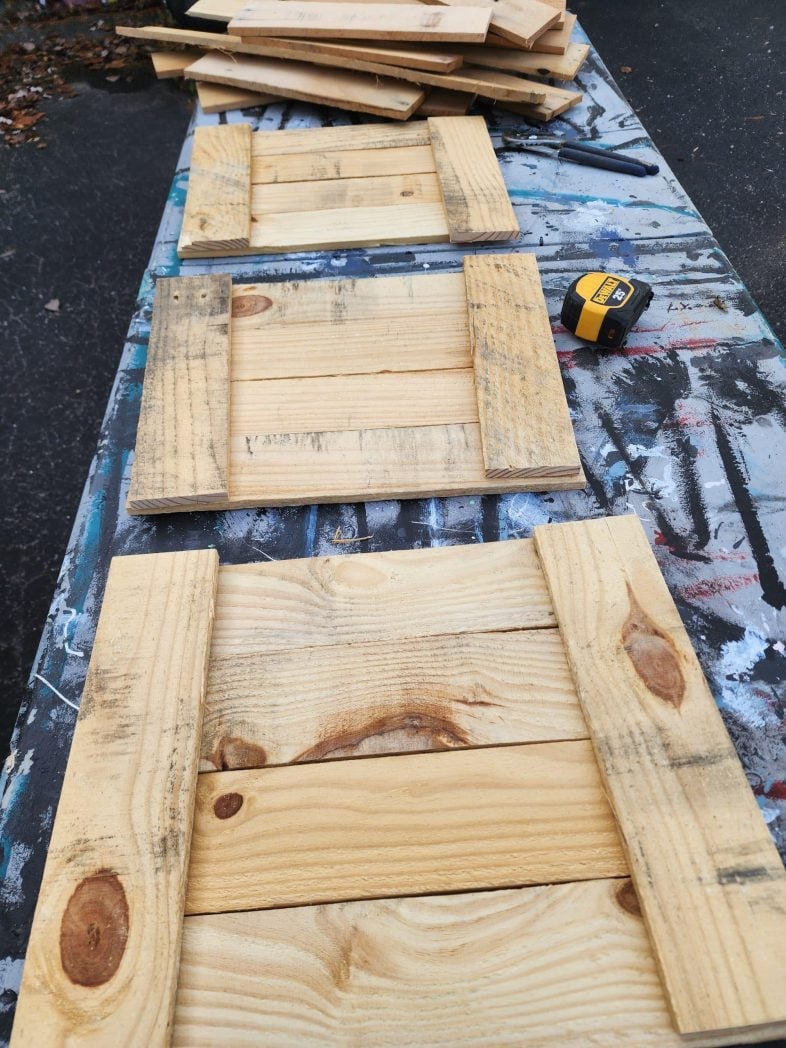
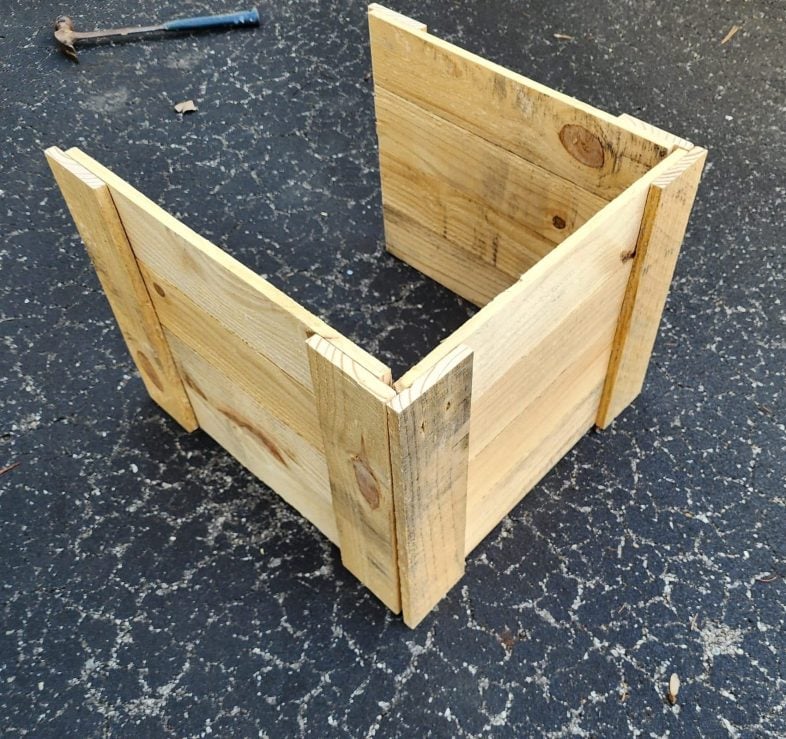
This is a dry fit.

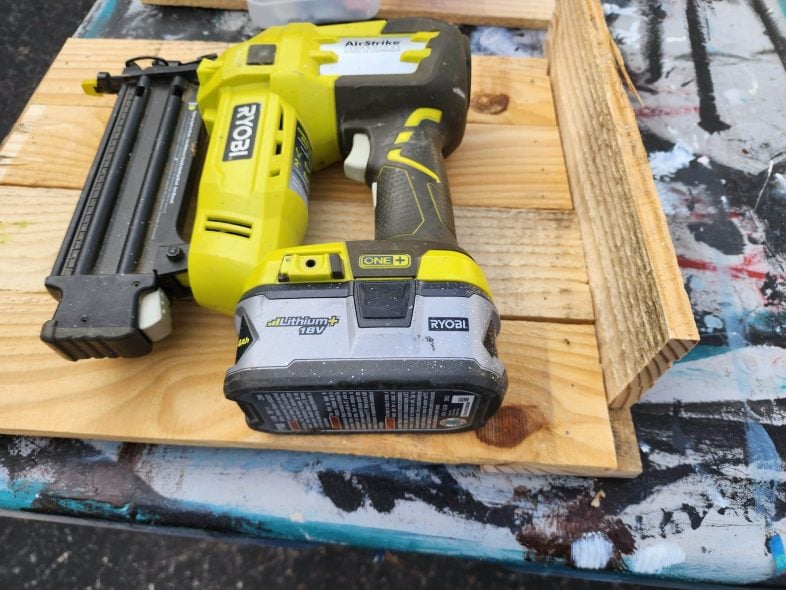
I assembled my pallet wood tree collar panels using brad nails and a nail gun. You can see the nails leaning up against the boards.
If you know someone who loves a good DIY, please pin this project or share it on Facebook. Your share helps me keep teaching these ideas for free.
The panel has been flipped over. This is where you would want the pretty boards facing down, as they will be the ones that show. Do you see that board on the right? It’s just for placement. Leaving the space will allow the panels to be secured together.
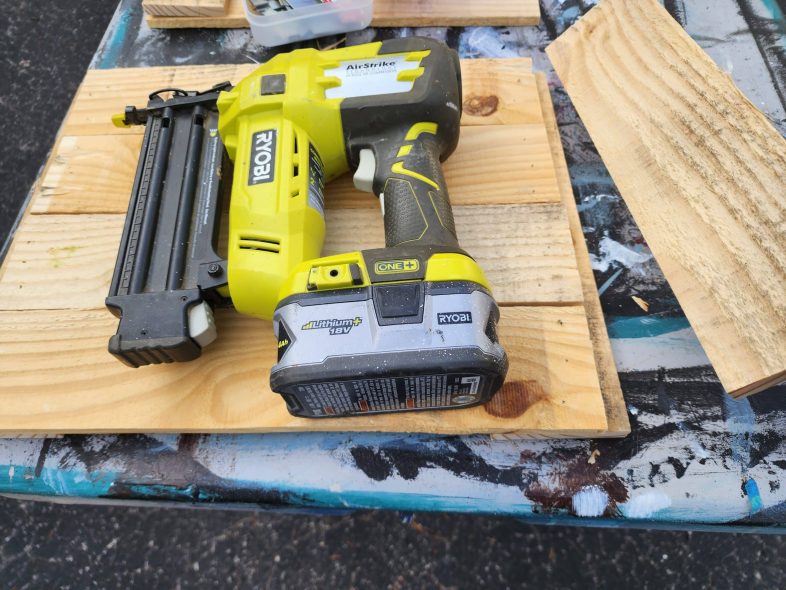
Remove the board, and begin securing all boards with the nail gun or wood screws if you prefer.
Tip: I didn’t use wood glue, but I recommend using it if you use short brad nails, as I did. In addition, shooting the brads at a slight angle will make the assembly more secure.

This is why you want to leave the space of the board width. This might be a good time to mention that if you expect perfection, you shouldn’t use pallet boards to make your tree collar.
Continue to assemble the rest of your panels. By leaving the space at the end, you get a clean look of a complete box (on the corners).
Sand Away Splinters

Sand the panels with heavy grit sandpaper. I used 150. This is before sanding.
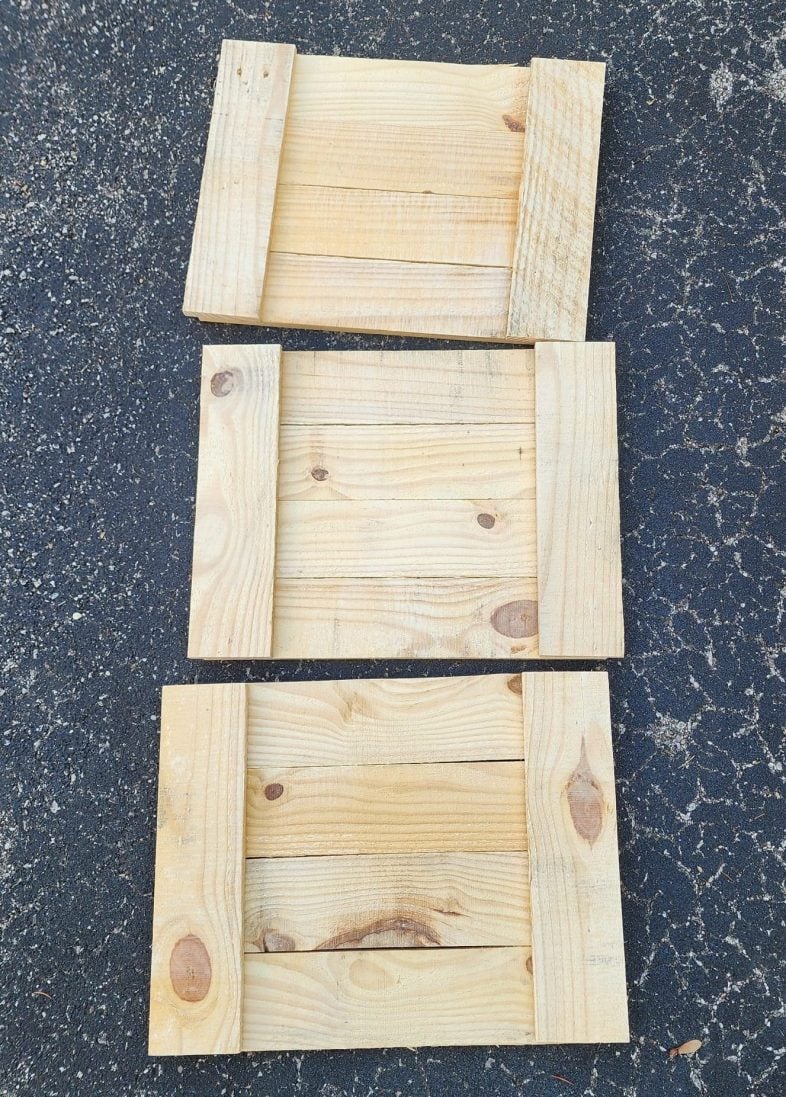
After sanding, I like the rustic, imperfect look of the pallet wood tree collar panels.
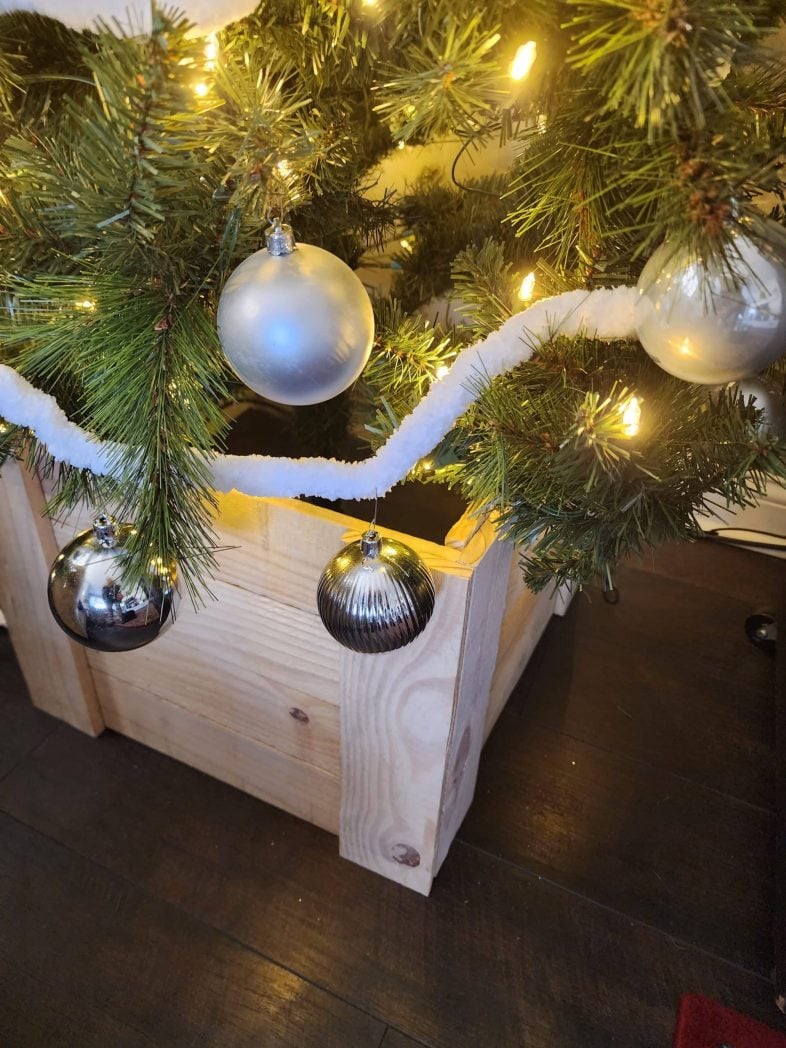
Pallet Wood Christmas Tree Collar
I quickly took two panels of the tree collar into the house to ensure they fit under the Christmas tree.
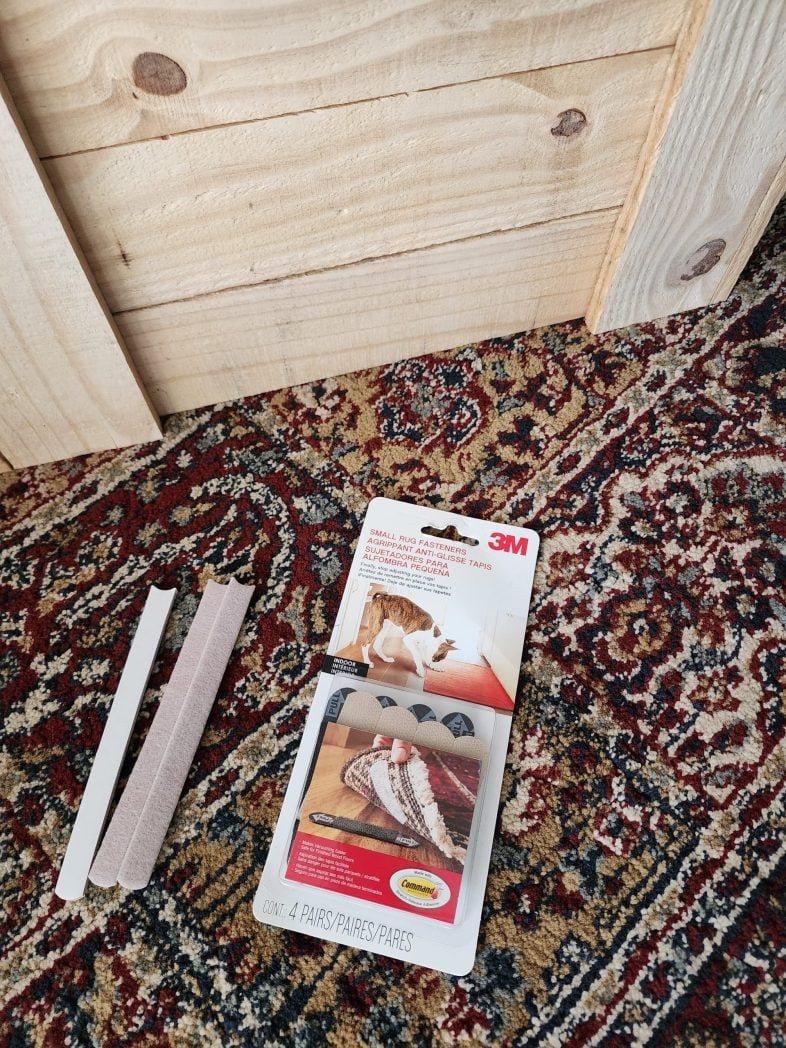
Now that my panels are complete, I can attach them using command rug Velcro. I used “rug” Velcro because it’s what I had on hand. I also use a few adhesive felt strips to protect my floor from scratches.
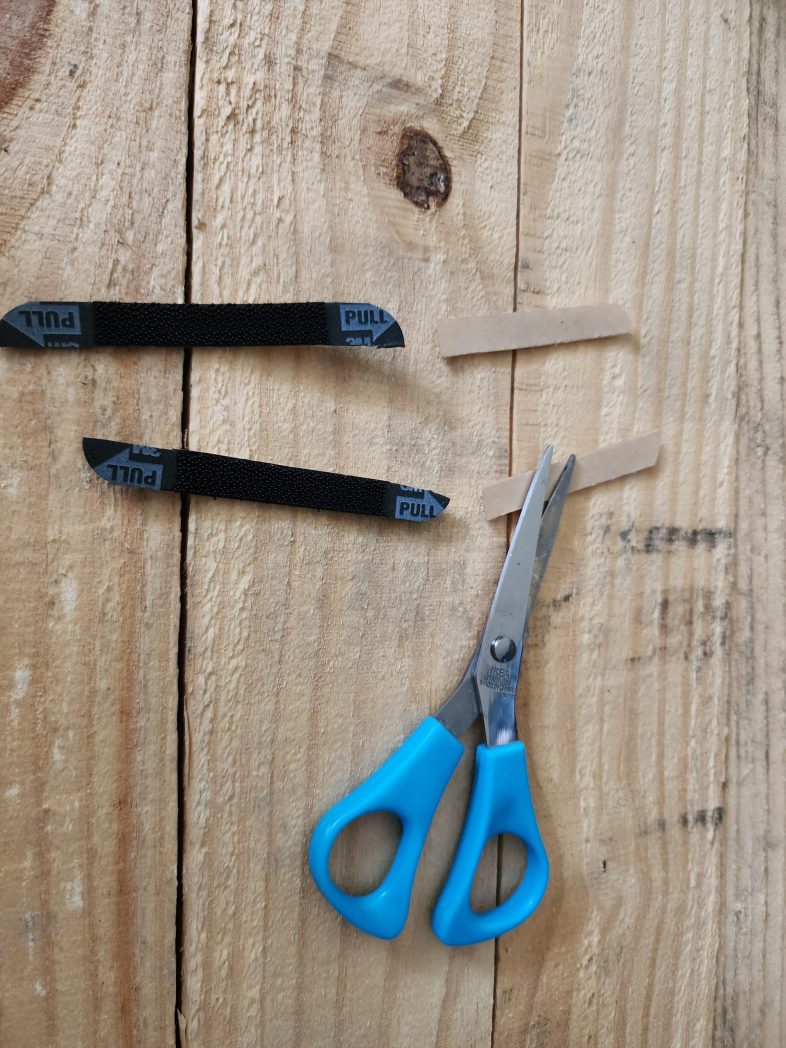
First, I cut the velcro strips to size, giving me two pieces for each corner.
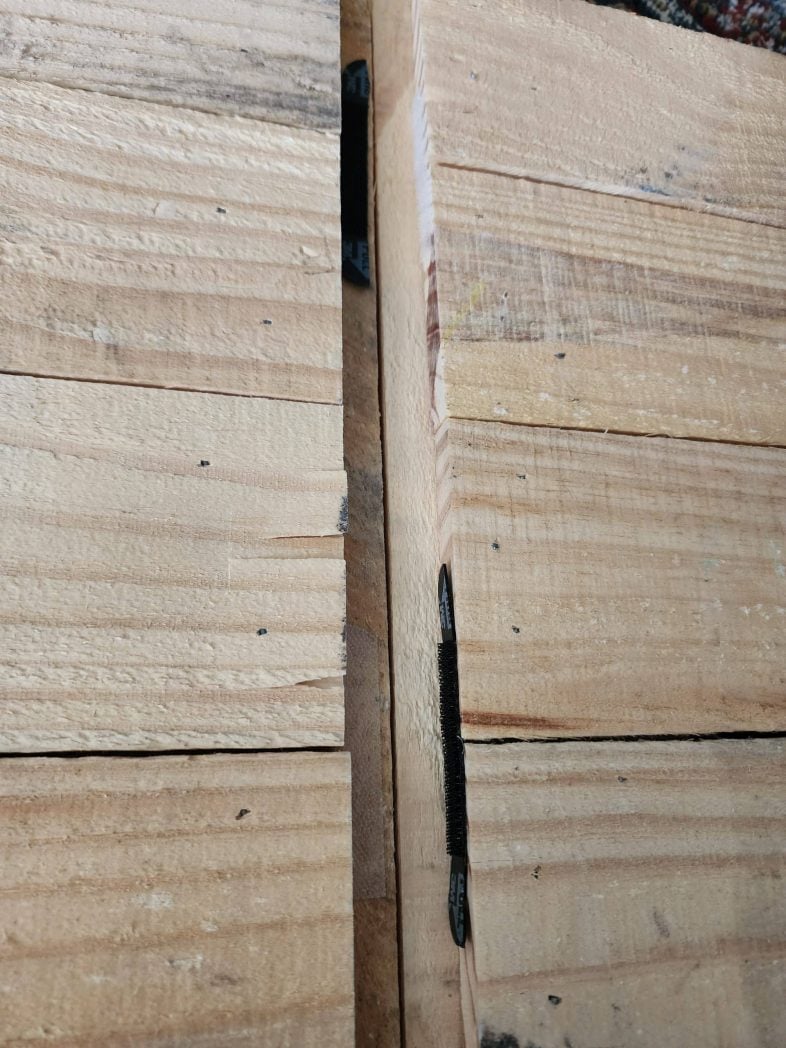
I hope you can see how I applied the Velcro strips. You can see the black hook piece and a tan loop piece on the right-hand side. Instead of putting both black pieces on the same panel, I switched them to get a better hold. The tan pieces are challenging to see, but I placed them directly across from the black pieces.
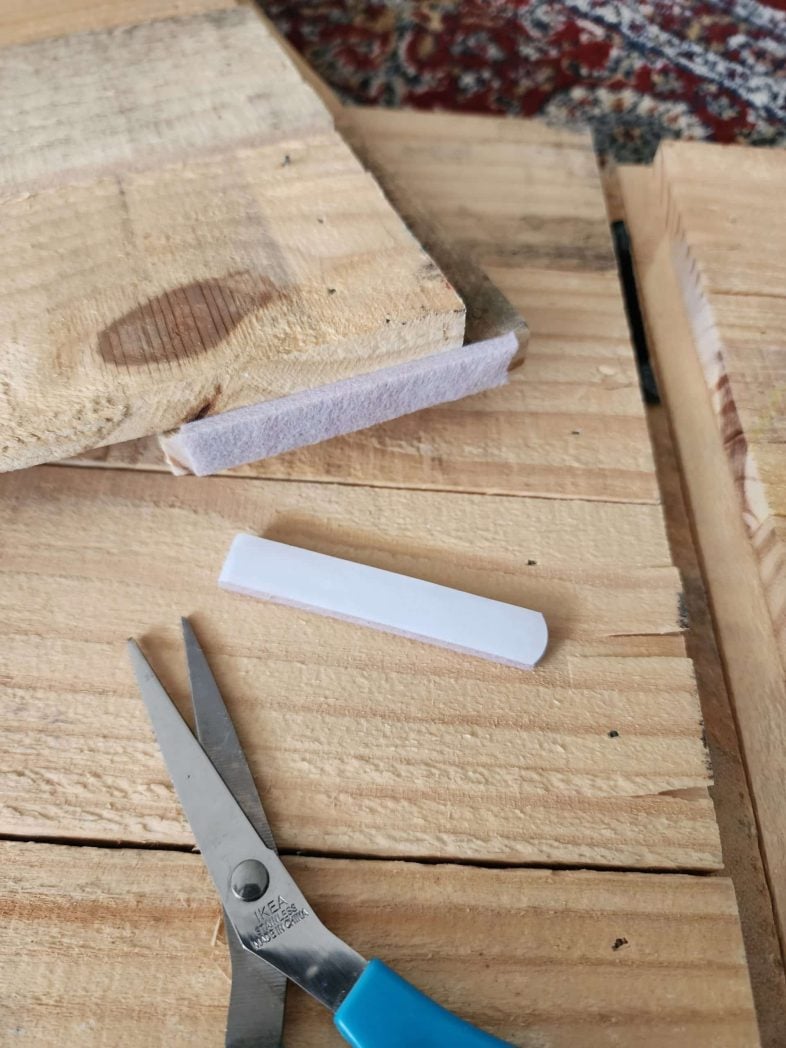
Now, it’s time to add the protective felt strips. I cut each long strip in half, giving me six pieces, two for each panel.
The pads raise the tree collar slightly off the floor.
Options to Make Your Own Wooden Tree Collar
What wood can you use?
The lumber amount for each option will depend on the size of the tree collar you need to make.
- Pallet Wood (what I used)
- New Lumber 1×3 boards
- Picket Fence boards (new or reclaimed)
- Dogeared Fence boards (new or reclaimed)
- Hardwood Flooring (new or reclaimed)
Assembly Options
- Brad Nails and nail gun (what I used)
- Wood Glue
- Wood Screws
- Staples
Paint & Stain
- Raw wood (what I did)
- Stain Cloths (fast and easy)
- Wood Stain
- Tongue Oil
- Clear Sealer
- Chalk Paint
- Latex Paint
- Whitewash (make your own)
How to attach tree collar panels
- Hook & Loop (velcro, what I used)
- Hinges (removable pins will allow the box to fold flat)
- Super Magnets
- Double Sided Tape
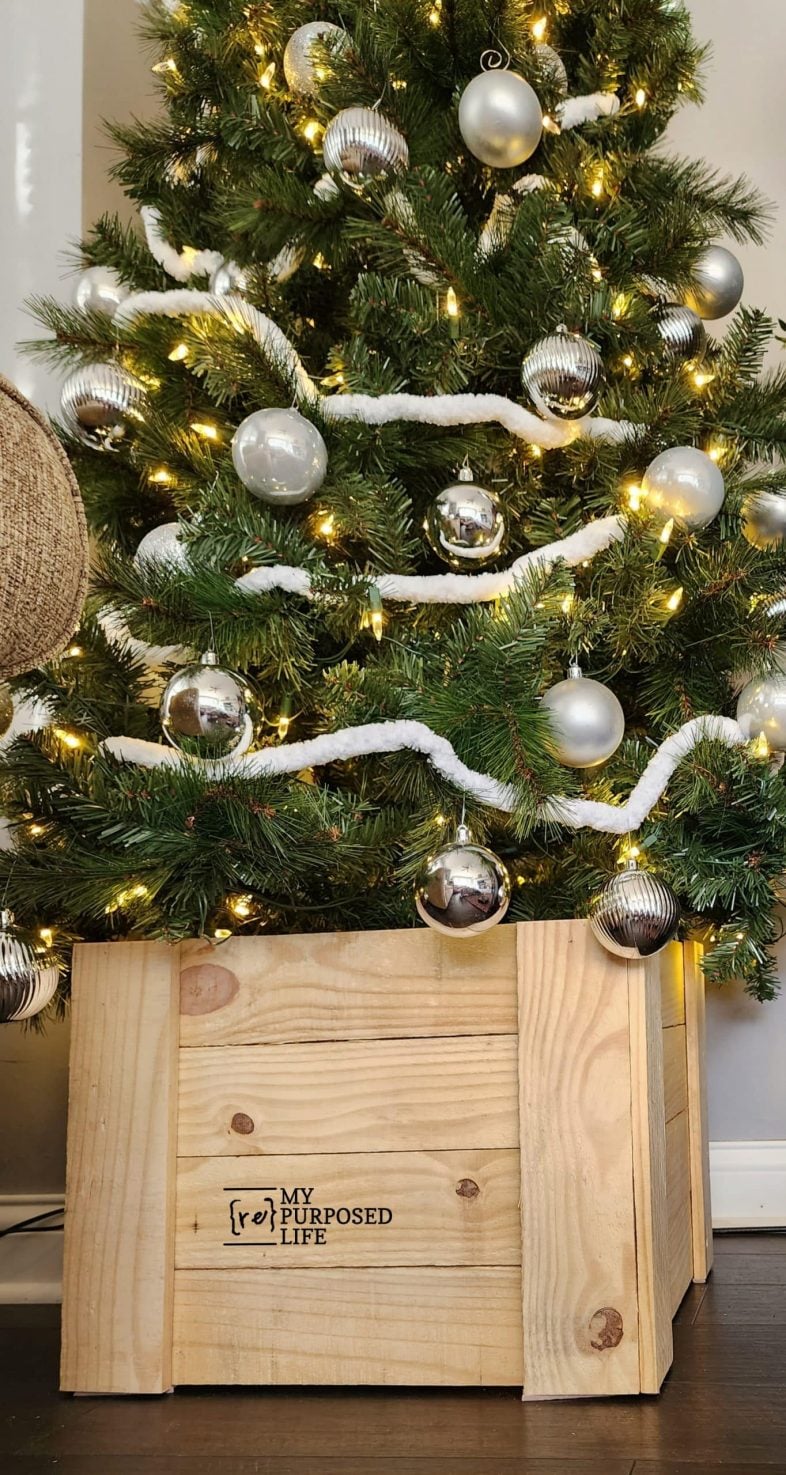
The weather was freezing, so I took the easy route in multiple ways. I didn’t make the tree collar as fancy as the first one I made a few years ago. I only made three sections because I had all the “matching” pallet boards. On a final note, I chose not to paint or stain it. After test-driving it under the tree, I like the raw wood look.
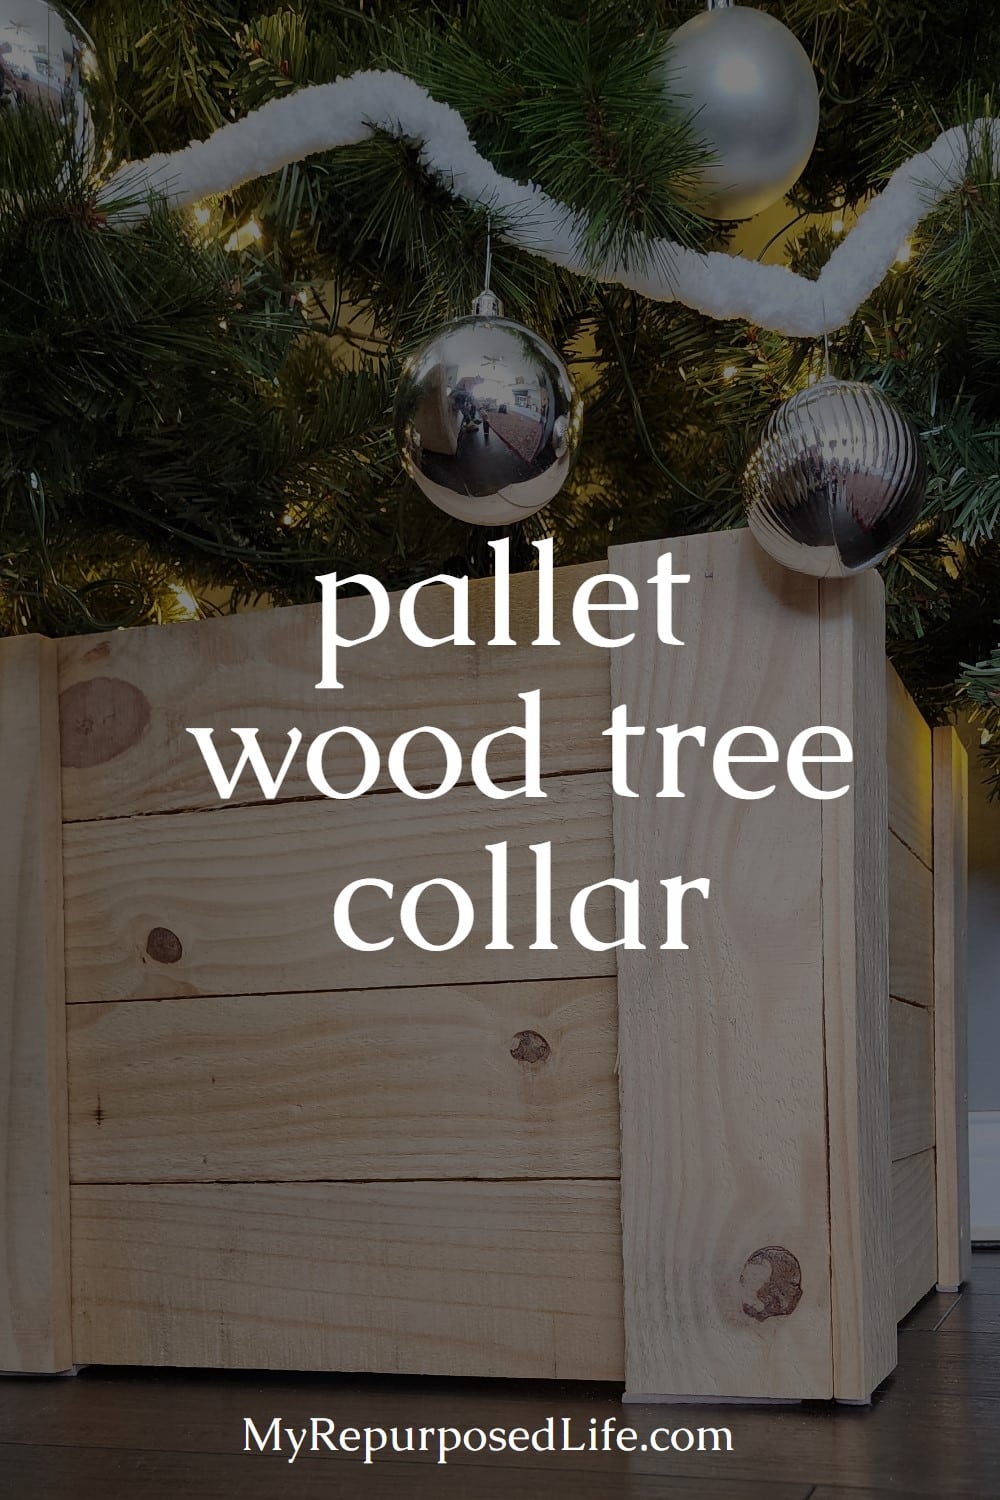
A handmade pallet wood tree collar is an easy way to upgrade a Christmas tree without buying new décor every year. Use reclaimed pallets, fence boards, or new lumber, then finish the wood with stain, paint, or a clear coat that fits your holiday style. Once the panels are attached around the stand, the floor is protected, and the cords are hidden, the whole tree looks more finished and cozy. Keep this idea in mind any time a tree stand needs cover, from a full-size tree in the living room to a slim tree in a hallway or bedroom.
Now that is really cute!! Very nicely done! Merry Christmas & a Happy New Year!!!
Thank you so much Shirley! Merry Christmas to you, and a very happy, and healthy new year.
gail