Pencil Transfer Method
As an Amazon Associate, I earn from qualifying purchases.
Sometimes the simplest techniques make the biggest difference. This easy pencil transfer method is a great way to add personality to a plain thrift-store find without fancy supplies or special equipment. Whether you want to dress up a stool, a sign, or a small piece of furniture, this budget-friendly project shows how easy it is to turn something ordinary into a one-of-a-kind piece.
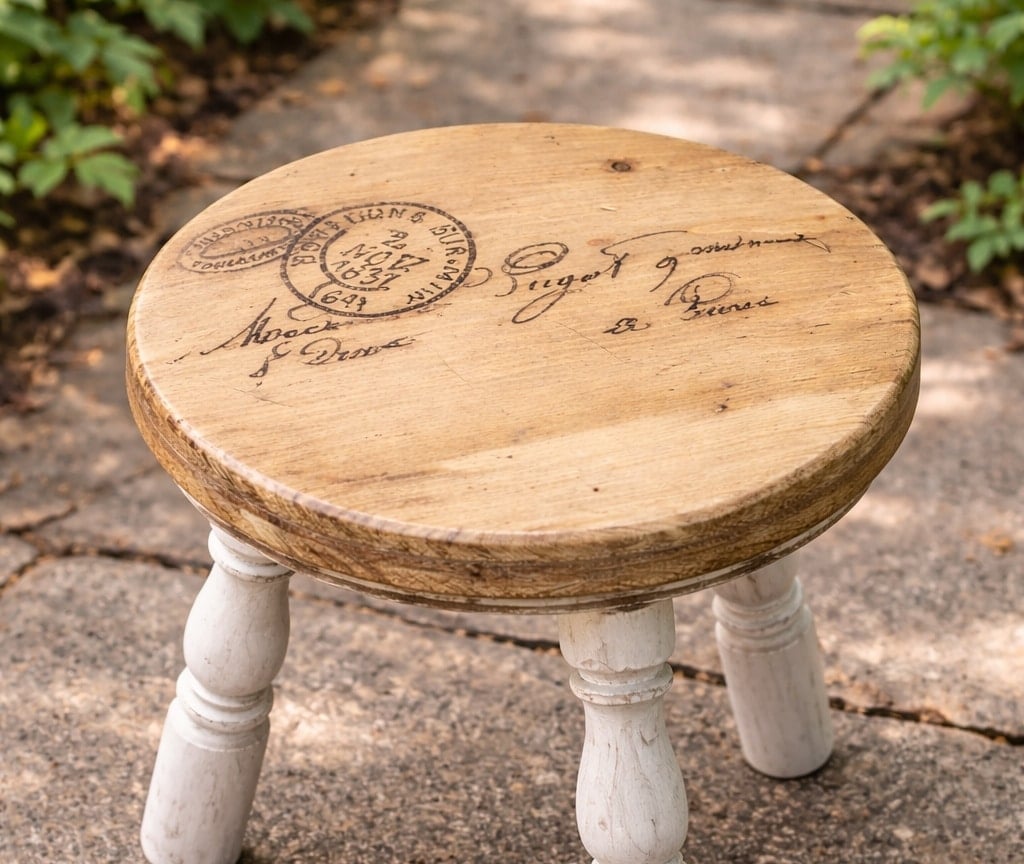
Have you done an easy pencil transfer for a graphic or simple image? I used a thrift-store stool and a French Image from The Graphics Fairy for a fun makeover project.
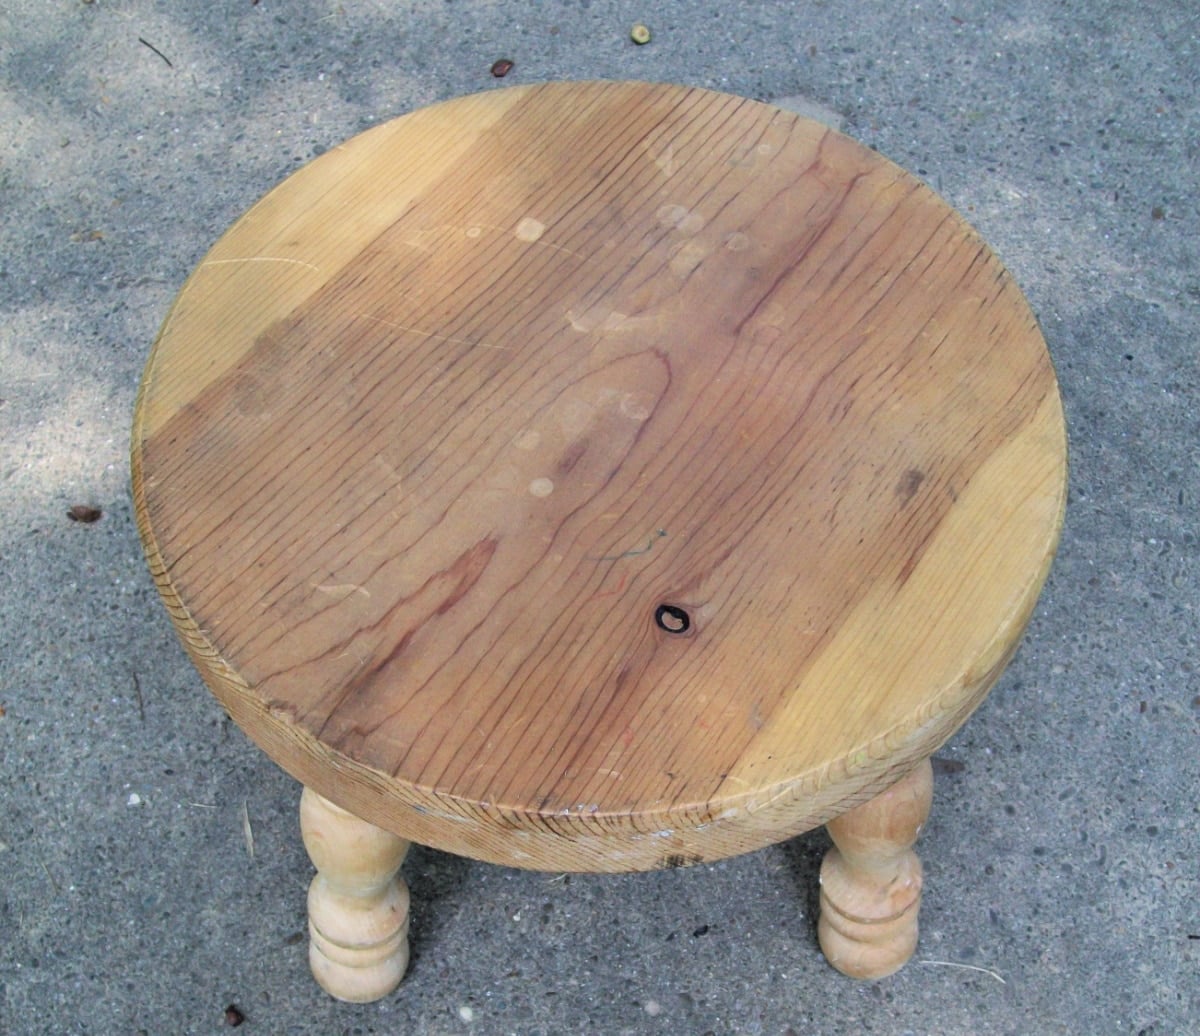
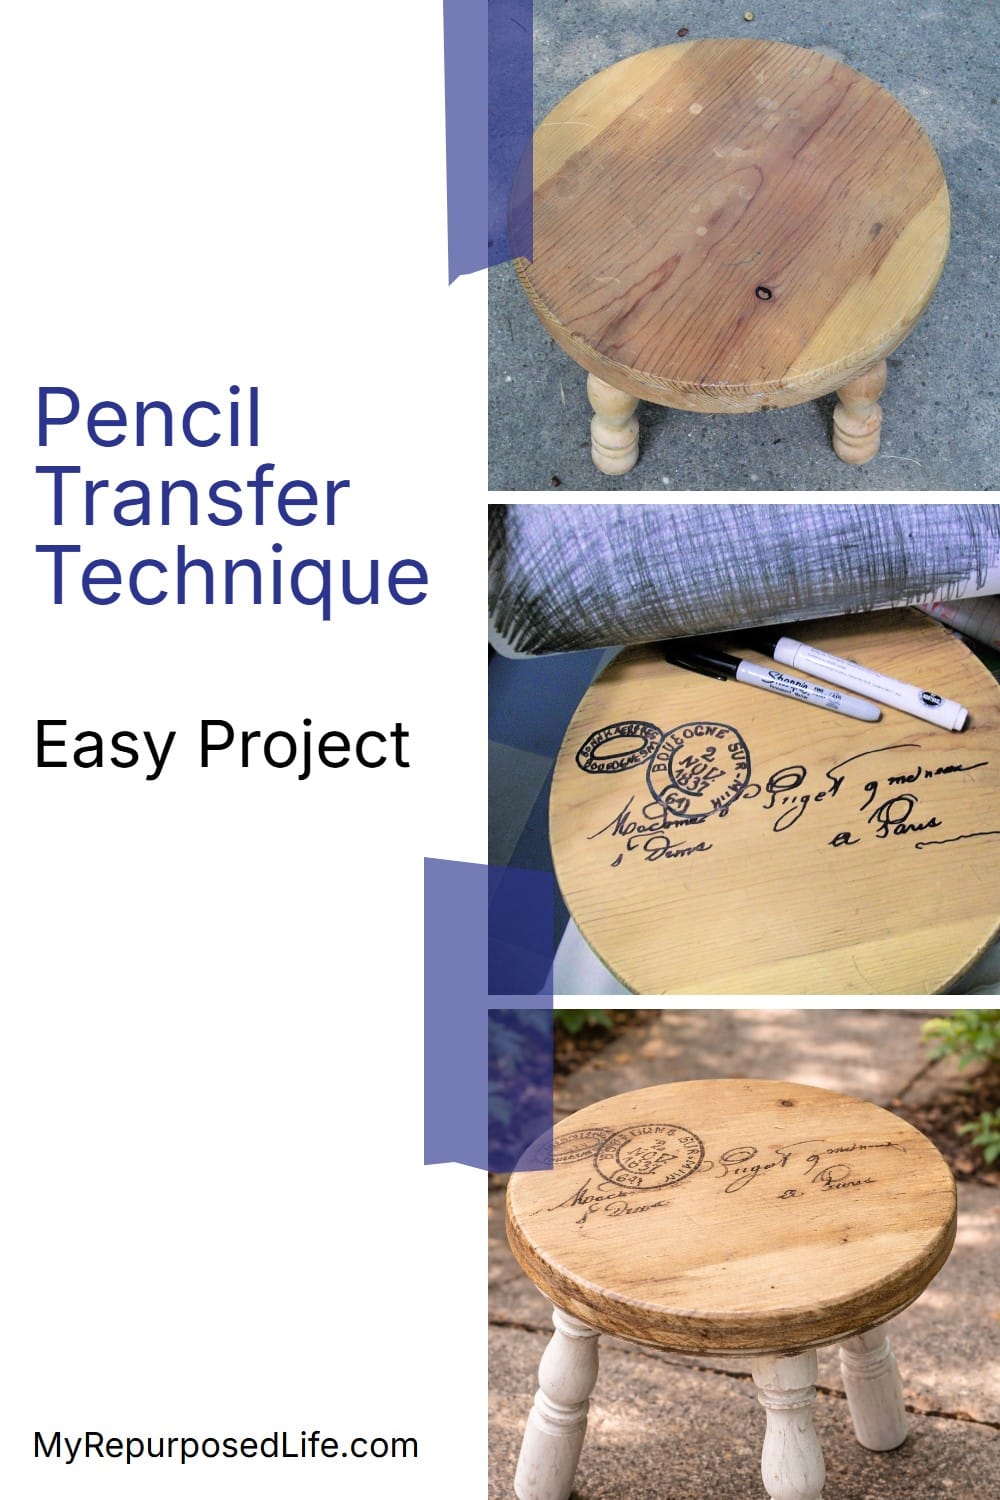
Small wooden stools are perfect for those of us who may be just a little too short to reach that top shelf! This little guy was only $3.99. I love the great bones. I thought it had real potential to do an easy pencil transfer.
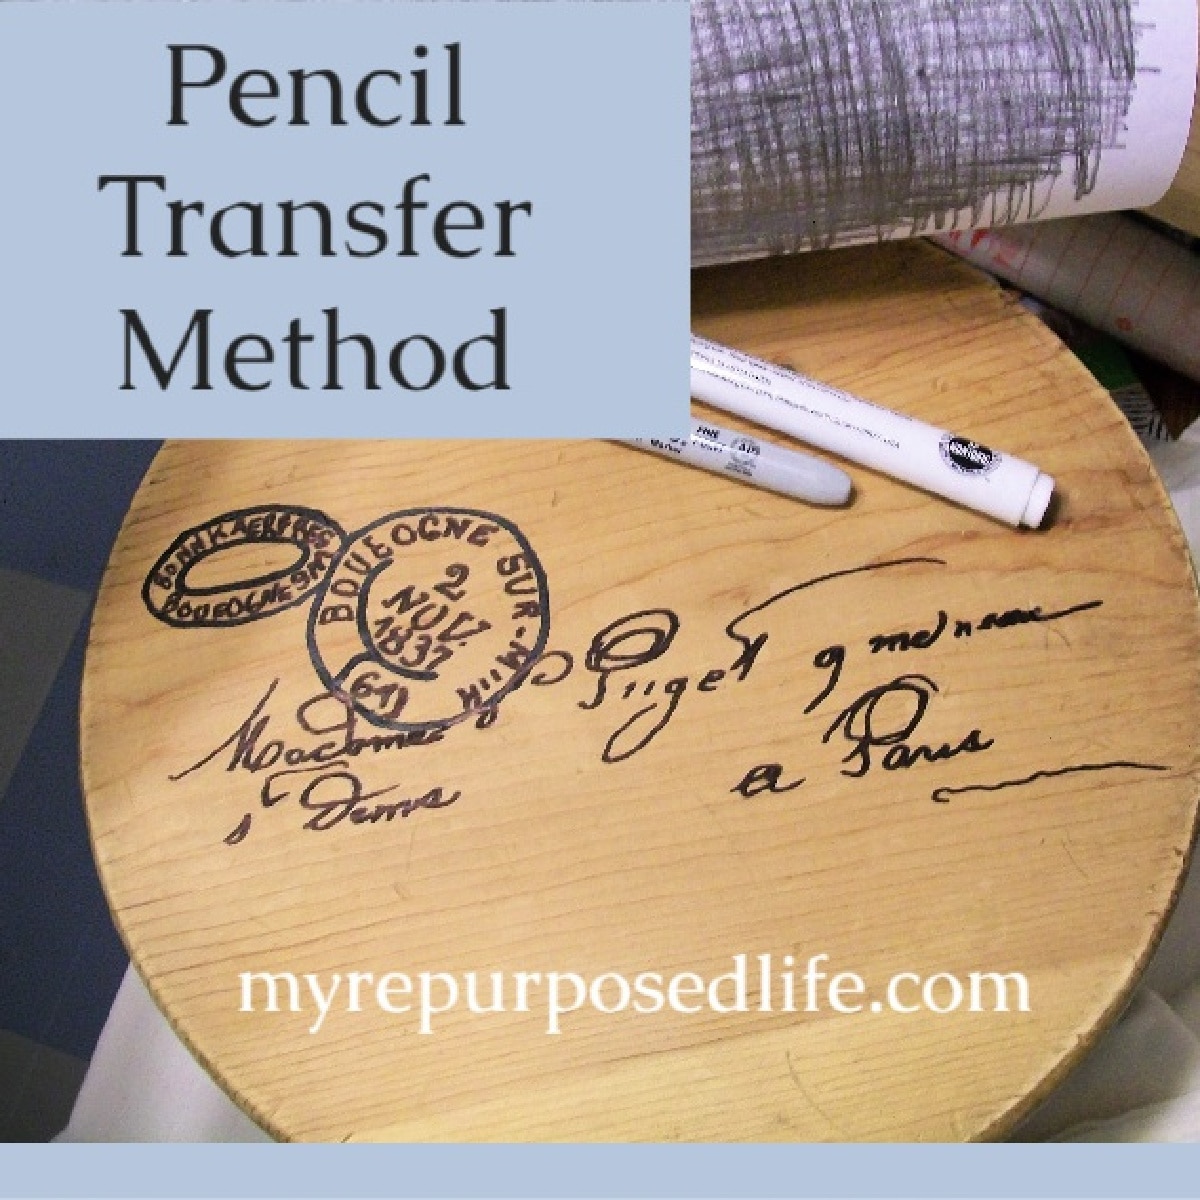
Graphics Fairy Image
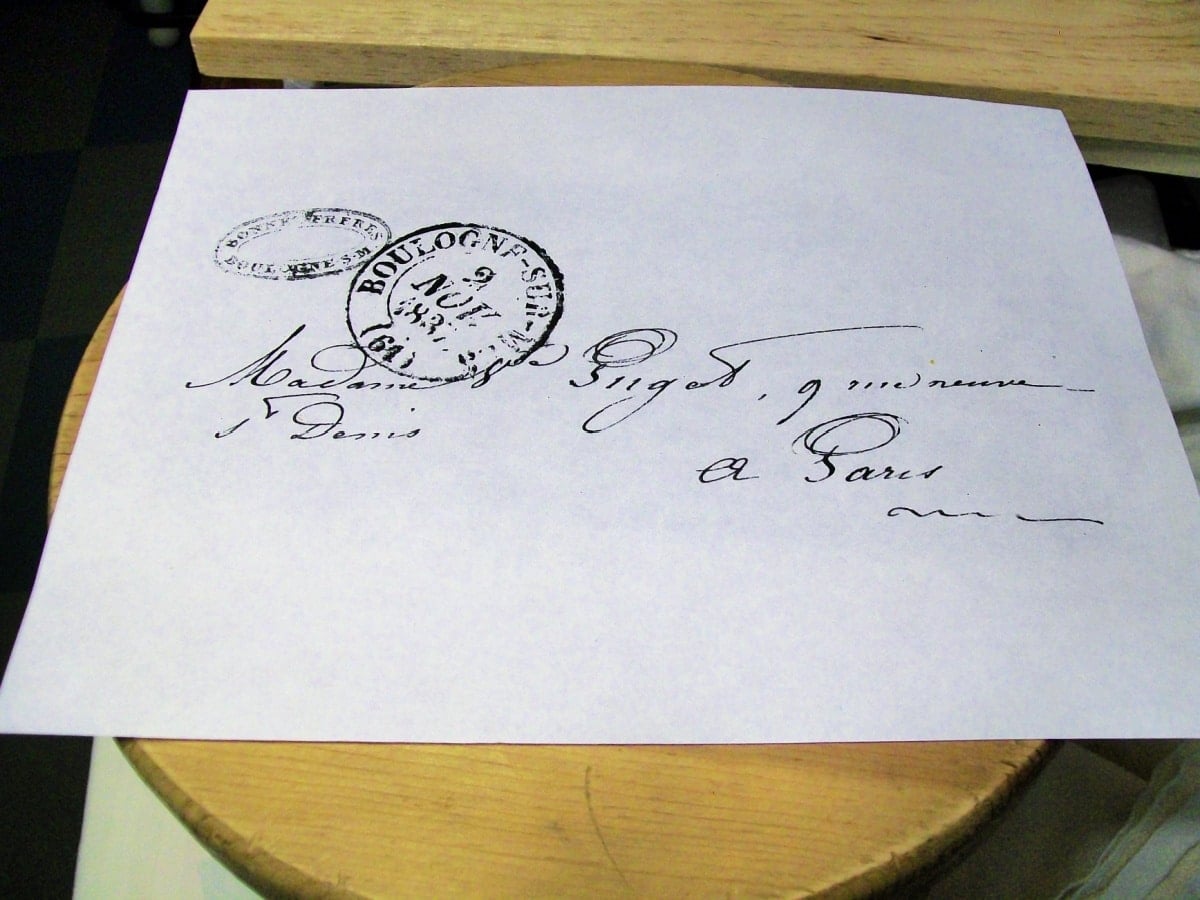
I got this great image from The Graphics Fairy. So easy, print it out, and you’re ready to go. No special tools or paper.
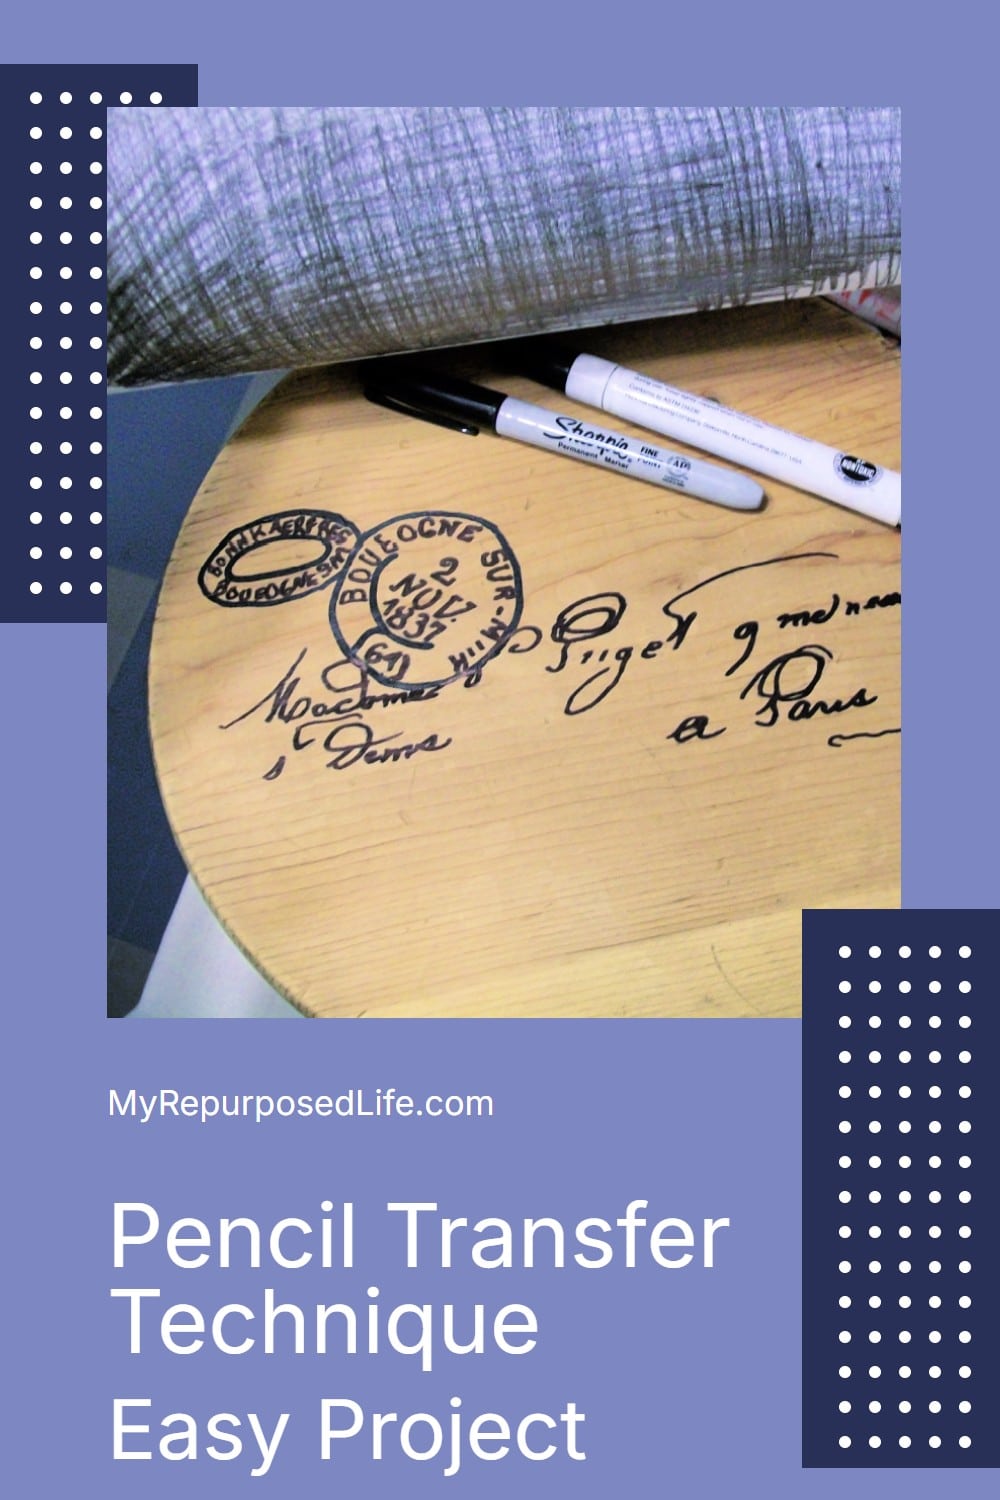
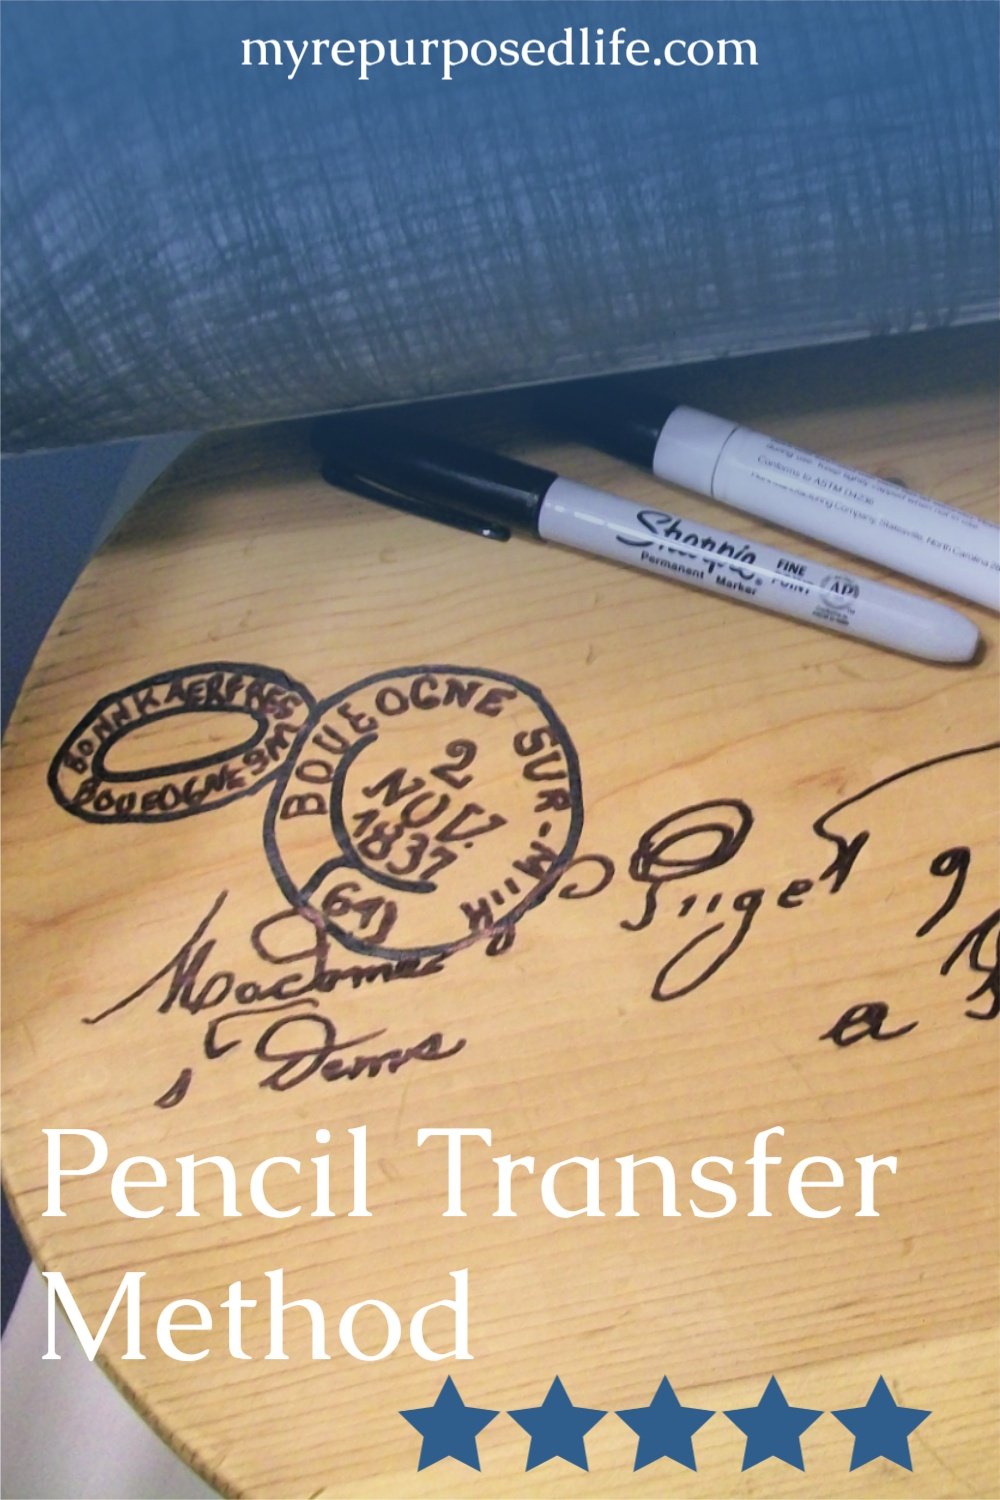
Pencil Transfer
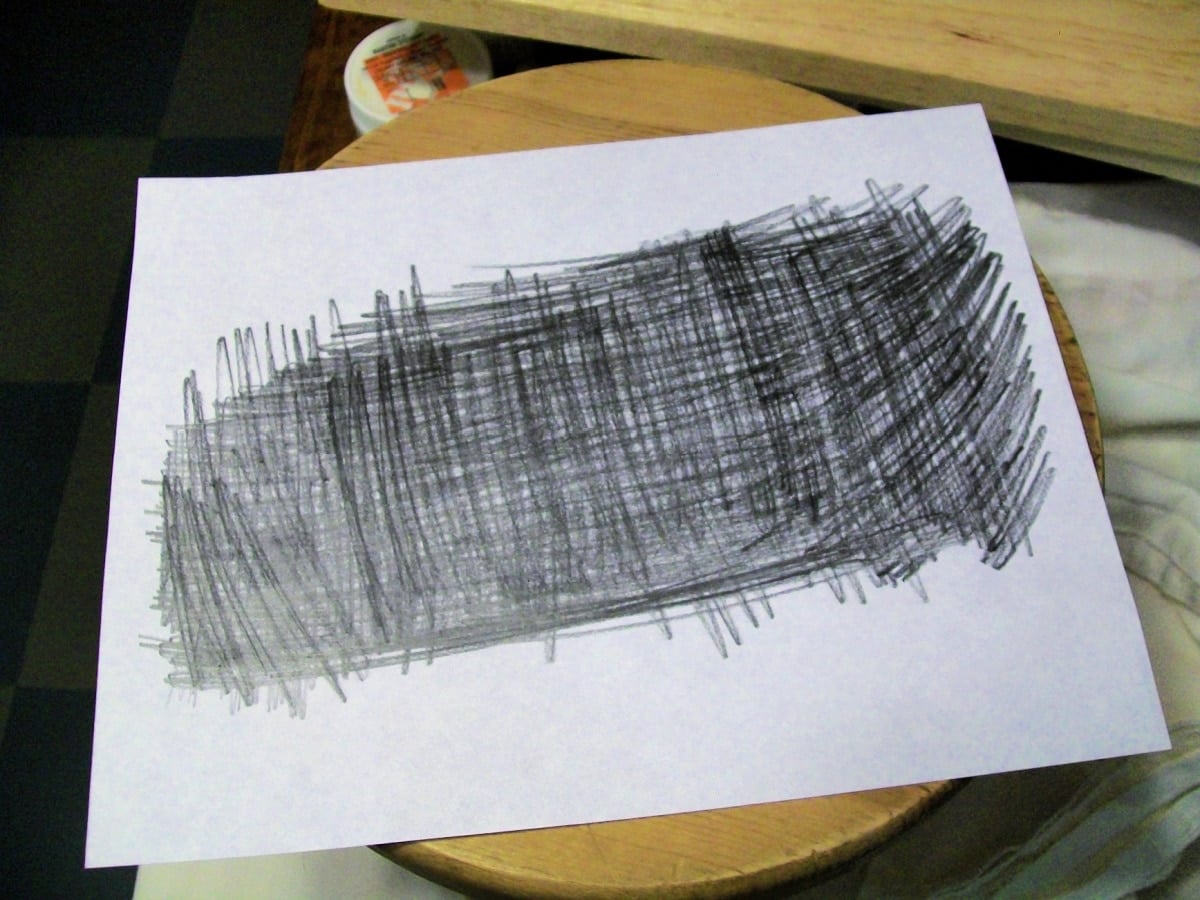
I rubbed the back of the paper with a pencil a LOT. North/South, East/West, and every which way in between.
Secure Transfer to Project
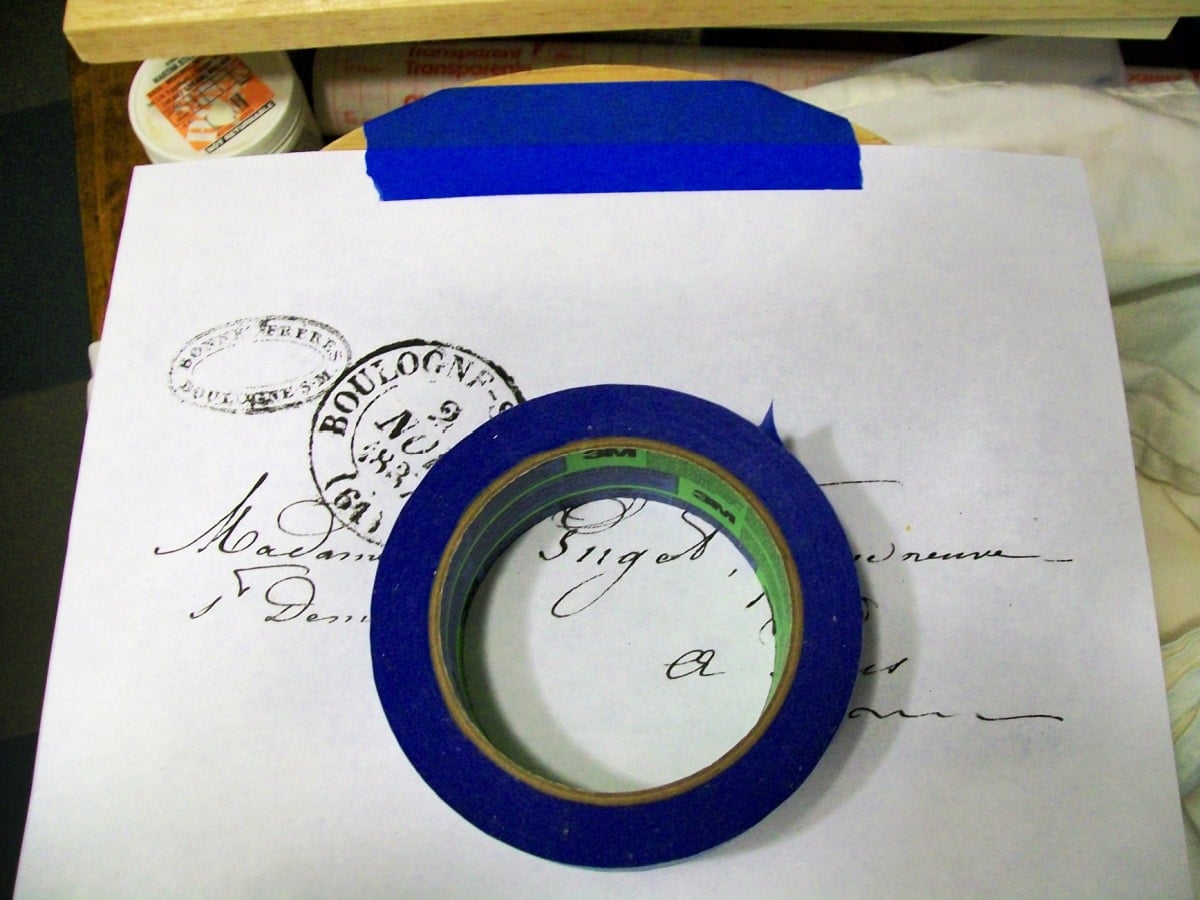
I taped it to the stool with some ScotchBlue Painter’s tape. Yep, I hinged it. I do this with a lot of stuff, including my vinyl. So if ever I mention “hinge,” you know what I mean. Using this method, you can easily lift the paper to check your image without worrying about placement.
Check Image Progress
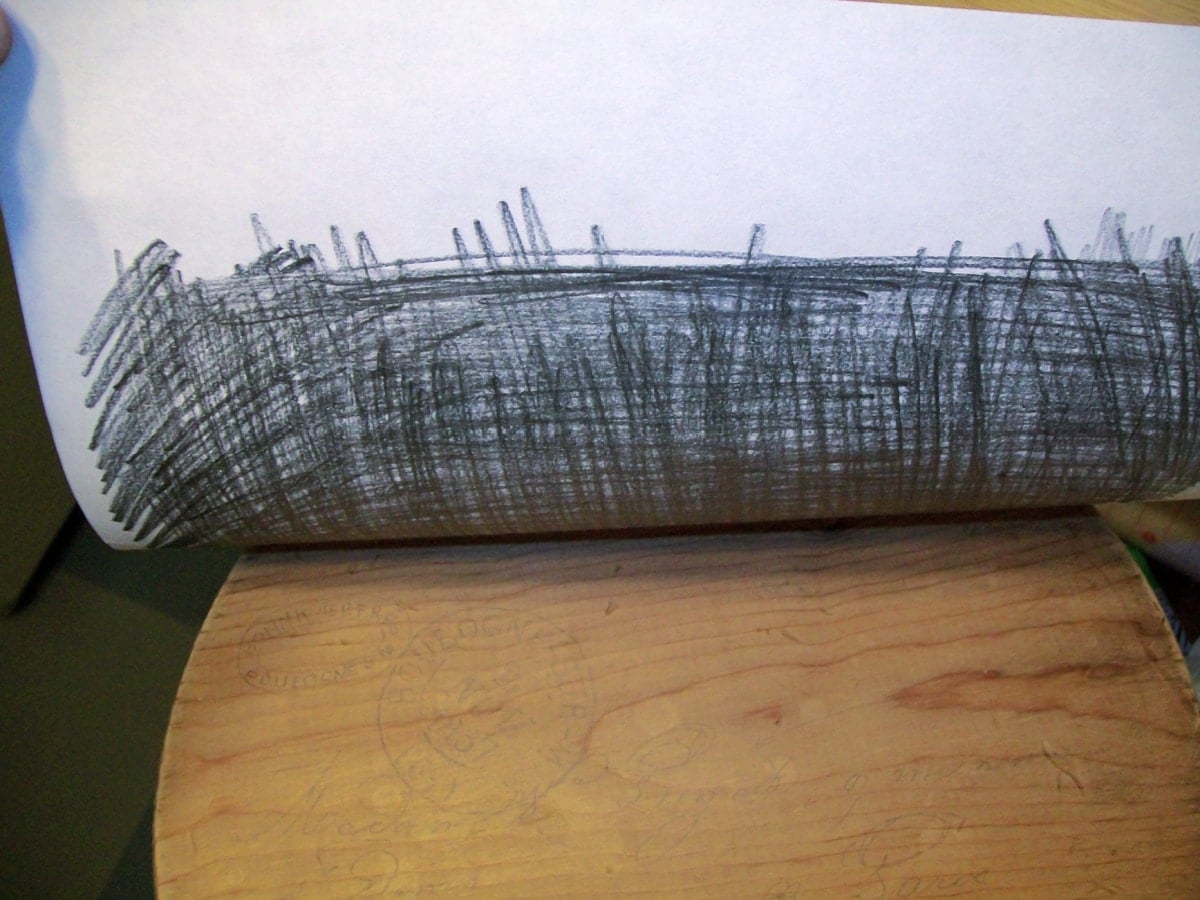
I used a ballpoint pen to trace the image, which in turn transferred it onto the stool. It works really well. As I said above, with the hinge in place, I was able to lift the paper to make sure it was transferring well enough. I should have used this method with the Vintage Ironing Board.
Embellish with Marker & Paint Pen
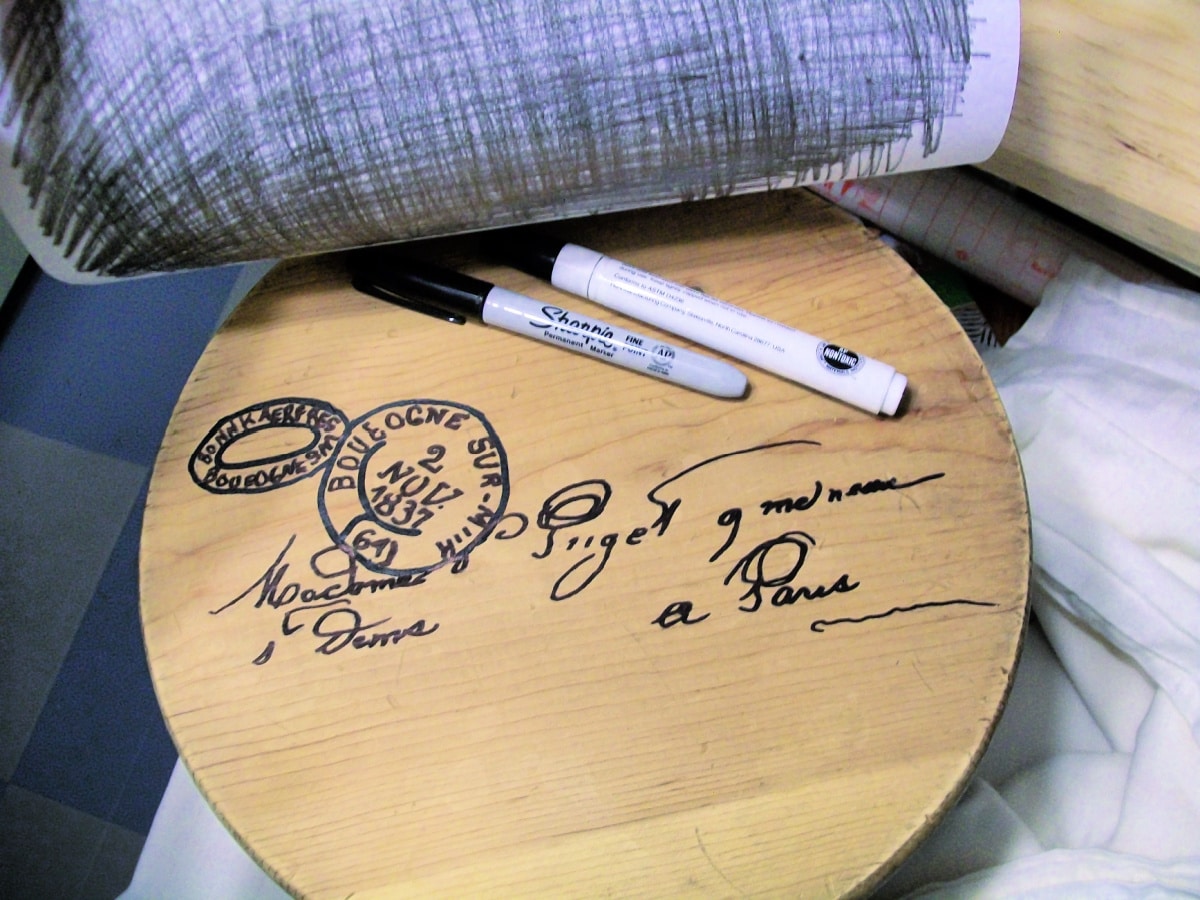
Here’s the best part: I then used a paint pen and a Sharpie to trace and color in the transferred image. It seriously doesn’t get any easier than this pencil transfer method!
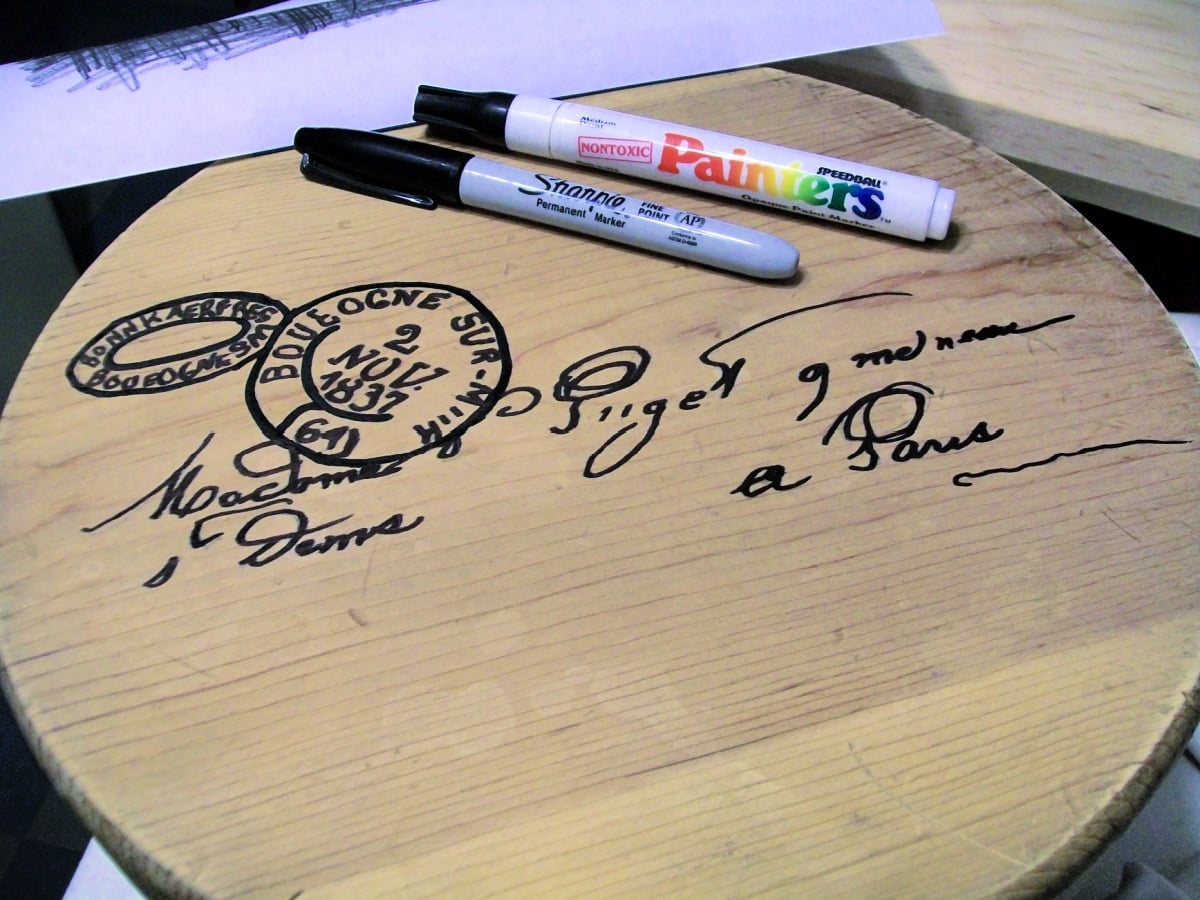
I really love, love, love how it turned out.
Paint and Stain
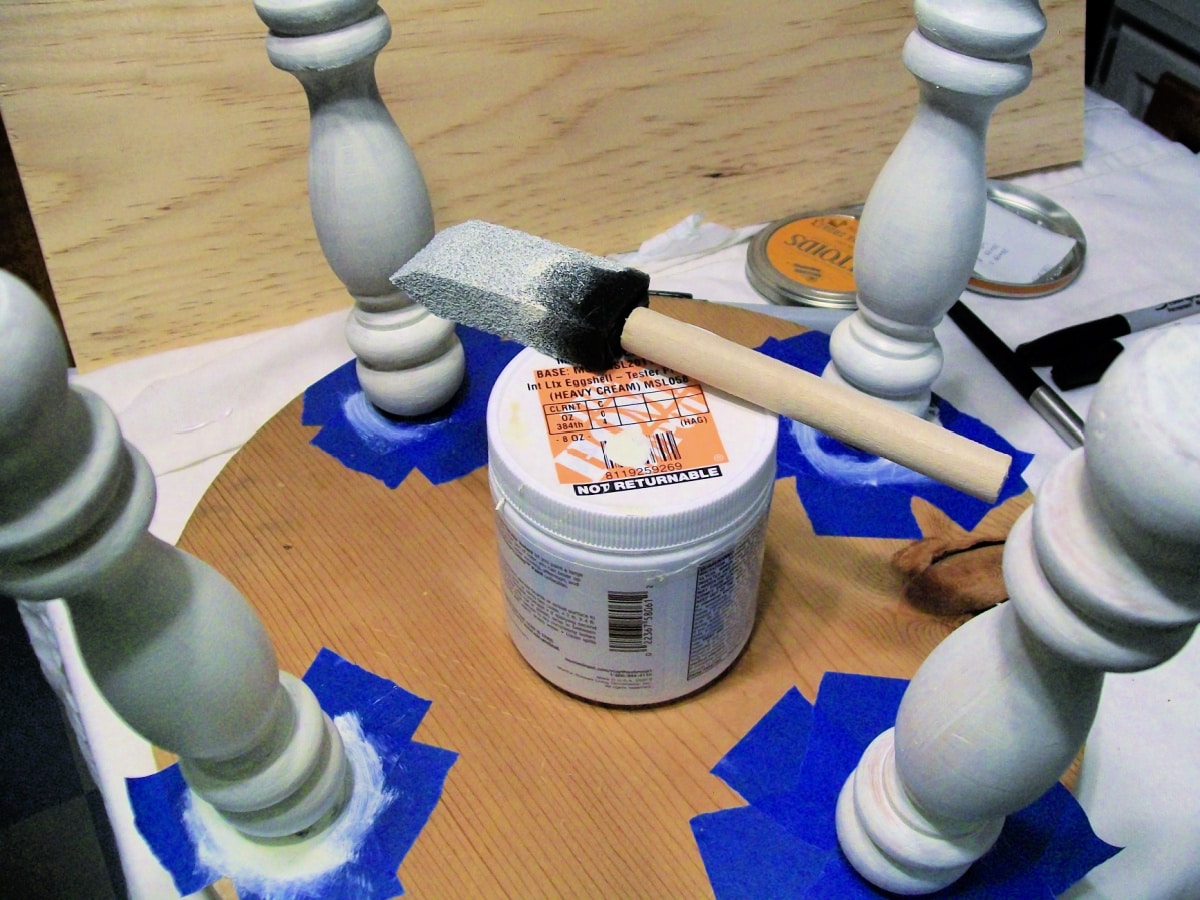
I wanted to paint the legs, since they had never been painted. (they were still in their natural wood state). But I knew I wanted to stain the stool, so I used painter’s tape to keep the paint off it.
I painted the legs with Martha Stewart Heavy Cream.
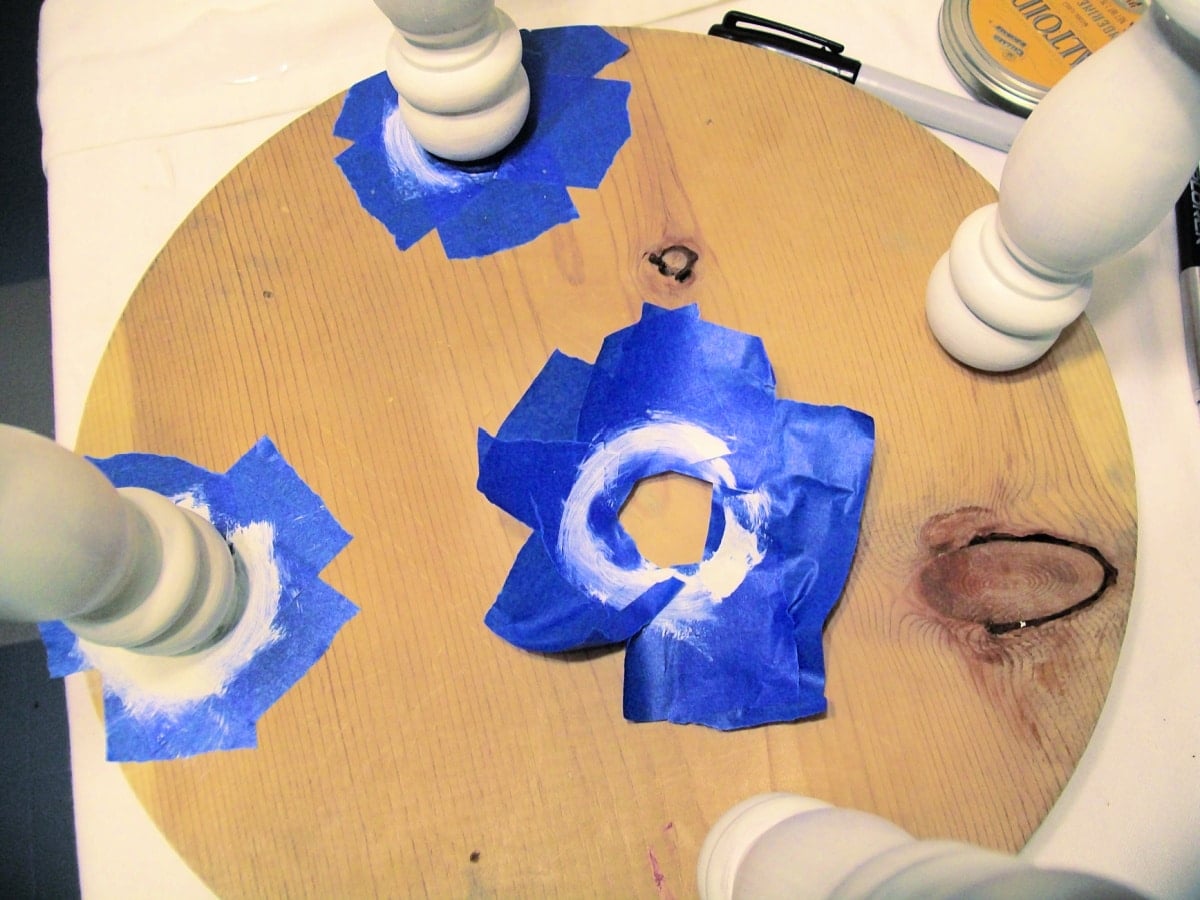
The painter’s tape came off easily, leaving great coverage on the leg but no oops on the stool! Of course, you can “cut in” and skip this step if you want to.
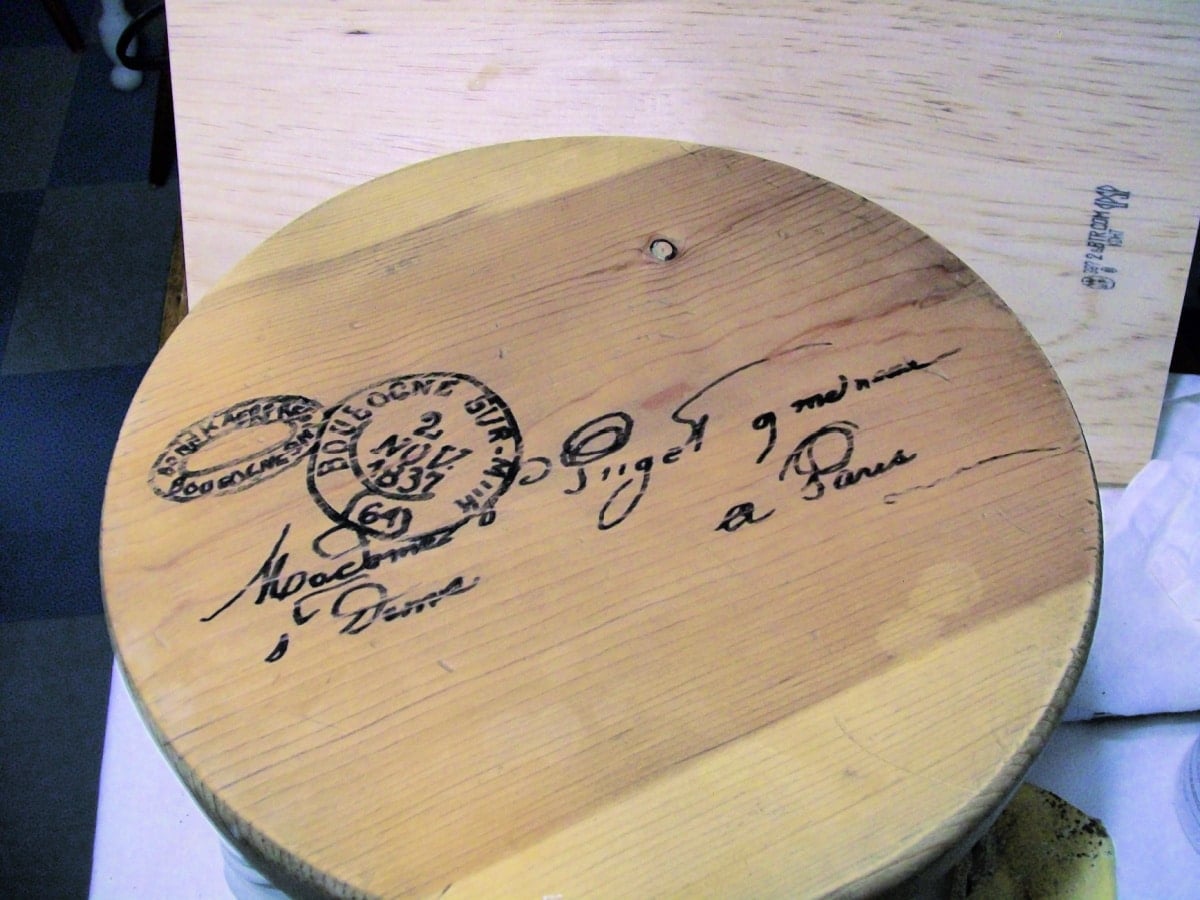
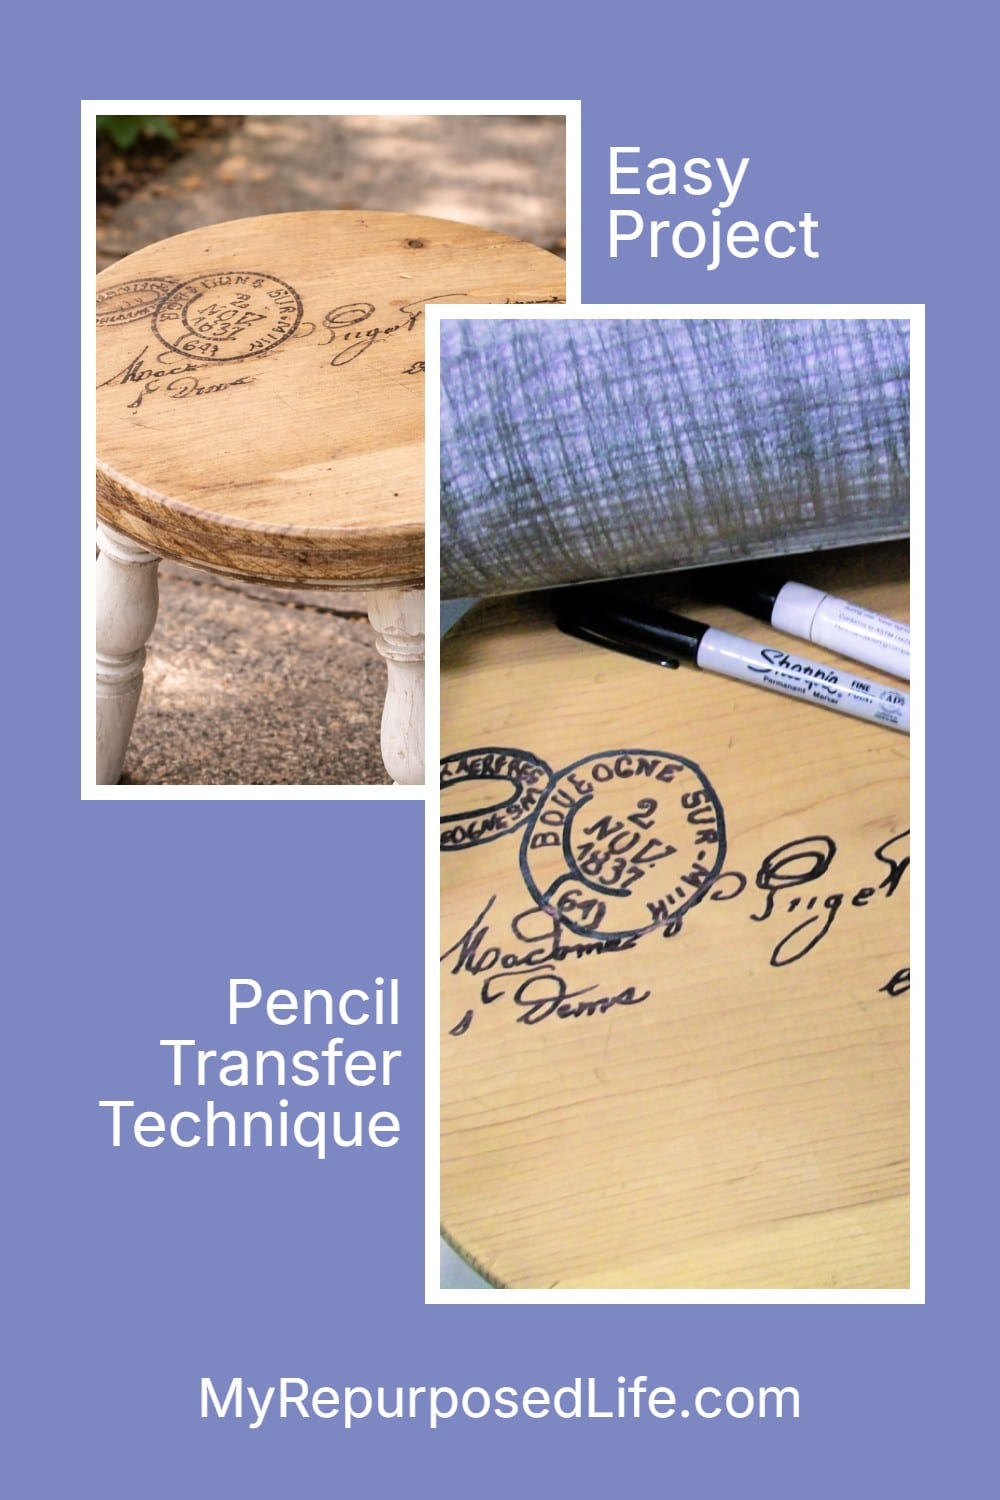
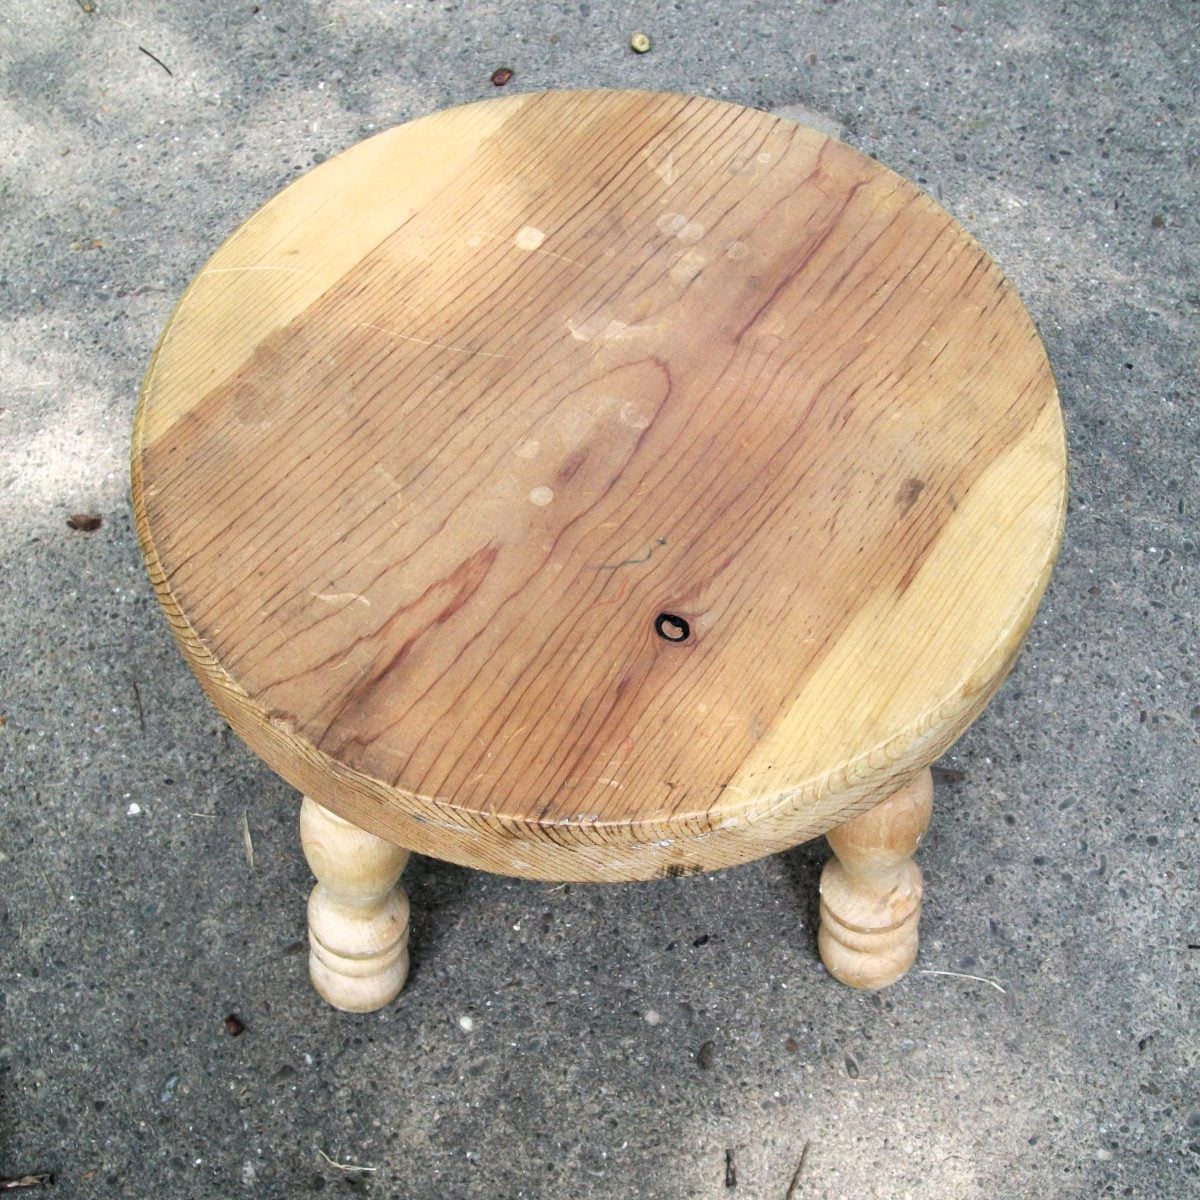
Now it’s time to stain the top. Mess it up. I love dark walnut, but it really was not the right option for this project. (hindsight 20/20-I think the real problem was NOT the stain, but the fact that I sanded too much of the paint off before adding the stain.) You can scroll up to see the difference in paint color.
So, if I ever do this again, I will do the pencil transfer, but . . . a) not sand the top b) use a clearcoat or a lighter stain.

This technique works so well because it is inexpensive, easy to control, and flexible enough for a wide range of projects. It gives plain furniture a custom look without the need for stencils, vinyl, or specialty transfer products.
Pencil Transfer Image Process on Small Stool
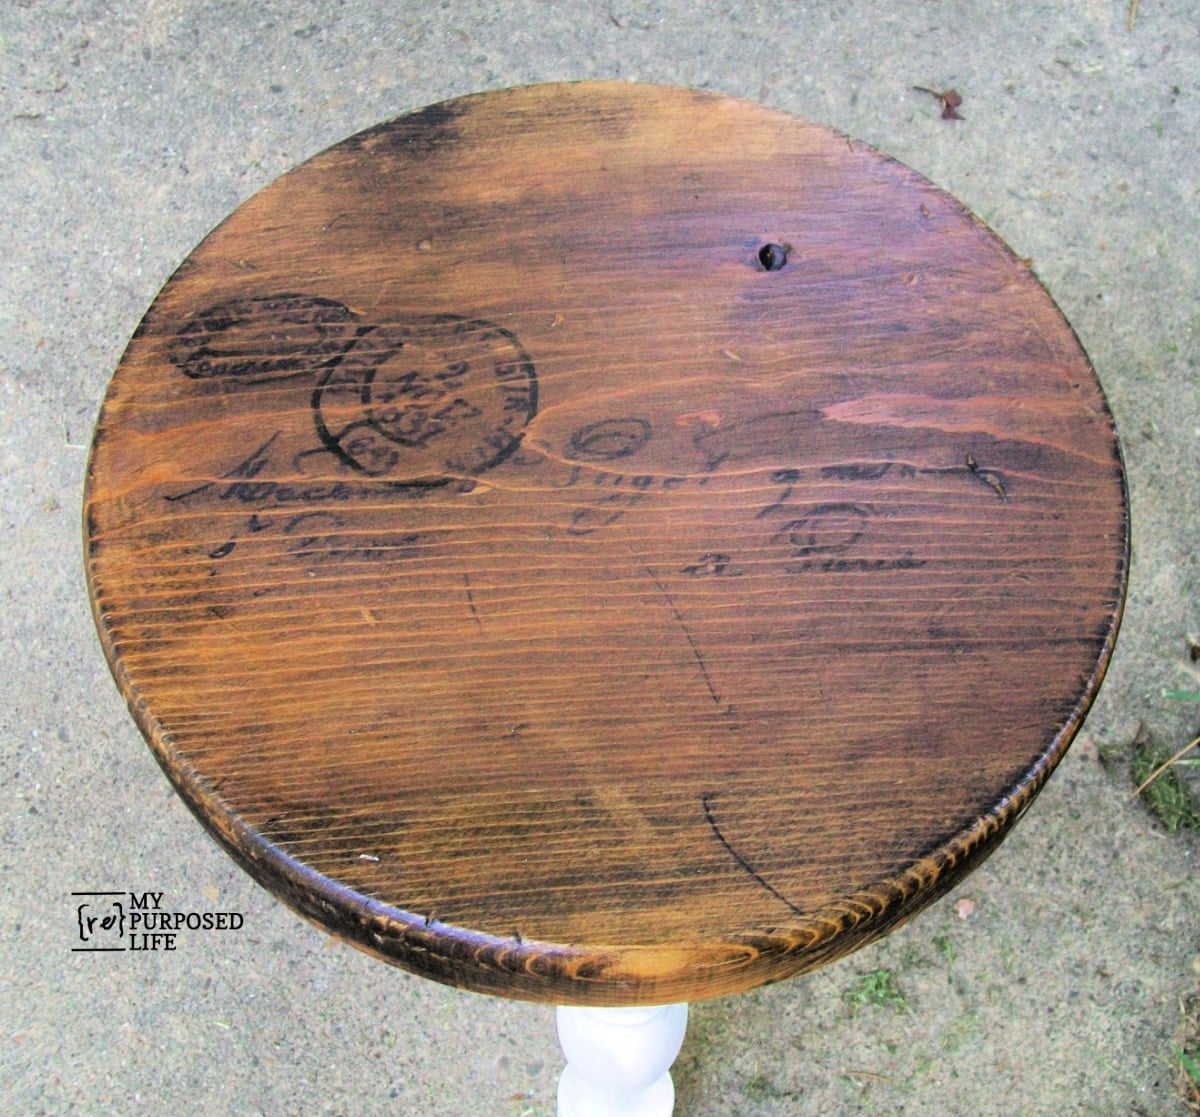
The image sort of gets lost. Not all projects turn out the way we envision, do they? It’s still a great little stool, I think I may keep it in the kitchen under my kitchen island so I can reach things up high.
Small Stool with a Beautiful French Graphic using a Pencil Transfer
This edited image shows how perfect it would have been had I used a sealer instead of a dark stain over the beautiful pencil transfer.
This project is a good reminder that you do not need a complicated process to create a custom look. A printed image, a pencil, and a little patience can completely change a simple piece. Even better, this technique can be used on so many surfaces, which makes it one of those handy DIY tricks you will want to keep in your back pocket.
This is such a great project and so easy! I did this years ago, and I can’t remember on what, but I loved the outcome! Thanks for sharing, you are so very talented!
Oh my goodness! No techie issues. No malfunctioning printers. I love this method. So easy. Pinned!
Yes! I agree, really so easy, and so many possiblities with this pencil transfer method.
Thanks Sue!
How smart!! I’ve never tried the pencil transfer method, but now that idea will be bouncing around in my head.
Sarah,
How do you have room for one more thing bouncing around in your head? Let me know if you try this on a future project.
gail
I love this technique. I have never tried it because it seemed to complicated, but with your little hinge trick, I think I might just have to give it a try.
I can’t write pretty, but I can trace! Thanks for stopping by! Let me know if you try this Pencil transfer technique.
gail
Turned out so cute! Questions: was there any problem with the sharpie or paint marker smearing when you stained the top of the stool? How long did you let it dry/cure before staining & what type of stain did you use?
Shirley,
All very good questions. No, there was no bleeding or smearing of the maker or paint pen. I used a regular walnut stain such as Minwax. Letting the paint and marker dry overnight should be sufficient. Perhaps my didn’t bleed because I sanded it back a little before staining?
gail