Petite Headboard Bench
As an Amazon Associate, I earn from qualifying purchases.
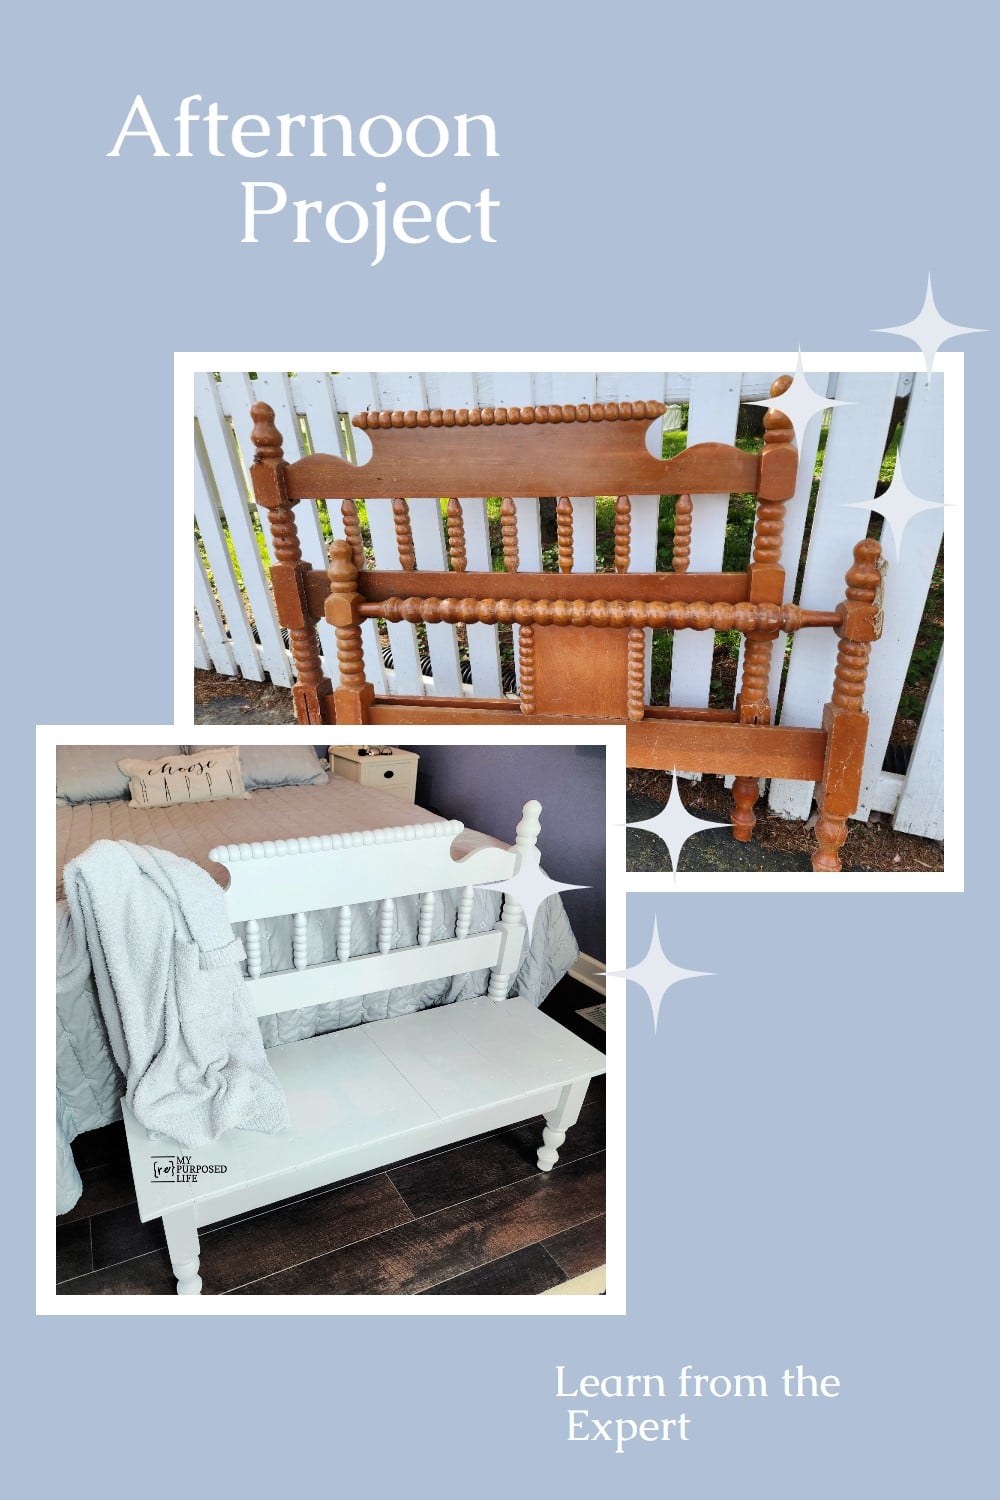
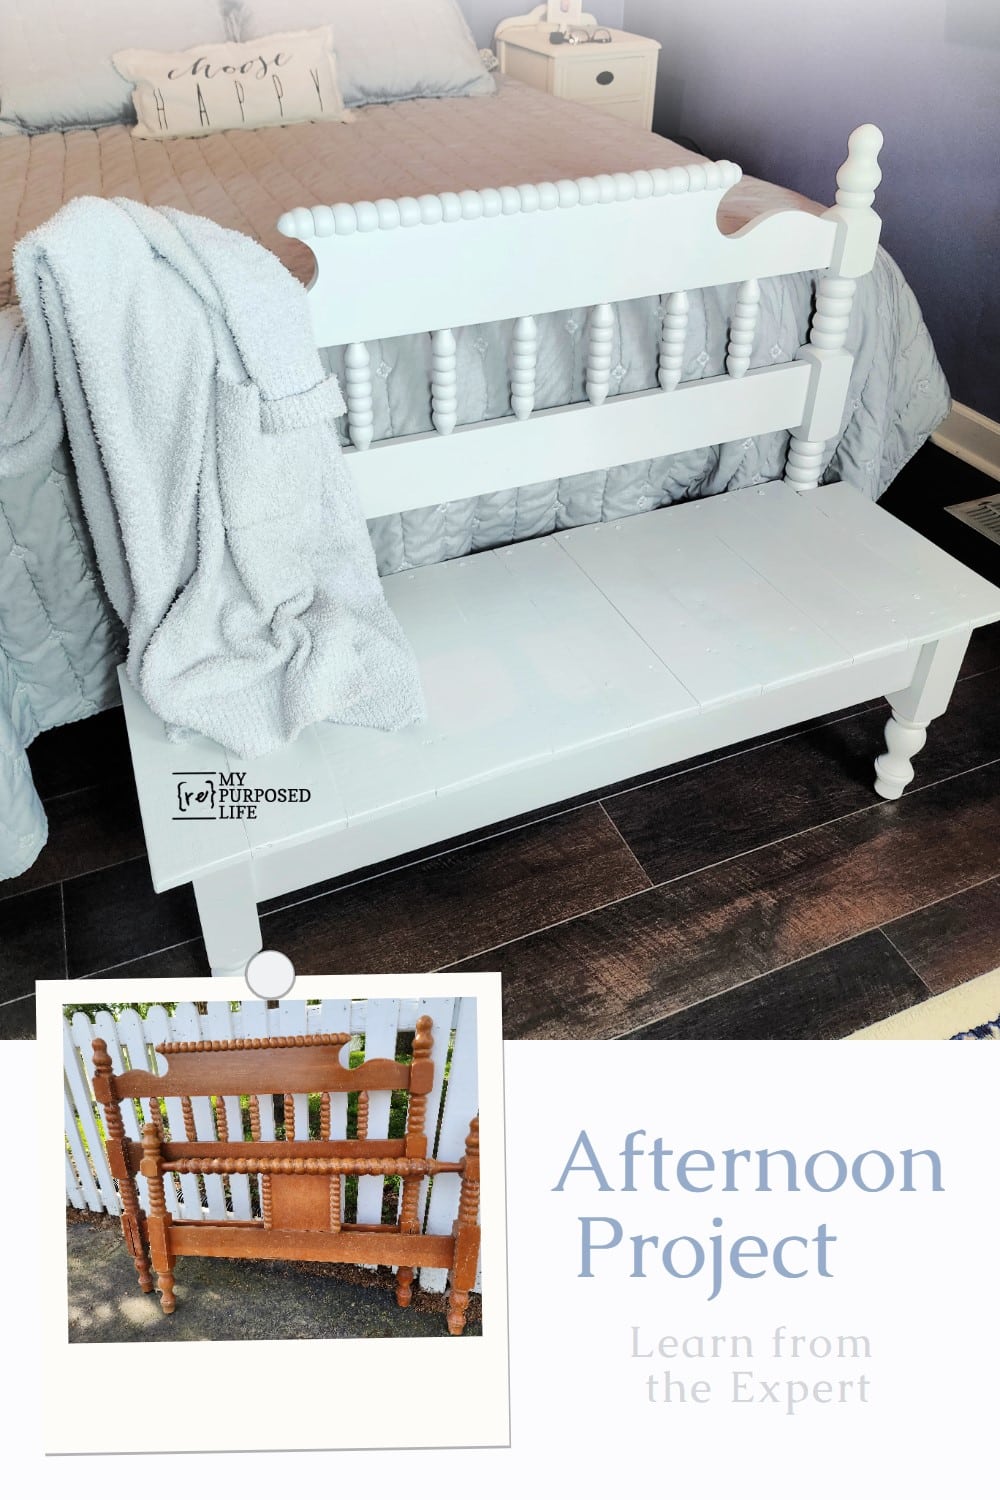
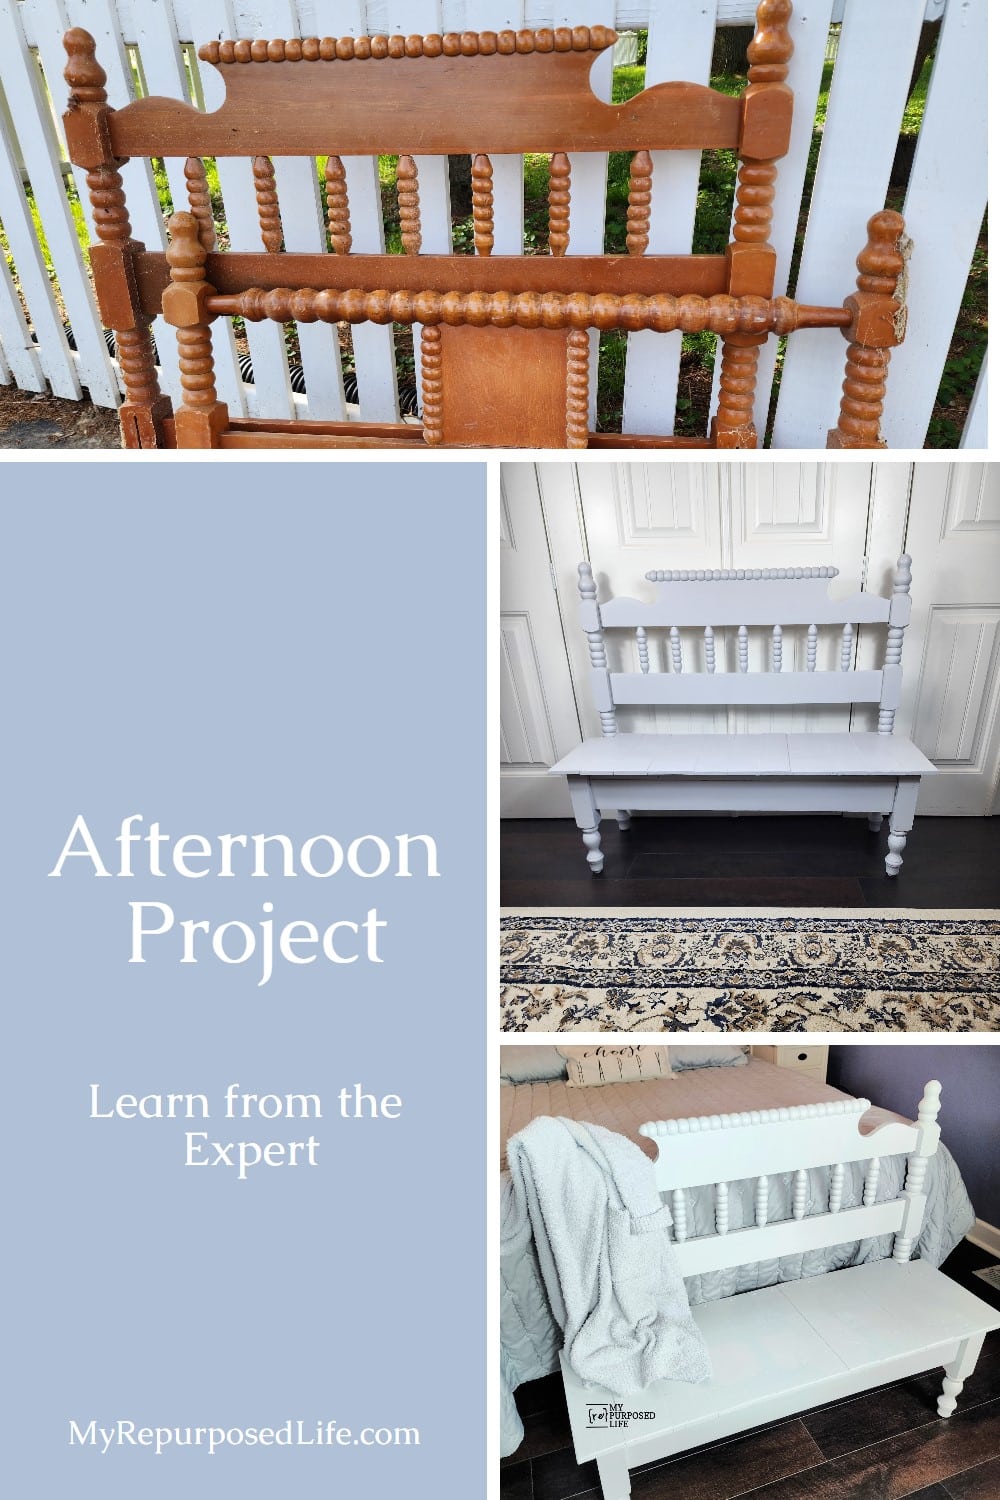
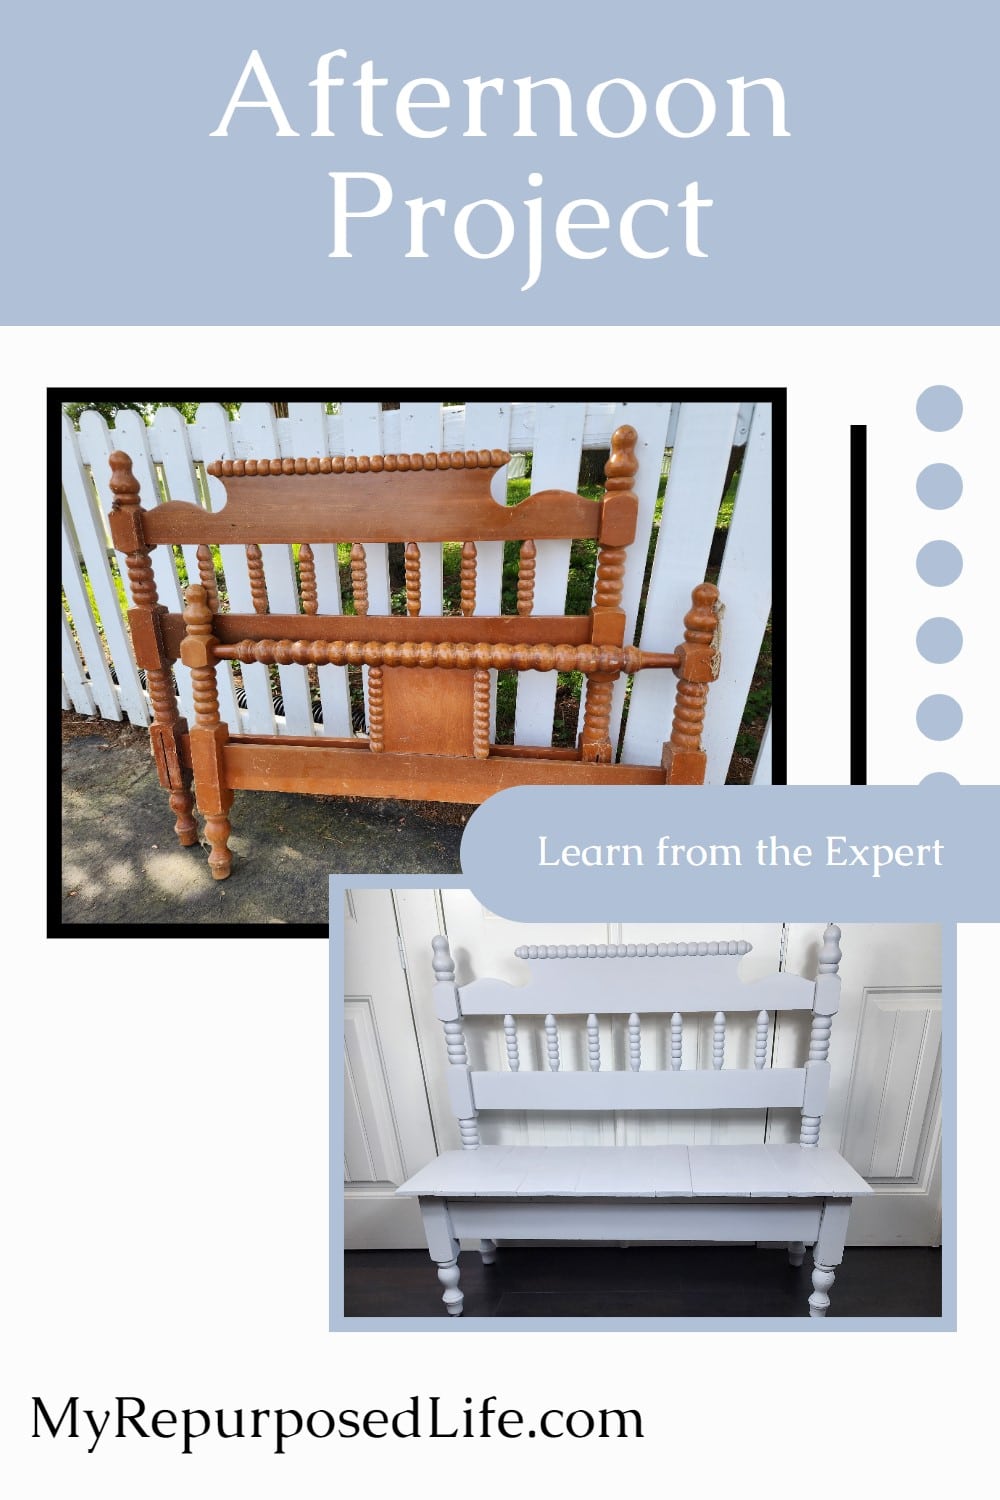
How to make a petite headboard bench in one afternoon.
There are all kinds of headboard benches, and I think I’ve made them all. I’ve been wanting to make another one to put in my booth. My neighbor Rodney picked up a small headboard and footboard long ago. So, I will show you how I used that bed to make a petite headboard bench that’s perfect for the end of the bed. It’s rough, so it could easily be used as a flower bench on the patio.
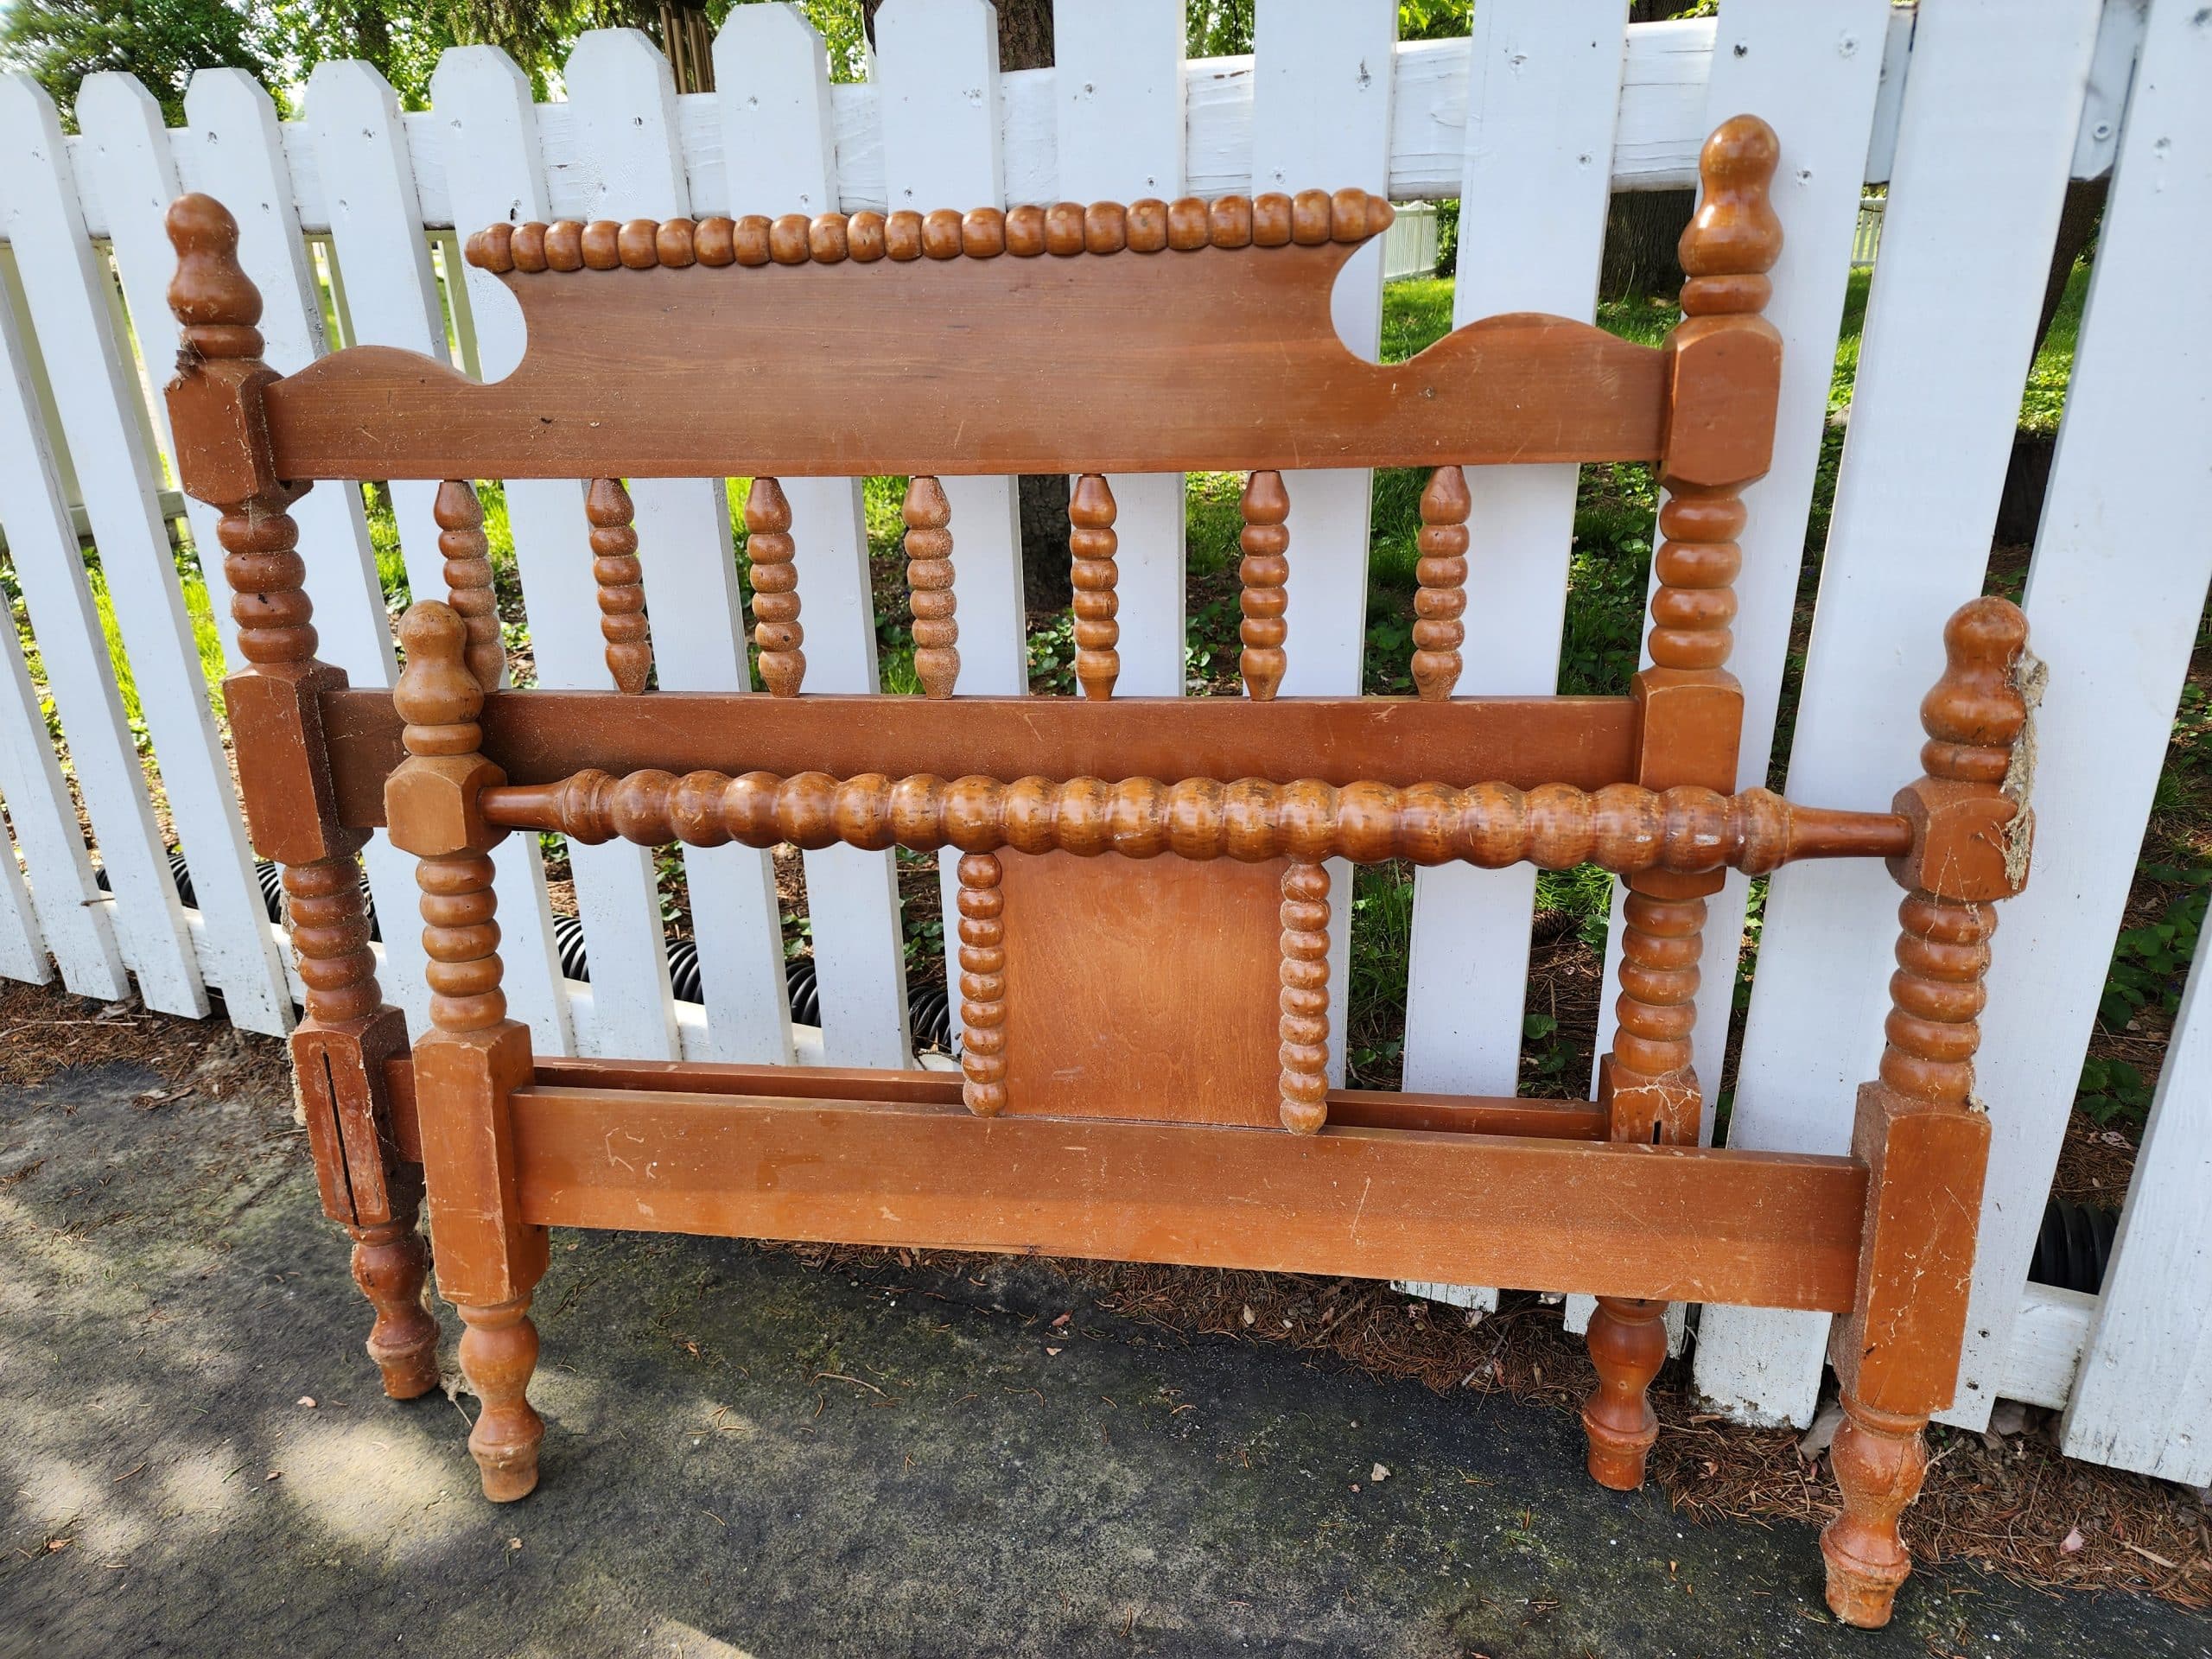
As I said, I’ve made so many headboard benches, but this one stumped me. It’s so short. In addition, cutting the footboard in half to use as armrests didn’t seem to work. Besides those issues, the bed was in perfect shape and needed no repairs.
Design your Headboard Bench
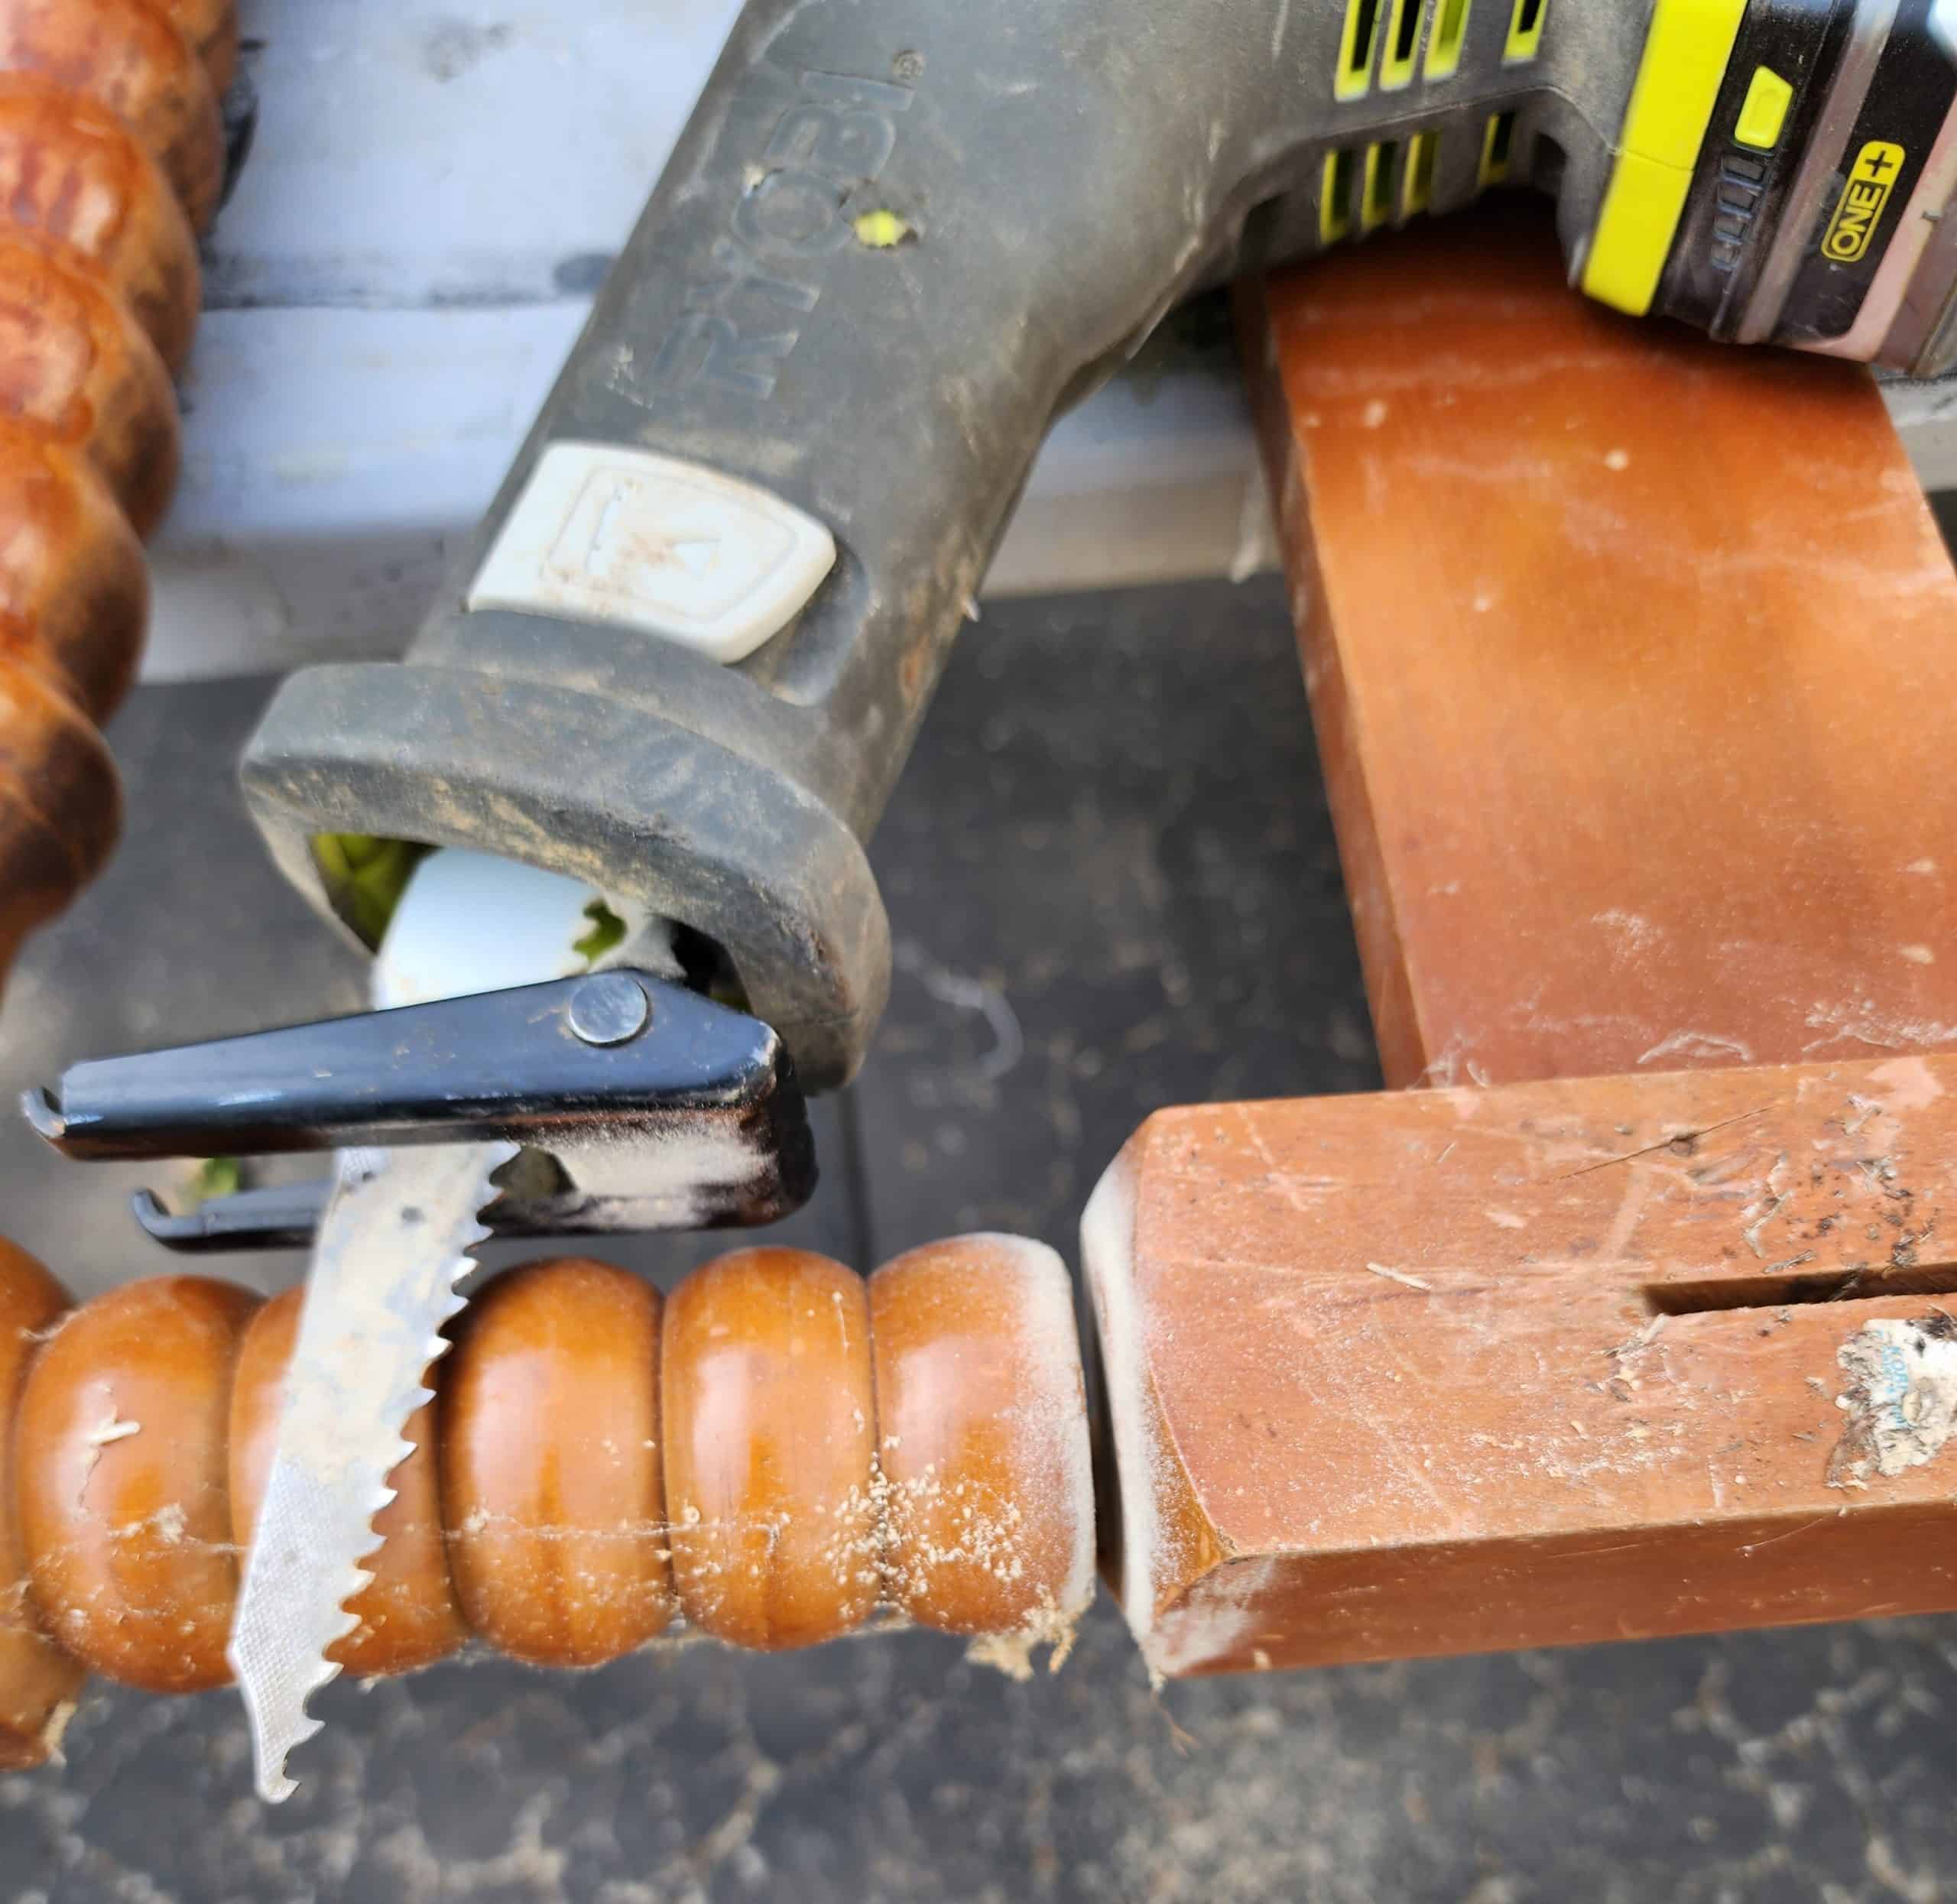
I decided to use the footboard as the front legs and brace. Using it this way meant I needed to dismantle and part it out. I chose to use a reciprocating saw for this task.
Visit the My Repurposed Life Amazon Store to shop my favorite items.
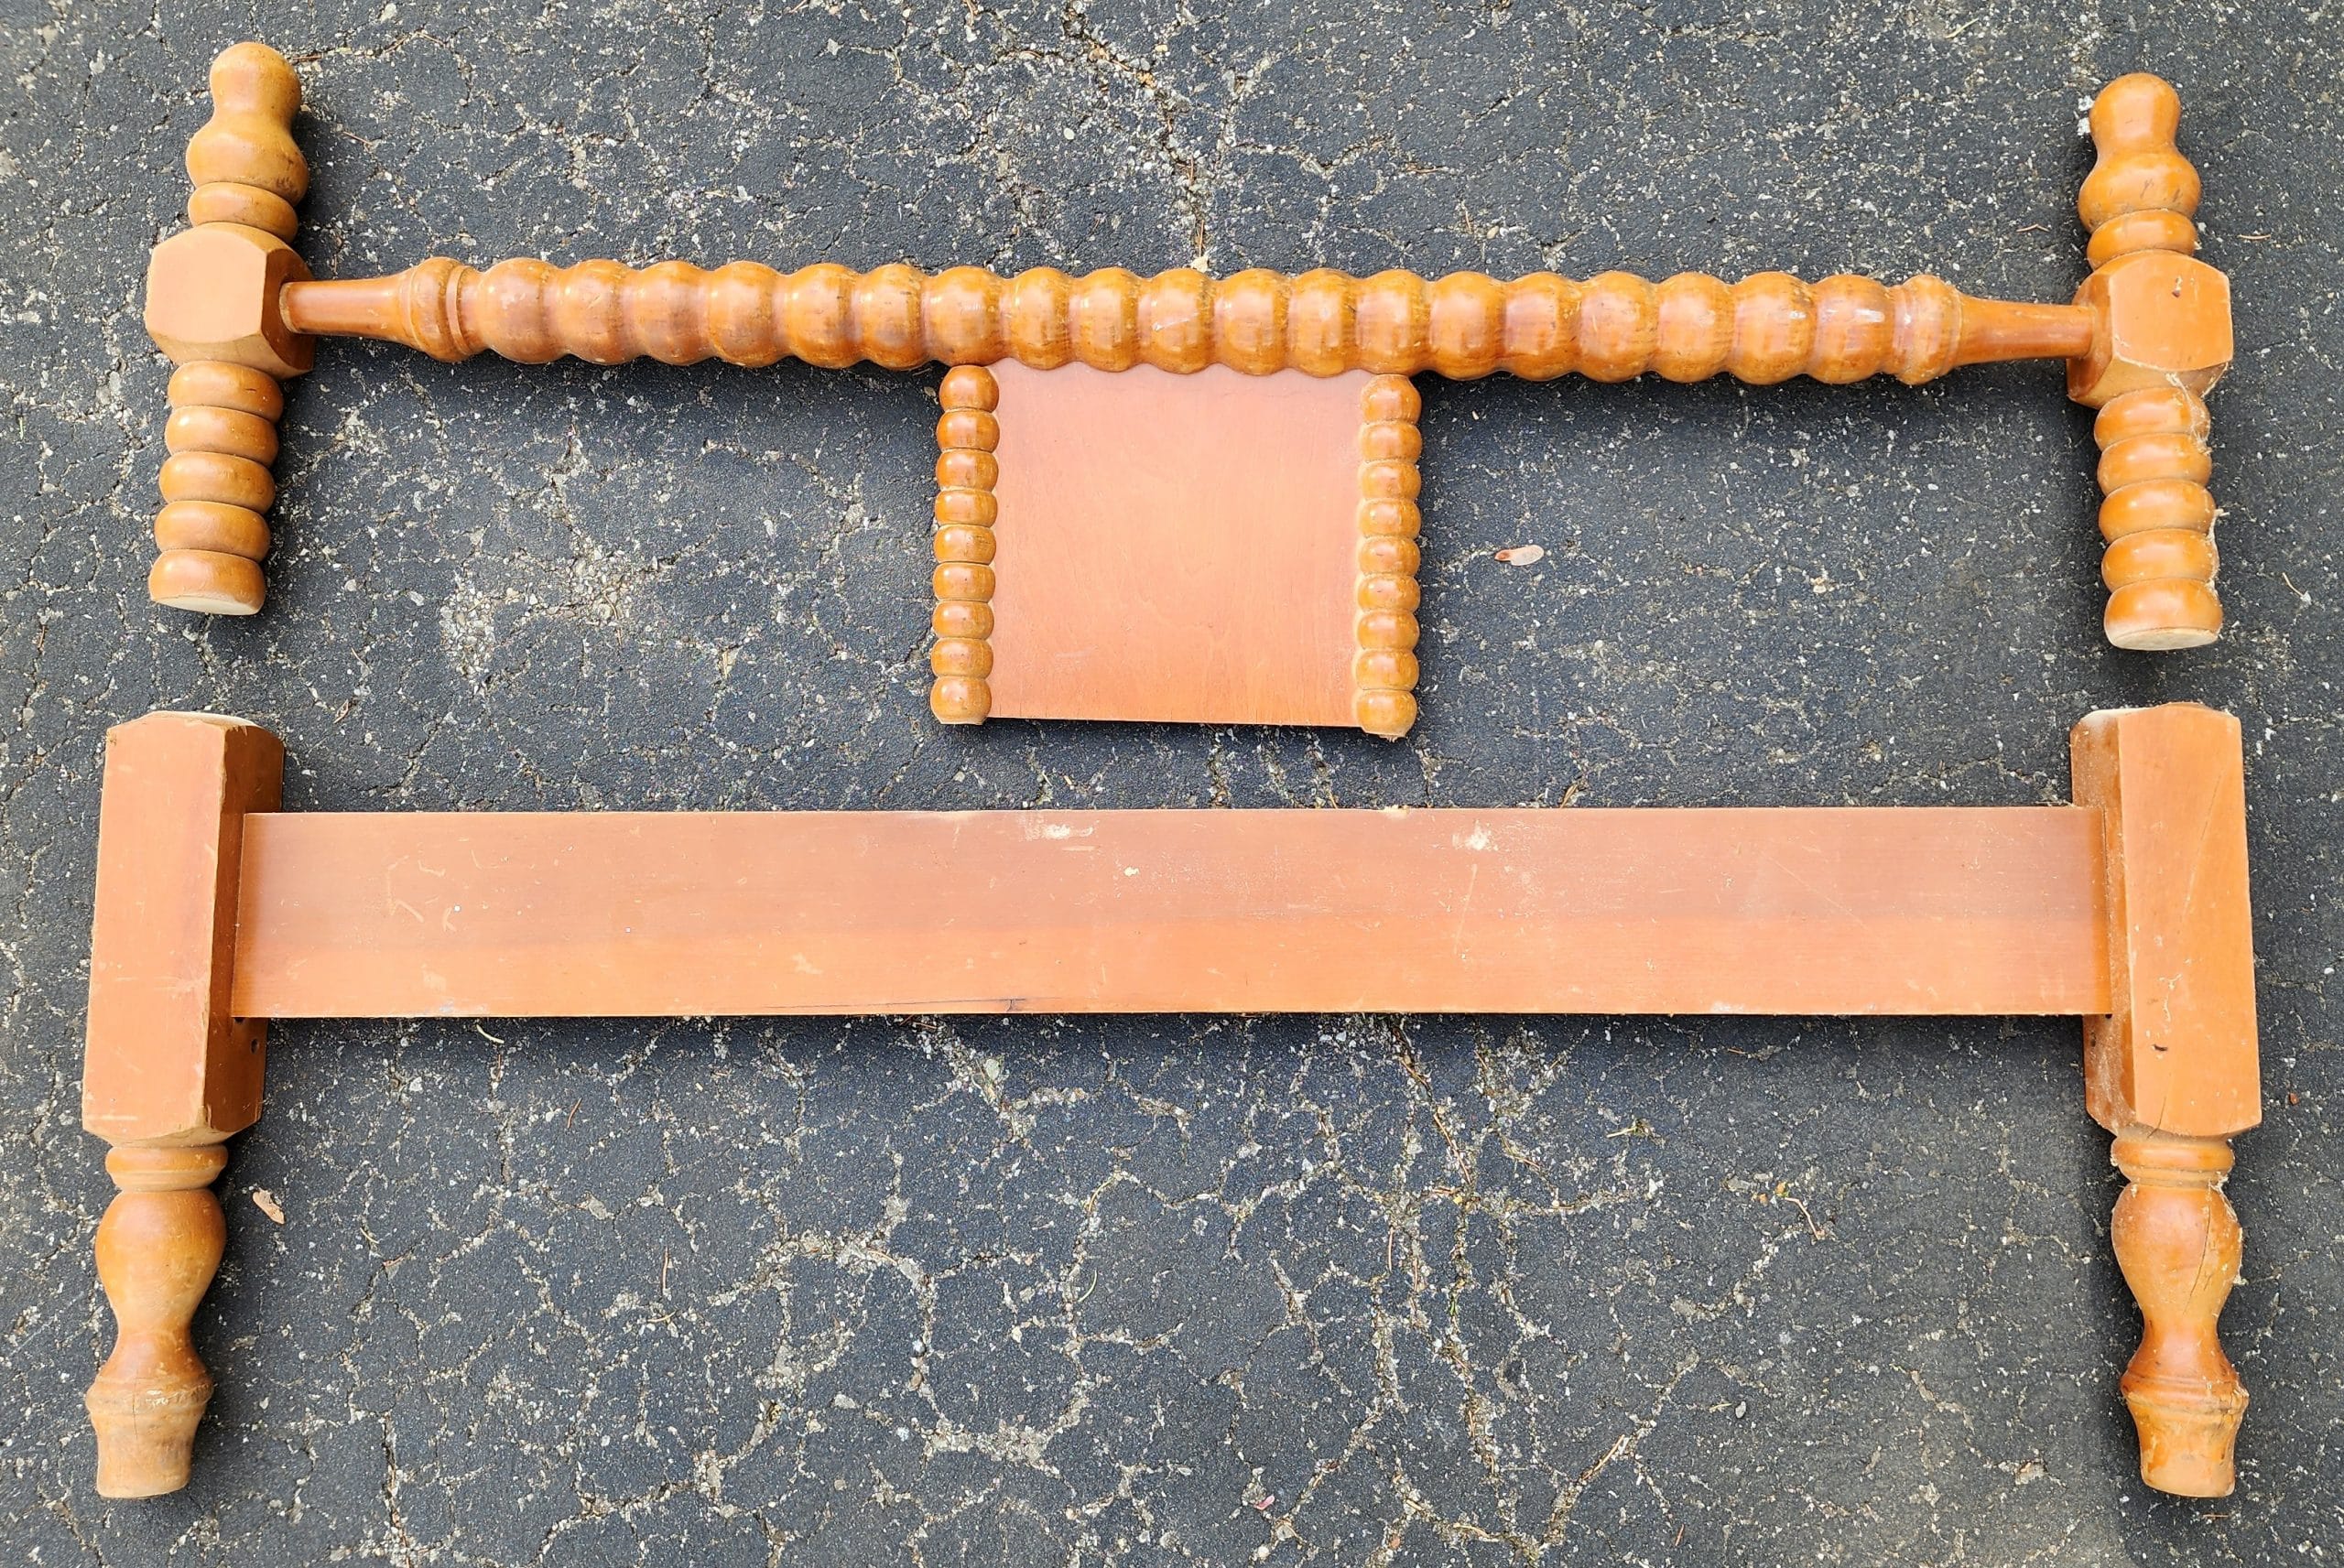
Does this image help it make sense? The lower portion will become the front of the petite headboard bench.
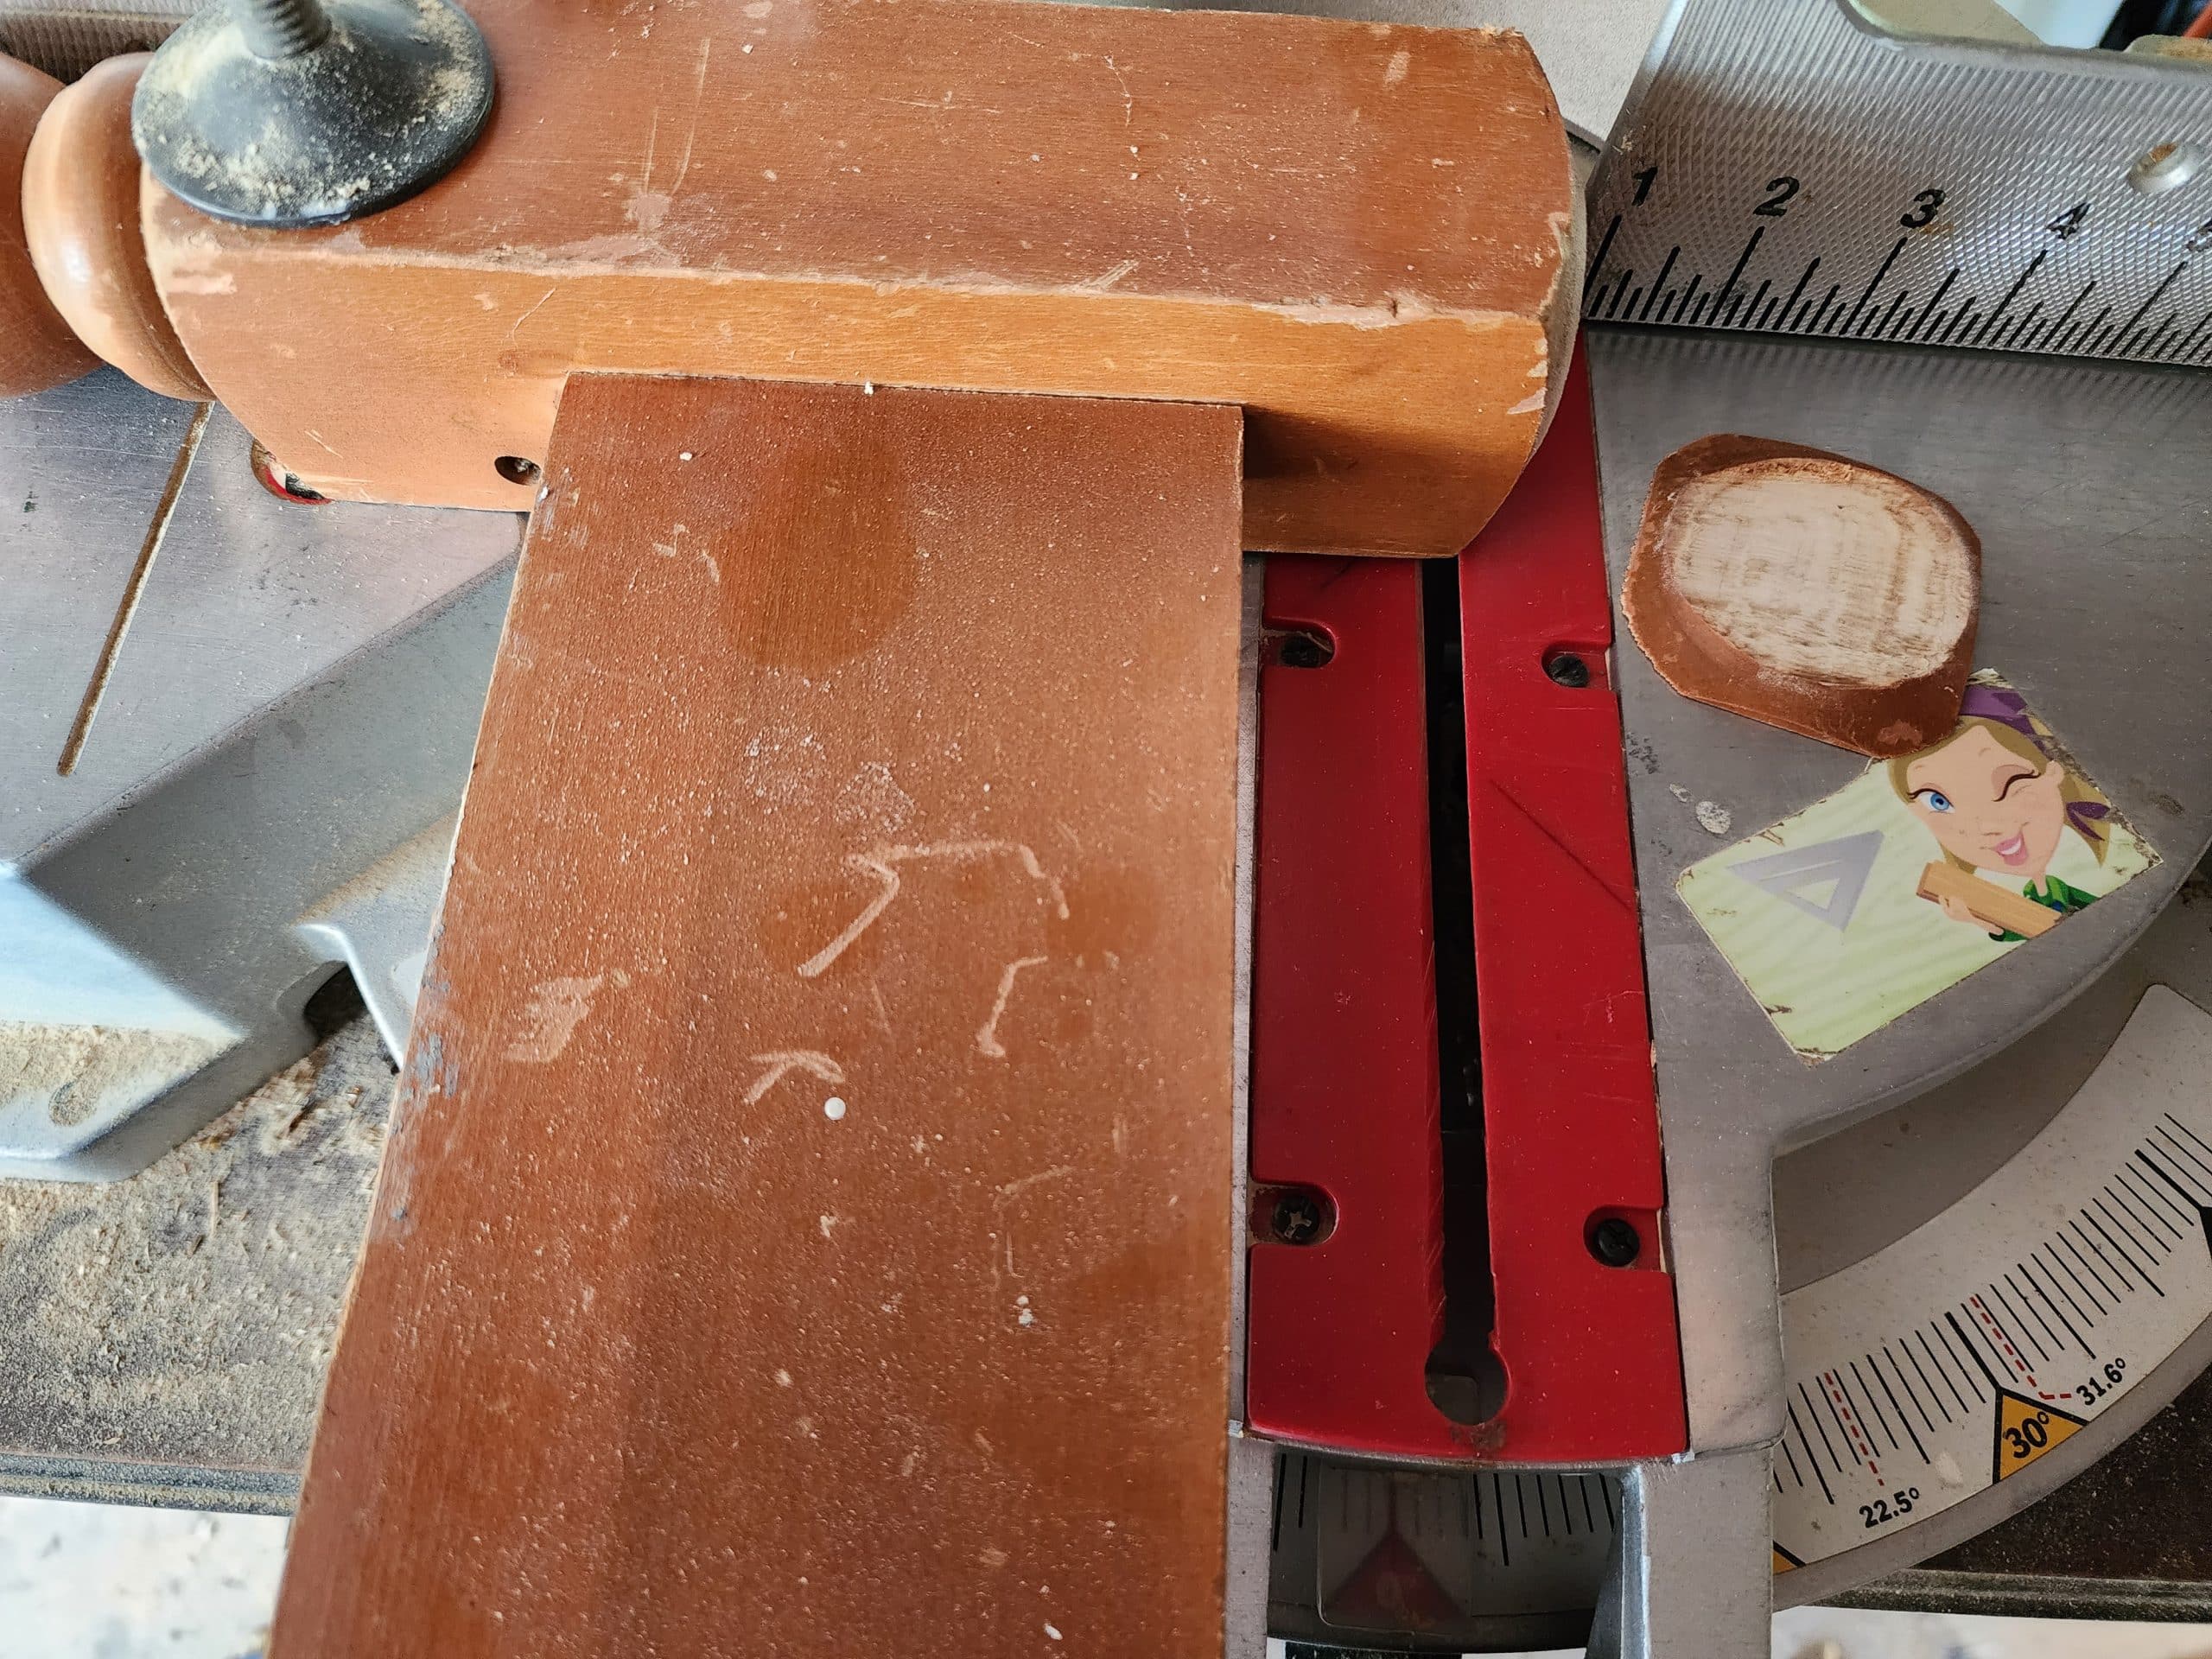
I clamped the piece to my compound miter saw to get a smooth cut and trimmed off the “curve.” The one you see lying there was already removed from the other side.

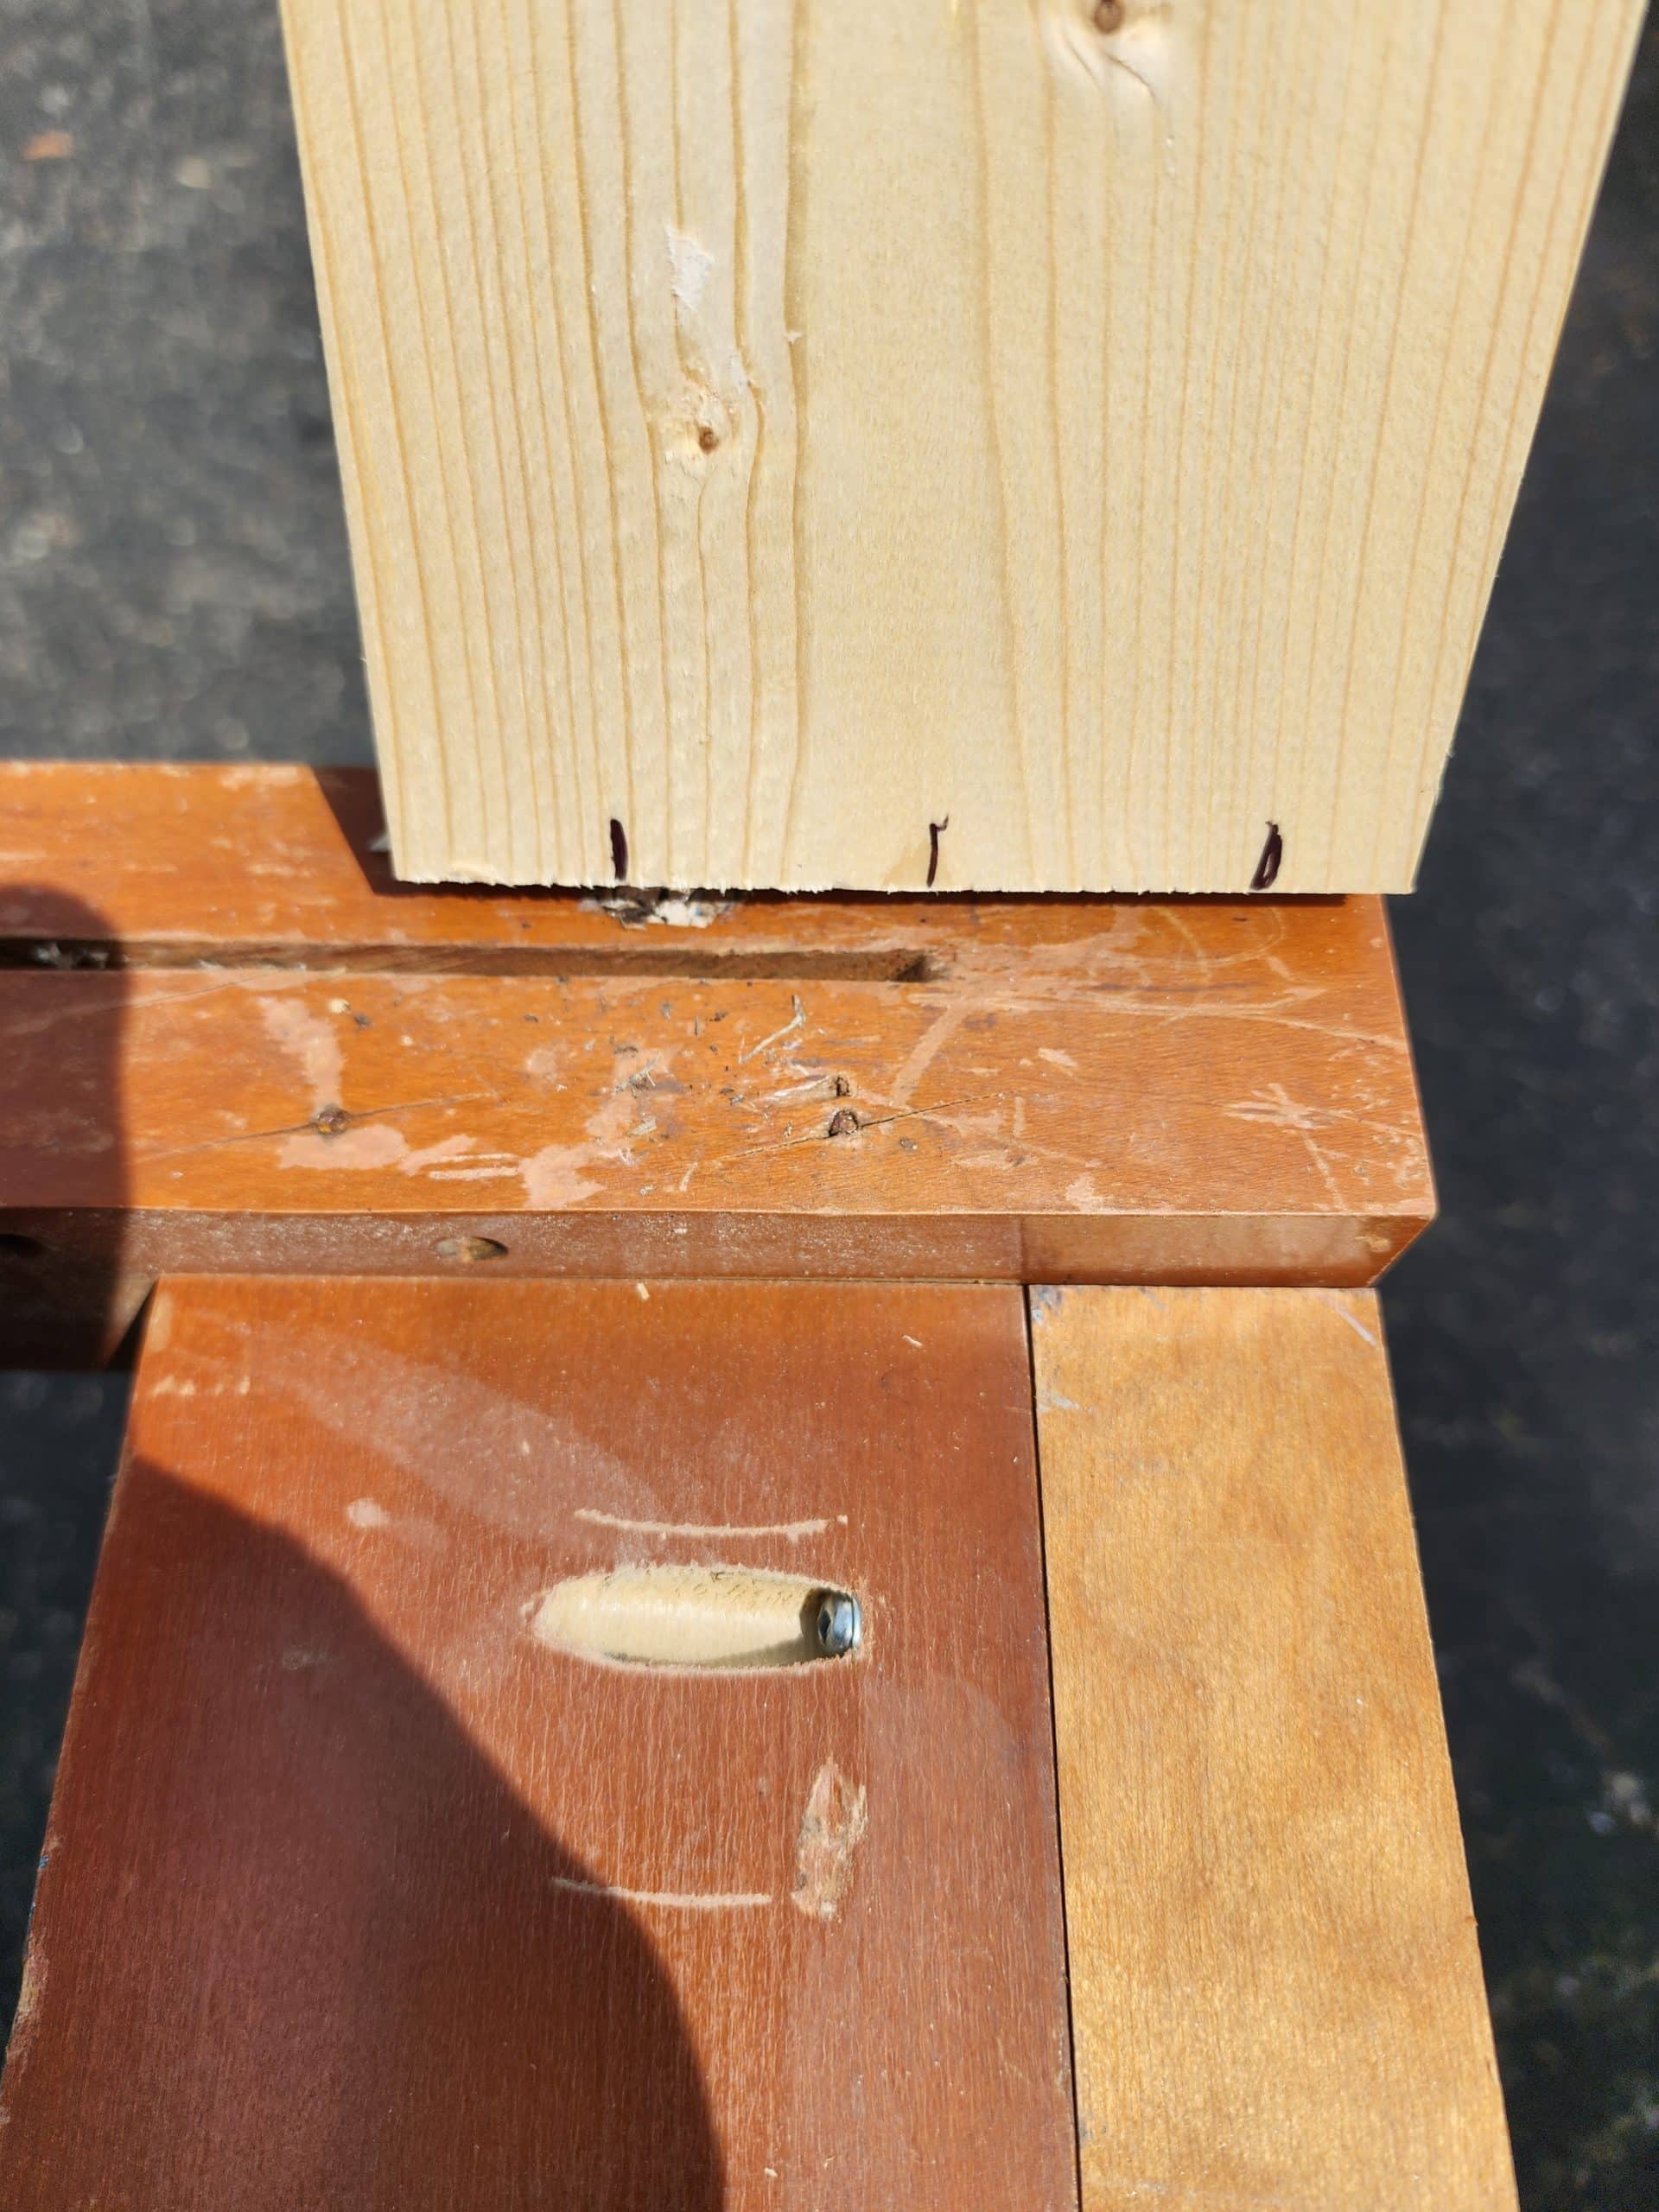
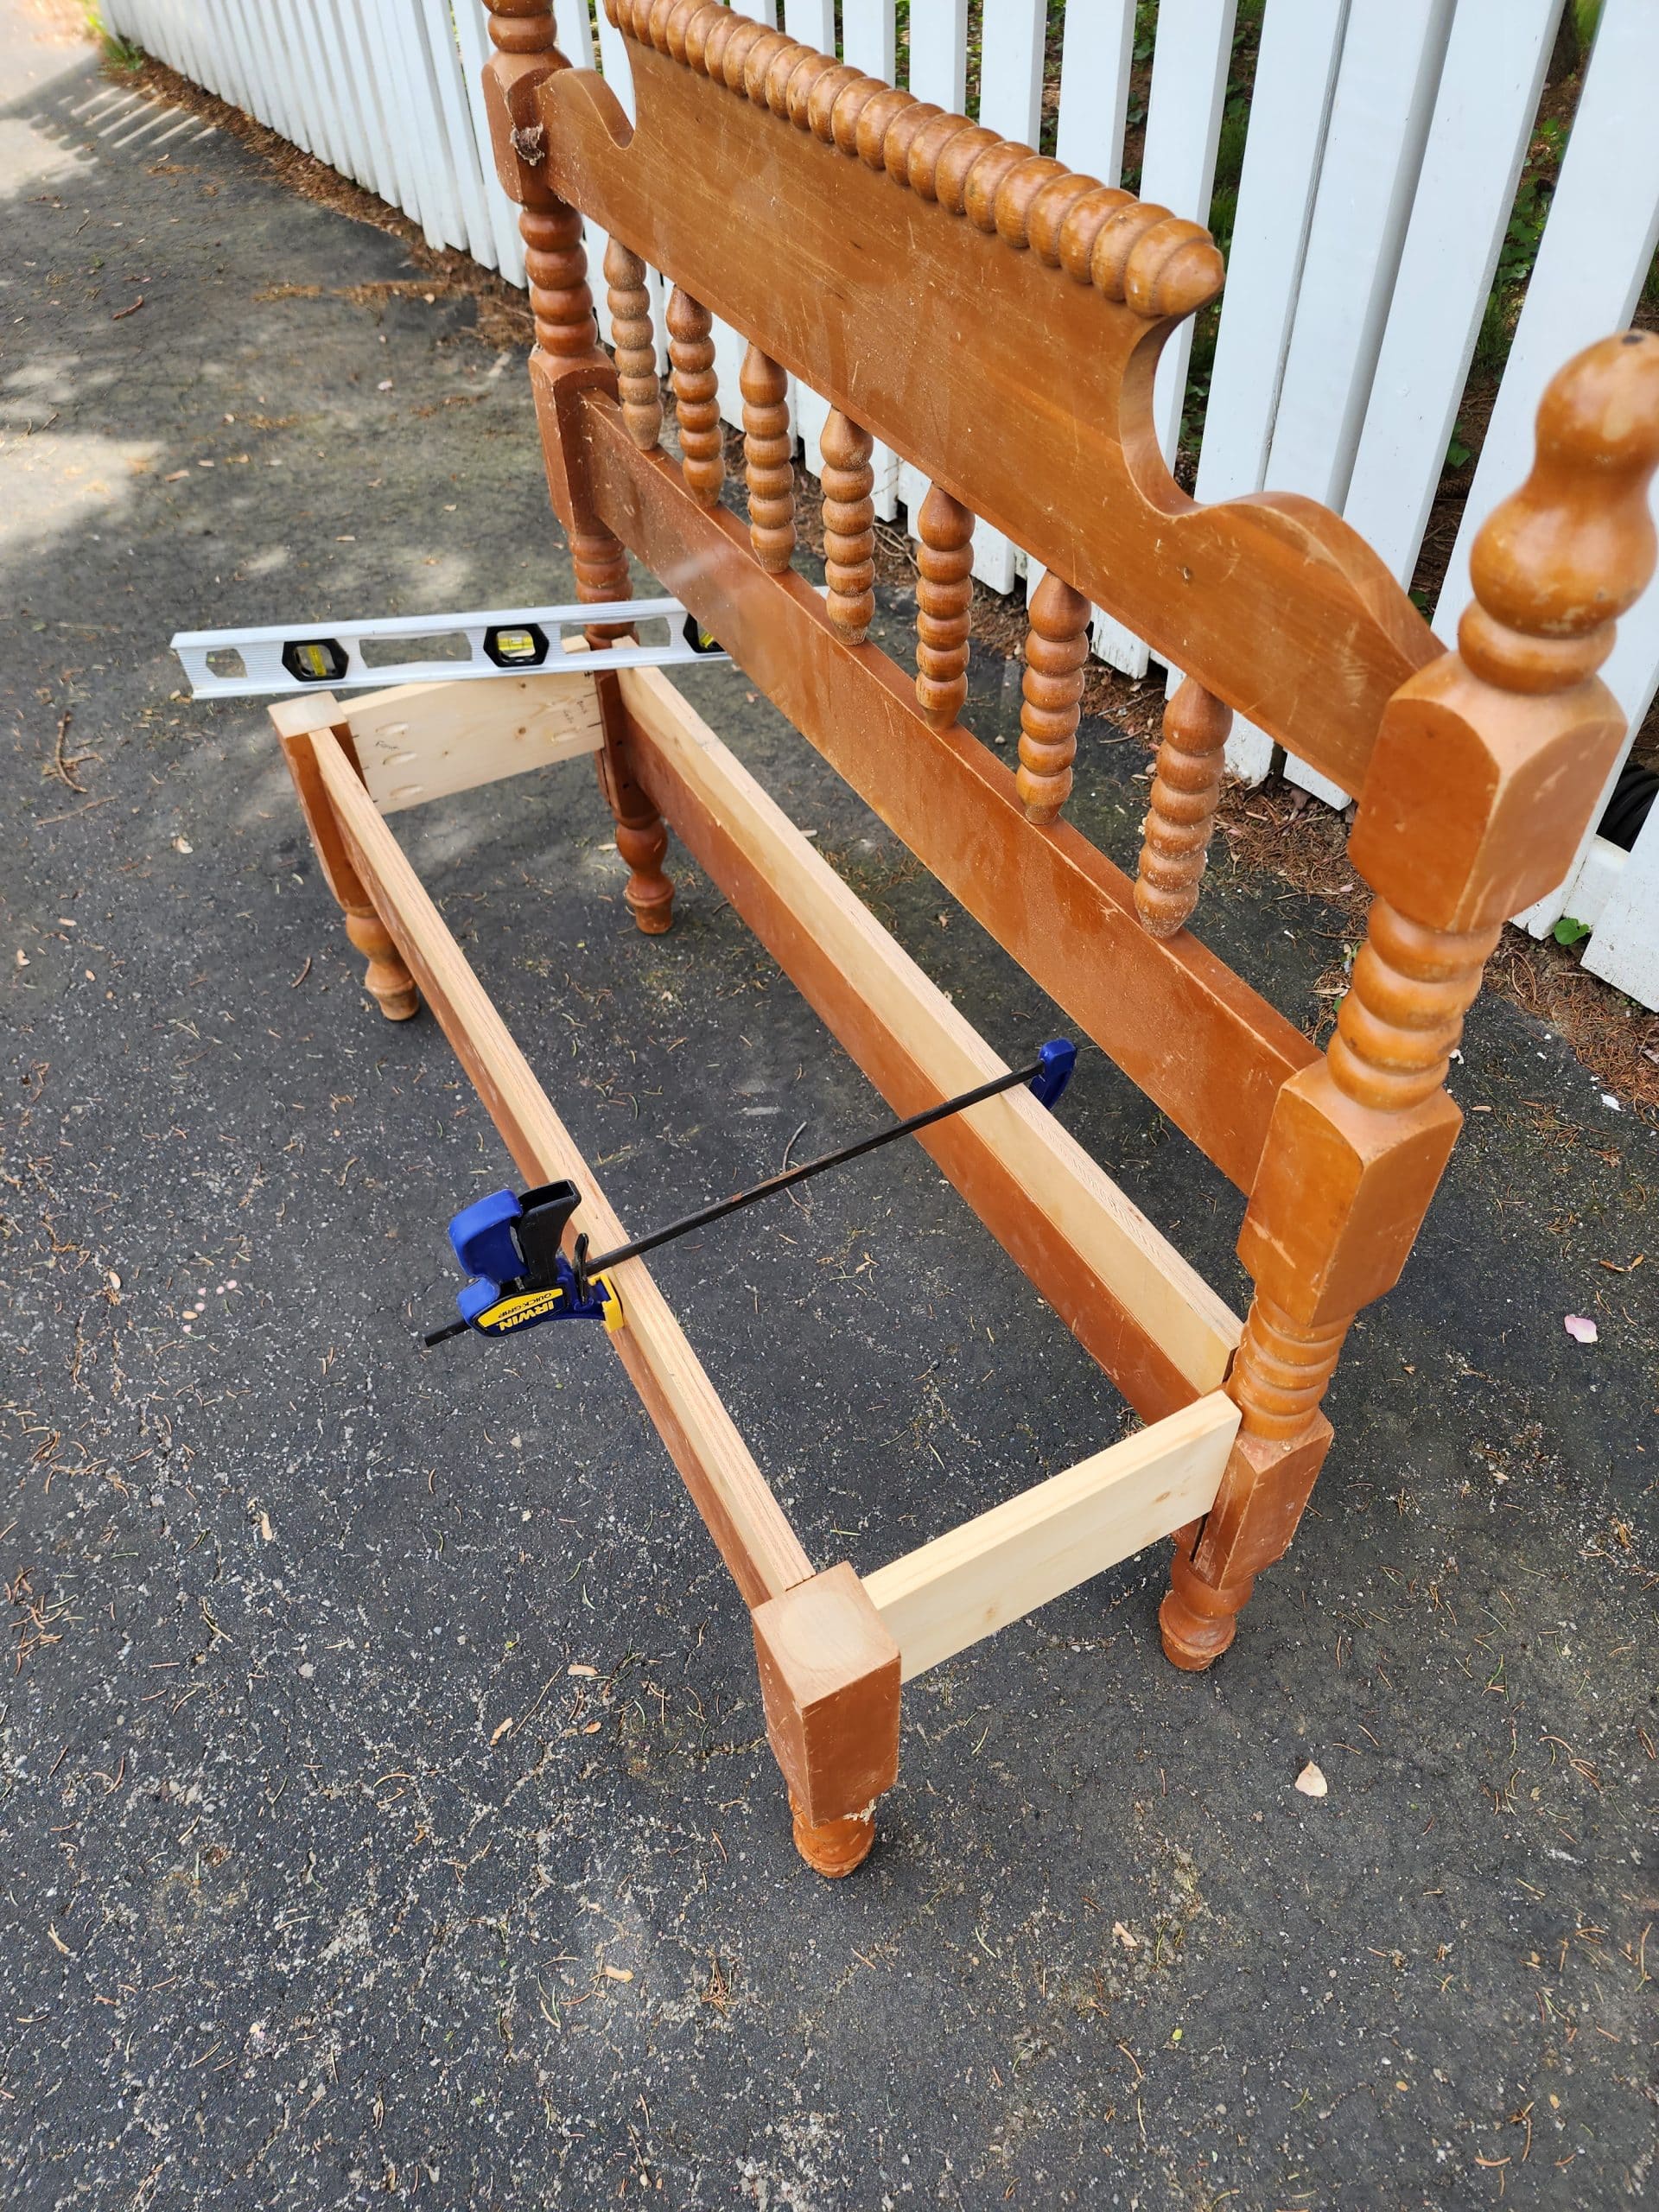
The headboard bench would sit even lower to the ground if I didn’t add these two scrap pieces of wood to add height. The legs on the footboard determined the size of the first board. Then I measured the board for the headboard to match the height of the footboard.
Make Adjustments Where Needed
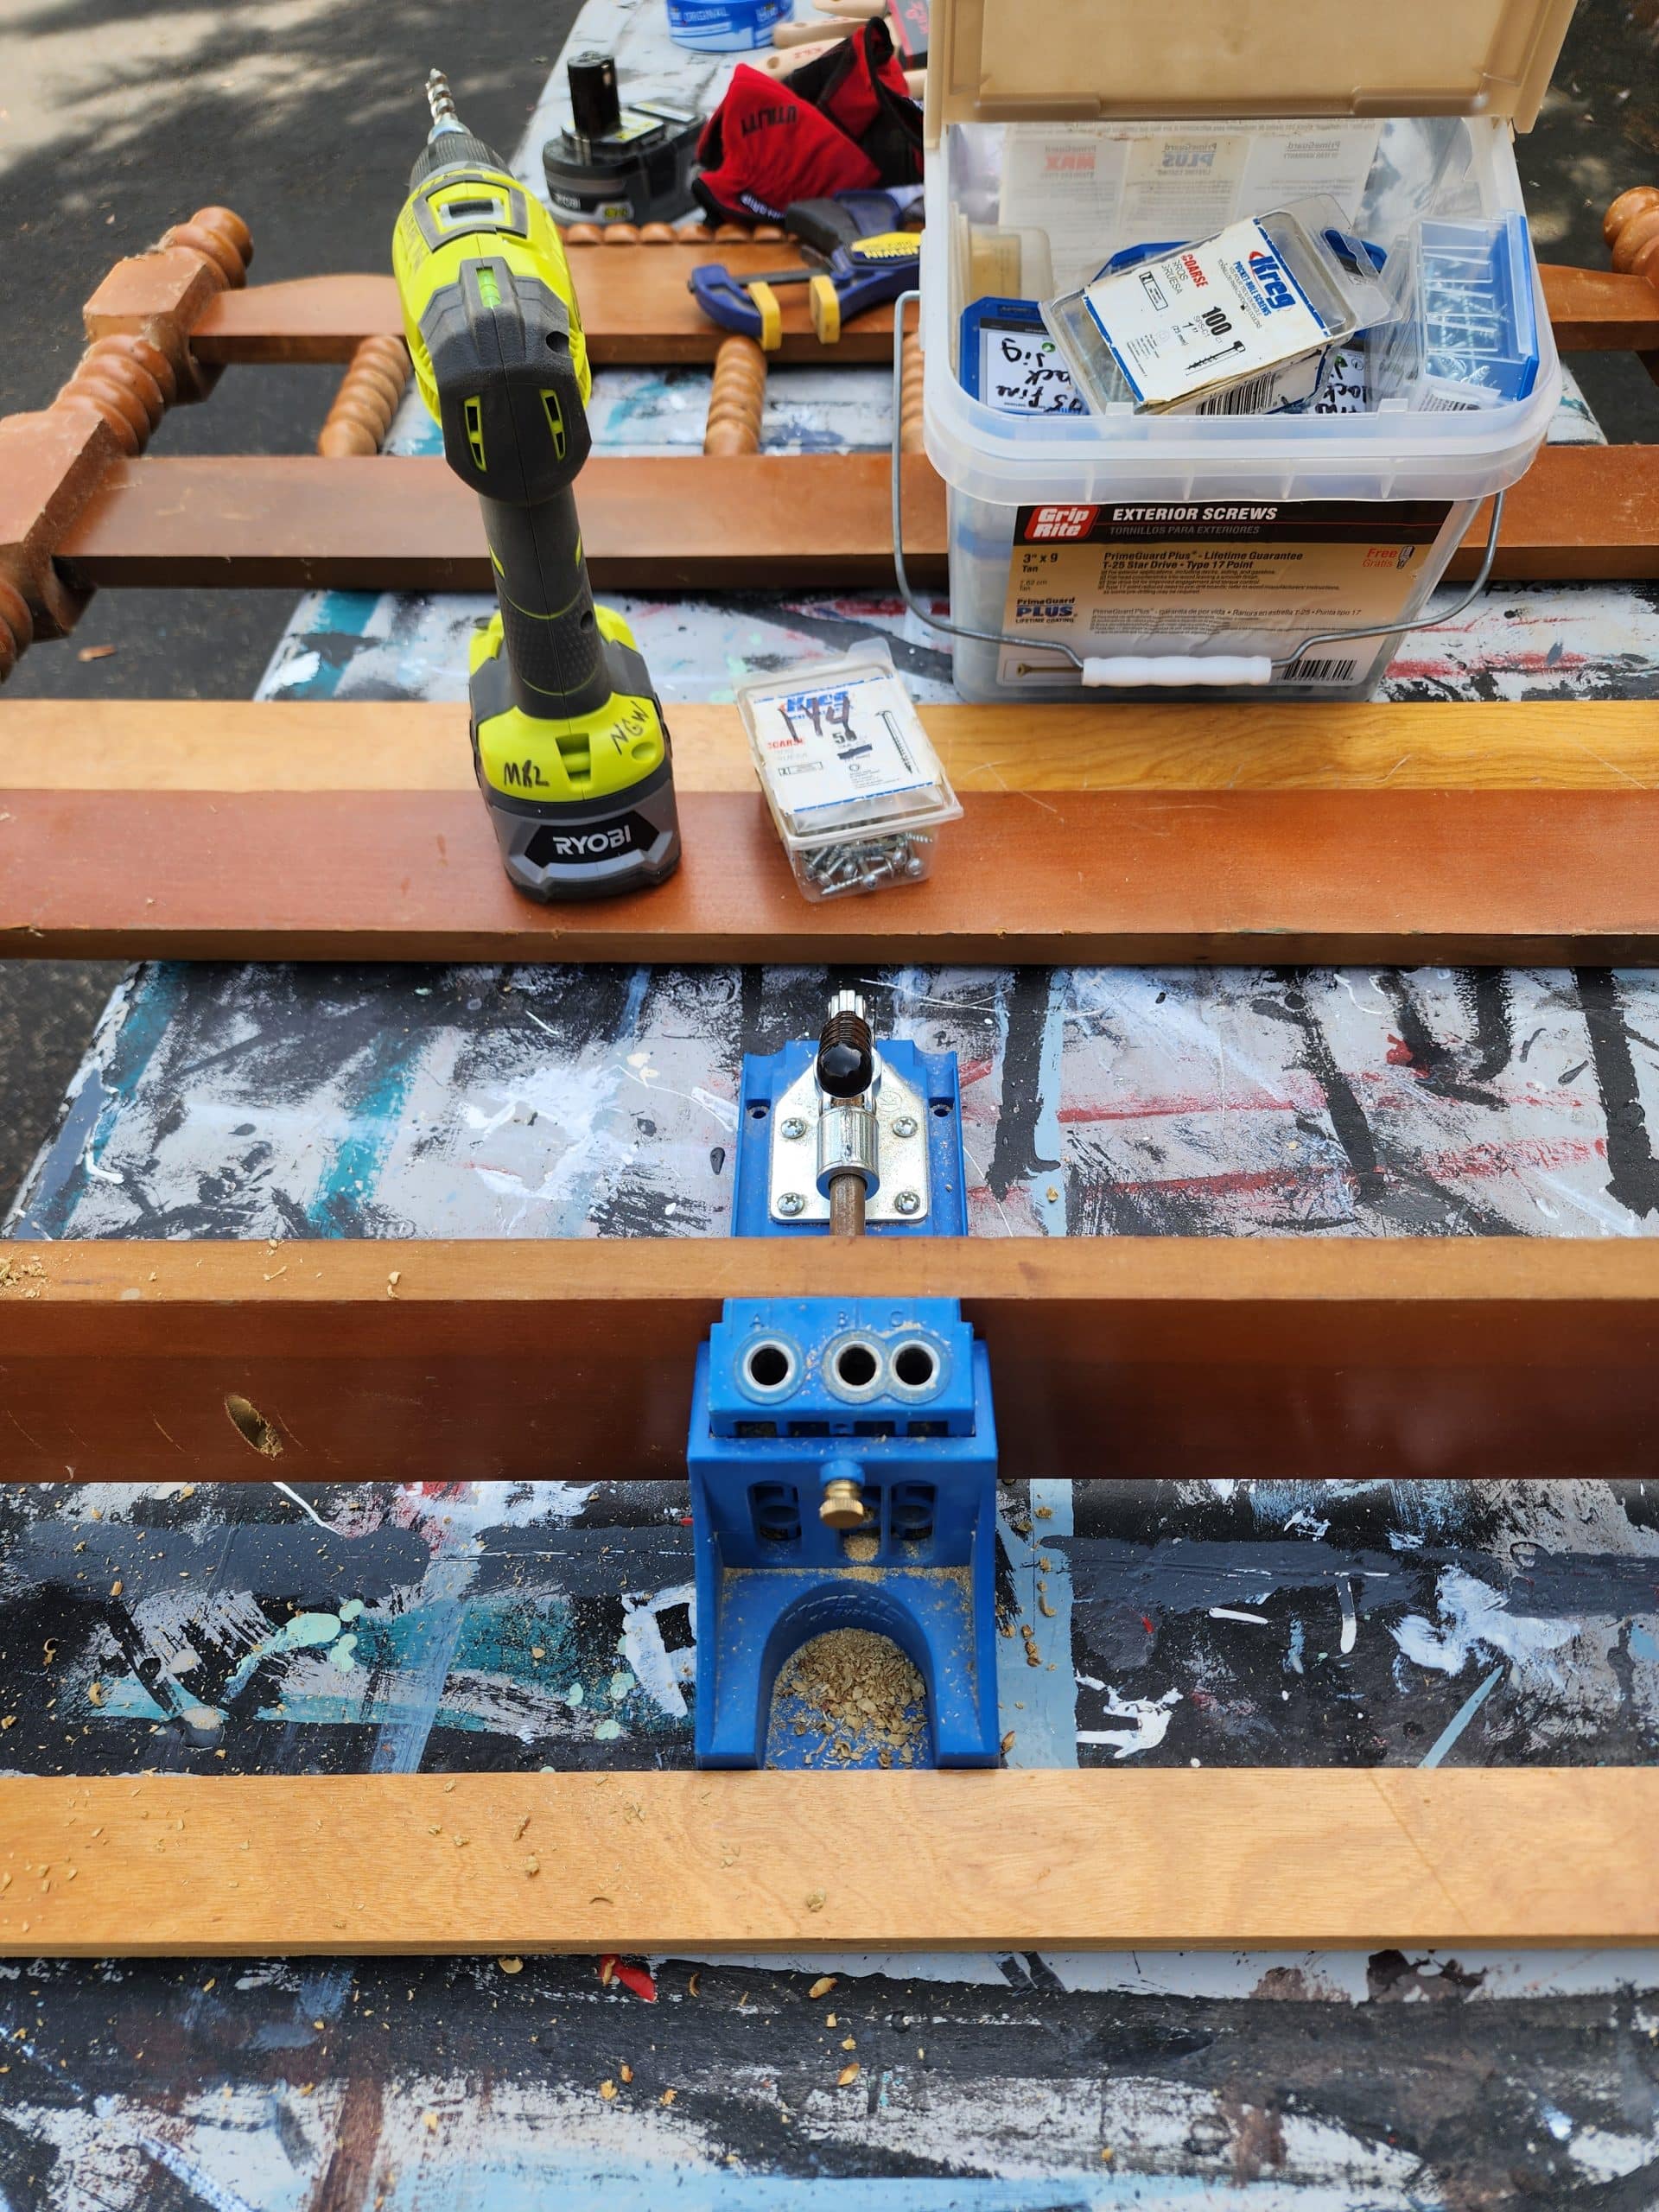
While the pieces were lying on the table, I mentally noted WHERE the pocket holes should be drilled on the bed to attach the extra scrap board. I highly recommend marking your pocket hole spots to avoid getting mixed up.
Adding the pocket holes to the larger headboard got a little confusing before I realized I had to turn the piece upside down to drill the pocket holes.
Determine Seat Depth
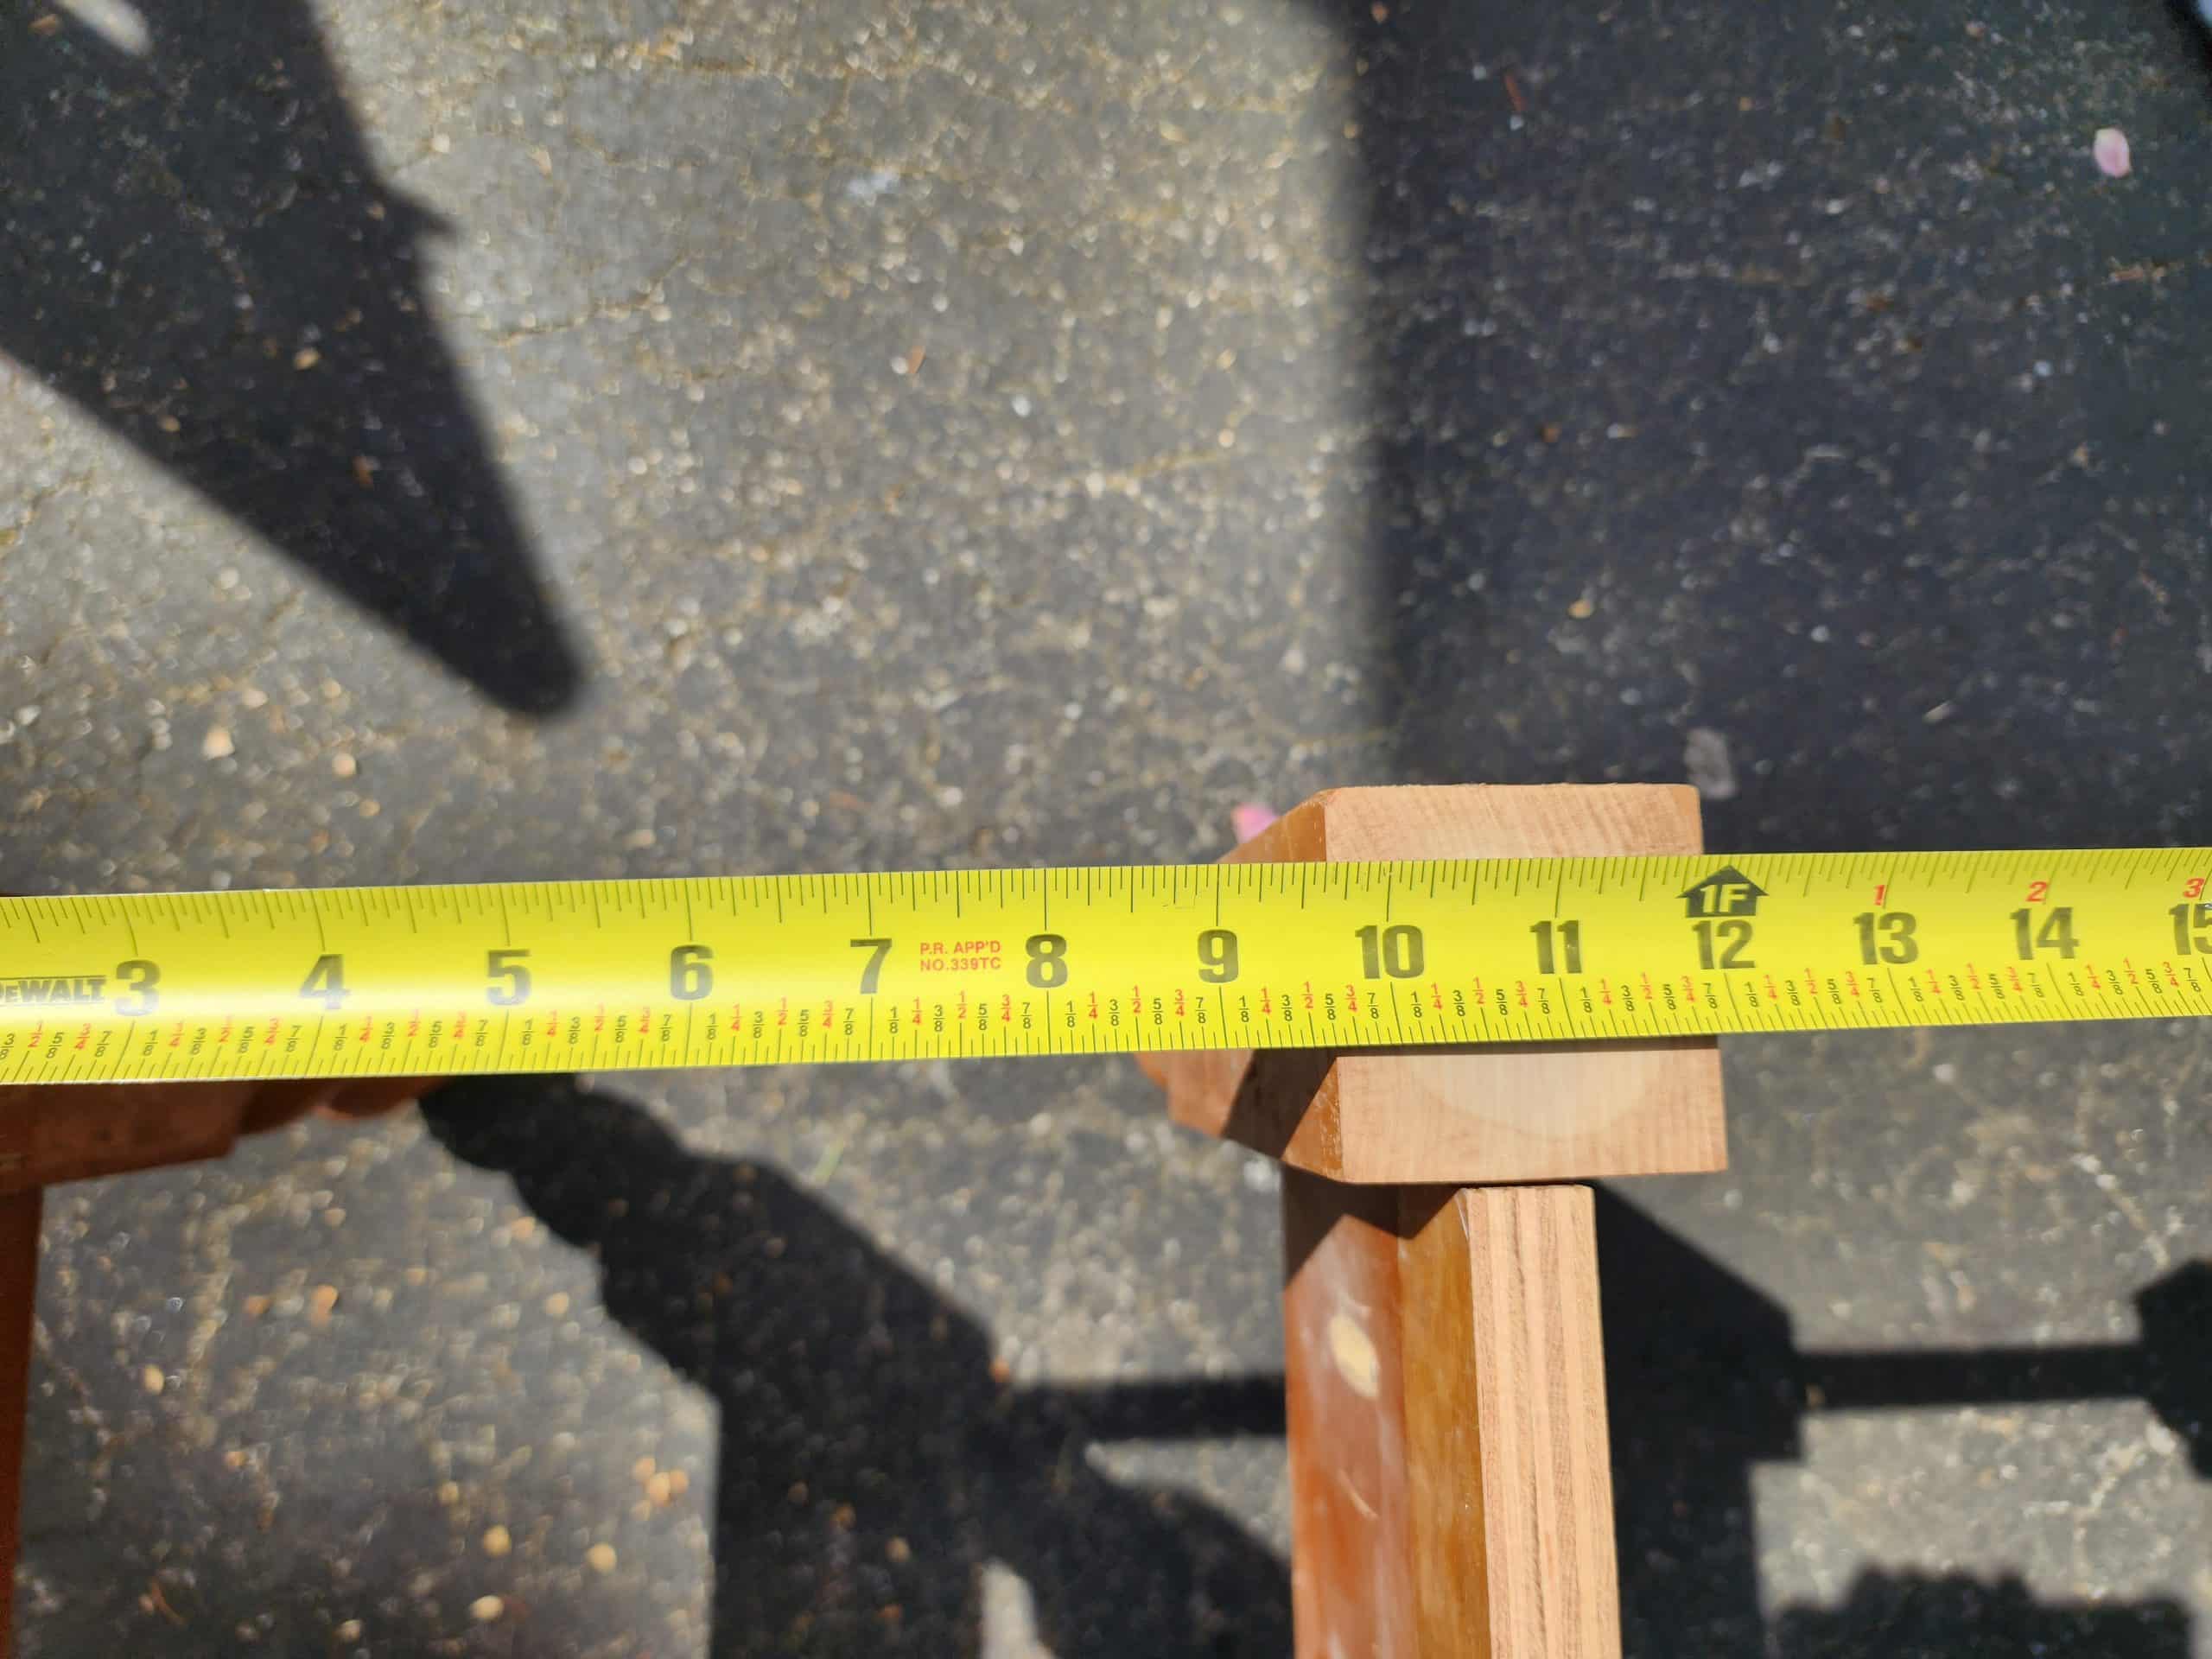
On the left (out of view) is the headboard. I measure from the headboard beyond the front leg to see what size board I need for the side. I wanted the seat to be about 13″ deep. Therefore I needed to cut two side boards approximately 9.5 inches long.
Again, I highly recommend MARKING your pocket holes. It was so important for this side brace because “pins” in the headboard originally held the side rails in place. You want to avoid those while you’re installing your pocket hole screws. You can remove the pins if you’re ambitious, but it’s not easy.
Assemble Headboard Bench
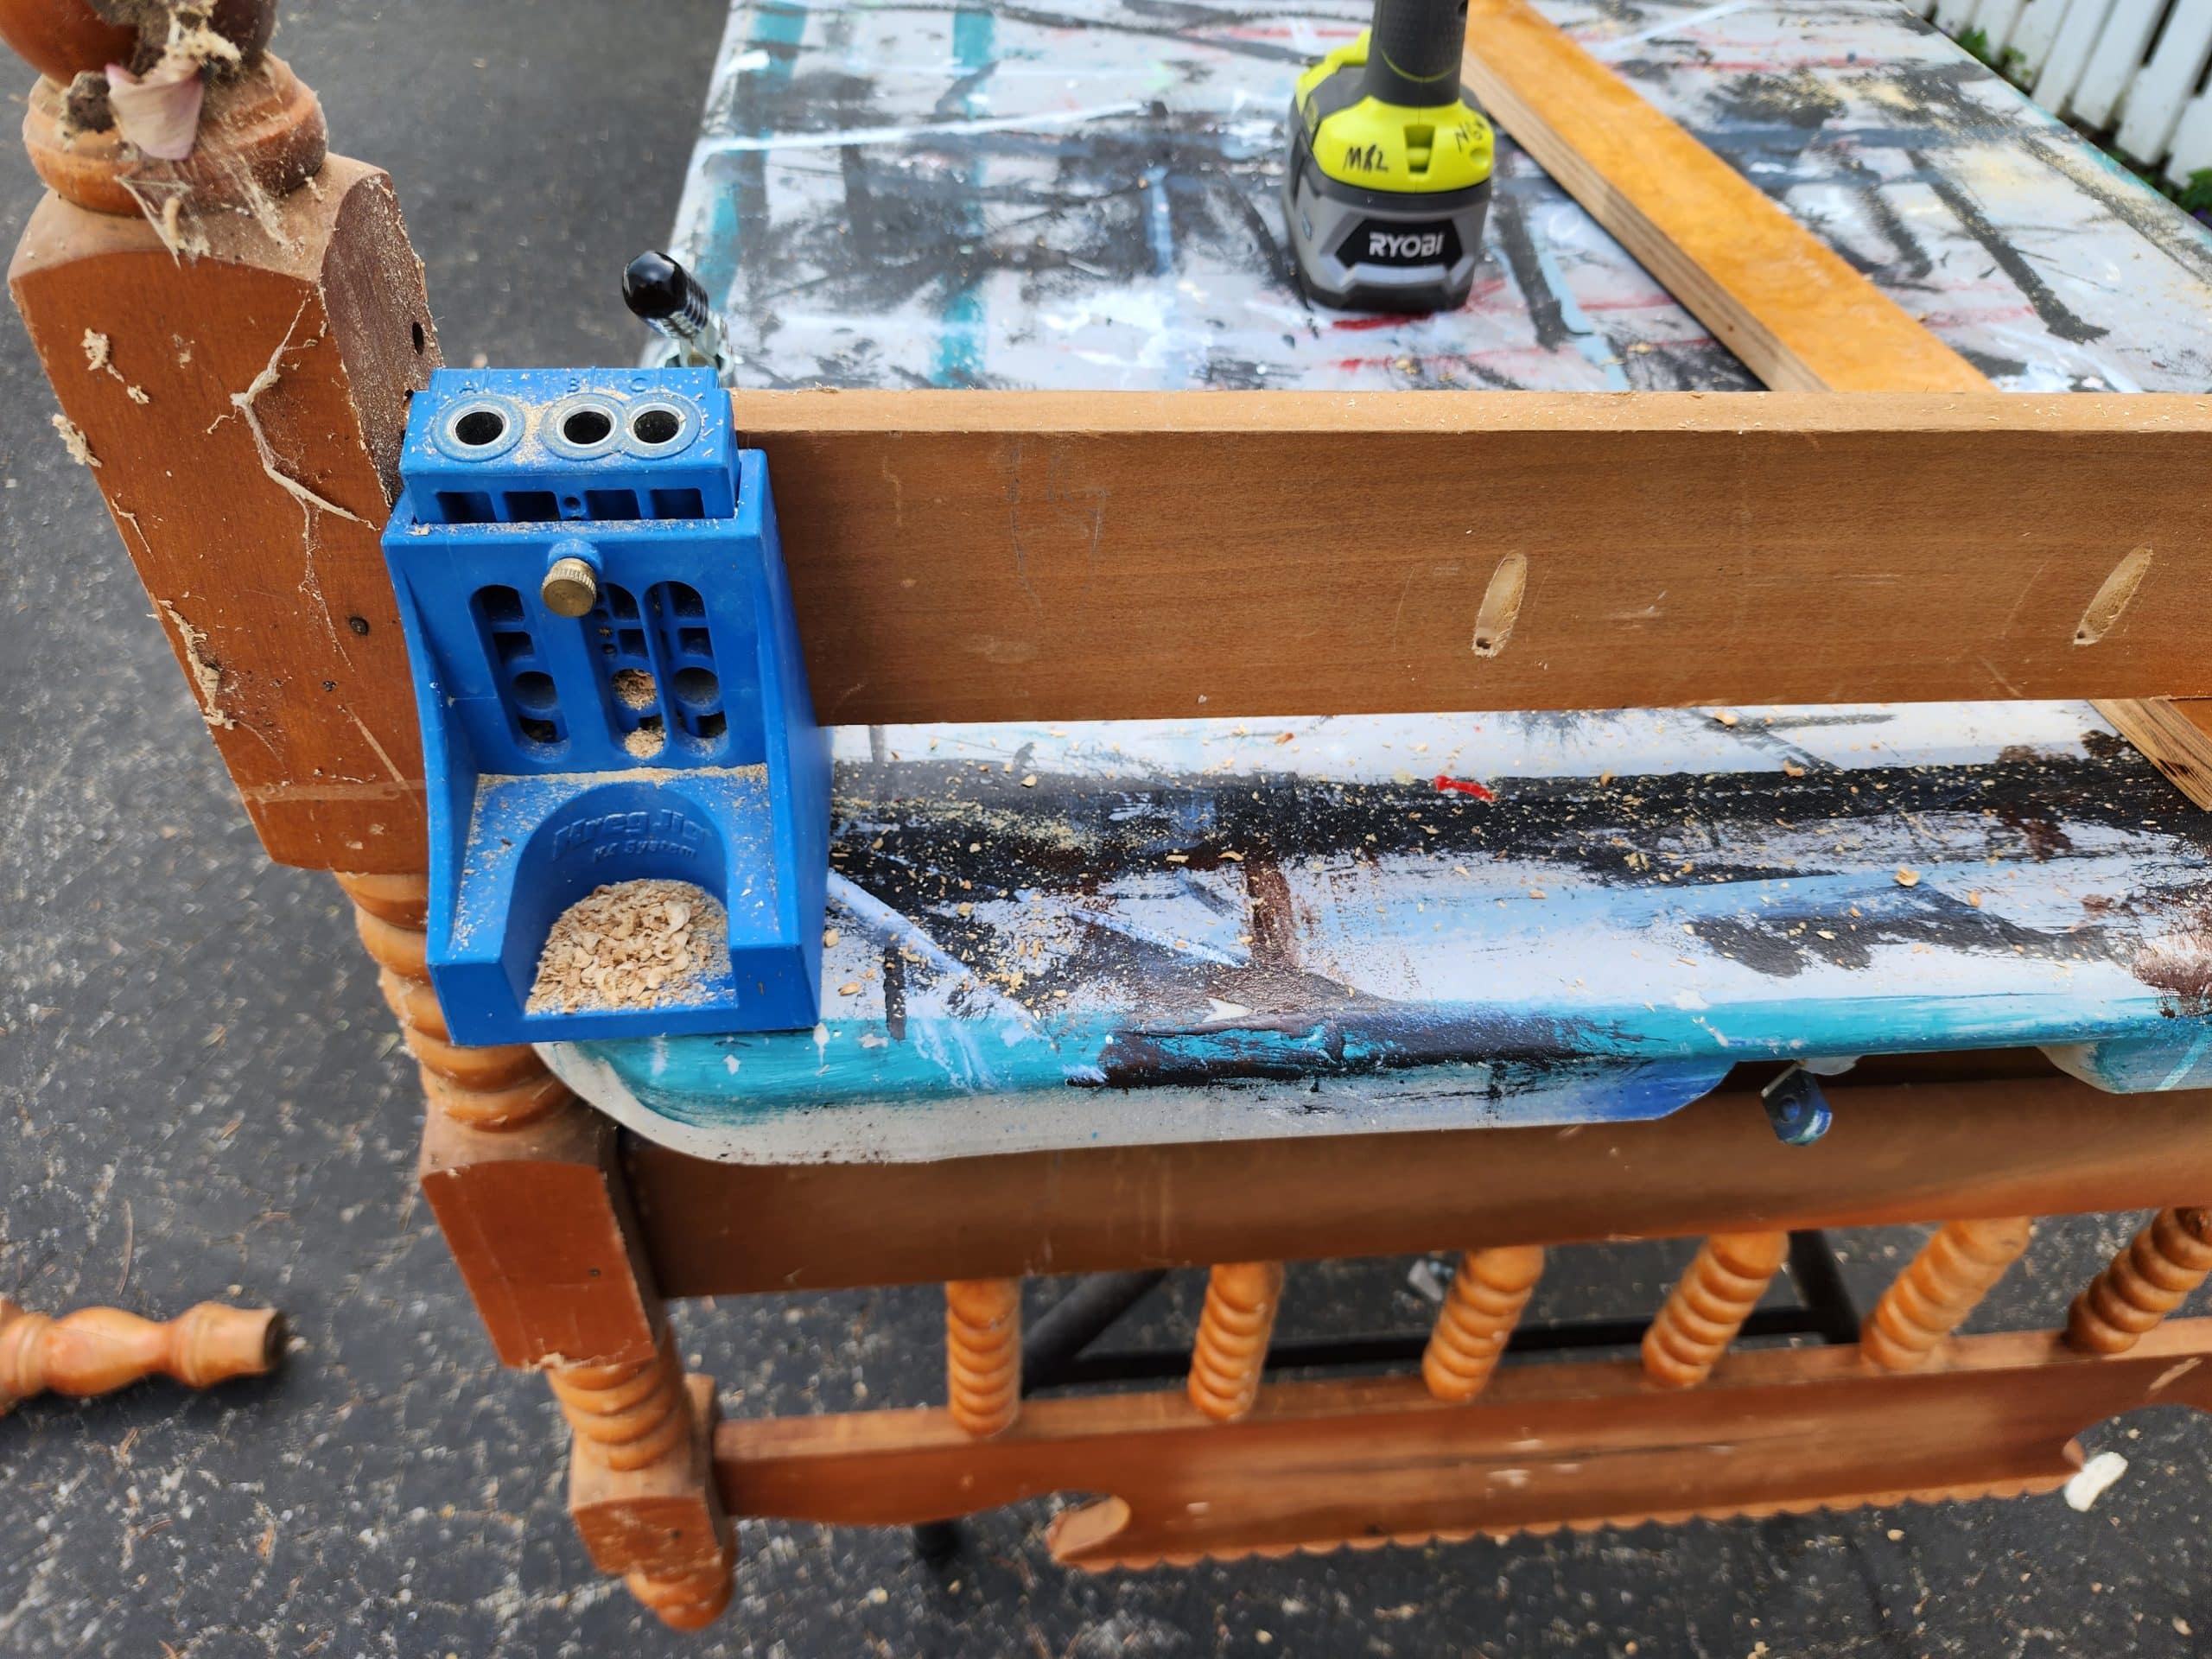
At this point, I have one screw on the front left and front right to hold the side board. By clamping it, I could mark the pocket holes on the back left and back right.
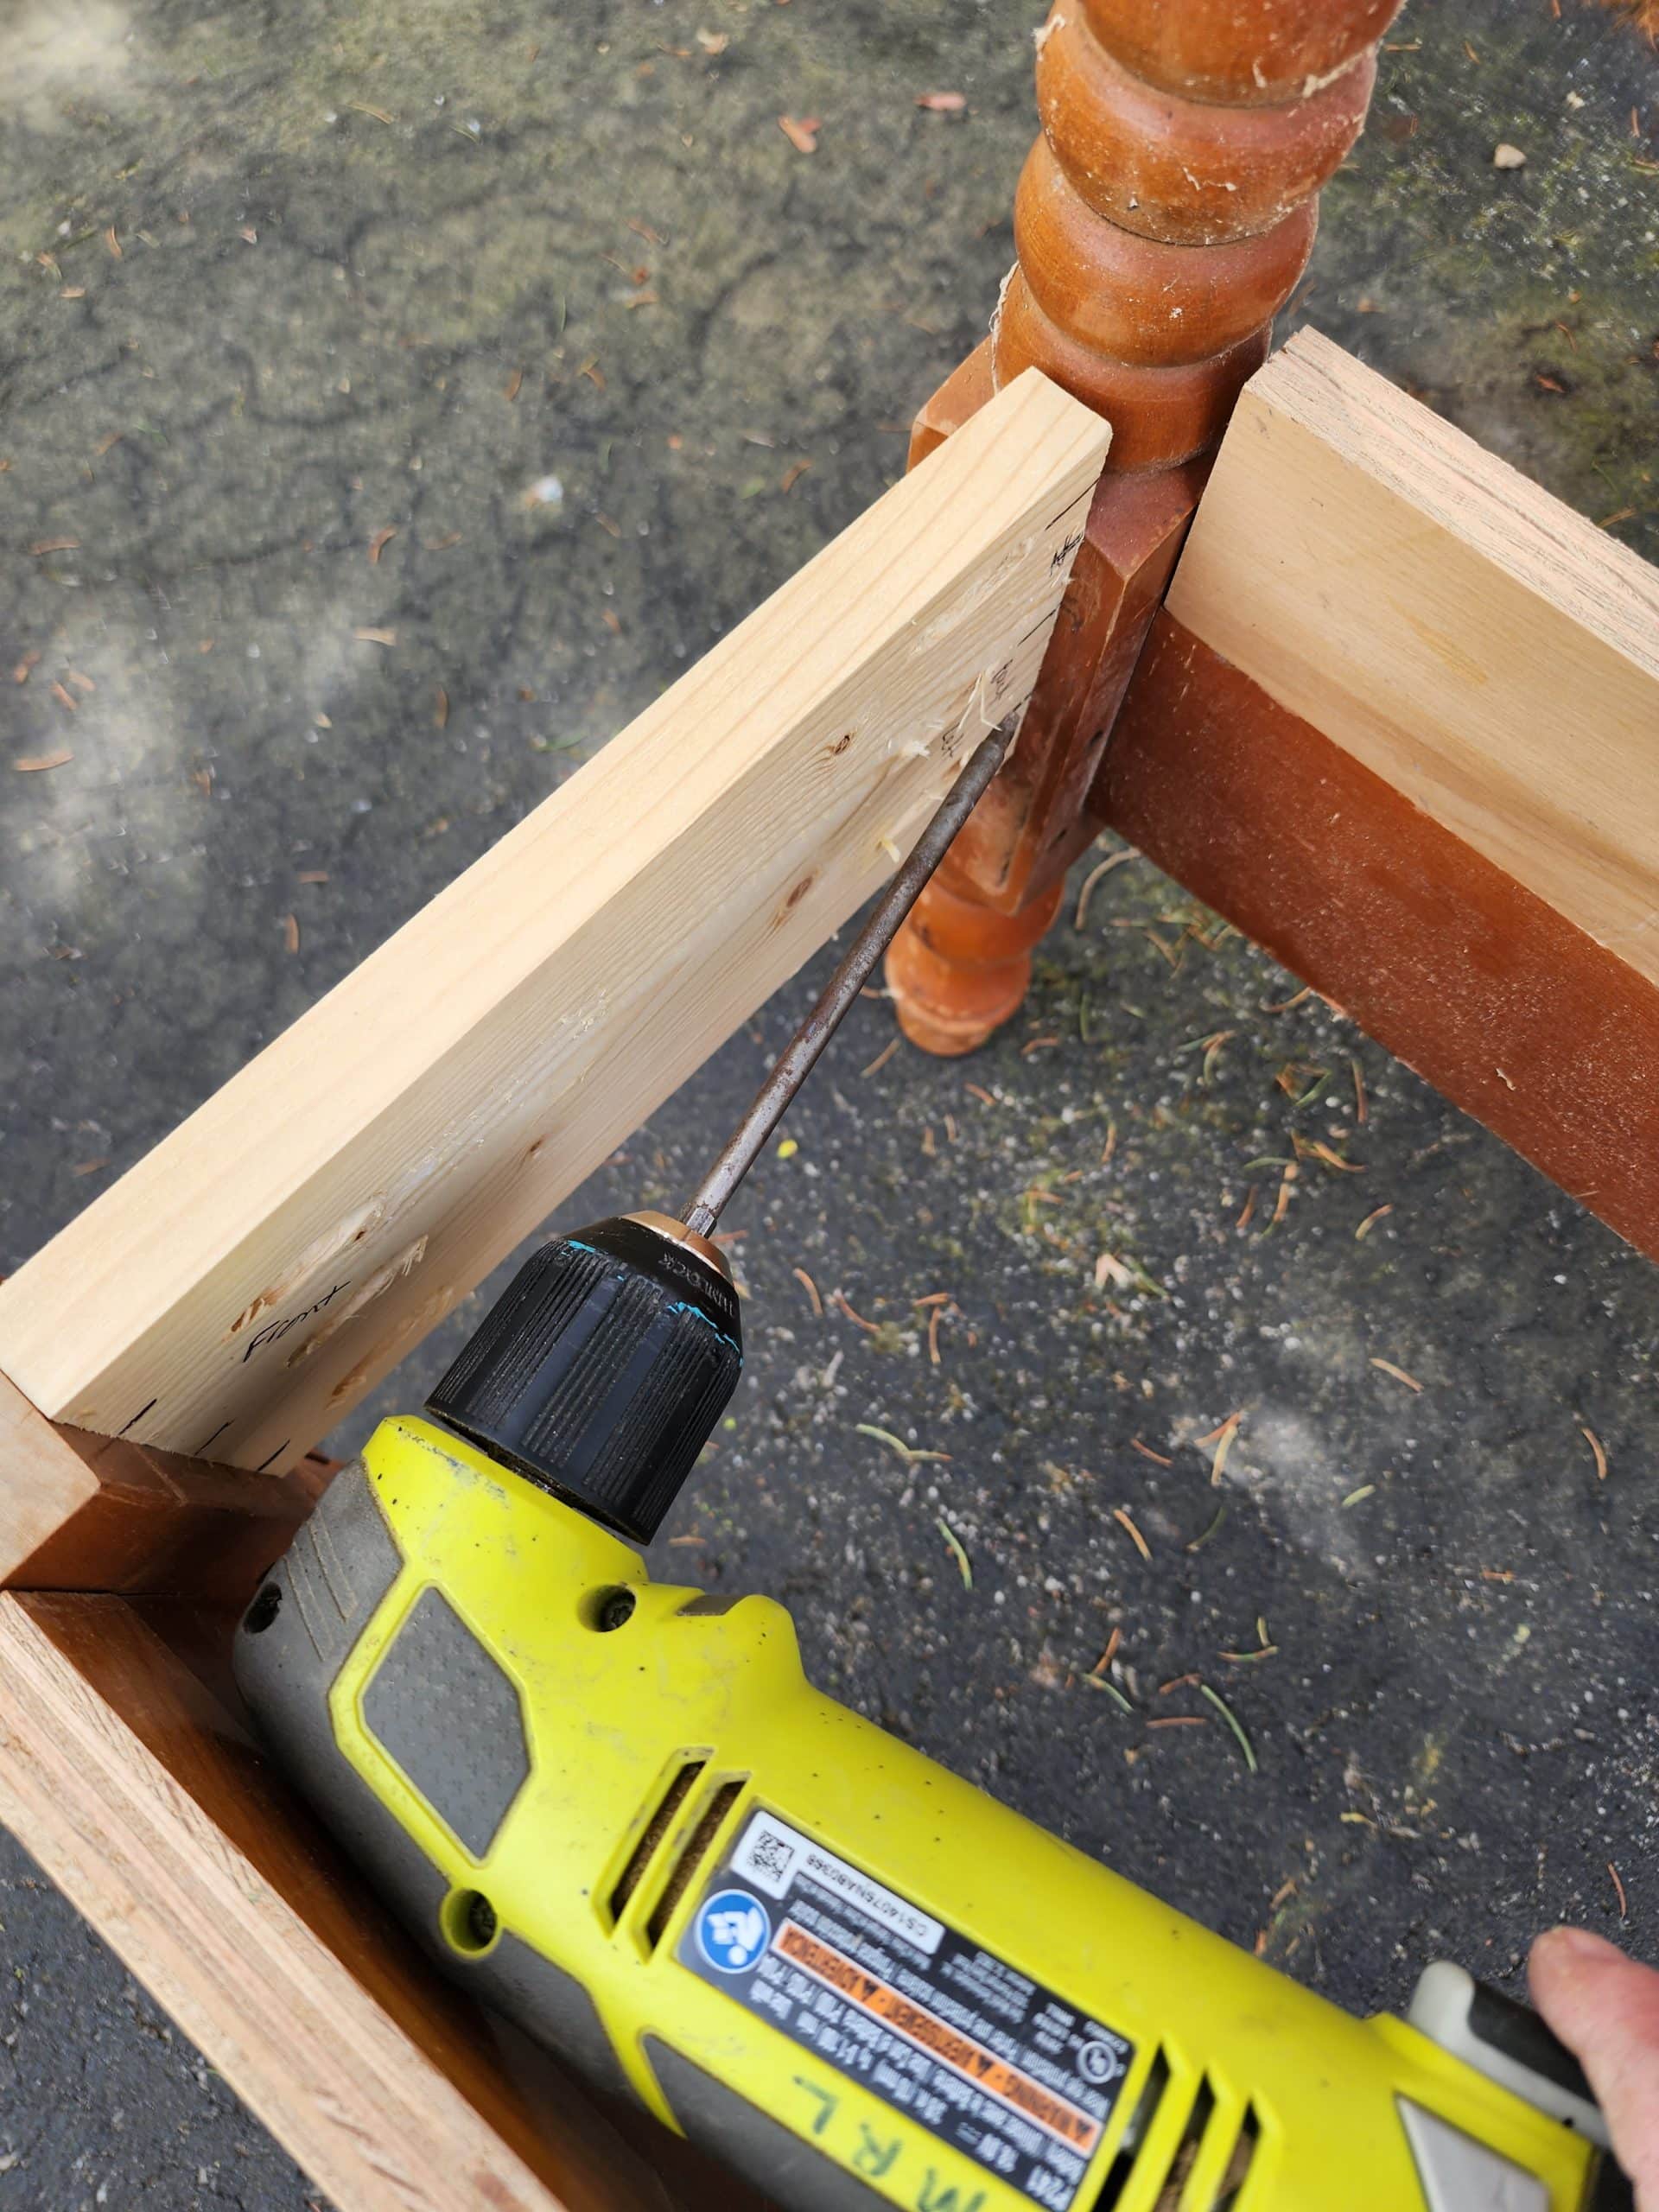
This part is essential; you will thank me later if you encounter this problem. The BOX of the headboard is very shallow, making it impossible to get a drill with the bit in place. I’m fortunate enough to have a right-angle drill that barely fits.
There are other options:
- Don’t make your headboard bench so shallow. Remember, this board is only 9.5 long.
- Drill your pocket holes on the OUTSIDE of your short board. This will allow you to secure your pocket hole screws quickly. NOTE: if you do it this way, you must patch your pocket holes. (more on that later)
- Lastly, you can drive your screws with a socket by hand or buy a right-angle drill.
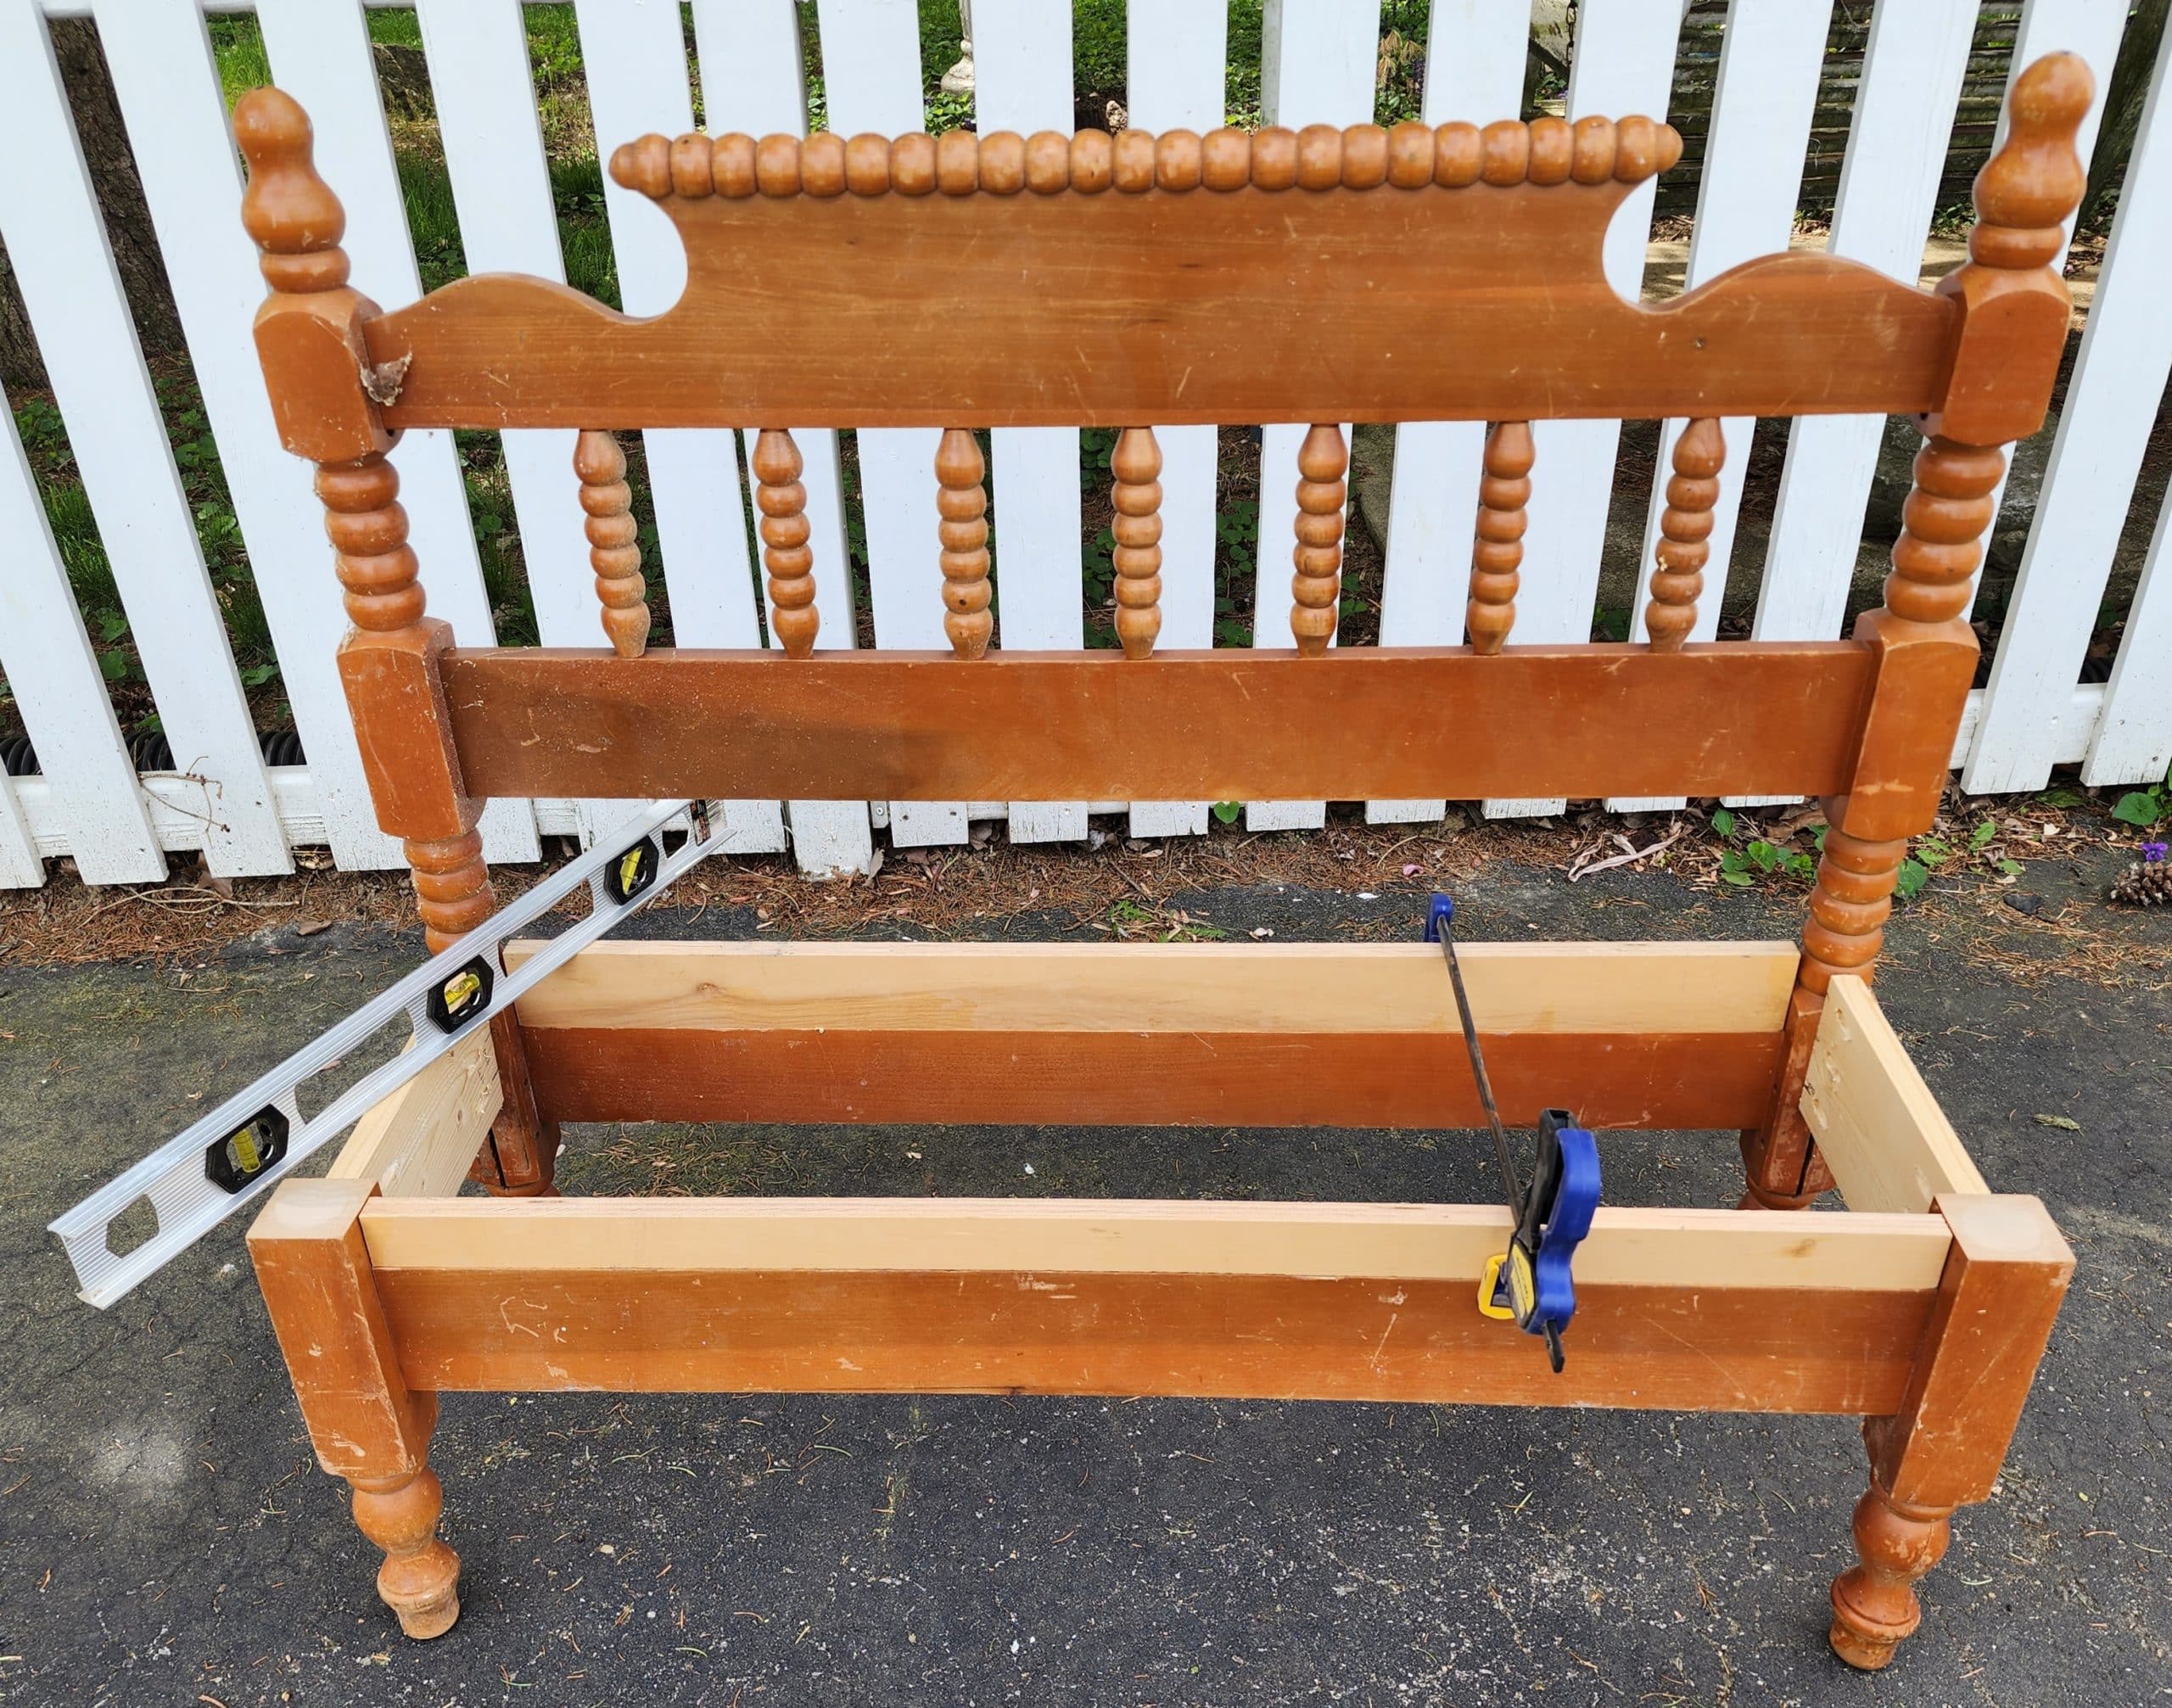
In this image, you can see that I gained almost 2 inches in height by adding the scrap boards to the headboard and the footboard pieces.
Measure Seat Boards
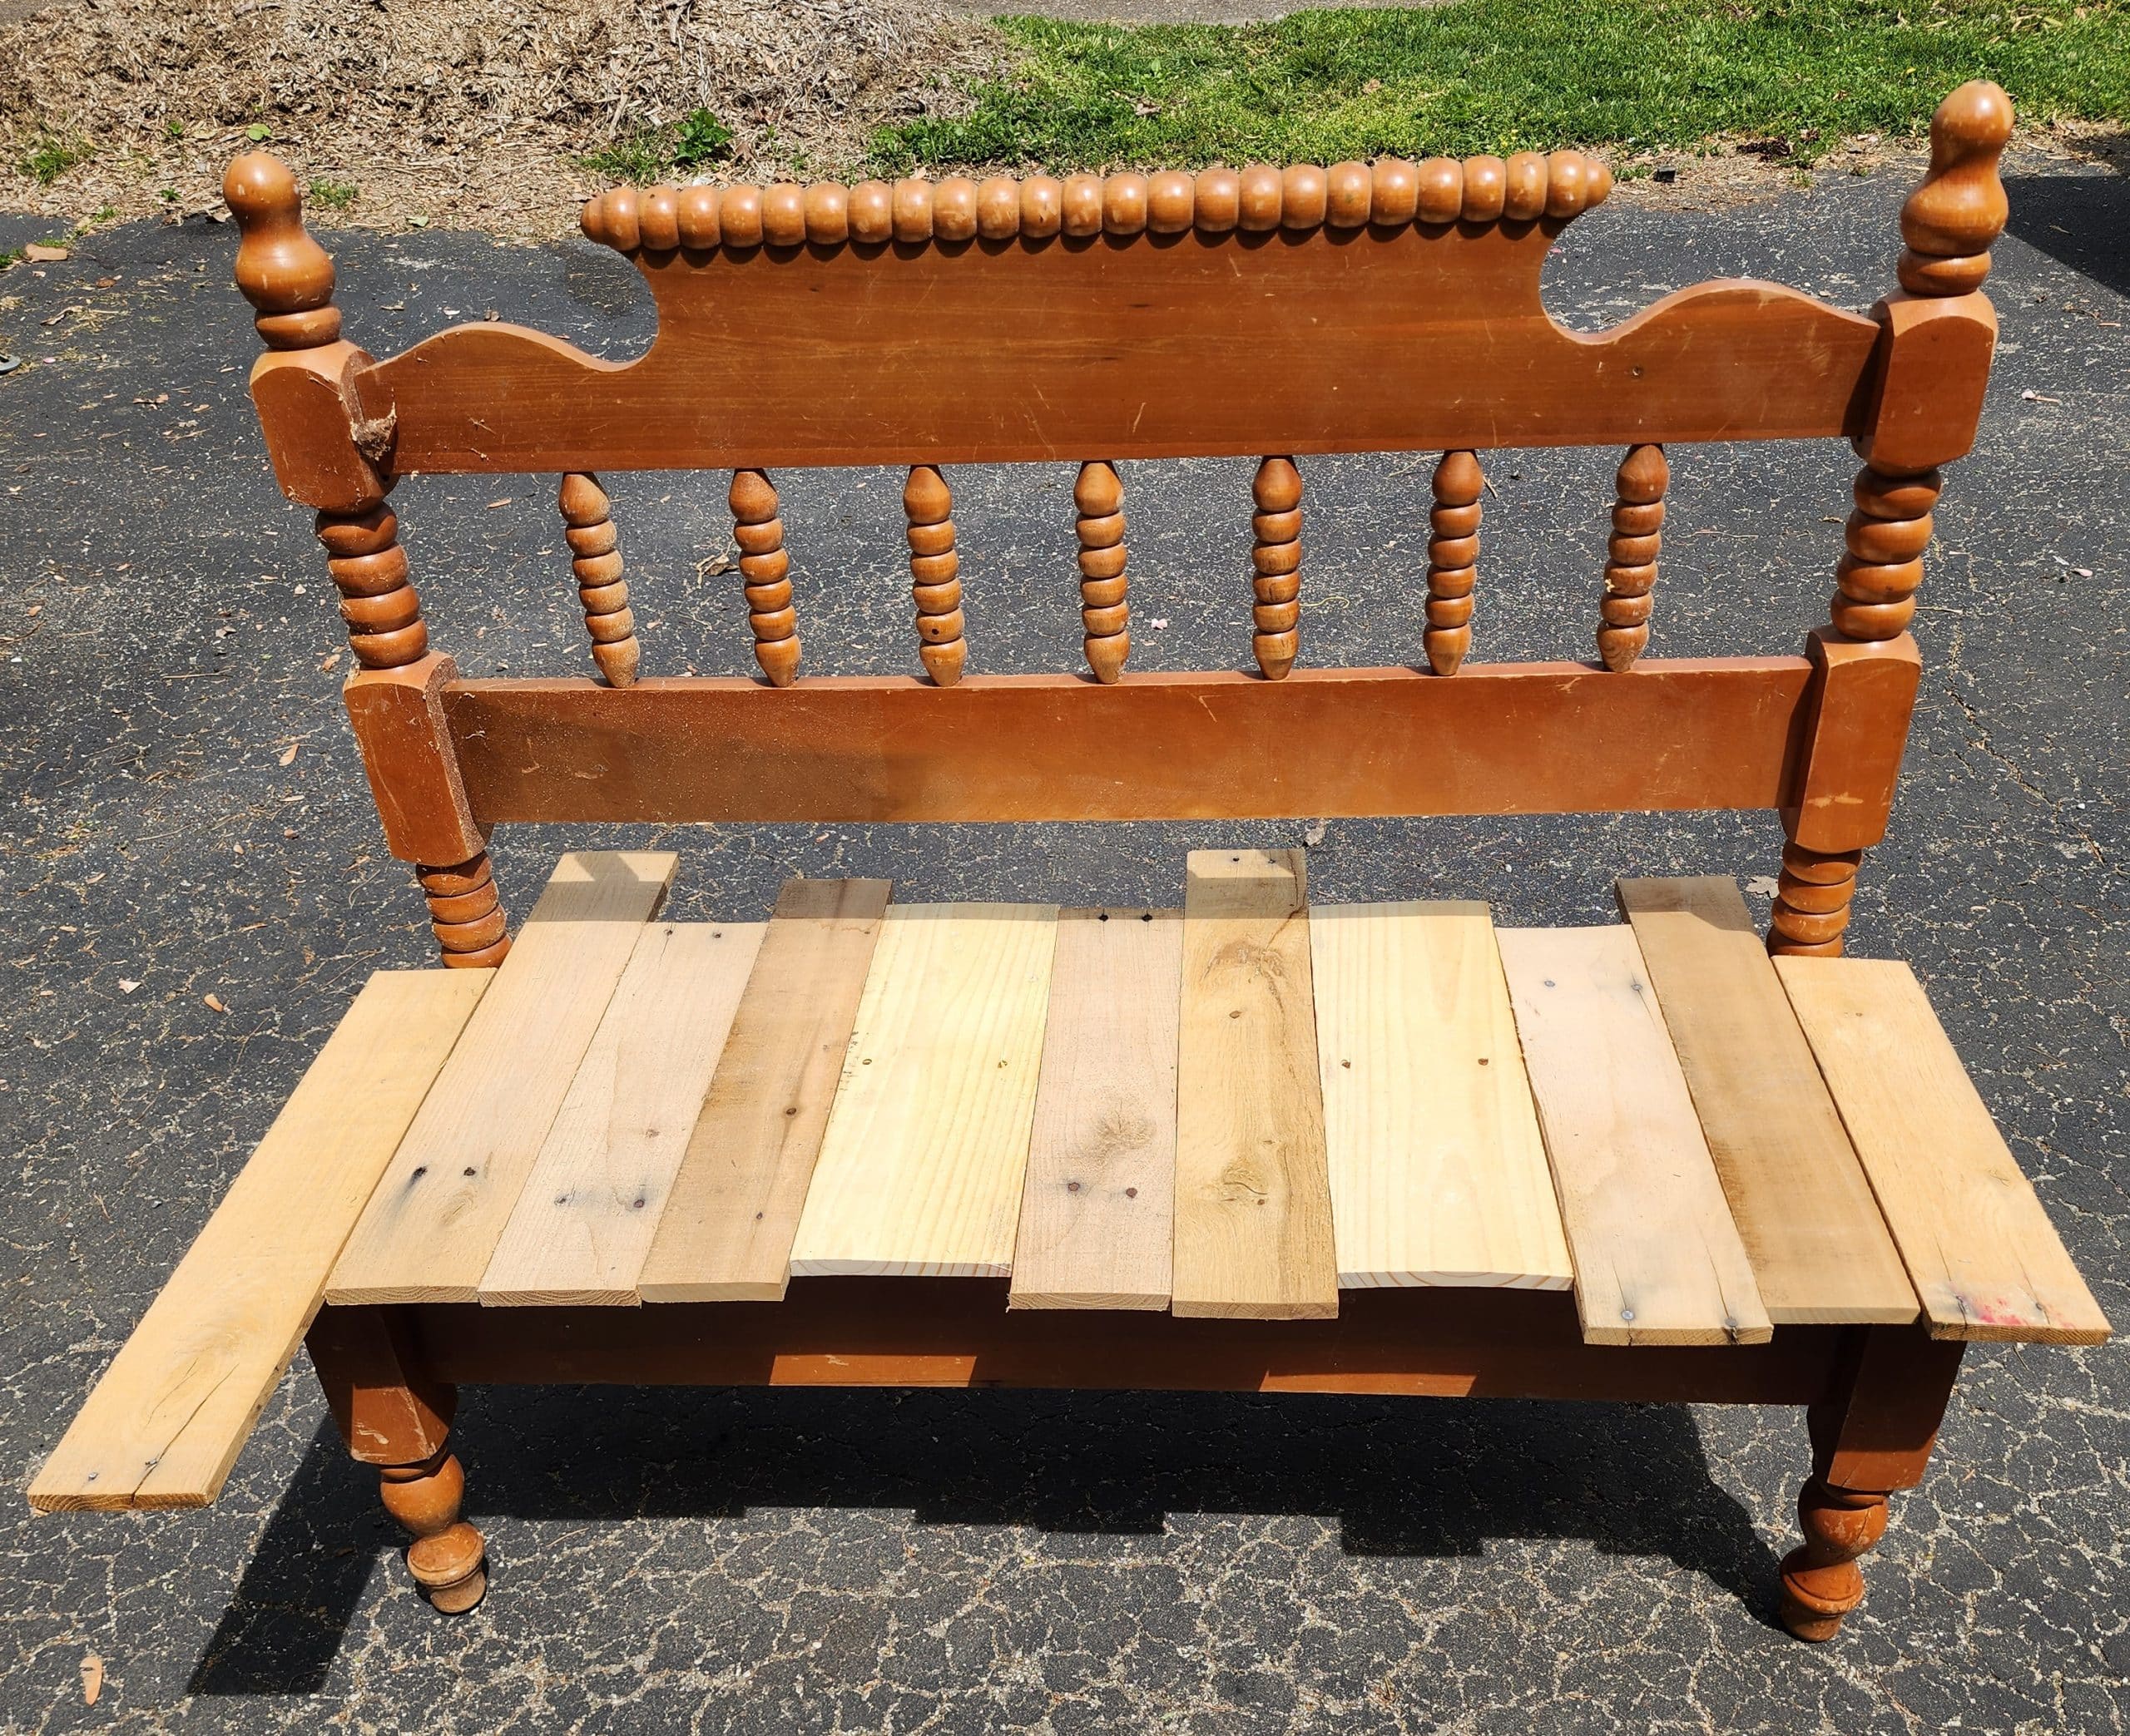
While making this petite headboard bench, I imagined it being used as a plant bench. I recently tidied up the garage and collected a bunch of small pieces of pallet boards. They were close by and were nearly the right size, so I went with them.
Remove Nails | Sand Pallet Boards
Some of the nails had already been removed, so I punched out the remaining ones. I quickly sanded the rough boards to remove any splintering pieces.
Patch Rail Slats and Visible Pocket Holes
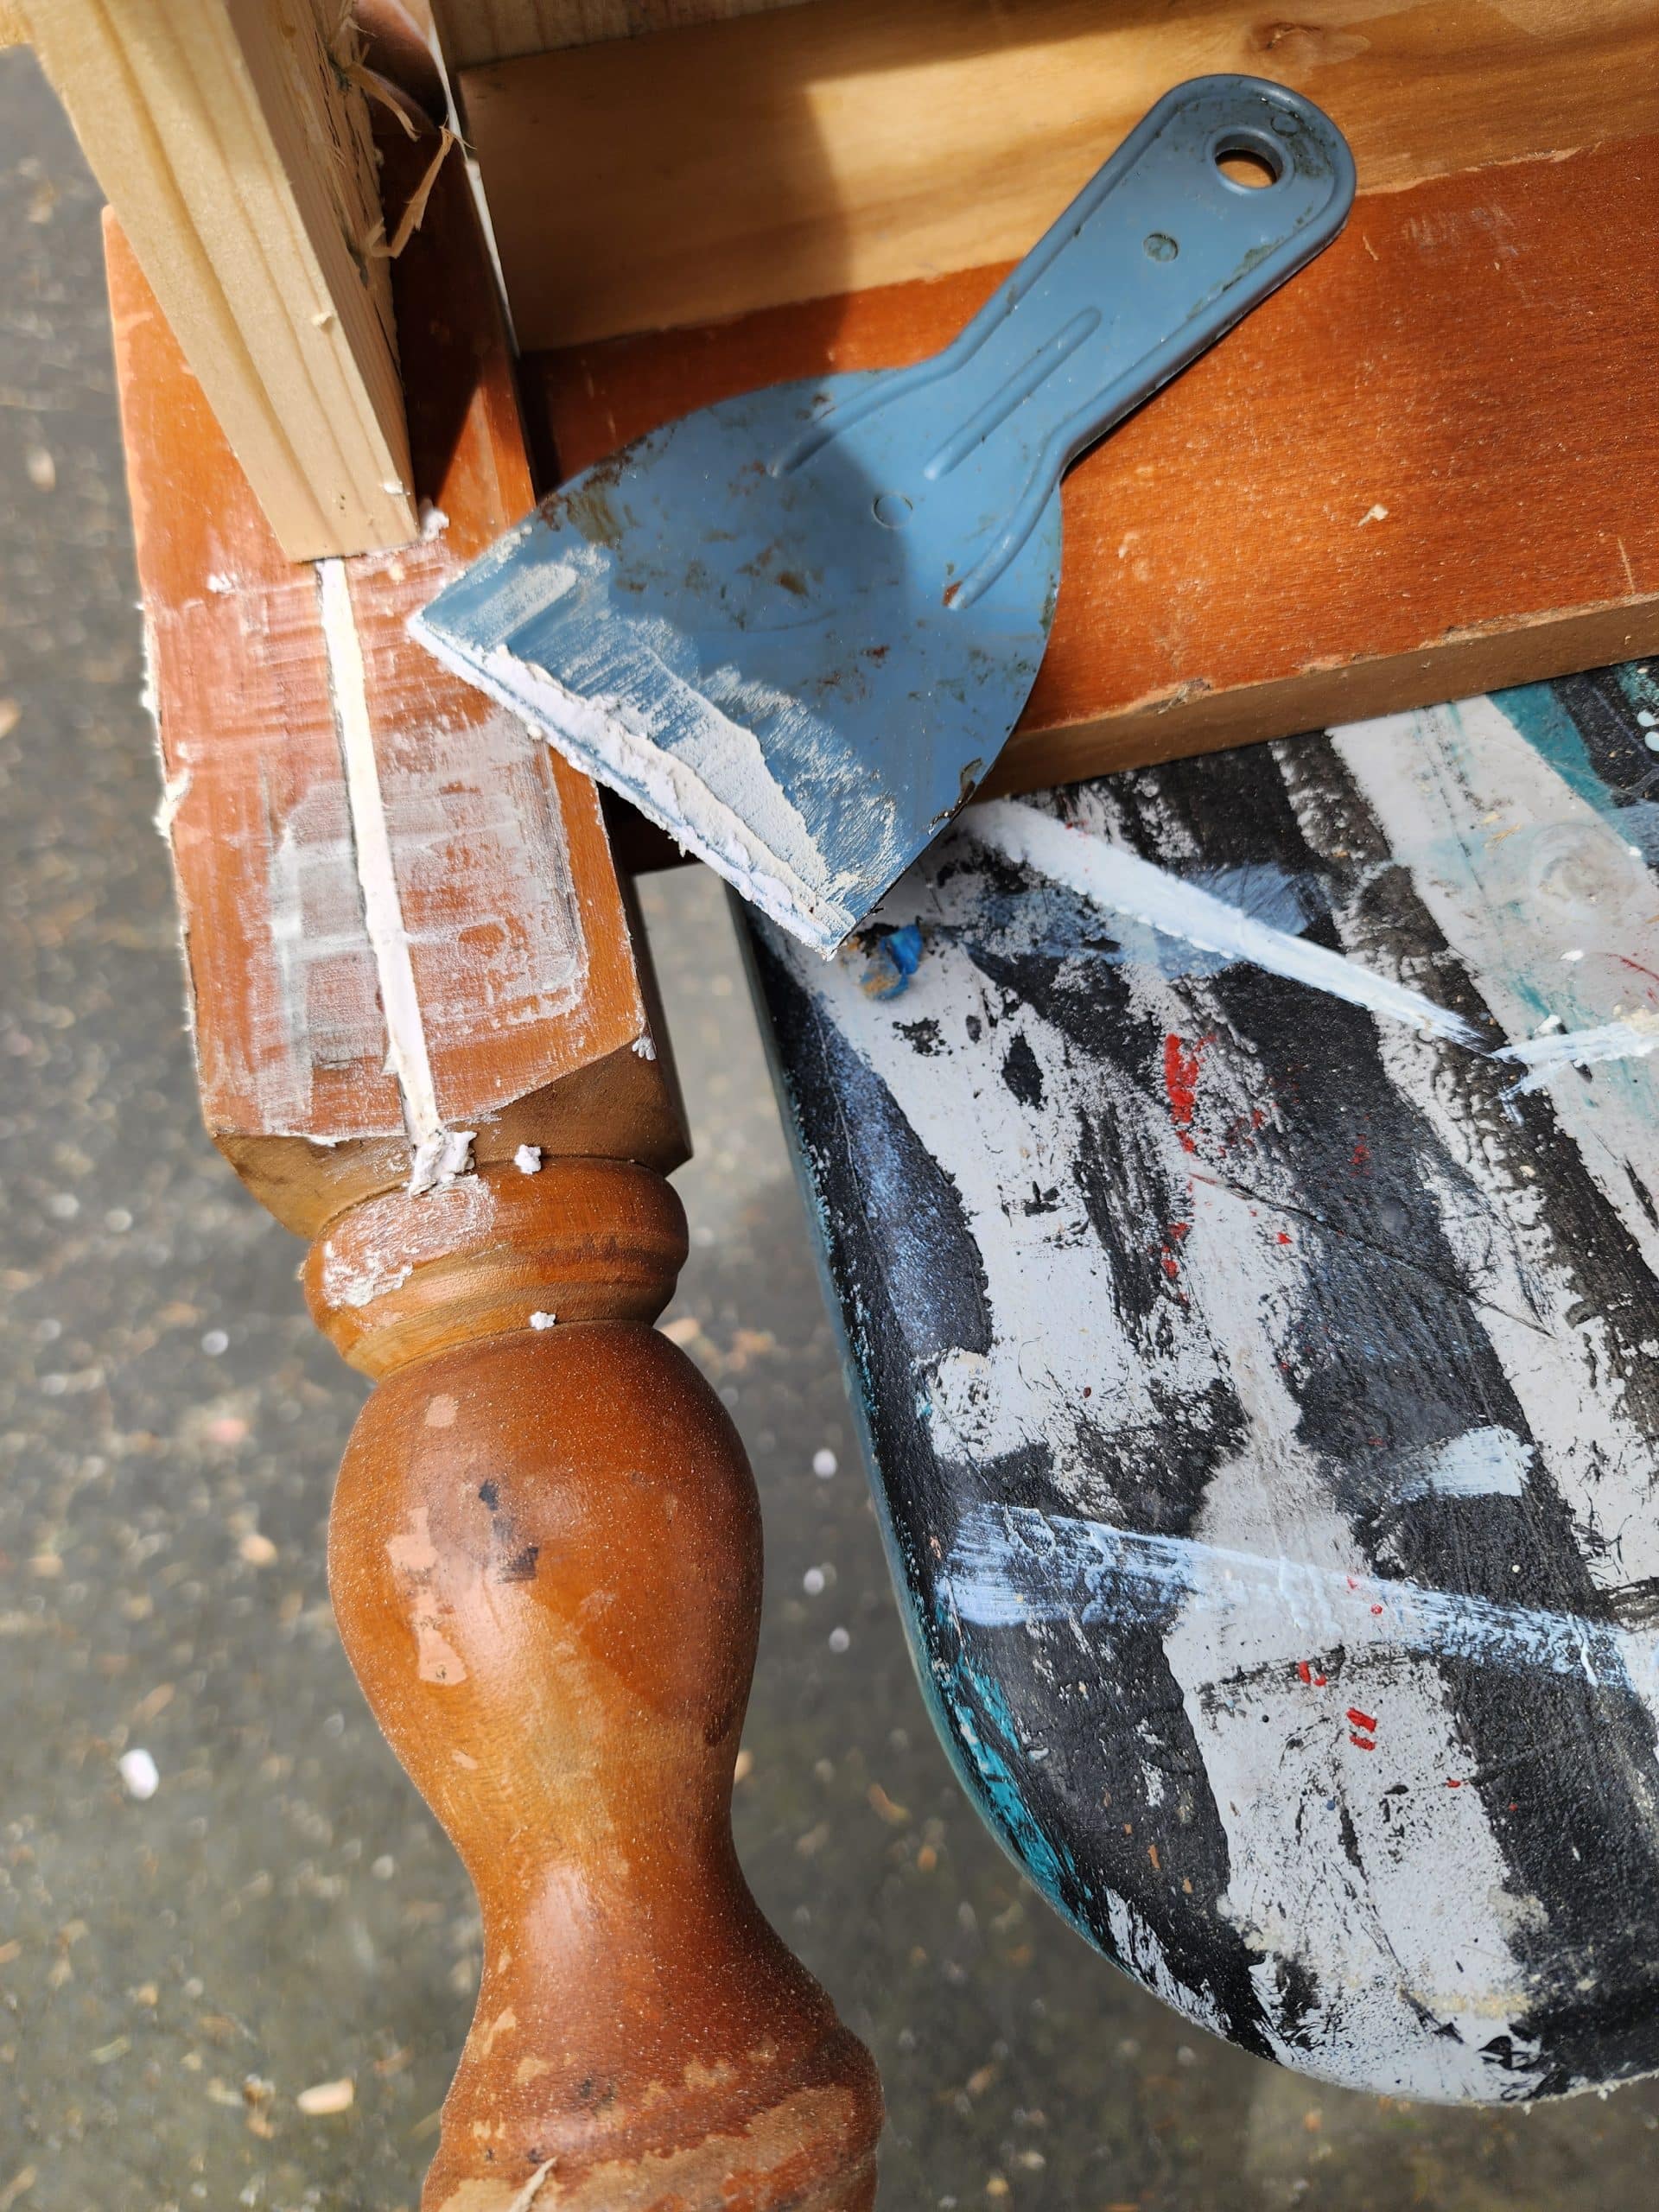
I patched the rail slats groove and visible pocket holes. However, I did not patch the pocket holes on the underneath side of the petite bench.
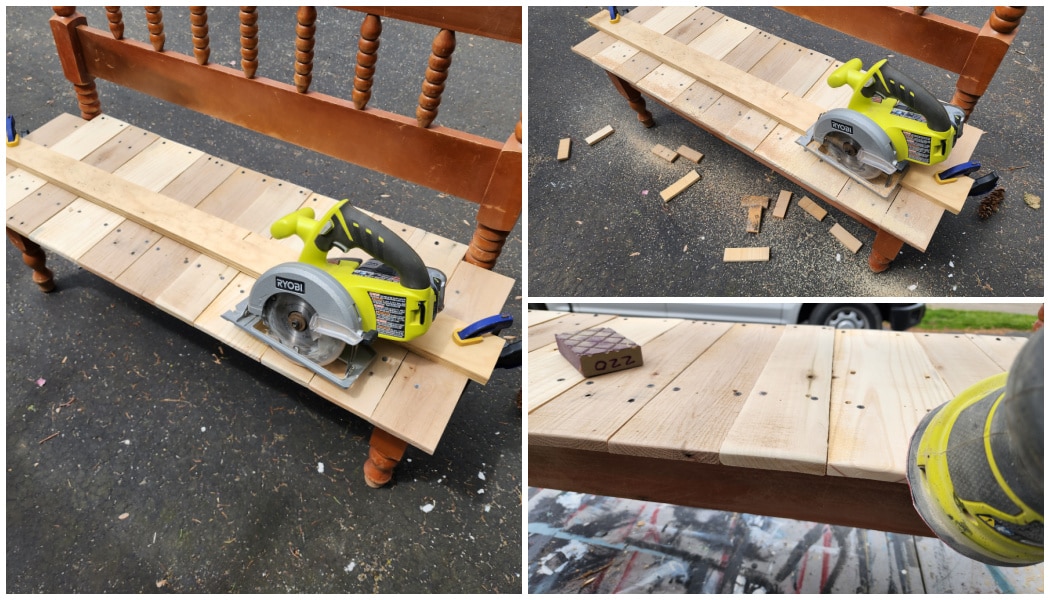
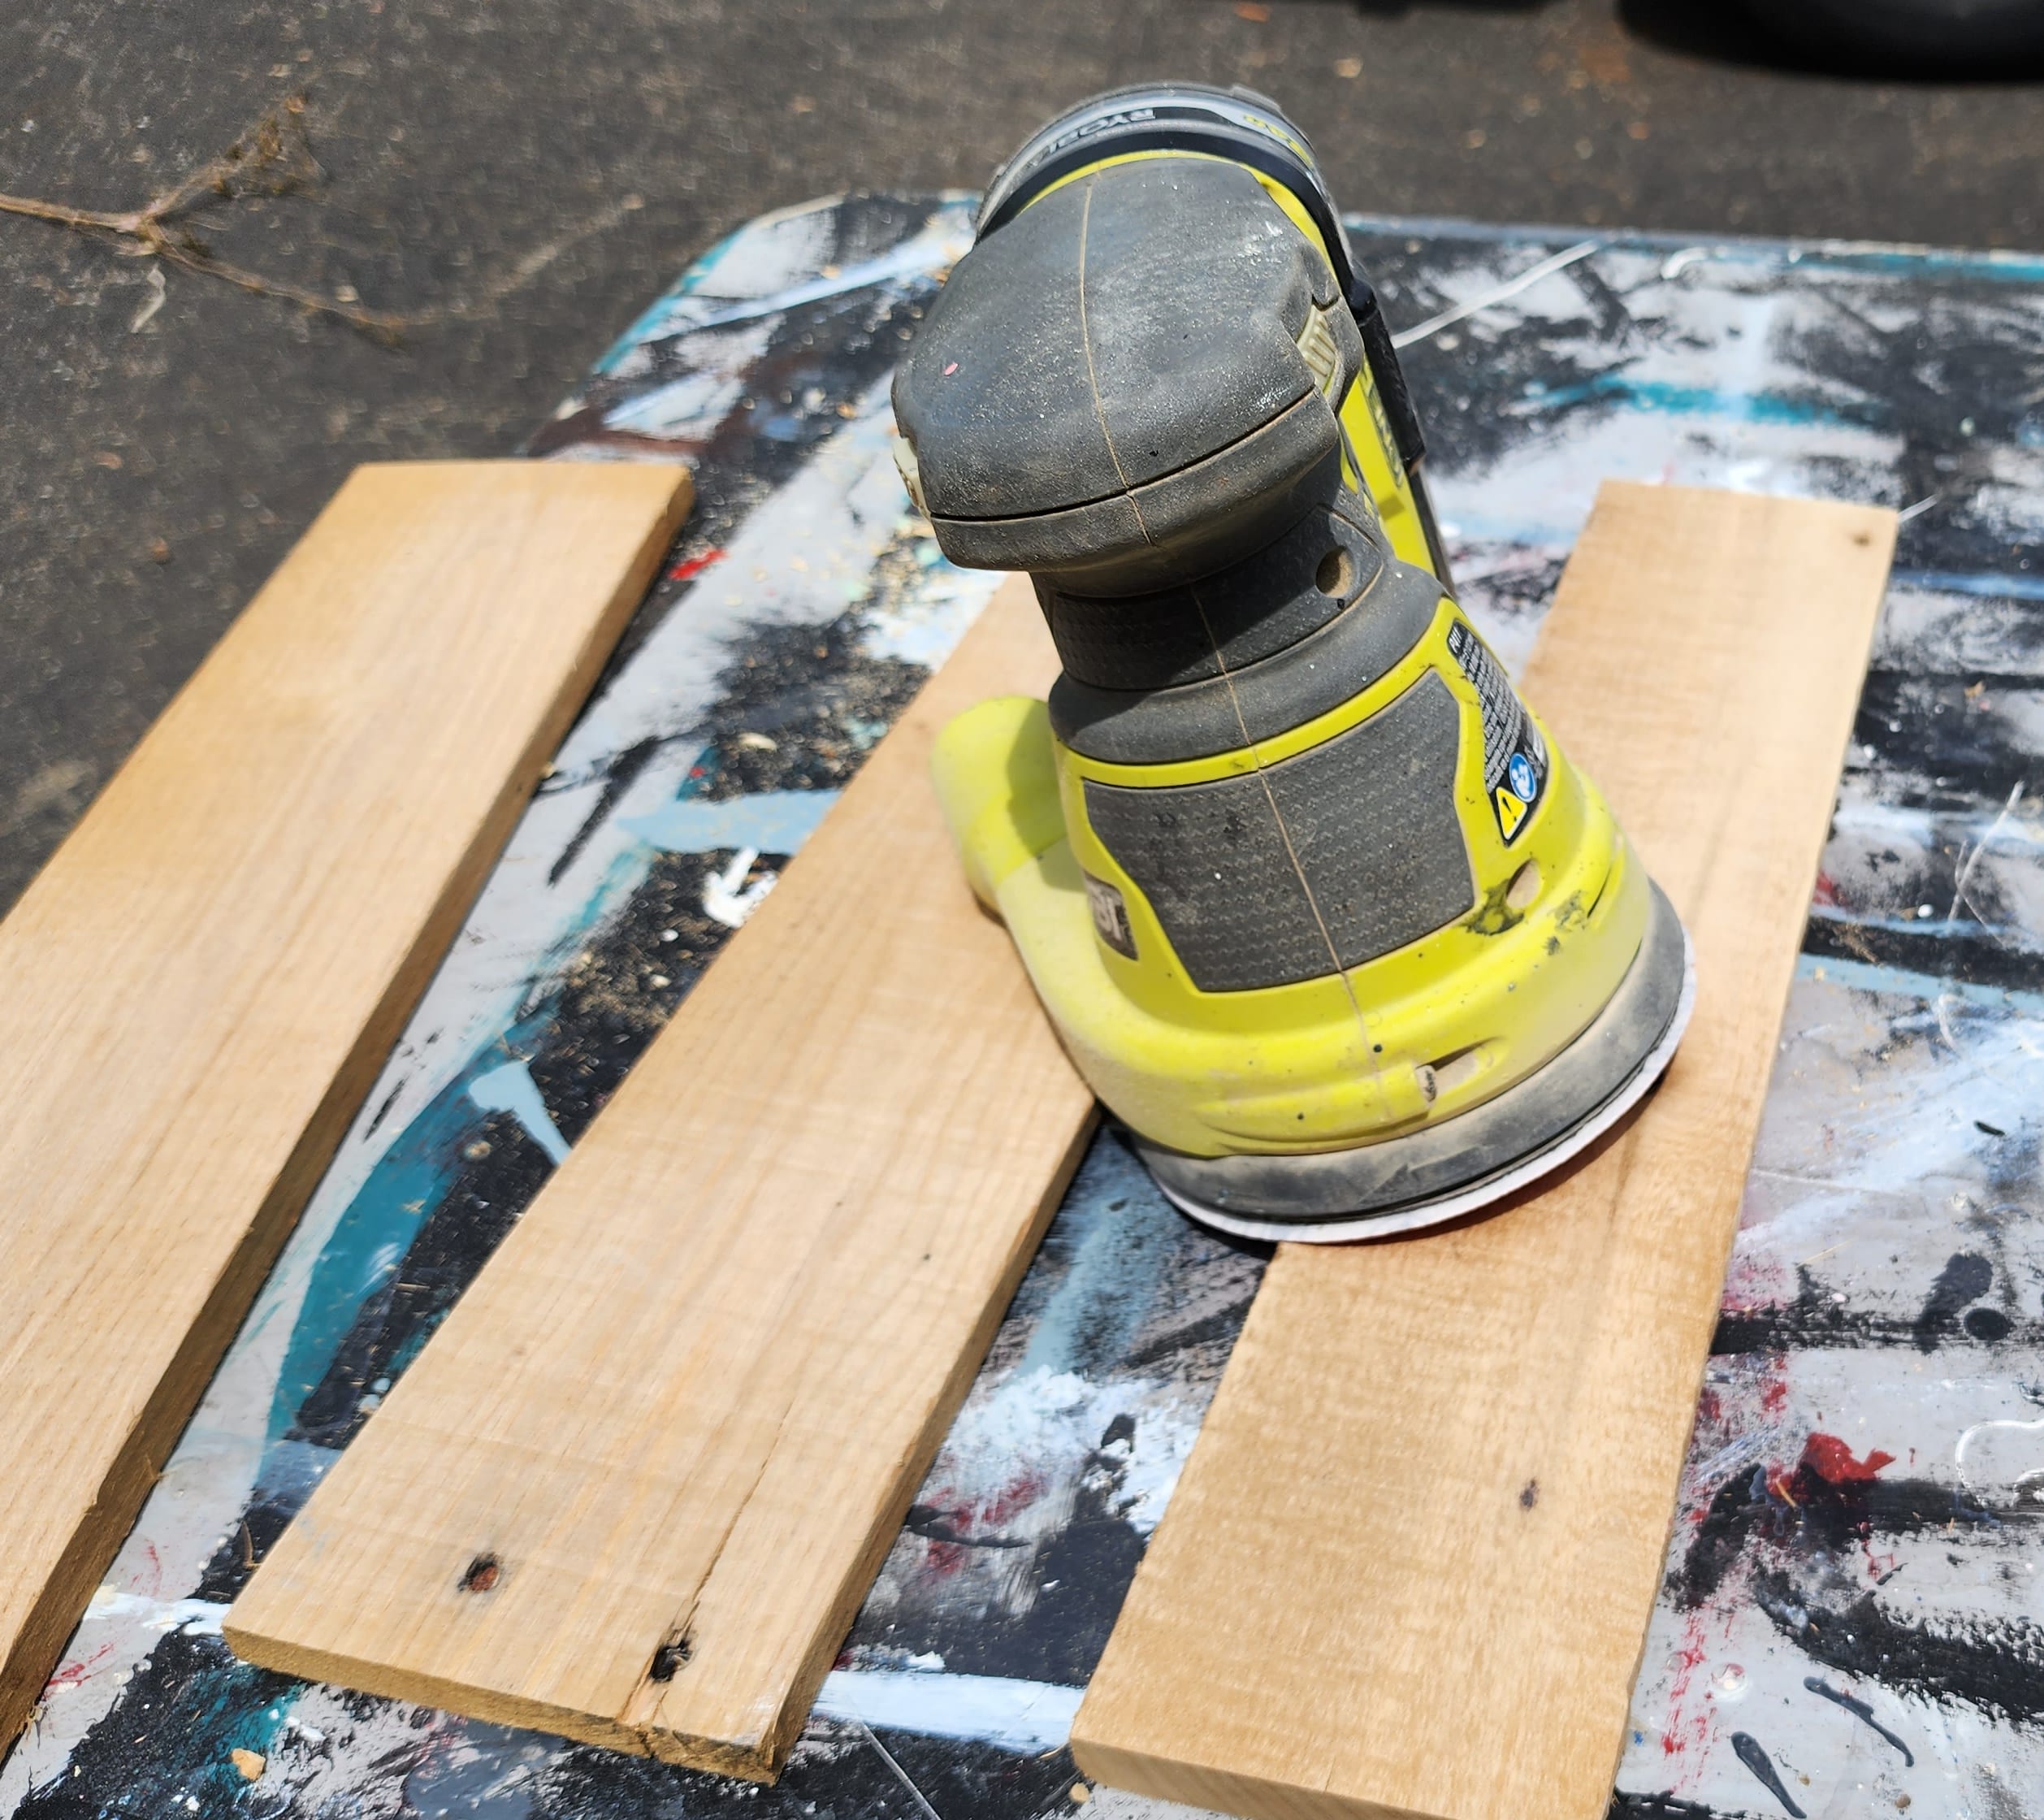
I had cut the seat boards too long. Not only didn’t it look good, it was top-heavy on the front, and I noticed it leaned forward when I rose from sitting on it. I clamped a straight edge on it and cut the boards with my circular saw. I never liked a circular saw until I got this small battery saw from Ryobi. It never fails me, and it’s easy to use.
After cutting the boards, I used the sander to round off the sharp edges of the pallet boards.
Petite Headboard Bench

I feel like it’s taking me longer to tell you how to make this petite headboard bench than it took me to build it!
Prep for Painting
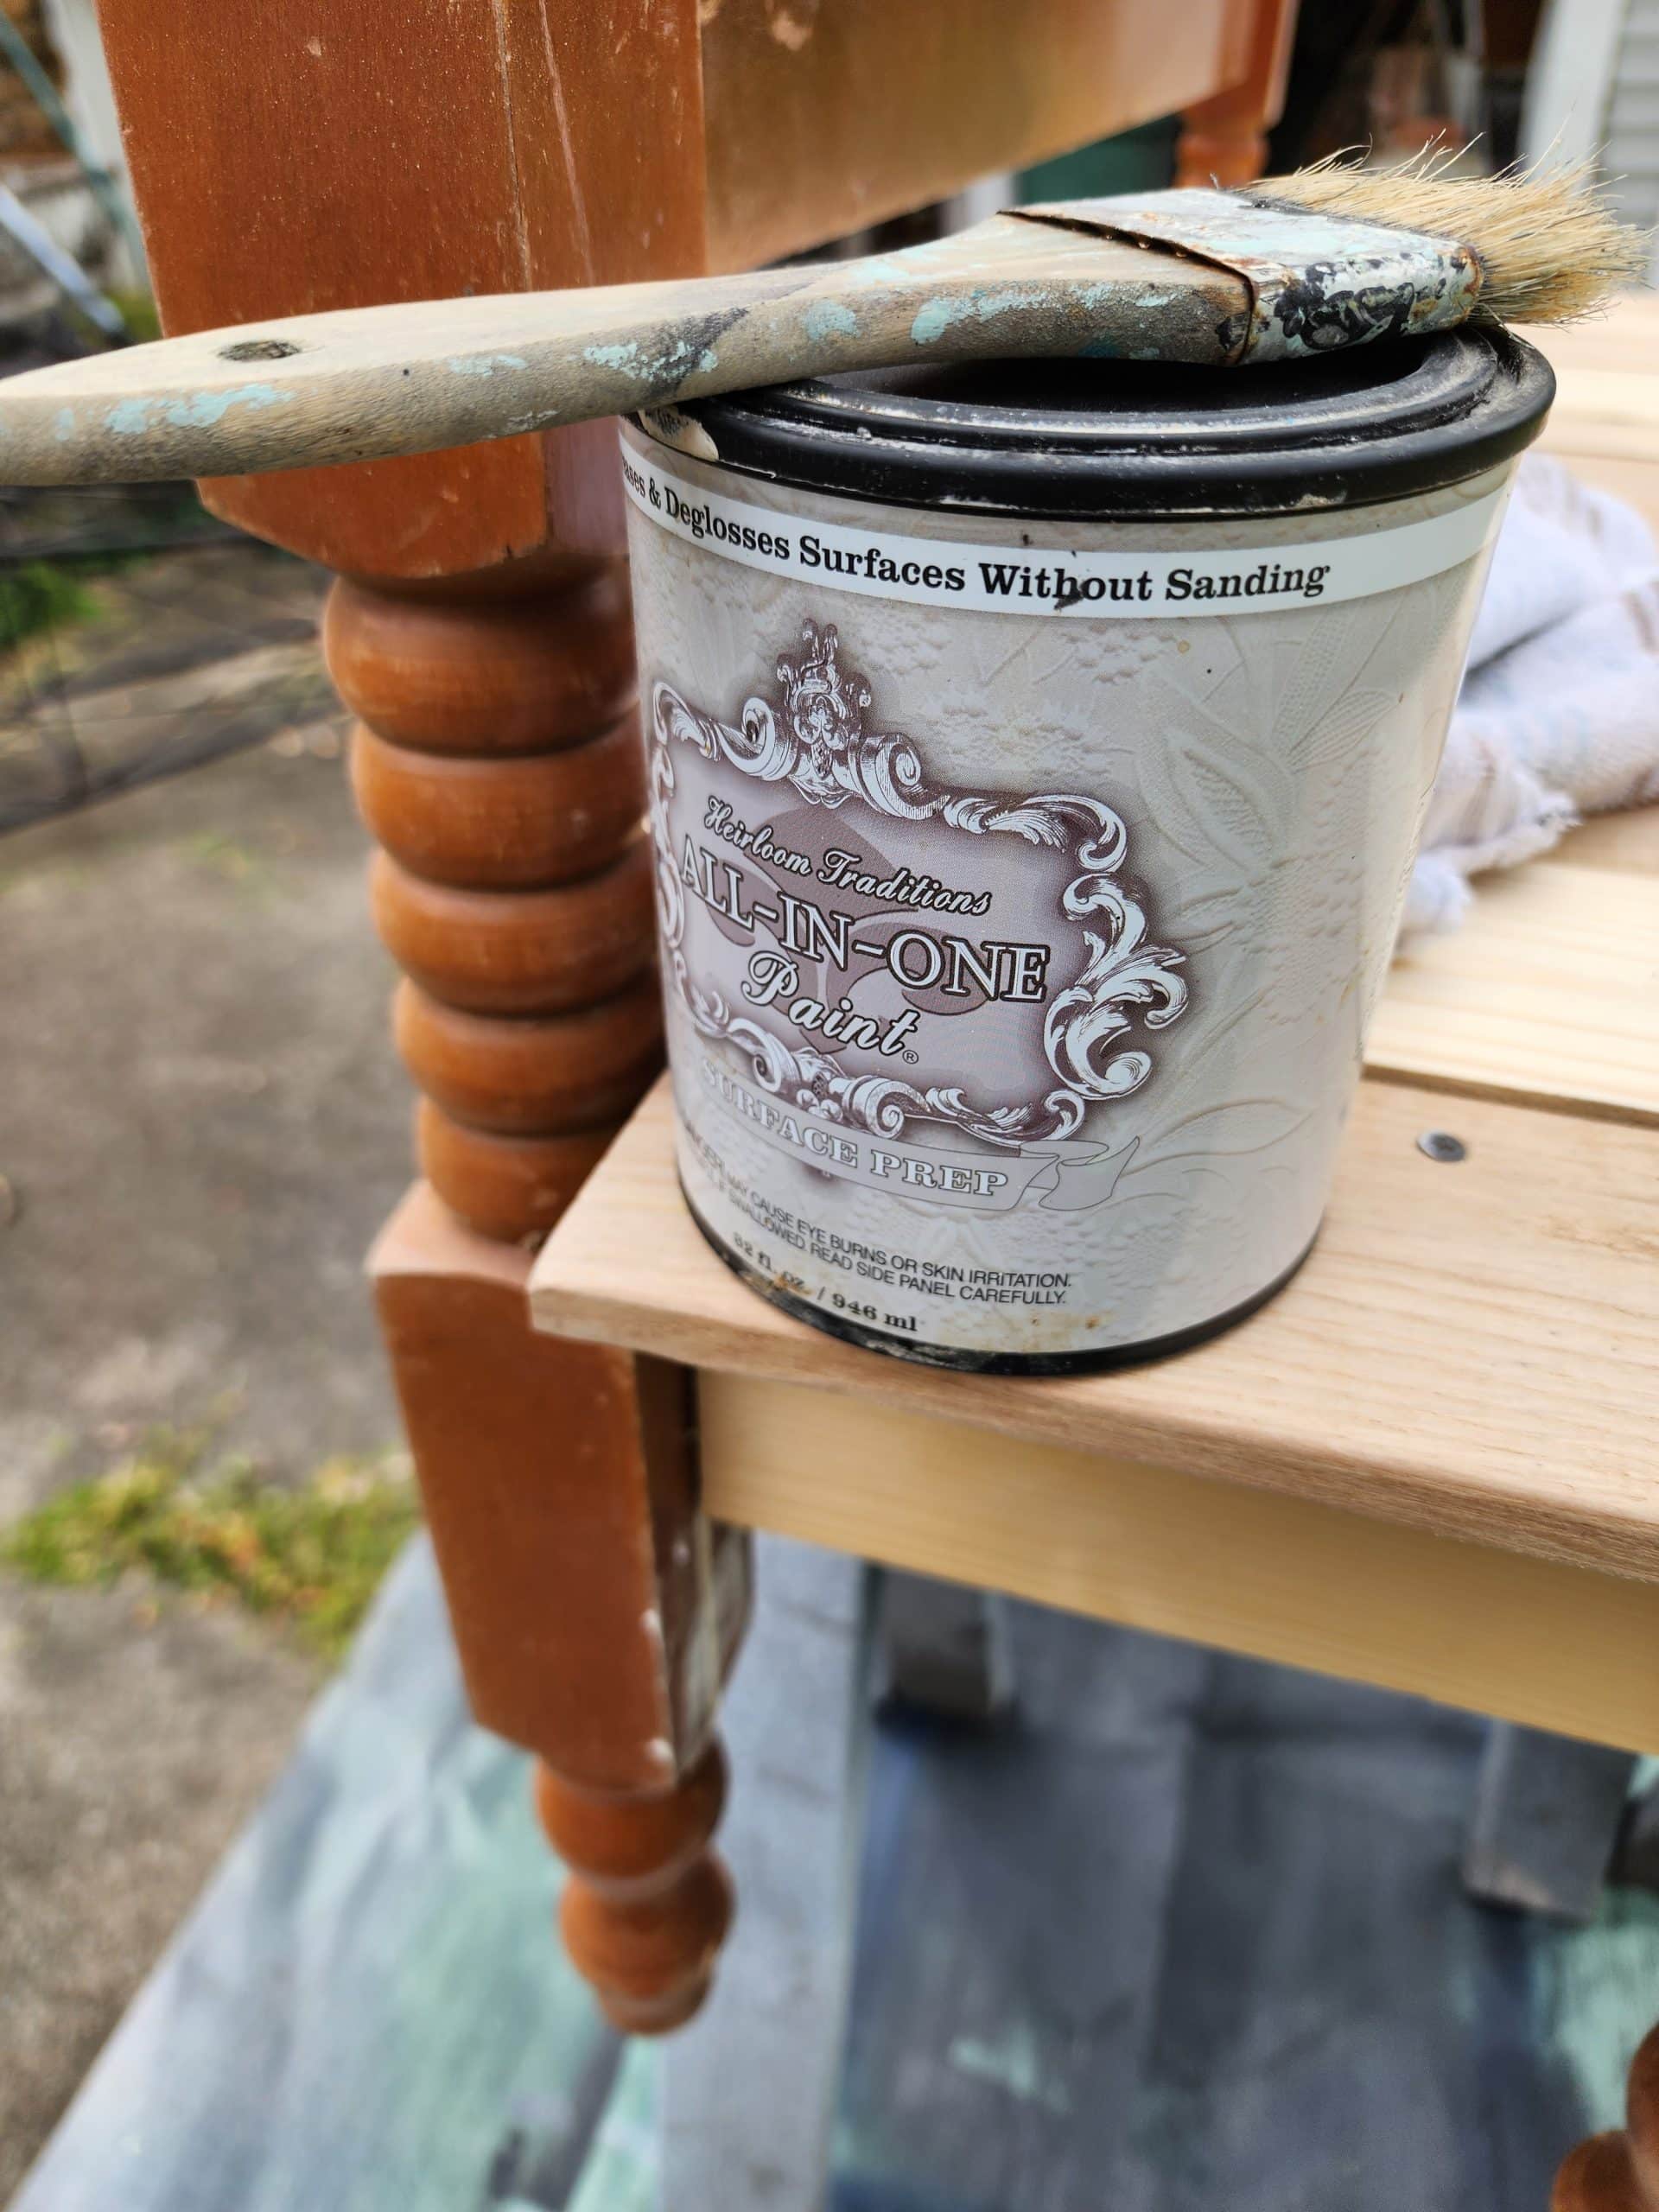
Now the bench is resting atop my easy 2×4 sawhorses. Some of the headboard still has a very shiny finish on it. The surface prep will aid in dulling the shine, which will allow the paint to adhere better. I brushed it on and wiped it off with an old towel. I did not bother to do the raw wood of the pallet boards.
The surface prep deglosses and cleans simultaneously, so now the headboard bench is ready to paint.
Time to Paint using a Paint Sprayer
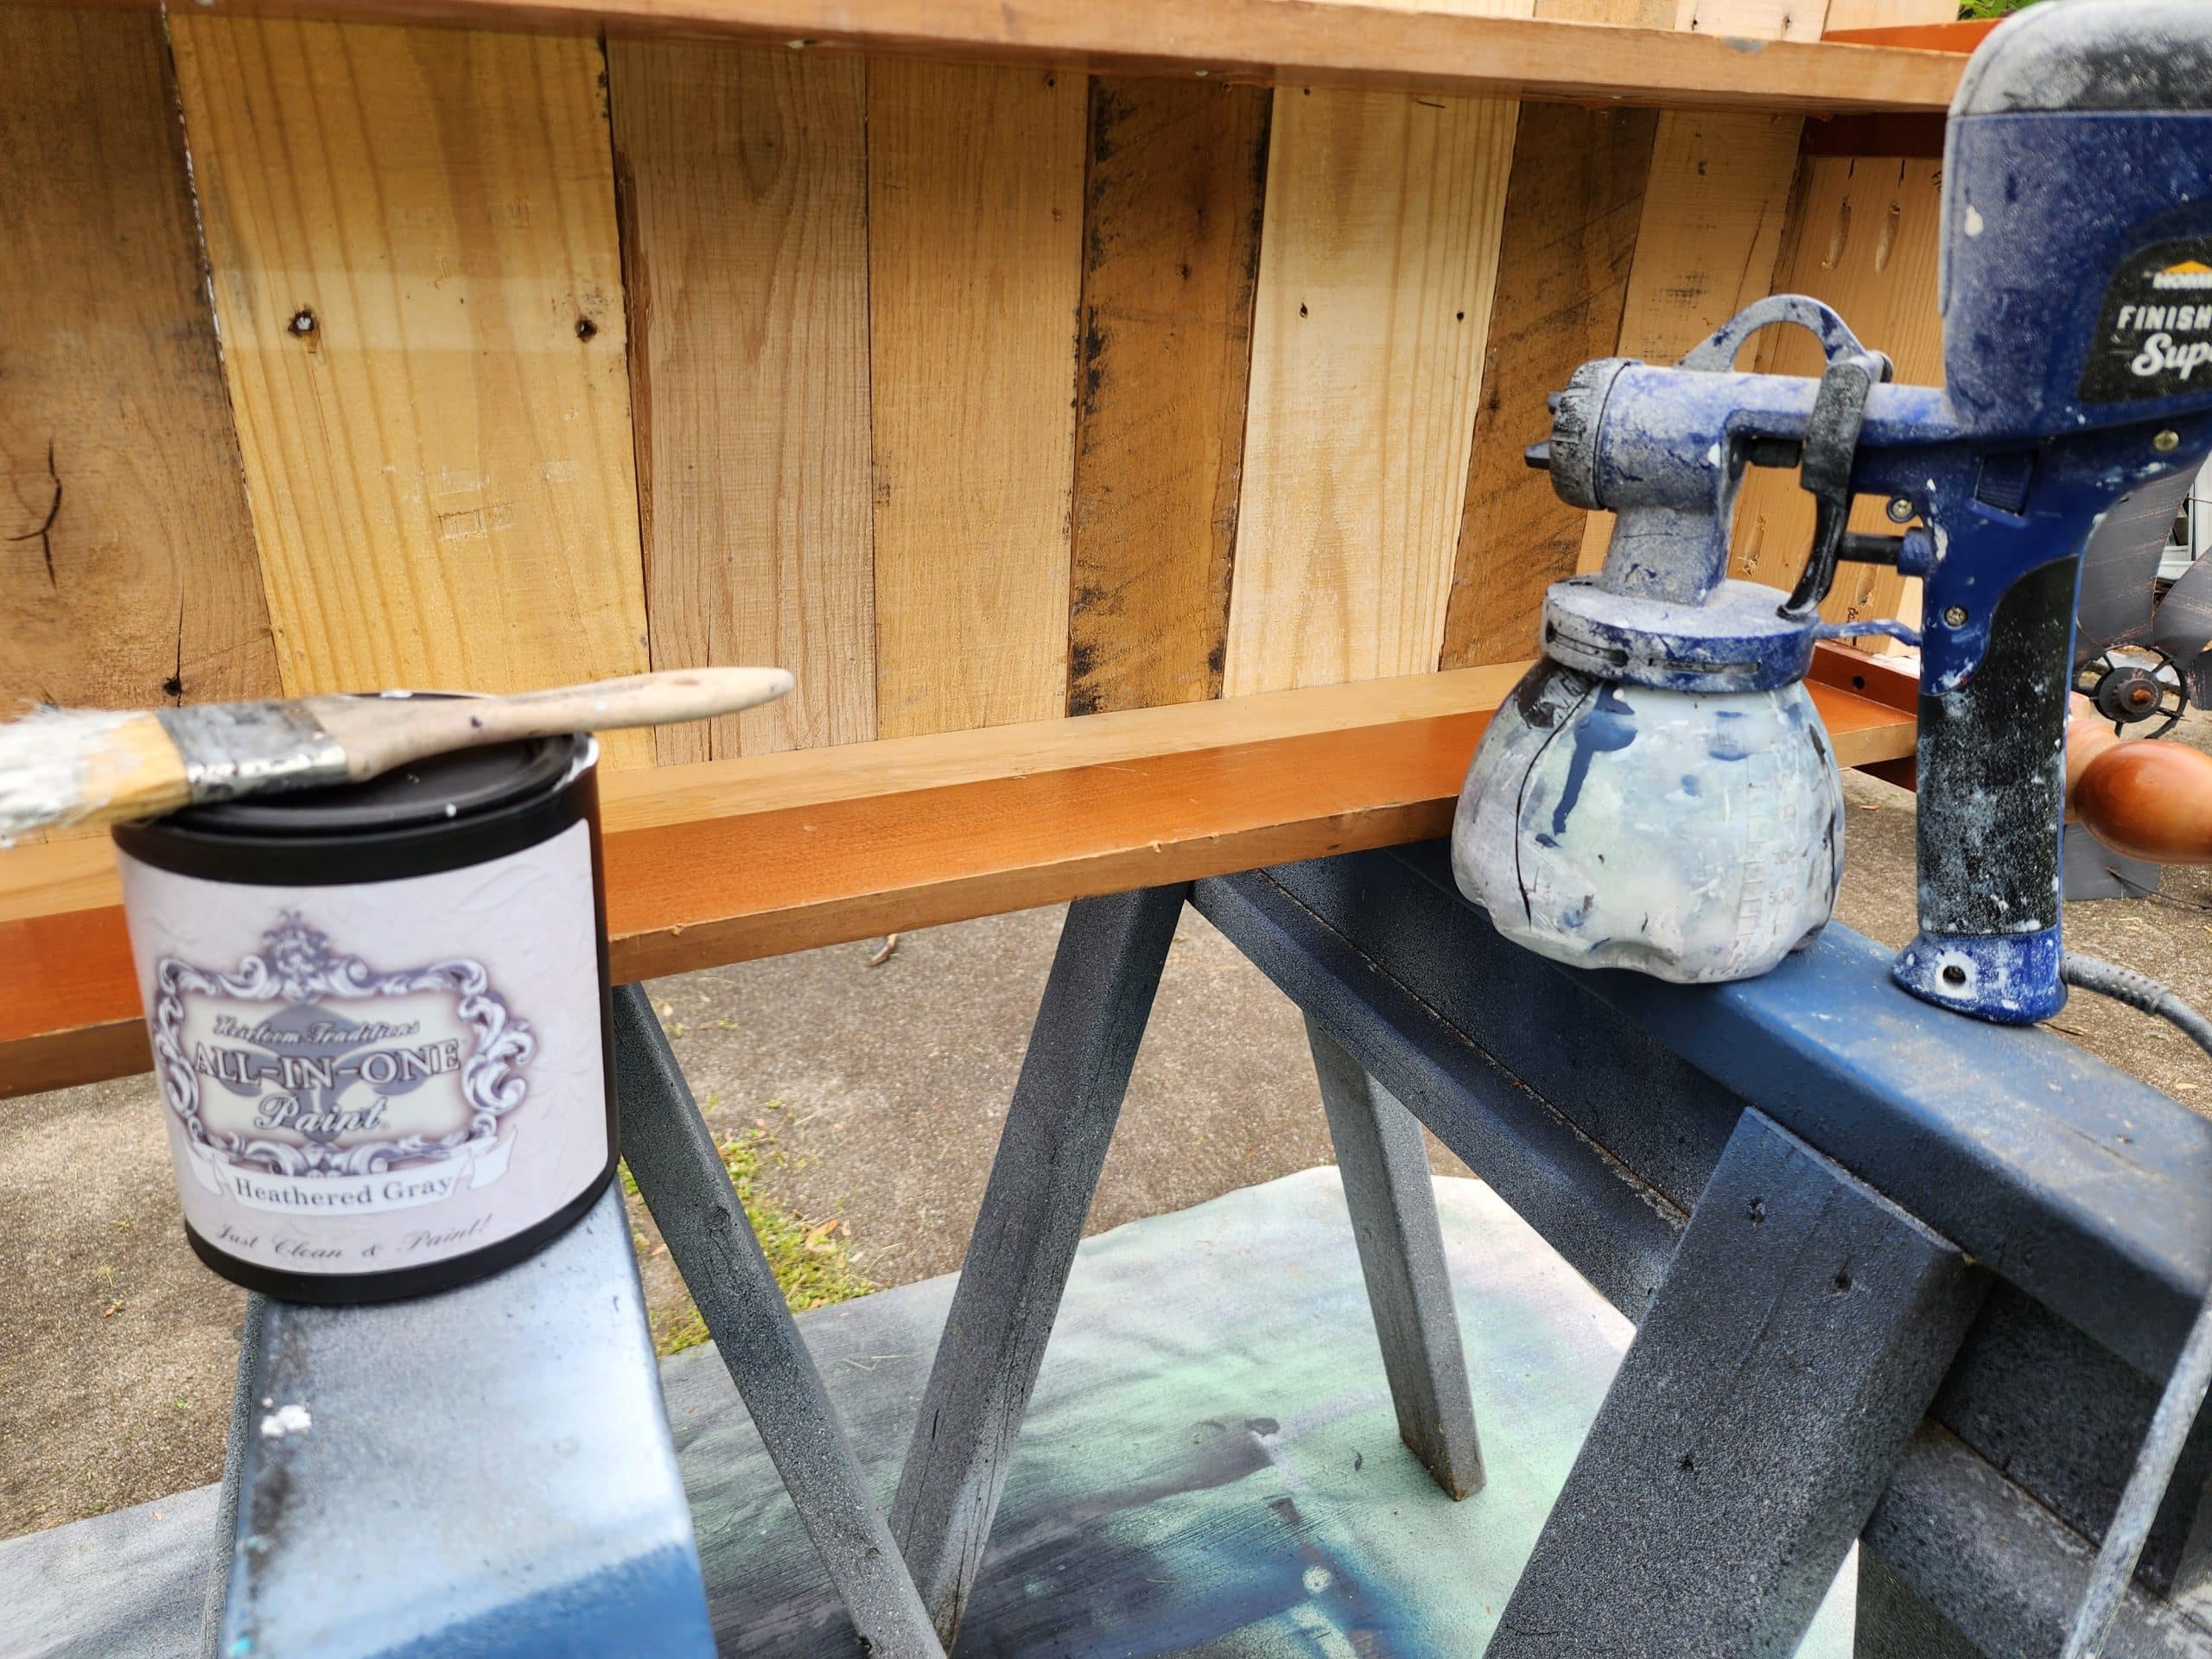
Being a spool bed, I knew there was no way I would paint this petite headboard bench with a paint brush. So, I got out my beloved Finish Max and Heirloom Traditions All In One Paint (Heathered Gray).
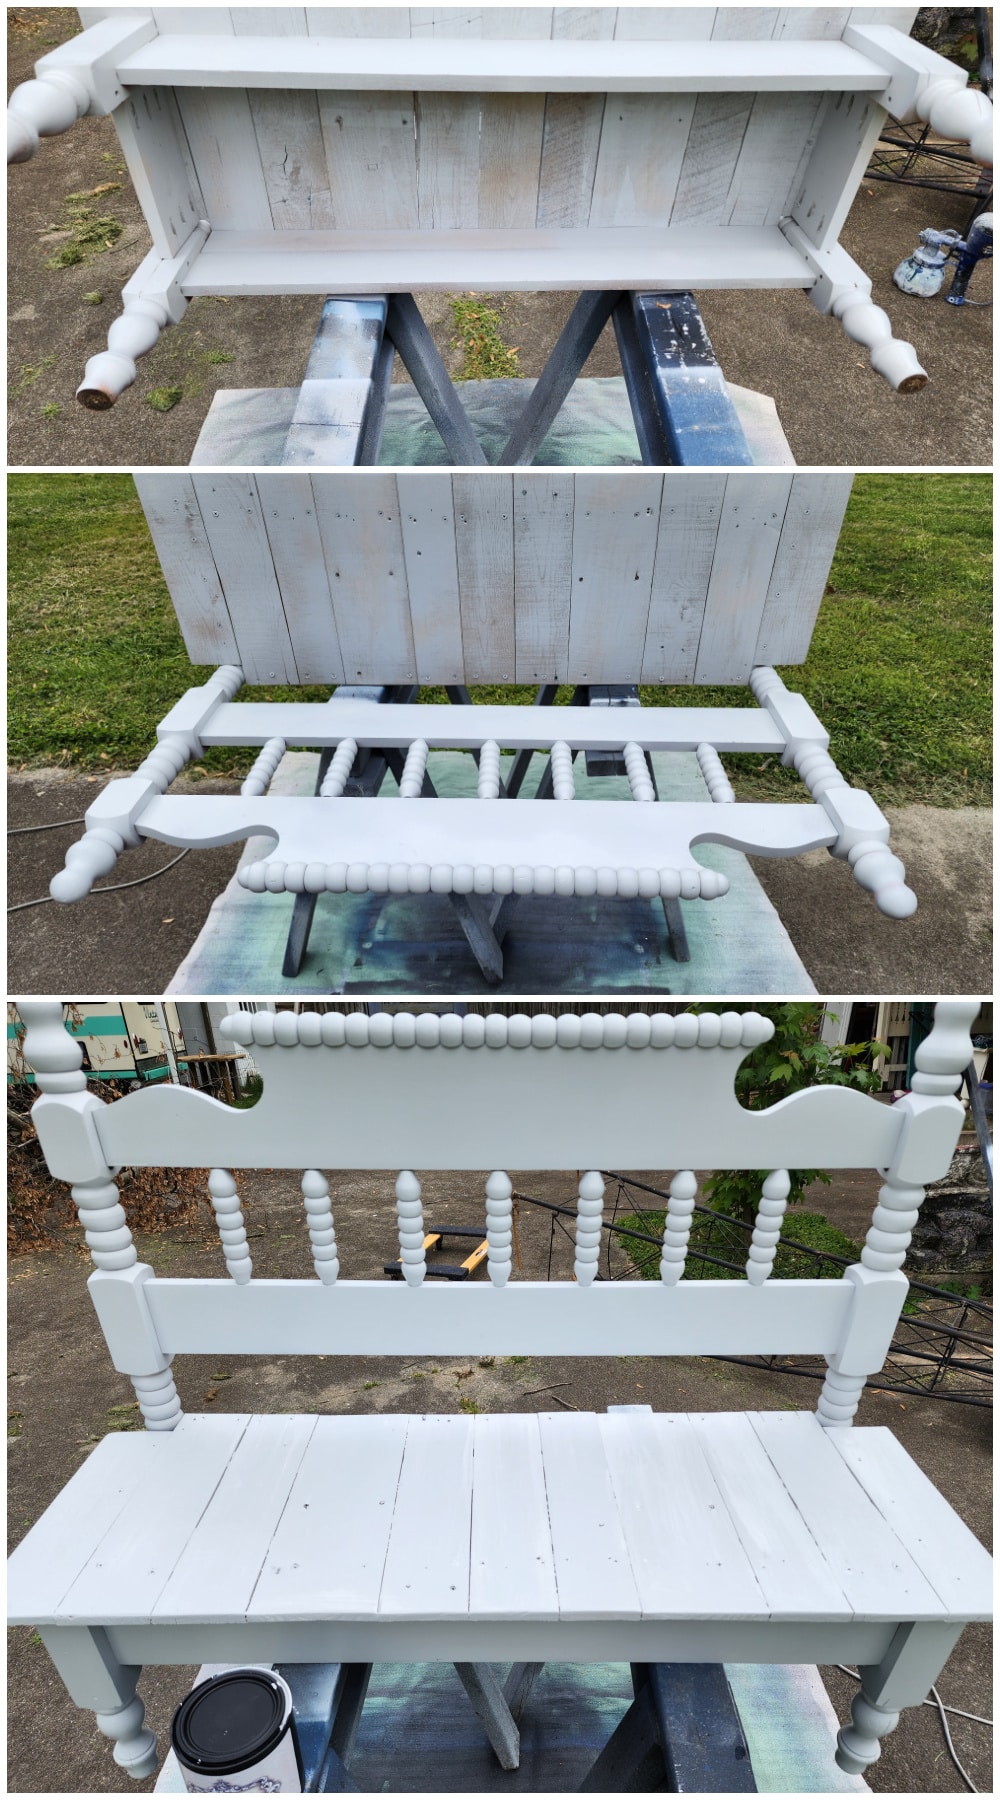
As always, I begin painting the underneath side of my project first. Then I move around to the other side to get every visible part. Finally, I tilt the bench on the sawhorses and finish painting places I missed.
Patch Holes & Gaps
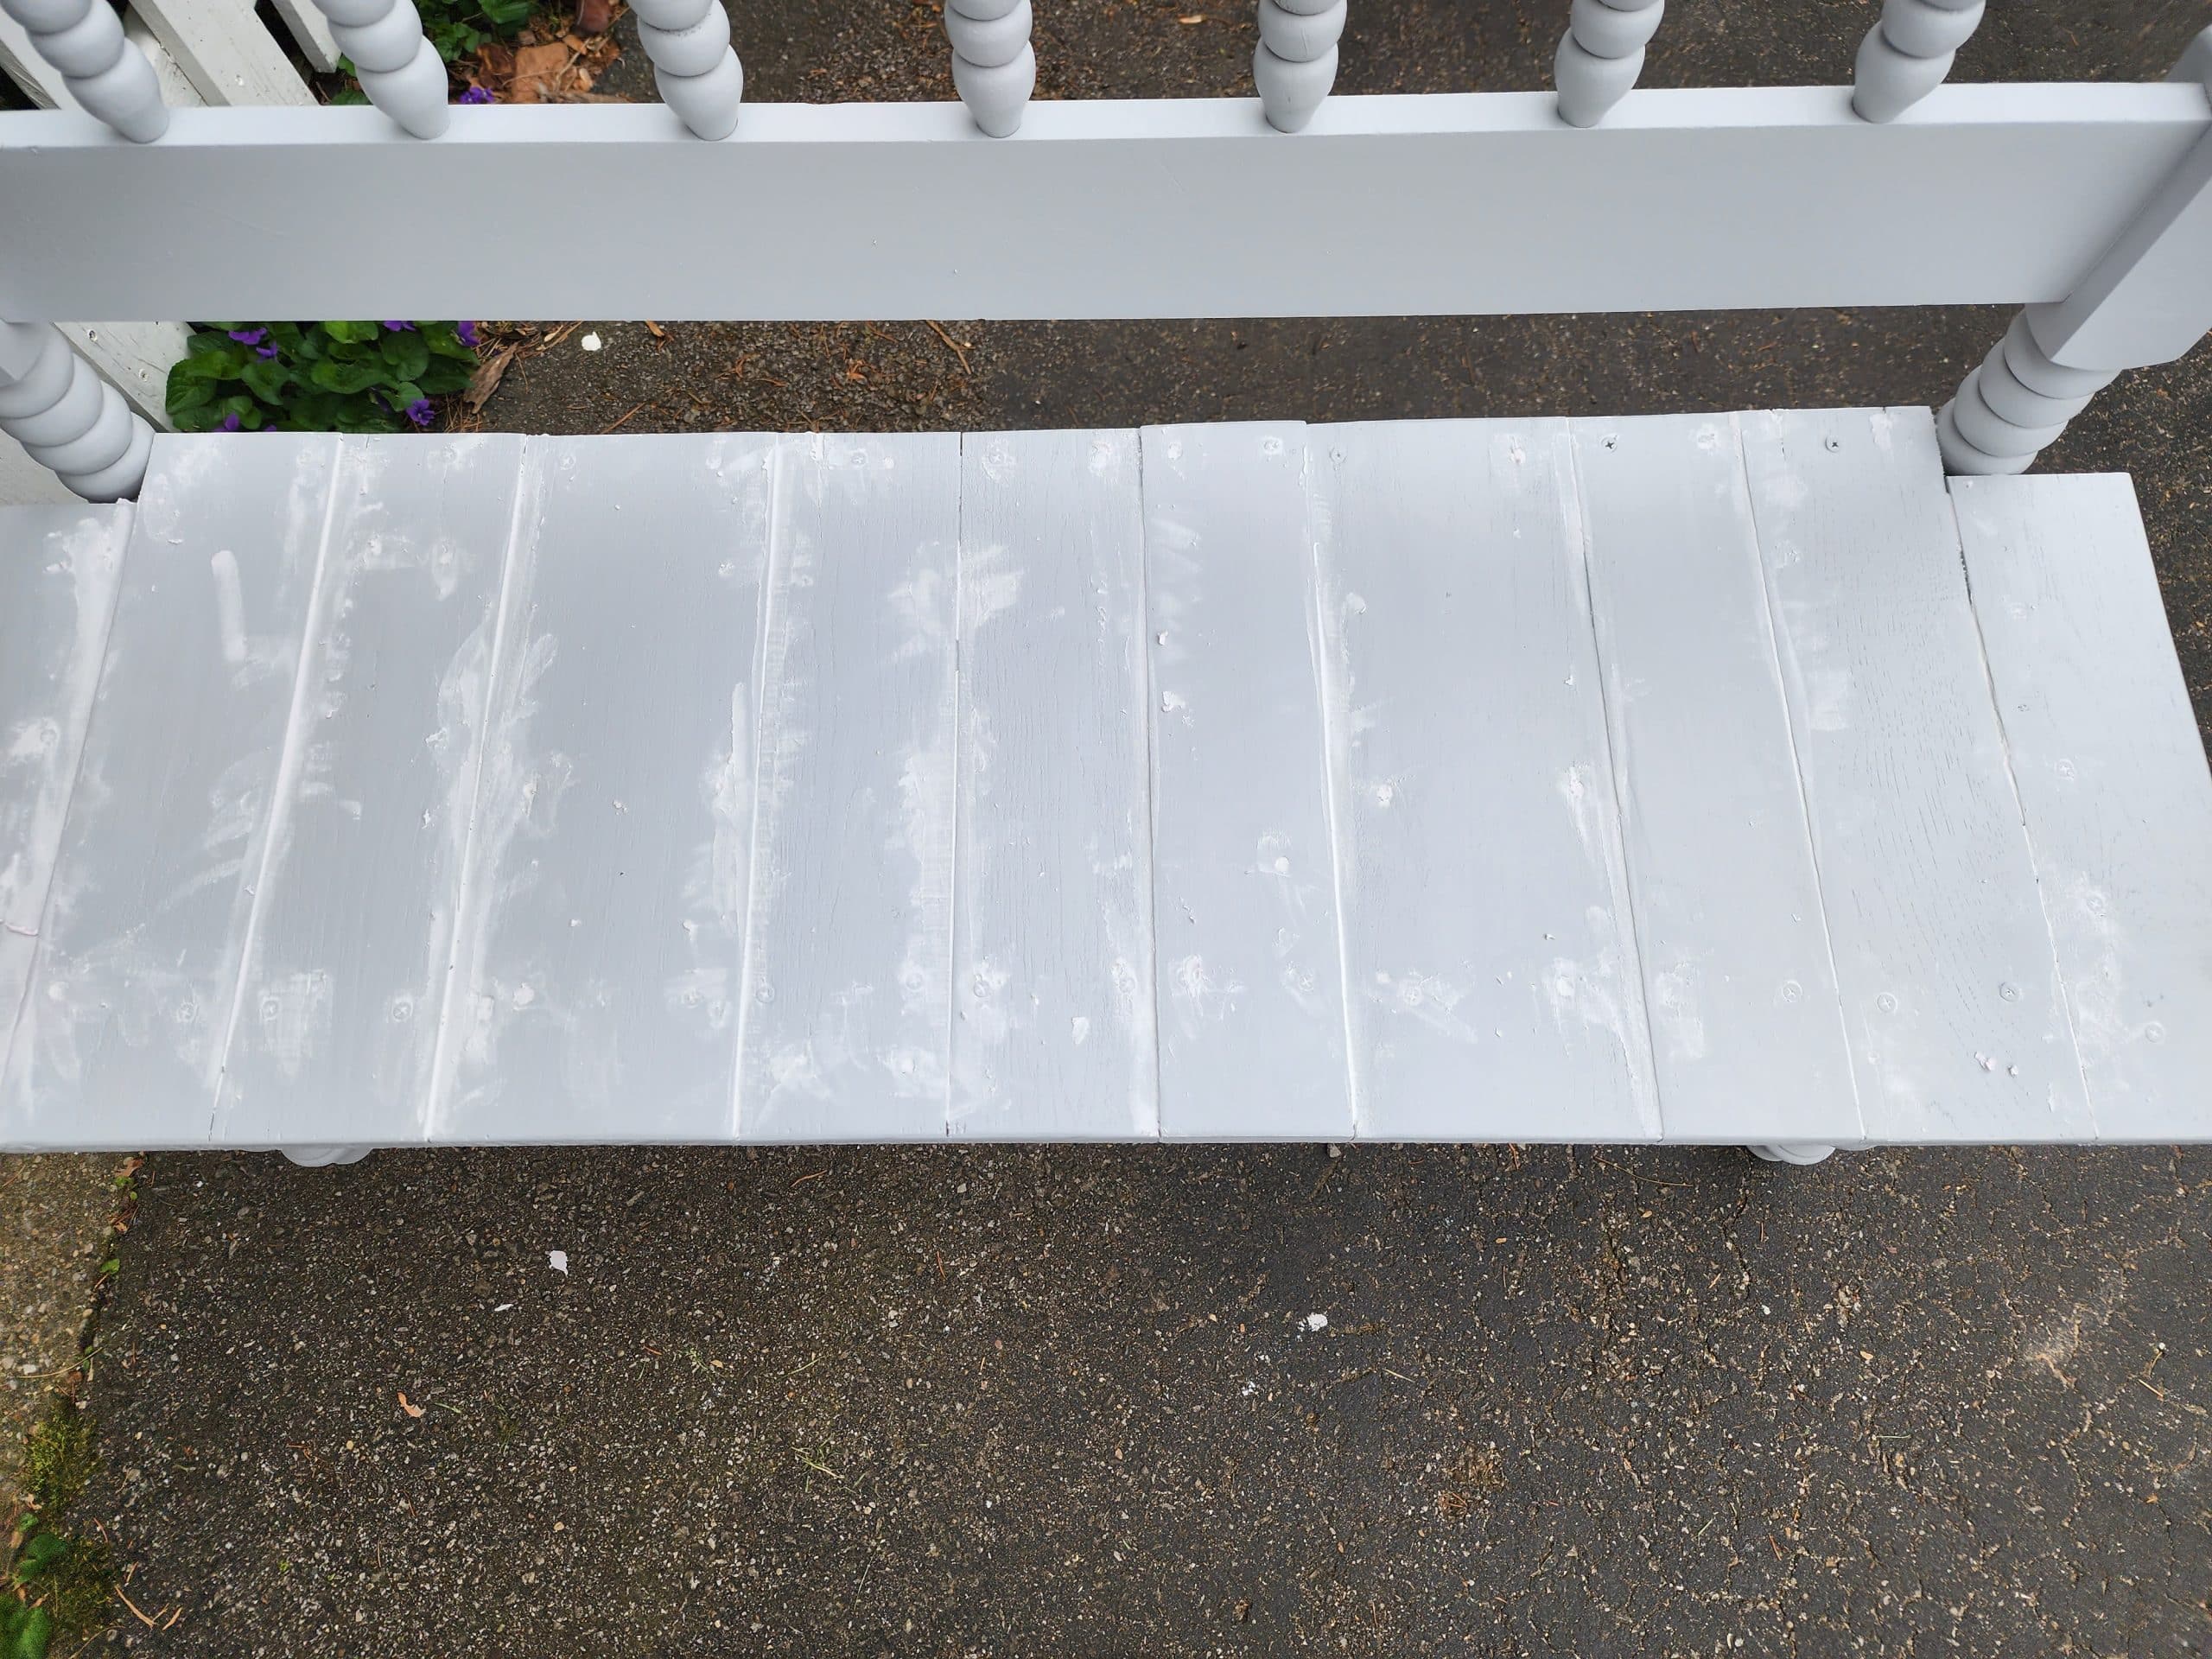
After painting, I noticed so many holes where I had taken out the pallet board nails. If you use new lumber, you will not have these issues. New lumber will also allow you to countersink your screws.
The day was ticking down; I dragged the petite headboard bench into the house.
Touchup Paint
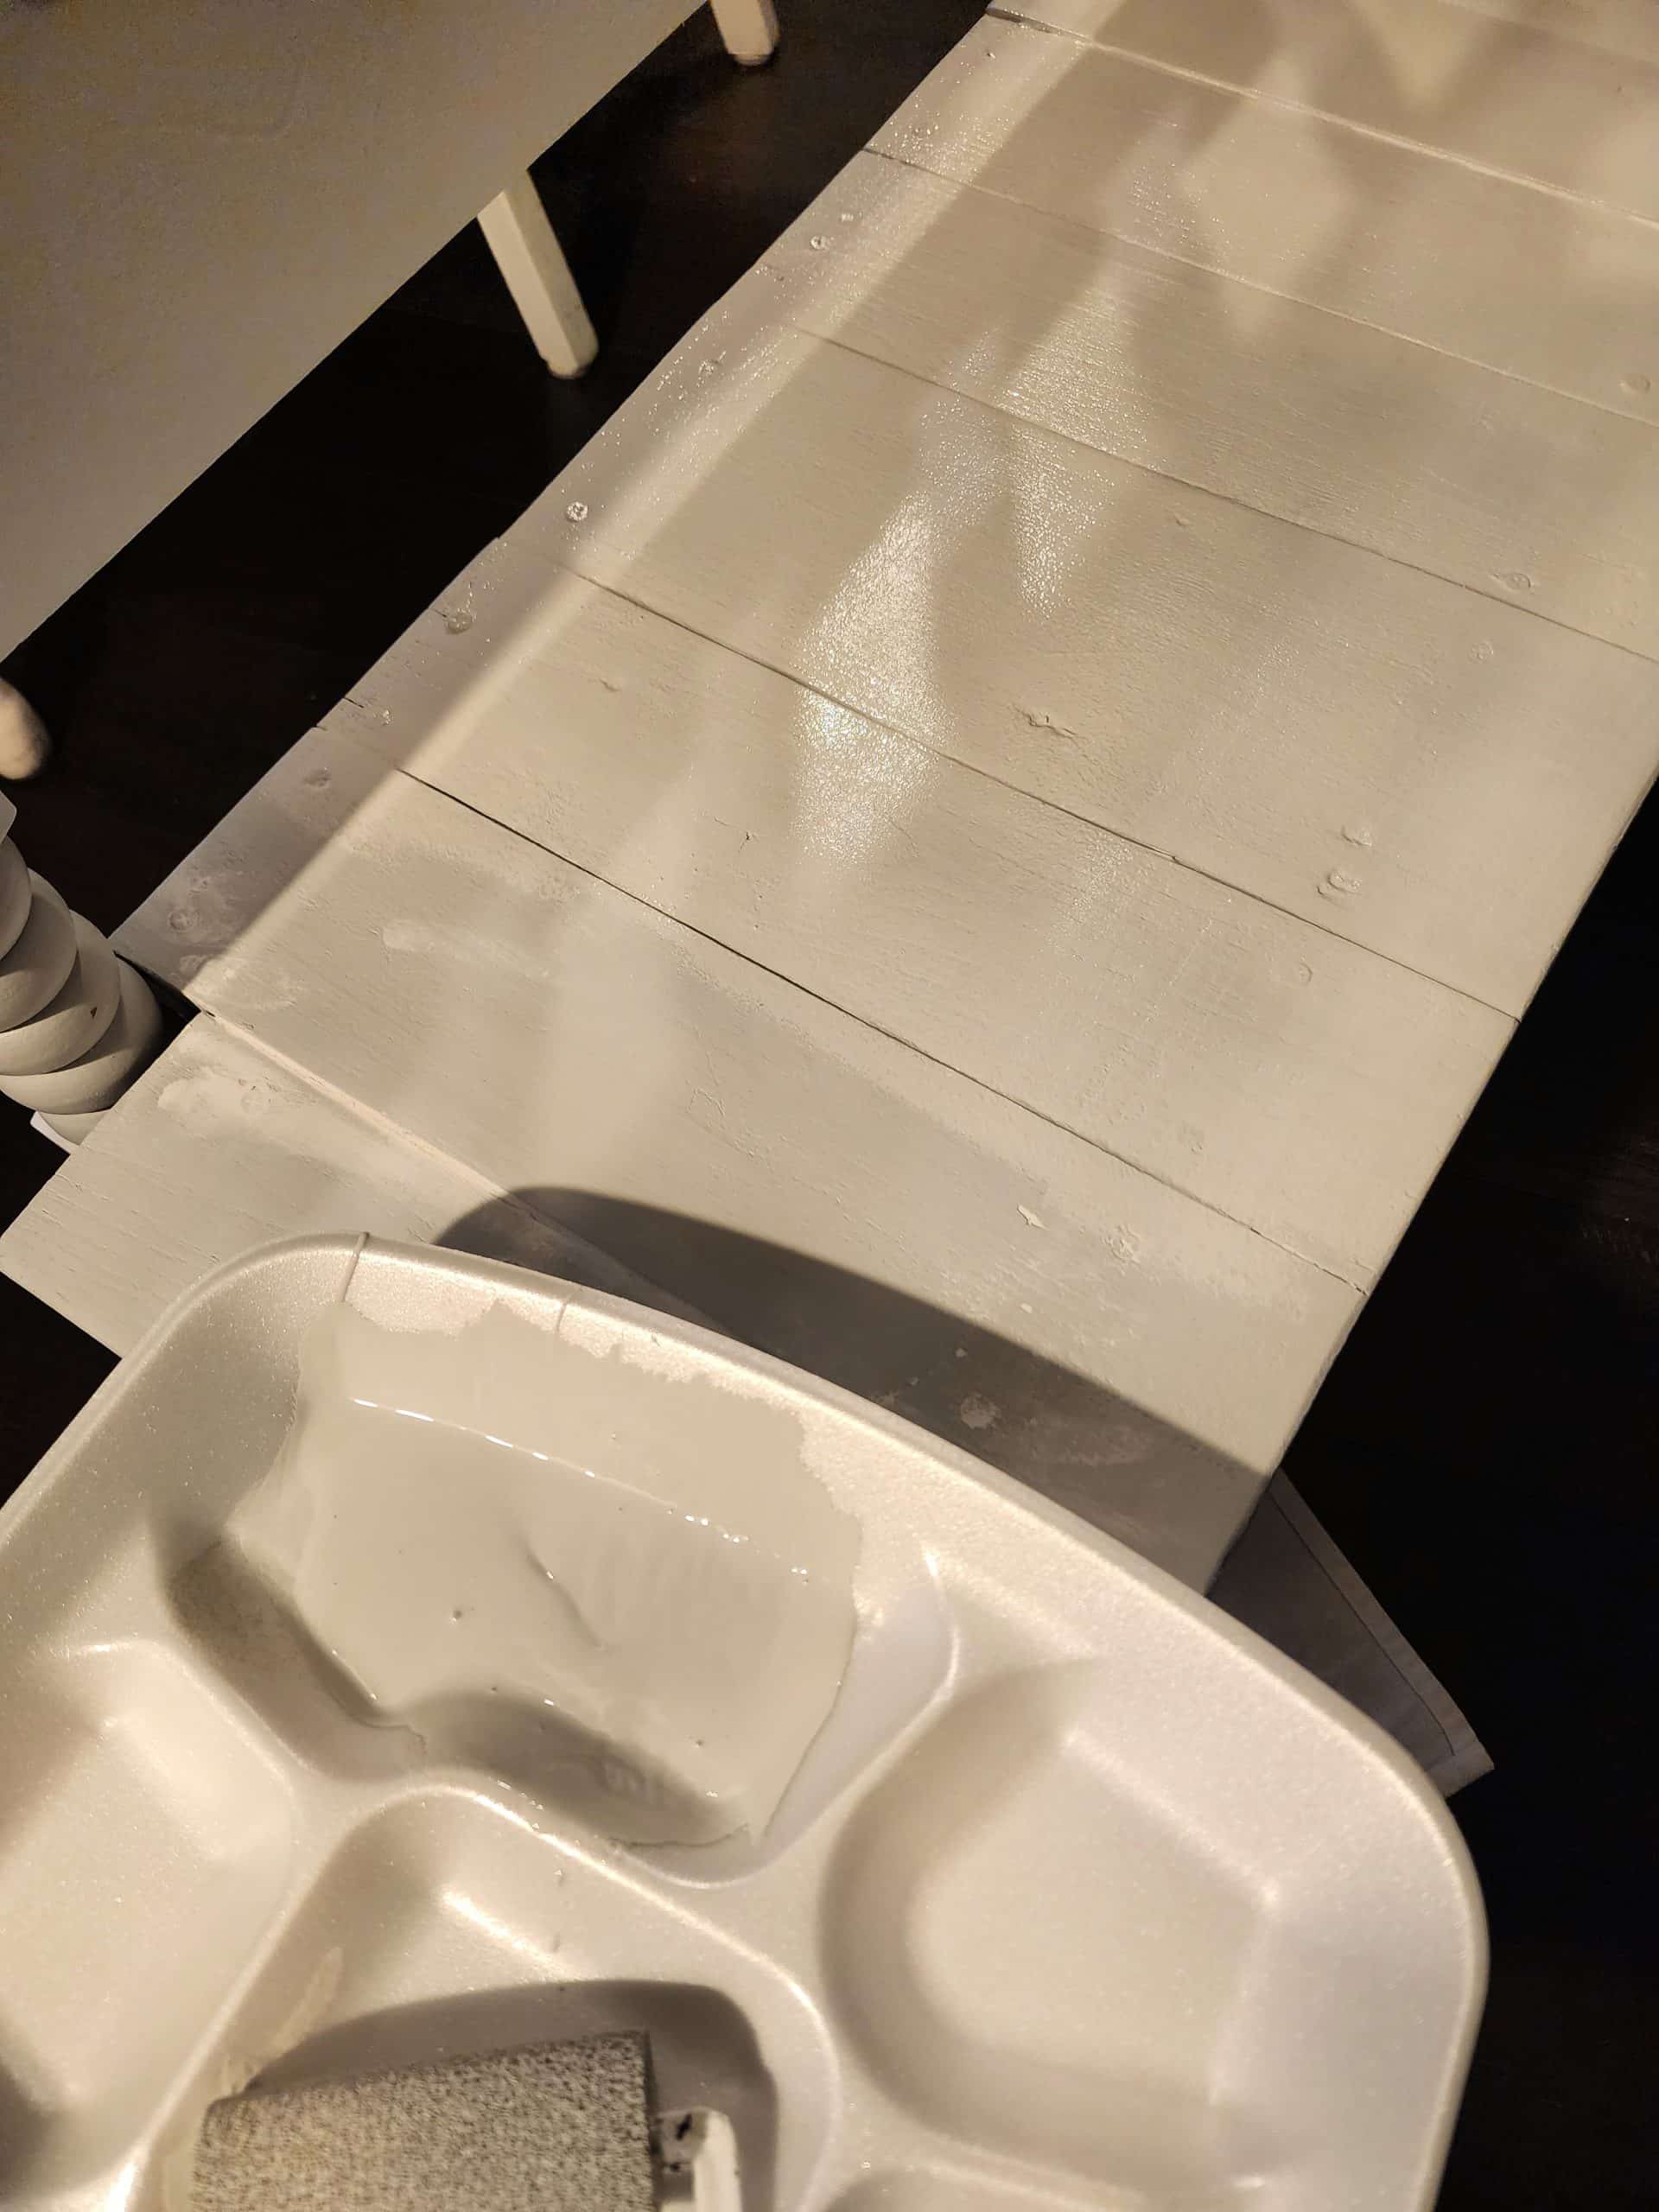
The following day, I sanded the patching and quickly touched up the paint. This was easily done using a small foam roller.
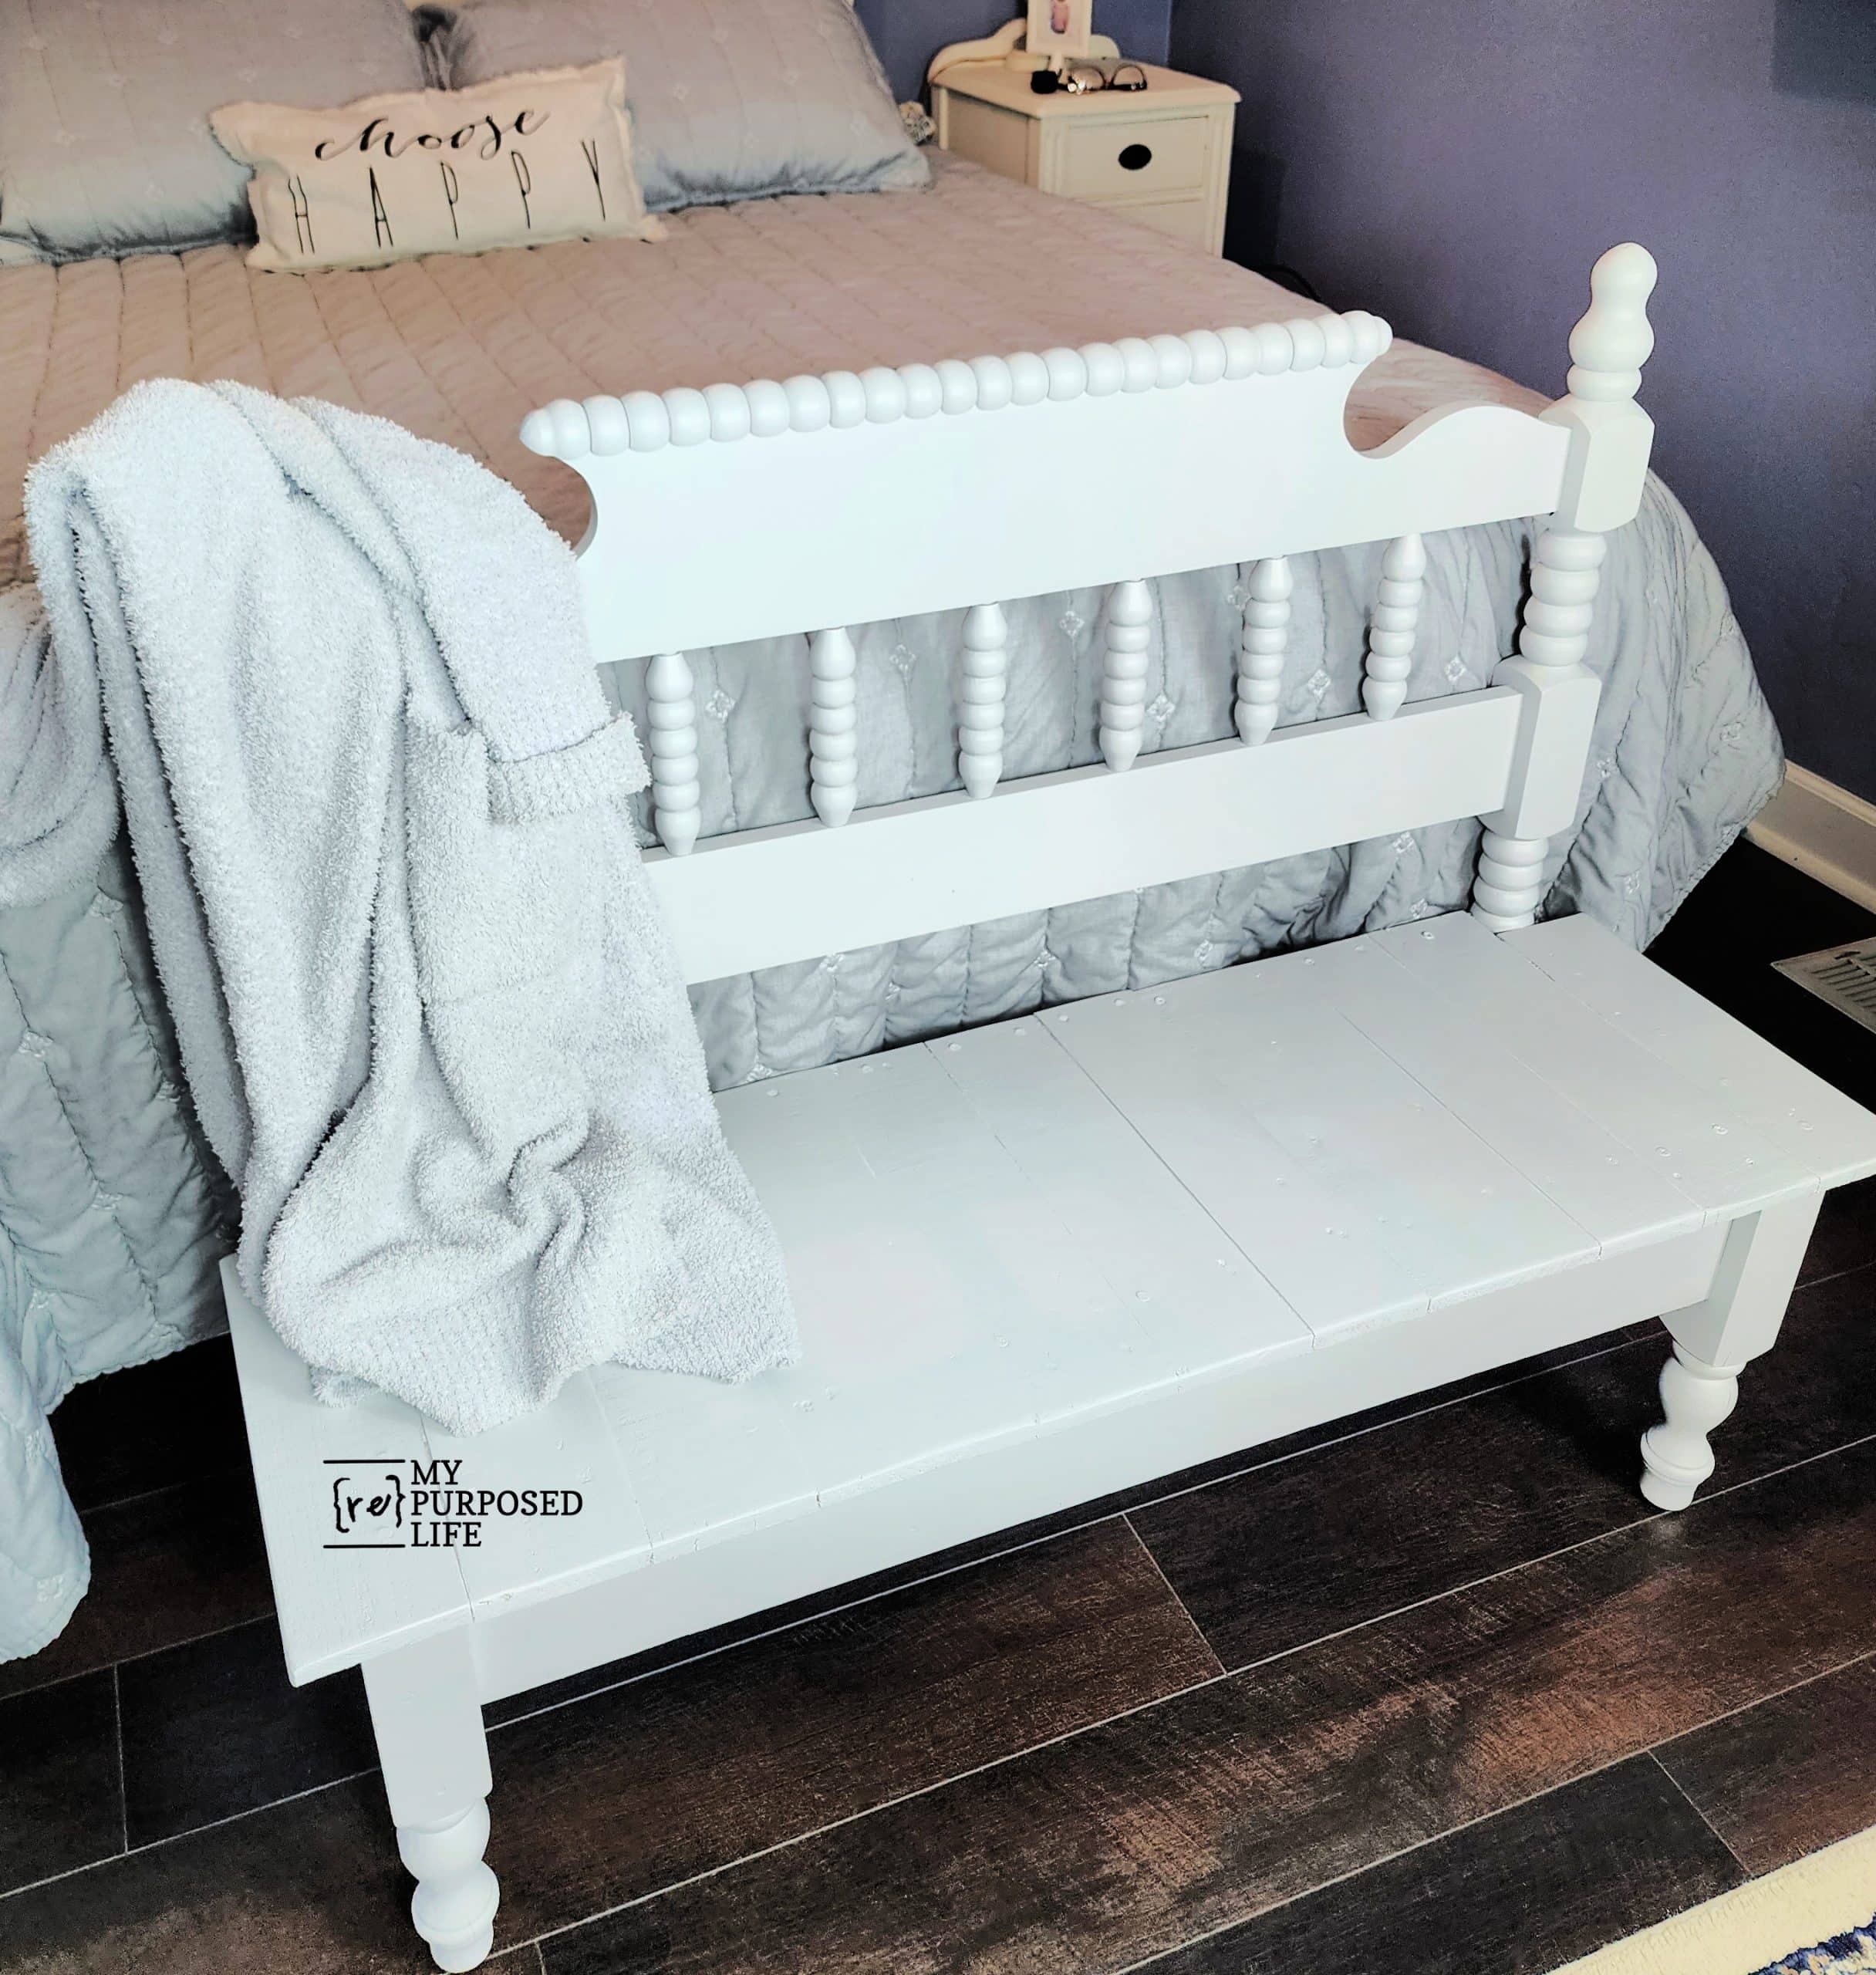
Where Will You Put Your Bench?
It’s not perfect, but it’s a frugal option if you can’t afford to buy new lumber!
I can see this petite headboard bench at the end of the bed for shoes and socks. Maybe you need something in your mudroom? It would be perfect for a small nook in your entryway. Where would you put it?
Save & Share this idea on Pinterest!
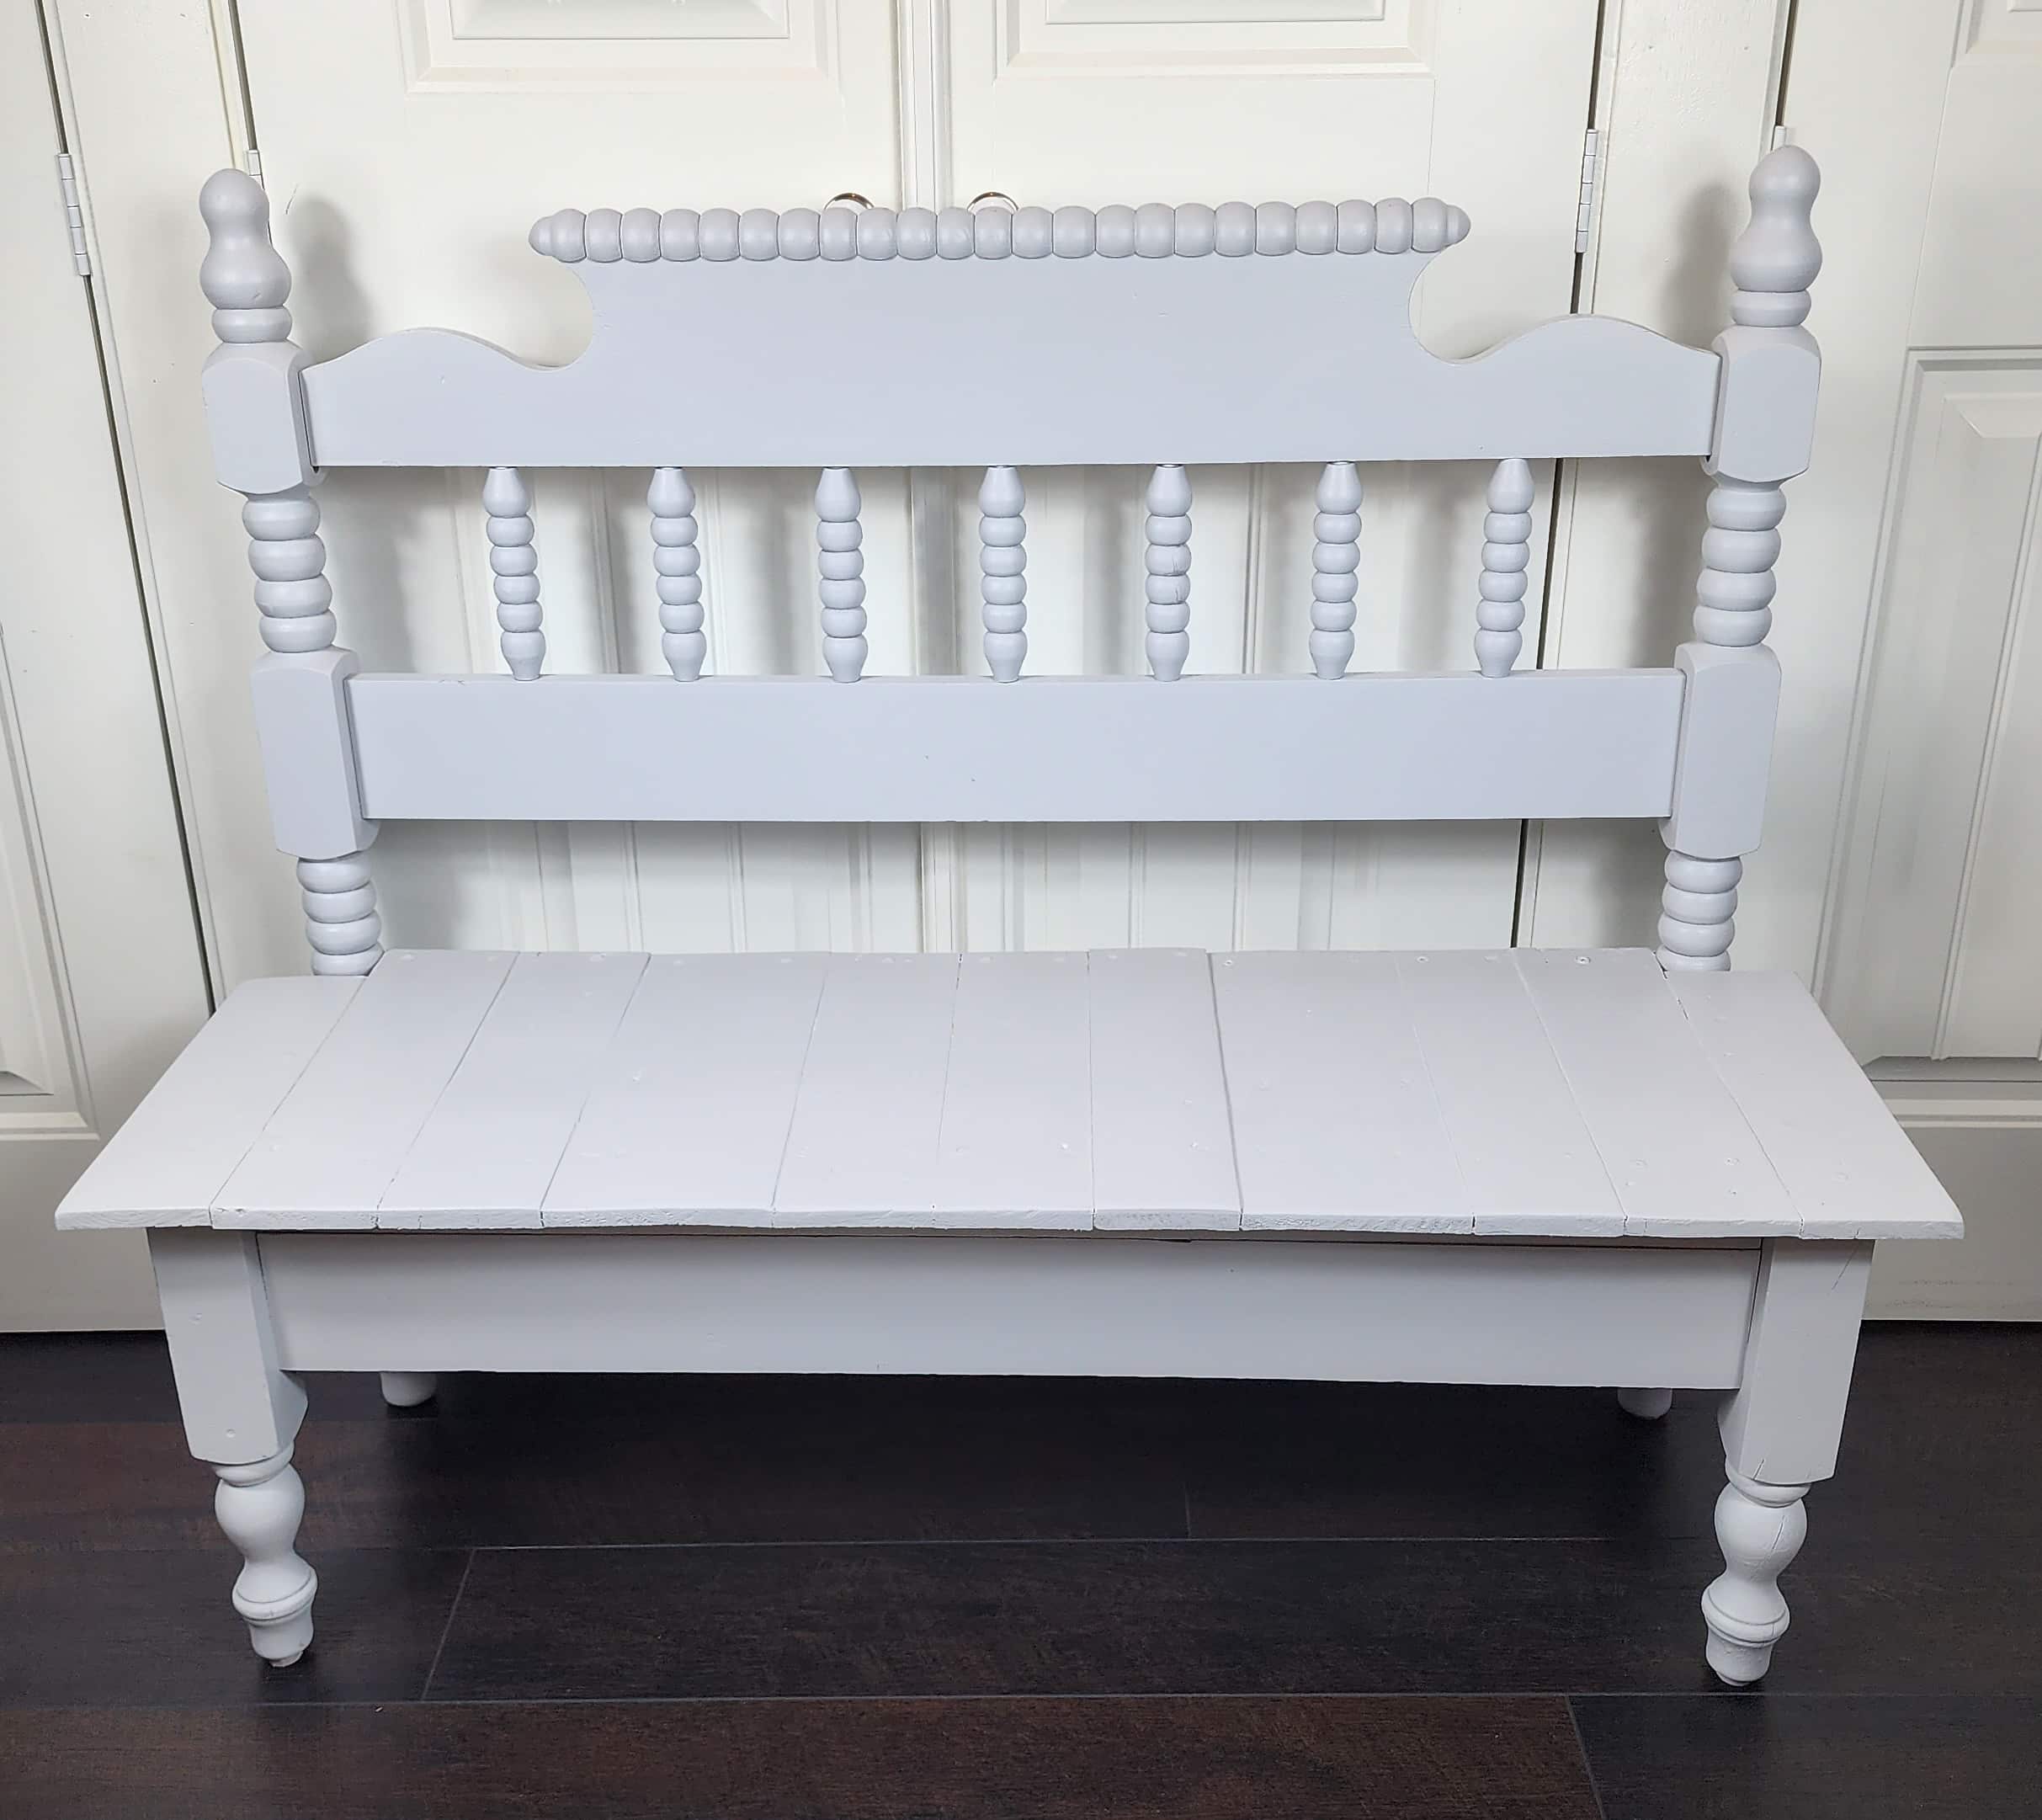
Placing the petite headboard bench in front of my wall-to-wall closet doors shows the actual color. The heathered gray is stunning, even on this FREE project!
With the proper guidance, building a headboard bench is a fun and rewarding project you can complete in just a few hours. So why not try it and create a beautiful new piece of furniture for your home?
Here’s a quick timestamp to show you how quickly this project came together:
- 10:37 Started with the design stage
- 10:50 Began dismantling the footboard
- 11:23 Drill pocket holes and attach wood to add height
- 12:12 Assemble Bench
- 12:20 Break
- 12:52 Lay out pallet boards, cut to size
- 1:22 Sand pallet boards
- 1:40 Lunch
- 2:31 Patch rail slats and pocket holes
- 2:51 Trim seat boards to a more desirable depth
- 3:31 Prep for paint
- 3:51 Paint
- 4:22 Patch nail holes
I regularly get distracted during the day with visitors, Lulu Mae, phone calls, etc. Six hours from start to finish, with breaks and lunch. All in all, it was a great day and a fun project. It seems like it’s been a long time since I’ve used the table saw. I had to rip the scrap boards in order to add height to the seat.
It was great to be back in the shop. I still have about 15 beds in my stash. . they don’t take up much room. What would you like to see me make next?
gail
Thanks Gwen, I totally get the too many beds… I think I probably have about 20. They don’t take up as much room as other furniture, so I never turn one down. 🙂
This mission style bed has hinged storage. https://www.myrepurposedlife.com/mission-style-headboard-bench-storage/
Happy New Year!
gail
Thanks Gwen, I totally get the too many beds… I think I probably have about 20. They don’t take up as much room as other furniture, so I never turn one down. 🙂
This mission style bed has hinged storage. https://www.myrepurposedlife.com/mission-style-headboard-bench-storage/
Happy New Year!
gail
Thanks Gwen, I totally get the too many beds… I think I probably have about 20. They don’t take up as much room as other furniture, so I never turn one down. 🙂
This mission style bed has hinged storage. https://www.myrepurposedlife.com/mission-style-headboard-bench-storage/
Happy New Year!
gail
Thanks Gwen, I totally get the too many beds… I think I probably have about 20. They don’t take up as much room as other furniture, so I never turn one down. 🙂
This mission style bed has hinged storage. https://www.myrepurposedlife.com/mission-style-headboard-bench-storage/
Happy New Year!
gail
Thanks Gwen, I totally get the too many beds… I think I probably have about 20. They don’t take up as much room as other furniture, so I never turn one down. 🙂
This mission style bed has hinged storage. https://www.myrepurposedlife.com/mission-style-headboard-bench-storage/
Happy New Year!
gail
Thanks Gwen, I totally get the too many beds… I think I probably have about 20. They don’t take up as much room as other furniture, so I never turn one down. 🙂
This mission style bed has hinged storage. https://www.myrepurposedlife.com/mission-style-headboard-bench-storage/
Happy New Year!
gail
Thanks Gwen, I totally get the too many beds… I think I probably have about 20. They don’t take up as much room as other furniture, so I never turn one down. 🙂
This mission style bed has hinged storage. https://www.myrepurposedlife.com/mission-style-headboard-bench-storage/
Happy New Year!
gail
Thanks Gwen, I totally get the too many beds… I think I probably have about 20. They don’t take up as much room as other furniture, so I never turn one down. 🙂
This mission style bed has hinged storage. https://www.myrepurposedlife.com/mission-style-headboard-bench-storage/
Happy New Year!
gail
Thanks Gwen, I totally get the too many beds… I think I probably have about 20. They don’t take up as much room as other furniture, so I never turn one down. 🙂
This mission style bed has hinged storage. https://www.myrepurposedlife.com/mission-style-headboard-bench-storage/
Happy New Year!
gail