Piano Bench Redo with Paint and Glaze
As an Amazon Associate, I earn from qualifying purchases.
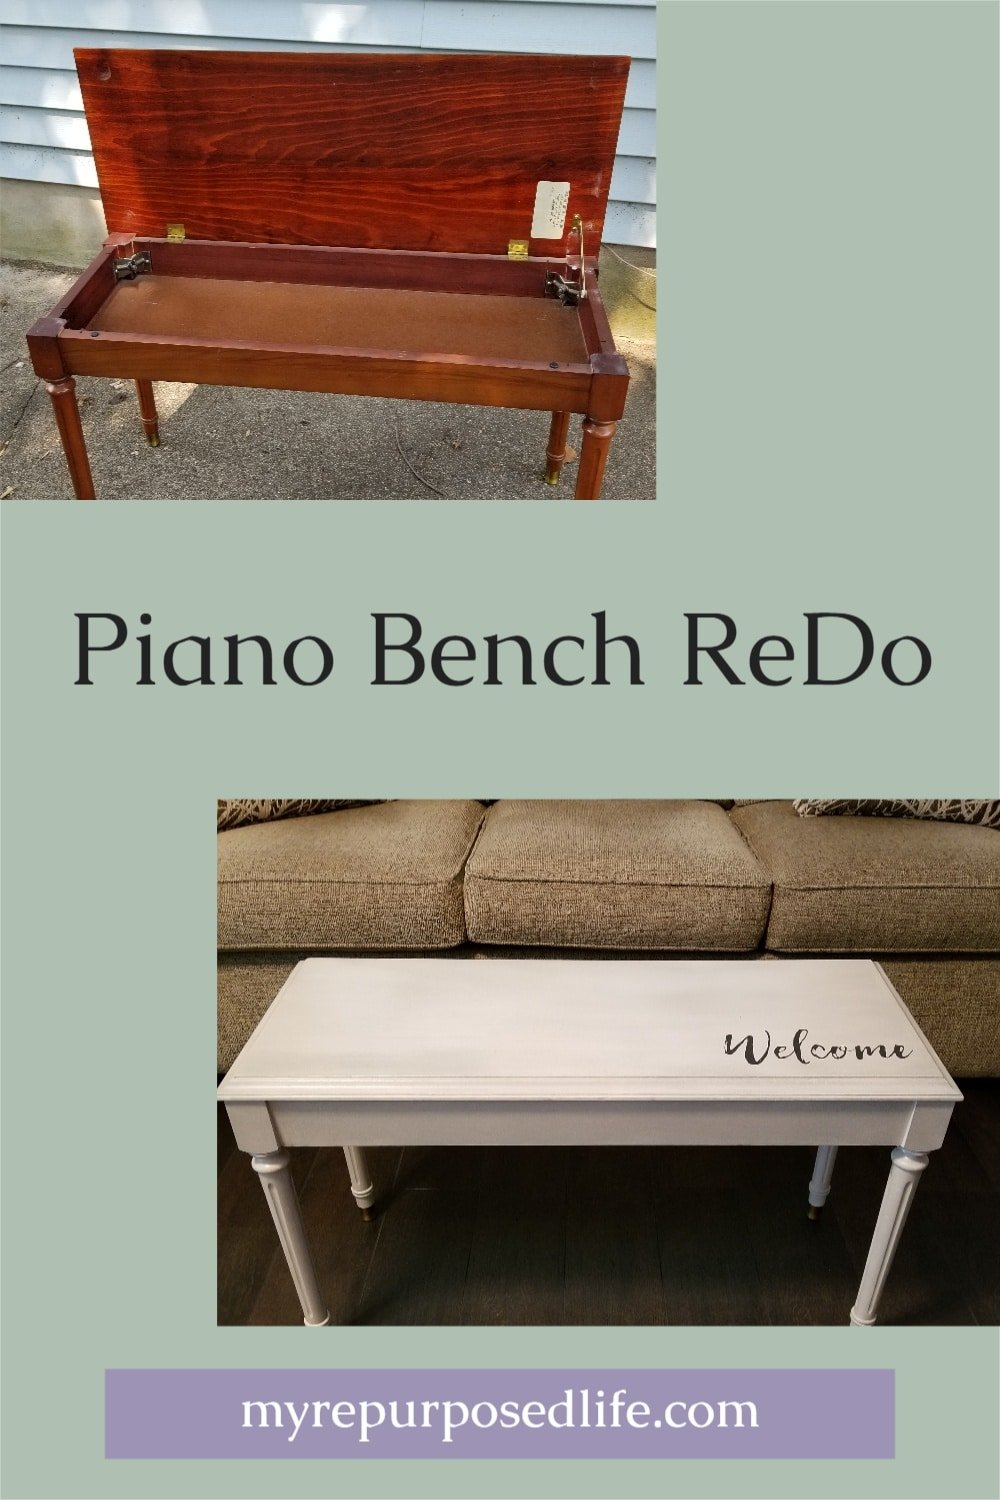
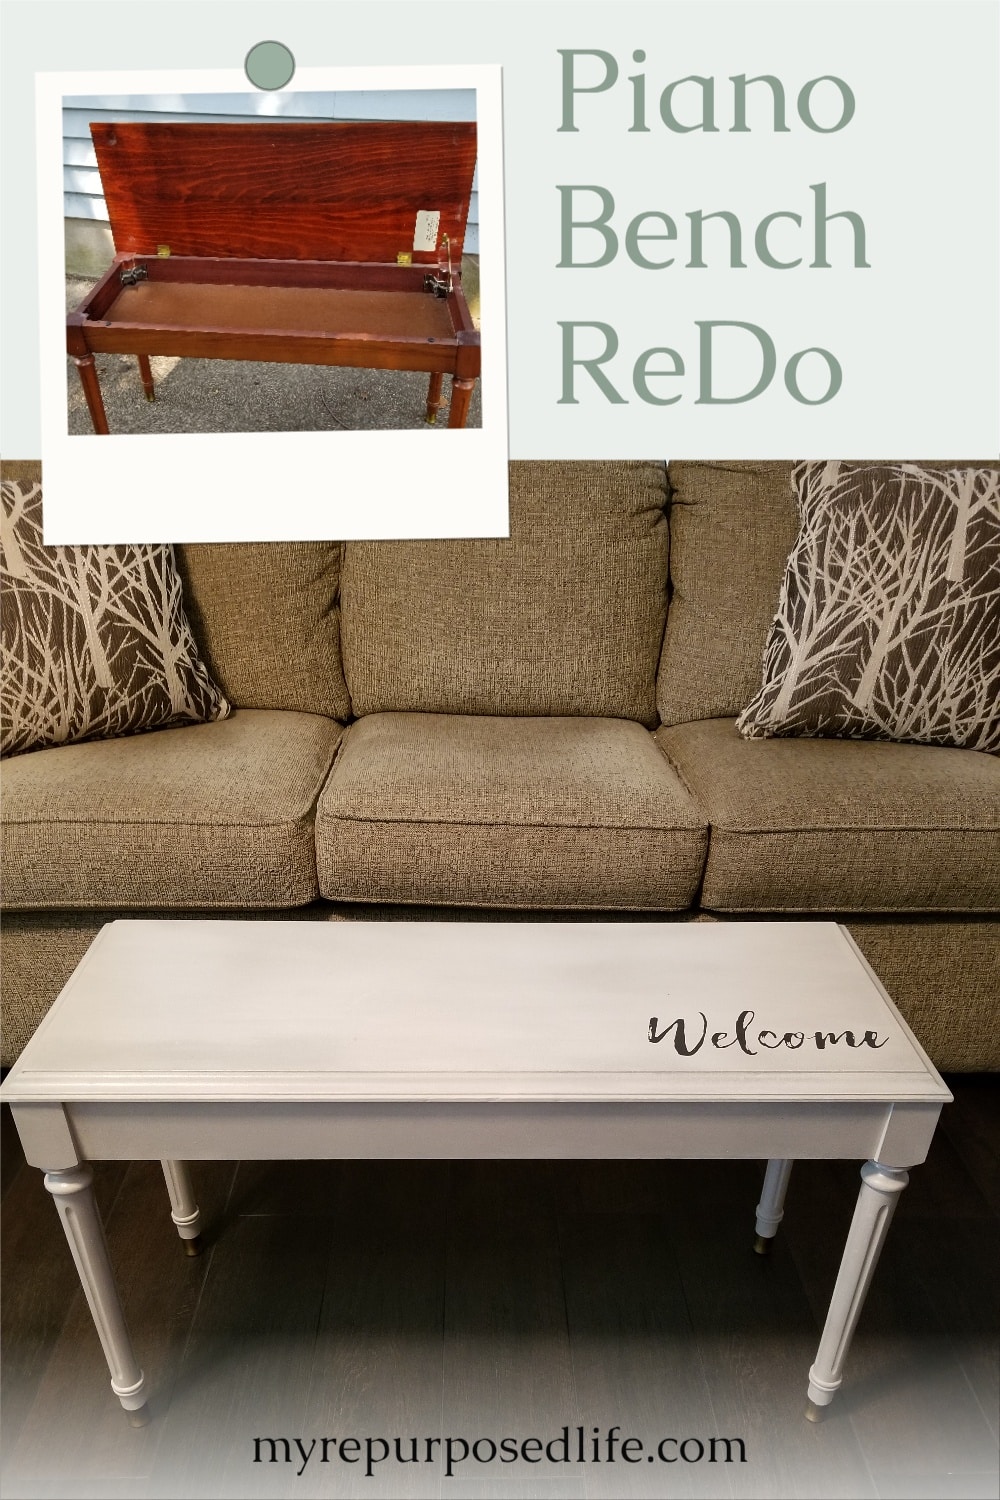
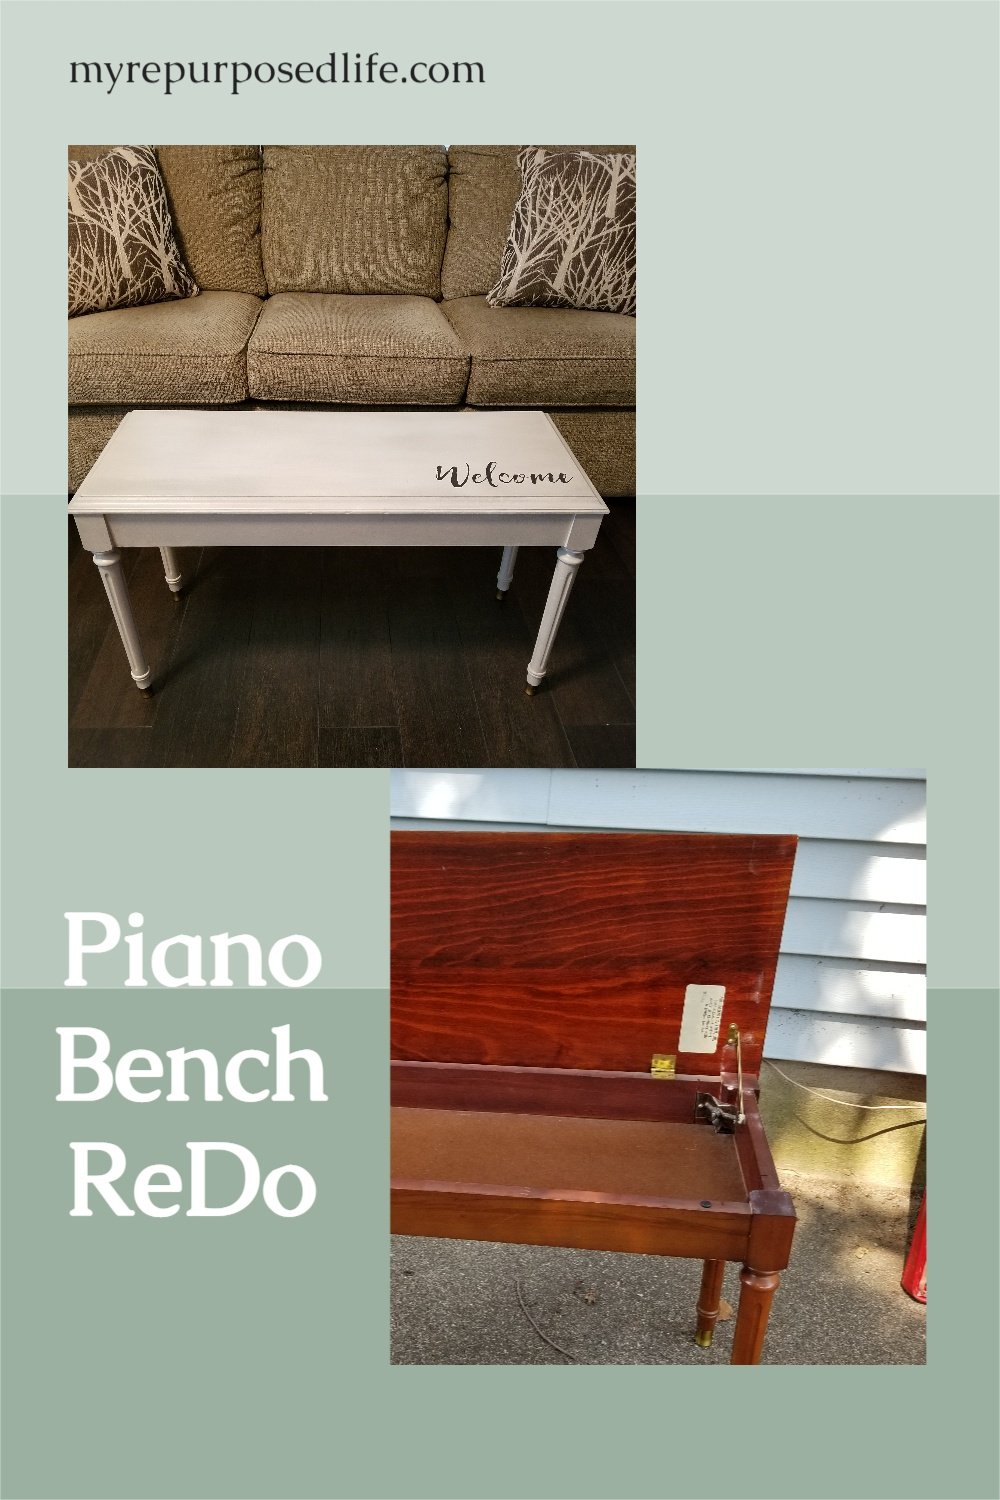
Today’s piano bench redo is so fun and easy; I can’t wait to give you all the details! As I was moving my furniture items out of Vendors’ Village, I spotted this small wooden piano bench on sale at 50% off its regular price. Even the sale price was steep for my regular thrift store budget.
Thrift Store Piano Bench

Isn’t the piano bench cute? I think you would have had difficulty passing it up, too!

Yep, I paid $14.00 for the cute little bench. It was tough to spend that much. Do I think it was worth $28 to anyone? NO! I do not.

Check out the address label inside the vintage piano bench! I blacked out some information in case Albert still lives at the same house with the same phone number. Guess who still lives where she lived in March of 1976?
Prepare an old Piano Bench for Painting.

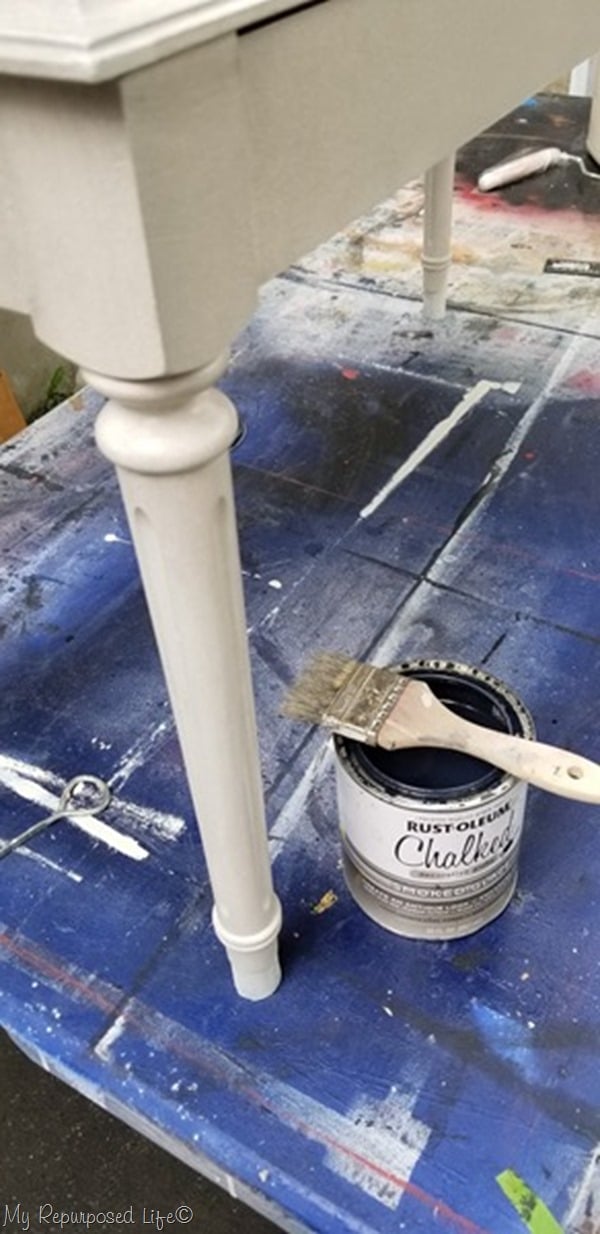
After taping off the metal feet with painter’s tape, I was ready to paint this little guy with my Super Finish Max Extra.

My unique DIY chalky paint primer was mixed using some off-white oops paint and plaster of Paris.

I prefer to start my projects upside down. That way, when I flip them, it’s on the underneath side if they mess up. With the turned legs on this piano bench, it’s essential to paint it upside down and right side up to get into the “rings” of the legs with good coverage. I painted two light coats of the chalky paint primer in off-white.

Here it is before I took the painter’s tape off the feet.
It’s nice, but you know what’s coming, right?
Add Glaze over Paint
Were you right? Did you guess what I was hinting about? Yes! I decided to add my favorite smoked glaze to the plain piano bench. But! This project would get the lightest coat of glaze I’ve ever done—just a hint of the gray glaze over the off-white paint. As always, I used a cheap chip brush to apply the glaze.
Project ideas and a video of “how to glaze painted furniture and more”

See?! Just a hint of the glaze, slightly dry-brushed onto the bench. I love this glaze so much; it’s so versatile!

I left the metal feet as I found them because I didn’t know what to do with them.

The inside of the bench was left alone. I do think it would look pretty with some paper on the inside. I’ll leave that decision up to its new owner!
But wait! How about one more small touch?
Embellish Bench Top With WELCOME

I chose a simple transfer from The Junky Chalker Store to use on the piano bench lid.

A thin coat of Minwax furniture wax was applied to the top of the piano bench.

I applied the transfer, lining it up with the edges of the bench top. A dab of chalk paste was spread on, then scraped off. I immediately peeled off the transfer and revealed the finished project! It really is as easy as 1, 2, 3. Step #4 is dropping the transfer into a pan of water to be cleaned and reused repeatedly!

Here is the newly refreshed piano bench in the living room. A piano bench like this could be used in a front hallway, as extra seating, or as an impromptu coffee table in the living room. This piano bench would also make a great end-of-the-bed bench. Bonus! It offers a little bit of storage!!
Before you run off, won’t you pin it or share it? Thanks!
Related Content: How to Add a Shelf to a Piano Bench
You can see Mindi’s French Inspired Piano Bench Makeover here
Natalie from Ray of Sunlight painted a piano bench with HTP All-in-One-Paint. Be sure to check out her Heirloom Traditions Paint Review.
gail
This is beautiful! Wow! The white was perfect for it, and I love the use of it as a coffee table. Going to have to keep my eye out for a piano bench. As a musician, I am in love! Pinned.
Yay Alexandra! So happy you stopped by and love the piano bench redo. I greatly appreciate you pinning!
gail
Hi Gail. Your piano bench turned out beautiful! I love the glaze. Do you just brush it on or do you wipe it afterwards? Another question I asked on an older post that you may never see…Can you use polyurethane or polycrylic over latex paint. I really need to know because I painted my rocking chairs and they already have dings in the paint. Thanks!
Thank you Kim! I love this glaze so much. I brush it on with a chip brush. On a project I worked on yesterday, I was seeing too many brush strokes because the base coat of paint was a little too glossy–so I did some stippling with the tips of the bristles and it turned out great. It’s a small footstool and will be posted next Wednesday.
I get notification of all comments, so yes, I did answer your question on the other post. About the dings, please remember it takes about 30 days for paint to fully cure to it’s full potential on furniture projects.
You should have gotten an email notification when I responded to the other comment. I get so many comments that at this time I can’t remember which post it was on. Let me know if you can’t find my response.
happy DIY’ing!
gail
I got your reply to the email I sent but no notification of a response and now I don’t remember which post it was either. Oh well.
Kim
I have emailed you again.
gail
I could be wrong, but wonder if the label and date were put there by a piano tuner when the piano was tuned? My tuner used to write the date on the inside of a wooden portion of a key. The bench turned out beautiful.
I bet you’re right Sharon about it being the piano tuner.
gail
what a wonderful refresh for the piano bench. love the color, love the glaze, and love that you left the inside original.
That’s a great idea. I never thought of a piano stool for a coffee table.its a great place to hide the multitude of clickers too. I see so many of these at thrift stores. I had to laugh when you said you’ve lived in the same house since 76’. I moved alone twice and 8 times with my husband since then. Now in a small house in a nice city, by my kids and grand baby, I’m never moving again!