DIY Planked Wood Sign
As an Amazon Associate, I earn from qualifying purchases.
It is good to be back at MRL! Today I have a super fun project to share my newest DIY Planked Wood Sign!!
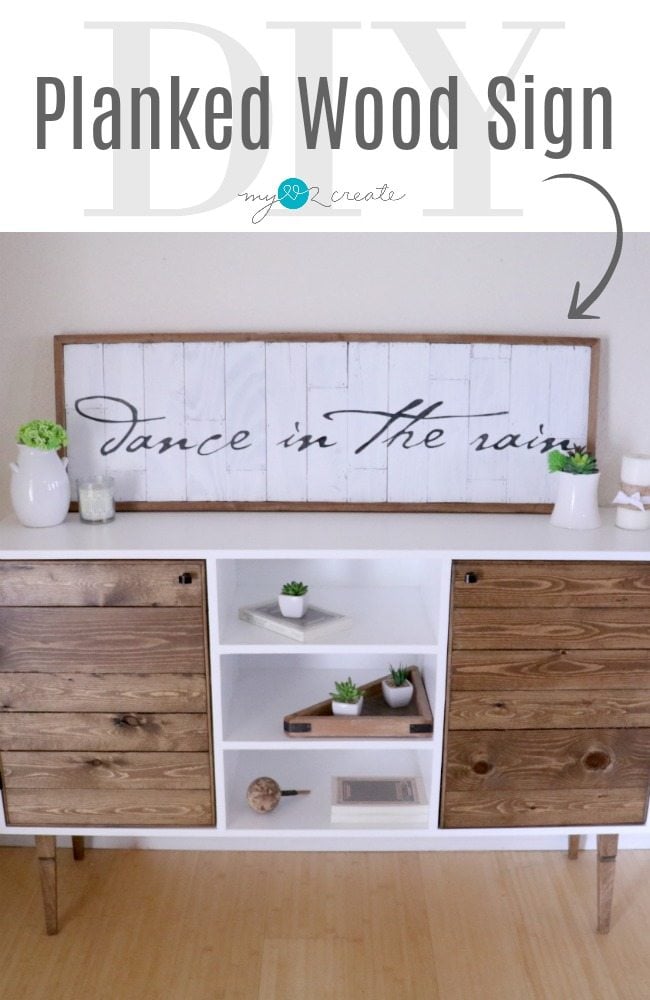
I am super in love with the planked look and of course I love the quote too! It is a great reminder to enjoy all times in life…especially the hard times. At least that is what it means to me. 🙂
Let’s get started!
How to make a DIY Planked Sign
This post contains affiliate links that help me at no cost to you! Read more.

Supplies:
- Scrap wood for planks 1/4” thick
- 1/2” thick plywood backing
- 1×2 wood for framed out sides
- Compound Miter Saw
- wood glue
- Nail Gun
- Hand Sander
- Stencil or Cricut Explore Air™ and removable contact paper
- paint/stain
- Stencil Brush
- paint brush
- D-ring hangers
Step 1: Build planked sign to any size you desire
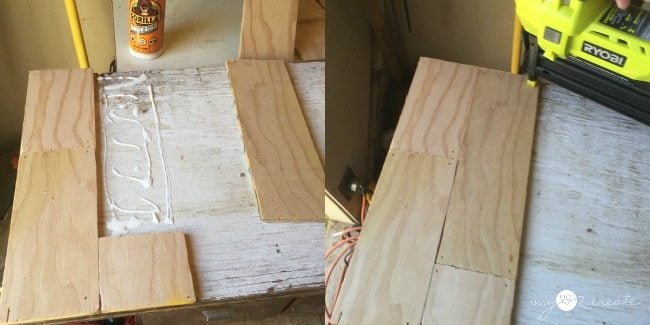
I used a piece of reclaimed 3/4” thick wood (I would recommend using 1/2” thick wood to make it lighter) as a backing for my 1/4” planks, which were left over from my Pottery Barn Clock Knock Off, and glued and nailed them on after cutting them to size.
Then I framed out the whole thing with 1×2 wood. I actually made two of these planked signs a few years ago and turned one into Marvel Subway Art…the other one has been waiting for it’s turn to become pretty…Click Here for a FULL TUTORIAL ON HOW TO BUILD THE PLANKED SIGN.
I am so happy to finally finish this second sign…good grief took me long enough!
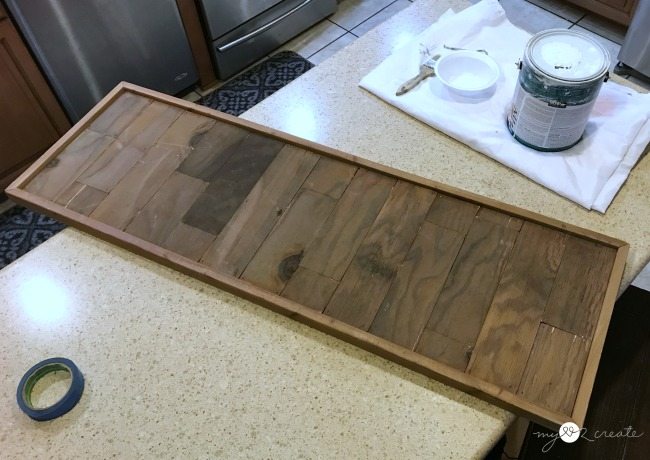
Step 2: White Wash or Paint planked boards
I started by taping off the frame with painter’s tape.
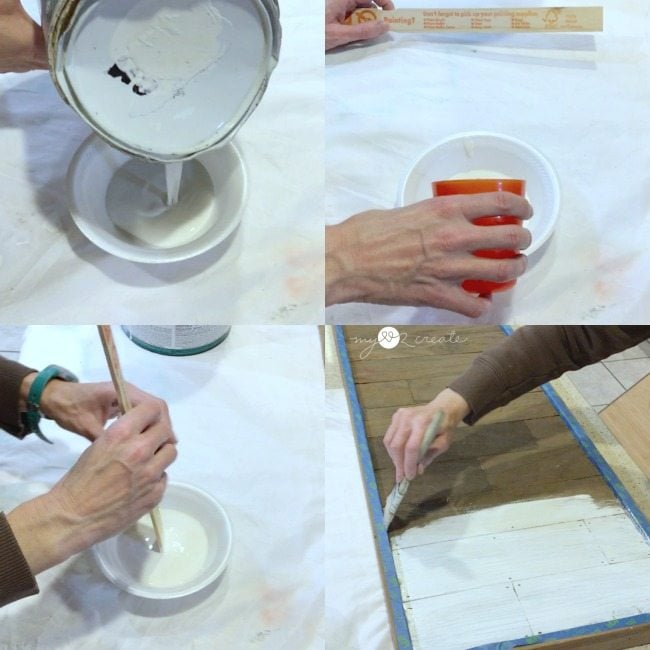
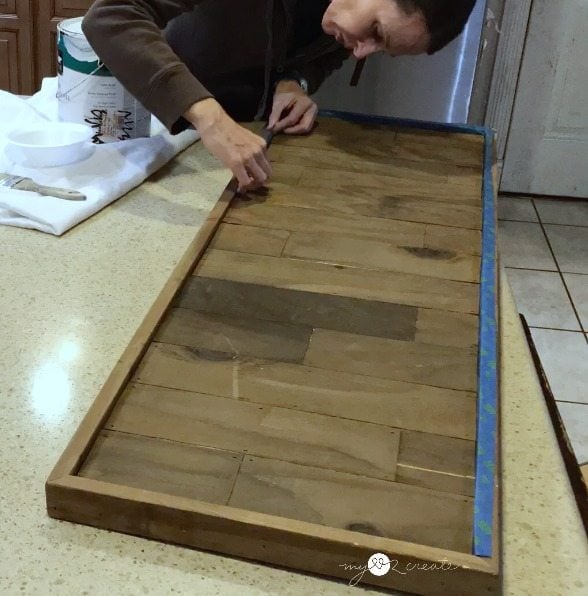
Then I mixed some white paint with water to give it a white washed look.

On the left I am finishing my first coat. On the right I decided to do a second coat. I LOVED the look of the boards with the first coat. After some reflection I decided that too much of the grain was showing and it might look too busy when I added the words, which is why I did the second coat.
Step 3: Stencil your sign
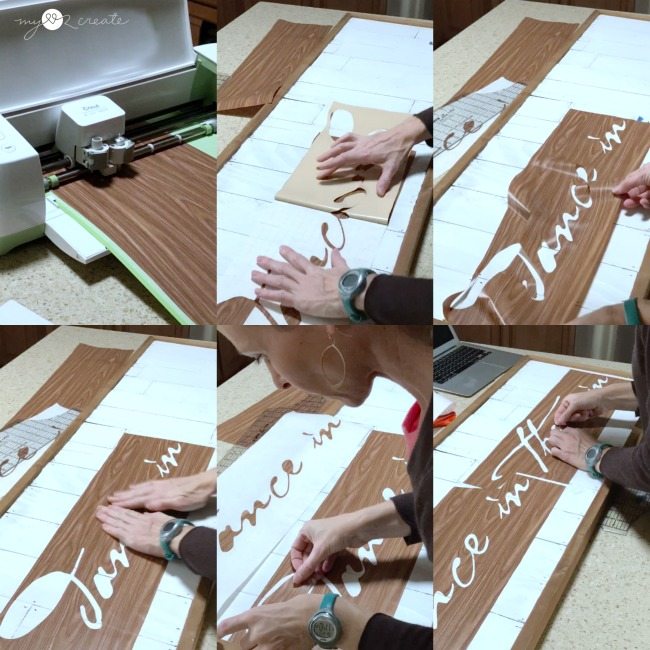
I used a cutting machine to cut out my stencil onto contact paper. I know not everyone has a cutting machine…and that is ok! Check out my post on How to make your own Signs for other methods you can use.
When I use contact paper stencils it saves me a ton of money, vinyl is expensive. I believe I first heard of using contact paper from Gail…she is a genius as you all know! I cut it out and peeled off the outer part of the stencil.
It takes some time to place it onto your project, just be patient. Make sure you buy the removable contact paper, because it makes it easy to pull the pieces apart when they stick together. Also, you will have to add the insides of the letters once the main part of you stencil is in place.
I did this quote in two sections because it is bigger than my cutting machine can cut.
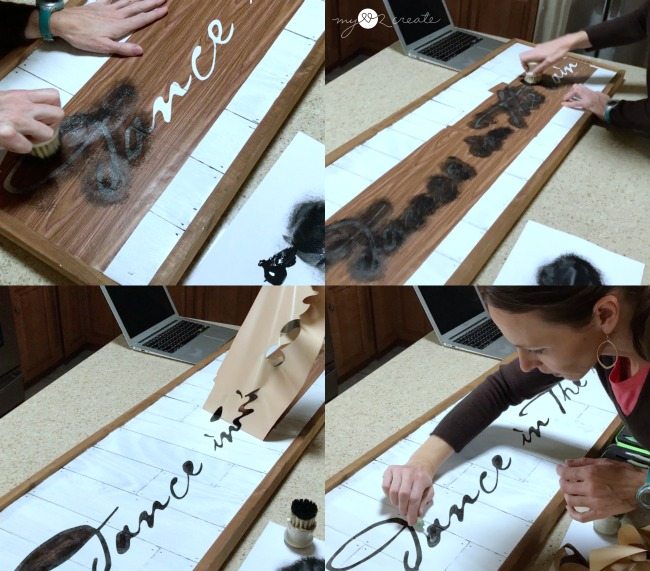
Using a stencil brush and black paint I loaded and unloaded my brush with paint to begin stenciling! You want a tiny amount of paint on your brush when you stencil, this prevents bleeding.
Remove the stencil when you are done and don’t forget to take out the insides of the letters!
Hang your new Stenciled Plank Wood Sign
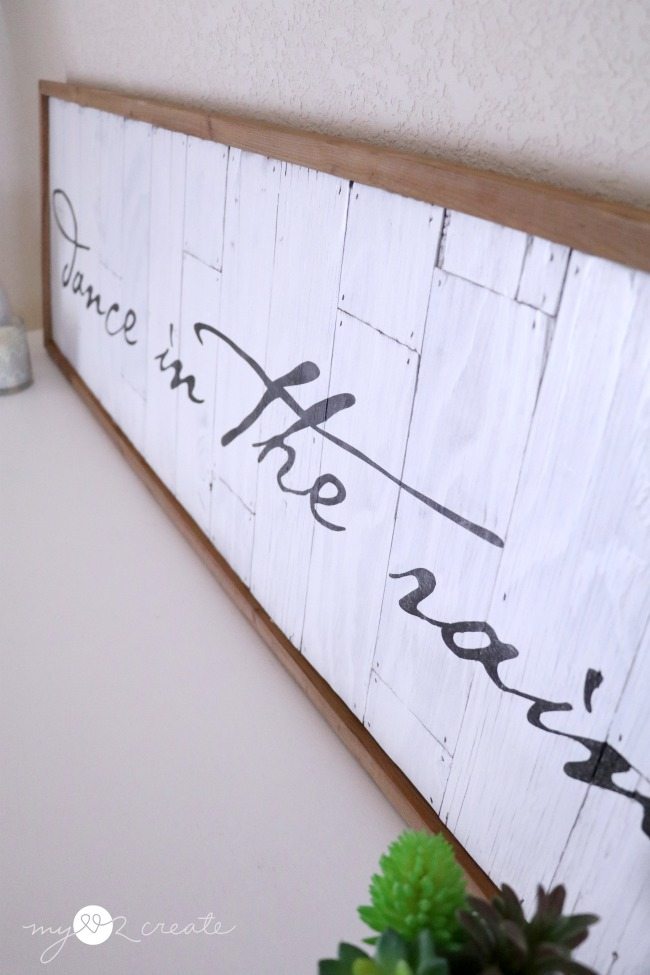
Put your DIY Planked Sign anywhere in your home!
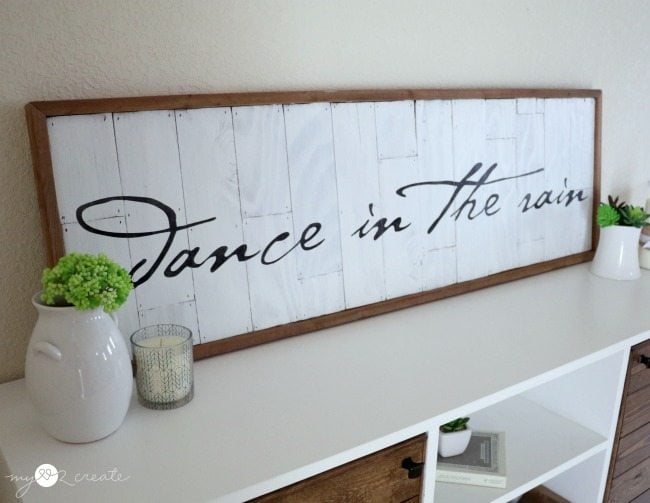
It looks great on my Modern Rustic Buffet! If you plan to hang it on the wall I suggest adding some D-ring hangers to the back.
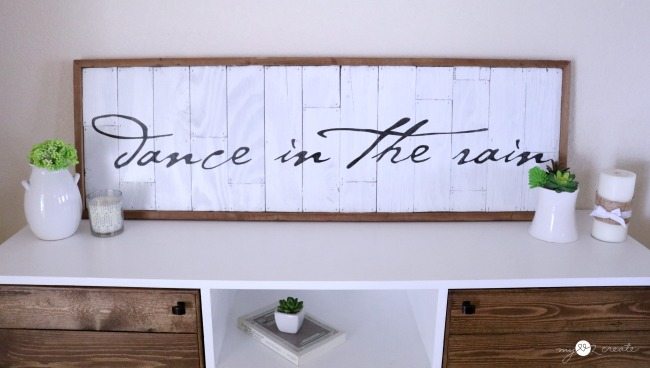
I love the simplicity of this sign, but the planks give it some really fun texture!
What would you put on your sign?!
I would love to hear your favorite words and phrases for signs, leave a comment below if you have one to share!
Hugs!
Mindi
I really enjoy your blog! Love this sign. Would you share the name of the font?
Thanks.
Malinda
Thanks Malinda! I wish I knew the font, I actually used and SVG file,this cut file so I don’t know what the font is called. Sorry!
i would hang it in the dining room or bedroom.
my favorite sign sayings are: wish, dream, love, kindness.
I love all these ideas!! Thanks so much for sharing!!
Mindi,
I love your Dance in the Rain sign! I would put Grateful, Thankful, Blessed. I sold my original sign and I want to do another smaller one for my new and improved kitchen!
Yes, that contact paper trick has saved me tons and tons of money. We use the same wood grain kind. I like the smaller boards added in to give this sign a more “patched up” look. I’ve never done it this way, but you’ve inspired me.
thanks for a great tutorial!
gail
Thank you so much Gail!! You should totally make a new sign for your kitchen! Those words are perfect, thank for sharing!!