Plastic Flower Pot Cover | Under $20
As an Amazon Associate, I earn from qualifying purchases.

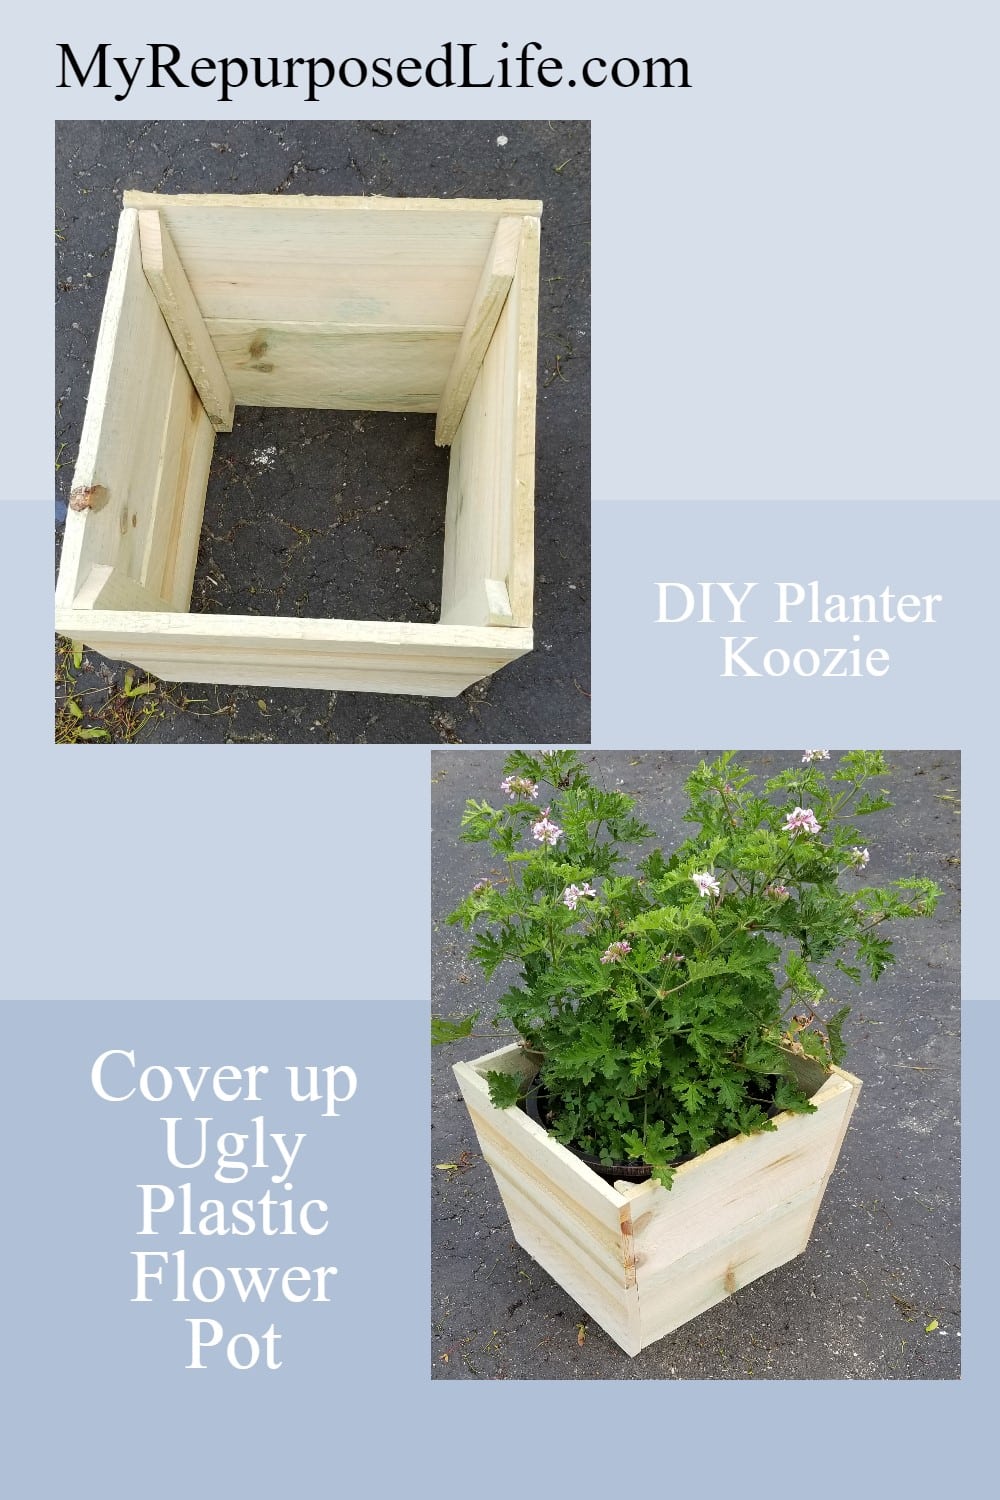
Do you have an old or unsightly flower pot that could use a little makeover? Instead of buying a new one, why not give it a stylish upgrade with a simple DIY plastic flower pot cover? This budget-friendly project is a great way to refresh your outdoor or indoor decor while reusing materials you might already have. In this tutorial, I’ll show you how to transform a plain pot into a decorative statement piece with minimal effort.
It’s not an ugly plastic flower pot this time, but I have the perfect solution if you want to make a pretty solution for YOUR ugly plastic flower pot! And you can make a few flower pot covers for under $20! Bonus! You get even more great projects from my friends, be sure to see them at the bottom of this post.
While doing my outdoor overhaul backyard makeover, a friend gave me the loveliest plant! It’s a citronella plant. If you’ve never seen one, let me tell you that it smells ten times better than a citronella candle. As you probably know, citronella products are used to thwart mosquitoes. So, the pot isn’t ugly, but I did want to disguise the fact that it is a plastic flower pot.
Small Deck with Fence Boards instead of Lattice
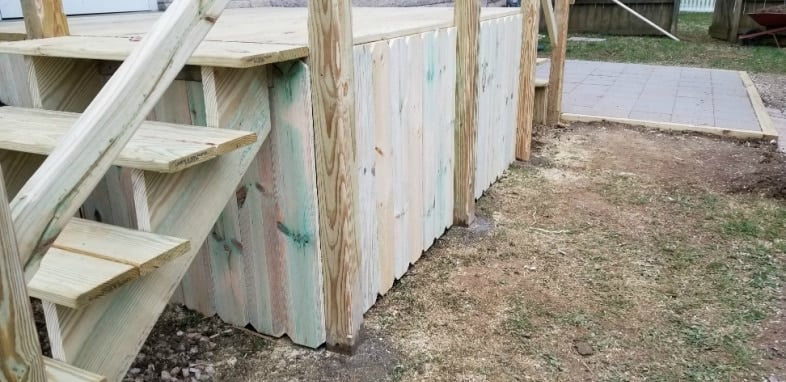
The new porch deck on the back of the house at the back door needed a surround to cover up the ugly concrete steps. I purchased 25 dog-eared picket fence boards. I had made so many runs to The Home Depot, so I bought more than we estimated. You can see that each board was cut in half, and dog-eared on each end. Personally, I love the way the porch/deck turned out.
It just so happened that I had four boards left over, which were perfect for making my new plastic flower pot covers.
Cut Fence Boards on Miter Saw
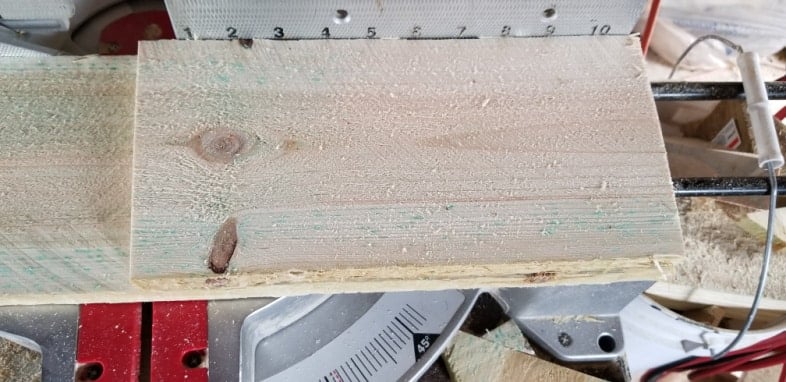
I customized my boards to fit my plastic flower pot exactly. You will want to cut yours according to the flower pot you cover. The boards were cut with a 5° slant. After cutting the first board, flip over the long side and cut again. Keep this up until all of your pieces are cut.
The top board is 1″ longer than the next board. If you make these, keep that in mind. Say you’re using three boards; they might be 11, 10, or 9 inches in length.
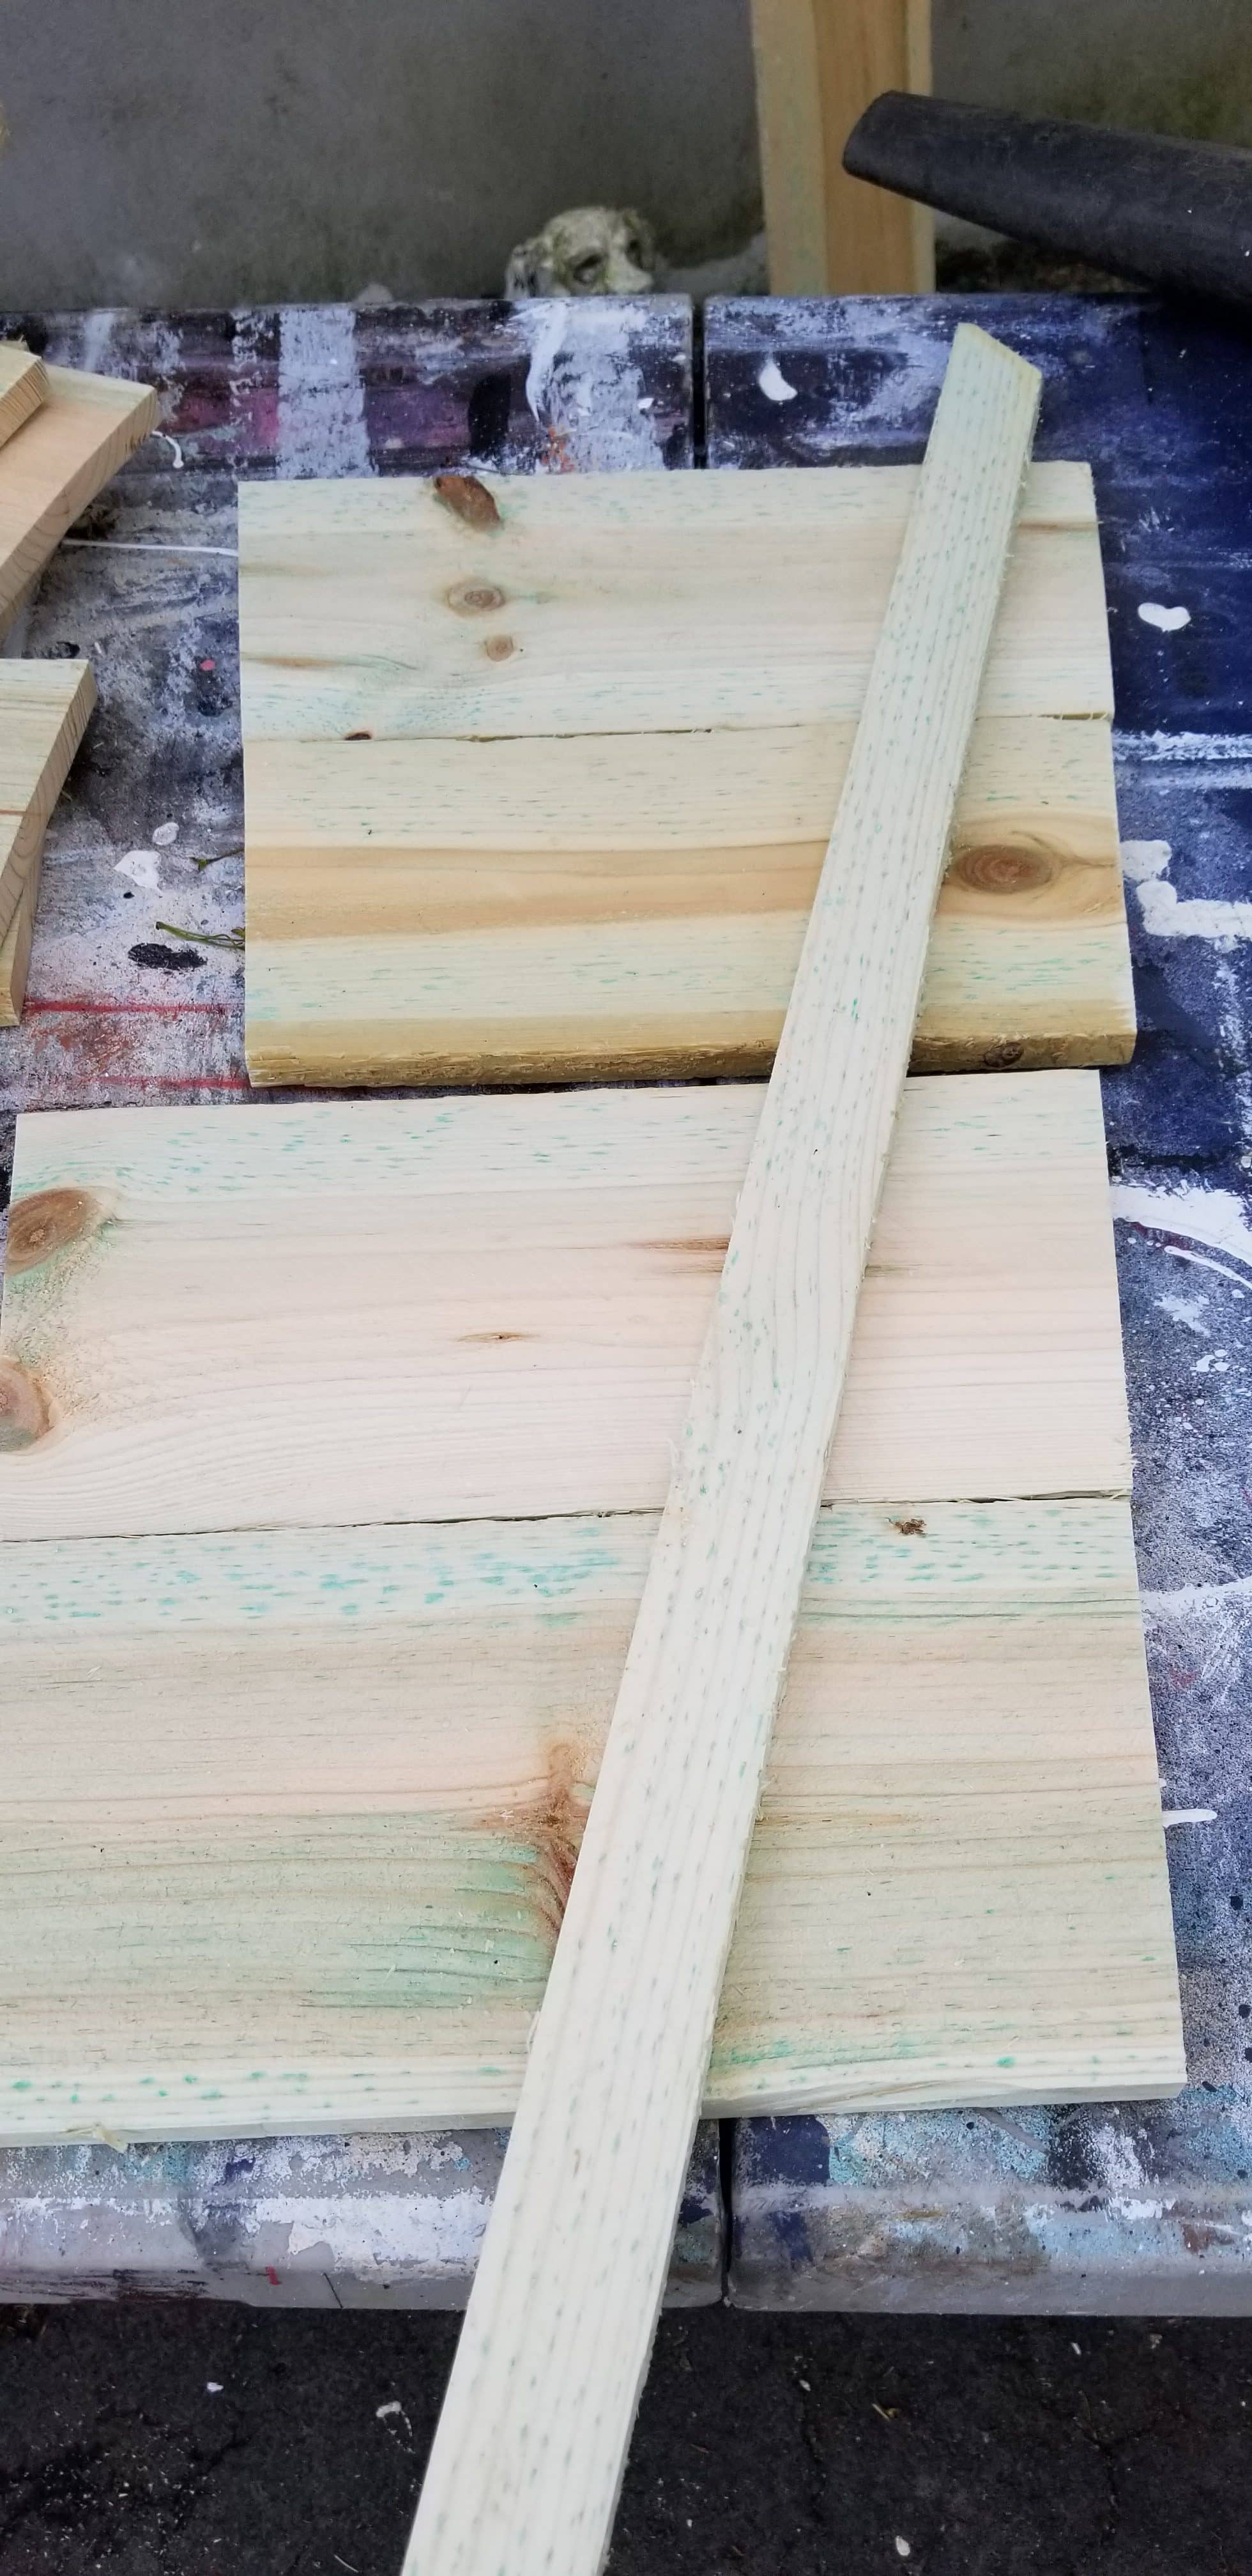
Attach Boards to Small Framing Piece
This is where I got fortunate. As my friend Rodney was installing the boards on the deck, he had to rip a couple to get them to fit perfectly. While cutting the boards’ lengths, I spied these pieces in the scrap pile he left behind. ![]() Oh happy day!
Oh happy day!
Make Two For Each Pot Cover
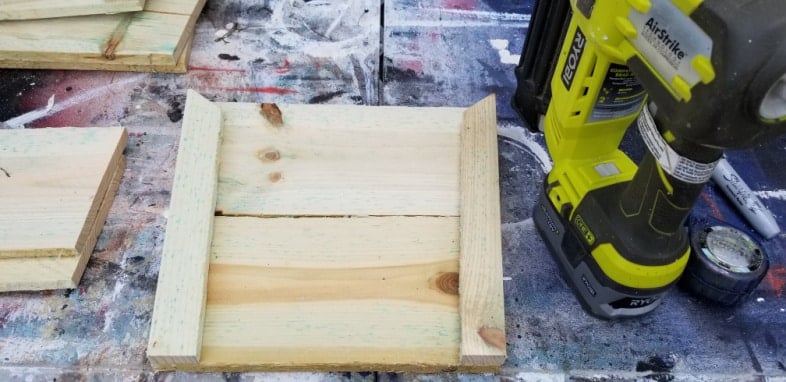
I left the angled cut for the top of the wooden planter boxes I was making to cover up those ugly plastic flower pots! My nail gun was the perfect option to make this project quick and easy. You could also use Gorilla Wood Glue if you prefer. For one wooden planter box, make two of these sides.
Attach Additional Boards
Add the other fence boards with your nail gun to each of those first two sides.
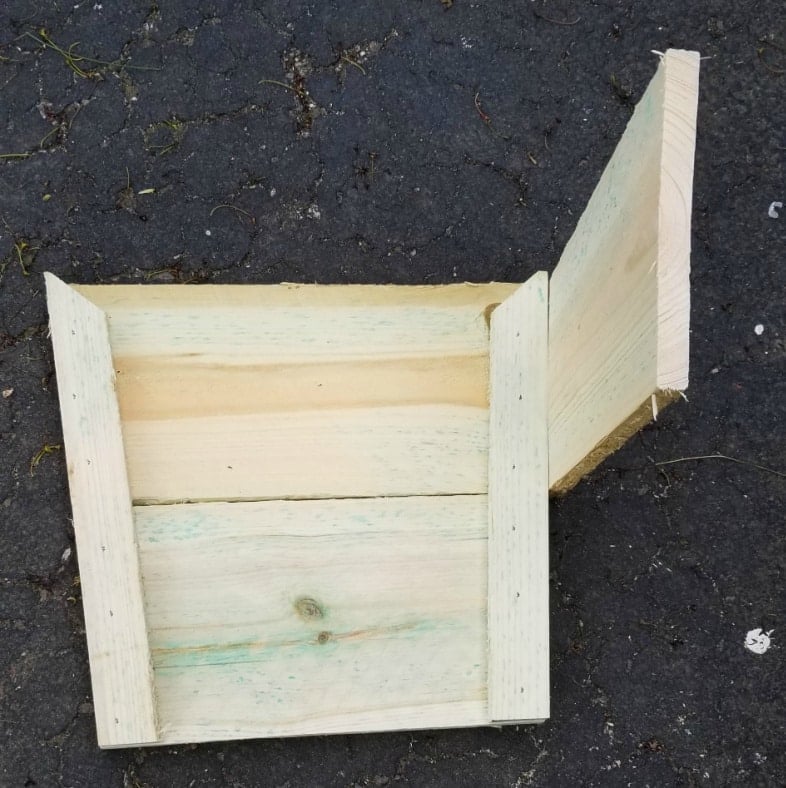
Plastic Flower Pot Cover In Progress
Now, the only thing left is adding two more boards to the last side. Can you see that the original two sides are opposite to each other? Making those two sides first is a very simple assembly process.
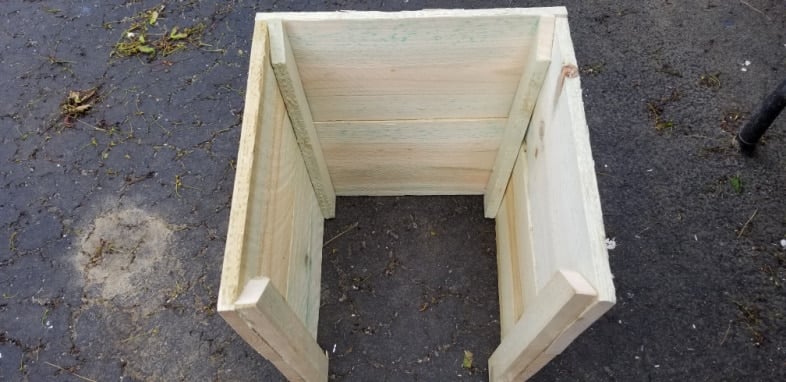
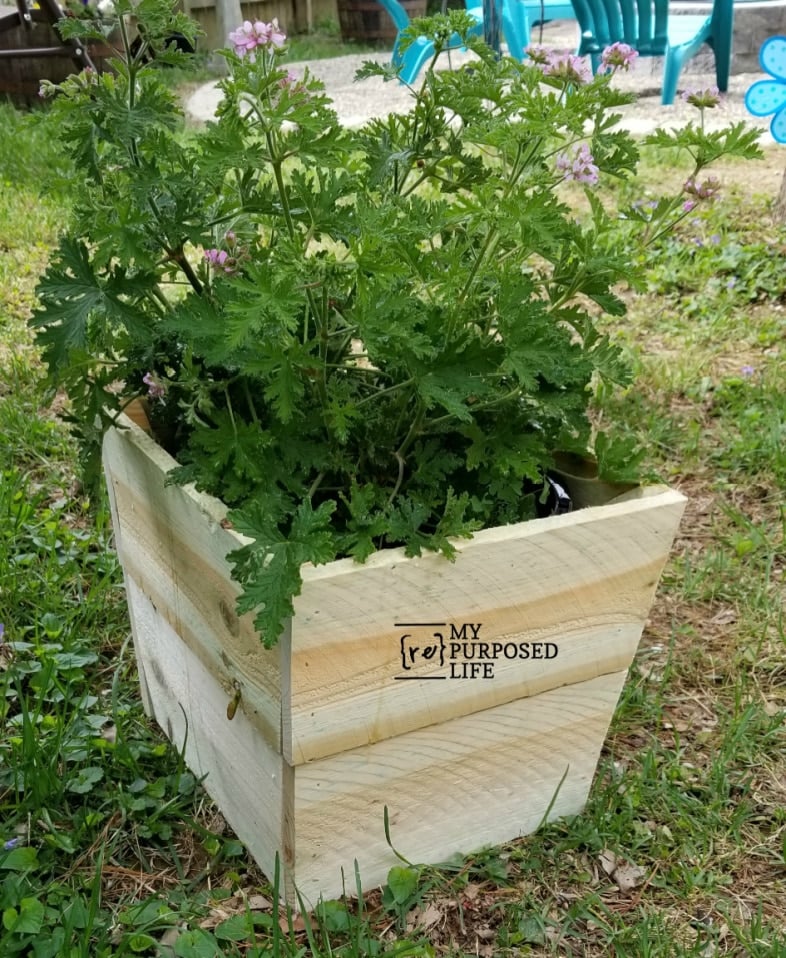
Perfect Planter to Cover Plastic Flower Pots
This simple wooden planter does not need a bottom for outdoor use. Three boards were used for two planters. You would need a fourth board for the stakes to make the supports to hold the wooden planters together.
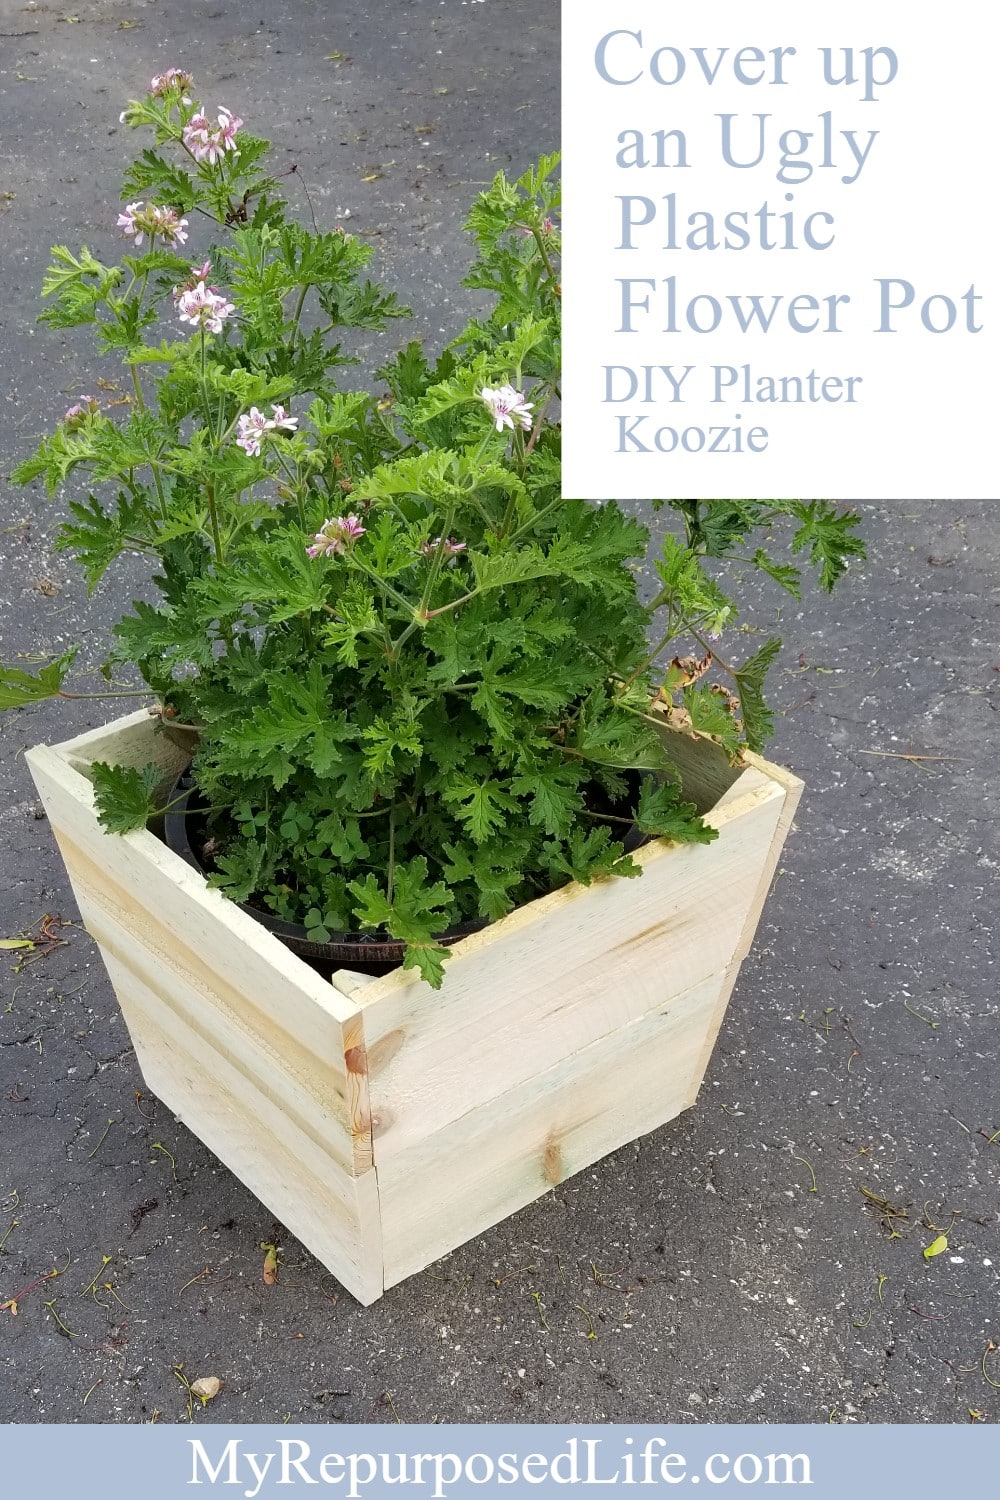
Citronella Plant Wooden Planter
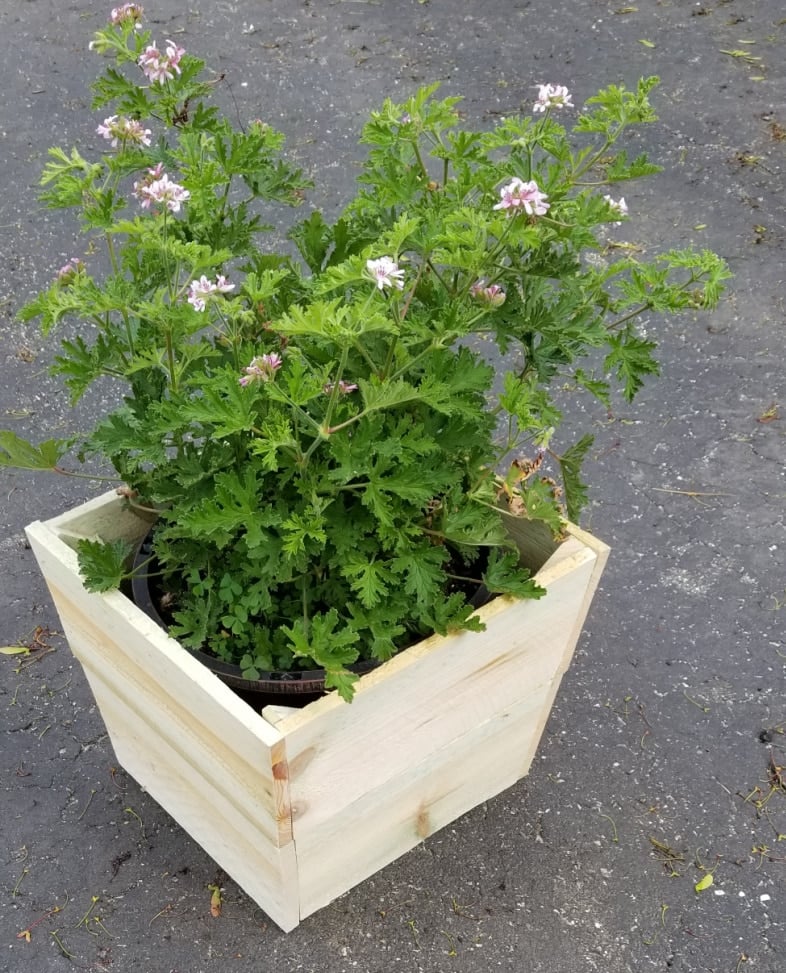
I was so excited to insert my plastic flower pot to ensure it would fit in the simple wooden planter box! It fits perfectly! The plastic flower pot is very snug in the wooden planter, making it very easy to move.
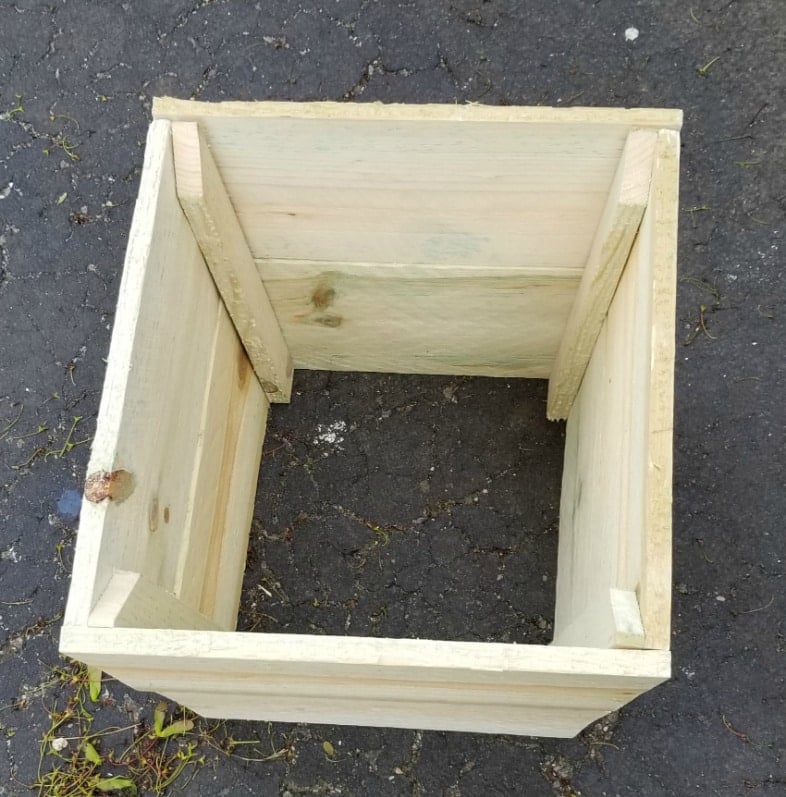
Bottomless Wooden Planter for Plastic Flower Pots
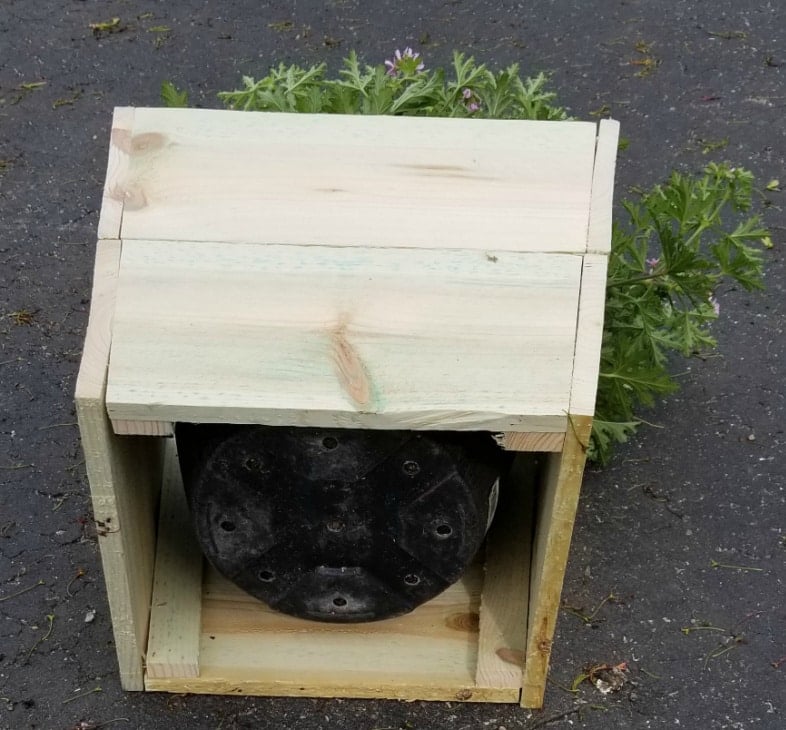
The bottomless wooden planter will allow airflow and drainage for this plastic flower pot.
Have you ever seen or smelled a citronella plant? It’s suggested that you squeeze the leaves to release the fragrance. I’ve also noticed that the fragrance is more noticeable when I water the plant. Thank you, Leann, for this sweet gift for my new Backyard Camper Retreat. I love it! I have the other wooden planter, so I need to get one more plant. ![]()
Rustic Koozies for Plastic Flower Pots
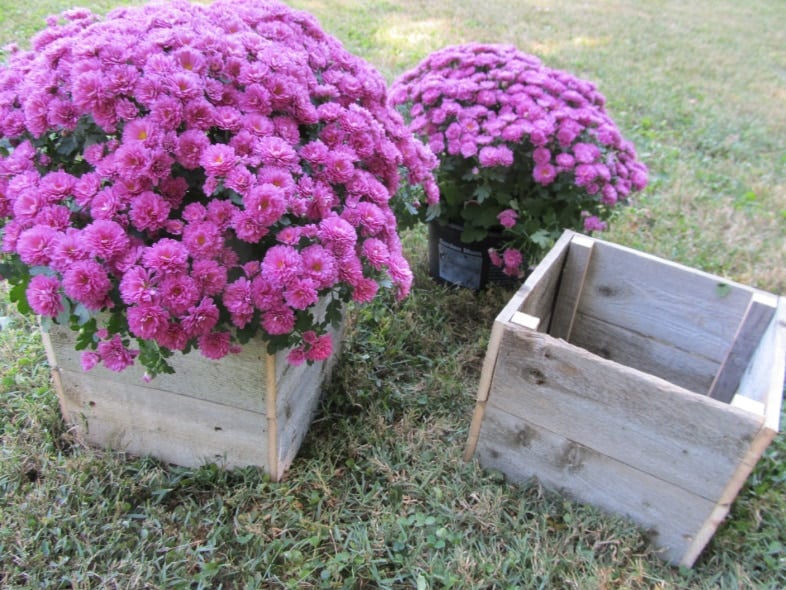
This isn’t my first time making wooden planter boxes to cover plastic flower pots. A few years ago, I made some rustic fence koozies for some mums. It’s tough to say, but I think I like the new style cut on an angle better. What about you?

Now it’s time to look at what my friends made for under $20. It’s fun to make great DIY projects when you’re on a budget.
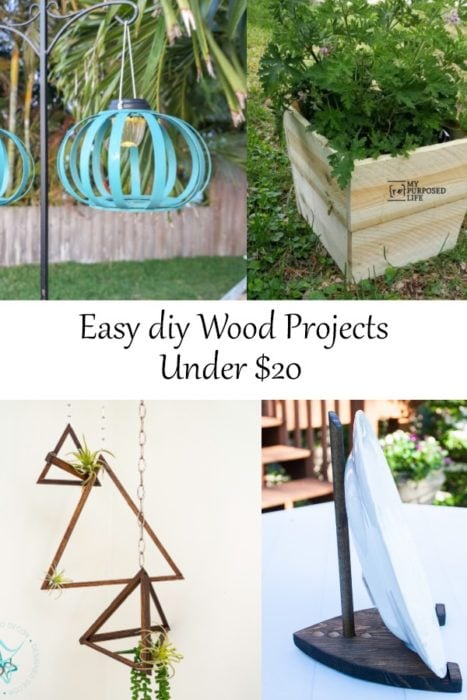
H2OBungalow – DIY Solar Hanging Lanterns
My Repurposed Life – Flower Pot Cover
Designed Decor – DIY Hanging Air Plant Holder
Sweet Pea – DIY Adjustable Plate Stand
Whoa! Aren’t they awesome?! Please visit my friends to see their DIY project.
gail
Read more about Gail Wilson | My Repurposed Life
Just when I was wondering how to conceal some ugly pots, you come up with a great solution. The angled design is much better than the boxes I had envisioned. Glad your treatments are coming along well. Get better soon!
I’m so happy the timing worked to your advantage for this project!!! You could even go up 3 or even 4 boards. Just make each board in 1″ increments. 🙂
thanks for the well wishes!
gail
Gail, I love the idea that they are bottomless. Perfect idea for your makeover. I love the “Rustic Koozie” term, now to make some koozies for my patio!
Awesome DeDe! I’m happy you like my planter koozies! 🙂 I like both styles equally well.
gail
Aren’t you a smart one! Great idea to make a pot cover! Bringing home a new plant becomes so easy if you just have to pop a plant cover over it. Oh Wow! I see a peek of your new deck/porch! I can’t wait to see it!! Pinned this project too 🙂
ohhhh, you spied my new deck/porch! 🙂 I love it so much. I designed it specifically for my needs/wants. Isn’t that the best thing about doing it yourself? 🙂
Thanks for Pinning!
gail
The covers that you made are such a good idea. You can keep the plastic pot that the plant came in but have it look attractive in your yard. I’m looking forward to your reveal next week!
Thanks Paula!!! When you compare the before and after photos, you’re going to be amazed! I would love to have your vote next week if you think my hangout is the best. 😉
gail