Porch Posts Need Trim
As an Amazon Associate, I earn from qualifying purchases.
It’s that time of the month…when the Power Tool Challenge Team gets together to share our projects with you. This month’s theme was patio and porch!

Over the last year or so, I’ve been trying to update the curb appeal around the old homestead. This is the before.

It’s been a year since cousin Terry and I installed the new porch posts. In fact when I looked at the date on the signature it was exactly ONE year to the day when I was working on the new trim!
I bought some 1×6’s to add trim to the top and bottom of the posts. I was going to use molding until I saw Traci from Beneath My Heart’s new front porch last year. It was then that I decided this was the way I wanted to go.

I cut the end off the board at a 45° angle, then flipped the board over, and butted it up against my 2×4 jig on the right to get the angle right on the other end.

It’s important to remember to flip the board over, or you will have an outside corner on one side and an inside corner on the other.

I did a dry fit with clamps. The porch and the roof/ceiling are both uneven, so this wasn’t going to be perfect.

Because I did the dry fit, I wanted to make sure I kept the pieces straight. I identified them on the backs of the boards.
 This is where cousin Terry signed her post a year ago!

You can see the tools of the trade I used—a rubber mallet, level, clamps, and my airstrike nail gun. not shown: painters caulk and sandpaper.

Sorry about the blurry picture, but I wanted to show you that your mitered corners don’t always have to be perfect. Perfection is overrated, right?
 I sanded the slight overhang . . .

. . . looks better, and will even be less noticeable after it’s painted.

I used masking tape to keep the porch from getting paint on it, and some scrap pieces of vinyl wallpaper…. I bought a couple of rolls at the ReStore, and I love using it when I paint. (it’s obvious, right?)

The curb appeal is definitely improving! There’s always something left to do. Next up? The walkway. You can see my hanging gutter planters tutorial by clicking the link.
 This poor little guy needs a new look! This is after I used the hose to spray off the loose paint. You can see more about him, and how long he’s been in the family in my original porch post blog.
![painting skunk[4]](https://www.myrepurposedlife.com/wp-content/uploads/2016/05/painting-skunk4_thumb.jpg "painting skunk[4]")
You can see that I got a little messy painting the porch post trim pieces. While they were drying I decided to give my favorite skunk a new paint job. I used several coats using Behr flat paint (beluga).
After the black paint dried, I used some of the porch post paint to do his white stripe.
![porch skunk[6]](https://www.myrepurposedlife.com/wp-content/uploads/2016/05/porch-skunk6_thumb.jpg "porch skunk[6]") He is soooo old, but a new coat of paint made a big difference.
He is soooo old, but a new coat of paint made a big difference.
Now it’s time to see what my blogger friends have been up to for their porches and patios.
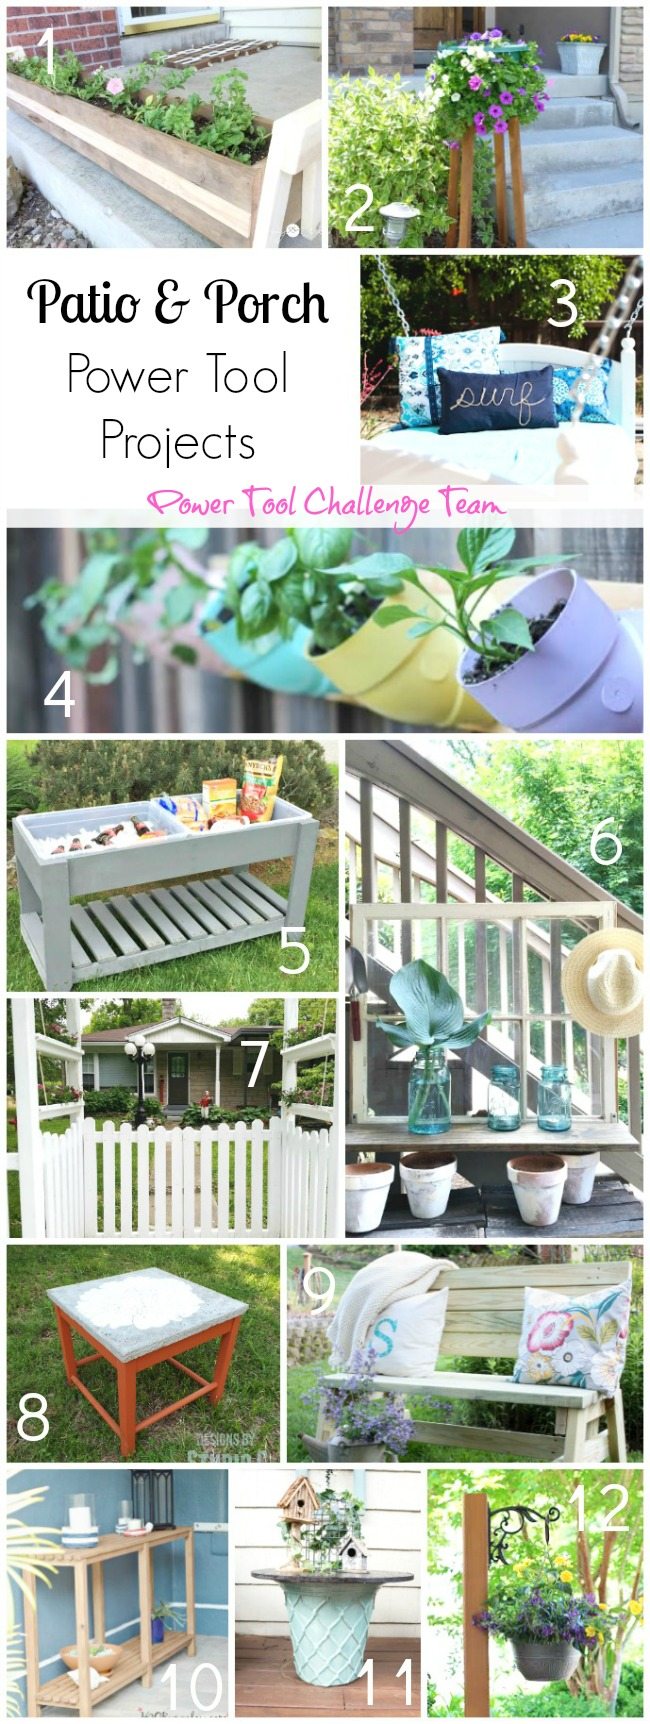
1. Long Porch Planters by My Love To Create
2. DIY Flower Pot Plant Stand by Her Tool Belt
3. DIY Easy Swinging Bed by Domestically Speaking
4. PVC Pipe Vertical Garden by Kim Six
5. How to Build An Outdoor Serving Table by Create and Babble
6. Repurposed Window Garden Shelf by Refresh Restyle
7. Trimming Out Porch Posts by My Repurposed Life
8. Stenciled Concrete Topped Table by Designs By Studio C
9. 2 X 4 DIY Bench by Virginia Sweet Pea
10. DIY Outdoor Sofa Table Tutorial by H2OBungalow
11. Repurposed Electrical Spool Holder Table by Designed Decor
12. DIY Outside Standing Plant Hanger by Confessions of A Serial DIYer
Gail, your porch posts look so much better and more inviting than the old metal ones. Your porch and gorgeous picket fence and arbor gate really amp the curb appeal!
Thank you Marie! I’m loving the new look myself! Still more to do….
gail