Reclaimed Coffee Table Repurposed Hall Table
As an Amazon Associate, I earn from qualifying purchases.
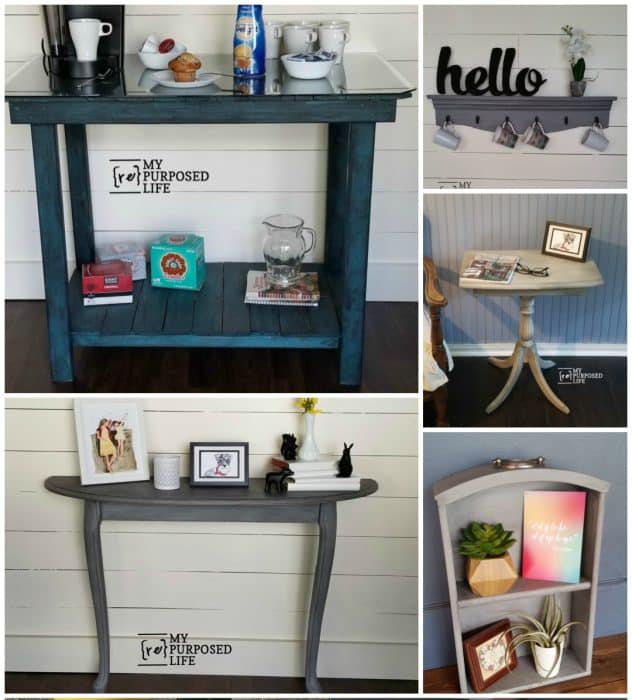
I made a repurposed hall table out of a reclaimed coffee table. In fact I have made three tables using the parts from this $7 busted coffee table.

When I picked it up at Vendors’ Village I somehow missed the broken edge pointed out by this arrow. Of course the top isn’t real wood, but that’s okay with me.
This post contains affiliate links for your convenience, read more here*

These are the parts I added for this first table project. One 1×4 and two random legs that were a buck each.
Cut oval coffee table on a table saw

The coffee table was cut in half on the table saw. I removed the fence, but left the guard in place.

I was left with one side that had the busted top, more on that in coming weeks. ![]()
Measure and Cut Table Skirt

Note: finding the center of the oval table was simple after I realized that nice rectangle pattern was there.

It’s time to design the new table base. I began by situating the new legs in the same place as the shorter coffee table legs.
- Measure for the skirt of the table in the front.
- Mark the board.
- Cut board on the miter saw
Use Kreg Jig pocket holes for assembling table

Drill pocket holes with a Kreg Jig
Need more details on using a Kreg Jig? See my article How to use a Kreg Jig Pocket Hole System

The Kreg R3 is handy to use larger items such as the table leg. Pocket holes were drilled in order to hold the table leg onto the table top.

Pocket holes were evenly spaced on the skirt (front) to attach it to the top of the table.

- Secure table legs to the table base with pocket hole screws.
- Attach the skirt to the side of the table leg.
- Continue with more pocket hole screws across the front skirt.

- Measure depth from front to back. Cut side apron.
- Mark for pocket holes
- Drill pocket holes
- Measure and cut skirt/apron for back
- Attach sides BEFORE attaching back.
If you attach the back before the sides, it’s difficult to secure the screws inside the small area.
 Use wood screws to attach back apron—cleat.

This is what your newly diy designed table will look like!

Then, if you’re like me—you’ll want to test it out to make sure it actually stands/rests against the wall (hahah fence).
Caulk or patch gaps and seams

The table top was a little wonky, so painter’s caulk was used to fill in any cracks.
Prepare for paint

As always I started with my own version of a diy chalky paint primer to get a good coat of flat paint on the table.
Use Finish Max Paint Sprayer

Putting the two legged table up on my easy diy sawhorses was the best way to use my Super Finish Max Extra.

This is my favorite part of any frankenfurniture makeover! When I get a good coat of primer on it and it brings all the components together.

I was anxious to see how it looked standing up on it’s own two legs. ![]()
Project ideas and a video of “how to glaze painted furniture and more”
Glaze your new table

Of course it got the royal treatment—glazing treatment that is!
Watch my video of How To Glaze Painted Furniture

I love, love, love this Smoked Glaze on all my projects. I used it on my printable pallet frame.

Isn’t it scrumptious? The glaze is so different on all my projects.
Reclaimed Coffee Table as a NEW Hall Table

Pin it so you don’t forget where you saw it!

Share it on Pinterest!!
The table adheres to the wall with screws directly through the cleat into the wall, or by adding picture hangers and using d rings attached to the back of the table.
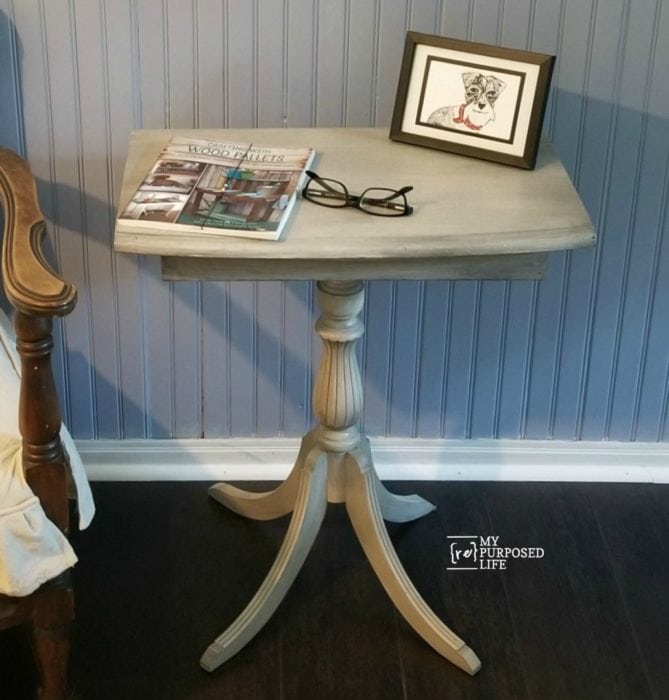
I used part of the bad half of this table top to make the small four legged side table!
This was such a fun project! See more table ideas here. Watch my video of How To Glaze Painted Furniture
gail
On the half table, did you do a primer coat, then another coat and then the glaze or just the primer coat and glaze?
Lori,
Good question! I usually glaze right over the primer coat. Because I use my own chalky paint primer, it’s flat and accepts the glaze really well. I love, love, love this glaze for so many projects!
gail
Really nice!
I like your half table but PLEASE don’t cut on the tablesaw without a either a fence or a mitre gauge.
Thanks for the heads up Julie! I’ll have to watch some videos on cutting an oval coffee table with a mitre gauge. I have NO idea how that would work. (and stay on the line) 🙂
gail
The table saw should always be used with either a fence OR a mitre gauge as I said but I don’t think you can do that table cut with a mitre gauge! I would probably use a circular saw or jigsaw running against a clamped board.
You know I admire you and all you do, just want you to be safe!
Love this table. Is it for sale?
Hi Gail!
I can’t tell you how many of these coffee tables I have passed up because there was damage to the outside edge! Well never again! What an awesome idea <3
yippee! I’m so happy to inspire you Christina! The best part is after you cut the table top, you still have more pieces to work with, including but not limited to the table base!
It makes me smile to know that I have inspired you to not pass up broken coffee tables anymore. 🙂
gail
so wonderful!! love the step by step directions. AND the glaze!
The glaze! I can’t stop using it Nova! I love it on everything. 🙂
Like I said, I would love to keep this table in place of my larger hall table…. but until I do a gallery wall I need the space on the larger table for photos.
gail