Reclaimed Wood Shelves
As an Amazon Associate, I earn from qualifying purchases.
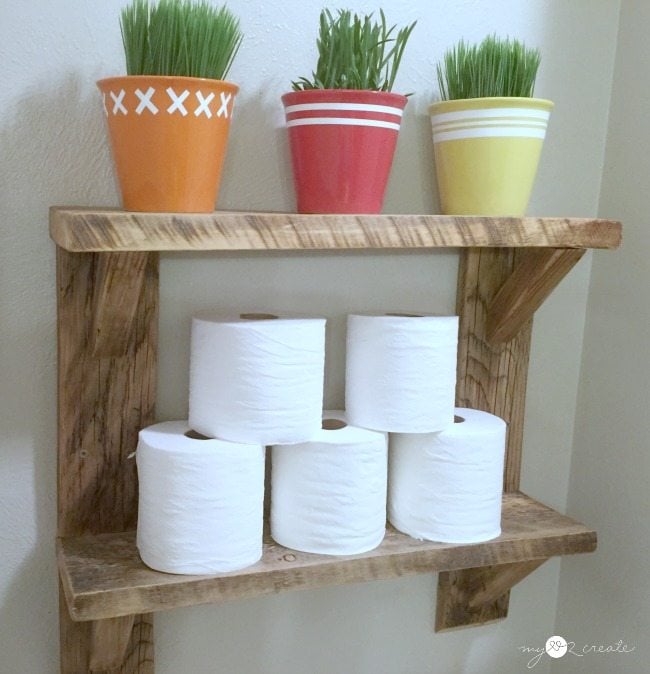
Happy April Fool’s Day! Crazy that it is April already, time flies. Today I am happy to share my reclaimed wood shelves with you…
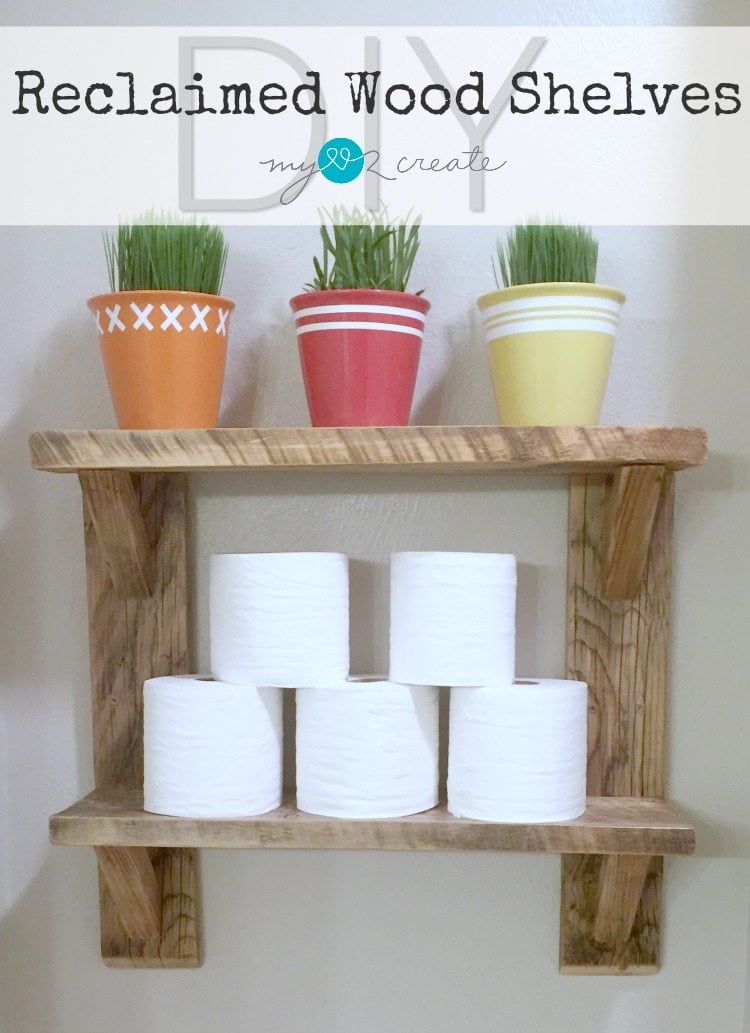
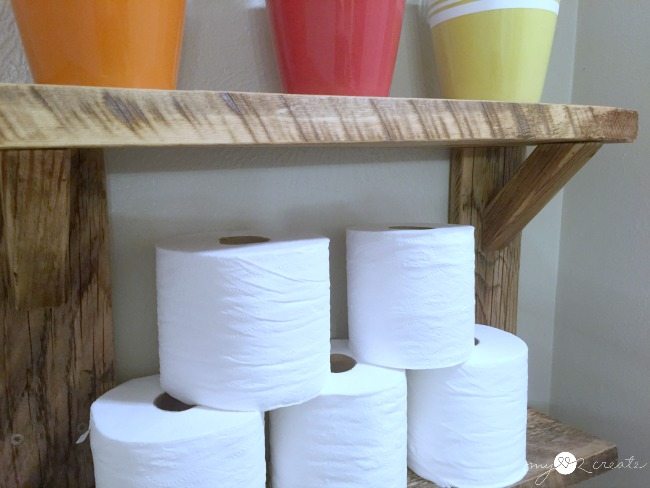
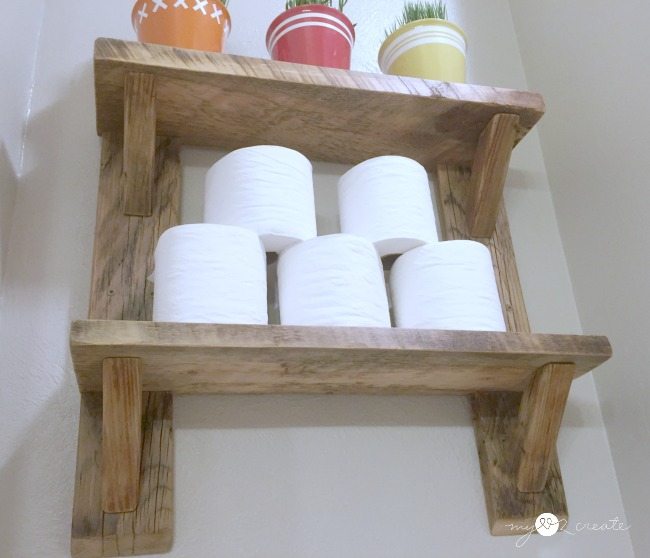
From the photo it is probably obvious that these cuties are hanging out in the bathroom, and let me tell ya. We are singing praises…no more searching for toilet paper! 🙂
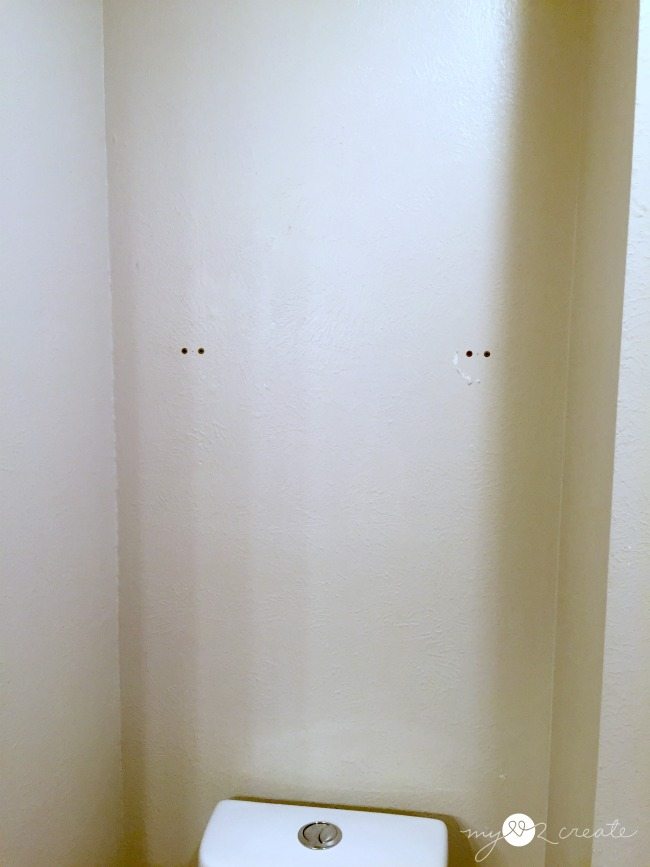
This is what the wall used to look like. There was a towel bar over the toilet and it fell down…like all towel bars do, and so it has been this blank boring nothing wall for a LONG, long time. Until now!
I love having something cute to look at and a place to store the toilet paper! Ahhh happiness.
Let me show you how this came together. I started with some reclaimed wood, you know the free stuff that you get off of the craig’s list free section, or the side of the road. In this shot I was looking at different options and figuring out what to do.
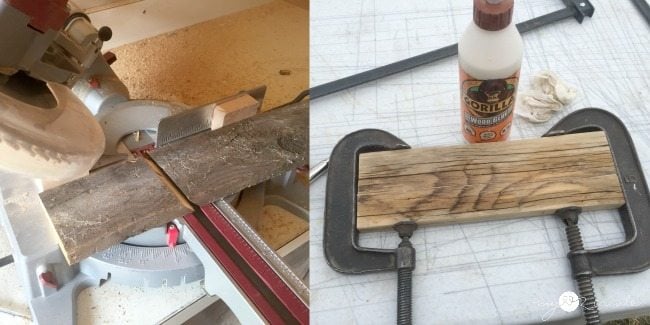
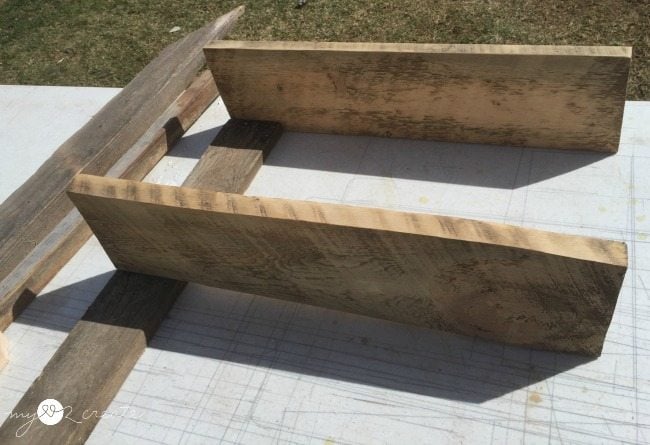
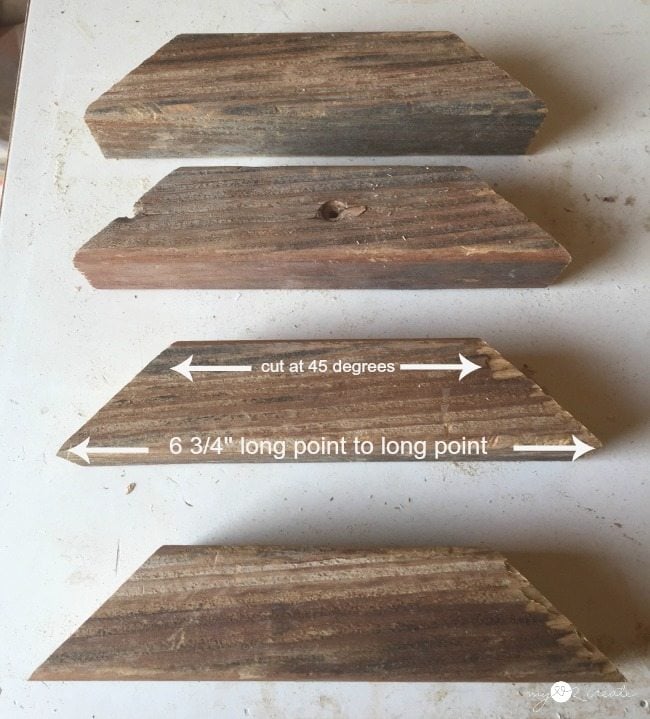
I took the weathered 1×4 board and cut two small pieces with a 45 degree bevel at one end and a straight edge at the other. I cut it to 6 3/4”. Then I cut two long boards at 12”. Because it was so weathered, one of the boards broke in half and I ended up using my gorilla wood glue to fit it, not it is nice and strong. 😉
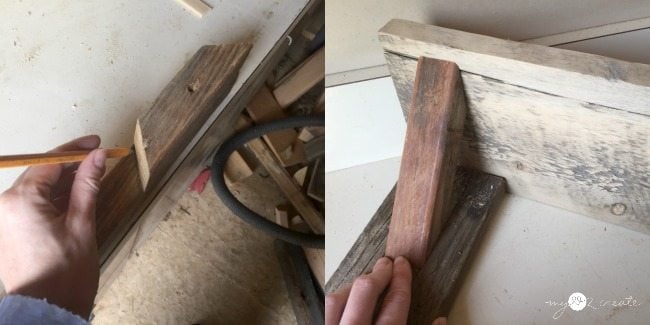
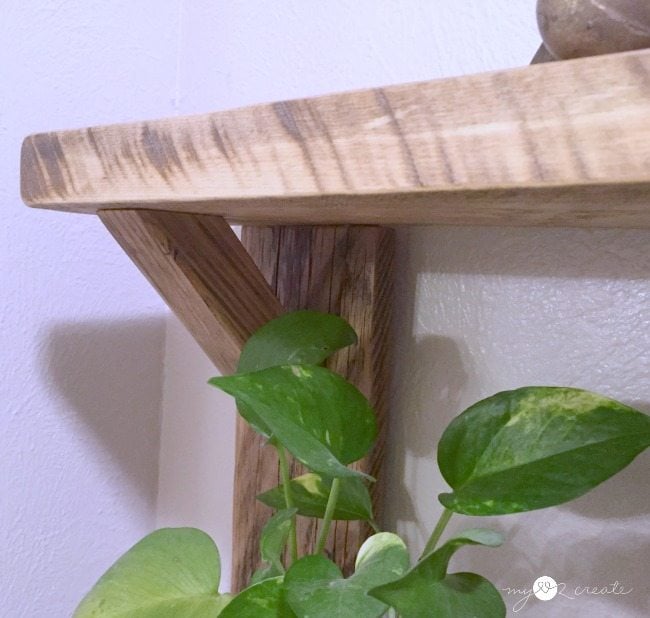
Next up I cut some shelf support brackets out of an old baluster, which is basically a 2×2. These were cut at 6 3/4” from long point to long point, cutting at a 45 degree angle ends not parallel.
Here is a shot to show the measurements. Of course you adjust it to fit your needs.
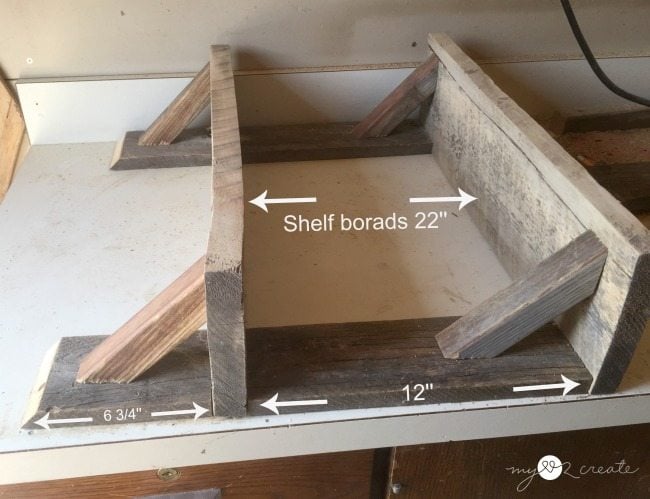
With all my pieces cut I put it together with a dry fit to see how it would look. Pretty good! My shelf boards were cut to 22” and are 6” deep. You can also see that they were not very straight…so my shelf is not perfect, which is expected when working with reclaimed wood. Embrace the imperfections people!
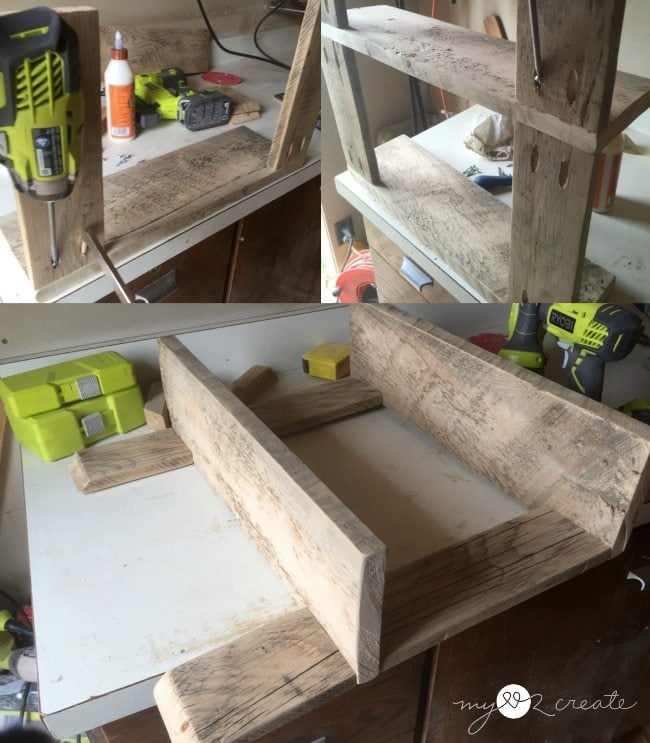
I decided the easiest way to attach the 1×4 boards would be with pocket holes. So I drilled some with my Kreg Jig into the ends and attached the long boards to the bottom of the top shelf (top left). Then I added the bottom shelf to the other ends (not pictured) , and lastly attached the short ends to the bottom shelf (top right). With a good sanding all the wood looks more uniform.
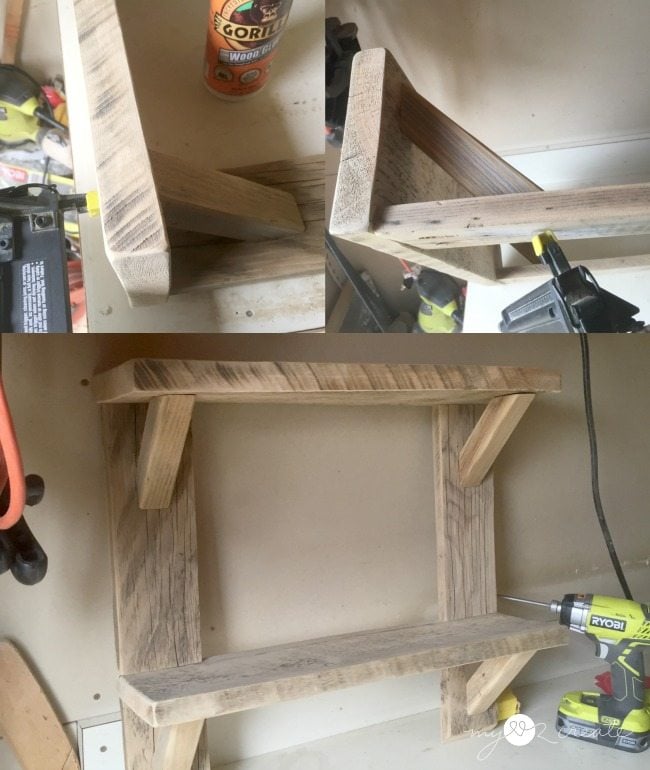
It was really easy to attach the shelf brackets. I gave each 45 degree cut end a generous helping of wood glue and then used 2” nails to nail them on from the back and though the shelf. And that is a wrap!! So fun and easy and just perfect! I love giving new life to old wood.
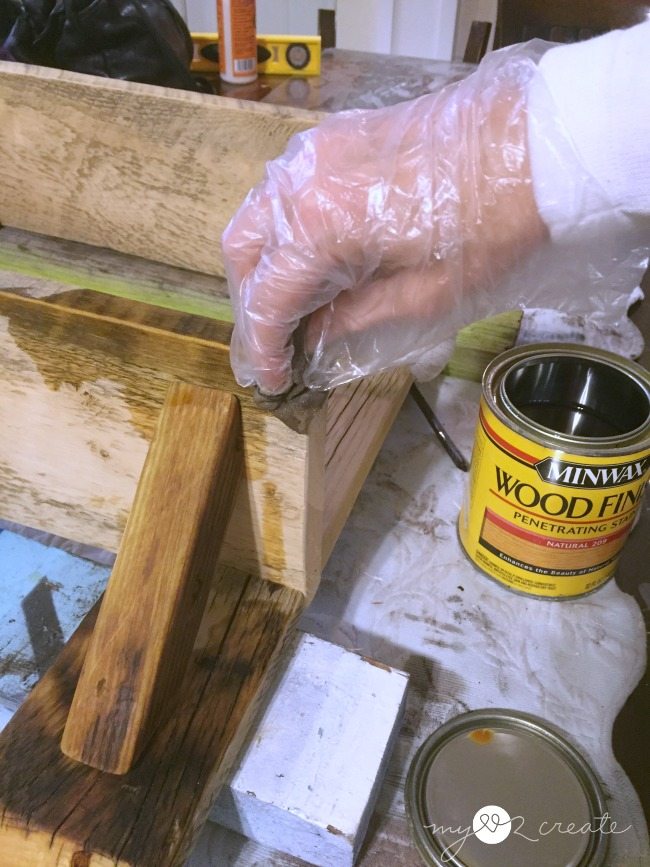
I really struggled on if I wanted to finish them with a natural stain or just use poly. I finally went with the natural stain, and I love it! I used the same wood on the shelves in my teen boys room makeover, and only went with the poly. The natural stain really darkens the wood up quite a bit, but it looks good both ways.
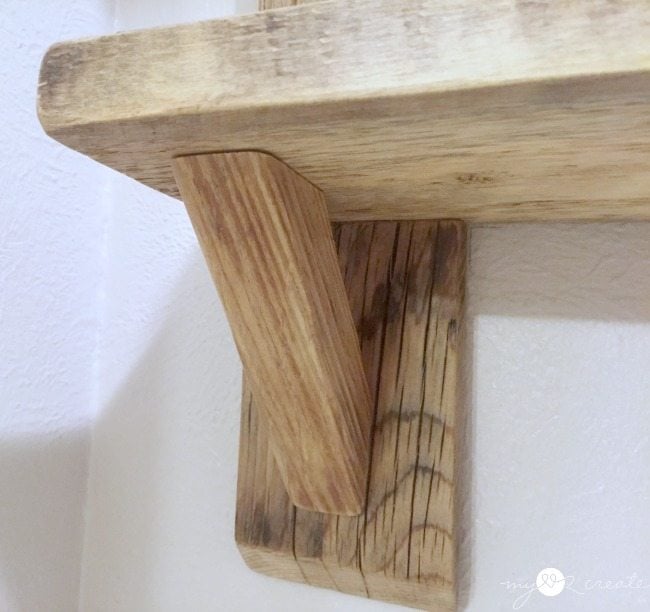
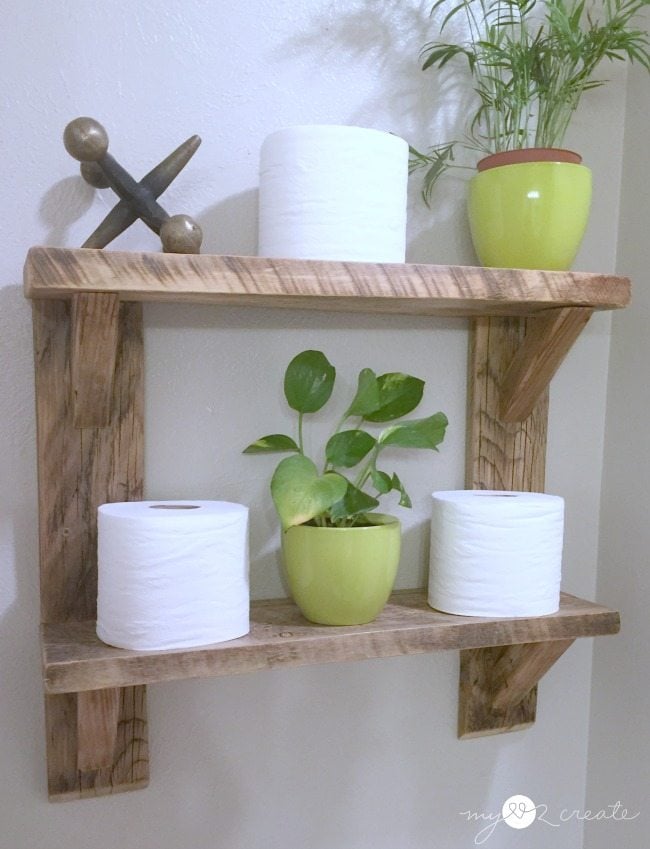
I think the brackets are so cute!
And of course the reclaimed wood is just so full of character, how can you not love it! If you look to the far left you can see I secured two screws into the 1×4 to attach it to the wall. I did this on both sides. Be sure to use wall anchors if you don’t have studs in the right place.
A shot from the bottom so you can see the cute brackets…and a nice view of the TP tower. 🙂
This bathroom also sports my Rustic DIY Rustic Shelf and my Curtain Tie Backs Repurposed into Towel hooks. So I guess it has the reclaimed wood theme going on.
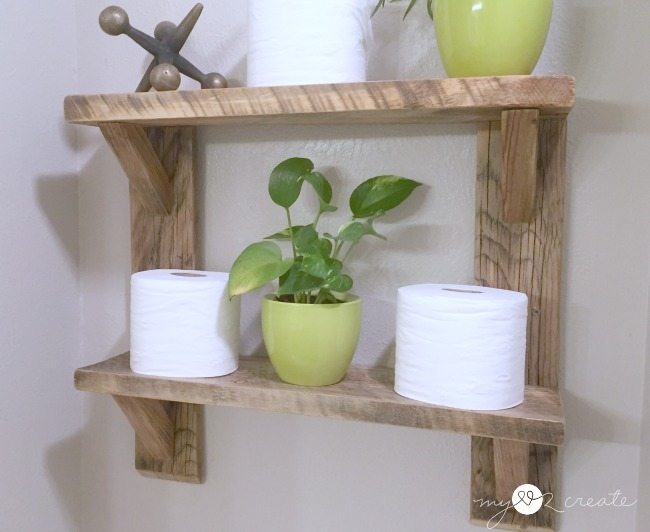
Now if I can just figure out which way to style them…
…then I can call it a day!
Do you have a preference? Oh, and honestly, if I had room in my kitchen for these shelves…they would look amazing with dishes on them don’t you think!? Oh the possibilities! 🙂
For more fun projects come and visit me at MyLove2Create!
Hugs!
Mindi
see more of Mindi’s posts on MRL below:
[categorythumbnaillist 274]
Mindi,
Your shelf from reclaimed wood looks so awesome in your bathroom, and you’re right, it would look great in a kitchen as well. Beautiful job and great tutorial!
gail