Chair Bench Tutorial | Three Chair Bench
As an Amazon Associate, I earn from qualifying purchases.
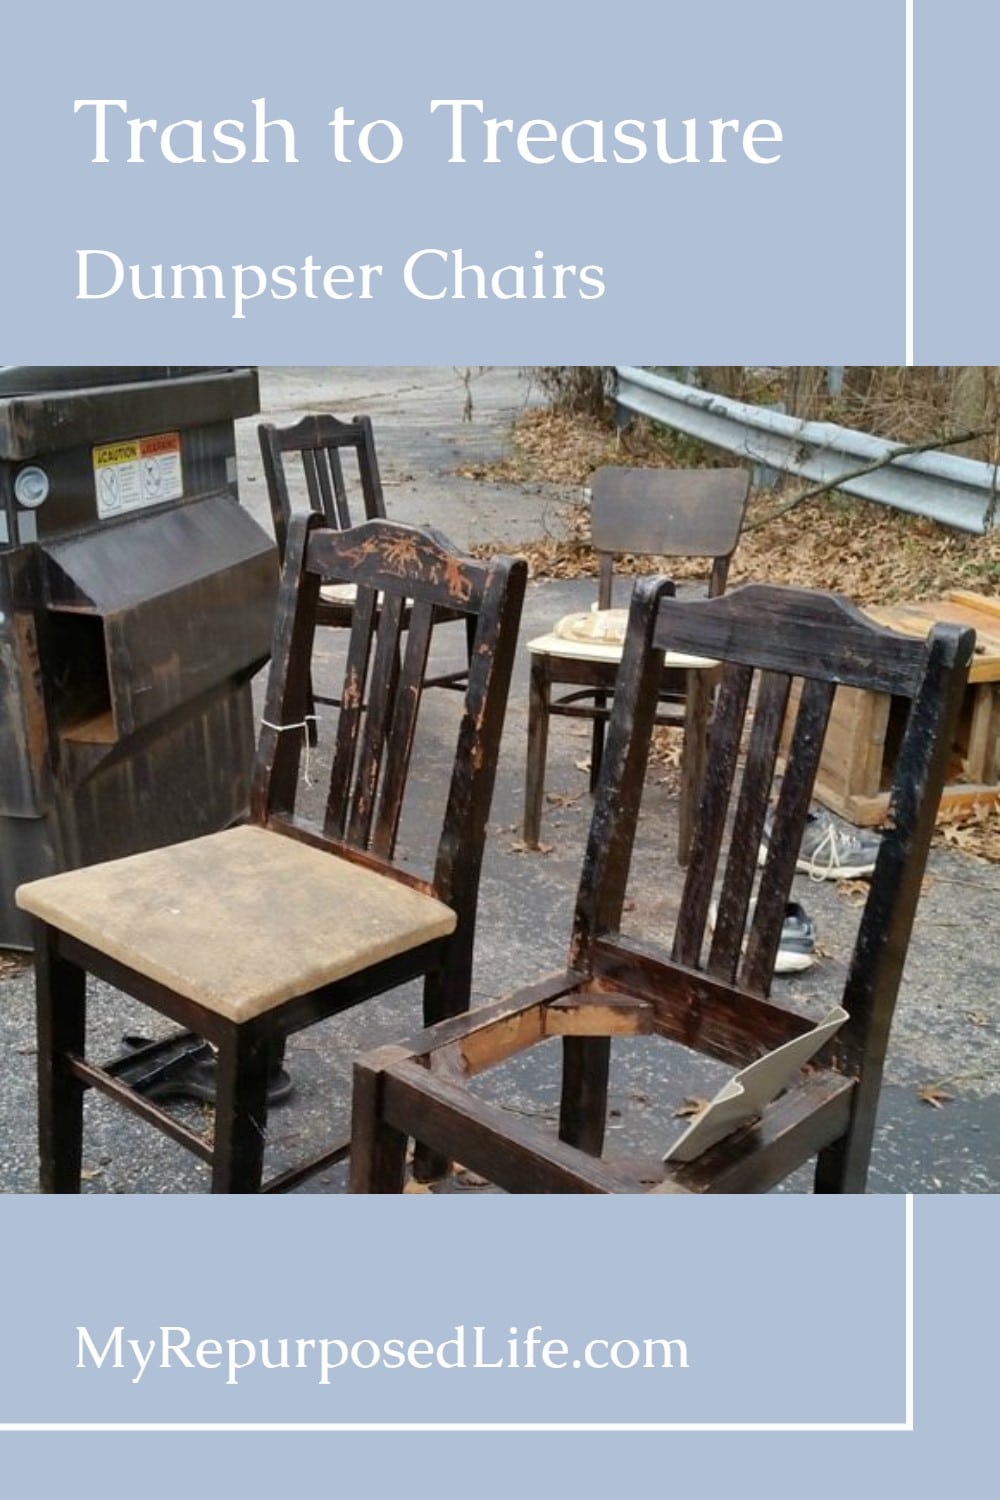
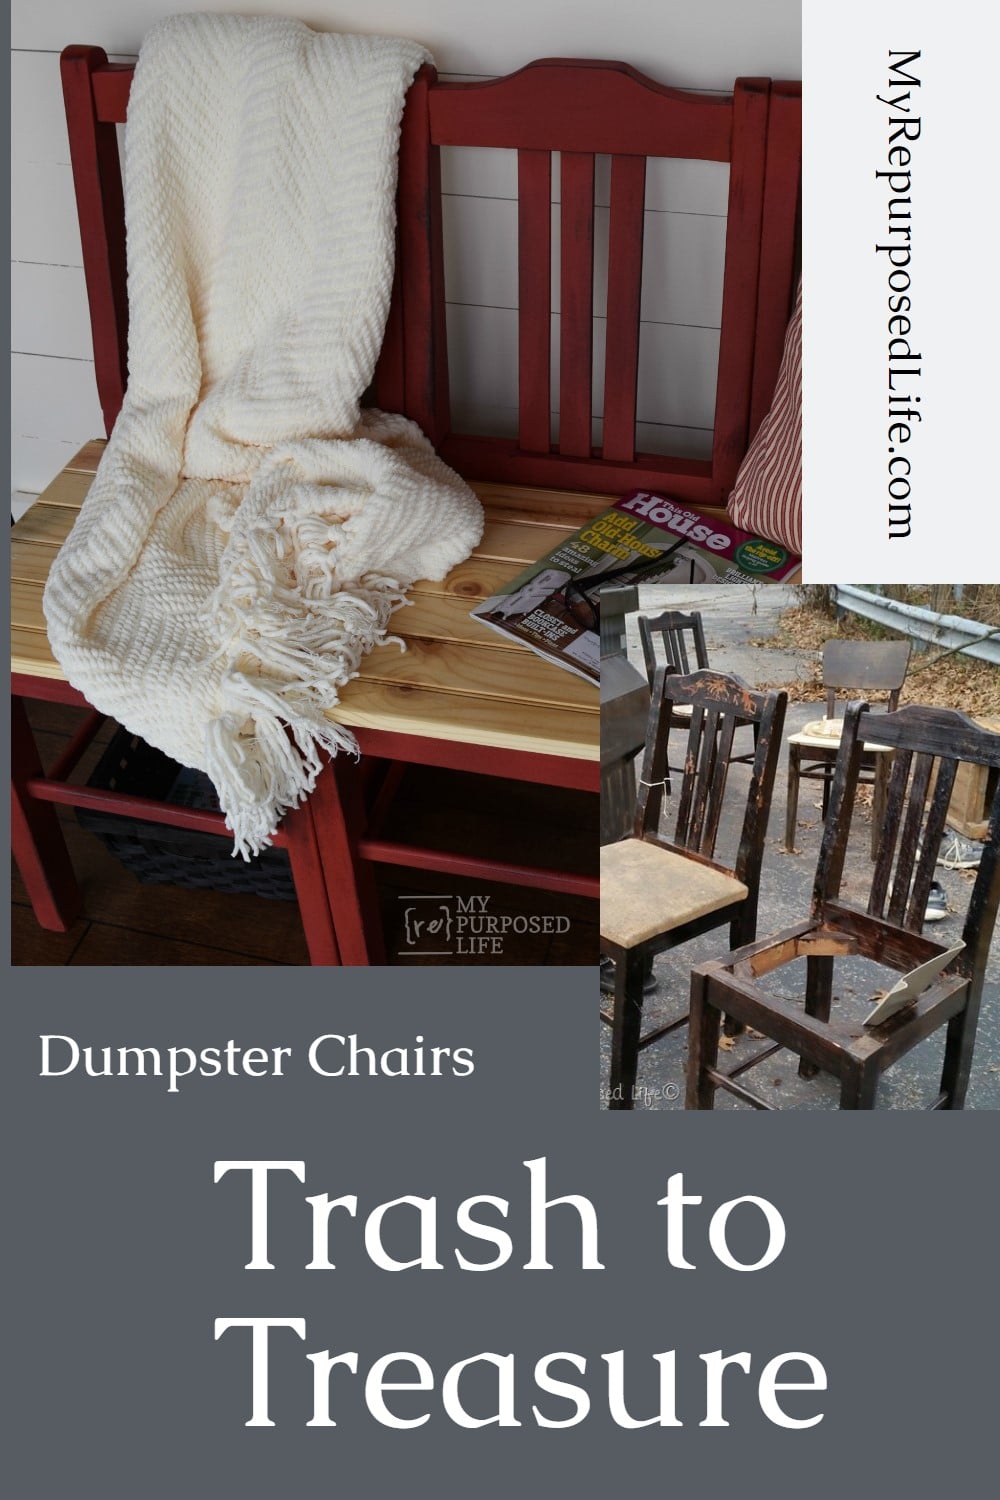
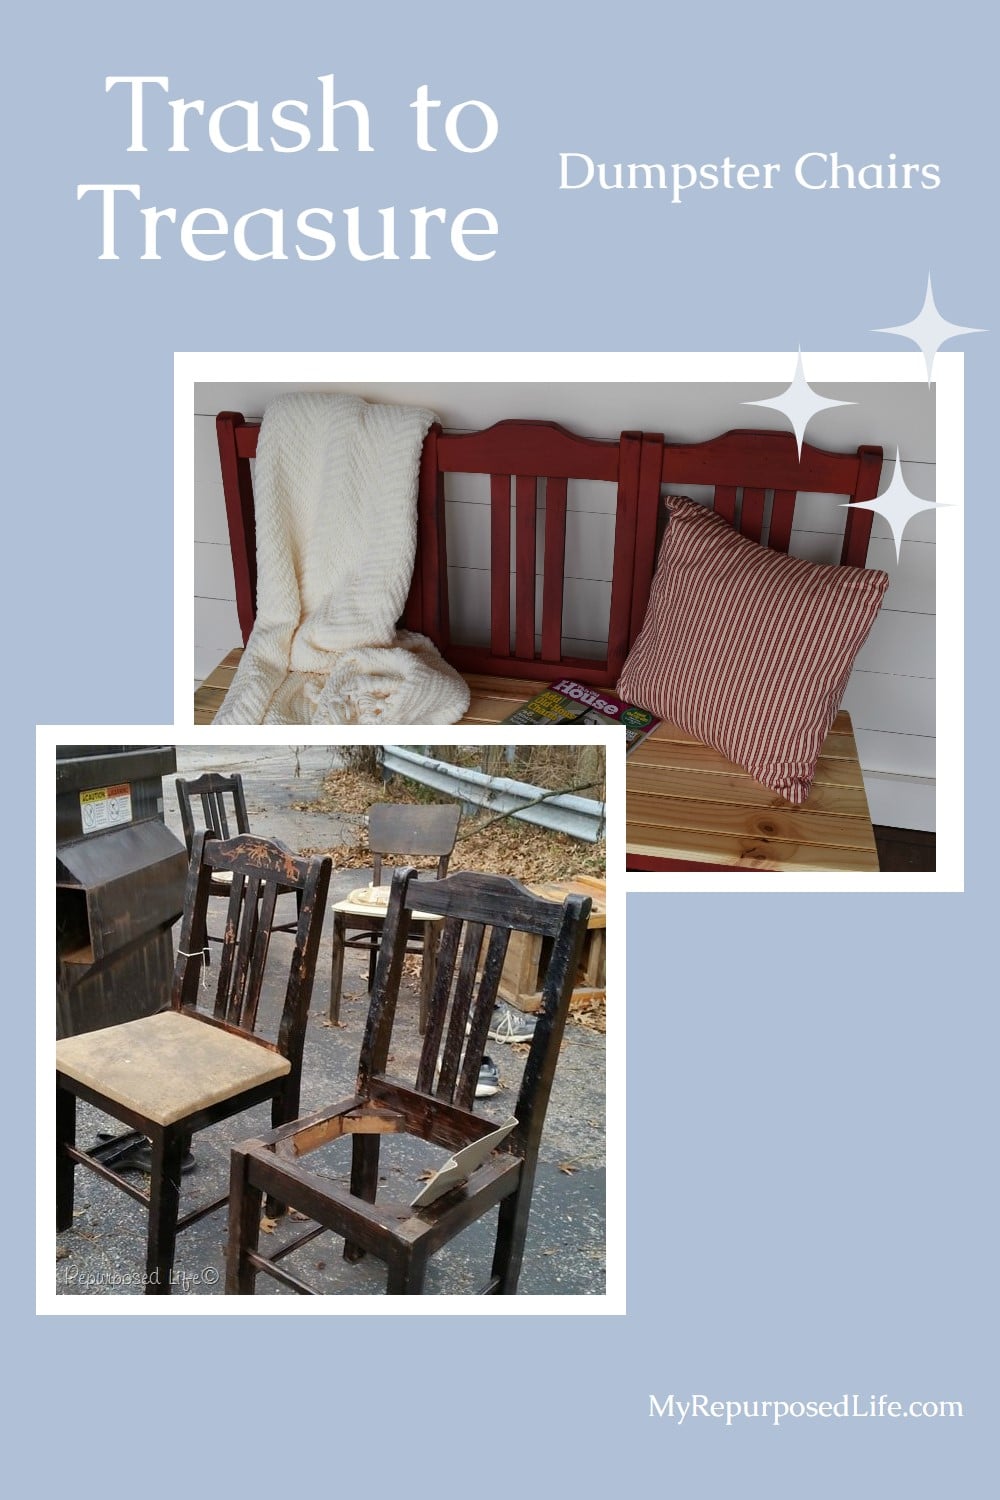
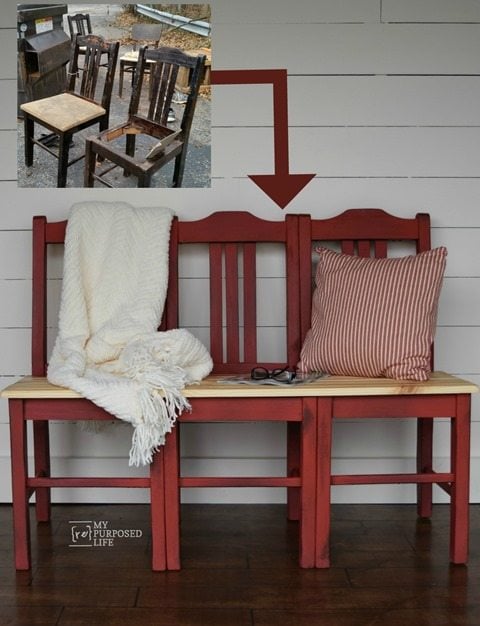
I have a soft spot for an old chair with good bones, especially when the color is too good to ignore. This red chair bench started with some dumpster chairs that weren’t doing anyone any favors. But with a little cutting, a little building, and a whole lot of paint, they turned into one sturdy little bench that looks like it always belonged together.
Easy Chair Bench Tutorial
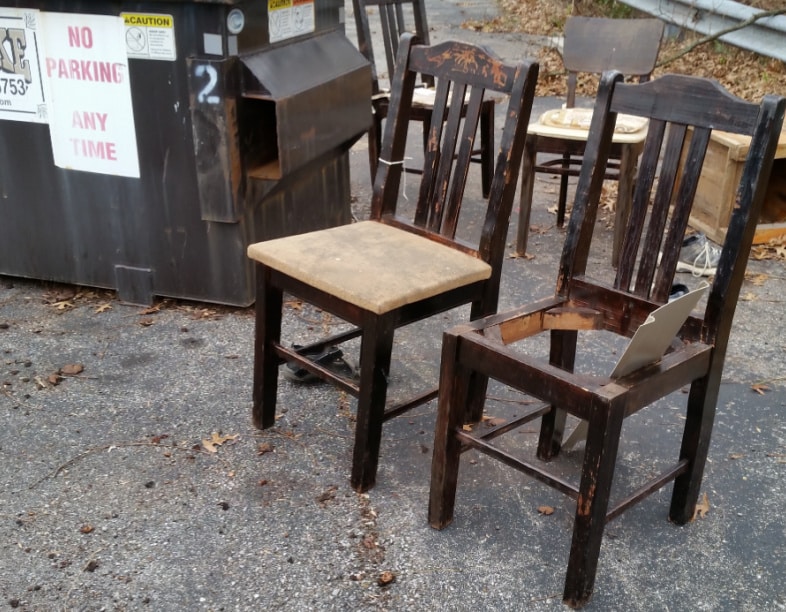
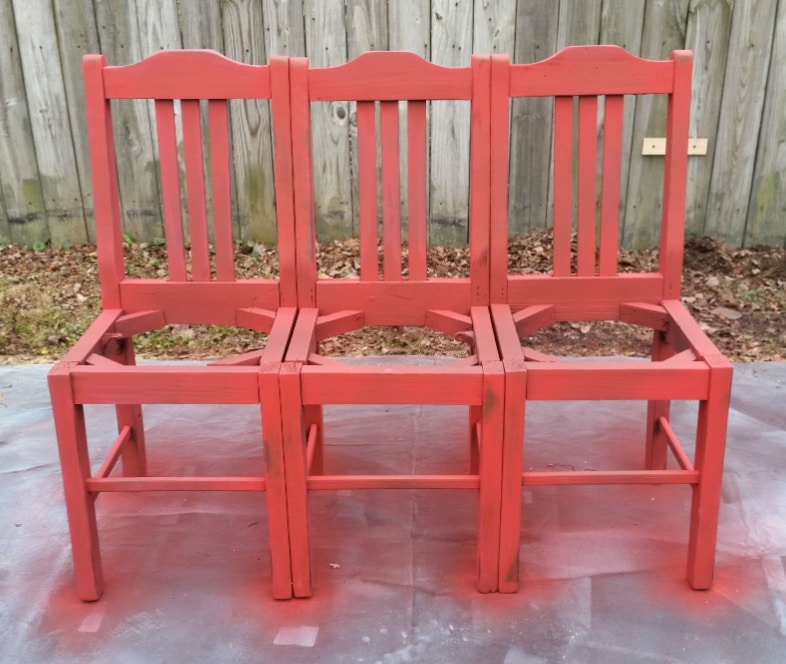
When I found these FREE, hefty, sturdy dumpster chairs, I knew they would make a fabulous triple-chair bench. What I didn’t know was that I would finally figure out how to achieve a dry-brushed look with the Homeright Finish Max instead of a paintbrush!
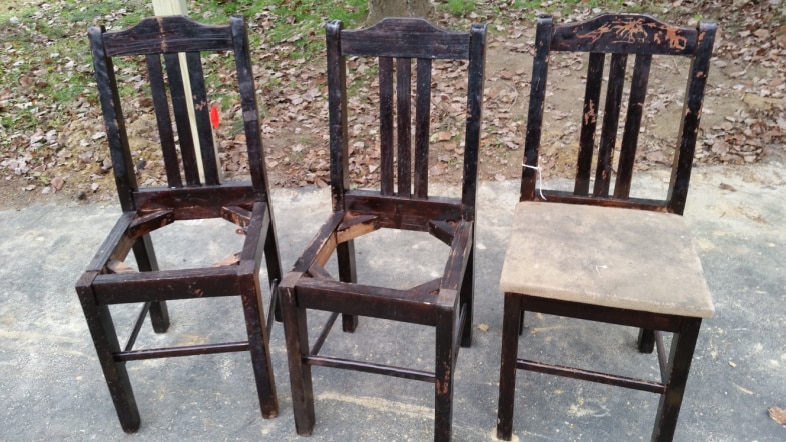
Those straight lines make these perfect for butting up side to side, making connecting them very easy, even for a beginner. This chair bench tutorial will make this clear.

How to Turn Dumpster Chairs Into a Bench
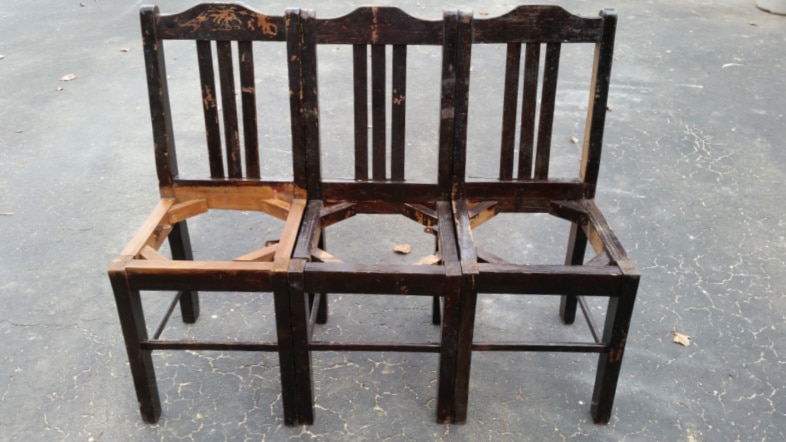
When building a typical triple-chair bench, removing the legs of the middle chair is customary. I decided to leave all the legs to make this the ultimate easy triple-chair bench.
Detailed Directions for Attaching Chairs to Make a Bench
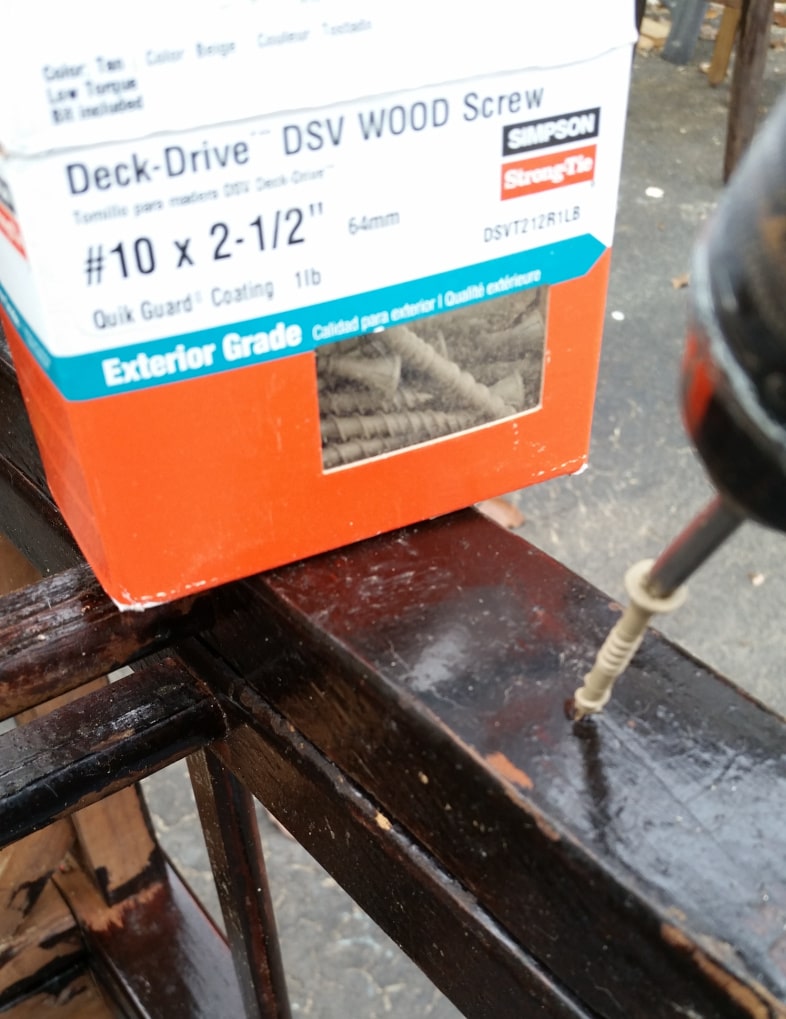
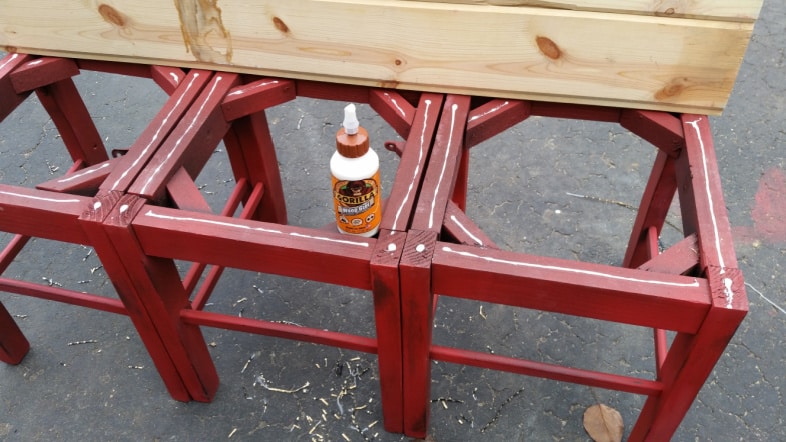
Not shown: Clamp the legs together, drill a pilot hole, and drive a wood screw to join the chairs together. Follow the diagram below.
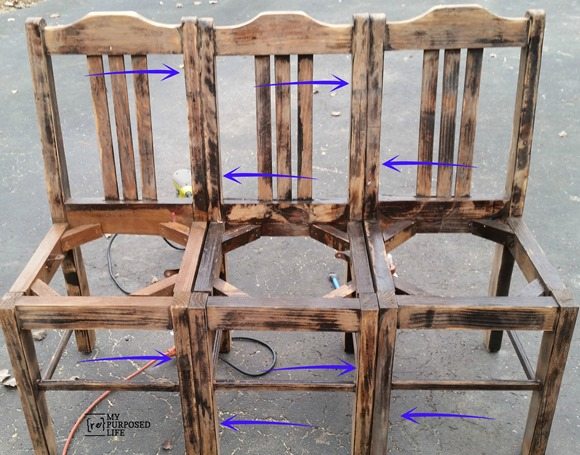
I sanded the glossy (and gross) finish off the three chairs. Then I secured them to one another using wood screws. You can see by the blue arrows where I secured the screws.
What’s The Easiest Way to Paint a Chair Bench Project?
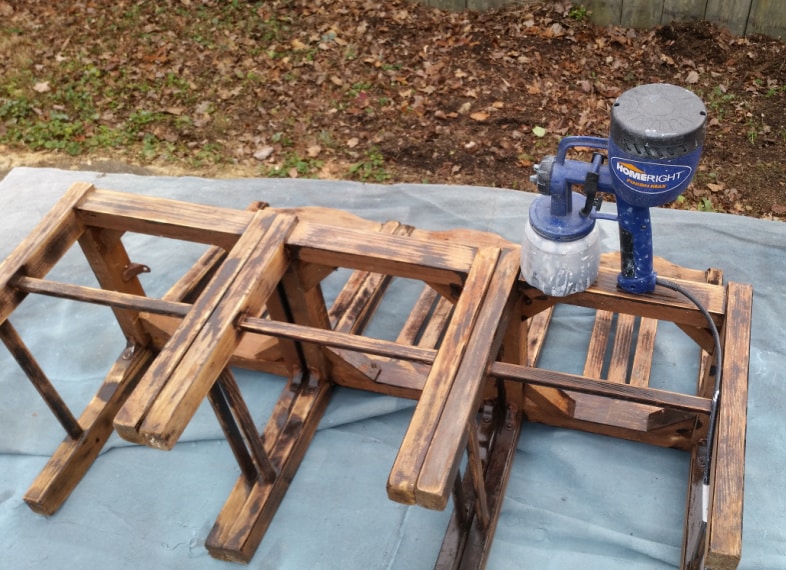
I used my favorite Finish Max to paint a base coat of DIY chalky paint primer in black. Painting with a paint sprayer is much easier than painting with a brush.
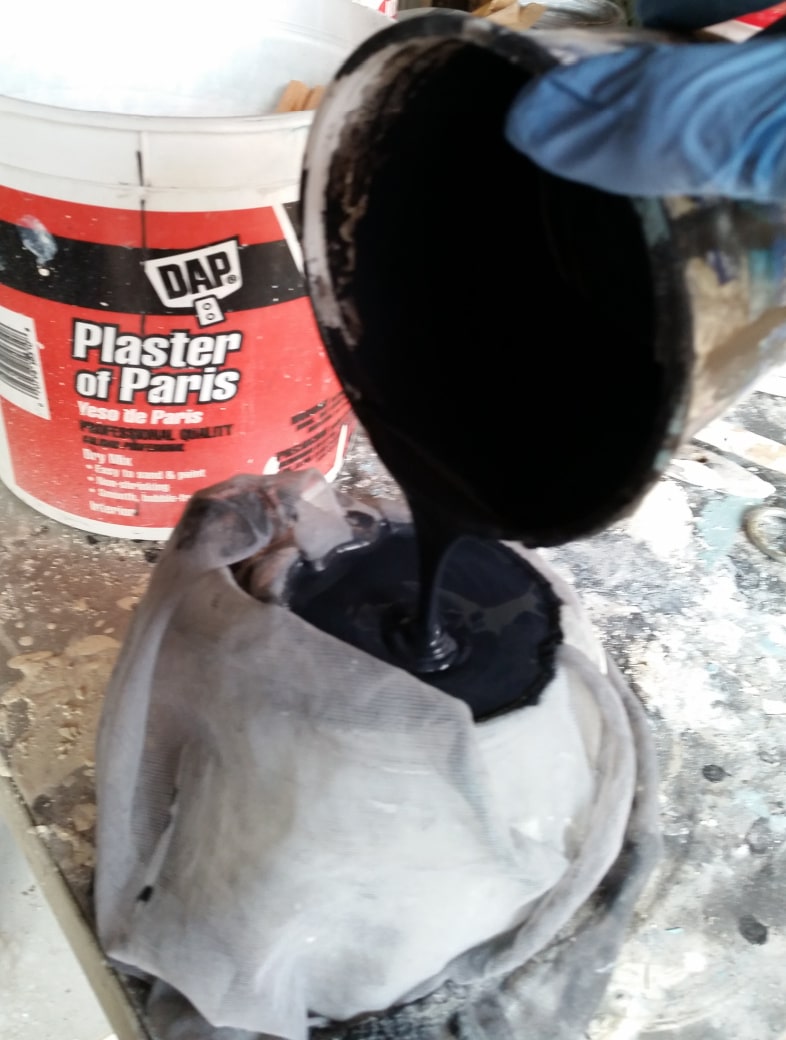
After mixing the chalky primer, always use a mesh paint strainer to prevent clumps from clogging the Finish Max nozzle.
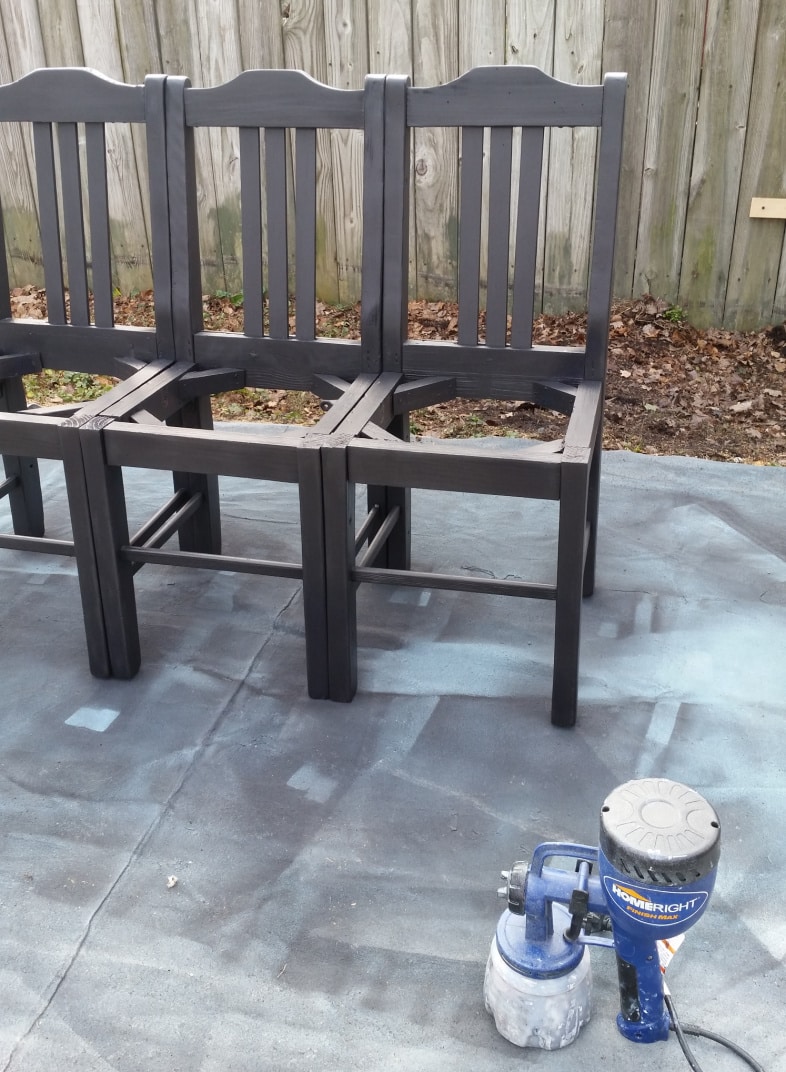
After applying the black chalky paint primer, I used an Oops Color that I thought would give me the old red I was going for. Not so much.
That’s okay, because it just gives me a stronger base coat on the chair bench.
Red Topcoat for a Chair Bench
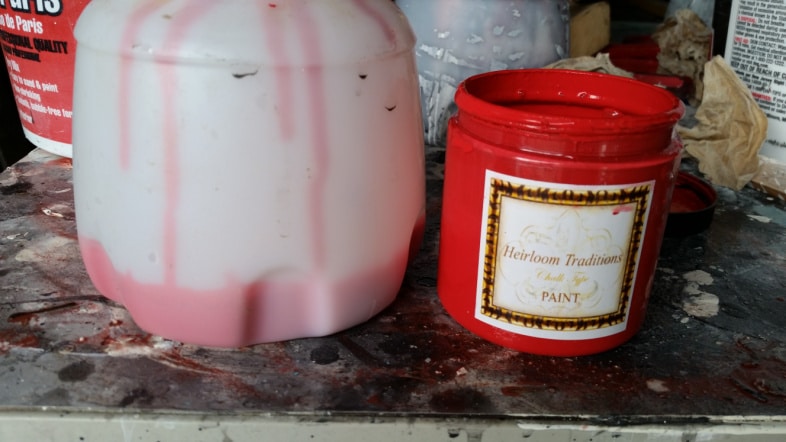
I went to one of my favorite reds from Heirloom Traditions Paint: Daredevil. This sample jar was practically empty, and I was a little nervous, but I have complete faith in the fine finish I get from my Finish Max and how far the paint goes in the paint container. For this technique—and because I didn’t have much paint—I dilute it with a little more water than I normally do.
Seriously!! Look how little paint is in that Homeright paint cup.
I used nearly every drop of paint from the cup to paint this chair bench RED. By keeping the Finish Max farther from the project, I was able to apply a very light coat. I did not intend to do full coverage. I love the look of an old glazed red, and I’ve been trying to perfect this technique with the paint sprayer so I don’t have to brush the paint on projects with spindles and legs.
Please note how little overspray there is with my Finish Max!
Related Content: Small Garden Bench

I get a lot of packages in the mail, and I always save the brown paper packaging. It is fabulous as fine-finish sandpaper. I used some to sand back a little more of the red paint to reveal the darker colors underneath.
Dark Wax for Rustic Red Bench
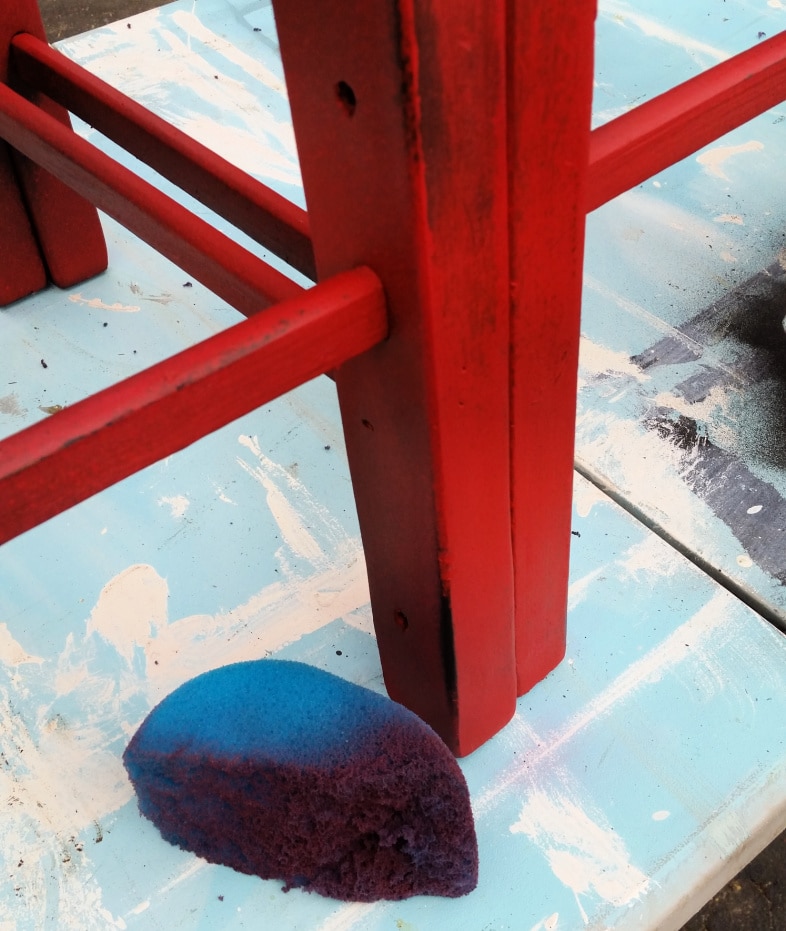
I used a damp chunk of a sponge to apply clear wax from Heirloom Traditions Paint, rubbing off a little more of the red paint as I went.

These three scrap wide tongue-and-groove boards were given to me years ago. They were perfect for the seat of this three-chair bench!
I attached the boards with my nail gun. After sanding the boards to remove the squared edges, I was ready to stain/seal the seat.
But! I decided I loved the wood’s color with the red, so I just applied a wipe-on clear coat of poly to seal the boards.
Glazed Red Chair Bench
You could choose to install a lower shelf, but I went the easy route and left lots of room for basket storage on the floor.
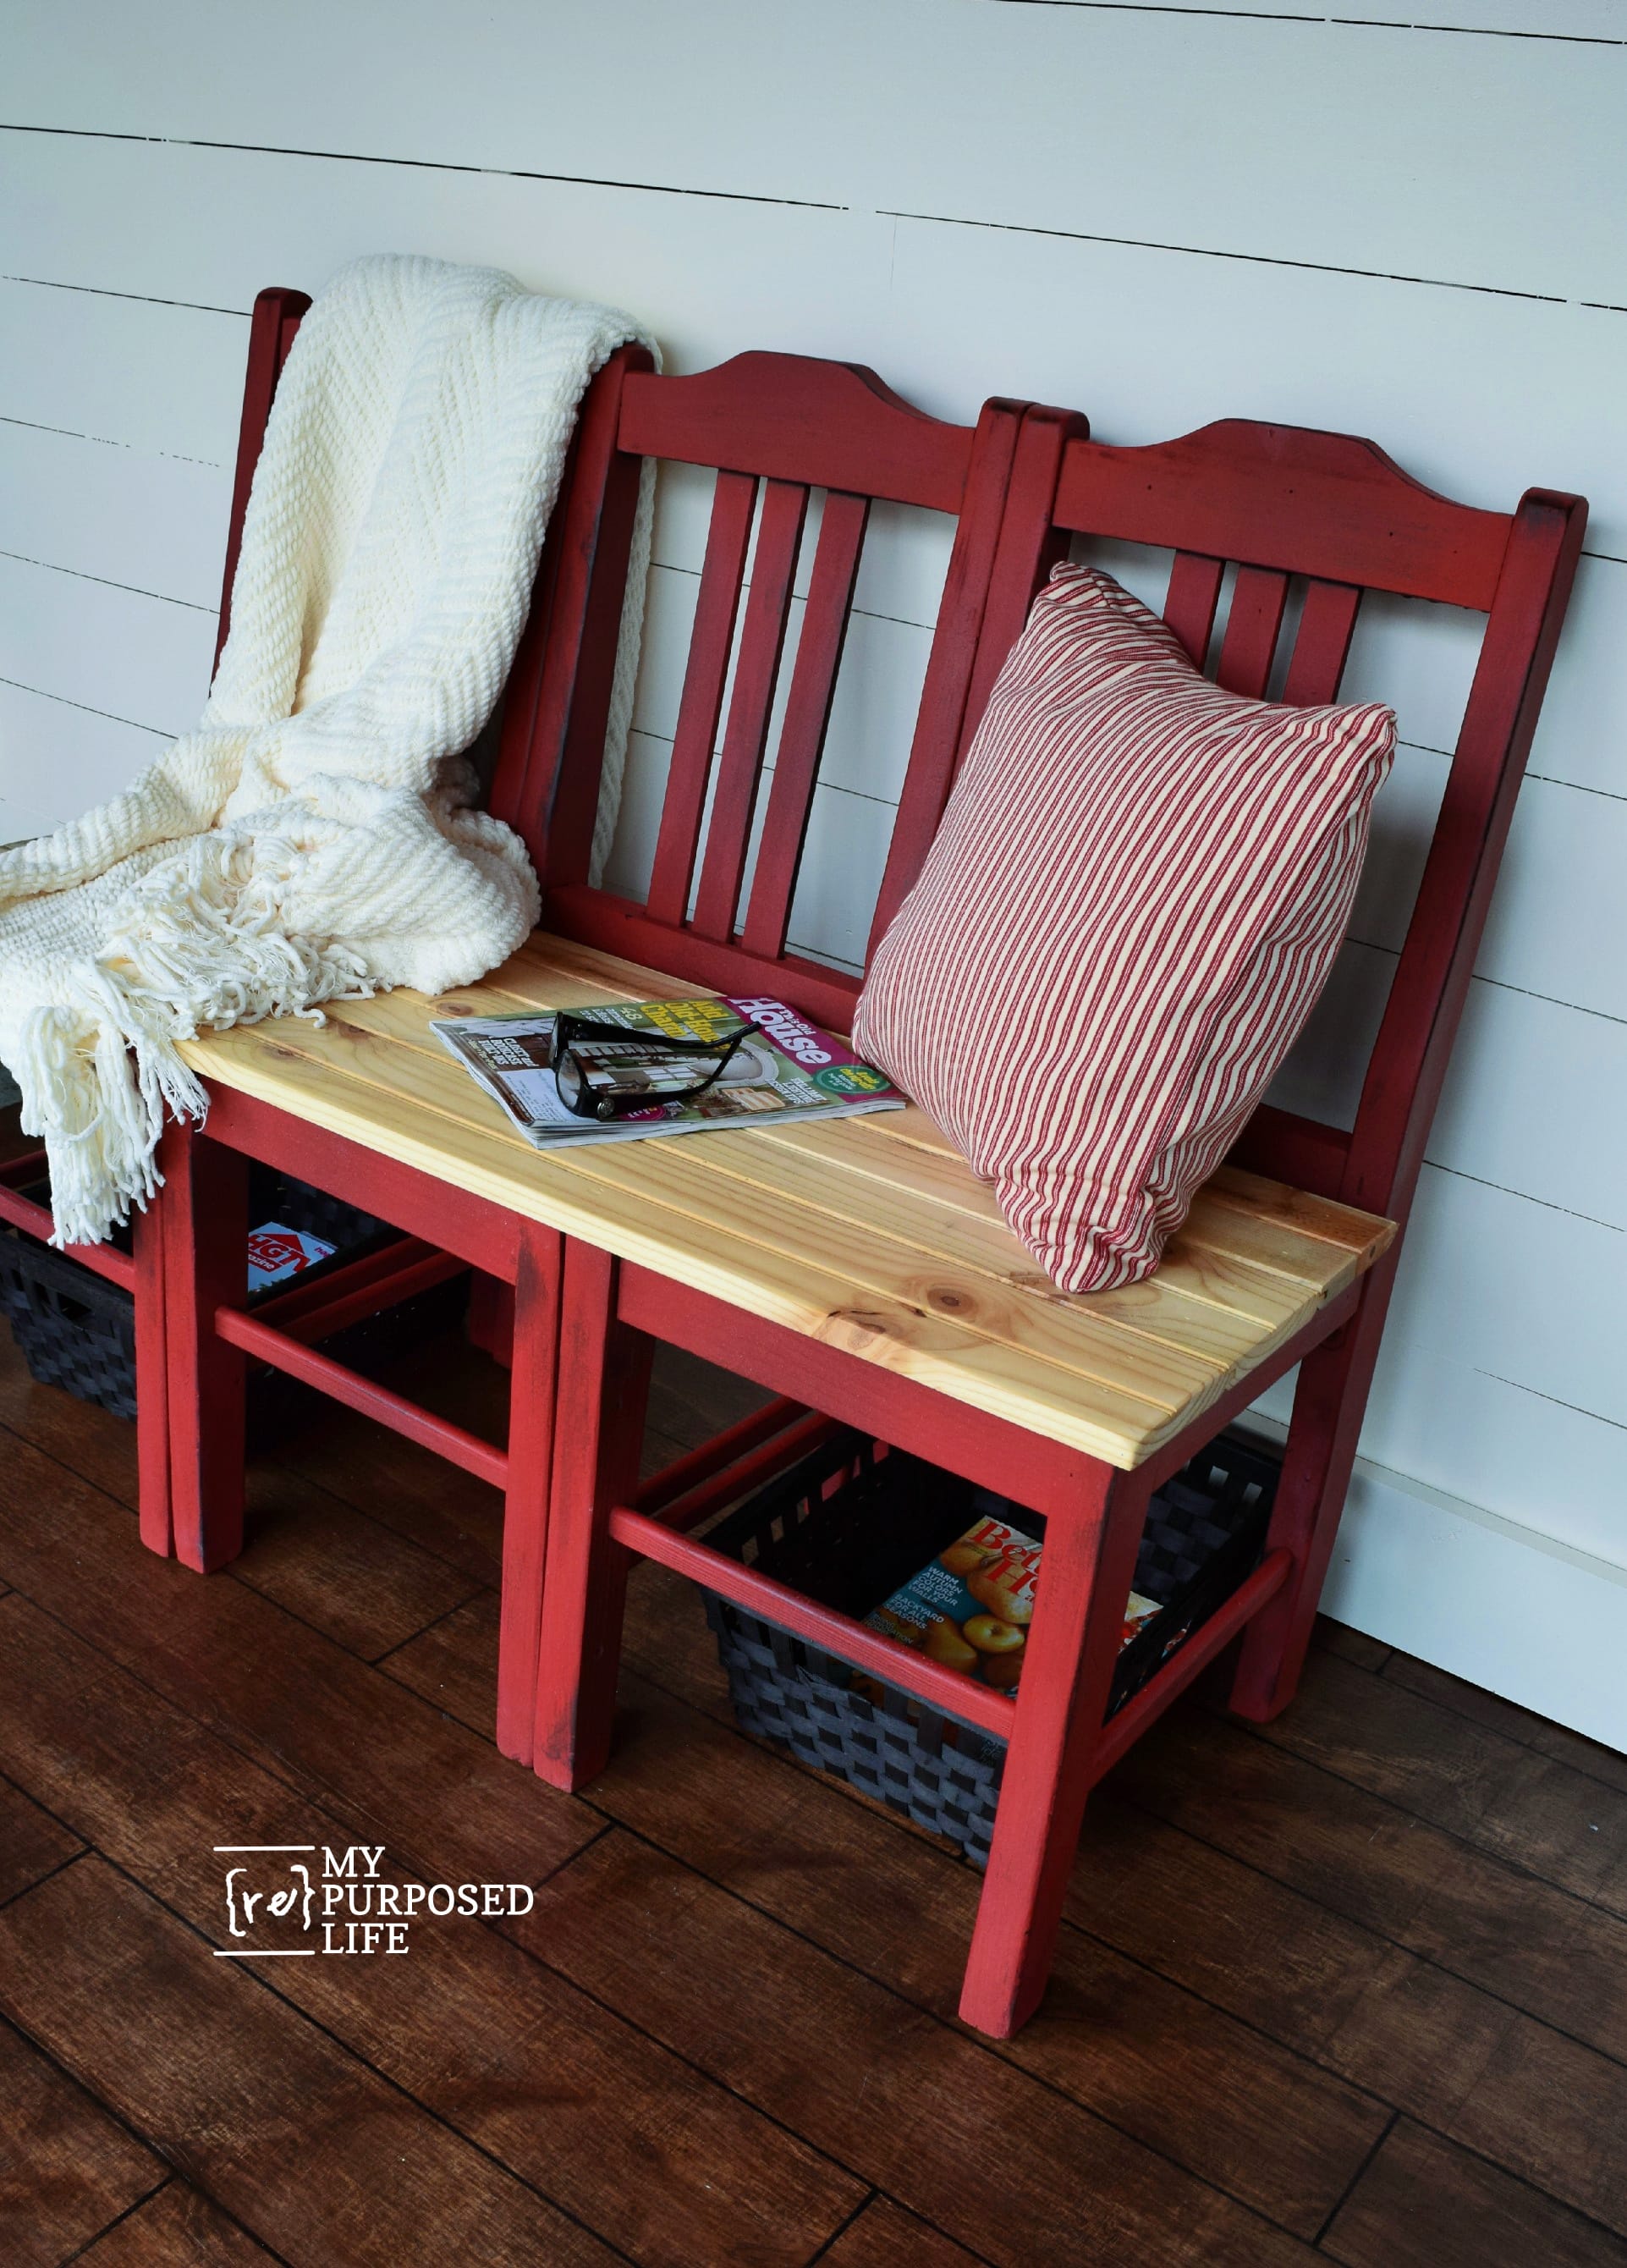
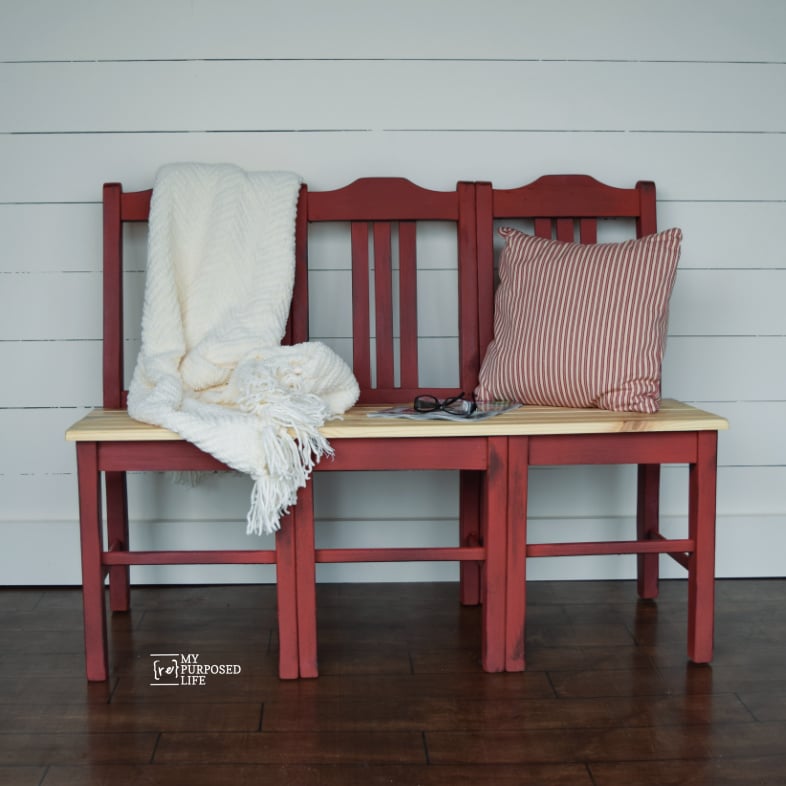
I love the way the light colored seat boards look with the red bench, don’t you?
 I am so happy with how this easy chair bench turned out. It has to be the easiest and one of my favorite chair benches to date. I love the color and the simplicity of the lines. Hopefully, this chair bench tutorial will help you make your own triple chair bench.
gail
See one of my first, and an all-time favorite chair projects here
Gail this project is absolutely beautiful. Love the red and love the fact that you just stained the seating. Great job..
Cathy
I’ve made so many headboard benches, but this chair bench might be one of my favorite benches ever. I appreciate your kind words!
thank you,
gail
Love this chair bench . New to the group. I am so inspired . Thank you .
Awesome! Welcome to my little corner of the DIY/Repurposed world. I’ve been teaching others how to do this for 13 years now. Wow! That’s hard to believe. I’m always here if you have any questions!
gail
What a pity. This had been – or could have been – really nice chairs…
We’ll agree to disagree. I think the chairs were very plain jane, and I absolutely love the way the bench turned out. I would do it again in a heartbeat! I’ve been looking for some more to do another version of this project for years.
I appreciate you stopping by to check it out.
upcycling, it’s what I do. 🙂
gail
The bench turned out so nice. And I don’t even like red anything!
Thanks so much Lis! I’ve never really liked red much either, but in recent years, I find myself leaning more toward red projects. They do sell fairly well.
gail
I love it, I’m a beginner. I’m going to try it. I’ll post a reply with a picture.
This is the perfect project for a beginner Elizabeth!
gail
That really turned out great, Gail!
This is crazy creative! Love the finish too. I didn’t know you could get a specialty finish with a HomeRight Paint Sprayer. It’s on my want to do list now:)
Gail- this chair bench is beautiful! I’m completely inspired!
Thanks so much Allison! This is one of my all-time favorite projects-love that it was so easy, and the color just makes me smile. 🙂
gail
I love the way your bench turned out, that red is so delicious and would look so good on my porch. I have some antique oak chairs I had planned to fix and refinish, but you know this would be so much easier and less time consuming. I think I just might give this a whirl. Great tutorial, thanks Gail.
Patty,
I still love this RED bench! I think the color is perfect, and want to paint something red again real soon.
gail
What a great find and a great project. I love the bare wood with the red
Thank you Karen! It’s rare that I find dumpster chairs. I love making chair benches, and this was the easiest ever!
gail
Oh yes, those chairs are perfect for this! I love the red!!
Man, this is so simple even my not-handy husband could probably do it (under my direction)! I’m going to be on the lookout for three similar chairs from now on.
I KNOW! I love the simplicity of it. It was such a fun and easy build!
I hope you make one real soon
gail