Antique Radio Cabinet
As an Amazon Associate, I earn from qualifying purchases.
Antique Radio Cabinet into a portable bar


Sometimes I look for “easy” projects in between the larger ones—I thought this portable bar made from an old radio cabinet would be one of those projects. I’ve been sitting on this for a few months, and after cleaning out the garage recently, I decided it was time to start a makeover on this little gem. You can see the recent finds post on this piece in my post Recent Finds-Thrifting With Friends
 I’m a little out of my element when it comes to bars. I’m not a drinker, and I really didn’t know which direction to go with this piece. I did think it was too low, so the first step was to give it some height.
 I laid some boards on the top to try to figure out how much height to add. I went with a 1×6.
This post contains affiliate links
 I used my Kreg Jig to make the box to set atop of the original cabinet. The Right Angle Clamp is great as an extra pair of hands. I used Gorilla wood glue for a good tight hold. I drilled all of my pocket holes after marking them during the dry fit.
 The new look.
 I recently picked up some of this trim molding from the Peddler’s Mall for $5. I felt it was perfect to top off this box/skirt.
 I added the molding with my nail gun and Gorilla wood glue.
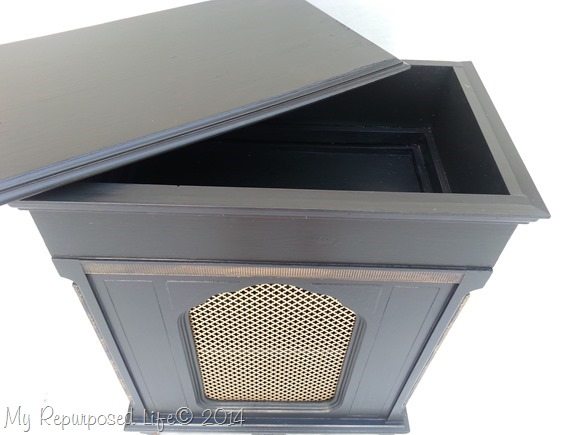
 The top of the bar will not be hinged, it will rest on top and be held in place with these placeholders. The small pieces will rest on the inside of the box/skirt to hold the top in place.
 I used some 1x’s to add a middle shelf. Not shown, I also used a small piece of thin plywood to cover up that bottom hole across the bottom.
 I used my DIY Chalky Paint as a primer to give it a base coat of flat paint. Once the piece was all one color, in this flat black, I really fell in love with it.
NOTE: I removed the knobs and filled the holes on the doors.
This is where it goes wrong. ![]()
 I did what I often do—putting semi-gloss paint over the diy chalky paint primer. As soon as I did that, I started not liking it. The flat paint hid the flaws, whereas the semi-gloss paint shows every single flaw.
 Looking at the underneath side, you can see that I broke one of my #1 rules. I always paint the bottom, but this piece is pretty heavy and awkward. I didn’t paint it first like I usually do, then it was difficult to do the bottom without messing up the back or the top.
I don’t like the way the wheels had to go in. I feel like I should have cut the bottom off to get the wheels into the corners. The wheels may or may not stay on. This is quickly becoming a least favorite of my projects.
 This piece is meant to roll away from the wall in order to get to the items inside, because the door area is so small. That is why there is no back on it.

I added this top skirt thinking it would be great to hold a large container of ice to chill drinks.
I’ll show you how we staged it, but I feel like it’s far from finished.
 This piece could be used as a liquor bar.

Do you think it’s more suitable for a small buffet to hold extra dishes, or maybe a dessert bar, or even a coffee bar?
UPDATE! I made some changes to this little cabinet. Check out the latest version in my post updated portable bar.
gail
Related Content: Black Radio Cabinet
sharing here:
That cabinet before was beautiful but I know not everyone likes to keep wood natural. You need to some how bring the beautiful details out in it. The center needs to pop with all the neat curves and also what was around the top before you’ve added on to it. It would make a great liquor cabinet if you area social drinker and entertain.
Teri,
Thanks for your creative input. This cabinet has already been rehomed. It’s difficult to stage projects as a liquor cabinet when I don’t have any “liquor stuff”. hehehe
gail
Could you not use stem casters in the actual corners? This is such a cool piece! It would make a great faux fireplace if it had a back and no shelf – filled with battery operated candles. It would look great with antique quilts folded up in it, I liked the idea of storing games in it, and it’s perfect for a bar! I love the black, but it would look great in any color!
I’m paying attention to these comments since I have two old radios waiting for some sort of something to happen to them.
You created a very nice piece! You seem to have tons of alternative ideas which I relate to more than I can describe. There are so many options that makes it difficult to keep it simple sometimes.
Simple is probably best for quick sell.
Maybe a couple of shiny hooks and / or pulls would add a touch of bling you seem to be looking for. One could hang a linen cloth or whatever is appropriate ….
Great work / thanks for sharing!
This is very cool, I LOVE how you extended the top! I agree with Amy about the wood applique for that spot. Also Kim’s idea for a stencil is very good too. There are a lot of great suggestions, and I vote for a fun color or accent’s of color, to make it really pop!
I will take a mixed drink please!! Great job Gail.
You could make it super Art Deco and add metallic gold to the inlay portions then add a vintage (appearing – I’ve seen a technique to do with mirrors to get the cracking silver look that old mirrors have) mirror to the doors or top that is trimmed in gold as well.
I think the piece would be lovely in a striking color that is the opposite of its time period. Maybe a fiery red or even a sage green? Maybe only paint the inside for a nice surprise? I think it’s pretty in black, but I’m leaning away from darks as I get older.