Repurposed Bunk Bed Wall Shelf
As an Amazon Associate, I earn from qualifying purchases.

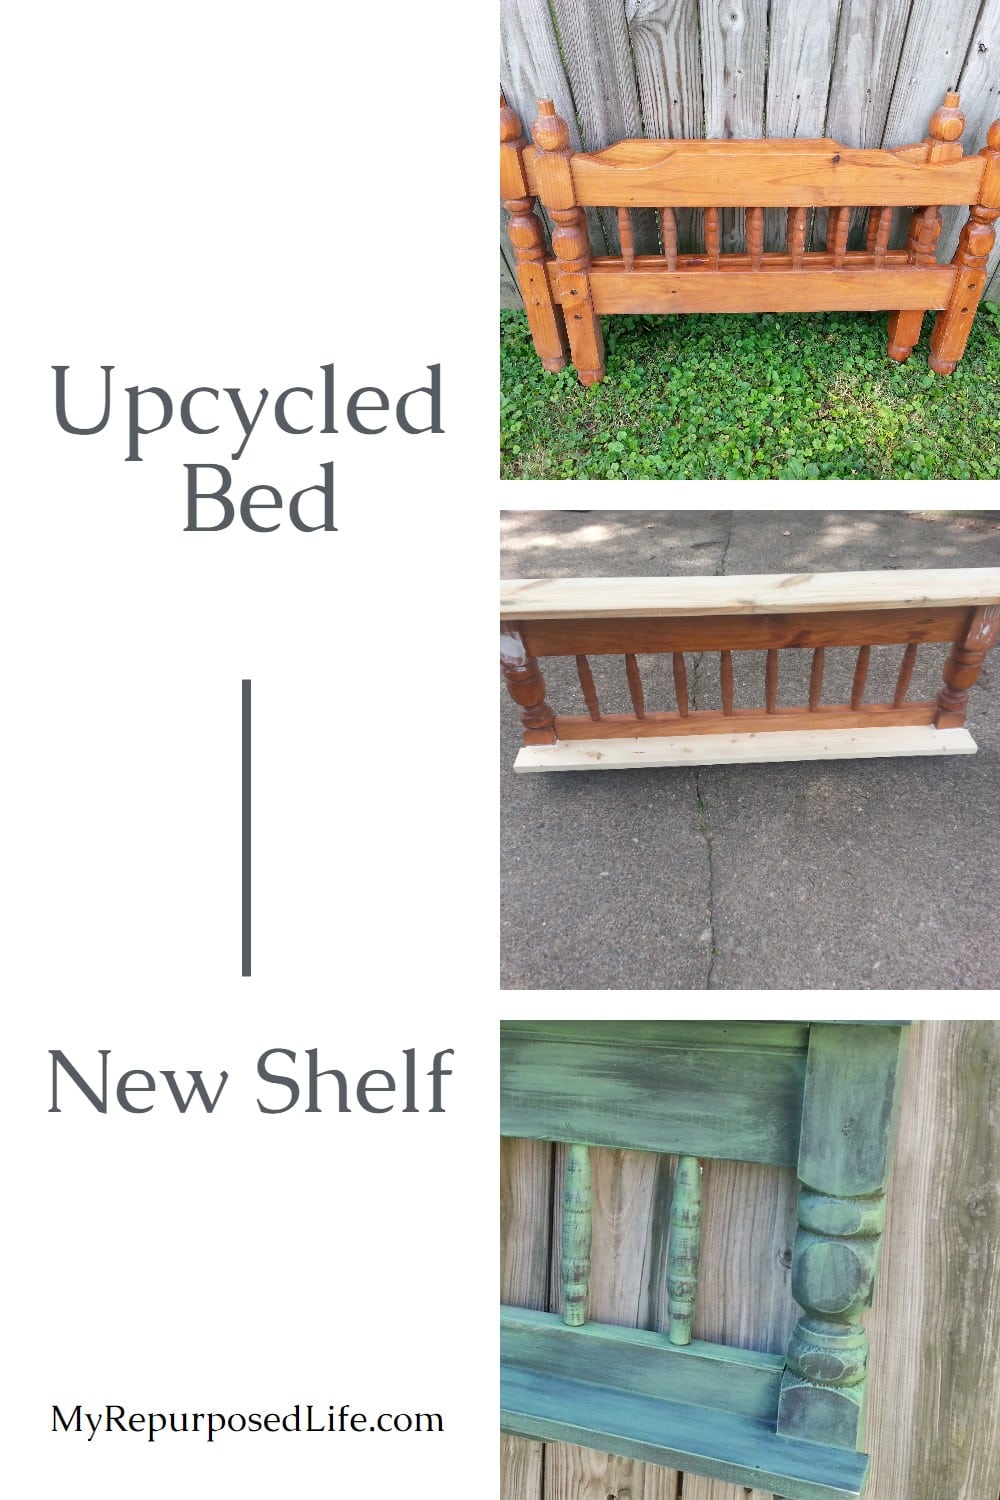
Old furniture often hides new possibilities. When a bunk bed outlives its purpose, its pieces can be repurposed into something useful again. In this project, the leftover bed parts were trimmed, fitted, and painted to create a sturdy wall shelf that looks right at home in any space.
I’m excited to show you how I repurposed this bunk bed into a unique and helpful wall shelf! It’s fun to tackle projects and declutter by moving junk storage to the “for sale” department.
So, let’s dive into this great repurposed bunk bed!!
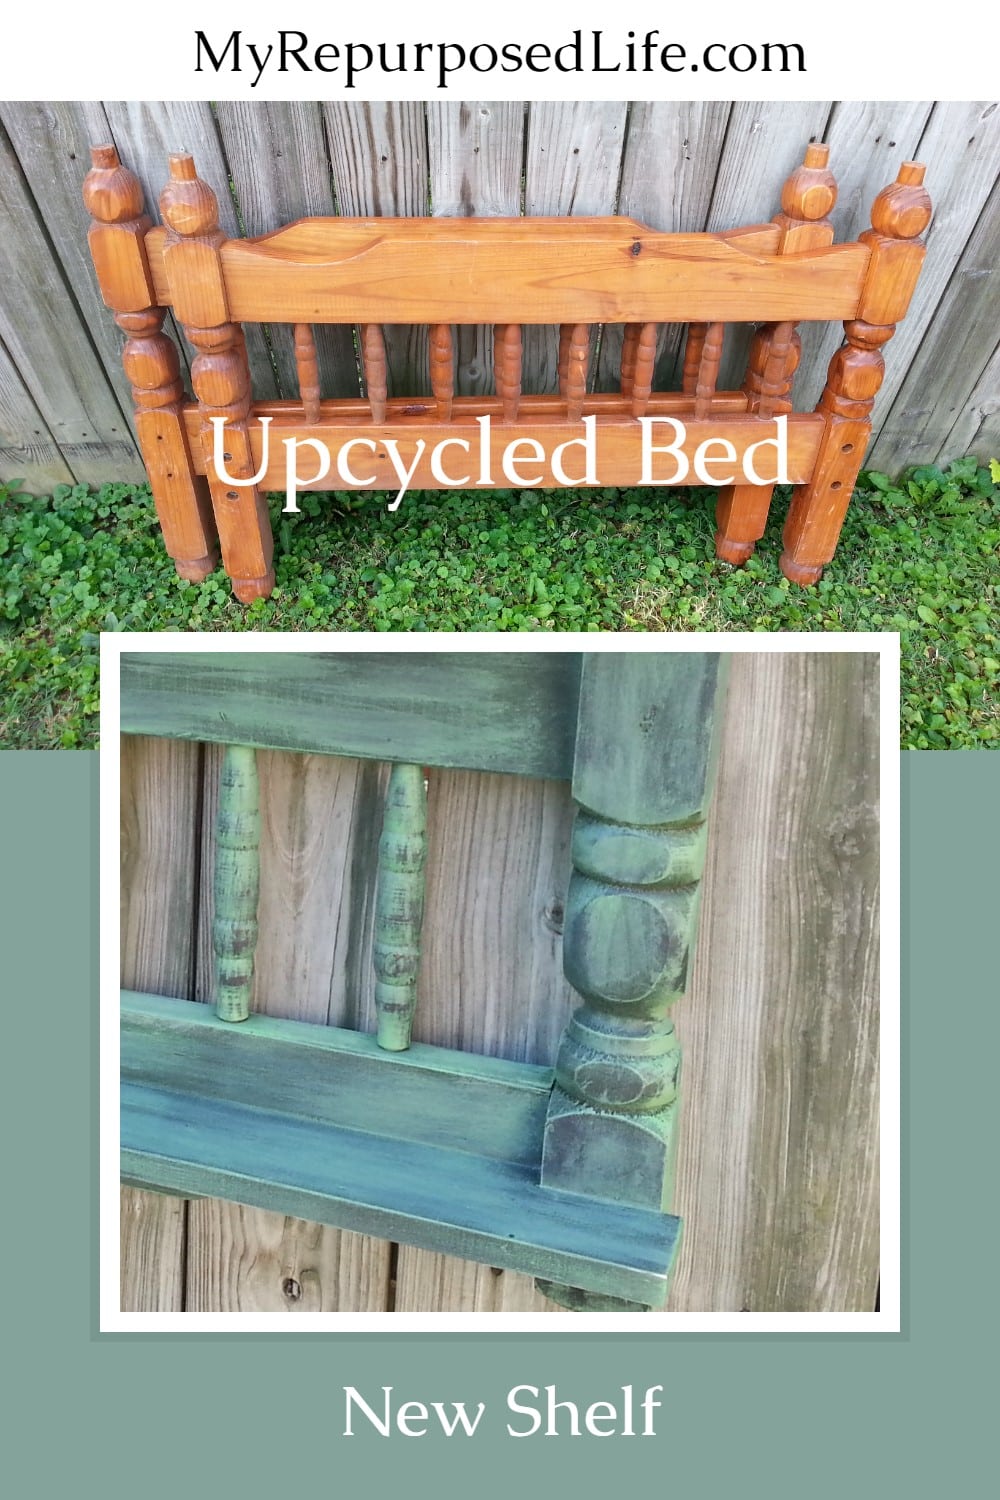
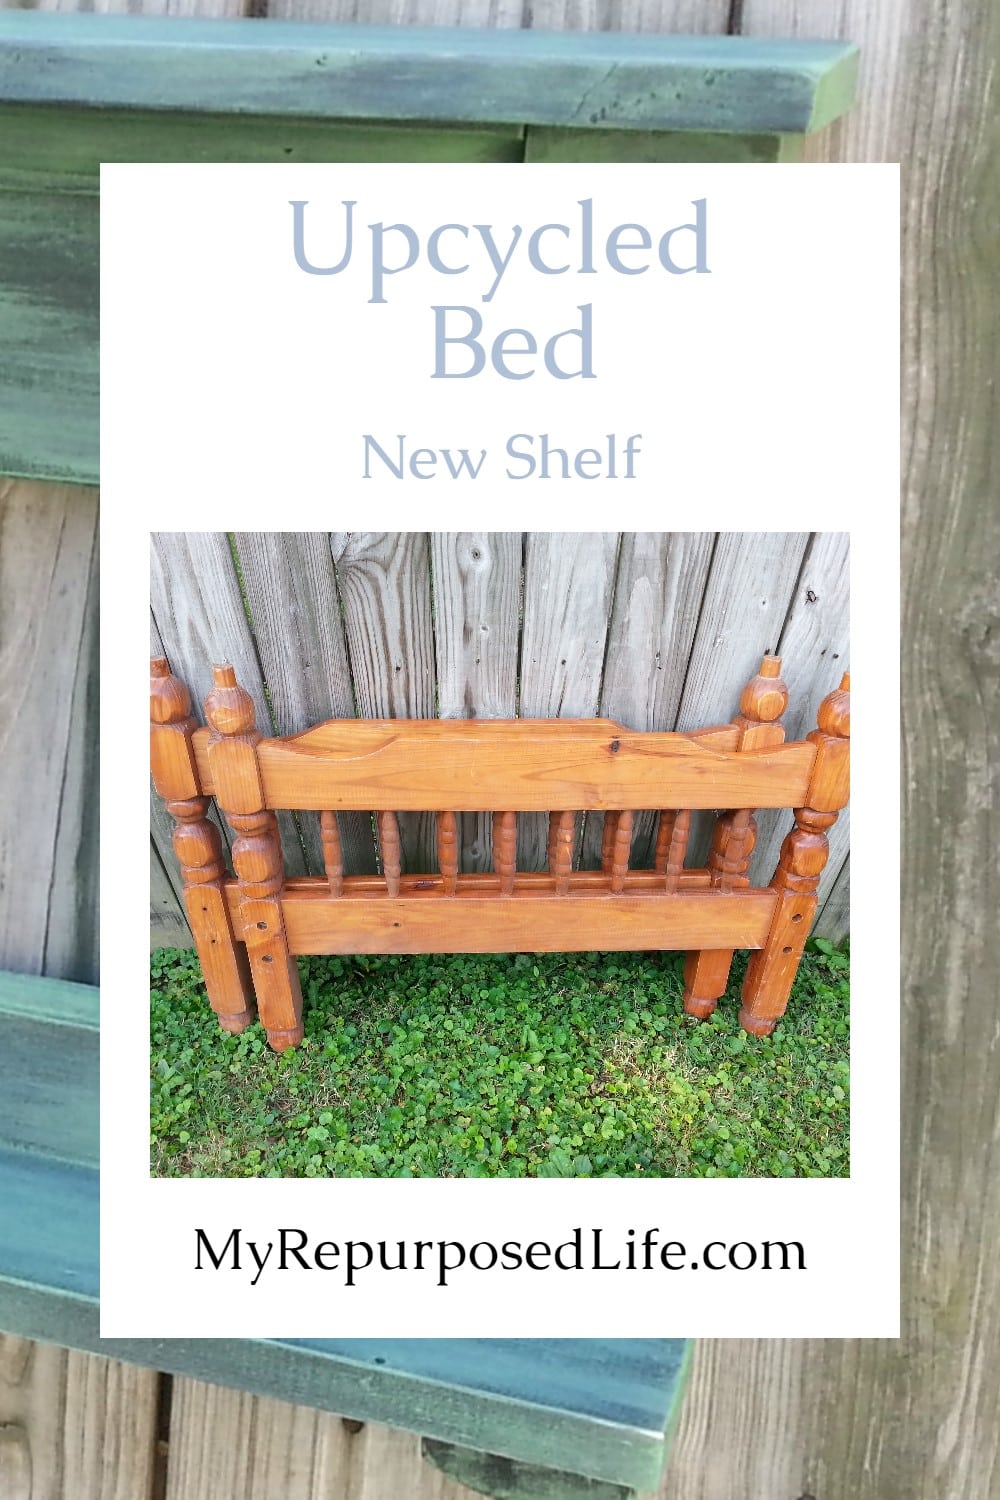
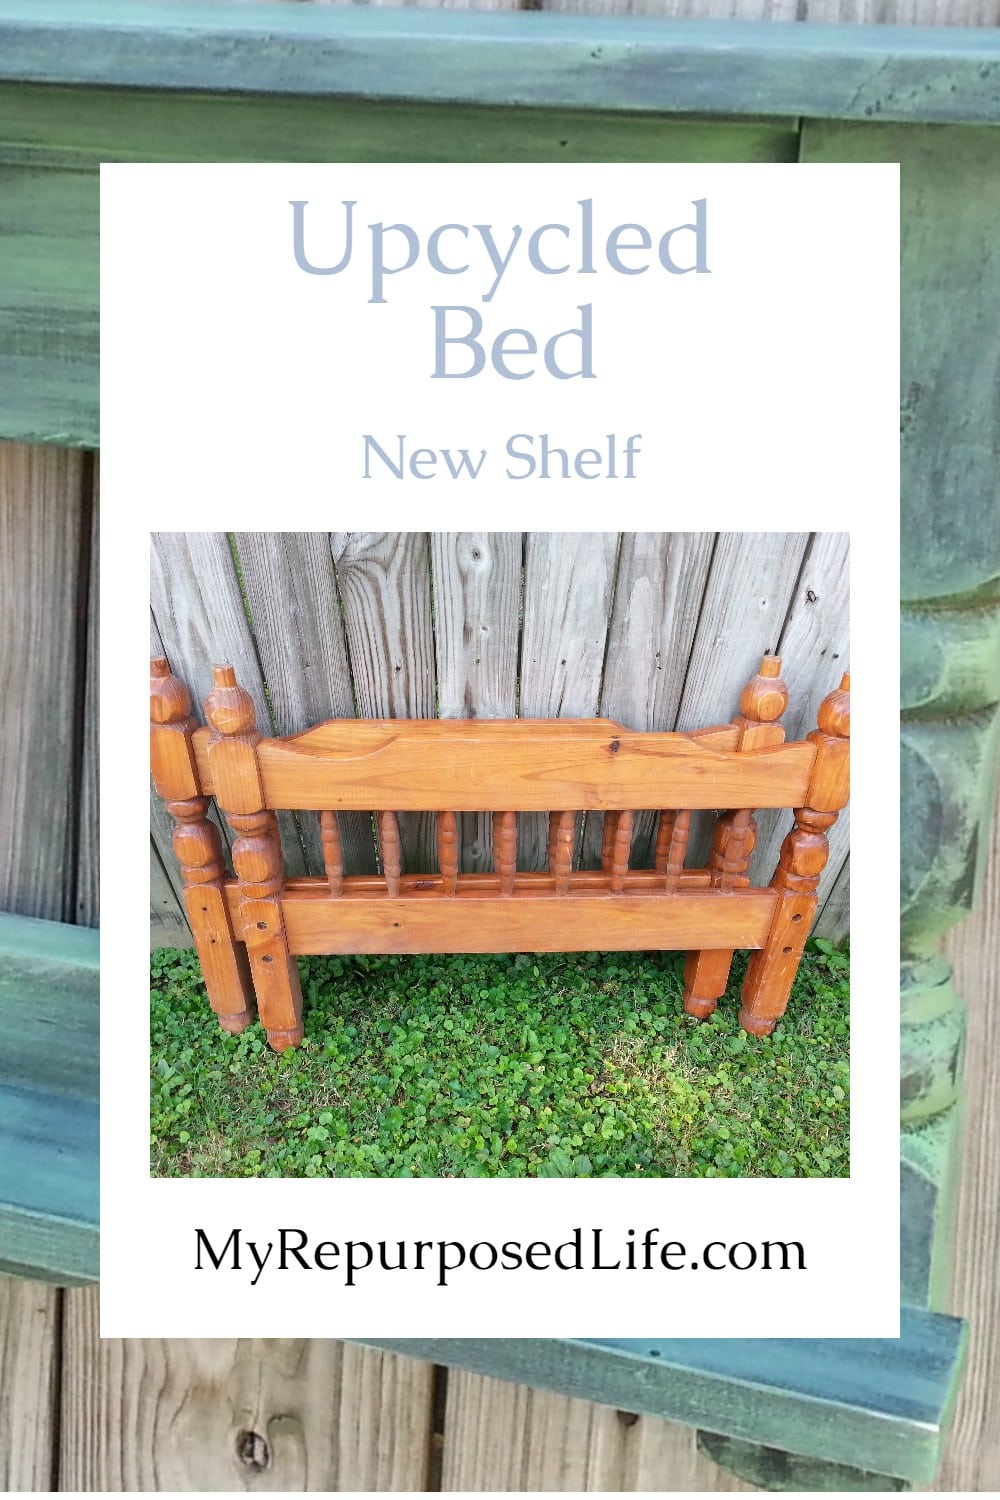
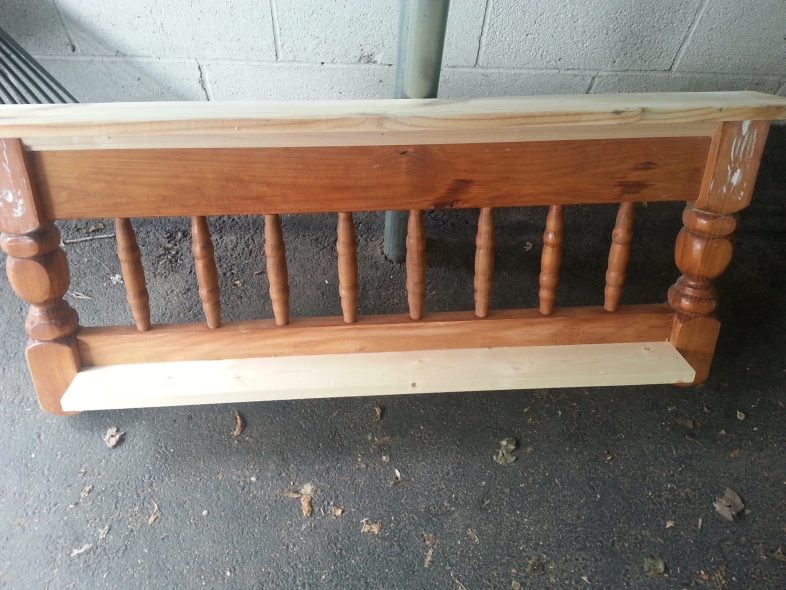
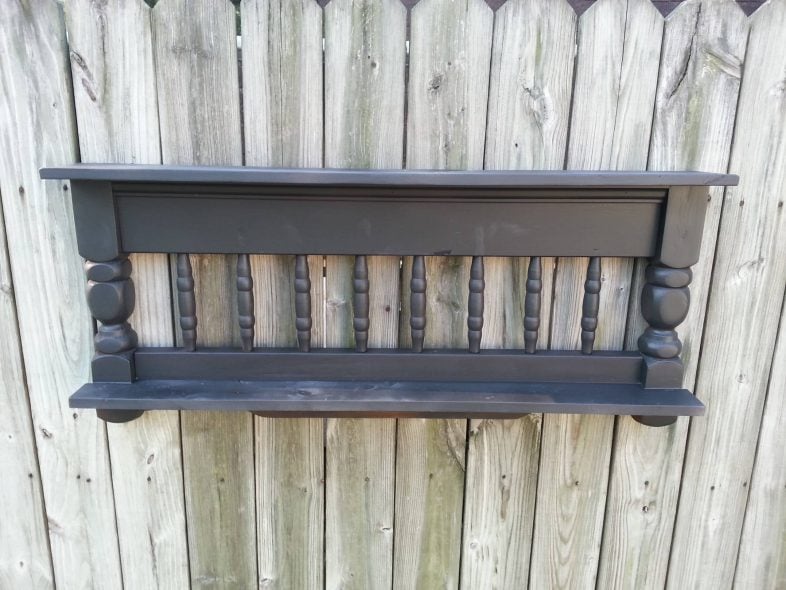
Salvaged Bunk Bed
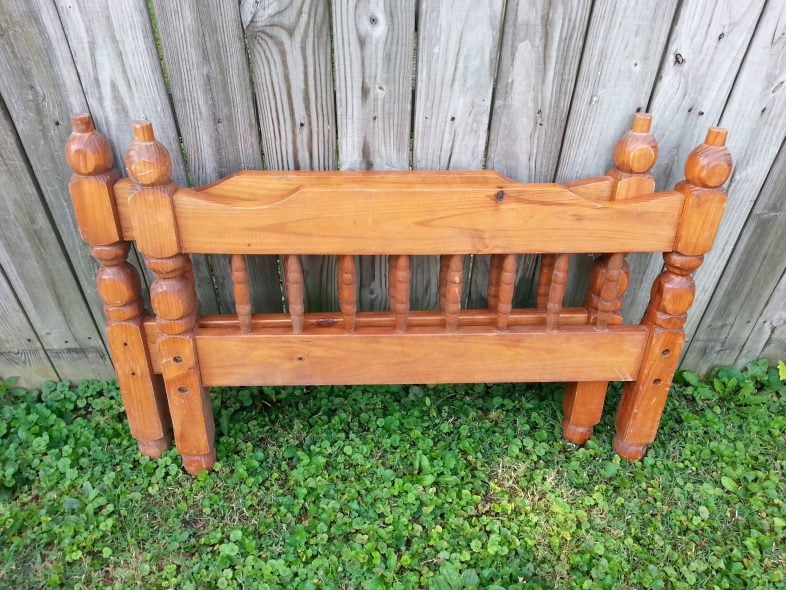
Many people told me they were eager to see what I’d do with these bunk bed pieces, as they are very similar. They are sturdy and chunky, perfect for a great wall shelf!
Remove Unwanted Bunk Bed Legs
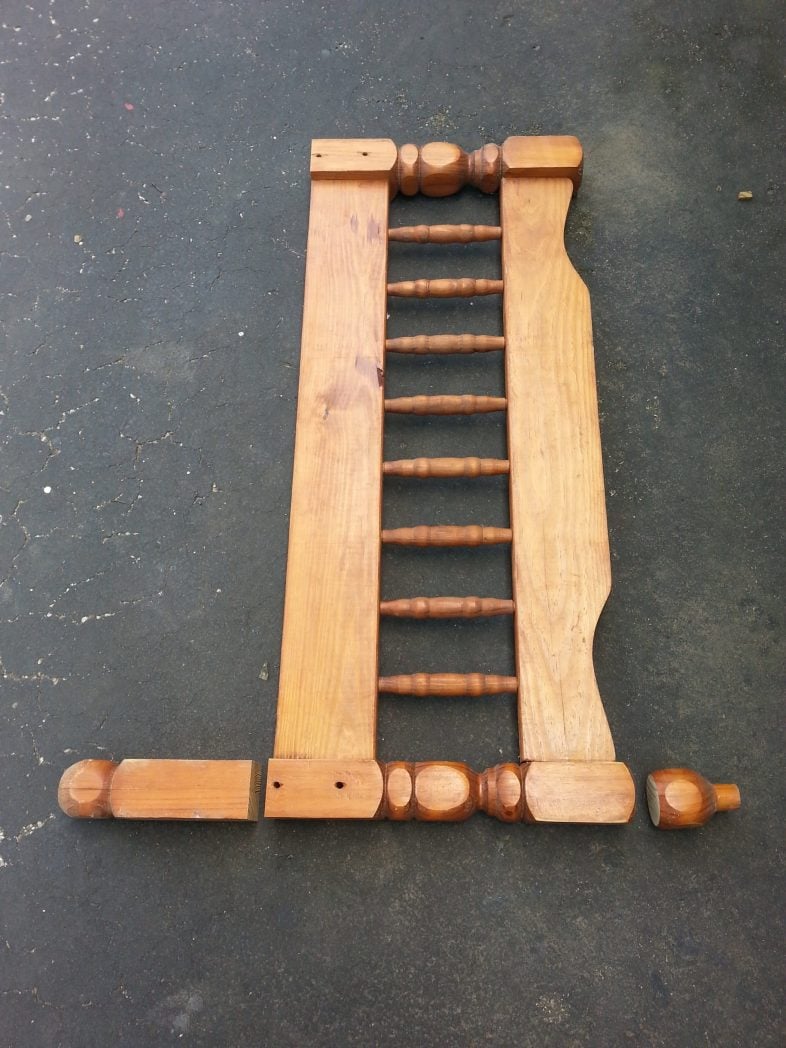
The first step was trimming the bunk bed’s top and legs on the compound miter saw. (I did this very carefully, using clamps to secure the bed while sawing.) This made me nervous, but it’s always good to feel anxious when using a saw, as it makes you more careful.
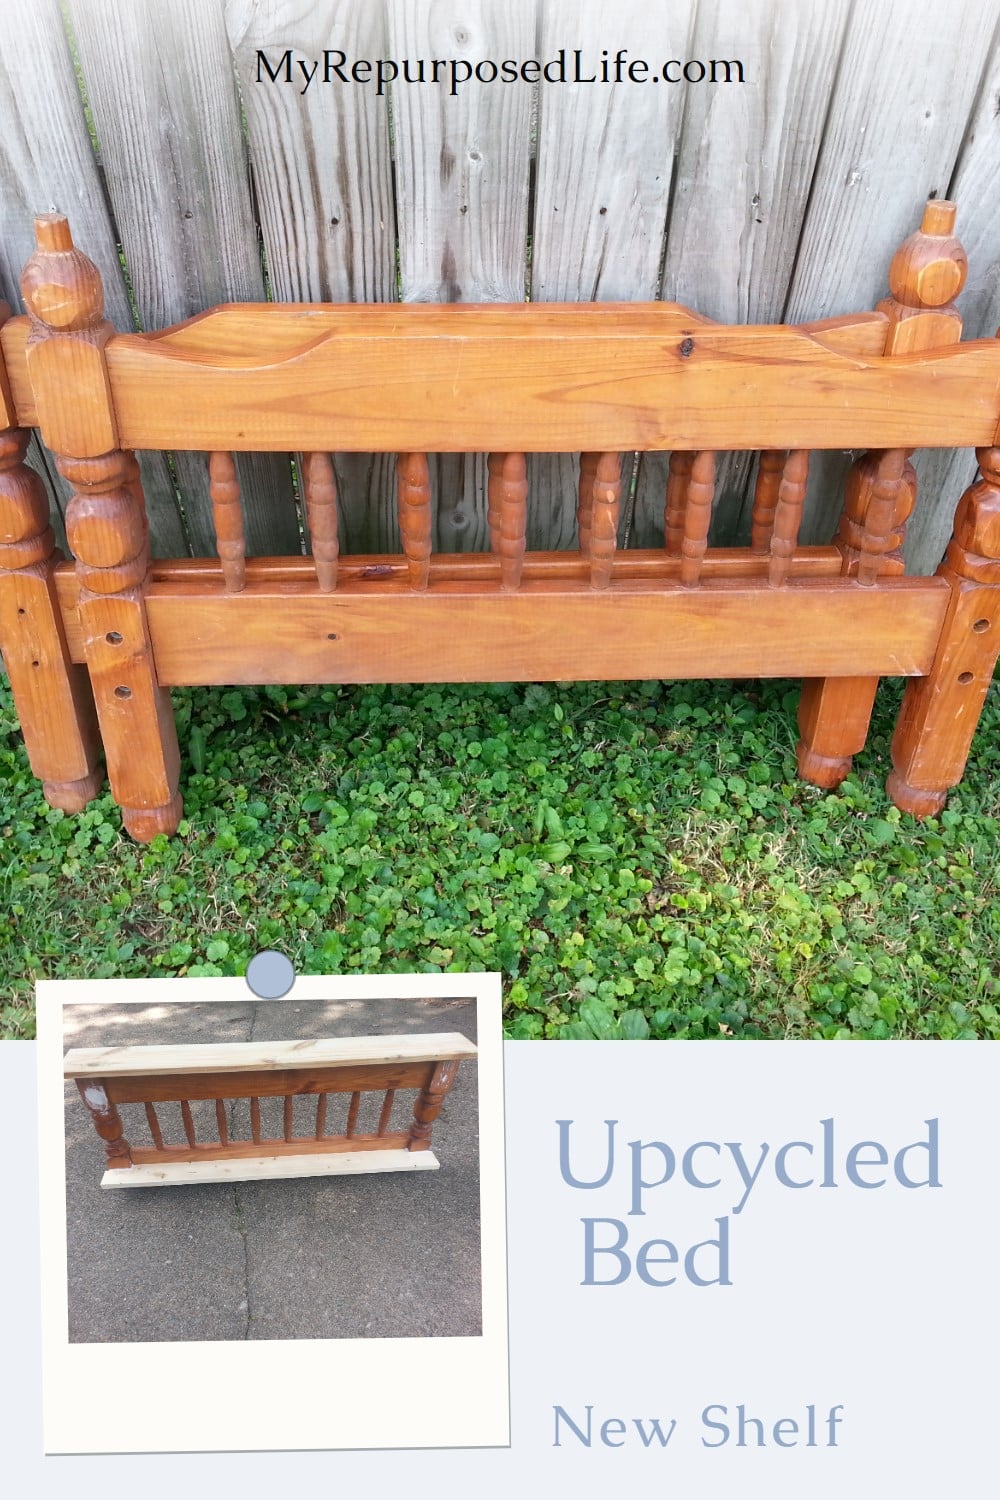
Dry Fit the Shelf
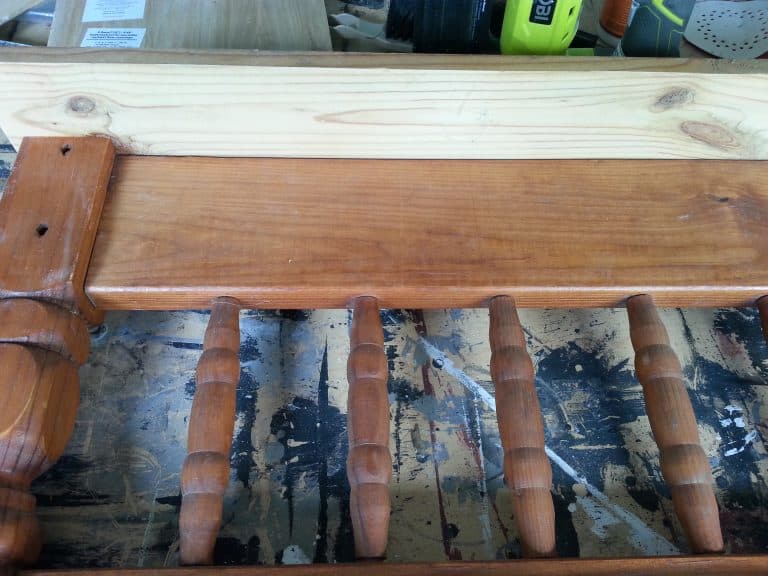
Next, I measured and cut a spare board for the top shelf of this repurposed bunk bed.
Don’t be Hard on Yourself When Things Go Wrong
Then, I used a NEW 1×4 to make the bottom shelf. Why, oh why, didn’t I make it longer?
Using a Kreg Jig to Make Pocket Holes
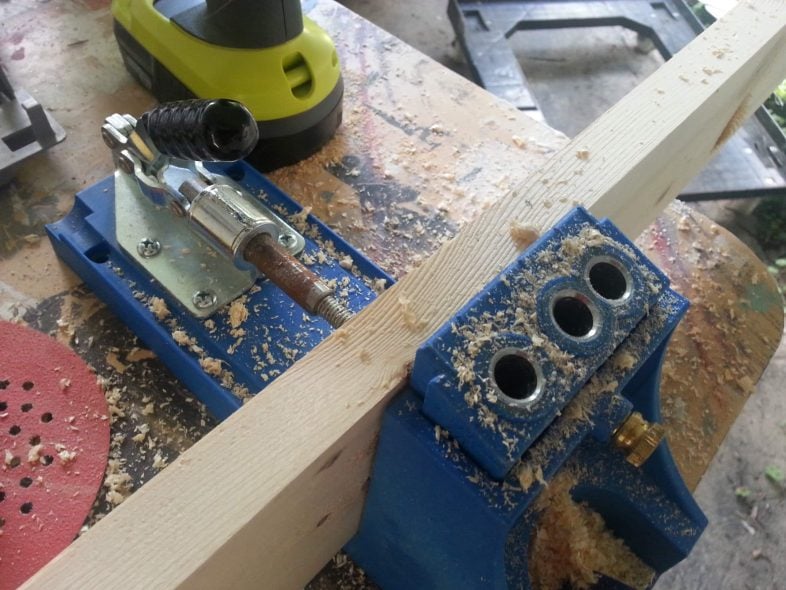
I attached the bottom board (shelf) to the bunk bed frame, using my Kreg Jig® K4 to make pocket holes for a solid and secure hold.
I filled the pocket screw holes with spackling to give the underside of the shelf a more finished look.
New Shelf | Better Look
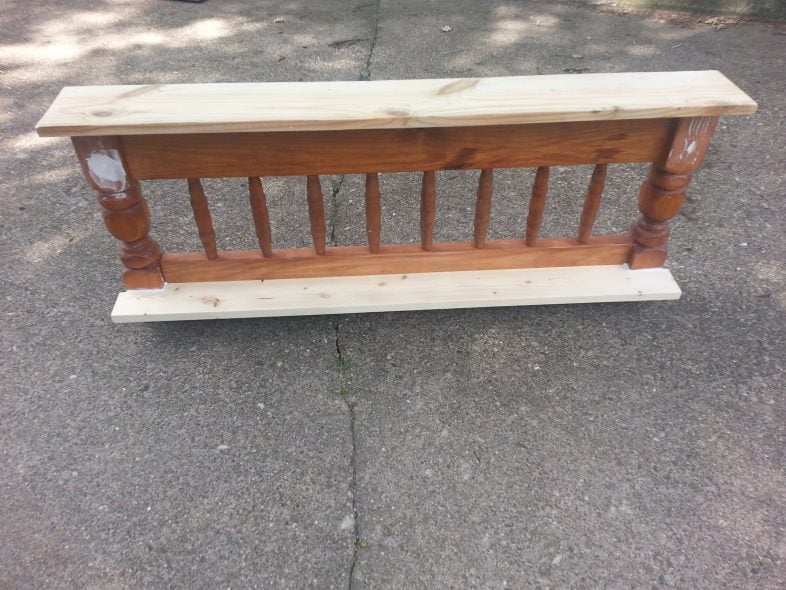
Voila! I really don’t like taking things apart and redoing them, but sometimes, you have to do it. I removed the too-short shelf, cut a longer board, and notched it with my jigsaw to better mimic the top shelf.
Painting Several Projects at a Time
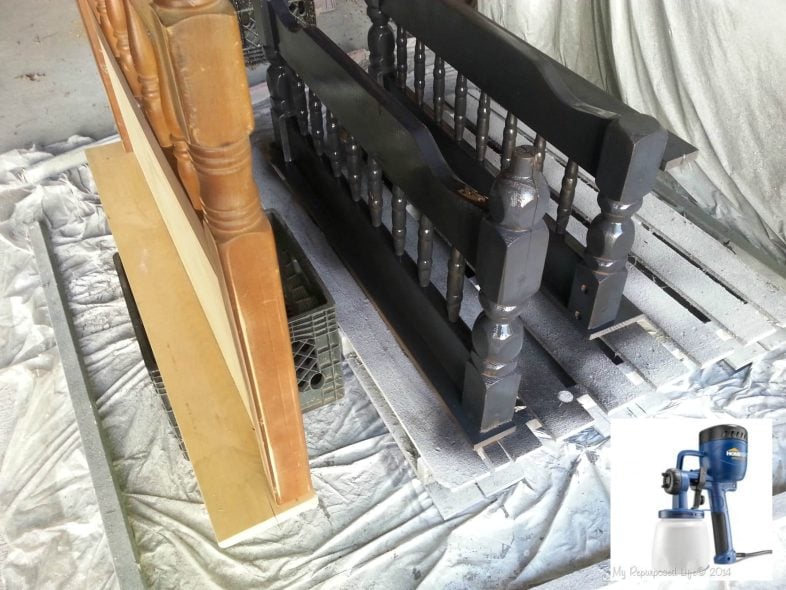
Everybody jump in the paint booth! I sprayed the piece on the right, then added the one in the middle, and finally the one on the left. Everything got a DIY Chalk Paint Primer coat with my HomeRight Finish Max. You can see the piece on the left in my post Headboard Coatrack, which is one of my favorite recent projects.
This is after the black diy chalk paint primer (that’s why you can see the fingerprint smudges)
Then it got H.O.T. too hot to use my Finish Max and paint booth.
Country Chic Chalk Paint
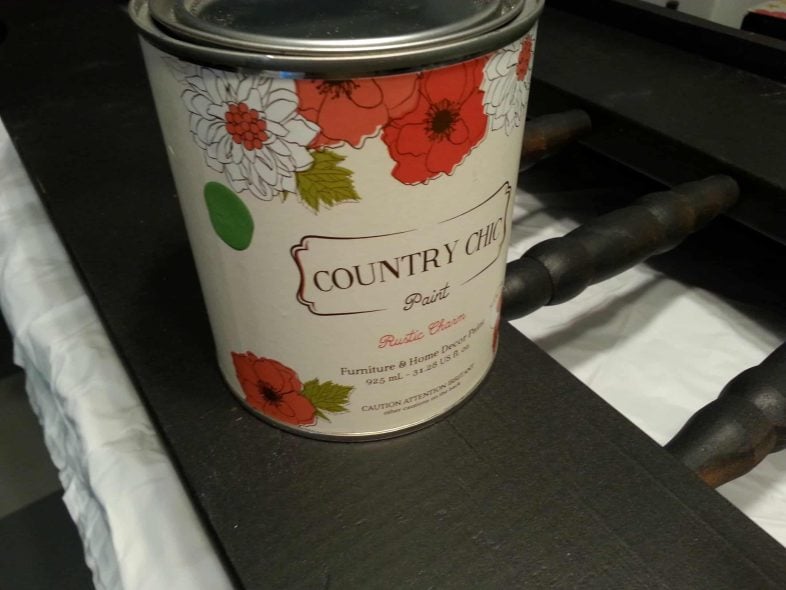
The friendly folks at Country Chic Paint sent me some paint to try. I LOVE this Rustic Charm green because it’s so close to the colors of MRL. It didn’t come with that pretty green dot on it, but I did that to all the cans they sent me so I could see the color of the paint at a glance.
Green Salvaged Headboard Shelf
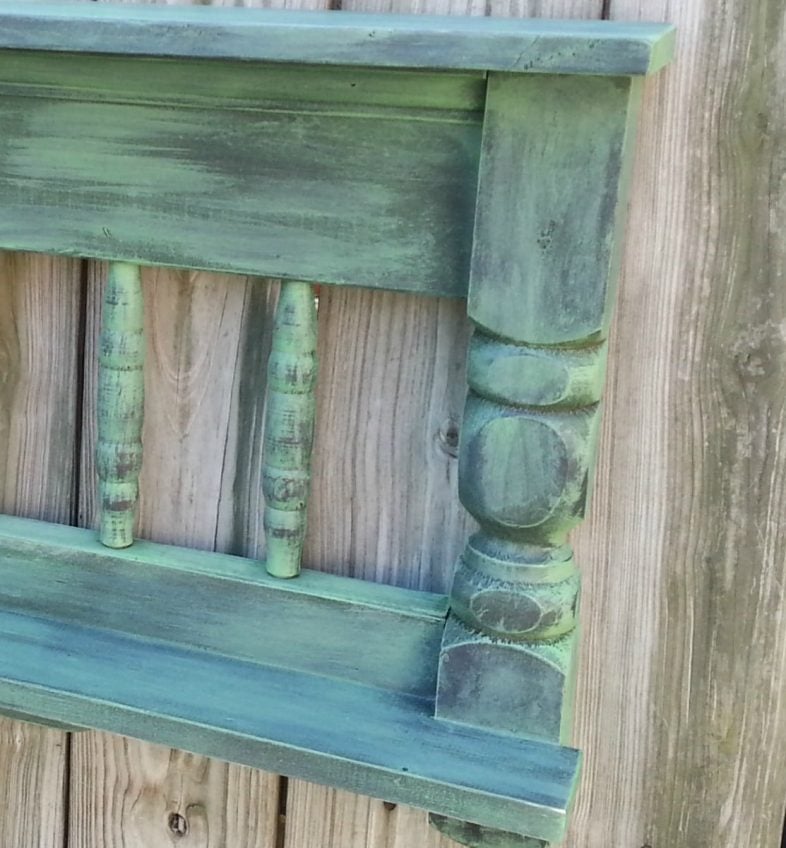
I had so much fun painting that I forgot to take any pictures. I used a chip brush to apply a “dry brush” technique, applying the green paint onto the black primer. The paint went on easily, and with no VOCs, it didn’t stink up my kitchen.
I use d rings to hang all of my projects.

I love the chunkiness of this piece. I’m so glad I redid that bottom shelf, too.
I styled it a bit….but that’s not my strong point. I’d much rather be sawing and building!!!
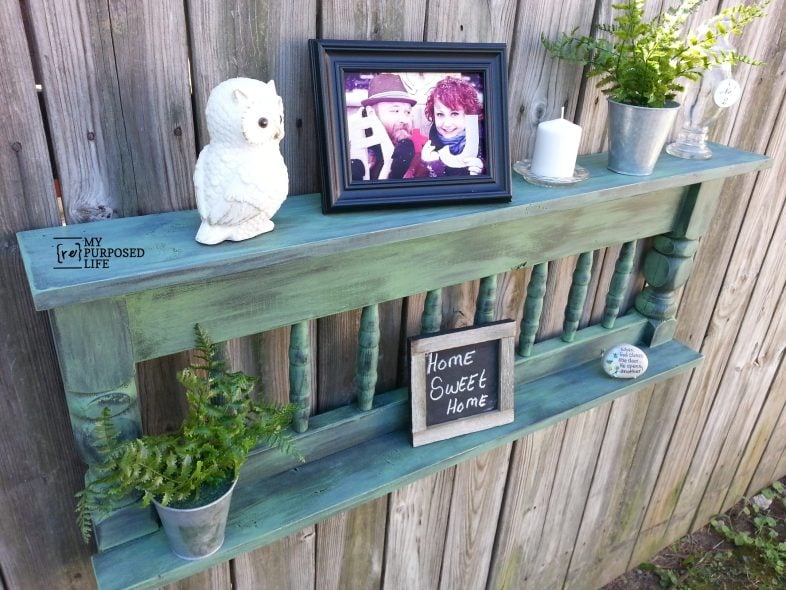
So, another project is ready to go to Glendale! wooohooo!
Are you curious about what I did with the other part of the bunk bed?
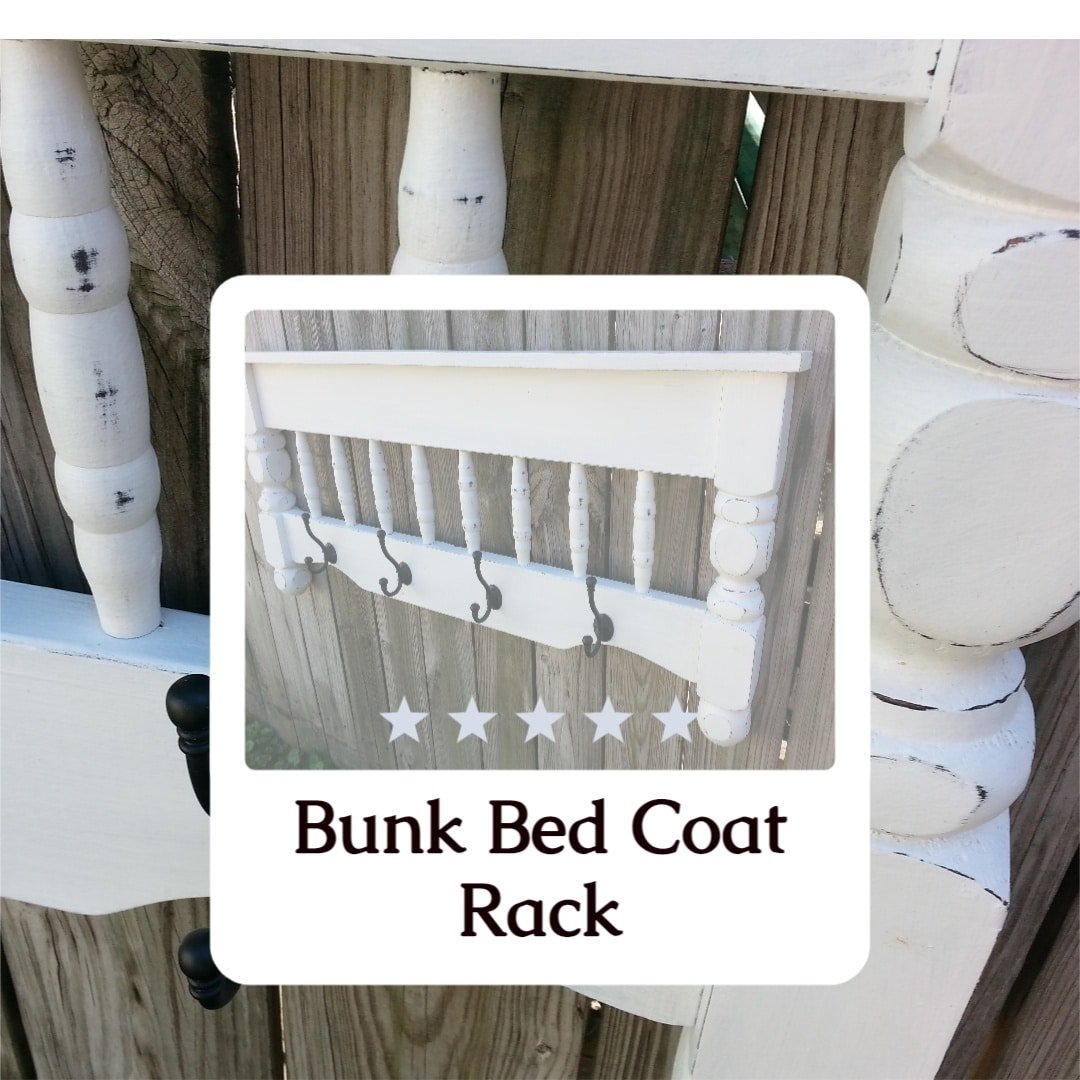
I painted this bunk bed coat rack white.
Do you love them? Or do you think they should have become a bench?
This shelf proves that repurposing is all about imagination. With a few cuts and some paint, scrap wood can take on a whole new life. Keep an eye out for what you can reuse the next time you see an old piece of furniture headed for the curb.
Find more great projects at Sharon’s Be Inspired
I love it as a shelf!!
Love the color Gail! I think you may have cornered the headboard market down there! Are there any left for the beds? LOL
This is pretty darn amazing. I would have never guessed it came from a bed!!!
It is a beauty. I bet it will be the first sale at your show. love the color.
Me? I love it!
I don’t think it should have become a bench– but I’d like to see you do one with a wider shelf. You know, a ‘faux mantle’! Though this one would be nice for a narrow space, entrance, hallway, or beautifying the laundry room or something. So many ways to use this cutie!
Patricia
A great repurpose Gail!
It makes a very cute chunky shelf, I love it!!! The color is awesome too, I like the dry brush technique you used, another winner Gail!
I LOVE it, too! I looked at my headboards the other day and realized that mine didn’t have the long legs like your great chalkboard headboard you just made last week. Now I know why… mine are bunk bed ends! Do you know what you will charge for your new shelf? I find it so hard to know what to price things at.
Absolutely adore this piece. I like this new direction for these types of headboard/footboards. Good idea with extending the bottom shelf board – more consistent. But it’s good to see your lessons learned in the process. Thank you for sharing. Bottom line: Love it! Thank you for sharing, Gail.
Love it!
I love how you repurposed it to a shelf. If you had made a bench, that would have been alright with me too. LOL 😉 Whatever makes a sell and you happy. Have a Good Day!!! 🙂
Love it, Gail! The color is AWESOME! Can’t believe it’s already time for the fall shows…where did the summer go?