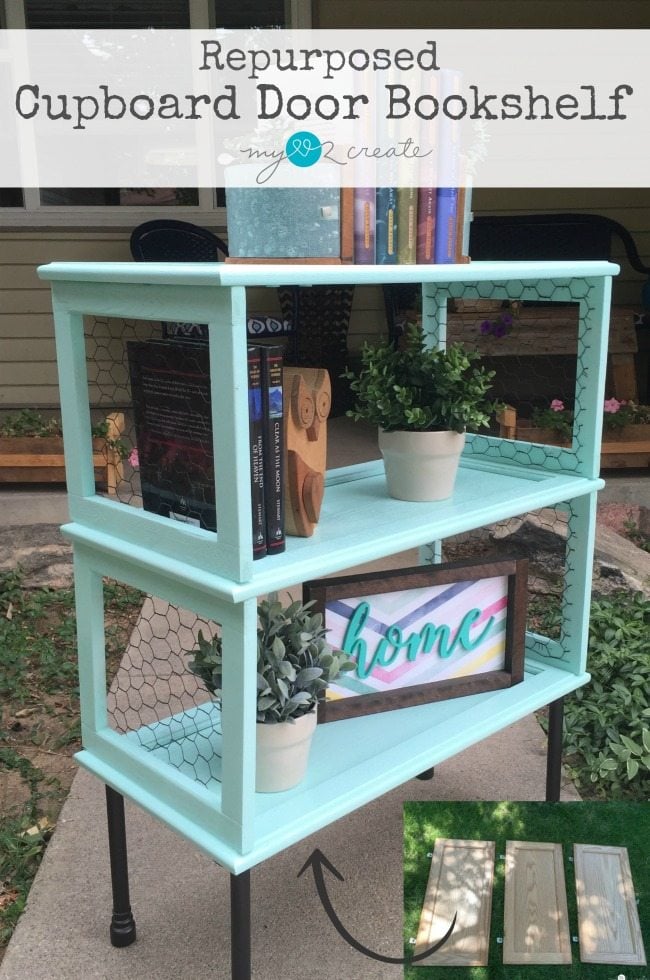
Repurposed Cupboard Door Bookshelf
As an Amazon Associate, I earn from qualifying purchases.
It’s Mindi again from MyLove2Create! My project today is a simple and useful repurposed cupboard door bookshelf
Cuteness! I have to admit I had my doubts while building this project. But I am happy to say that I love it!
Free cupboard doors
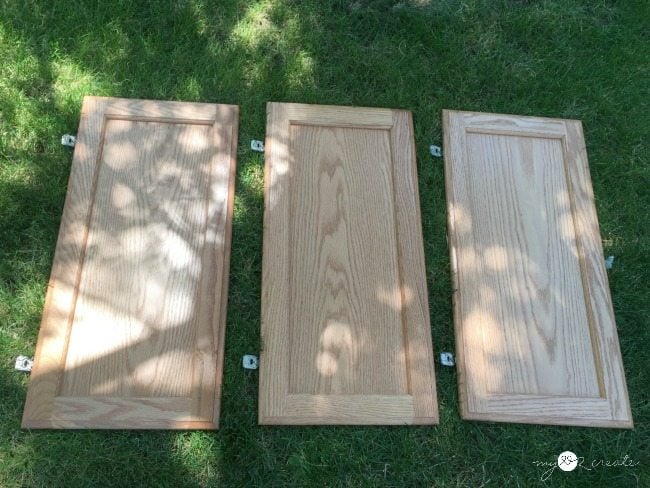
I was gifted a whole kitchen of cupboard doors from a friend, so naturally I am always scheming up ways to repurpose them into something useful. Like my Cabinet Doors into Children’s Desk, or my Corner Cabinet Planter, or even my Cupboard Door into Command Center.
Since I had three cupboard doors the exact same size I decided they needed to become a book shelf.
Remove hardware-design bookshelf
I started by removing the door hardware. Using plywood scraps I propped up the cupboard door to get a visual of how it would look as a shelf.
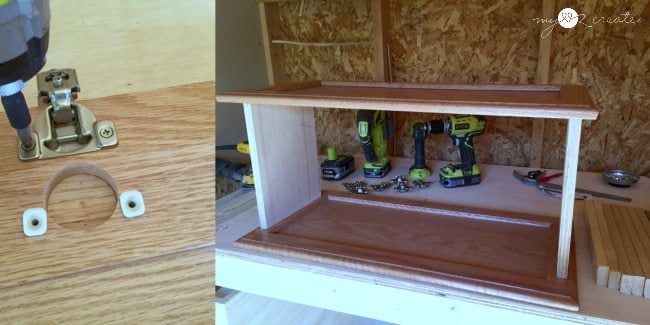
Construct bookshelf using pocket holes
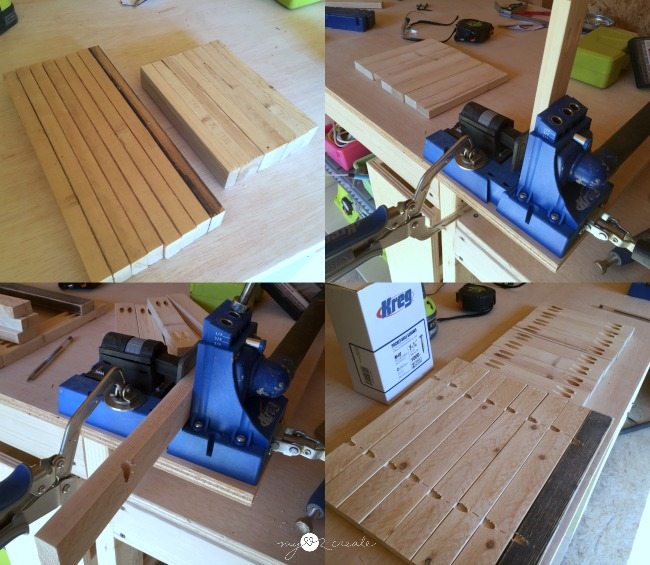
I always have lots of scrap 1×2’s laying around, so I decided to use them and build 4 frames, which would become the shelf supports. You could use plywood for the dividers, but I wanted a more open look on the sides.
First, I cut the scraps to the size I needed and then proceeded to drill pocket holes with my Kreg Jig K5. I drilled two 3/4” pocket holes into the ends of the shorter pieces. On the long pieces I drilled two pocket holes for attaching the shelf support frames to the cupboard doors.
Here I am building my support frames, using Gorilla wood glue and 1 1/4” pocket hole screws. Always clamp before drilling in pocket holes to make sure the boards stay flush.
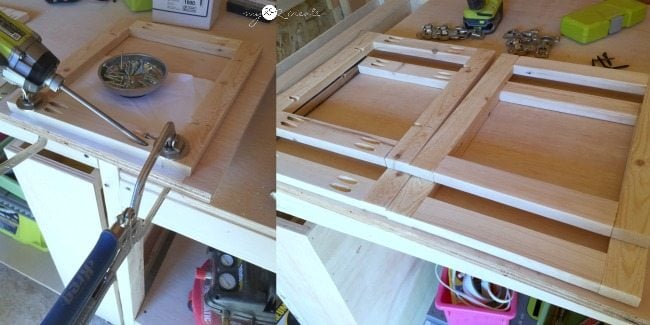
Wood glue and clamps aid in construction
Because of the decorative edge on the outside of the cupboard doors I needed to inset where I would be attaching my divider frames. The perfect tool to use was my combination square, it allowed me to mark all of my boards the same without measuring every time (top left). I used wood glue and clamped the shelf support into place and drilled in my pocket holes. On the bottom right you can see I did this with two of the cupboard doors.
Next, I grabbed my third cupboard door and attached one of the cupboard doors with the shelf supports already attached onto the top, again using wood glue and 1 1/4” pocket hole screws.
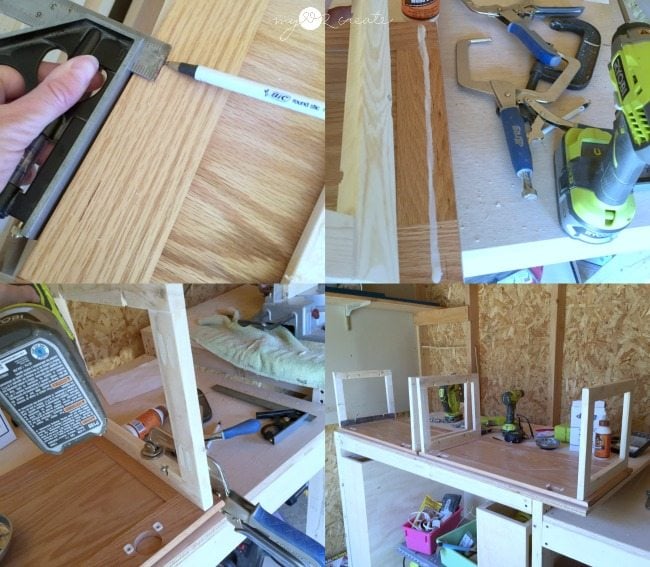
Complete construction – fill pocket holes
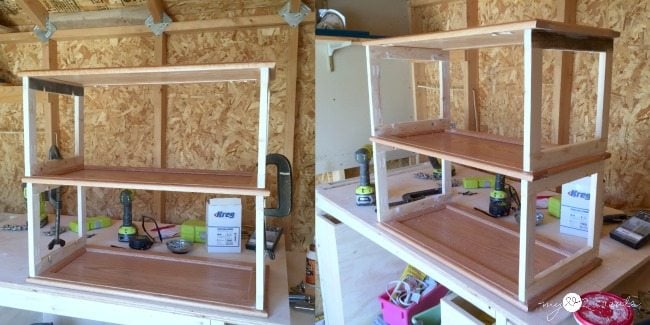
Now all I had to do was attach the last one on the top. In the left photo you can see I have it clamped and ready to be screwed together. On the right I have filled in all my pocket hole screw openings with spackle.
Prepare to paint cupboard door bookshelf
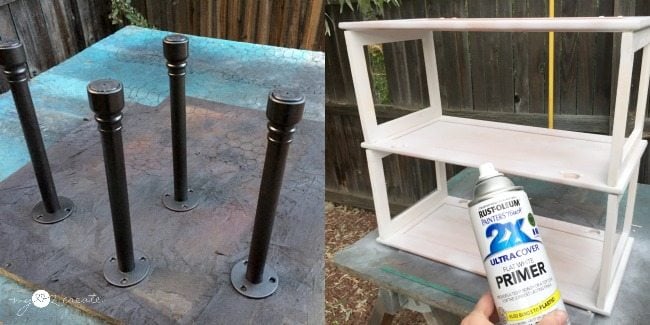
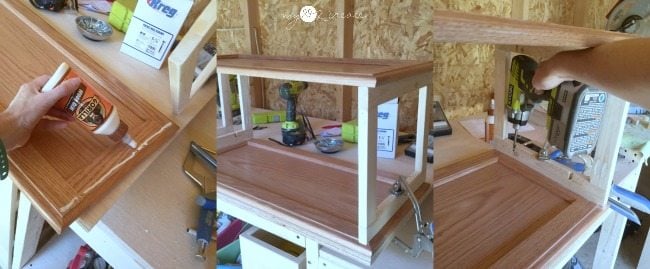
Once my spackle was dry I sanded is smooth and wiped down my new bookshelf in order to get it ready for primer. I also dug out my $1 legs that I got at the same time as the legs I used when I built my Rustic Industrial Table. The legs got a quick spray with oil rubbed bronze spray paint. Can you see the chicken wire in the background? I sprayed it to match the legs.
Add chicken wire
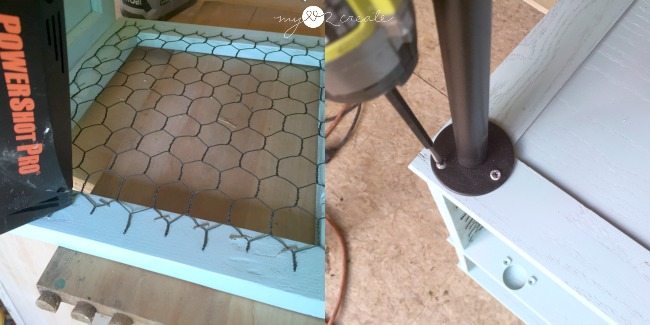
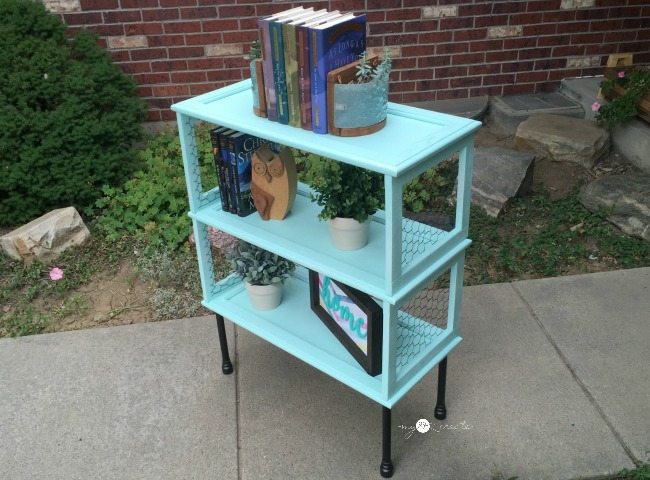
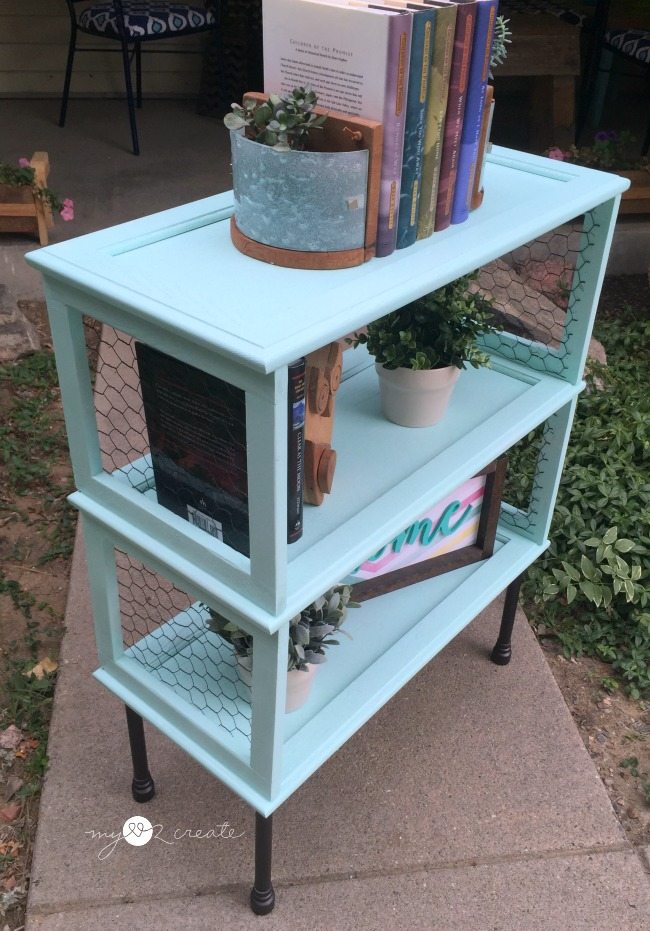
The repurposed cupboard door bookshelf was finished with Rustoleum’s Ocean Mist spray paint. I added my chicken wire to my shelf support openings with my staple gun, and screwed the legs onto the bottom.
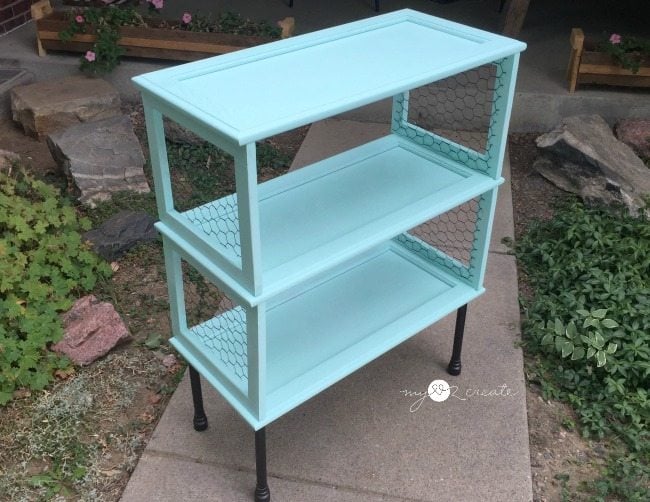
This is the final product.
It was way to dark and overcast to get decent photos inside, so I did my staging outside.
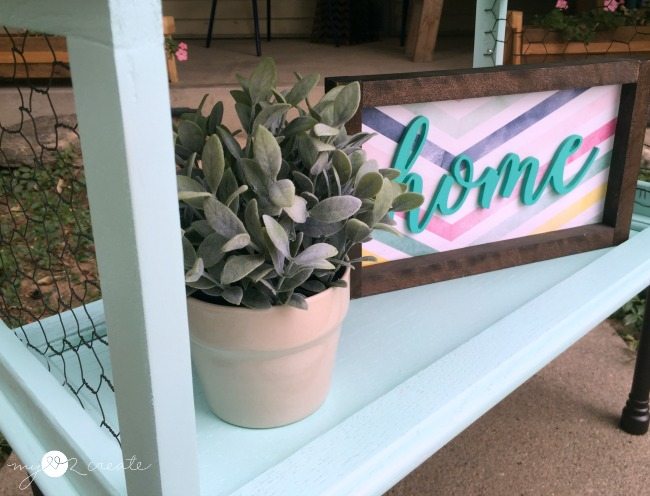
The inset portion of the cupboard doors make a perfect place for books and decor items, as well as a nice ledge. 🙂
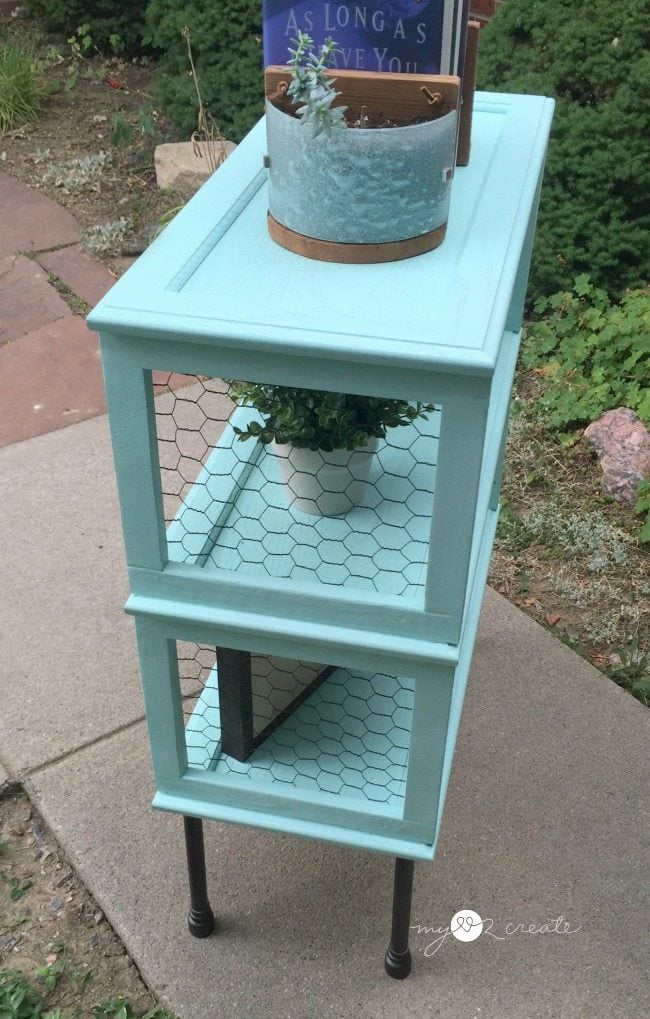
I had several ideas of how to dress up the sides of the repurposed cupboard door bookshelf. But with crazy things happening in my week I went with the chicken wire. I think it adds a little farmhouse feel.
Of course I know the inside wires could use some covering up. But I ran out of time. I have some ideas of how I will do it, but I am curious as to what you would do?
Thanks for reading! I would love for you to visit and follow me for more great repurposing and building ideas!
Hugs,
Mindi
see more of Mindi’s posts on MRL here
Hi there Gail,
Well that is just like me to scan the article and miss that important fact. Hope you told your friend Mindi it is the best one yet. Enjoying your site.
Have a great day Gail.
Darlene
Nova Scotia
Absolutely beautiful Gail. I have so of these doors in my basement from our kitchen makeover. This is the nicest cupboard door makeover I have seen. I love Rust-Oleum Paint. 29 years ago I painted a front door using a can of red Rust-oleum, today it is still in perfect condition. Now a days the spray cans are so easy. Gail thanks for sharing your beautiful creation.
Thank you Darlene, however this project was made by my friend Mindi as a contribution to My Repurposed Life. I’m sure she is as happy as I am that you love this project!
gail
Thanks for using our PowerShot Pro stapler on this project. Looks great! #MadeWithArrow
What are the dimensions?
Hi Zech, the cupboard doors are 14 1/2” x 28” by themselves. The final shelf dimensions (excluding the legs) are 29 1/2” tall, 14 1/2” deep, and 27 1/2” wide. You could build it as wide or narrow as you want. Hope that helps!
Thank you for replying to that comment with the information Mindi! 🙂
you’re the best!
gail
Oh I love your cabinet doors shelf. It turned out really pretty, love the color and the chicken wire that you added.
Mindi,
Thanks for another great project made from cabinet doors. I love the way you think. 🙂
The chicken wire really makes a huge difference in this project. great choice.
gail
What a great idea! We are ripping out a kitchenette in our basement so I may have to use them to make this!
Mindi did a wonderful job. I love the color and clean cut look of it. Great job.
Mindi,
I always love seeing your doors and drawers projects. This one is no exception. I love the chicken wire element.
great job friend!
gail
You make everything look so easy! Thanks for the share the other day, you made my page views jump about a million percent that day! 🙂
This is Mindi’s project, but gail says “you’re welcome” for the share on facebook. 🙂
I must find some cabinet doors! Love this repurposed beauty!
Debbie