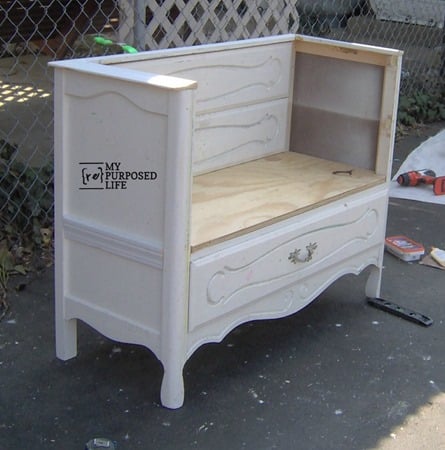
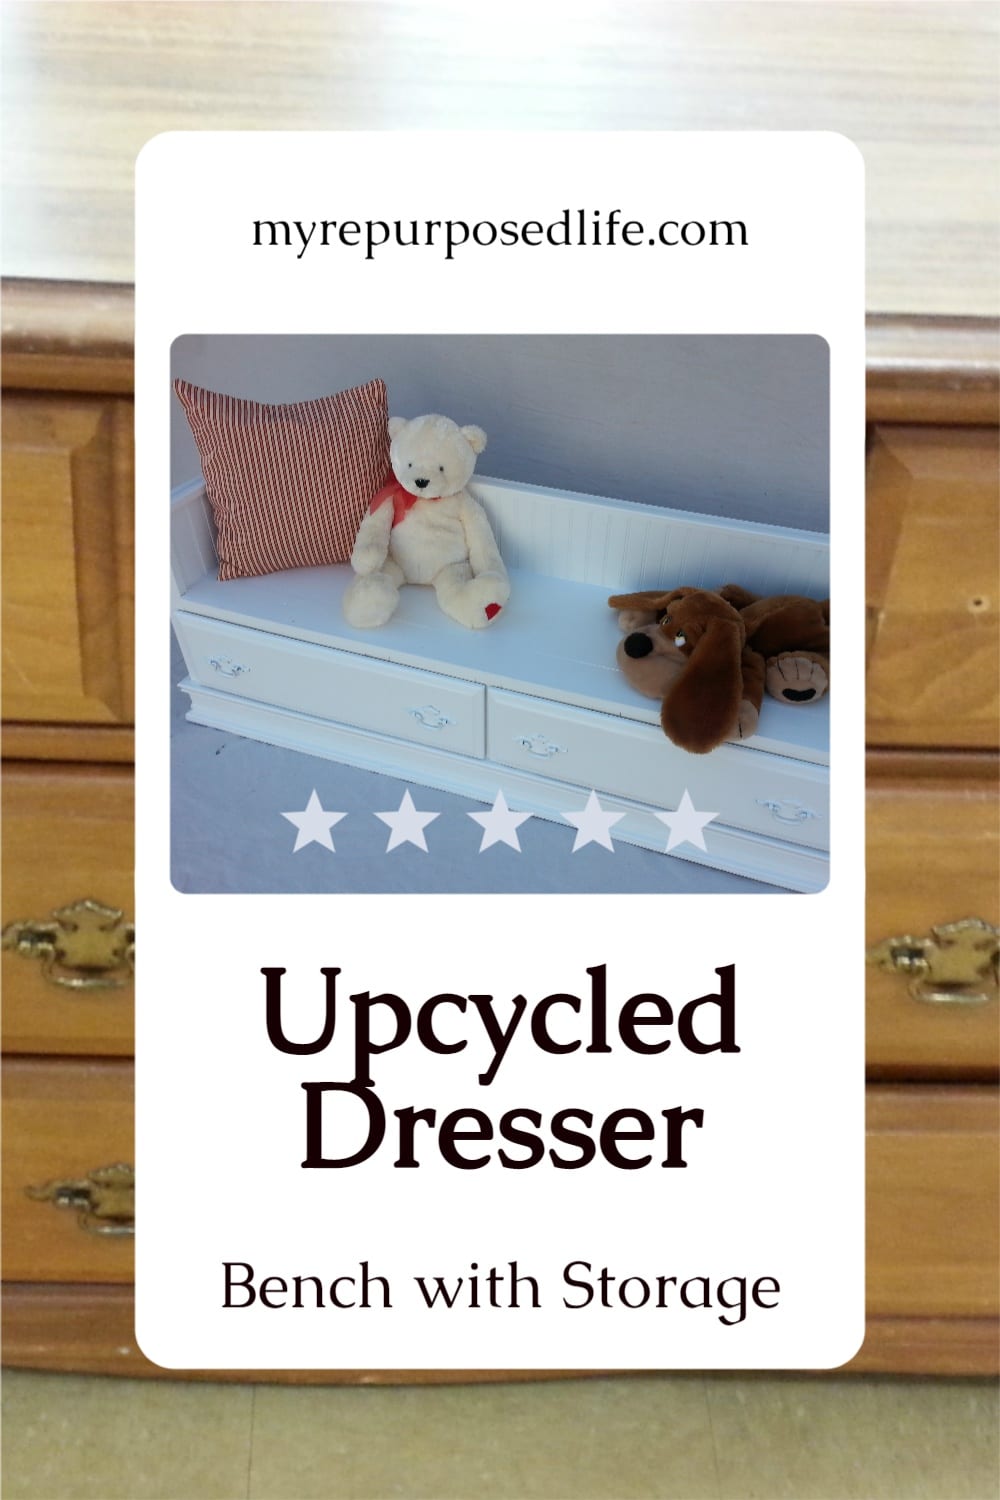
Repurposed Dresser Bench
As an Amazon Associate, I earn from qualifying purchases.
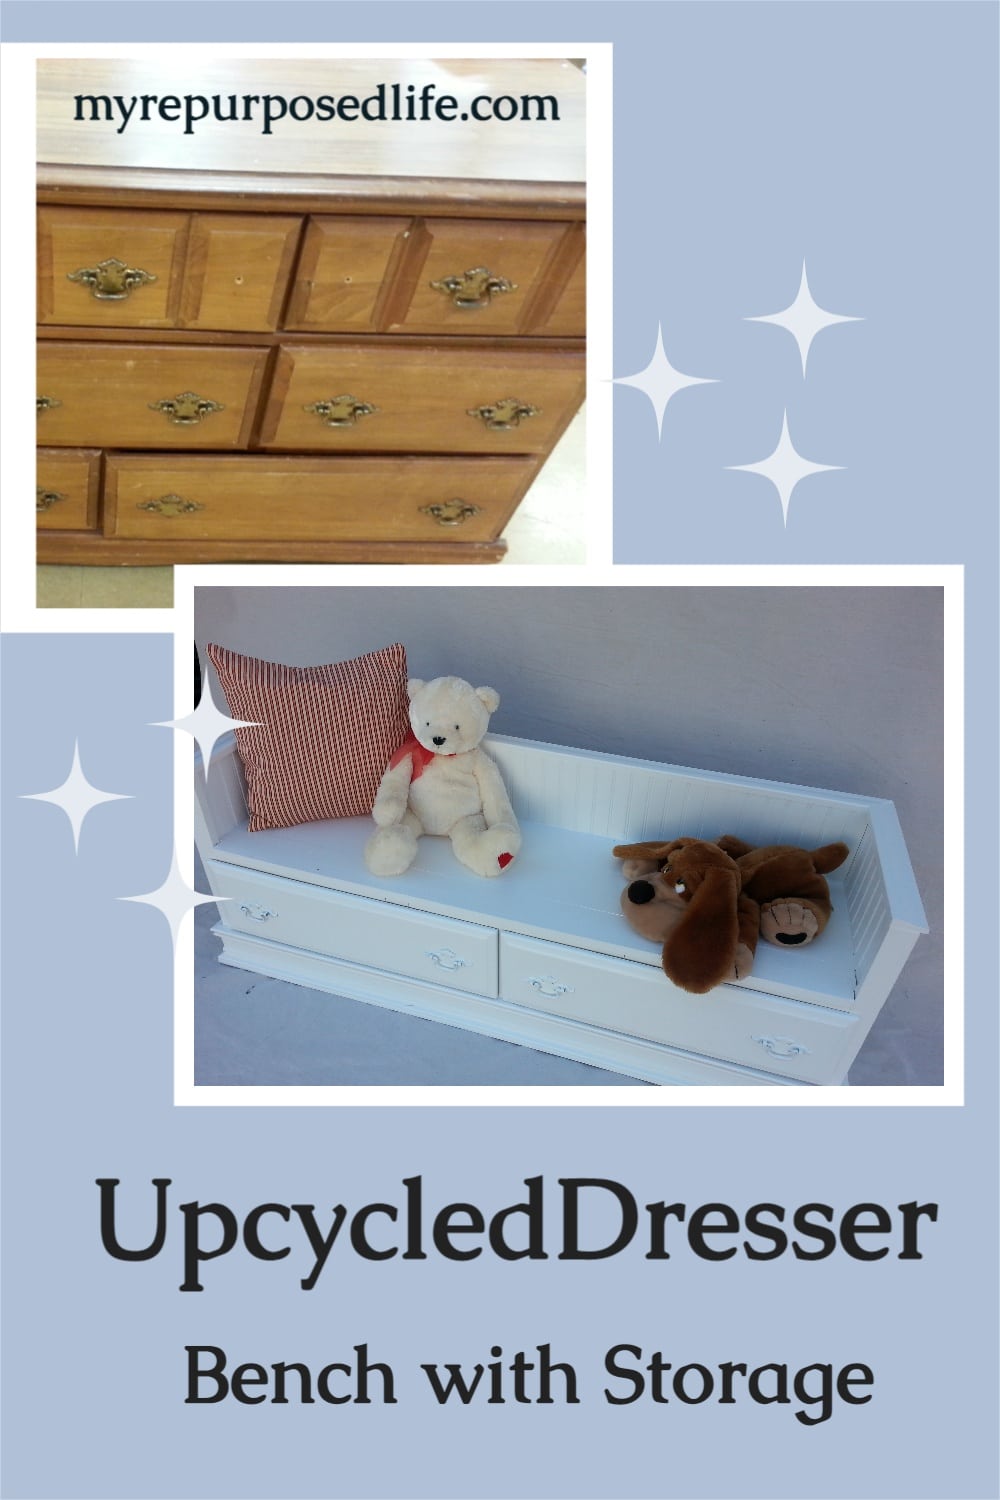
This isn’t my first repurposed dresser bench, but this one is a little lower, and it’s a perfect kid’s bench with storage. I actually got two projects out of one old dresser, so look for the other project near the bottom of this post.
So, if you’re wondering how to turn a dresser into a bench for extra storage, you’re in the right place!
Repurposed Dresser Bench
I love the way this project turned out. Please stick with me and see all the details below.
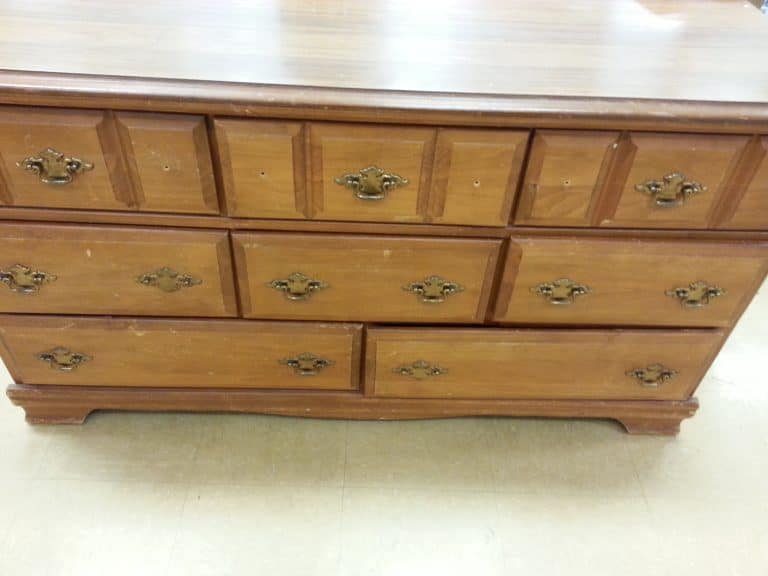
I bought this dresser for $20 and two pieces of beadboard paneling for $4 each. Yeah, I know, $20 is way over my $5 limit….but remember, I got two (projects) for one dresser.
The dresser had some bad veneer issues. How do you fix bad veneer? You can click that link if you’re curious, but it wasn’t necessary for this repurposed dresser bench.
Great End of Bed Dresser Bench
I already knew that I wanted to repurpose another dresser into a bench. I did this one years ago and wanted to do it again.
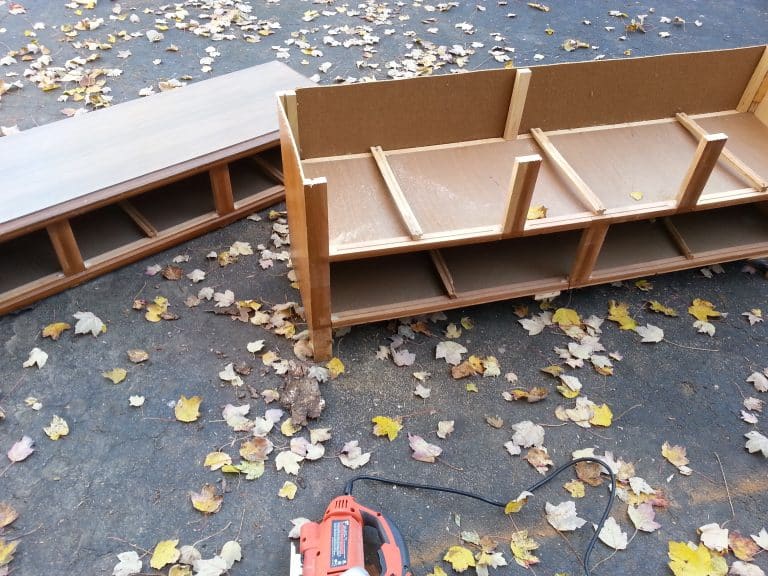
Cut Dresser in Half to Make Bench

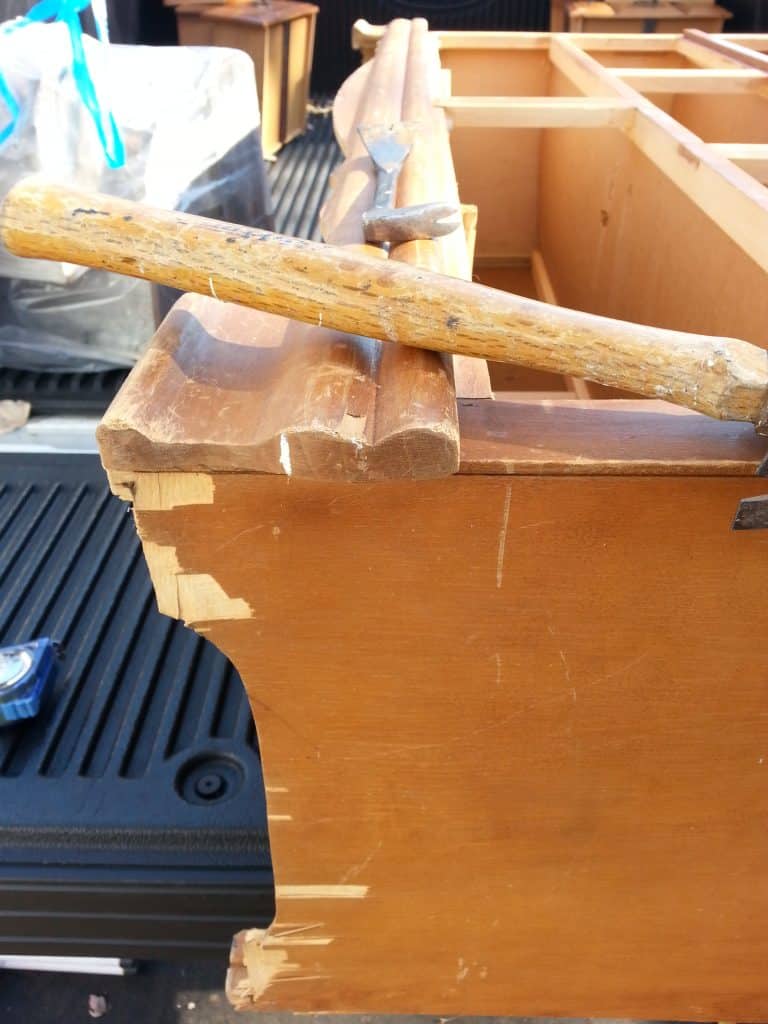
I got busy cutting the dresser apart with my Jig Saw . I should have used tape; that would have cut down on the splintering.
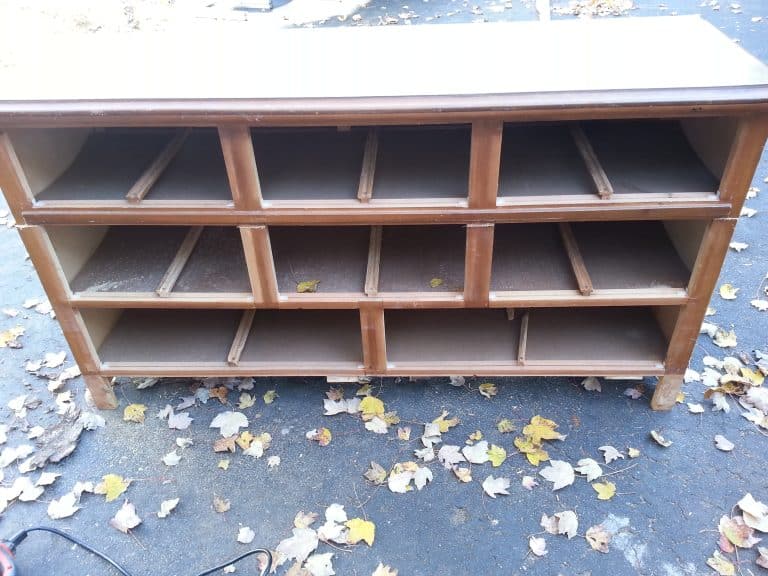
If you look closely, you can see where I cut the dresser apart—into two pieces, with the top being one drawer section. I’ll use the bottom two drawer sections for this repurposed dresser bench project.
You may think your dresser is made too cheaply to be of any use. This dresser is about as cheap as they come.
One Dresser | Two Projects
See? Now, this repurposed dresser is good for TWO projects, so $20 is now $10 per project. ![]()
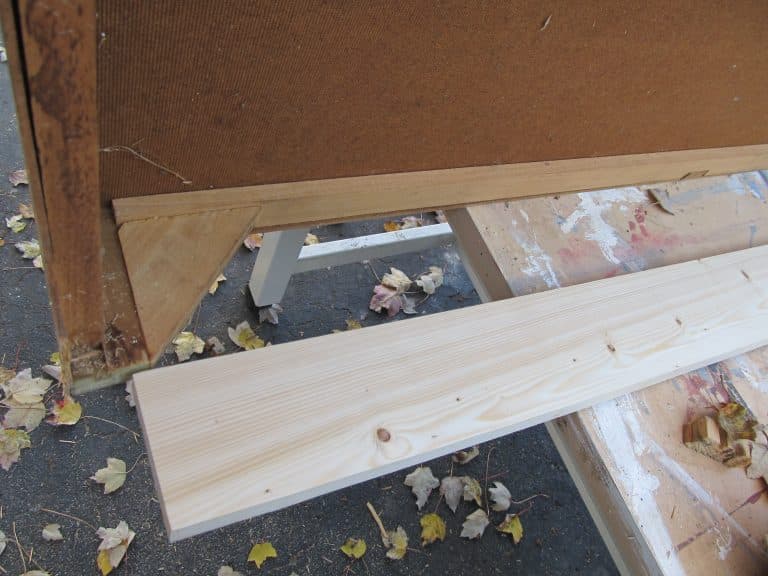
Cut off Dresser Feet

My trim isn’t quite wide enough to cover the lousy veneer, so I cut some of the dresser’s feet off.
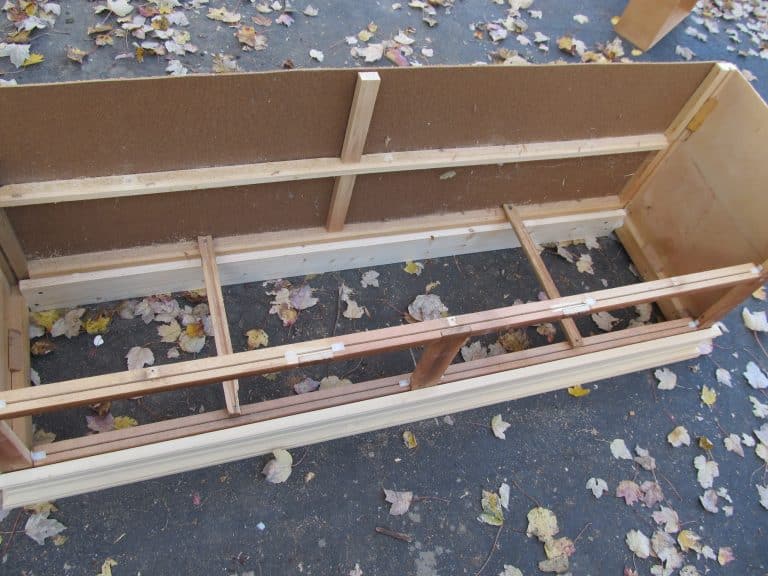
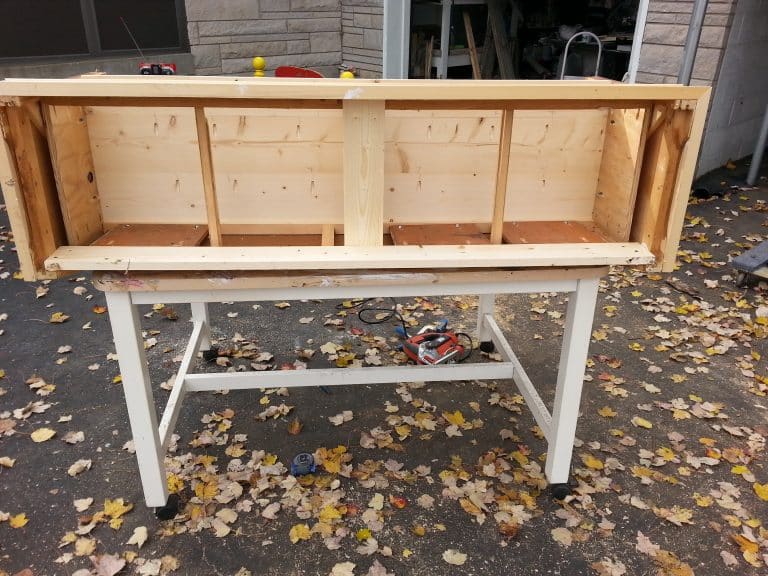
Add Back Support Board
This project will need a lot of extra support. The first support I decided to add was across the bottom (back). I used a 1x for that.
Add Trim to Cover Bad Veneer
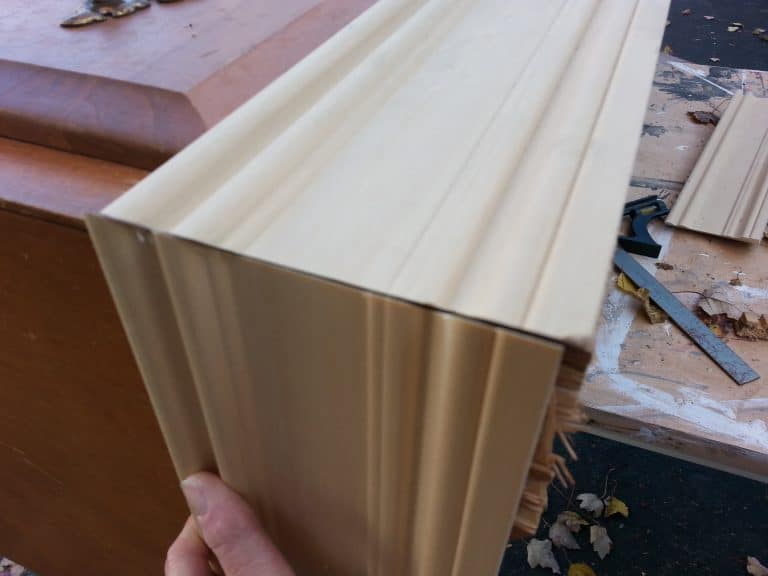
I got this very wide piece of molding at one of the Peddler’s malls for $2.75—what a bargain! It was easy to find now that all my lumber pieces were organized in my new work bench.
Gutted Dresser | Repurposed Project
Can you believe this is the bare bones of a vintage dresser? As I said, it’s going to need a lot of support.
Add Side Supports to Repurposed Dresser Bench
I started by adding some braces on each side.
Of course, I used my Kreg Jig to make pocket holes; they give a really nice fit. That gave me something sturdy to attach the side seat supports.
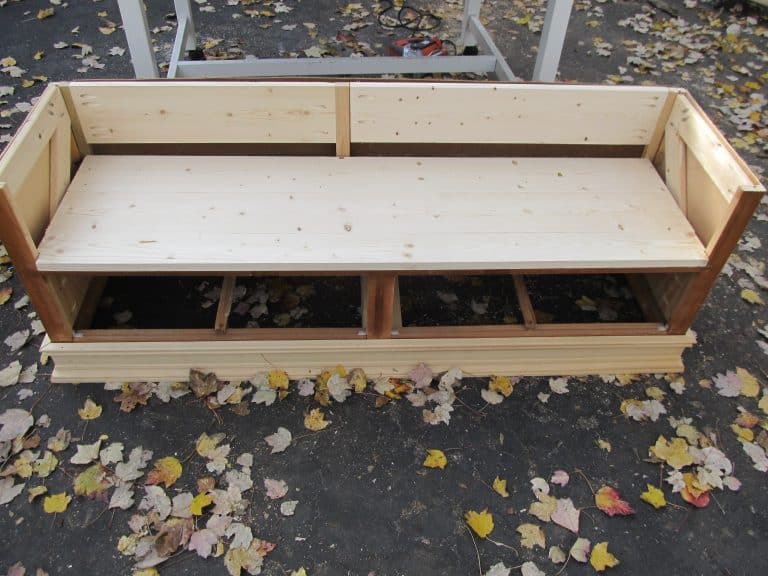
Make Seat with Pocket Holes

I used some 1xs for the bench seat to get the correct width. I used my Kreg Jig to drill the pocket holes to make my seat nice and sturdy.
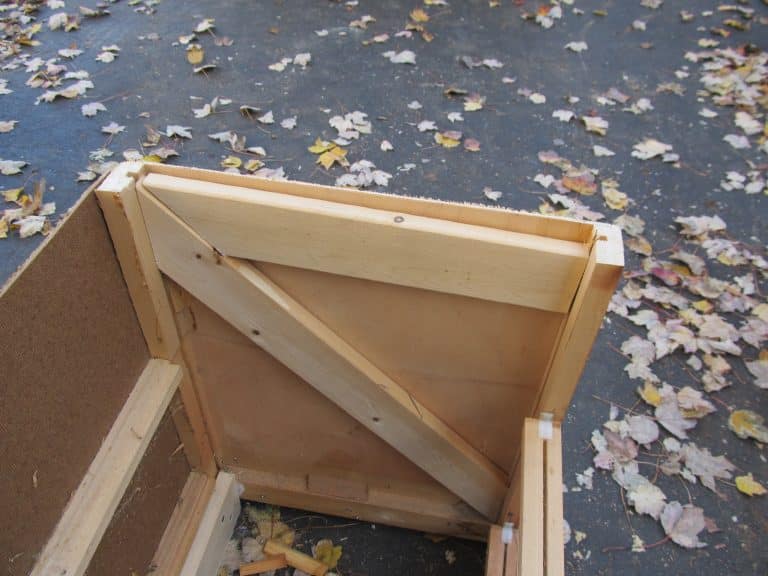
Underneath the Side of the Bench
This picture shows the bench seat rests on the side supports.
How to Add Supports
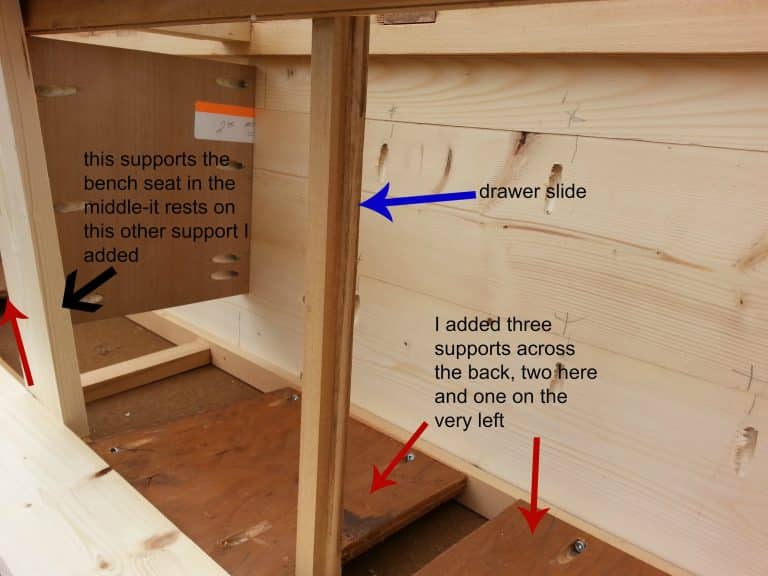
This close-up shows all the supports I added to make this repurposed dresser strong enough to hold people. I kept inserting the drawers to ensure I wasn’t interfering with their movement.
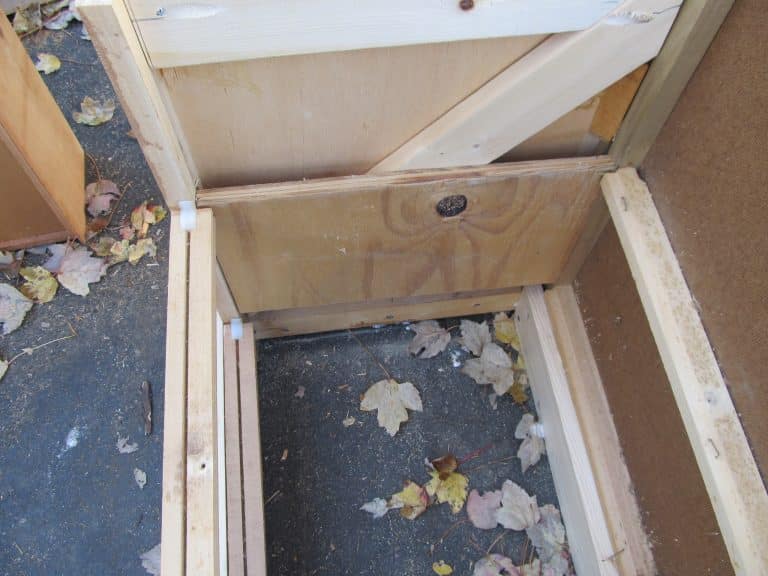
Why is a Dresser Made of Cardboard?
I don’t know WHY they make dressers out of cardboard, do you? Since the back of this dresser WAS cardboard, I needed to add some braces to attach my bead board. I used 1x’s connected with more pocket hole screws. See the middle stile? There is that nice, sturdy brace behind it to support the length of the seat.
Attaching the Back and Sides
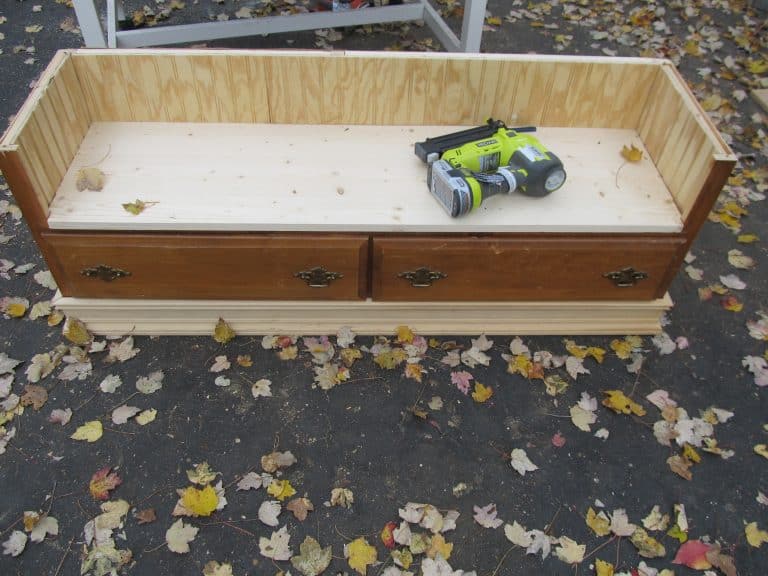
I was fortunate to have enough scrap bead board pieces to complete this repurposed dresser into a bench. I used my Ryobi BRAD NAILER to attach all the bead board pieces.
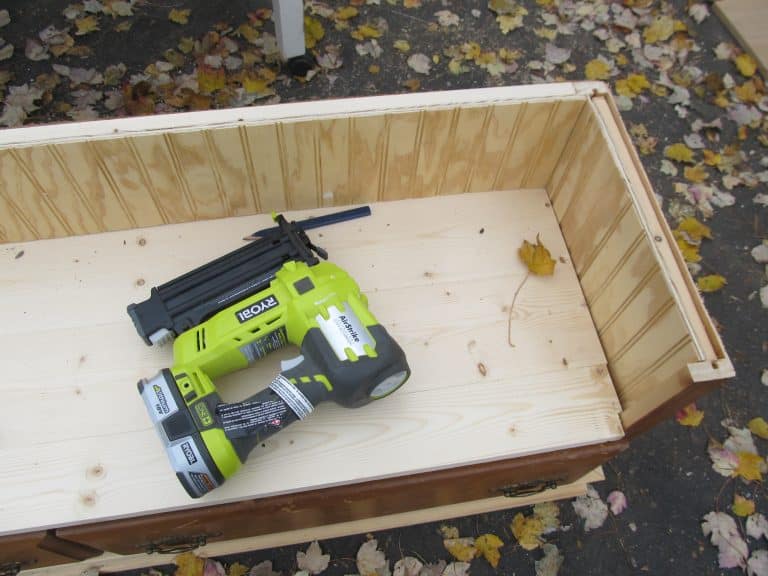
See how there is enough “meat” on the sides and back to attach the top trim? Had I not added those boards, there would be nothing for me to nail to.
Add a Top Railing
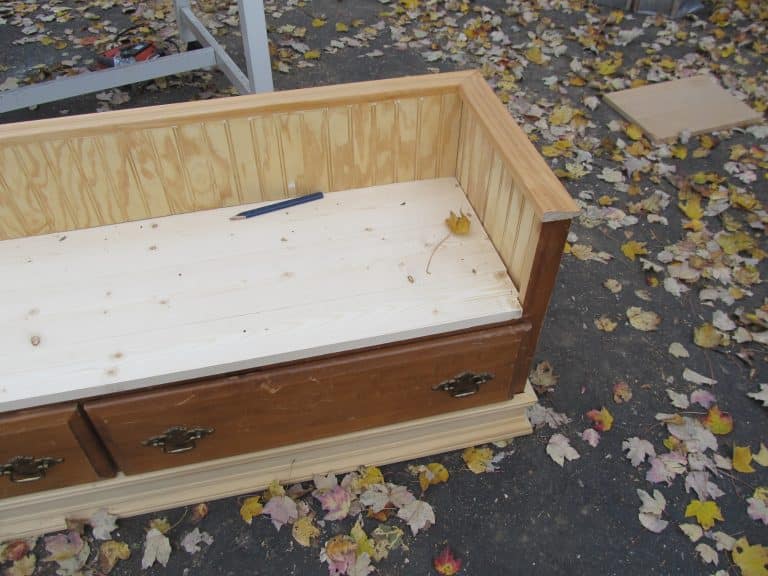
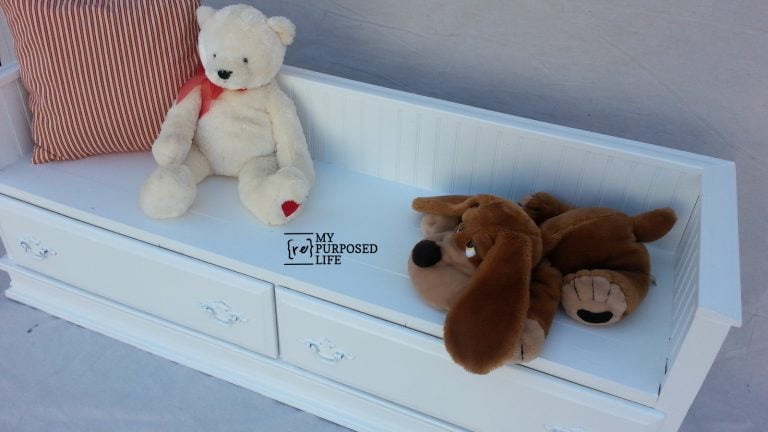
I used window casing to trim out the top, making it flush with the bead board to be comfortable. So far, I’m really loving the repurposed dresser bench; how about you?

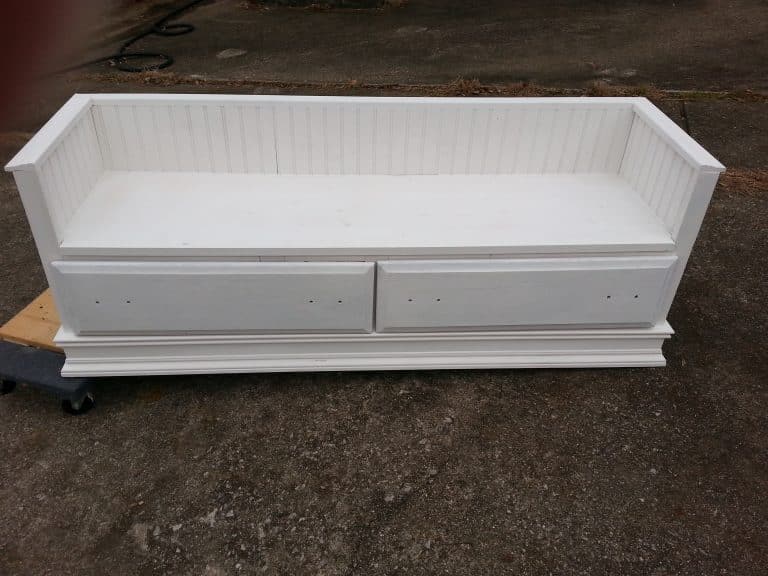
The bench was painted the same as 99% of my repurposed projects. I used my DIY chalky paint primer and my Finish Max. The bench was topped off with a final coat of White Semi-Gloss paint. (Behr)

After cleaning up the hardware, it was spray painted and reattached.
Wow! Don’t you LOVE it?
Thanks for Sharing and Saving on Pinterest!
What did I do with the top of the dresser??
Cut Off Dresser Top

Bonus: I still had this part of the dresser for project #2! After much debate, I decided it wanted to be a lego table!
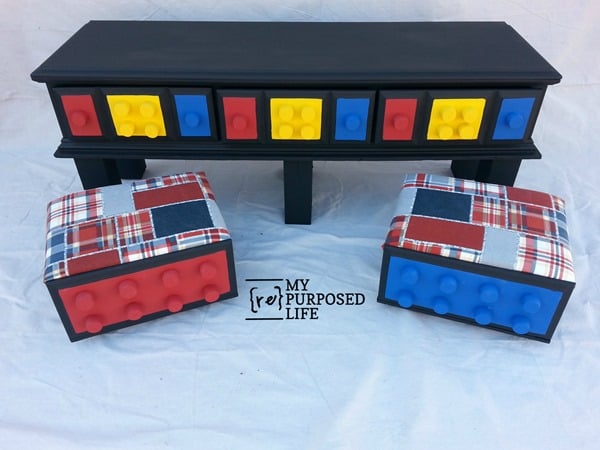
Anything with drawers and storage will help you keep the kids a little more organized!
gail
See other fun bench projects here
sharing here: Funky Junk Interiors
What a fantastic transformation! I love how you’ve repurposed the dresser into such a functional and stylish bench. The choice of color is perfect too! Can’t wait to try a similar project for my entryway. Thanks for the inspiration!