Dresser Table
As an Amazon Associate, I earn from qualifying purchases.
The weather has not been very cooperative lately. I have an unfinished project to show you today, but I’d like your thoughts about dresser ideas and how to finish it out.
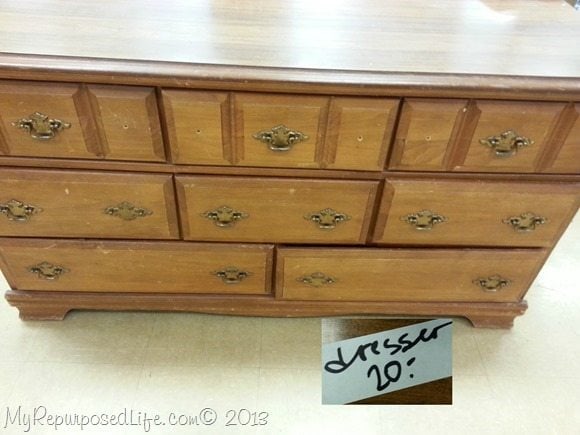
Do you remember this dresser I picked up recently? It was more than I usually pay, but I knew I would get 2 projects out of it, so I felt justified in paying $20 for it.
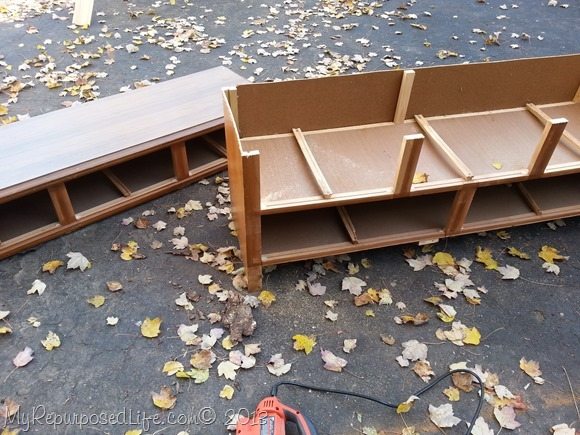 As soon as I got it off the truck, I started cutting it apart to make the 2 projects.
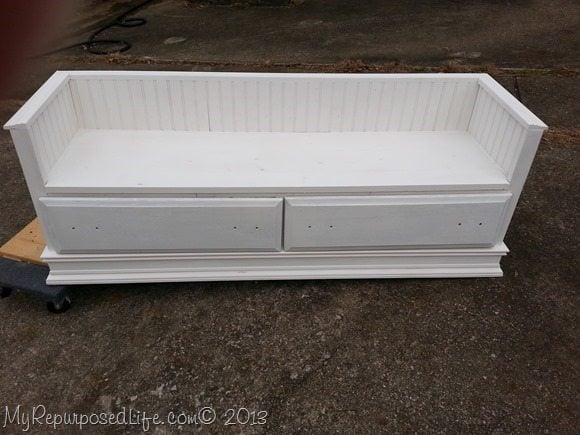 This is project #1, a kid’s bench made from the bottom part of a dresser. It is still not finished. I’m looking for some fun fabric for pillows, so I’ll know what color to paint the hardware.
Today, I’m going to show you what I did with the top of the dresser.
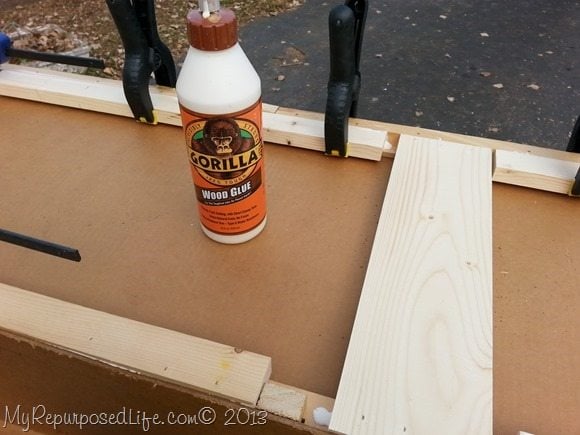
This is the bottom of the dresser top that I cut off. It needs a base. In order to give it a base I need to beef it up a little so that I’ll have a way to secure the base. I used some scrap lumber pieces and Gorilla Wood Glue.
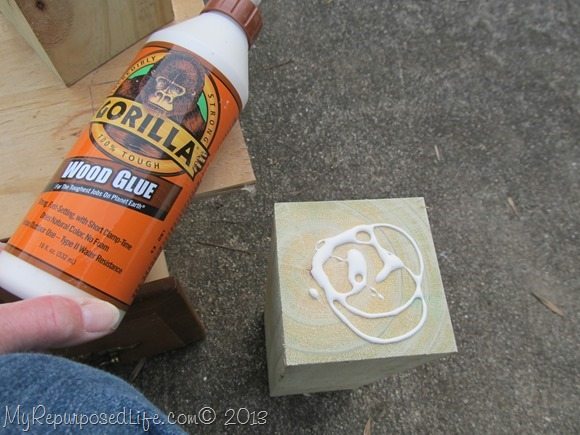
I wanted this table to be chunky, not dainty, so I used 4×4’s for legs. I used Gorilla Wood Glue and screws to hold the legs in place.
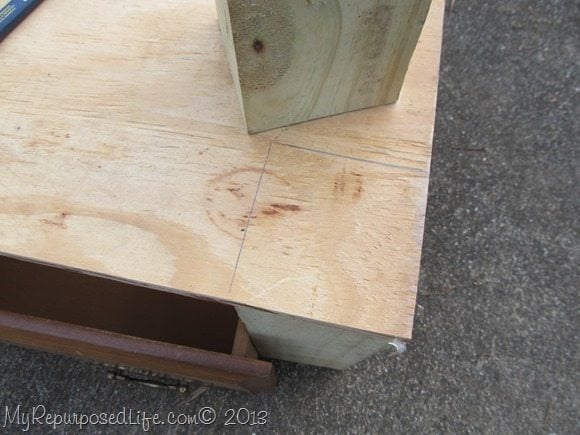 I use a scrap piece of 4×4 block to mark the area, so I’ll know where to put the screws.
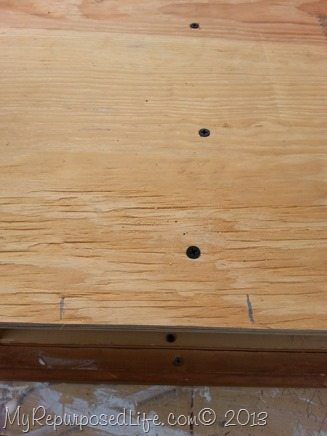 After attaching all four legs, I used screws to secure a piece of plywood to complete the base.
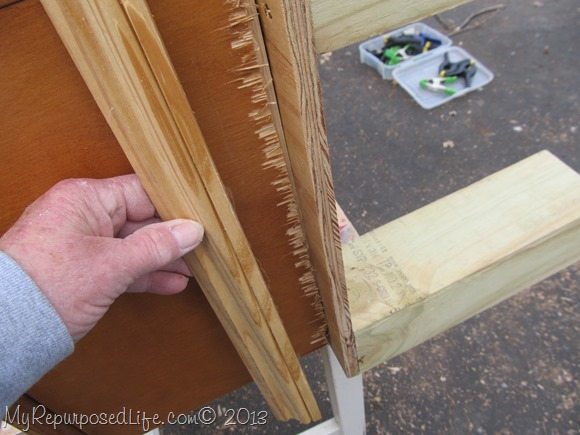 To cover up the chipped veneer, I selected some scrap trim pieces I had laying around.
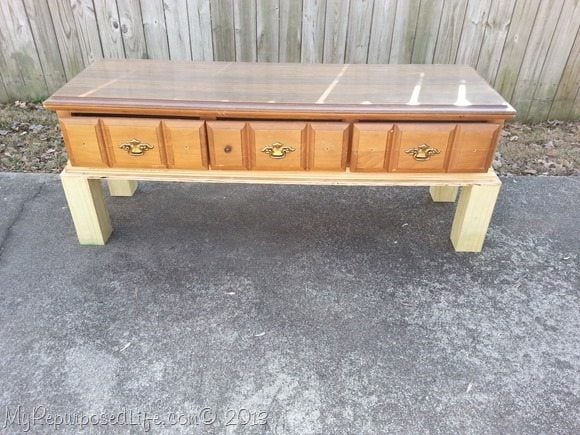 I purposely put the legs all the way to the edge…
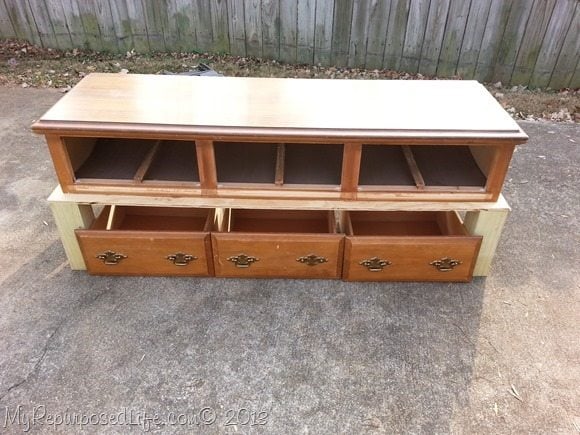 . . . so I could use all three drawers as seats (storage) underneath.
This stage was at the beginning of December when we had some warm(ish) weather. Then it turned cold, and I had to store it away.
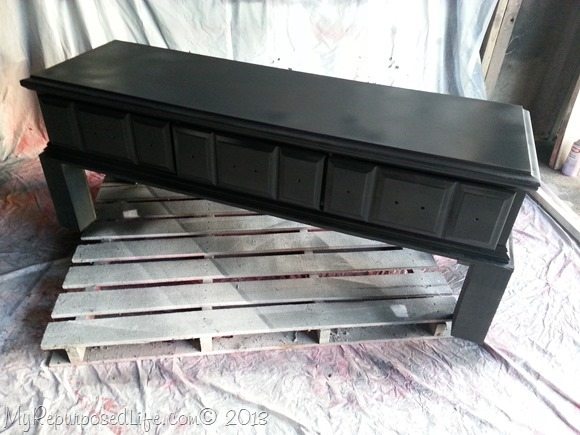 When the weather warmed up enough to paint, (a couple of days after Christmas) I gave it a quick coat of some DIY Chalky Primer with my HomeRight Finish Max .
I never really liked having the legs all the way to the edge. I didn’t look how it looked so boxy.
When I started working on the drawer/seats, I realized all three of them were not going to fit after all.
Time for plan B
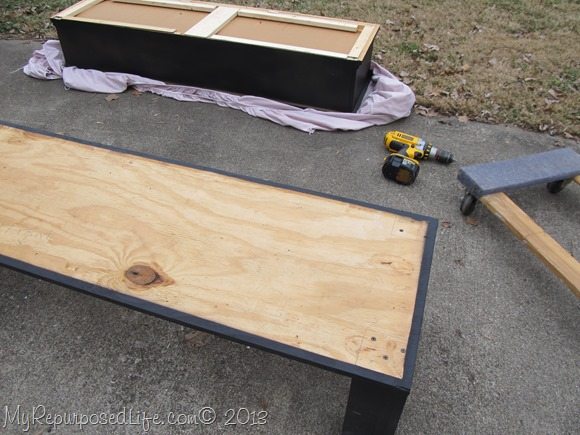 I removed the table from the base, then I removed all four legs. It wasn’t easy to do since I used the Gorilla Wood Glue, but I knew I would never be happy with it the way it was.
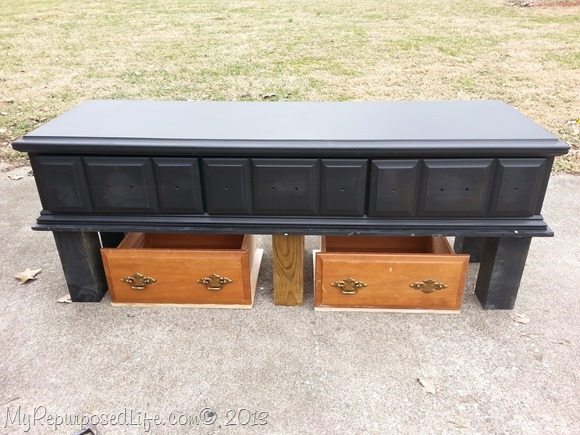 This is a dry fit to see if I like the legs—thinking about adding two more in the middle.
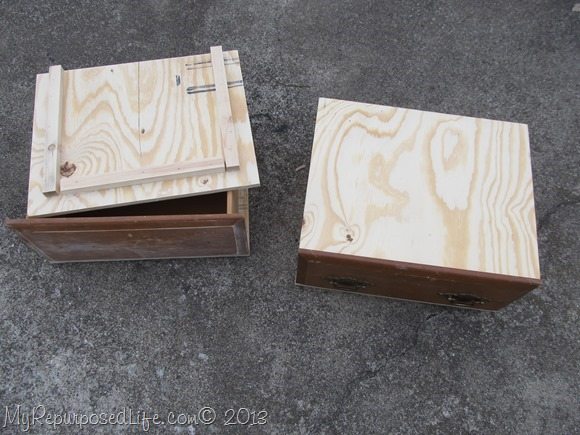 Meanwhile, I start finishing off the drawers. I added plywood to the bottom (so I can add wheels). Because it’s going to be for kids, I really didn’t want to hinge it because of fingers getting smashed, and the lid possibly being abused and coming off. I decided to have a lift off lid.
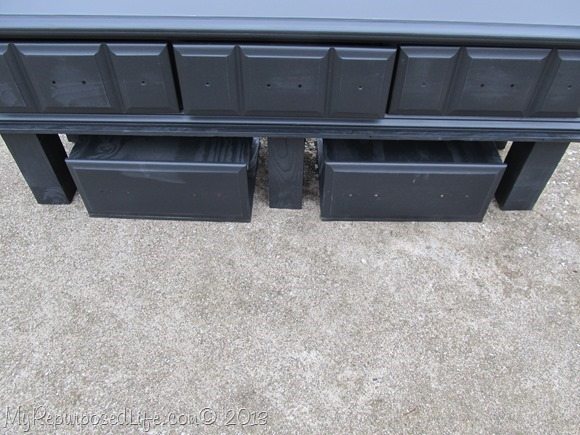 This is right after painting it. I didn’t want to shut the drawers because the were still a little tacky. You can see that I decided to add two more legs in the middle.
The weather turned cold again, so it is in storage for now.
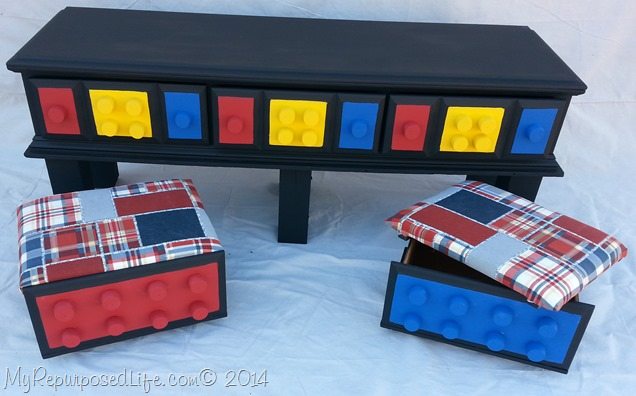
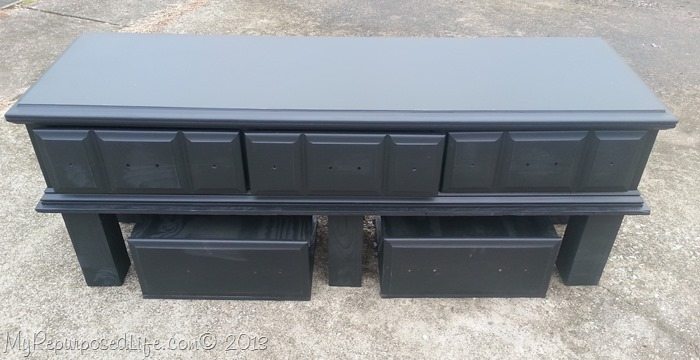 The seats will have wheels. This will make a great table for kids to sit or stand at. I have two ideas to finish it off. One idea would be a chalkboard table, the other being a Lego table. My cousin had mentioned she might be looking for one, so I got to thinking with all the storage this might make the perfect Lego table. We’ve never really had many Legos around here, so I need to figure out how to paint it and finish it off. The dresser drawers sort of look Lego(ish) don’t you think? I’d like to do some sort of Lego handles for the drawers. Have you ever made anything permanent by gluing Legos together?
I plan to cover the lids to make the seats softer. And of course it will be painted. The black is just a primer.
I’m open to suggestions to finish off this table. Can you think of a better use for it? Maybe a train table? What kind of kids table needs a lot of storage?
Hopefully we will have some warm weather soon so I can finish this project.
gail
see more repurposed dresser ideas here
EDITED TO ADD:
It’s a DIY Lego Table


Wow! That is impressive. Thanks for sharing.
Great imagination! Lego table is perfect. I would paint it white so the Lego pieces stand out, and possibly add a 1″ x 1″ trim piece on the table top sides and back to hem in those pesky pieces that always try to run away.
My Grandestson needs a table like this – I would make one end a busy board – he loves the one is PaPa made him for Christmas. He is always twisting the locks, turning on and off the switches and playing with the caster wheels all mounted to the sides of a dry erase/chalk board. then I would paint a “road” on the other half for cars and then all the drawers can be used for the cars and action figures (little people at this age) and balls that little boys want to play with. I think its a fabulous table!!
Clever and great idea!!!
Wonderful Simply Wonderful!! I love it and have a similar item at home waiting for a bolt of creativty to hit me.
Thanks for the strike of lightening. Now I can show my Hunny Bunny what I see. He’s pretty handy.
Thanks for sharing.
Wonderful idea! I read some of the comments above, but as a former daycare owner, I like painting the top with chalkboard paint so the kids, or parents, could use it any way they want. You can get large lego plates, but they don’t need to be screwed down. They could draw roads, train tracks, houses for toy cars. It could be used as an art table with a big roll of paper on the end…I say find a buyer and customize it for them!
I totally agree with you Cindy after reading all the comments on this post and on facebook. So many clever ideas out there.
thank you for your input!
gail
My 2 year old grandson, his baby brother, and parents are living with me so I must vote for a lego or train table. I love the idea of being able to store legos or Thomas the train engine away out of sight! How clever and talented at repurposing you are! By the way, having taught school for over 35 years, I have never understood how anyone in their right mind could be thrilled over the idea of blackboard paint. There is nothing like a steady diet of chalk dust to dull the thrill.
I have a suggestion for the bench…cartoon characters. I’m not sure you can still find it but I have some scrap fabric of Scooby Doo. My grandkids love Scooby Doo so for me that would work. But I do know JoAnn’s has character fabrics for Disney and SpongeBob. As for the table, a craft table for kids is an idea. the crafting tools, markers, crayons, and such, can be stored in the drawers with paper and coloring books.
It is so fun to see what you come up with Gail!!! So very awesome and inspiring! I just read all the comments, there were a million! I think it would be so cute with any of the ideas, but it seems Lego table is the most popular, I know that is what my boys need! You are right the drawers could totally be made into lego pieces, which would be super fun! Can’t wait to see what you do! Hugs!
Hi, Gail.. i absolutely love these two projects,, especially the last one. I like the lego table idea ,, or what about some kind of cool top (roadways, street signs, etc) for hot wheel cars .. lots of ways to go with it.. cant wait to see it all finished.
I so wish I could think up these ideas. Thanks for sharing your work. That $20.00 gave you the material you were able to re-create with, helped out those who benefit from the thrift store and gave joy to those of us who love to see your projects. Thanks so much, Sue Wright
Awesome projects! Lego table would be great, if you could make it a little more universal for like: K’Nex, Lincoln Logs, Erector Sets, etc. or especially for a girl and her Barbie stuff.
Since I have all boys, the Lego table idea is fantastic. If you do it, glue Lego baseplates to the top. Then there is a built in surface to start building on! A 10 in by 10 in plate is $5 at Lego.com, but you may be able to find some used for cheaper. I glued some of these to a TV tray to make a portable Lego table, and my son loves it.
I would buy or make circular knobs for the drawers so they LOOK like giand lego blocks if thats what it’s going to be used for! Also- you could put a very thin frame of some sort around the edge of the table so puzzle pieces or legos or whatever isnt so easily slid off the edge. and ruined. One an 1/8 of an inch or maybe even a BIT thinner would do the trick. I LOVE the idea of that dresser becoming TWO different peices, too. Also- could you have turned the top into a low coffee/coctail table instead? Just an idea. LOVE your blog!!!! xx
Gail I do believe you’re a creative genius! I would totally make it a lego table or or a ‘creative station’ for kids, mine were never into lego’s but crayons, paints, beads and construction paper other stuff were always laying around. Add a roll of paper on the side and it would be perfect to draw and paint on or easy clean up for glued disasters…errr creations!
I wonder if you could make a reversible top, Lego on one side reversible to smooth on the other? (Sorry if that was already mentioned in comments.) Not sure how you’d keep it secure, though. I think this is one of your best ideas yet, Gail. I wish I’d had it when my kids were young.
Love what you did! it looks awesome! Train table would be cool! or Legos! I havent ever done anything like this before but looks like fun!
Love the idea, I use to cringe when people would paint over wood, but I’m a convert now and love this idea.
How DO you think up these projects!? I’m always in total AWE…….I love what you’ve done with this old dresser, and so will the lucky family that’s blessed with the finished product! Can’t wait to see it.
I too am amazed as to how your mind works so quickly when you see a item. Wish I could do all of that… !! Love the “leggo” table.. great idea. Can’t wait to see the finished project.
I really admire your ability to see great projects in something as simple as a dresser! I would never have imagined any of that.
Love both projects that came out of one dresser!!!
u r a very talented lady…..we r thankful to have u in r family Erin…thanks to that darling hubby “u belong to me too”
I’m just not sure how a mind has to work to come up with turning a dresser upside down and having it look better and more useful than when it was right side up. I would never have thought of that, but now that I’ve seen it, I’ll store it in my mind.
As always you amaze me!! I wish my brain worked the way your does. I would not have thought of cutting it in half and make two projects out of it in a million years!!! Your creativity always inspires me. I am opening up my own store with lots of used furniture and I hope I can learn to use all the great power tools and be as good as your are!!! I got a spray painter for Christmas!!! Woot!!!!!! just like yours!!!! Have a great day!!! I will be posting pics of my store soon!!!
s always you amaze me!! I wish my brain worked the way your does. I would not have thought of cutting it in half and make two projects out of it in a million years!!! Your creativity always inspires me. I am opening up my own store with lots of used furniture and I hope I can learn to use all the great power tools and be as good as your are!!! I got a spray painter for Christmas!!! Woot!!!!!! just like yours!!!! Have a great day!!! I will be posting pics of my store soon!!!
Will make a great Lego table. Maybe just paint each drawer front a bright Lego colour, red blue green white yellow, and leave the rest black?
Kids love Lego and mom’s love somewhere to store them!
It’s amazing what happens to a piece of furniture after you work your magic. Love it!
I saw a table like this several years ago that was turned into a sandbox table. You put up an edge several inches high around the table and then fill it with sand. The edging keeps the sand from coming out, and you can keep all sorts of sand toys in the drawers underneath. Kids LOVE it. We got it for our church’s primary age Sunday School class and they spent much of their time playing there. I was amazed!
Love the two projects. If you add a Lego base I just wouldn’t permanently attach it. So the kids can also do arts and crafts. Also if it’s flip able a car track could be painted on the other side. Or some kind of boardgame design or yard design for a little girls dolls. Love all your ideas. Very inspiring.
I WOULD BUY BOTH PIECES! LOVE THEM!!!! I HAVE TWO UPRIGHT DRESSERS I NEED SOMETHING NEAT DONE WITH BUT I AM NOT CREATIVE, GOT ANY IDEAS?
Thanks for sharing …. this is a great idea !
We have 4 boys… and yes there was a ton of buckets full of Lego in our house. We are a blended family and when we got married, the boys helped to design our wedding cake stand, using Legos. It was nice and colourful and the boys and all our family loved the idea !
It’s been 13 years since we married and the boys are working or in college/university now . The lego days are over for now… till we get some grandkids !
I love the bench and drawers. I may have to do that. Do you plan a cushion later? If it were mine, I’d probably upholster a sheet of plywood and just set it on top of what you’ve got. You probably already already know this. But you can minimize the chipped veneer while cutting by taping it first or using thin scrap clamped over it and cutting both. In this case you may have planned from the start to cover it with more trim.
AWESOME!
This is ADORABLE!! I was also thinking that maybe this could be used for an entertainment piece for a flat screen /DVD/Xbox etc.
Also for like a table by the front door to stash stuff when your coming & going daily; like mittens/hats / little shoes(in drawers) , keys, etc.
Your incredibly talented, definitely makes be more aware in others trash so I can reinvent the “treasure” that lies beneath! Great work, & thanks for sharing!! 🙂
I like the idea of using it for a Victorian doll house. You can put the items for furnishing, lighting, building in the drawers along with glue gun, paint and brushes, etc. Love the idea.
I’m always inspired by you. I’m just a chicken to try a project like this. I have a cheap little plait table for my granddaughter. It has a plain top and then a little insert (with nubs) for legos. Maybe you could make the table really multipurpose by having a craft table with a lego topper. Don’t know where you could buy that, but I’m sure you could find out.
Thanks for all your great posts!
Both pieces came out positively amazing, Gail! Incredible job. Isn’t it one of the best feelings in the world to be able to turn someone else’s “trash” into your very own treasure? I recently found an old wooden desk on the side of the road and, with my husband, transformed it into two nightstands. Keep up the great work, you’re an inspiration to us all!
I love this idea…always have extra used furniture from our many houses and homes we furnished over the years in our evangelism…your work just amazes me..I look at every project …storing it in my head and computer for references and ideas…just love you work and imagination..my idea for your bench would of been to add round fat legs on the bench..not tall ones but like maybe six in or there about ..just to dress it up some..not that it needed it but for my own personal look I’d like. Love your work and imagination !! keep it up you have a fan !! right here in Eufaula /Longtown , Ok !
What a great table! If you’re turning it into a Lego table it would look cute painted in the classic Lego colors and in block shapes just like the pieces. I can’t wait to see what you do with it.
If you use it as a Lego table, you can attach a green Lego mat to the top for building on. I LOVE his project and would have made it for my kids when they were small. Hmmmm, perhaps any future grandkids!
you are so clever!!! what a great tv stand it would be now!
Hot wheel cars or matchbox cars. You can draw a road on the top and store the cars. And for girls we are all about Barbie here so I would have to set it up with different rooms and clean up would be easy.
Love the bench, like the idea of the rolling seats. Still thinking about the table, for me, to much resemblance to a coffin.
I found your site right after I picked up a baby crib at my neighbors curb. I had no idea why I got it, except I did not want to see it go to waste. I plan to make the bench with it. The dresser above is coming out great. My suggestion would be that you would change the color to primary colors if it is for kids. The black just doesn’t seem to go with the look. I am totally impressed with your creativity and can’t wait to see what you come up with next. I am inspired!!!
amazing as ALWAYS!
Wonderful! You are so creative!
Cute idea! If you did a Lego table, they have Lego “bases” you could cover the top with. The storage is great idea. A train table is also an awesome idea. You could paint a scene on the top.
What a great job…..loved the ideas and the journal of how it is done is just as impressive….Thanks for sharing!
Wonderful project genius. Thanks for sharing
Id put chalk paint on top. What amazing craftsmen u r. Great job
Legos or even some sort of craft table (says the mom of 1 boy who had a million Legos and a girl who became and art major)! I really like this project because I have a similar dresser…I’ll show this post to DL.
Wonderful projects! And yes, Lego table, excellent idea.
Lego table totally! If thats what you end up using it for, you should make the drawer pulls out of legos or something whimsical like that!
My girls had an awful lot of sylvanian families stuff…. you could paint a village plan on top… paths/lanes etc and all the miniscule stuff and characters and furniture could be stored underneath….. fantastic repurposing idea… love your site and work…. very inspiring !!!
Amazing! This would be perfect for Lego’s. And the seats could be used to store the booklets or separate Lego men from the bricks. As a mom of 3 boys who ask for -nothing- but Lego’s for Birthdays and Christmas, I could sure use one of these at my house. Guess it’s time to hit the second hand stores. Great Job!
I did something like this some 30 years ago. I needed place for standing practice for a developmentally disabled child. I used some scrap lumber to make an edge the sides and back of the table so that toys (or legos)would not fall off the back. I then took one of those extremely inexpensive closet mirrors, turned it on it’s side, and attached it to the back of the table. I put the table against a wall (for stability). This table was a good as anything in a therapy institute to encourage standing, and we used it for years, as the child in question grew very slowly. Thanks for reminding me of all this :). Oh, and the the only thing I had to go out and buy was a can of red spray paint. Every thing else we had lying around.
When you mentioned Legos,I saw the parts that looked like Legos being painted fun Lego colors,red,blue,yellow,etc
Then perhaps a lego themed fabric,if you could find any,this is a great project,enjoy
Love It!!!!!!!!!! I have a dresser almost EXACTLY like this one just sitting in storage!! I’m so glad that you posted this!! I plan to make this my spring project, as I have 3 grandchildren under the age of 4. You did a wonderful job! It’s so creative!! Thank you for sharing!! 🙂
You never cease to amaze me!!!!
Love it!!!!!!!!!!!!!!!!!!
How in the world do you see this potential when you see/buy the dresser?! Just love what you are doing to it!!
It would be perfect for Lego’s, cars (with a track on the table) or the trains!
Just want to say, wow, what great ideas! A fabulous job. My husband likes to do things like this also. Nothing like taking a old piece of furniture and refurbishing it to use in other ways. Good for you!
wish my husband could do things like this