Repurposed Headboard Sign
As an Amazon Associate, I earn from qualifying purchases.
This repurposed headboard sign isn’t too difficult to make. I used a power saw to cut the bed apart, but you could use a handsaw. Small bunk beds or twin headboards are fairly easy to find. This would even work with a larger bed, you would just cut more of the sides off if you wanted it to be on the smaller side.

%20sign%20from%20a%20headboard%20using%20spray%20paint%20and%20a%20stencil)
Twin Headboards Repurposed
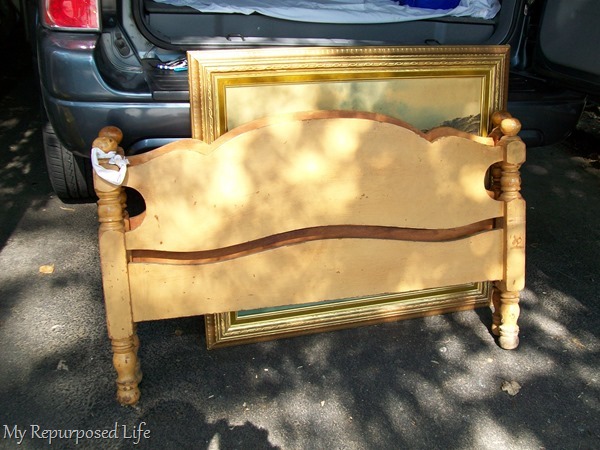
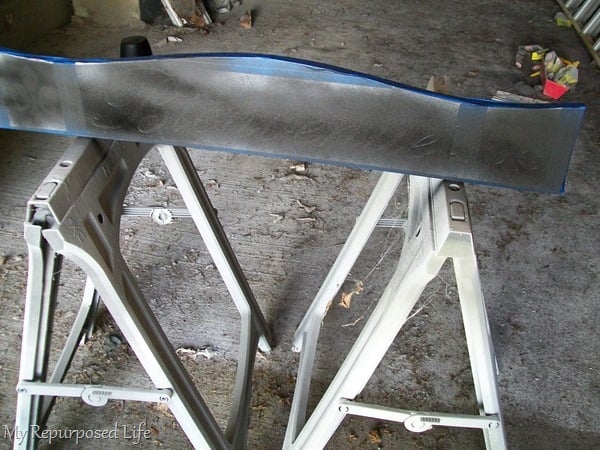
Do you remember these bed parts I got recently for $5.00? The one in the front is painted, while the one in the back had never been painted. I used my sawzall to cut the posts off of the headboard. (I used my compound miter saw to even up the ends after I cut them with the sawzall)
This sign was made with the bottom of the piece that was not painted.
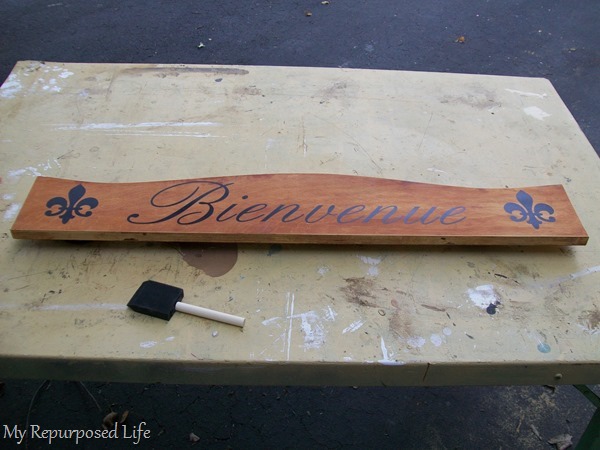
Using Contact Paper as a Stencil Material

I used some contact paper in my Silhouette to make some stencils. By the way, I still have the positive pieces to stencil another sign someday.
I prefer using contact paper to make one use stencils because it’s such a good deal. Generally, I buy one large roll, and cut it down the middle yielding me two nice rolls of 9″ material!
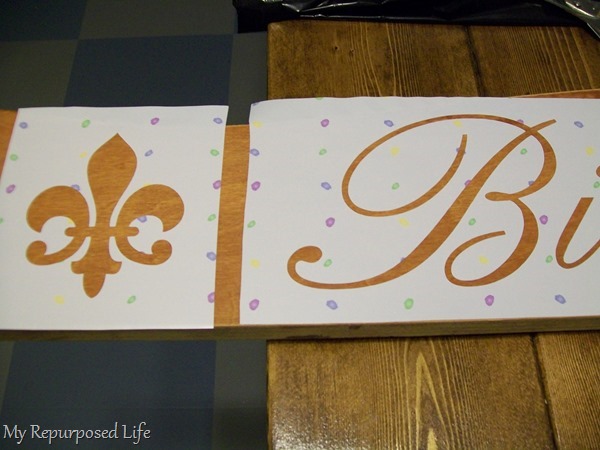
The word was very large and difficult to work with because the font was very “frilly”. However, I really feel it was worth the trouble in the end. Of course you could hand paint this sign, or use some other kind of stencil you purchase.
Spray Painting Repurposed Headboard Sign
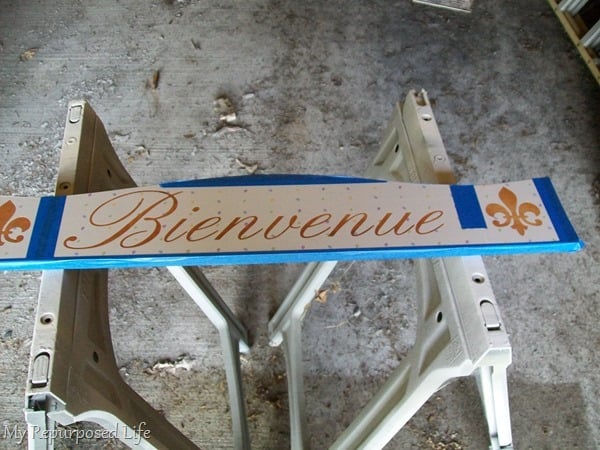
I used some Scotch Blue Painter’s tape to tape off the edges of my repurposed headboard sign.
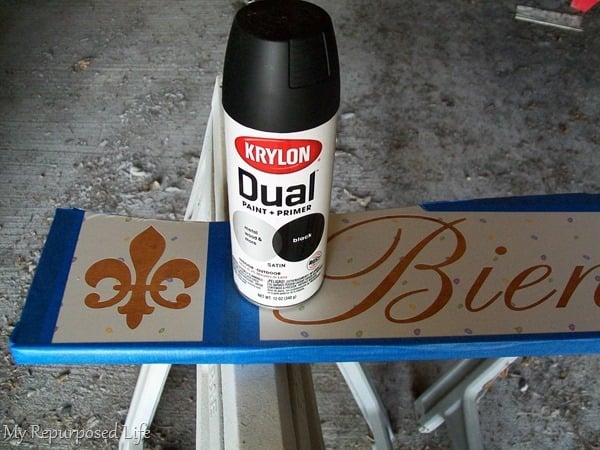
To make it easy on myself, I used some spray paint that is a paint and primer in one to spray paint the piece black.
Several light coats work best. I did it basically like I did the Welcome headboard bench.
DIY Wooden Bienvenue Sign
Wow! Do you LOVE it? After I removed the stencils, I was thrilled with the results. The fleur-de-lis were so crisp, they almost looked like stickers.
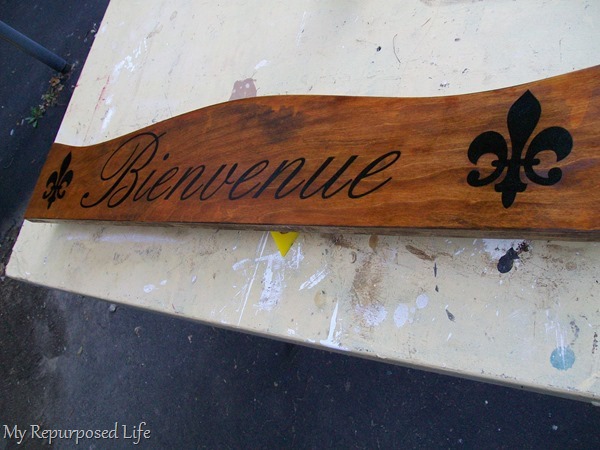
To give the sign a little shine, I applied some wipe-on poly right over the paint.. I wasn’t sure if it was going to work, but it did just fine. Not only does the wipe on poly give it a little shine, it also acts as a sealer! Bonus! It darkens the wood and makes it look richer.
I use d rings to hang all my larger signs.
Pretty Repurposed Headboard Sign
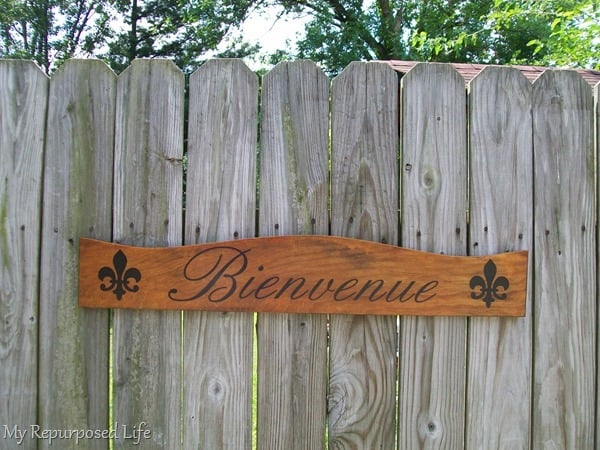
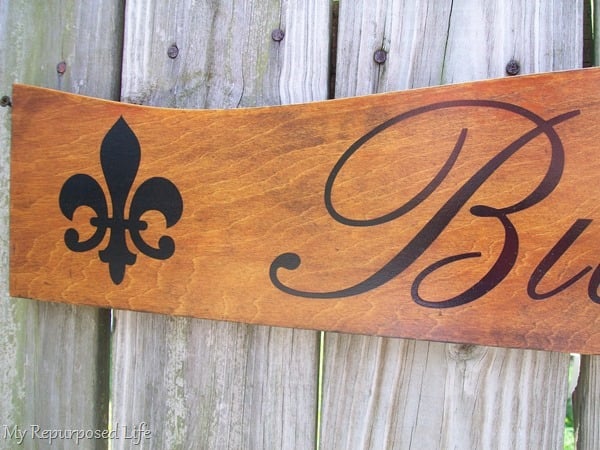
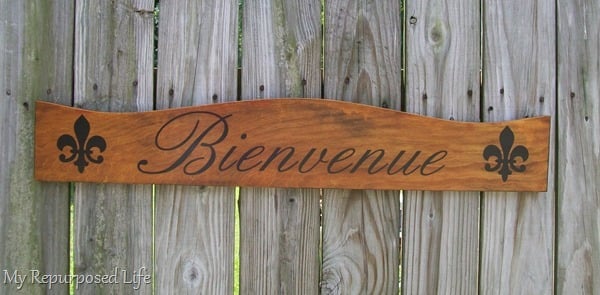
This might be one of my favorite signs. I really like the natural wood tone with the black paint. I made a Home–Where your story begins out of the larger top board. 
Are you a wood tone lover? Or do you prefer painted signs?
gail
I love this — I need to get a cricut!! I would also like a lesson on how to use one and use one with the contact paper — I love the crispness of the painting
Vickie,
I’ve never owned a cricket…. I have 3 Silhouette Machines! With all the YouTube channels, I’m sure you would be able to use either very easily!
I’m not sure if cricket owners use contact paper or not….
thanks for stopping by and taking the time to leave a comment!
gail
This is really beautiful!
looks great! I love the black on the wood tone too!
This sign turned out great. I like unpainted wood if it has a pretty grain, otherwise painted works for me.