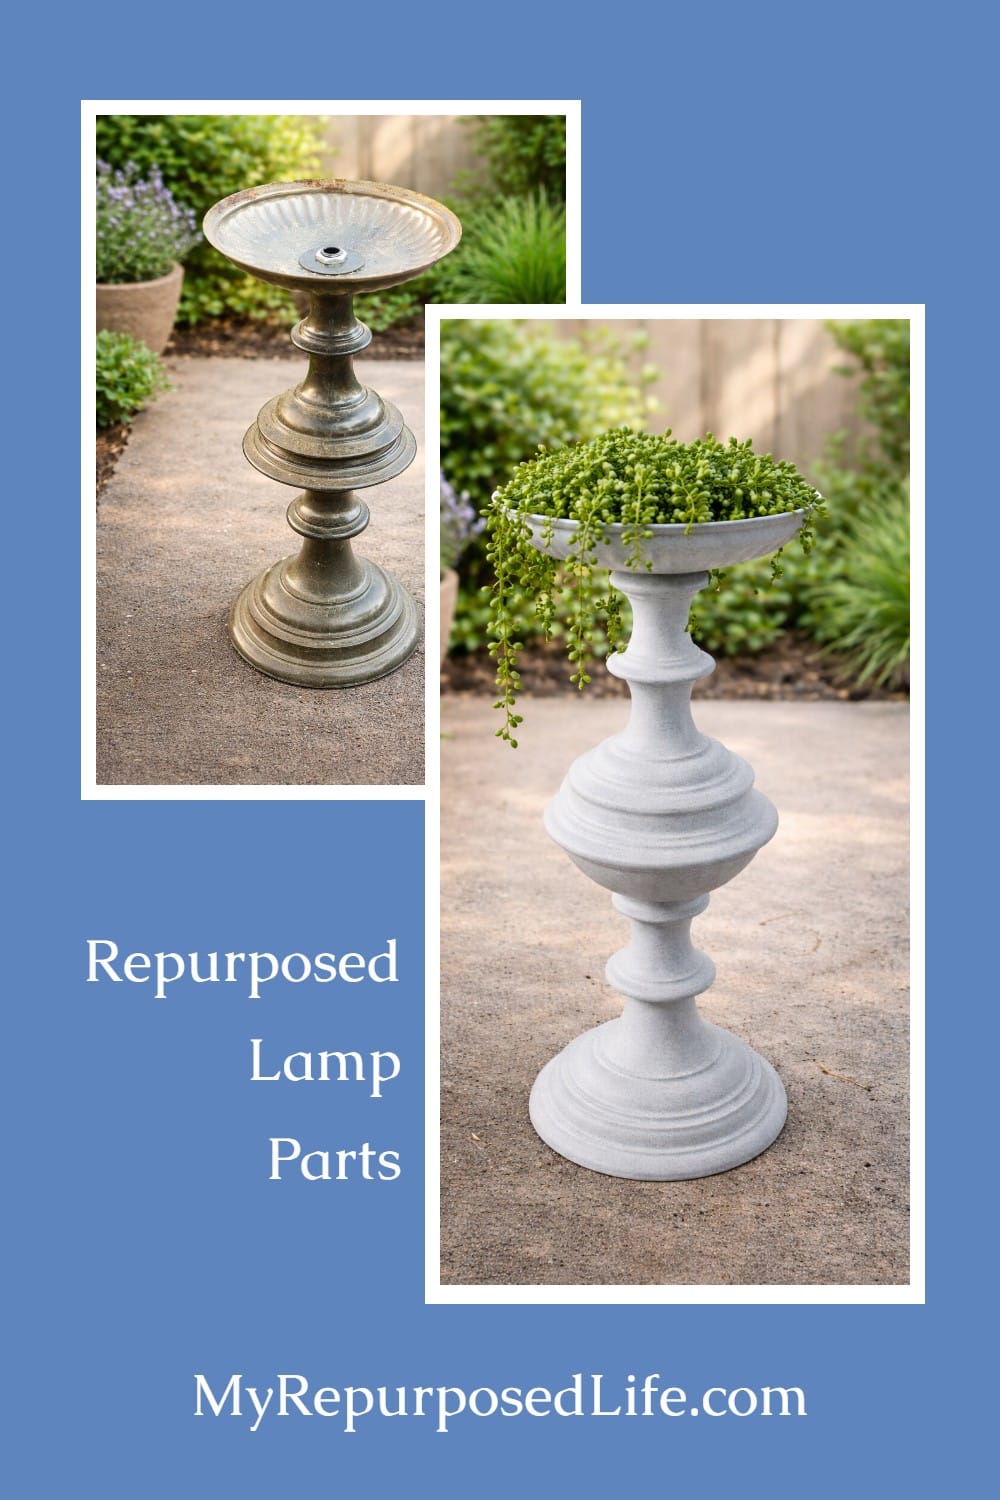
Repurposed Lamp Metal Plant Stand
As an Amazon Associate, I earn from qualifying purchases.
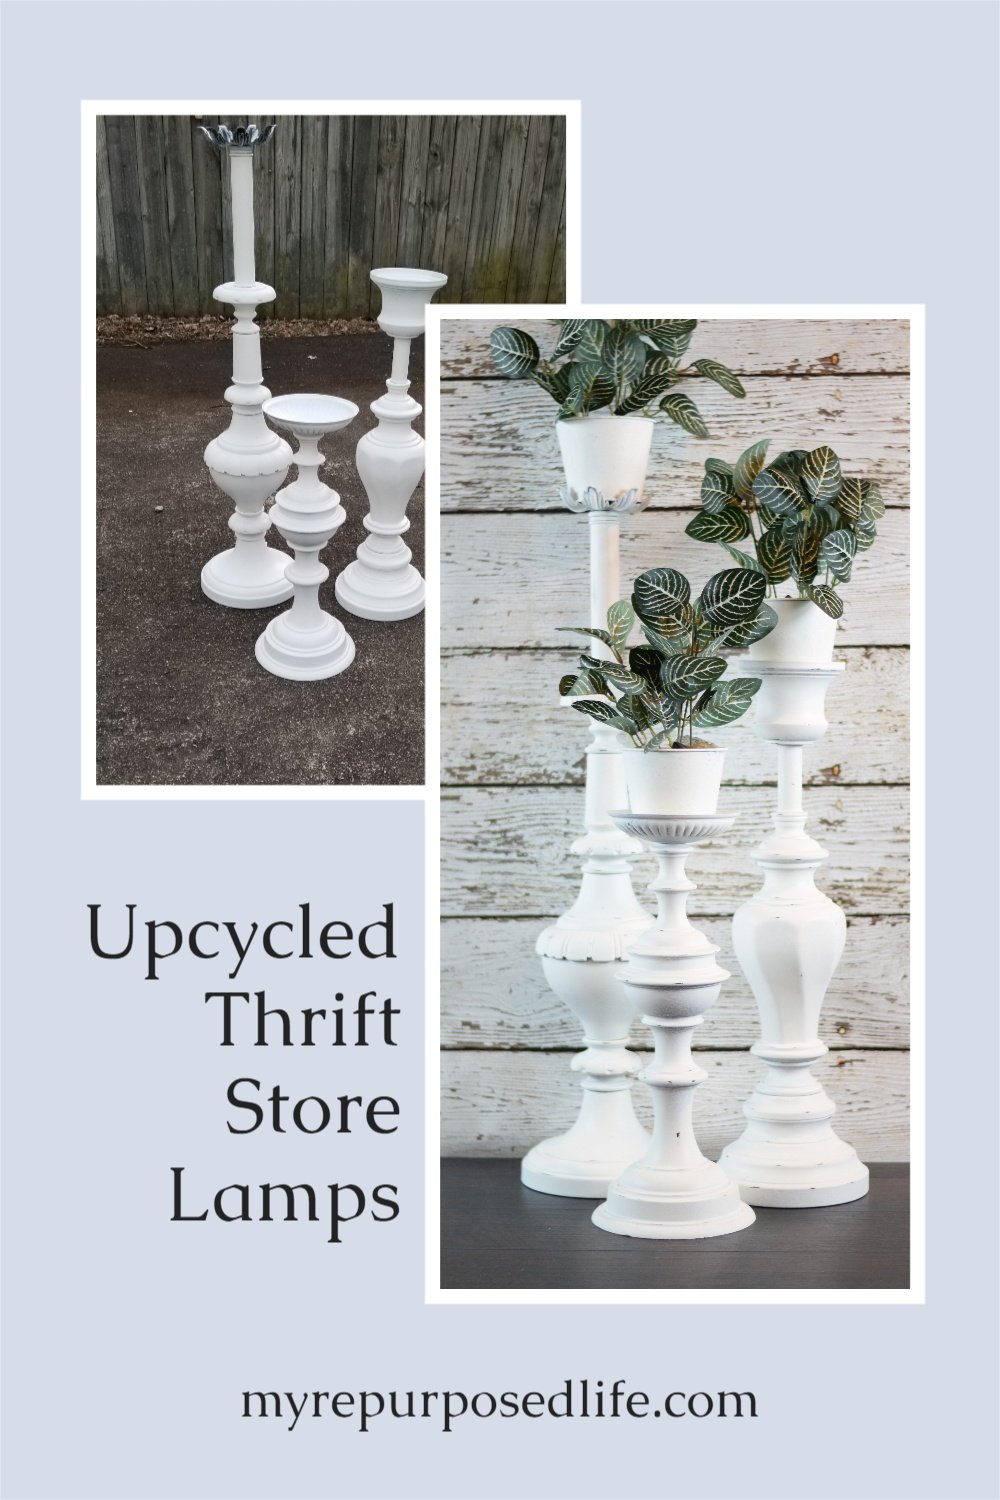
If you’ve ever come across an outdated lamp and thought, “There’s got to be a way to repurpose that,” you’re in the right place. This project is all about turning old lamps into one-of-a-kind plant stands. It’s a simple makeover that gives new purpose to forgotten lighting—and creates a charming way to show off your favorite plants indoors or out.
Let’s see how I transformed these misfit lamps.
Junky Lamps
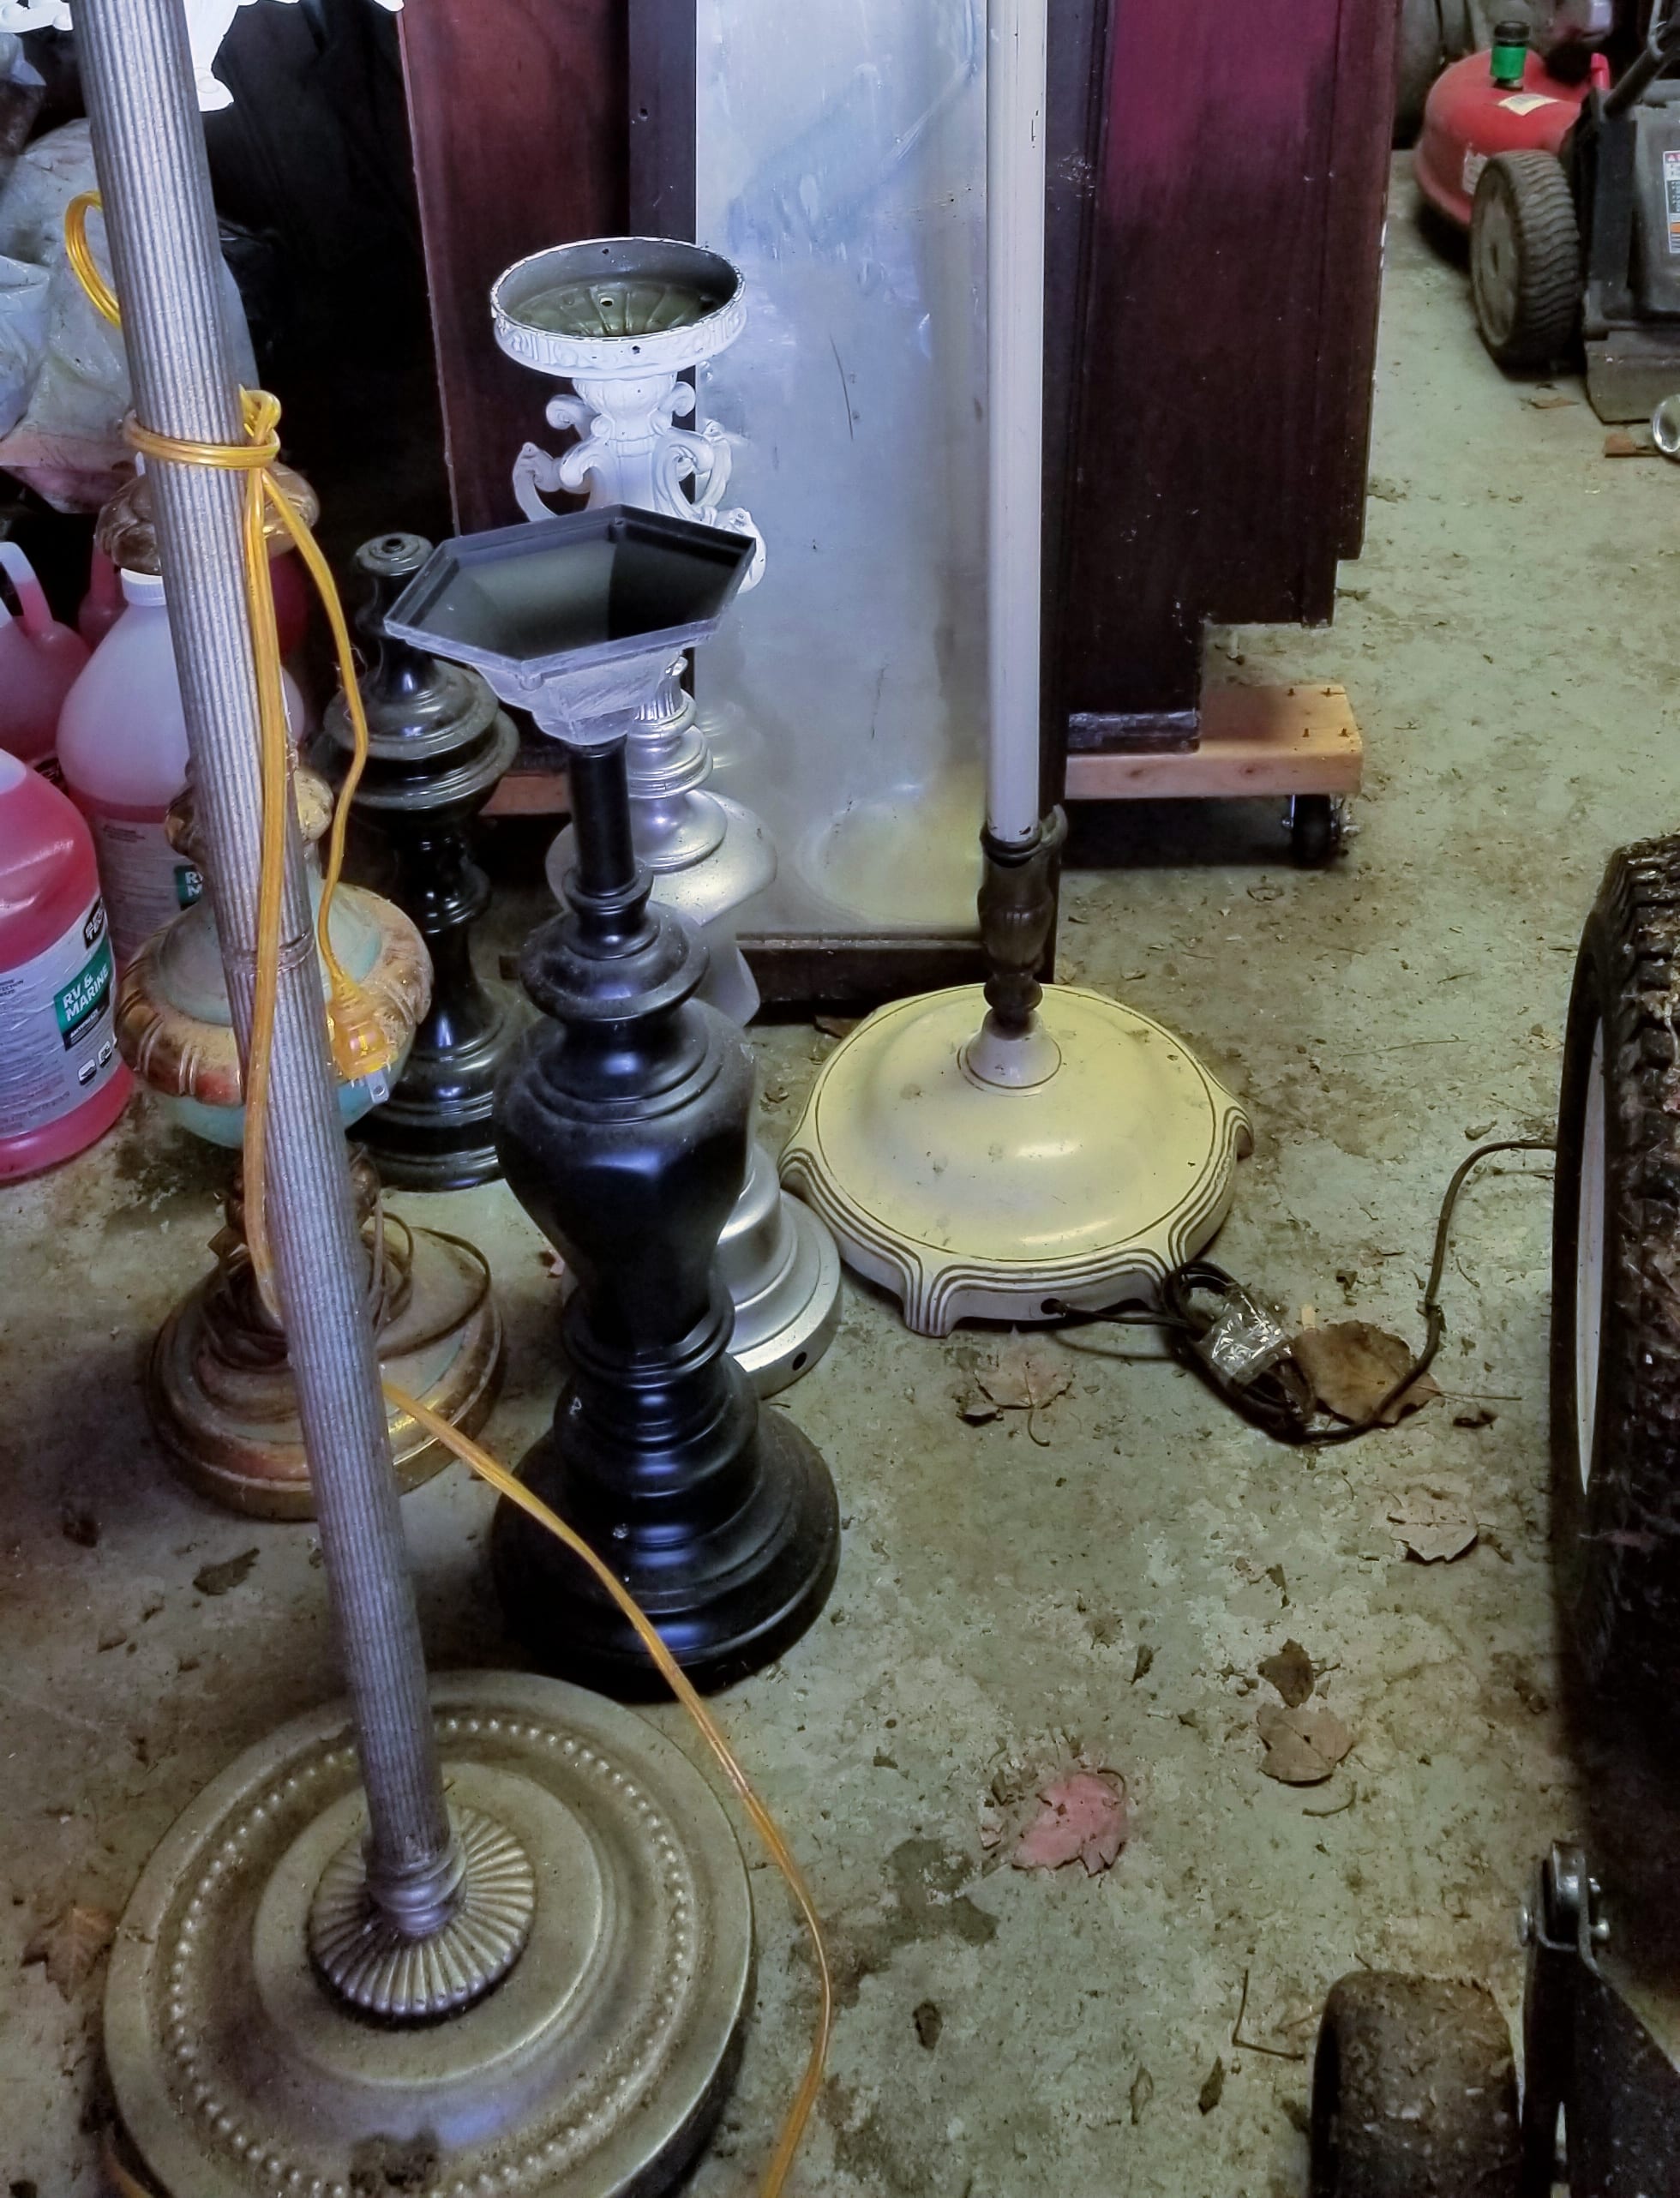
I have a thing for cheap lamps. I just can’t help but buy broken lamps of all sorts.
Assess Your Thrift Store Lamps

A few of the lamps had already been painted, then put in storage and never repurposed. You can see tools handy for this lamp base project, including vice grips, pliers, and wire snips.
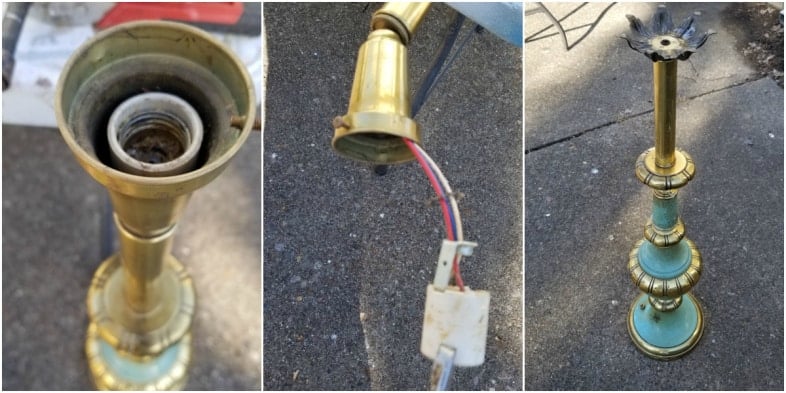
Mix and Match Lamp Parts
First, I started mixing and matching lamp parts to see if I could add interest to any of the upcycled lamps.
Remove All Wiring
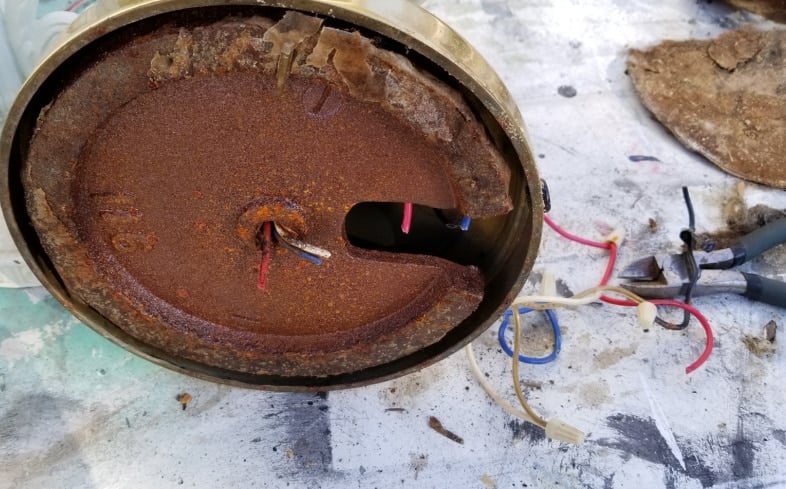
The very tall lamp still needed its wiring to be removed. This is where the snips come in handy. Whenever I part out a lamp, I save all the bits and pieces for future projects. If the lamp has good wiring, a socket, and a plug, I save those, too. In this case, the wiring and plug were very old and not worth saving.
Generally, to gut a repurposed lamp, you need to work on the base and the socket simultaneously. They are both connected to the threaded rod that runs through the entire lamp.
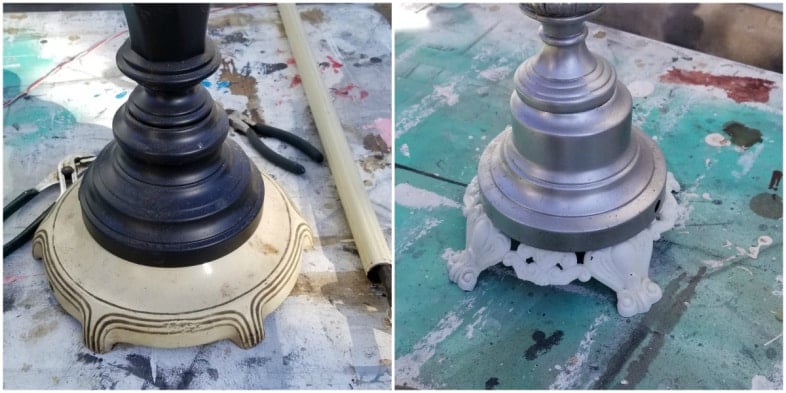
Clean and Sand Where Necessary
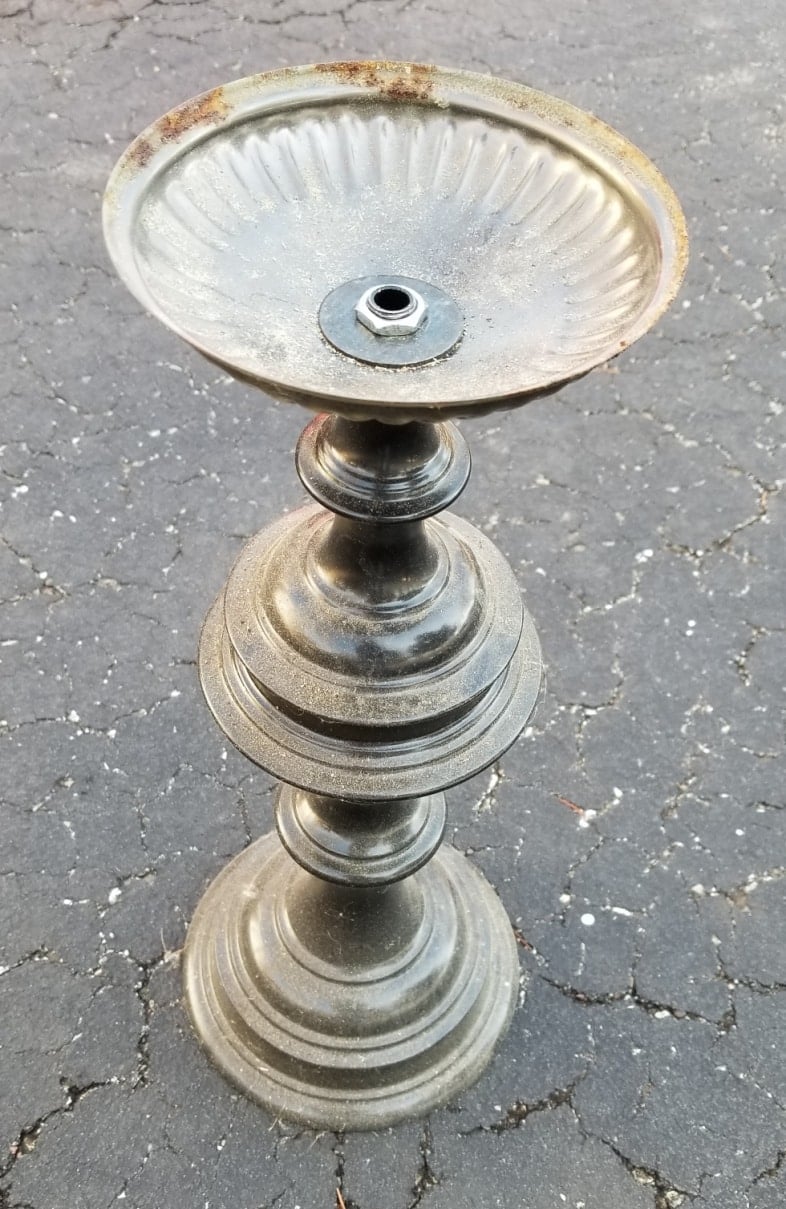
This lamp base was a simple fix. I added a small top piece that I found in my stash. See why it is handy to keep nuts and washers from past projects?
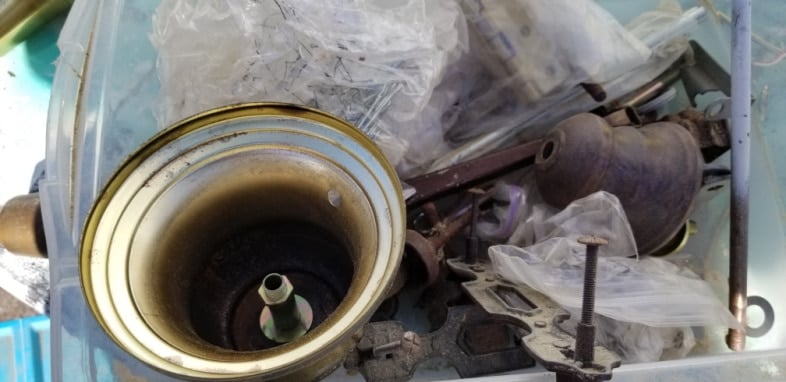
Here’s my messy collection of used lamp parts. That large bell-shaped piece was dismantled to be used on one of my lamp candlesticks.
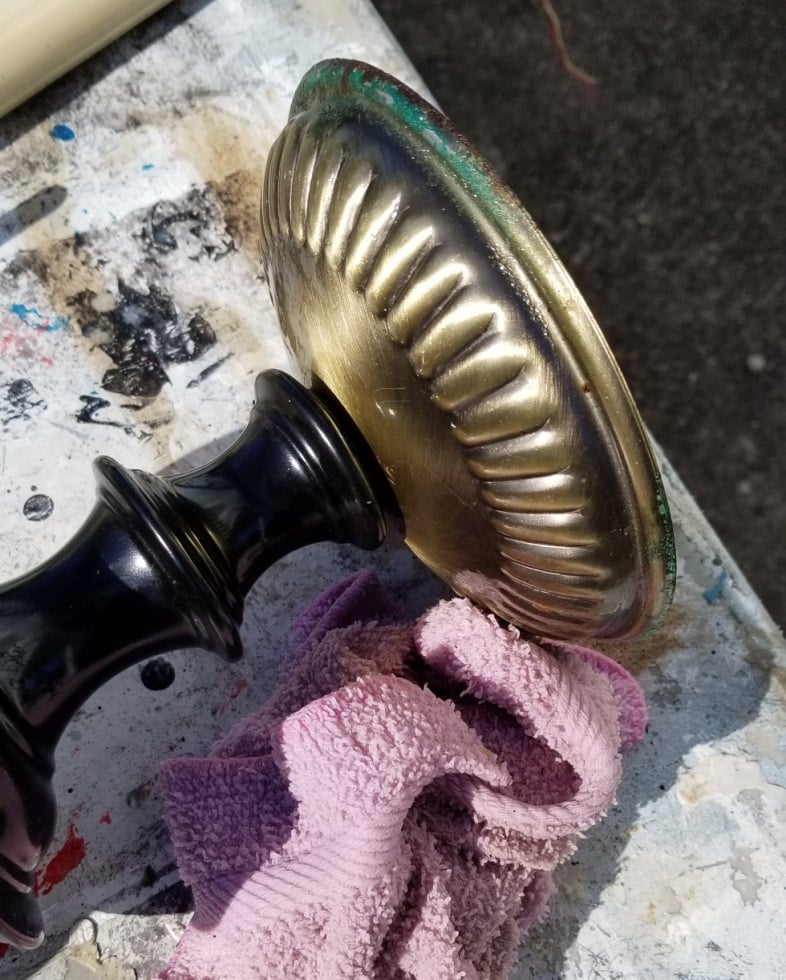
This piece needed to be sanded and cleaned well before it was ready to be painted.
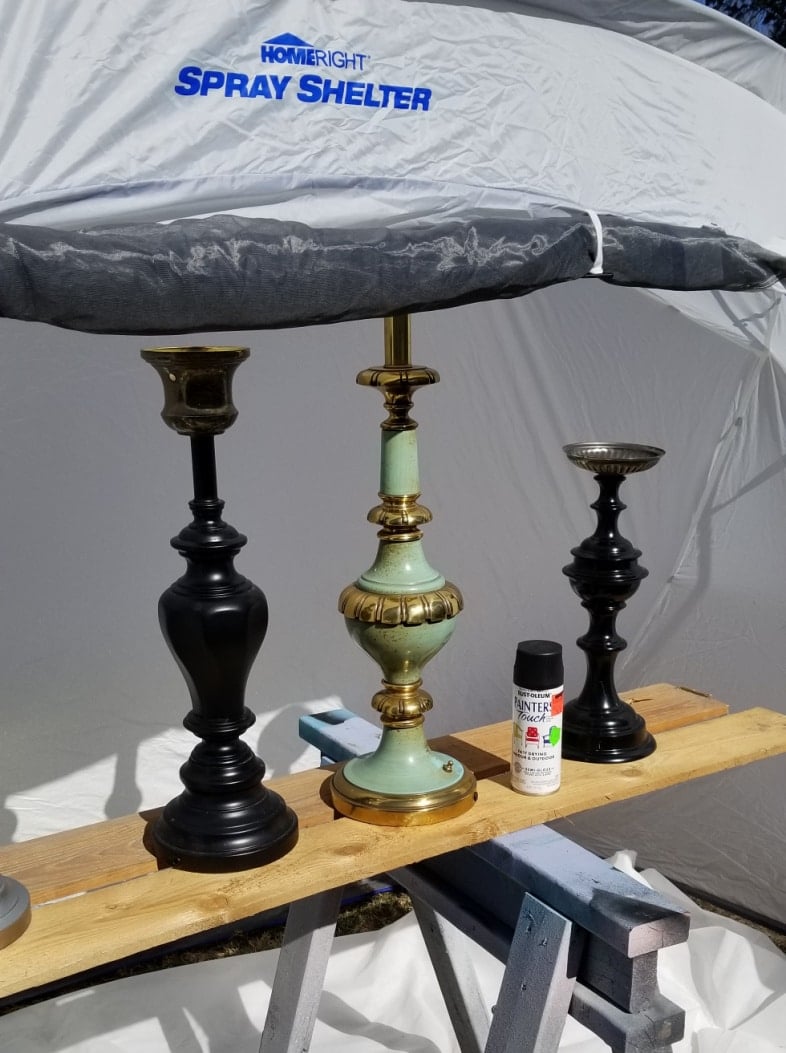
The large spray shelter can be used for spray painting when using your Finish Max paint sprayers.
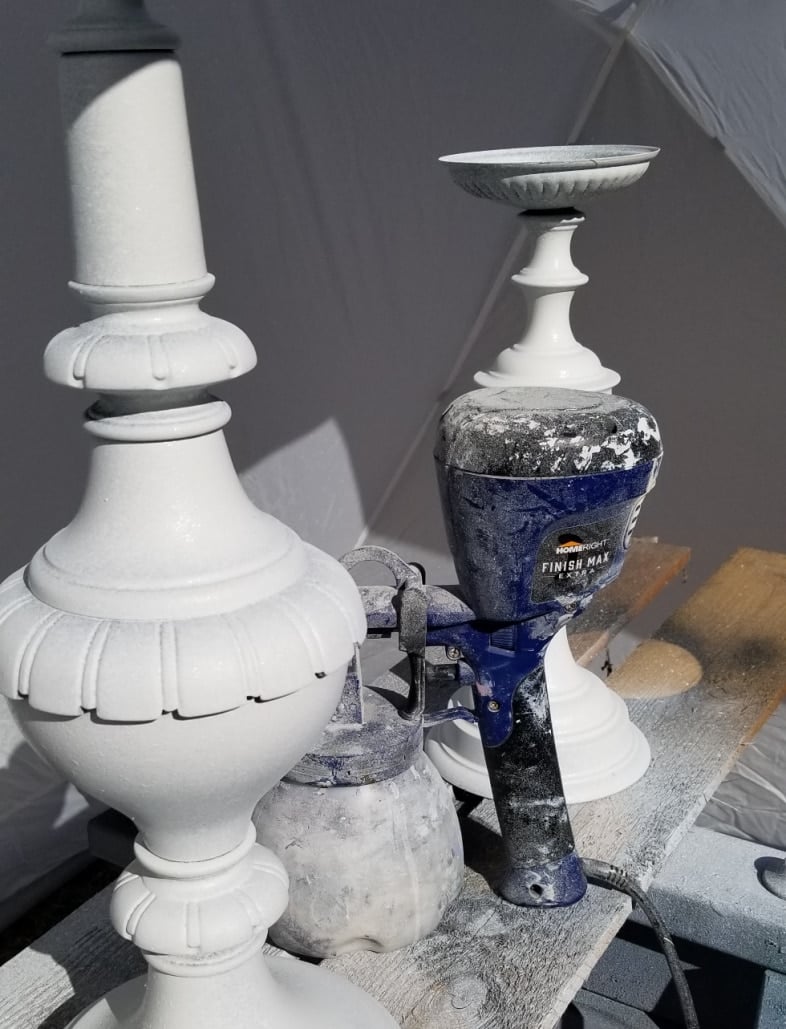
In this case, a chalky paint primer was mixed for usewith the Super Finish Max. Elevating your items on sawhorses makes the task easier.
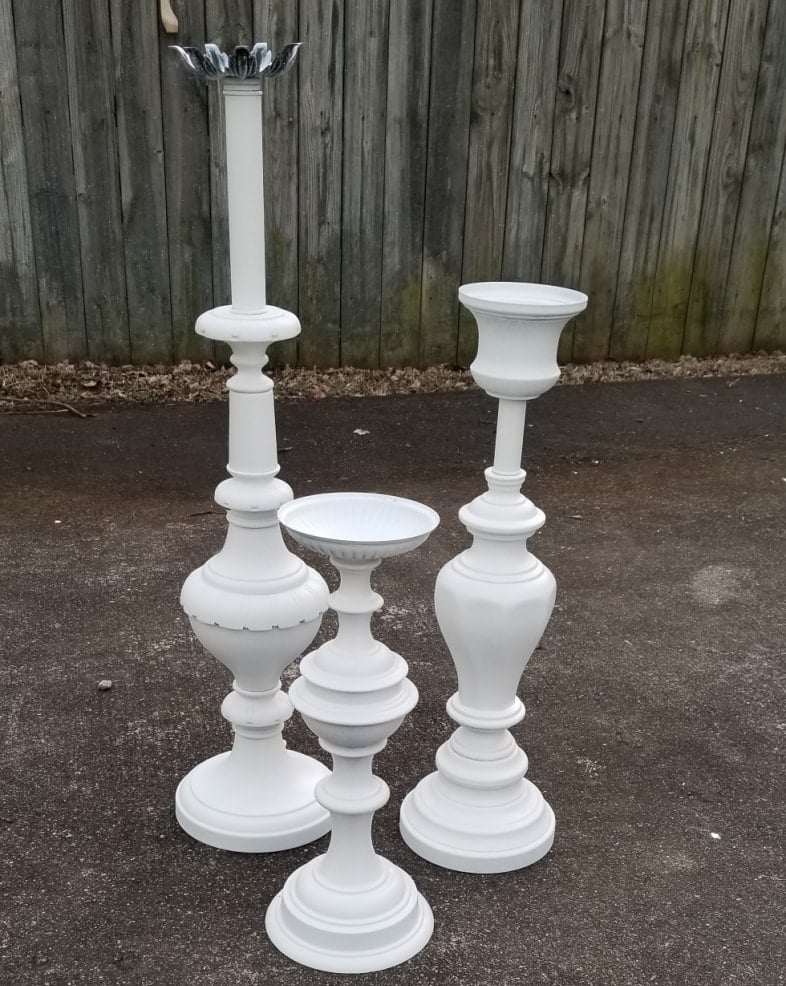
Painted Repurposed Lamps
So, spray a coat of black paint, then add the top coat of the chalky paint.
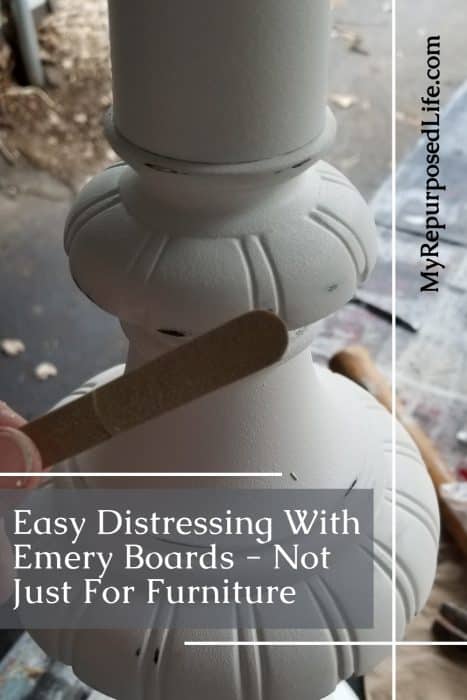
How to Distress With an Emery Board

I’ve been using these emery boards I bought on Amazon for years. Using the emery boards for distressing gives you more control than sandpaper on small areas. This is especially helpful when you want subtle distressing. I continued with this technique on the other two repurposed metal plant stands.
Click HERE to share this idea with your friends on Pinterest.
Repurposed Lamp Metal Plant Stands

Do you love them as much as I do? They currently reside in my hallway, and I smile when walking by them. The light distressing is a difficult choice—it is tough to know when to stop.


Candle Holders made from Repurposed Lamps
I have to say that I don’t love them as much as candle holders. What do you think? How would you use these repurposed lamps?
Want to try it? Grab a few cheap lamps, gut the wiring, and play with the pieces like a puzzle until the top feels “right.” Then paint and style it with a plant or a candle. Pin this so you can remember the steps the next time you see a broken lamp at the thrift store.
gail
See more upcycled lamp ideas here
I love these repurposed lamps! What did you as the top pieces for the plants? Why do you have sand the metal?
Thanks very much. I am excited to try this on 3 old lamps I have.
Lori
All the pieces were from abandoned lamps. If you look at thrift stores, many lamps are made up of several components. I just start taking them apart and mixing and matching the pieces. Maybe tuning a cheap BASE upside down to become a holder for a candle or potted plant. It’s really, really fun, like working a puzzle. Sanding the metal, roughing it up a bit allows the paint to adhere a little better. (or are you talking about when I used the emery board to distress?)
have fun!
These are beautiful! I have several of these lamps sitting in my garage that I’ve wanted to do this to forever! My healthy side hasn’t been with me for a long time so I haven’t done them yet but I will because now that I’ve seen yours I definitely love them! I knew they’d be gorgeous and they certainly are!
Shirley,
Thank you so much! I’m so happy you’re going to get busy on yours as soon as you’re feeling better! I know they will be beautiful!!
gail
Love these!! Thanks for your tips and tricks!
Thank you so much, and I appreciate you sharing this project on facebook!
gail
You are, without a doubt, the most talented person online!! I have followed you for many years now and you never cease to delight me and make me smile as I look at your beautiful projects!! Thank you so much for taking the time to share everything with all of us!!!
Doris
I appreciate you very kind comment so much. After receiving a really ugly comment in my inbox about my emails being BORING, It’s nice to hear such a sweet thing from a longtime reader. It made me smile.
thank you!!!
gail
they look wonderful. i like how you used the emery board for distressing.
Thanks Nova,
The emery board makes the distressing easier to control. It takes a little more patience, but I think totally worth it.
gail
I love this. I’m gonna go get me some for my garden. Your a genius 🙂
awww you’re so sweet Roseann! Thank you. I’m so happy you love my project. Lamps are sooooo plentiful at thrift stores (and my garage) heheheh
gail