• Skip to primary navigation
  • Skip to main content
  • Skip to primary sidebar
  • Start Here
  • Shop Favorites
  • About
    • Welcome To My Repurposed Life Home of Repurposed Furniture
    • More About Gail
    • Disclosure
    • Privacy Information
  • Gallery
    • Repurposed Furniture
  • Repurposed Items
    • Building Supplies
    • Miscellaneous Household Items
    • Picture Frame/Chalk Board
  • DIY
    • Home Reno
    • outdoor living
    • Painting
    • Shop Talk
    • Tips for Around the House
    • Build It
      • Furniture
      • Home Decor
      • Storage
    • Crafts
      • Dollar Store
      • Easy
      • Holidays Seasonal
  • Furniture
    • Chair
    • Desk
    • Dresser/Chest
    • Headboard | Bed Parts | Cribs
    • Kids Furniture
    • Table
    • Kids Furniture
My Repurposed Life® Rescue Re-imagine Repeat
menu icon
go to homepage
subscribe
search icon
Homepage link
  • About
  • Start Here
  • Project Index
  • Furniture
  • Subscribe
    • Email
    • Facebook
    • Instagram
    • Pinterest
    • RSS
    • Twitter
  • ×

    Home » DIY » Build It » Repurposed Window Cabinets

    Repurposed Window Cabinets

    Published by Gail | Published July 24, 2018 | Updated March 6, 2023
    As an Amazon Associate I earn from qualifying purchases.

    Pin
    Share
    Tweet
    How to make repurposed window cabinets -- step by step directions on how to build the cabinet, put legs on it and use windows for doors. #MyRepurposedLife #Repurposed #windows #cabinets via @repurposedlifeHow to make repurposed window cabinets -- step by step directions on how to build the cabinet, put legs on it and use windows for doors. #MyRepurposedLife #Repurposed #windows #cabinets via @repurposedlife
    How to make repurposed window cabinets

    Friends and family know I collect JUNK. People love to unload their unwanted items on me as much as I love getting random junky finds.
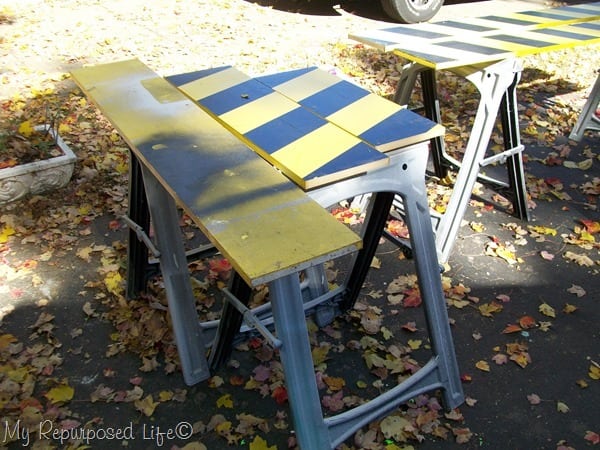
      MDF is not my "go to" building material, but I wouldn't turn it down if offered to me. Nor would I throw it out.

    repurposed windows

    I always have old windows in storage. Many times I even have matching windows as in this case. Since I was making two window cabinets, I wanted to use two windows that matched.
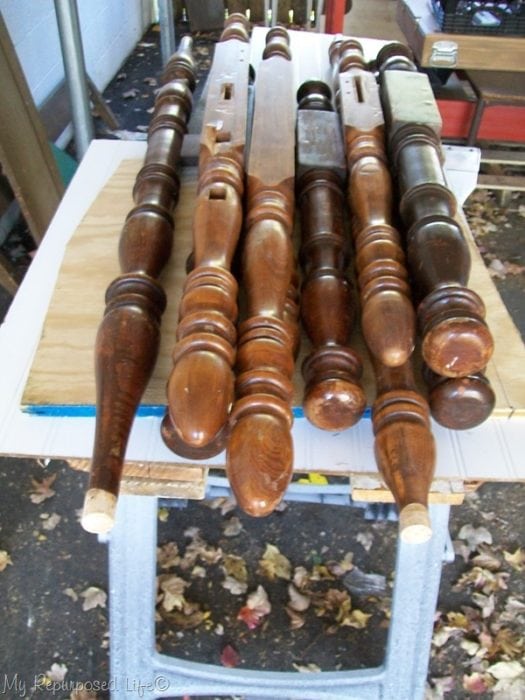
    bed parts and spindles

    My friend Missy brought me all these spare bed parts from her mom to use on these window cabinets.
    *This post contains affiliate links, read more here*

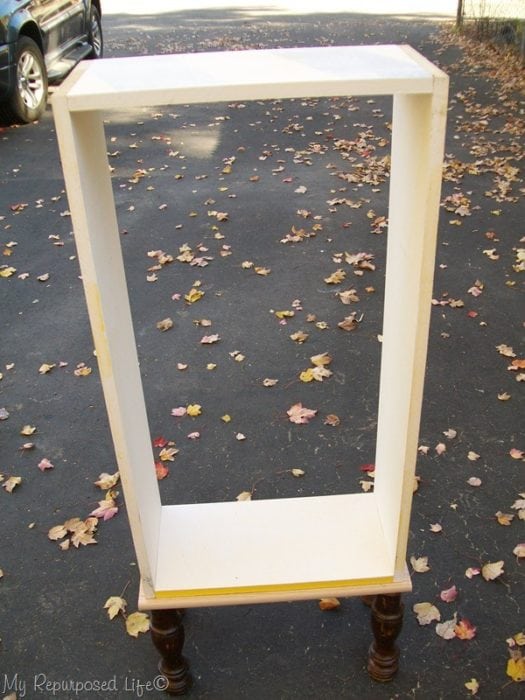
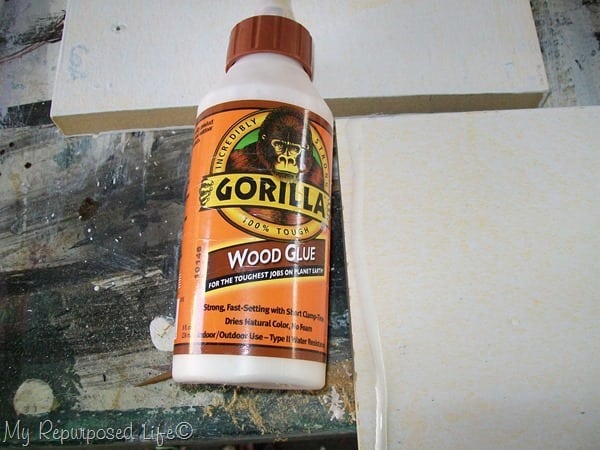
    After putting two coats of primer on the mdf wood, I got busy building a standard box to fit the size of the windows. I used Gorilla wood glue for a strong hold.

    .
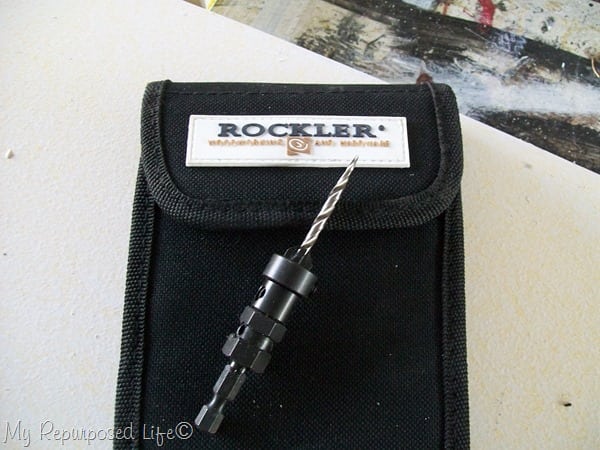
    countersink bit

    Using a countersink bit is useful for a project like this. It not only drills a pilot hole, but allows you to easily hide the screw heads.

    Build a base for the repurposed cabinets
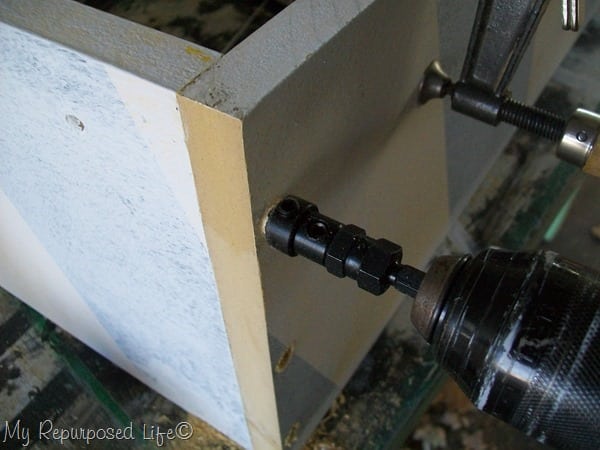
    I clamped the glued pieces together and used the countersink bit to drill my pilot holes. After I built the box, I started putting together the “stand”.

    How to attach legs to window cabinet
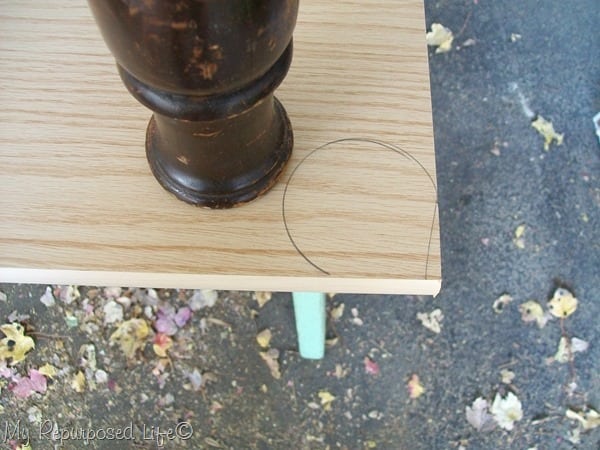
    how to attach legs to a floor cabinet

    I cut the bedposts down to size. Drawing  a circle around the leg on the top of the wood allows you to know where to drill the pilot holes

    Here’s a tip:  It’s difficult to hold the leg and the top together to get the screws in. I used very long screws to hold the board to the legs. In order to do that I first screwed a shorter screw through the pilot hole in the board just barely going into the leg.

    Remember: Most bedposts are VERY hard wood. You MUST drill a pilot hole into the leg.

    Work smarter not harder
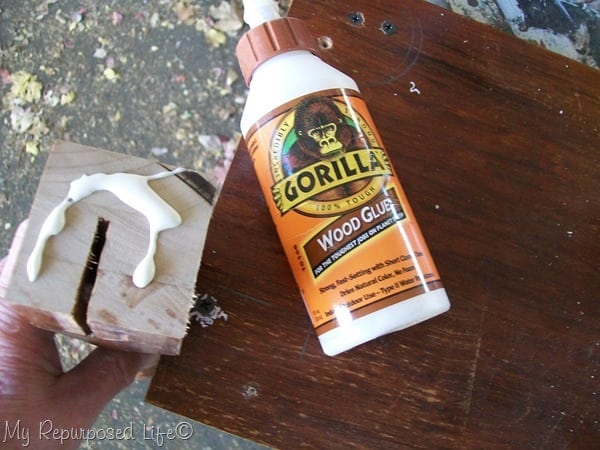
    After the short screw secured the leg (barely) I drilled the pilot hole through the original pilot hole into the leg. Then I  inserted my long screw. I did this a second time, then I removed the original short screw, drilled the pilot hole into the leg and inserted one of my long screws.

    You may think to yourself why not just use one of the long screws and not go all the way with it. The long screws were coarse (too big to do this without first drilling a pilot hole). The short screw I used was more of a fine thread and easily screwed into the leg enough to hold it temporarily. Another option is to shoot a brad nail through the base into the top of the leg to hold it until you can secure it with screws. I highly recommend using Gorilla wood glue for an extra strong hold.
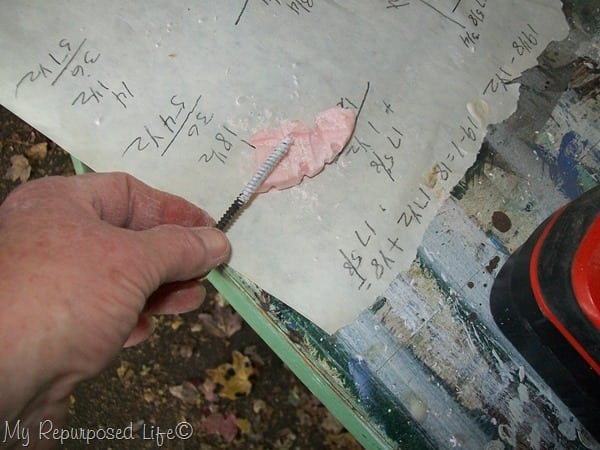
    add soap to screws for easy install

    I soap my screws, they go in much easier that way. Even then sometimes they squeeaal. If that happens to you, back it out slightly and push it in again. Sometimes you might have to do that twice.

    Stand for window cabinet
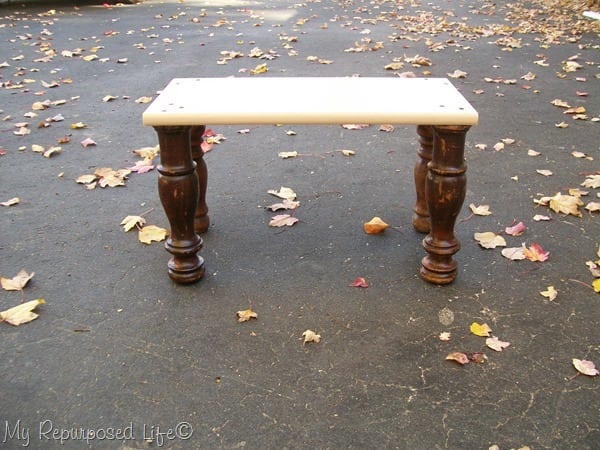
    window cabinet stand

    This is the stand.

    repurposed window cabinet box

    In this photo I'm testing the fit of the repurposed window box onto the stand base.
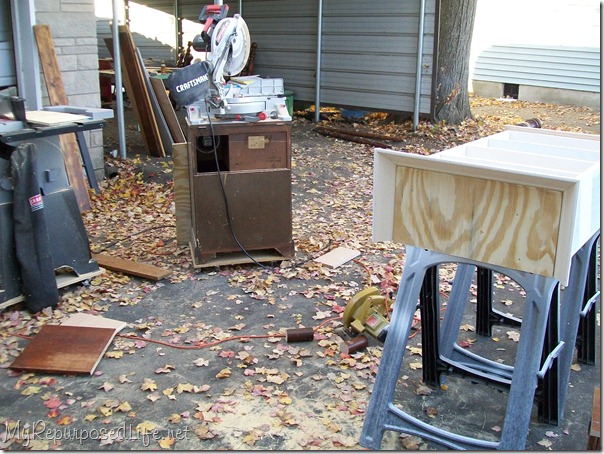
    100_8248

    I took this picture to show you how I work! Working in the driveway is my best option.

    You can see here that I have the crown molding on the first cabinet.
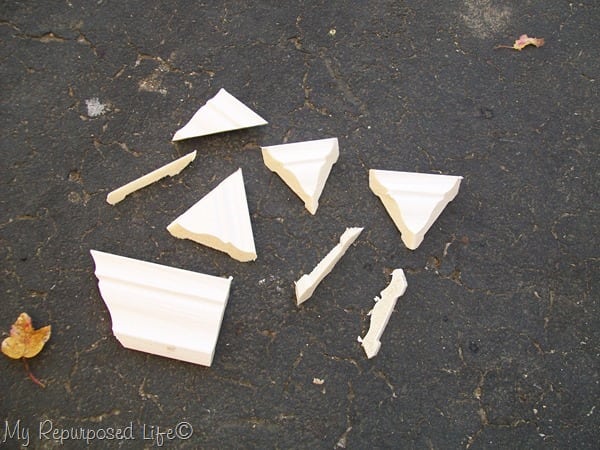
    This is all I had left of the length of crown molding I used. I was a little stressed. There was NO room for error here.

    Embellish window cabinet with molding
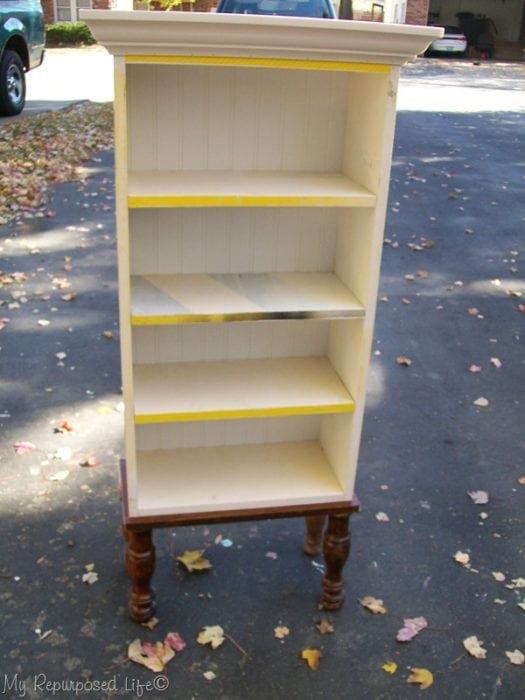
    floor cabinet made from windows with crown molding

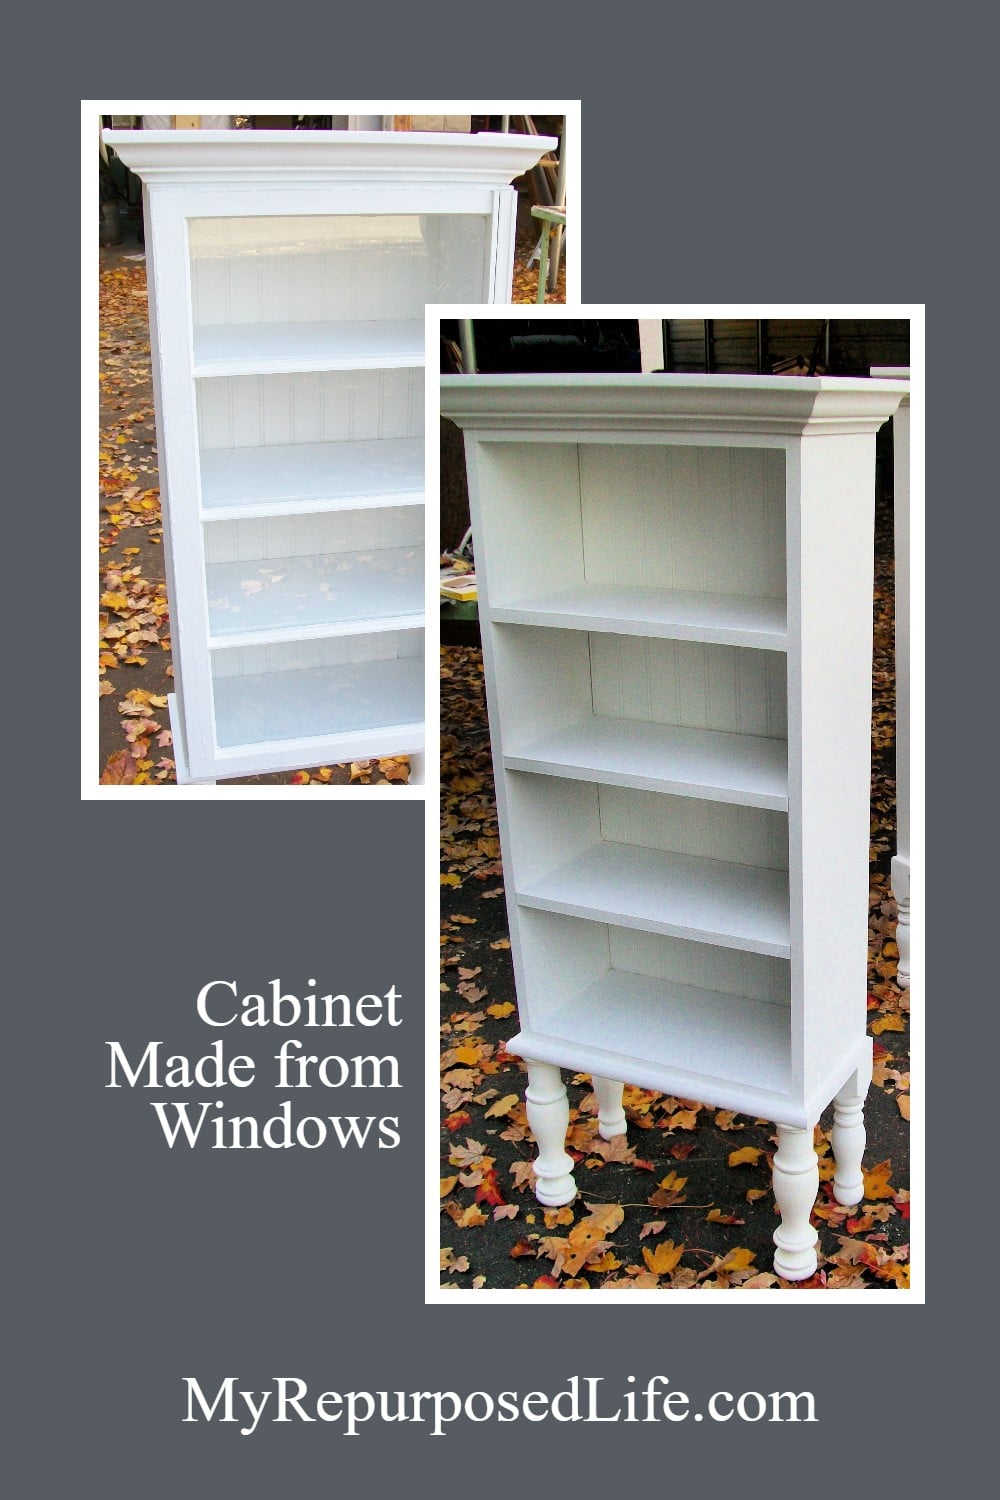
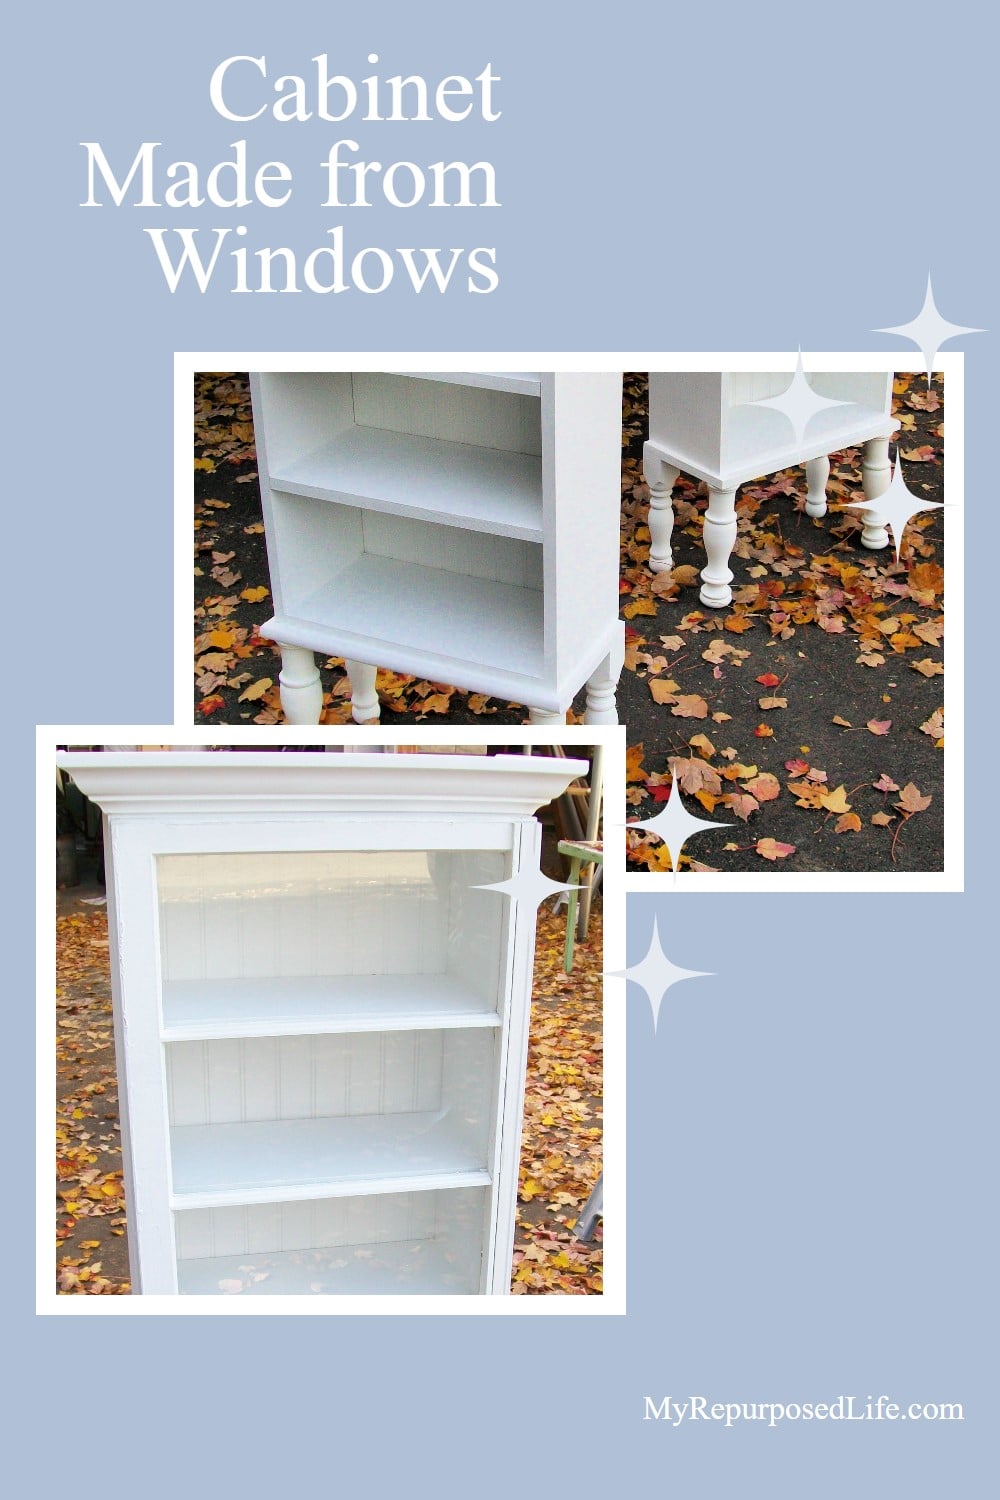
    This is the basic design of the window cabinets.
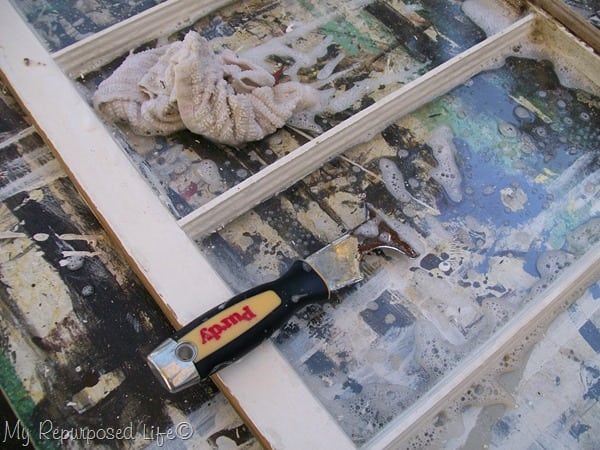
    I cleaned the windows and scraped all the years of paint off.
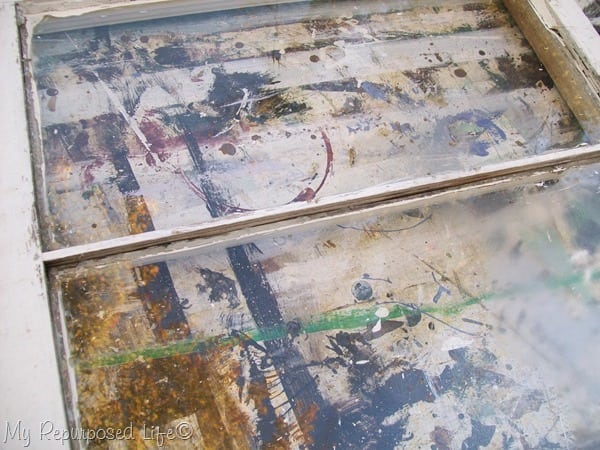
    While removing MASSIVE amounts of putty on window #2 I had a little accident. OOOPS! I pressed a little too hard near one of the points and one of the panes cracked. You can see how to cut a new pane in my post How To Cut Glass
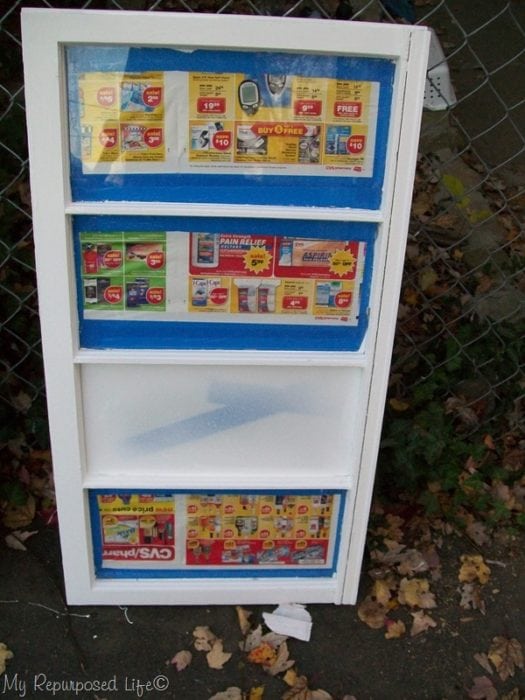
    I taped the windows so I could paint them. You’ll see the second from the bottom pane is NOT taped. Well, it has a piece of tape on it to keep it from breaking completely. That’s the one I had to replace.
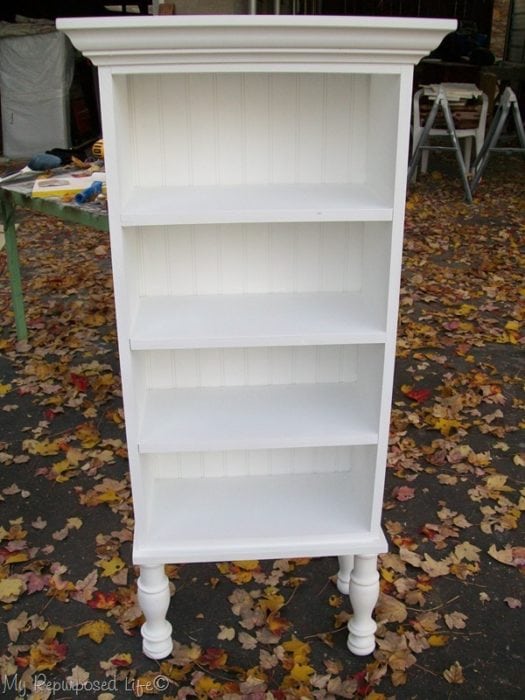
    how to make a floor cabinet with legs

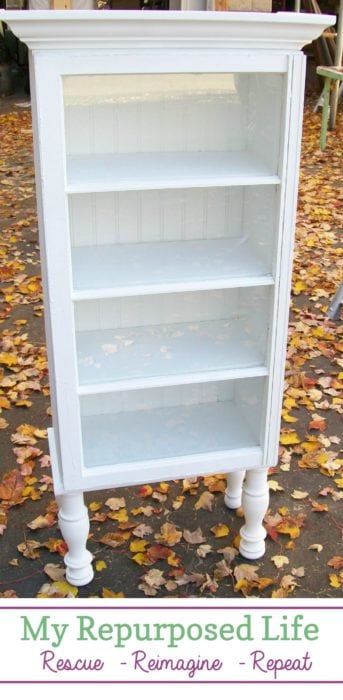
    Here is one of the cabinets after 4-5 coats of primer and two coats of flat white paint. I added shelves that lined up with the panes of the glass. That really makes a big difference in the end product.

    Window Cabinet Display Cases
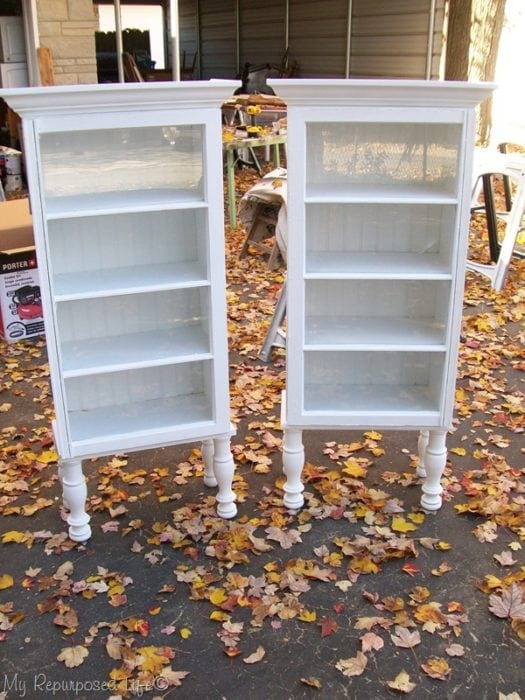
    matching floor cabinets made with window doors

    I made the cabinets so they would open opposite. One is hinged on the right, the other is hinged on the left. Don't you love how the twin window cabinets turned out? I love that they stand on the floor instead of hanging on the wall.

    gail
    Pin It

    More-than-25-DIY-Repurposed-Window-Ideas-from-MyRepurposedLife.com_.jpg

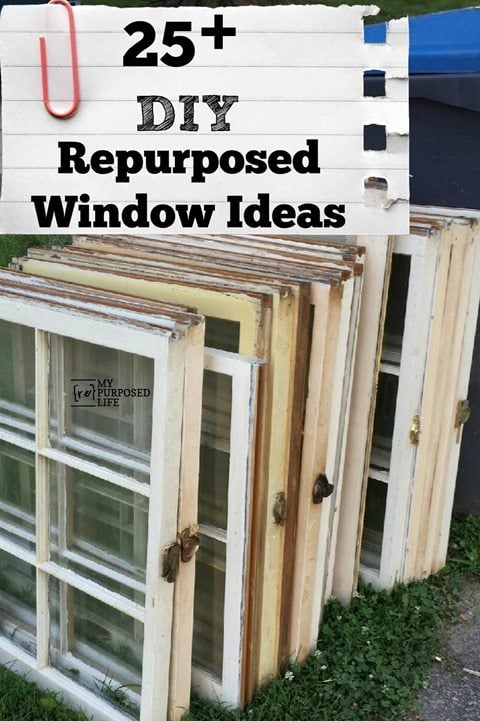
    If you love this project, you will not want to miss this roundup of window projects.

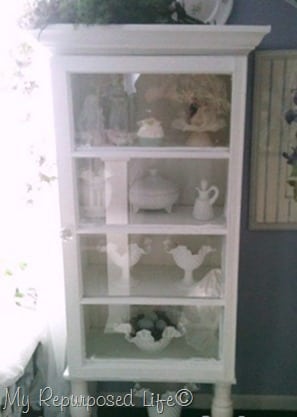
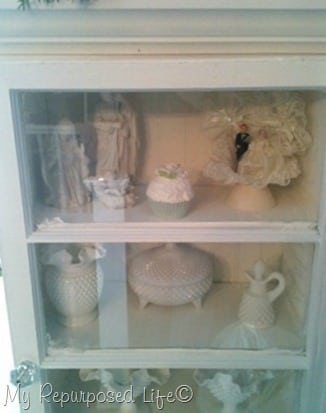
    EDITED TO ADD: Missy emailed me some pictures she took with her phone of the twins in their new room. Her mom Mary dressed them really pretty, don’t you think?
    repuruposed floor cabinets made with windows
    decorated cabinet made with repurposed windows
    Print Friendly, PDF & Email
    Pin
    Share
    Tweet

    Related Content:

    • Storage Bench Made From A Dresser
      Storage Bench Made From A Dresser
    • Old Window Ideas
      Old Window Ideas
    • Jenny Lind Bed Bench
      Jenny Lind Bed Bench
    • Spool Bed Bench Video Tutorial
      Spool Bed Bench Video Tutorial
    • DIY Tall Window Cabinet
      DIY Tall Window Cabinet
    • IKEA Billy bookcase update with paint and reclaimed wood
      IKEA Billy bookcase update with paint and reclaimed wood

    Reader Interactions

    Comments

      See comments Cancel reply

      Your email address will not be published. Required fields are marked *

      This site uses Akismet to reduce spam. Learn how your comment data is processed.

    1. Cherie

      July 25, 2018 at 5:45 pm

      Love these twins. Just beautiful.

      Reply
    2. Brette

      July 25, 2018 at 3:22 pm

      I agree on the MDF. If kept away from moisture, it’s okay, but if it gets wet, it literally dissolves. Very bad for things like bathroom vanities, below-sink cabinets and exterior doors. The door I know about from experience. The sink cabinet was seen at a thrift store.

      Reply
    3. Christina

      July 25, 2018 at 2:59 pm

      Wow Gail, these are amazing! You can turn anything into a gorgeous new piece 🙂

      P.S. So jelly of your camper, it's sooooo cute! Hope you enjoyed your trip!

      Reply
    4. Bliss

      July 24, 2018 at 9:43 pm

      I love how they turned out using all the spare parts. Lining up the trim in the panes with the shelves makes you one smart cookie!

      Reply
      • Gail Wilson

        July 26, 2018 at 2:51 pm

        Thank you Bliss. I have more window projects on my list due to an excess amount of windows in storage! 🙂 Not that you would know anything about THAT!

        gail

    5. Susan

      April 02, 2016 at 8:42 am

      Oh My these are fabulous Gail! If you lived next door I'd have you make one for me.... if you lived next door I'd be your intern!! <3

      Reply
    6. Nancy

      April 01, 2016 at 3:47 pm

      Wonderful job! Lovely finished project!

      Reply
    7. Donna

      December 15, 2014 at 8:31 pm

      🙂 I'm salivating! Wow, wow, wow! You make everything seem do-able and even more important you make projects seem WORTH doing. I love that.
      The original builder/owner of my 1941 house remodeled my house the 60's and saved all of the old original windows in a stack in the attic. Guess you know what I'm gonna do with one or two! Thanks for all of your efforts, Donna

      Reply
    8. Paula

      October 13, 2014 at 3:35 am

      love your creativeness

      Reply
    9. doreen

      October 09, 2014 at 12:42 pm

      OMG - you are so clever! I am envious of your creativity and know-how! Great job.

      Reply
    10. Kelly

      October 09, 2014 at 12:19 pm

      Hello Gail -
      I always enjoy your posts and am inspired to make my own cabinet! I've been looking for a good countersink bit so thanks for the recommendation. I do have a question - the way they have the bits listed on the Rockler site, they identify them by numbers instead of measurements...can you tell me what size # you used for this project?

      Thanks!
      Kelly

      Reply
    11. Di B

      October 09, 2014 at 10:27 am

      You do such a beautiful job in everything you do. I am truely amazed at your fine workmanship!

      Reply
    12. Betsy

      October 09, 2014 at 10:13 am

      Wow, you really delivered! They look awesome all dressed up, you'd never know how they started life. Great job Gail.

      Reply
    13. Jeanne

      March 07, 2014 at 1:13 pm

      OMG, you are AMAZING! I LOVE everything you do. wish you were my neighbor and would help me get started.

      Reply
    14. girlfromwva

      March 06, 2014 at 4:10 pm

      i love the way these turned out! great job!

      Reply
    15. happy hill

      March 06, 2014 at 2:51 pm

      Honestly.... you inspire me.... i so look forward to ur posts..and cant wait to hit the link.... you truly are amazing... so clever !!! ××

      Reply
    16. Helen

      March 06, 2014 at 11:06 am

      Wow, great job. Love them!

      Reply
    17. Diane

      January 30, 2014 at 12:48 am

      These are adorable. I could see them in my granddaughter's room. I am having a hard time finding windows.

      Gail- BTW I am getting an old dresser and chest of drawers from my son. He was going to junk them. I have no room but I will find room for these two pieces. I will dream of what I'll do with them come spring.

      Reply
    18. isthisloadbearing.com

      January 19, 2012 at 12:27 pm

      Those are gorgeous! What a creative and clever way to reuse those items. I never would have thought of that!

      Reply
    19. Jennie416

      December 30, 2011 at 4:18 pm

      These are absolutely beautiful!! I still can't believe how you re-purpose items - so clever Helping me think outside the box!! Great job!

      Reply
    20. Kim Nelson

      April 28, 2011 at 3:01 pm

      You're a genius!

      Reply
    21. Deborah March

      March 27, 2011 at 4:18 pm

      Wow wow WOW...picking-jaw-up-off-the-floor-in-Nova-Scotia!!!!!

      Reply
    22. Bonnie@Creative Decorating

      December 02, 2010 at 4:38 pm

      I just had to comment at how awesome these turned out. Great job!

      Reply
    23. Allison @ House of Hepworths

      December 02, 2010 at 1:11 am

      I'm featuring you at this weeks Link Party. It will post tonight at 8pm CST. You rock! Thanks for Hookin' Up with HoH!

      ~Allison @ House of Hepworths

      Reply
    24. Jenni

      November 19, 2010 at 2:02 pm

      Those are beautiful. You are inspirational with your use of tools and know how.

      Reply
    25. Style Sisters

      November 18, 2010 at 5:38 pm

      HOLY COW!! You are good...no.... better than good you are amazing! This is just flat out gorgeous!! Very inspiring.

      Reply
    26. Sue@Uniquely Chic

      November 18, 2010 at 12:58 pm

      WOW, you are amazing!

      Reply
    27. jodi@Pleasant-Home

      November 18, 2010 at 5:54 am

      Simply Awesome!

      Reply
    28. Diann @ The Thrifty Groove

      November 18, 2010 at 4:03 am

      "What am I doing?" you ask. That would just be me Kow Towing to your amazingness!! You totally rock! So, are you taking on apprentices yet? It really isn't THAT far for me to drive! 🙂

      Reply
    29. Dave'sWife@{thediaryofdaveswife}

      November 18, 2010 at 2:51 am

      These really are AMAZING!

      Reply
    30. thimblecottage

      November 18, 2010 at 2:07 am

      Hi Gail,I love my cupboards!!! I tried to leave a comment and my computer was acting up . Thank you so much .You exceeded my expectations. Don't tell anyone but I crawled up the stairs to see how they looked in their new settings. Thanks a million mary

      Reply
    31. Serendipity Chic Decor

      November 17, 2010 at 11:06 pm

      Absolutely fabulous!

      Take care,
      Lisa

      Reply
    32. Marla @ Always Nesting

      November 17, 2010 at 1:30 pm

      In my wildest dreams I could never have the vision for creation that you have. Gail, you are amazing.

      Reply
    33. Christa @ Stories of a House

      November 17, 2010 at 10:21 am

      Are you kidding me? What an amazing project! I'd never thought of putting a book shelf on legs, but I love it!

      Reply
    34. freckled laundry

      November 17, 2010 at 5:32 am

      You. are. amazing.

      Reply
    35. She'sSewPretty

      November 17, 2010 at 4:25 am

      Wow! That is a fantastic way to re-purpose all of those components! I'm really, really impressed!

      Reply
    36. Michelle @Shellsshabbyshack

      November 17, 2010 at 3:58 am

      Hey Gail! I have some old windows at my house...come on over 🙂 I think you just one up'd yourself on these. Wow... they turned out gorgeous!
      xx
      ~Michelle

      Reply
    37. Erin

      November 17, 2010 at 3:24 am

      Hi Gail, this is my first time visiting and I found you through POWW at Primitive and Proper. My jaw hit the floor reading through this post! The cabinets are just stunning and I love the way you pieced them together using things most people would have simply tossed. You are one talented and visionary lady. 🙂

      Reply
    38. Anita @ GoingALittleCoastal

      November 17, 2010 at 2:47 am

      I love these cabinets! I had something like this in my head for my laundry room I'm still trying to find the right size window for a door. And I may have to just go with plan be and make a tongue and grove door. I keep checking our restore but nothing.

      Reply
    39. Rose @ Confessions of a Curbshopaholic

      November 17, 2010 at 1:03 am

      You totally rocked that challenge! And it WAS a challenge, wasn't it?
      Bet Missy's mom is pretty darn happy right now, and I hope you are too. You even surprised yourself on this one...me, not so much. I had total faith in you pulling it off, my friend. Total faith.

      Reply
    40. Pudel-design

      November 17, 2010 at 12:01 am

      Awesome!
      Love this project, I build my furniture from old pieces too, if I can`t find the right one i`m searching for.;)
      Lovely greetings...

      Reply
    41. Cassie @ Primitive & Proper

      November 16, 2010 at 9:00 pm

      ok, i have to admit, by the title of this post i thought your blog was taking a dirty twist.... i was worried. so glad the twins turned out to be fabulous cabinets!! they are gorgeous! and they're real!

      Reply
    42. Cassie @ Primitive & Proper

      November 16, 2010 at 9:00 pm

      ok, i have to admit, by the title of this post i thought your blog was taking a dirty twist.... i was worried. so glad the twins turned out to be fabulous cabinets!! they are gorgeous! and they're real!

      Reply
    43. Amy @ Increasingly Domestic

      November 16, 2010 at 7:42 pm

      These are incredible!

      Reply
    44. Barbara

      November 16, 2010 at 5:22 pm

      Could you please come to my house and build things? Wow, you are so talented!!

      Reply
    45. the cape on the corner

      November 16, 2010 at 4:49 pm

      unbelievable. you flippin' rock.

      Reply
    46. My Cottage Charm

      November 16, 2010 at 4:46 pm

      GAIL, you are invited to go junking with me anytime you wanna drive out here...we could make a day of it! 🙂 Maybe this time we could have time to have lunch and sit down and talk. 🙂
      Love ya girlfriend!

      Reply
    47. Reenie

      November 16, 2010 at 4:38 pm

      Now.....I would LOVE to make something like this with my old windows....if you were near me....I'd be on your doorstep learning from you! I love them.

      Reply
    48. Lucrecia

      November 16, 2010 at 4:34 pm

      I'm always amazed at your vision! These are amazing!

      Reply
    49. Angie

      November 16, 2010 at 4:21 pm

      Wow. Seriously. Wow.

      Reply
    50. Homemade Quilts by Granny

      November 16, 2010 at 4:18 pm

      What a marvelous job you have done on these cabinets.....I didn't know I was a noreply blogger....I send you a email. Trish

      Reply
    51. truckermomma

      November 16, 2010 at 4:08 pm

      Wow, those are great, do you live close to me, I will drop some stuff off. hehe I really like the twins

      Reply
    52. Carmen at Primcatshouse

      November 16, 2010 at 3:28 pm

      I'm back! Thanks for visiting my blog. No... I didn't know I was a "no reply" Blogger. I don't even know what that means. O.O How do I change it?

      Thanks, Carmen

      Reply
    53. Jenni

      November 16, 2010 at 3:16 pm

      I saw the ugly MDF, then i saw the legs, and the glass and thought "where the he%& is she going with this?!" Then I saw the legs on the bottom and said, "hmmm I'm not sure I'm gonna like this"...then I saw it all done and i gotta say...you are a genius! I LOVE IT! I'm trying to train my brain to think outside the box and see things for what they could be. You are inspiring! Thanks for sharing!

      Reply
    54. Carmen at Primcatshouse

      November 16, 2010 at 3:10 pm

      You are very very talented!!!

      Carmen and the Primcats

      Reply
    55. Proper Prim

      November 16, 2010 at 3:10 pm

      Gail, you truly do bring the real meaning to "one woman's trash is another woman's treasure". Most people would look at that first pic and think trash... not you. You literally took that trash and made it into a beautifully cut diamond.

      I bet Missy's Mom is trilled as I think anyone of us would be too happy display those in our home.

      Fantastic job, I am so impressed.

      Hugs, Deb

      Reply
    56. Corn in my Coffee-Pot

      November 16, 2010 at 3:08 pm

      Wow-- a contest to win tools. I couldn't think of a more deserving winner!
      You are my kind of DIY-er. Well, my kind -- if I could choose what kind to be. I try but lately- the dh usually takes over my projects.
      I actually got to cut out my own corbels and use the nail gun to add the molding on sunday for my mantle. I was so happy!

      Reply
    57. Connie

      November 16, 2010 at 2:53 pm

      I seriously covet your skills. Amazing. I have all these great ideas but I'm intimidated with power tools that cut. My husband has all the tools and the skills but thinks it's senseless to use "old junk". Wish he'd share my vision. Love your blog

      Reply
    58. Laurie at Turner Farm

      November 16, 2010 at 2:37 pm

      That is amazing! Love your creativity!

      Reply
    59. Kathy

      November 16, 2010 at 2:07 pm

      Once again, another beautiful creation! I'm heading in the direction of redoing my kitchen and using my old wood windows for the cabinet doors! We marked off the ceiling over the weekend to do a coffered ceiling and will begin taking down the cabinets after Thanksgiving. I will definitely be referring to your GREAT tutorials! Thank you, as always, for your inspiration! It really makes me feel like I CAN DO IT TOO!

      Reply
    60. gypsy@Hebrews11:13

      November 16, 2010 at 1:52 pm

      These are STUNNING. Gorgeous! You are so talented and also a very hard worker. And a visionary. I'm scared to try a project like this!

      Reply
    61. Paige (Final Clothes-Out)

      November 16, 2010 at 1:51 pm

      You are seriously talented! It really takes a knack to see things for what they could be, instead of what they are.

      Reply
    62. Sylvia

      November 16, 2010 at 1:27 pm

      Fabulous, as always. You have a wonderful talent... vision and the skills to actually make the vision a realty. Thanks for sharing your creations and the tutorials, too. Not that I'll ever actually build anything 🙂

      Reply
    63. Terri

      November 16, 2010 at 12:55 pm

      OMG...you totally rock. You never cease to amaze me with your creations! Such inspiration!

      Reply
    64. Shannon @ Quarry Orchard

      November 16, 2010 at 12:50 pm

      As always, these are fantastic! You make such beautiful pieces from piles of scrap materials 🙂

      Reply
    65. kathie

      November 16, 2010 at 12:45 pm

      Amazing, once again! You have such an eye & a 'midas touch' that turns everything you touch into perfection!! What a great idea, and what a cool use for a bunch of scrap materials 🙂

      Reply
    66. Coleen's Corner

      November 16, 2010 at 12:25 pm

      Oh my gosh, Gail, every time I look at your projects I say "I want to do that!" However, I never seem to get it done. These window cabinets are truly amazaing! I know I say that all the time, but jeez, your work just leaves me speechless in a new comment sort of way : ) I have everything needed just sitting around in my shed... I so feel like playing hookey today!

      Reply
    67. Lee Laurie

      November 16, 2010 at 12:17 pm

      OMG! These are so beautiful! I gotta have some of these. I don't know a thing about wood work but I am fixing to learn. I have some very old windows that my mom gave me years ago that came out of an old church that was being torn down. I've had them in storage for years. Now I know what I want done with them. Thanks so much for the inspiration. I just wish that I lived closer to you like Missy. I know that her mom is going to love these. I can't wait to see them in her house. Great job!

      Hugs,
      Lee Laurie

      Reply
    68. LMcBurney

      November 16, 2010 at 11:05 am

      Those are really great! Good job!

      Reply
    69. The Rusty Teapot

      November 16, 2010 at 10:40 am

      I am always amazed at your work, every post has something awesome to look at and dream about doing one day, but you definitely have a brilliant and creative mind! Great job I bet your friends mother was over the moon with how they turned out.xMx

      Reply
    70. The Rusty Teapot

      November 16, 2010 at 10:40 am

      I am always amazed at your work, every post has something awesome to look at and dream about doing one day, but you definitely have a brilliant and creative mind! Great job I bet your friends mother was over the moon with how they turned out.xMx

      Reply
    71. My Cottage Charm

      November 16, 2010 at 9:47 am

      Hello sweet friend....thank you for all your hard work, mom is SO pleased. 🙂 I'm going to do a post today on visiting you...I'll link over so people can see what an amazing job you did!
      It was so fun to actually meet you...never thought I would ever get to meet any of my blogging buddies..it was great! 🙂
      HUGS and thanks again!
      Love ya!

      Reply
    72. Holly

      November 16, 2010 at 8:31 am

      ARE YOU KIDDING ME!? You get better every day. I love this...I have a stash of windows!

      Reply

    Primary Sidebar

    Hi, there! I’m Gail Wilson, the author and mastermind behind My Repurposed Life. I’m obsessed with finding potential in unexpected places and believe that with a little hard work and imagination, any old thing can be made useful again—myself included! I hope you’ll enjoy the journey and pick up a few tools along the way… literally!

    More about me →

    Join Our Mailing List

    ​

      Click the topics you're interested in below:

      Subscribing above means you agree to our Privacy Policy​

      Footer

      ↑ back to top

      SEEN ON

      Might I Suggest

      • Start Here
      • Furniture Makeovers

      Newsletter

      • Sign Up! for emails and updates

      About

      • Gail's Favorites on Amazon
      • About

      As an Amazon Associate I earn from qualifying purchases.

      Copyright © 2023 My Repurposed Life · Privacy Policy · Disclosure