Rustic Industrial Coffee Table
As an Amazon Associate, I earn from qualifying purchases.


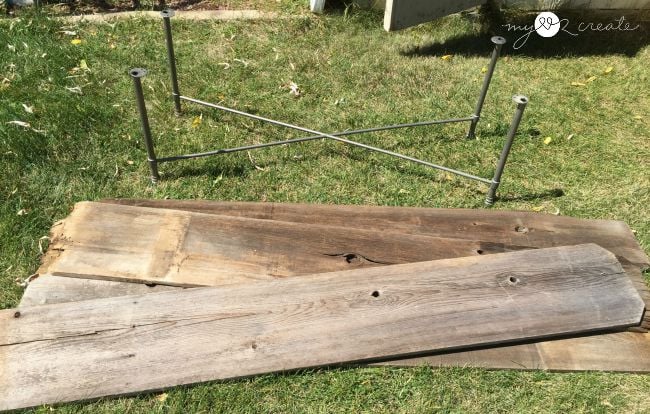
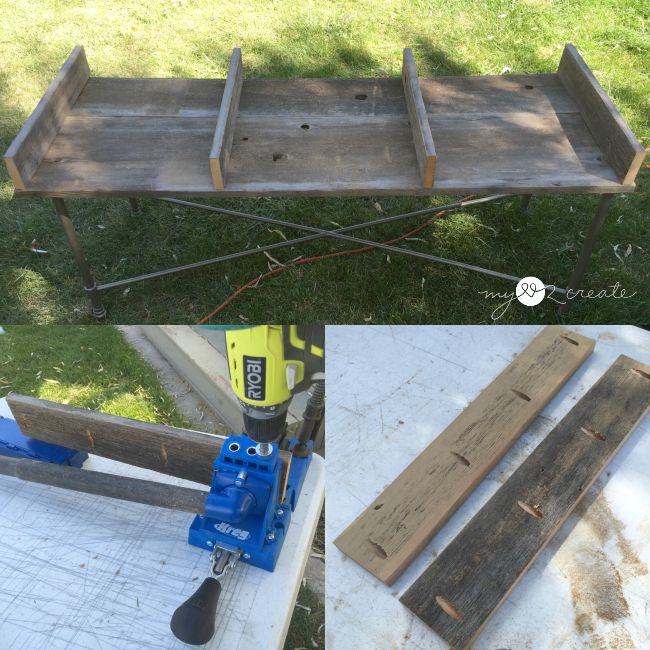
I have had this old fence wood for a few years now. My bathroom towel rack, or curtain tie backs repurposed into towel hooks was made with this wood. I rescued it from the trash at our city spring clean up. So I was super happy I could use it on this project. The metal base came from one of the few garage sales I got to go to this summer. It had an mdf top on it that I knew I didn’t want.
So I asked the lady if I could just take the base and she agreed. She got me a screw driver and I got busy. I took this base, along with a larger table base and some smaller table legs. I left all the tops, which were labeled with a Tommy Hilfiger logo. The lady said they were display tables. I paid $3 for all three bases total. Score!!
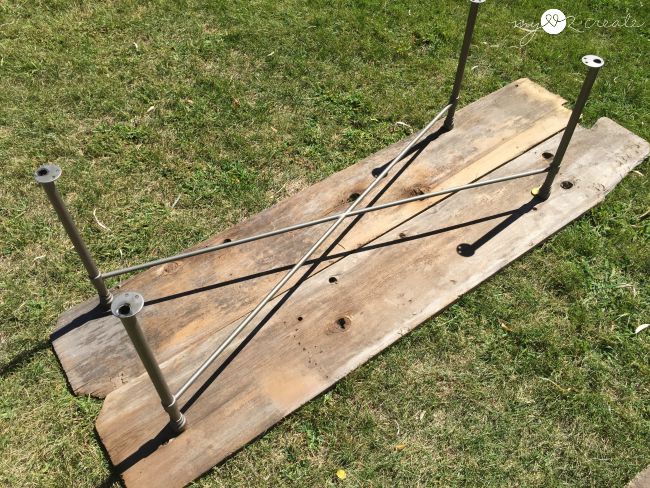 I started by placing the base on two fence panels. If I attached panels together it would make a good top. Even they were going to be a little too wide, I knew I could fix that. 🙂
 I measured the metal base and added an inch to each side. Then I cut off the ends of my fence panels and cut them to that length, which was 51 inches. You can see on the right I cut all four fence panels to this length.
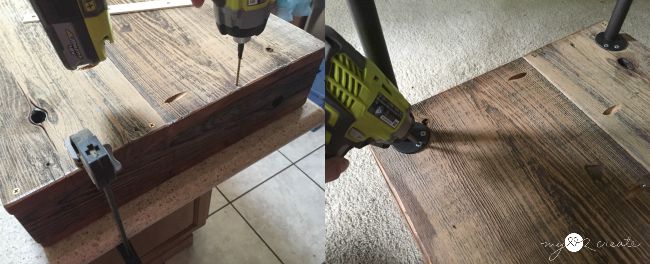
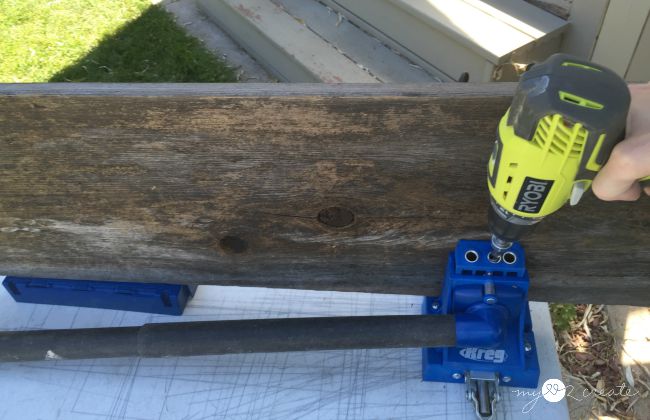 Then I proceeded to drill pocket holes, the fence wood was 3/4 inch thick so I set my Kreg Jig K5 accordingly.
Need more details on using a Kreg Jig? See my article How to use a Kreg Jig Pocket Hole System
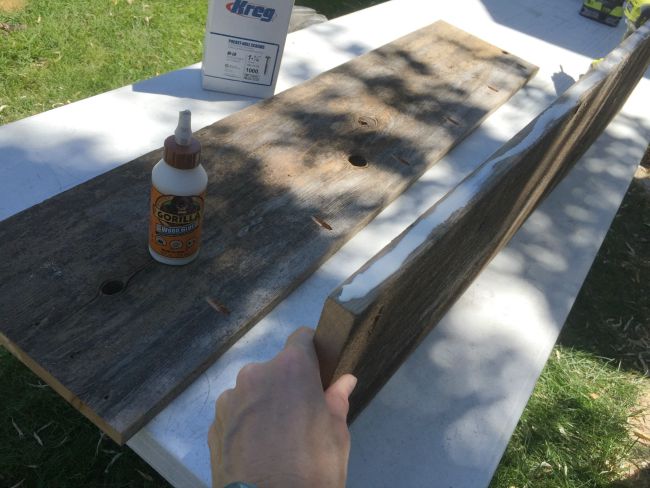 After drilling pocket holes I added gorilla glue for extra strength.
 Then I clamped my boards together and drilled in my 1/14 inch pocket hole screws. I staggered my pocket holes on each fence panel so I could drill in from both sides. Now I have the top for my rustic industrial coffee table!
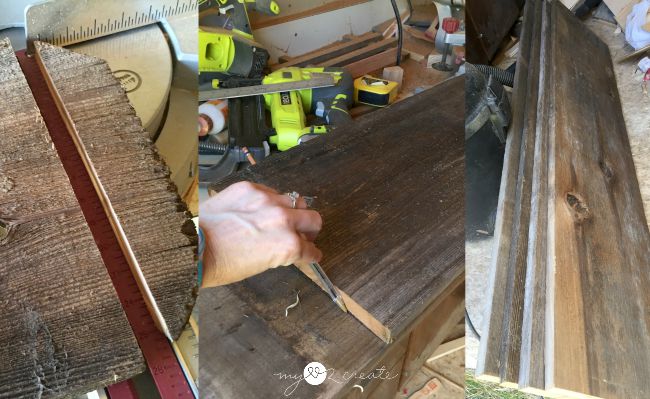
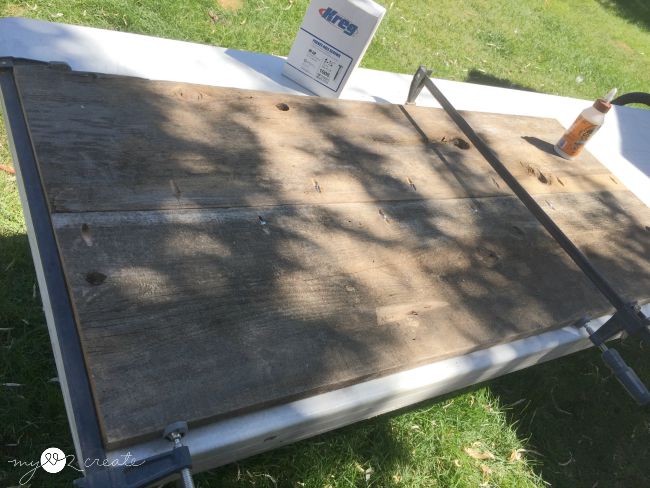
 In order to make the attached fence boards the width I wanted for the table top, I used my Kreg Rip cut to cut them at 19 inches. I did this with both panels and it left me with two three inch strips. If you don’t have a table saw, like me, then this tool is a life saver.
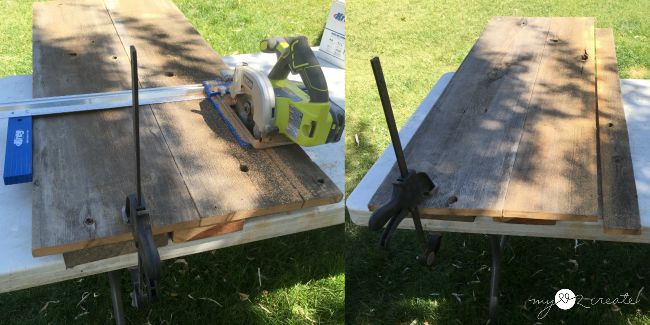
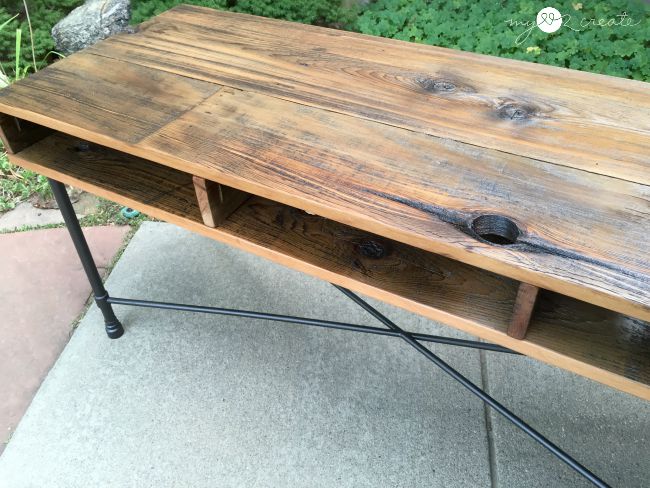
 I cut the strips into four pieces that were 19 inches long so they were the same length as my table top and bottom, they would serve as the divider pieces.
 Once I knew I wanted to use all four, I drilled pocket holes into one side. Then I sanded all my boards. In the bottom right photo you can see the difference the sanding made, the lighter one has been sanded and the darker one hasn’t.
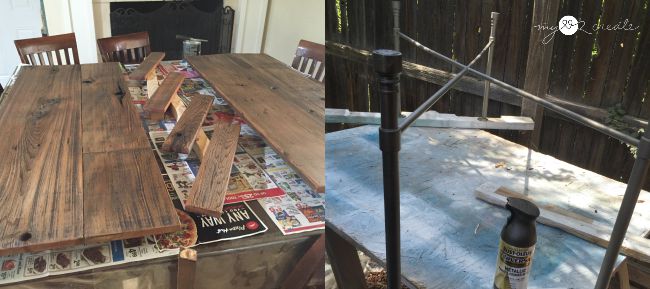 I decided to finish my boards before I built the table top to make it easier. I applied one coat of natural stain and then three coats of poly to all the boards. As a rule, I always sand with a fine grit paper (I use 400) after coats one and two, to give my wood a smooth finish. Then I gave my metal base a fresh coat of oil rubbed bronze spray paint, and I was ready to put the rustic industrial coffee table all together!!
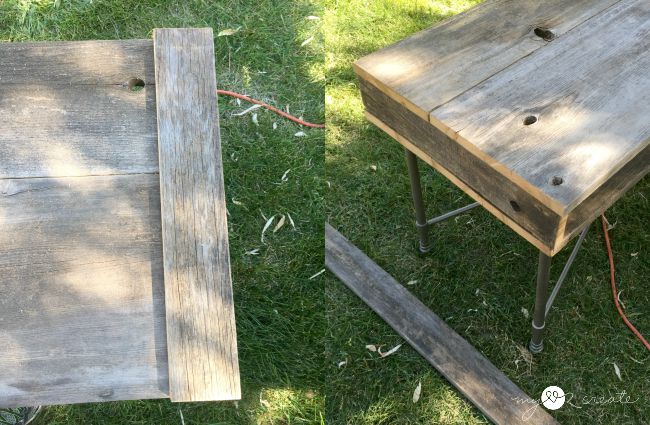
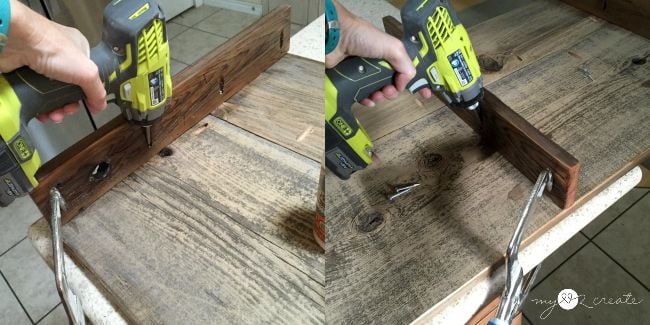 Placing my top board upside down, I attached the support boards with pocket holes and glue. My right angle clamps were a great help to hold the boards in place while I screwed them on. You can tell I didn’t stain or finish the bottom side of the boards. I choose to save on supplies since they will not be seen anyway.
 Once all my support boards were attached to the top I added glue so I could attach the bottom.
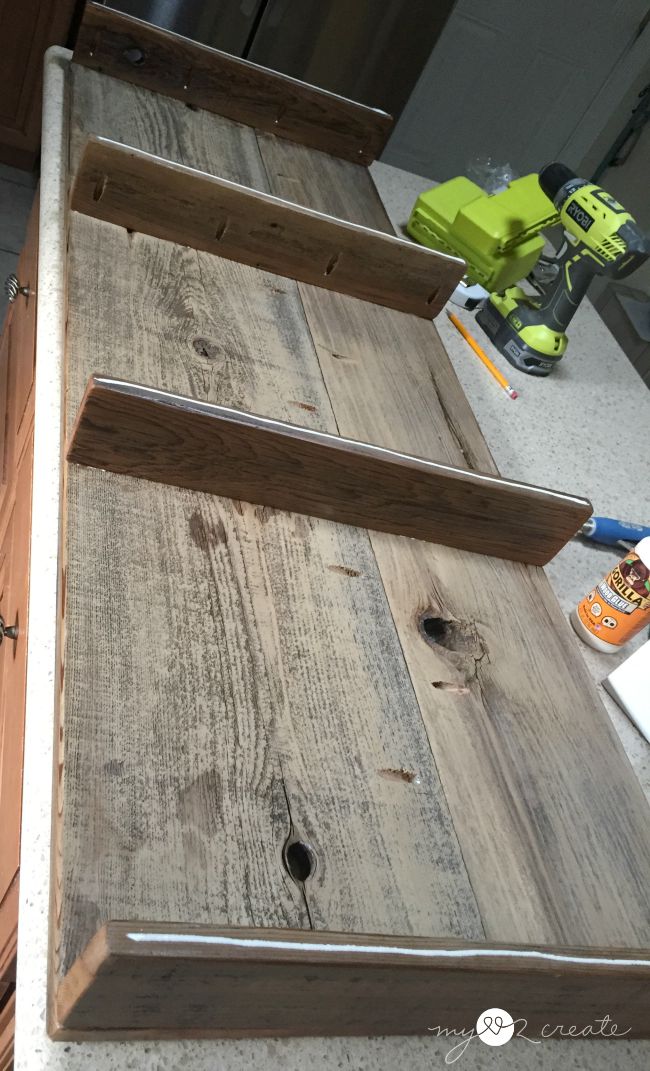
 I placed the bottom board on the support boards, making sure to have the finished side facing the top. Then I clamped it down and pre-drilled holes so I could attach the bottom to the supports with 2 inch wood screws. I put four screws into each support board. In the right photo I am attaching the metal base with 1/2 inch screws, and then I was done with the rustic industrial coffee table!!
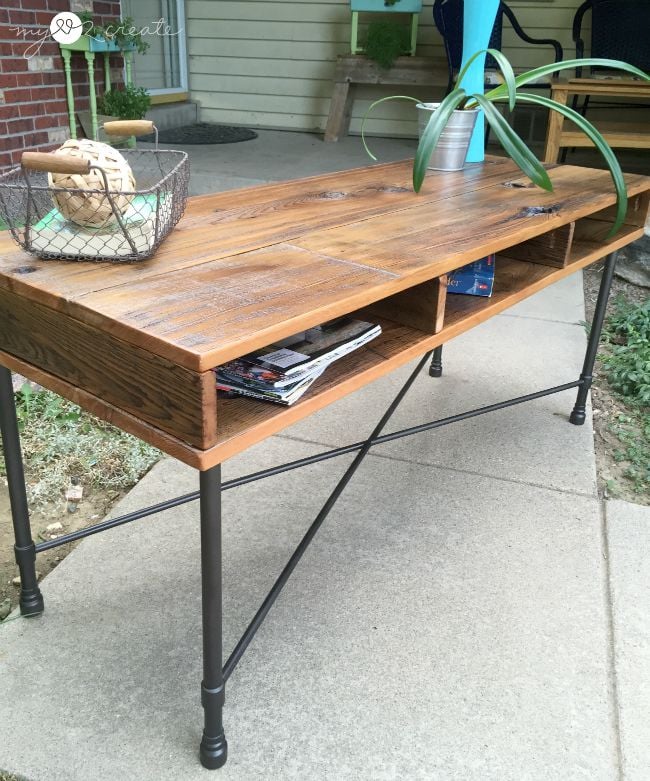
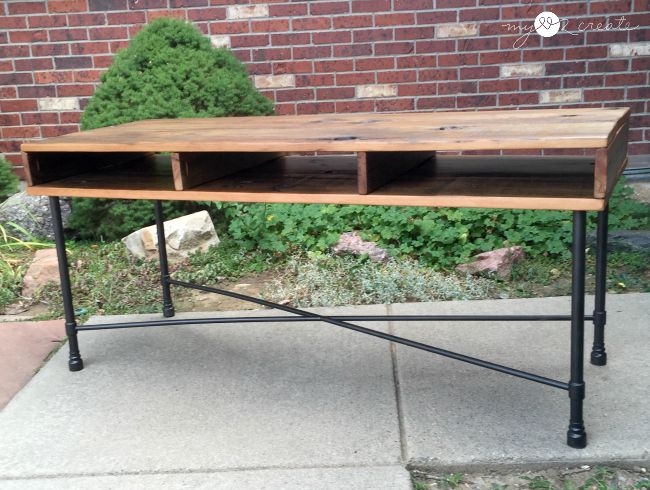 I seriously love it, since rustic industrial is one of my faves, it makes sense.
 ![]() I like the open back, it makes it easy to access magazines, remotes, and dvd’s from either side. Although I am calling this a coffee table, I secretly think it would make a great TV table as well since it is a little taller than a coffee table, by a few inches.
I like the open back, it makes it easy to access magazines, remotes, and dvd’s from either side. Although I am calling this a coffee table, I secretly think it would make a great TV table as well since it is a little taller than a coffee table, by a few inches.
 If you like the look, and don’t have a metal table base laying around, like most people won’t, you could use metal plumbing pipes like Gail did in her DIY Industrial Shelf post.
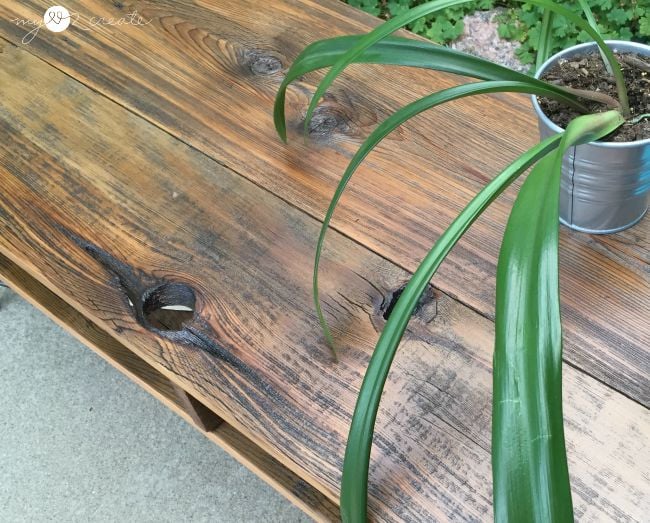 The finished weathered wood is just beautiful, I really think working with it is one of my favorite things. I have done many projects with weathered wood, my Reclaimed wood table still makes me swoon when I see it.
 ![]()
You can find weathered wood for free all the time, check places like free cycle, or the free section on craig’s list.
I just threw a few things on the rustic industrial coffee table to give you an idea, and when I looked at this photo and saw the decorative ball in the basket I just started laughing, I think I had a little helper on that one…aren’t kids great!
Have you used old fence boards in a project? I would love to hear your favorite!
Hugs!!
Mindi
see more of Mindi’s posts on MRL below:
[categorythumbnaillist 274]
How did you prep the wood before you started working with it? Did you just sand it? Or did you plane it? I had some old barn wood I had somebody plane it down, but I don’t always have access to them and their planer… wondering if I could just sand it down some…but how long of a process that would be.
Hi Shawna, I did not plane my wood. I actually just sanded it really well, and it did not take very long. If your wood is really rough you can start with a coarse grit sand paper, like 60 or 80, then move up to 100 and eventually 220. I personally like the character the wood provides so I sanded with 100 grit until it was smooth to the touch. When I finish the piece with poly to really get the nice smooth surface I make sure to sand with really fine sandpaper (400 grit) after my first and second coat, and then seal it with my last coat (no sanding). This way my wood still has the rough reclaimed character and it is very smooth to touch. I hope that helps! Lucky you to have old barn wood it is so fun to work with! Good Luck!
Excellent makeover! I love the barn wood it’s gorgeous!
Love it. I even like the holes, you left in the top. You can feed cords thru them. 🙂
I have a base that is very similar to that. Mine waits for me while you actually did something lovely with yours!
Amazing as always! I am always in awe of the projects you do–I want to be your apprentice!!
I LOVE the way it turned out. 3 table bases for $3…what a bargain! I must go to garage sales…
this is freaking awesome xx
What an AWESOME table!!!!! I love the base. What was the original top….I need to find something like that!
Happy day!
karianne
OMGosh! Mindi! I love this table! using those extra pieces as dividers was brilliant, and gives the table a totally umph! to it. (take that as a chest bump) lol
You really hit this one out of the park. Thanks for a fabulous tutorial, making it easy for anyone to make a table like this.
gail