Rustic Industrial Narrow Bookshelf
As an Amazon Associate, I earn from qualifying purchases.
It is Mindi from MyLove2Create again, and today I am back to share my latest project. This rustic industrial bookshelf is easy to make and I’ll show you how.
And boy am I LOVING it! I am so happy it turned out, cecause I had a few “iffy” moments where I wasn’t so sure. Luckily my worries were just that, worries.
How to make this rustic industrial bookshelf
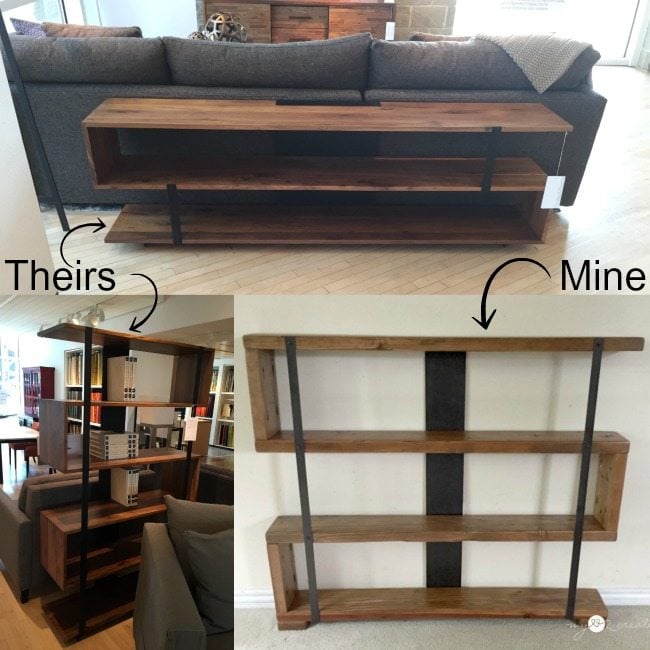
I love to browse Crate and Barrel when I go to the mall (which is hardly ever…). They have some awesome furniture. I came across the above two pieces on two separate occasions, of course I took pictures. 🙂
Anyway, I have been wanting a narrow type rustic bookshelf for a wall in my master bedroom for a while. I had it in my head that I needed to use spindles. But it I could never come up with a plan that I liked. Then I remembered seeing these…And they became the perfect inspiration to create my Rustic Industrial Bookshelf!! Finally!
The Rustic bookshelf is better than what I imagined, and I love the wood and metal combo.
Let me show you how I made it!
Reclaimed Rustic Wood

It all started with this reclaimed wood. Quite honestly, I have no idea when I got it. I just know it was from one of my free craig’s list finds. It is 2×6 lumber and you can buy it at any lumber store.
Industrial metal straps
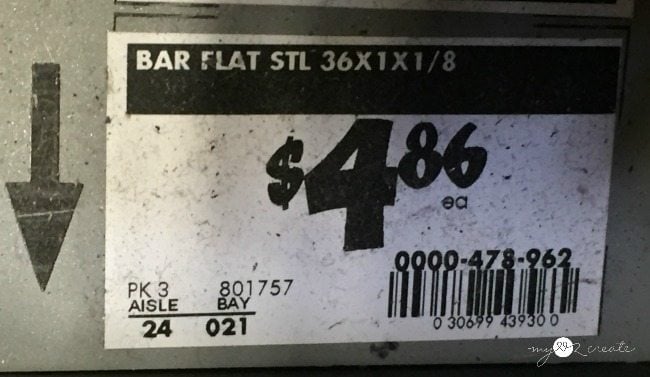
I knew this project had to have real metal to keep it sturdy. So I went to Home Depot and looked at the goods and chatted with a nice guy who was very helpful. I ended up with pretty cheap steel (above photo). It was the perfect height for a floor bookshelf without me needing to cut it down, so I grabbed two.
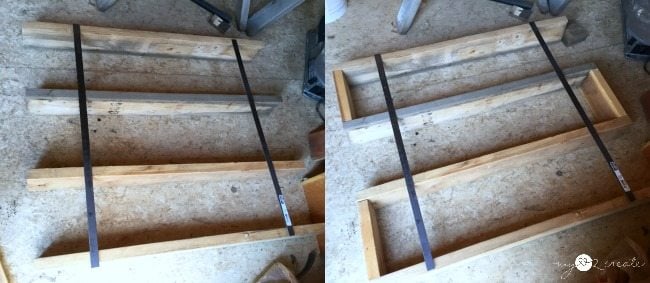
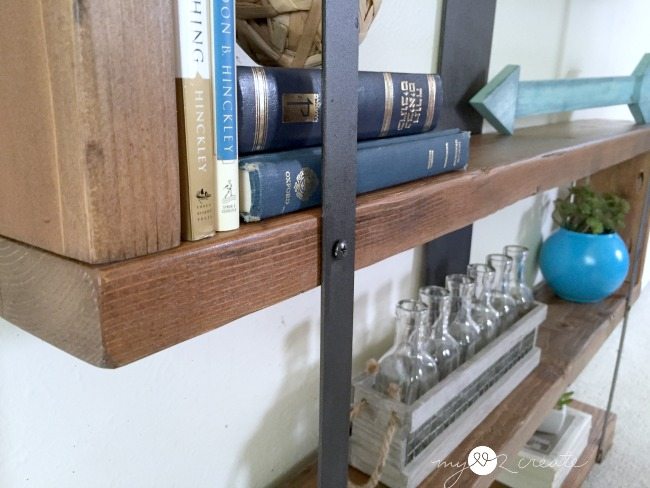
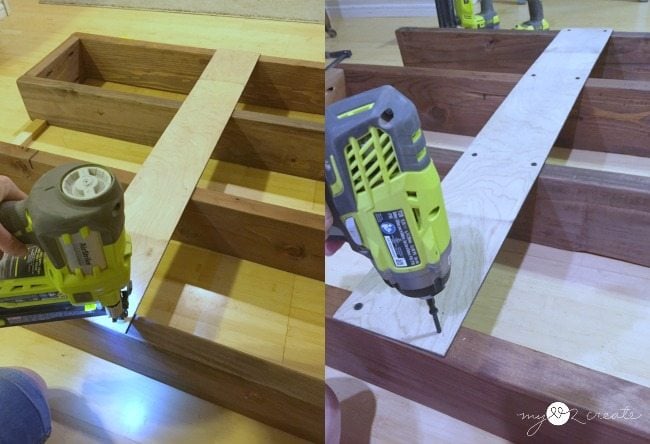
After measuring the wall where the rustic industrial bookshelf would go, I decided to cut my shelves at 34” long. I cut four shelves and then spaced them so the steel straps fit flush with the top and bottom shelf. (top left photo). Doing the math, the steel bars are 36” tall. The four shelves are a total of 6” when you combine their widths. So 36 – 6 = 30. Then, I needed three wood dividers, so 30 divided by 3 = 10. Therefore the shelf dividers would be cut at 10”. You can see in the top right photo I have cut the dividers. They are here as a dry fit.
In reality the steel straps were not exactly 36” they were a little longer, but the math is the same. You could make this shelf any size you want. You can use wider wood, make it longer, or shorter, add more shelves. The true beauty of DIY, you make it the way YOU want!
Kreg Pocket Hole Construction
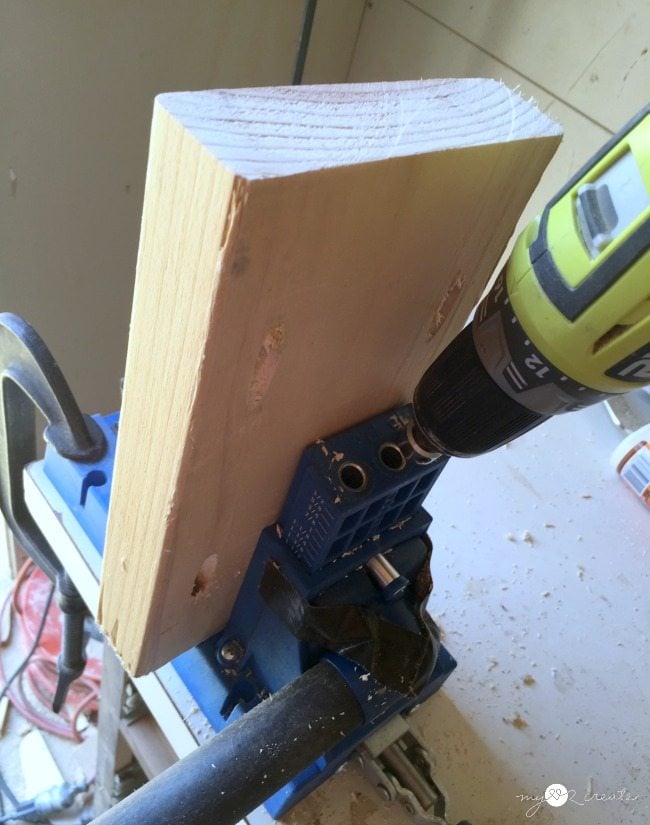
Once I had my three dividers cut I drilled 1 1/2” pocket holes on each side using my Kreg Jig K5. You will see later on that it is pretty tight drilling in the pocket hole screws. So if you prefer you can drill through the shelf boards into the dividers. Either way will work. The original pieces were done with dove tails, which I LOVE, but I was going for quick and easy.
Need more details on using a Kreg Jig? See my article How to use a Kreg Jig Pocket Hole System
Drill holes in metal straps
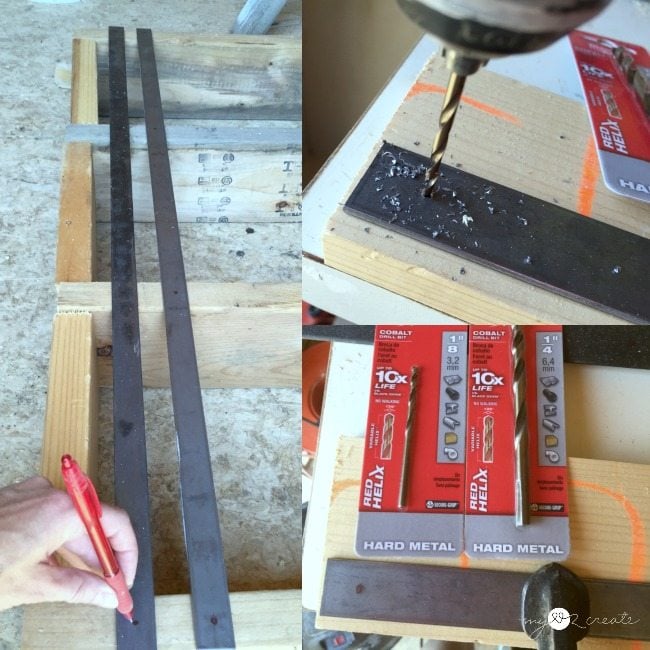
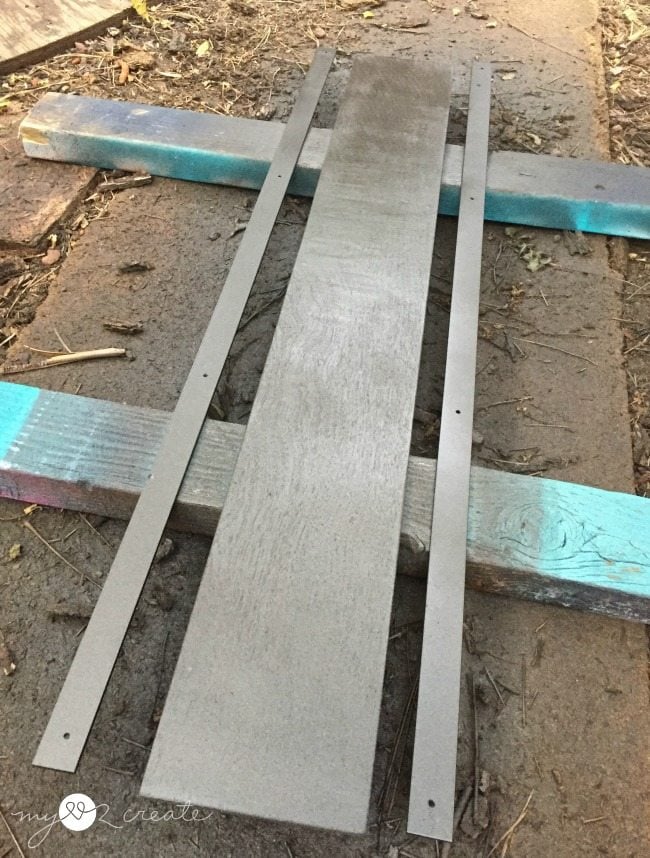
I also needed to drill holes into my steel straps. In order to quickly mark where the holes needed to be I used my three dividers to space the shelves. Then I laid my straps on the wood and marked the center of the metal where it connected with the 2×6 shelves, far left photo.
I used a strong hard metal drill bit, the small one on the right, and placed it on a block of scrap wood so I didn’t drill into my workbench. If you go slowly and use the proper bit you should be fine. Always start with a small drill bit when drilling in metal, then slowly increase the size of bit to get a bigger hole, if needed.
How to rip plywood with a circular saw
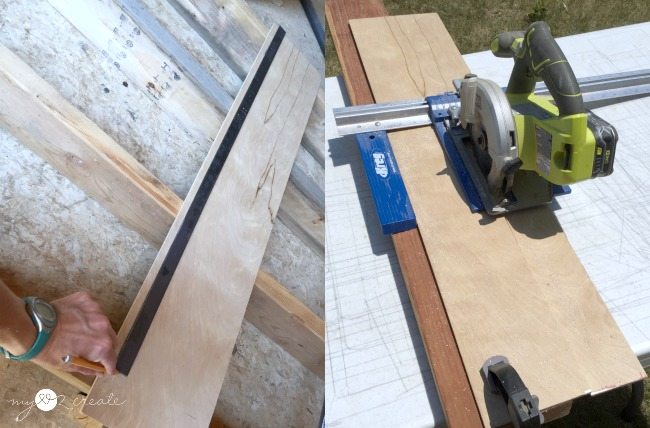
While I was purchasing the steel I made the decision to use a piece of scrap 1/4” plywood for my back brace instead of buying more metal. I planned to spray paint it to look like metal. I did this for two reasons, I am cheap, and I already had spray paint at home. So, I only spent about $12 dollars on this project, the two steel straps and the drill bit (I returned the larger one).
Anyway…I marked my plywood to the same sizes as my steel and then used my Kreg Rip-Cut and Ryobi Circular saw to rip it down. I choose to make the back brace 5” wide.
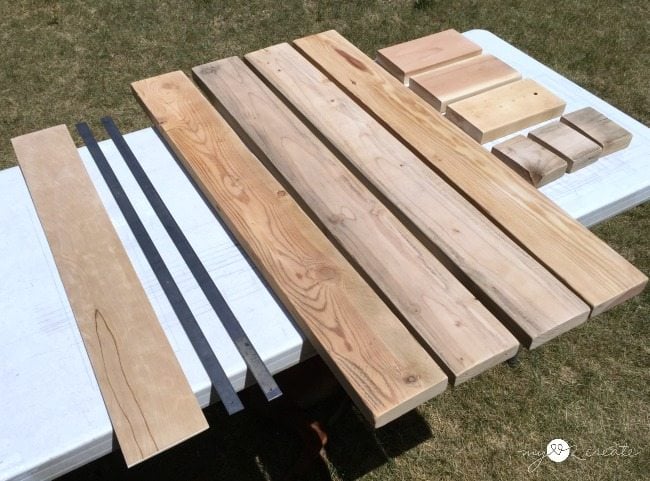
Here are all the pieces I used to build my rustic bookshelf. You will notice the three small pieces, those are the feet, I ended up only using two of them. They were just cut offs from the shelves and I cut them to roughly 3” to 3 1/2” for nice sturdy feet.
Stain rustic shelf boards
I stained my wood with Minwax special Walnut, the same color as my Hanging Storage Shelf, and I also spray painted my support pieces with Rusteolum’s Oil Rubbed Bronze.
Assemble rustic industrial bookshelf
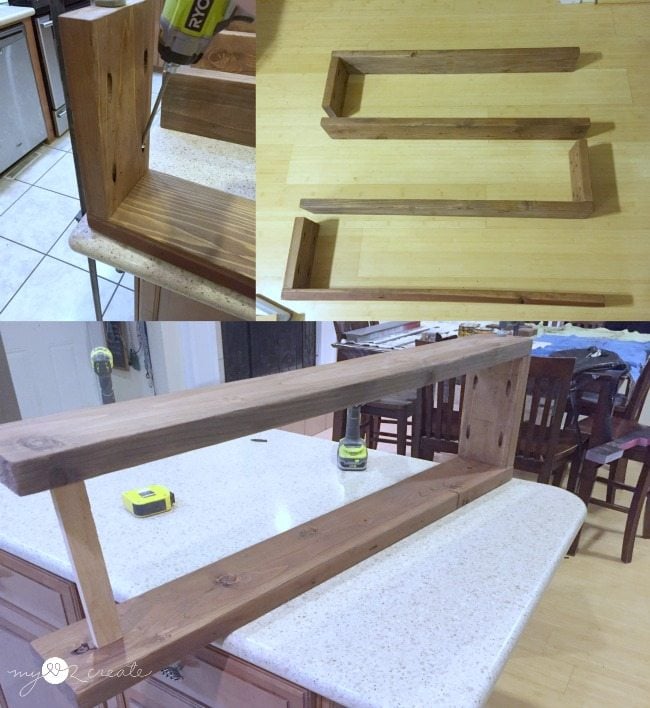
Once the stain was dry I began to build. I started by connecting the three support pieces to one of the shelves with my 2 1/2” pocket hole screws and gorilla wood glue. You can see them in the top right photo laid out on the kitchen floor ready for the next step.
At this point I needed three scrap pieces of wood (cut to the same length as the dividers) to act as supports so I could attach the other sides of the dividers to the shelves. They were great to keep my spacing.
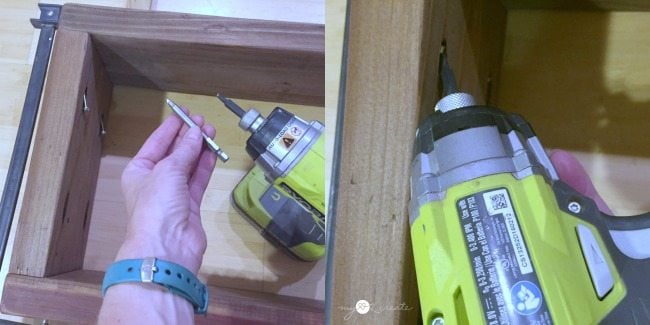
Because the space was so tight for drilling into the pocket holes, I grabbed my short pocket hole screw bit, but it was still too long. I grabbed an even shorter square tip bit and used it to drill as far as I could go (right), and then I changed it to the shorter Kreg drill bit and drilled in the rest of the way. You can do it this way or drill through the shelf into the dividers with 2 1/2” screws, just make sure to pre-drill and countersink the screws.
Plywood supports for bookshelf
Once I had all the shelves and dividers connected it was very hard to move the rustic industrial bookshelf without breaking it. In the left photo you can see I have my spacers in place to help keep the shelves where they needed to be, I was a little worried my project might be a fail at this point, because It was very wobbly when I had to flip it over to add the back support.
On the back I marked the shelves for where the back support needed to go. Then I glued and nailed on my plywood back support. I also pre-drilled holes and added 1 1/4” screws to strongly secure it to the shelves.
The plywood back support ended up being sturdy enough (instead of using a metal piece), but before I put the straps on the front it was still a little wobbly and the shelves were not sturdy on the ends…I swallowed down my panic and moved on…
Adding spacers
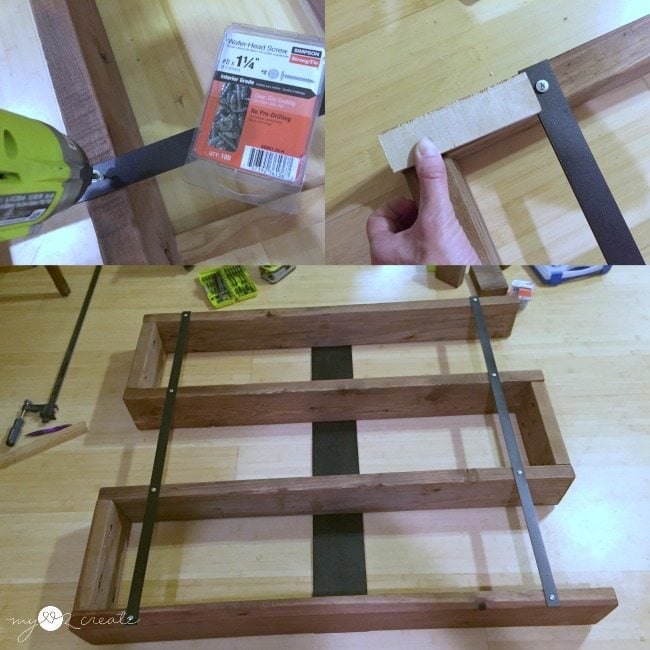
To attach the metal straps I cut a spacer to the length of how far I wanted my straps from the edge. I believe I cut it at 4”. Then I held it in place while I drilled them on with my Simpson Strong Tie 1 1/4” Wafer Head self tapping Screws, love these. They were left over from my Rustic Industrial Media Console.
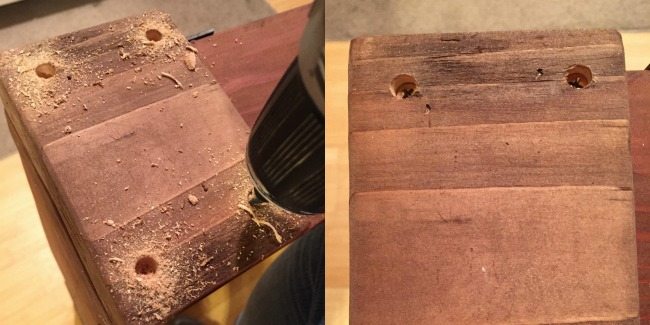
I added two feet on the bottom by using a countersinking drill bit, which is thicker at the base so the head of the screw goes into the wood. Then I drilled in my 2” screws. I counter sunk them nice and deep. 🙂
To finish, I added three coats of poly sanding with 400 grit between coats 1 and 2, for a nice smooth finish.
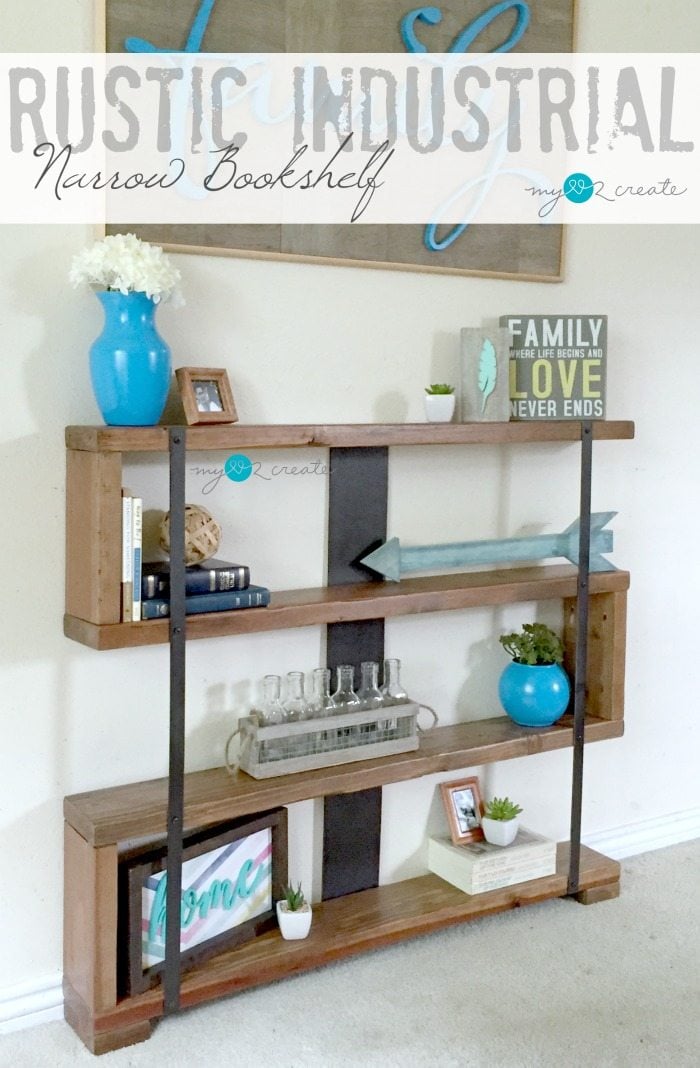
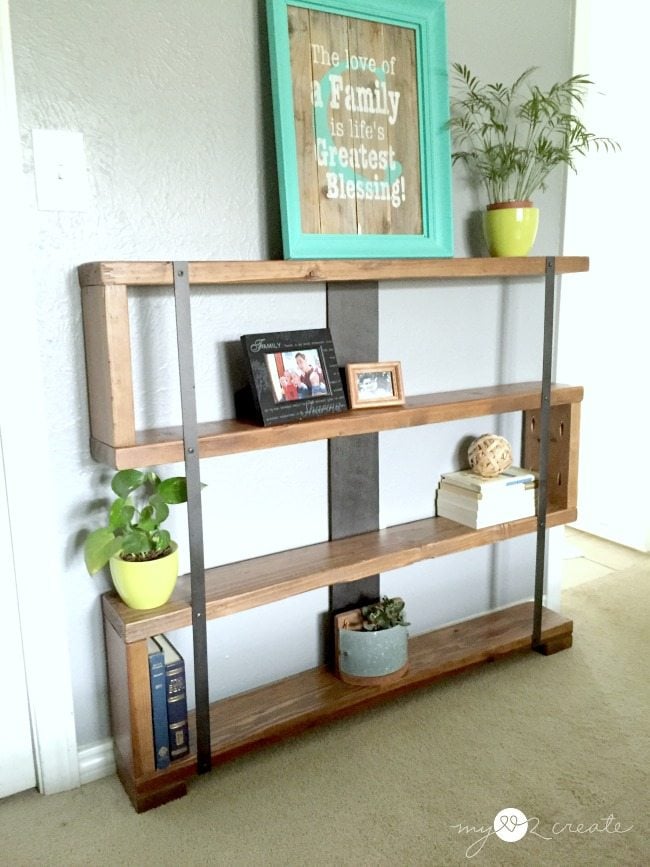
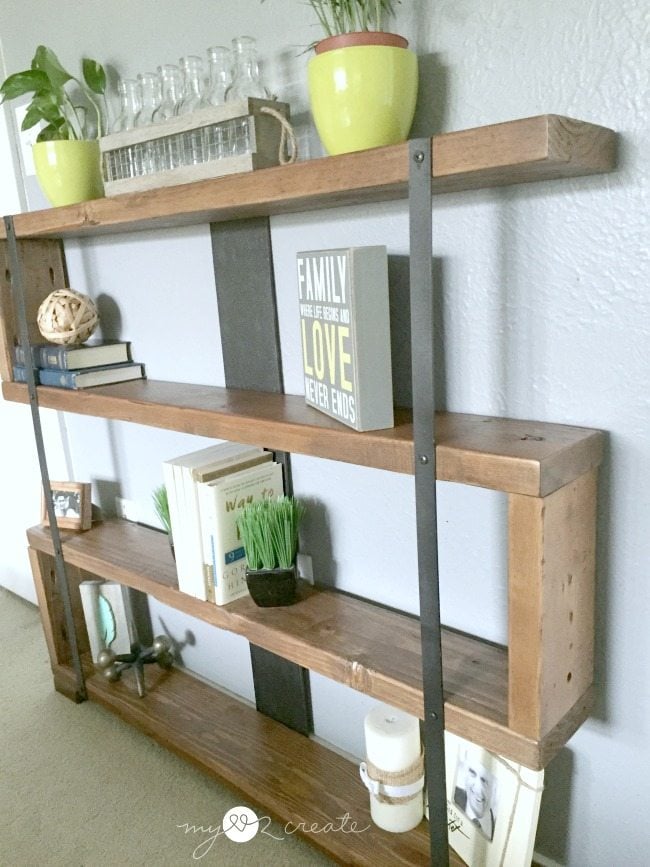
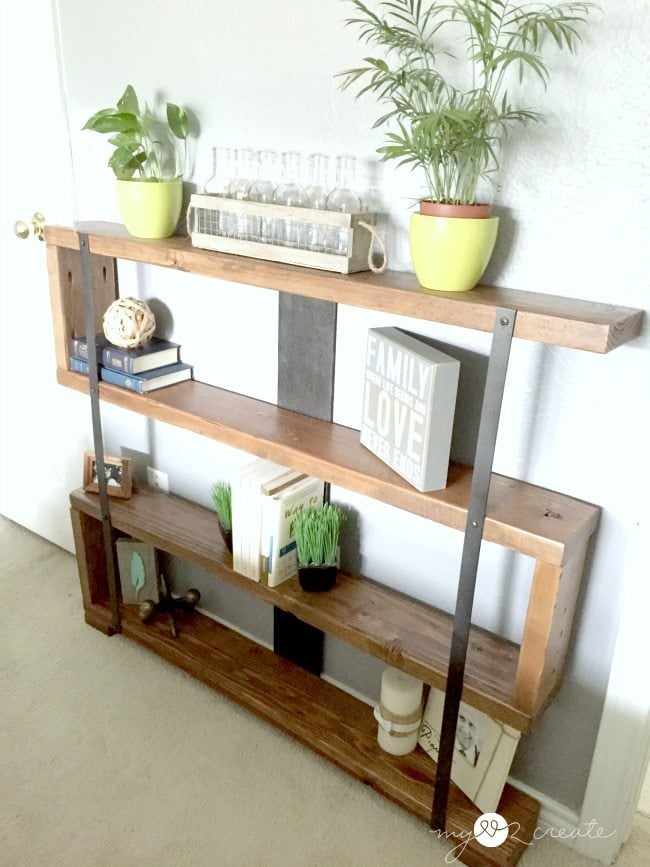
Rustic Industrial Bookshelf in bedroom
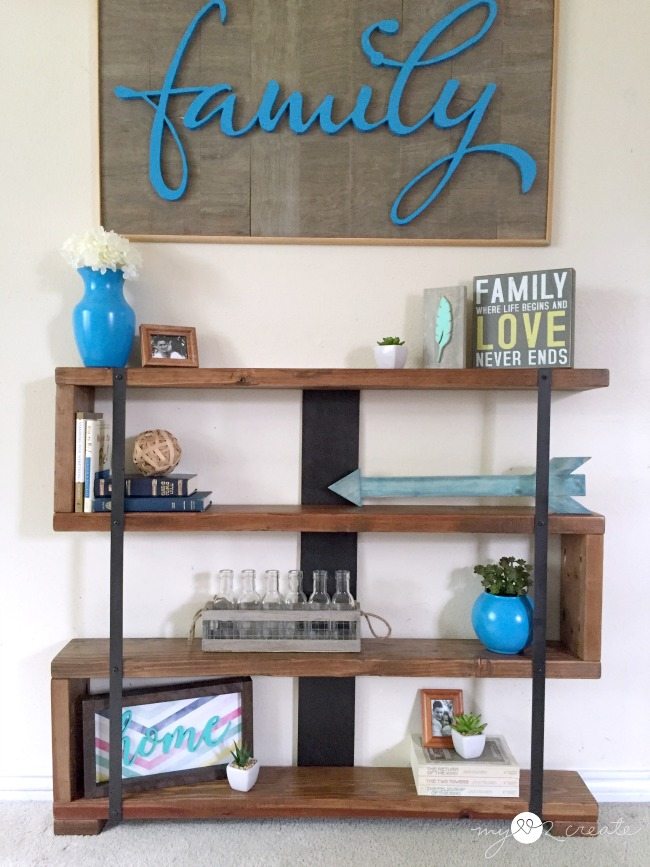
All done!! I started taking photos in my living room because I get better light than in my bedroom. I am not very good at staging, so hopefully you can look past that and see how cute the shelf is!
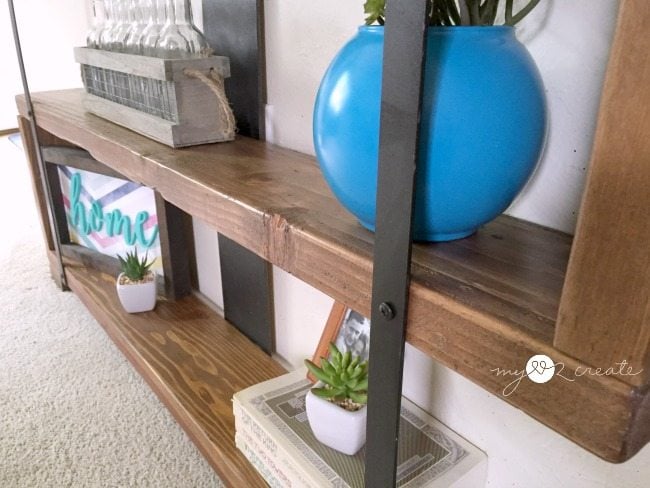
It fits smaller books and home decor items very nicely. It would be perfect for DVD’s or video games if you wanted to use it for media storage, it is about the same width as my kid’s Video Game Storage that I built from drawers.
I moved it into my bedroom and tried several different staging options.
It was hard work let me tell you! Ha ha! No really, people that can stage things have a real talent. Just sayin.
And like I said the lighting is bad in here…
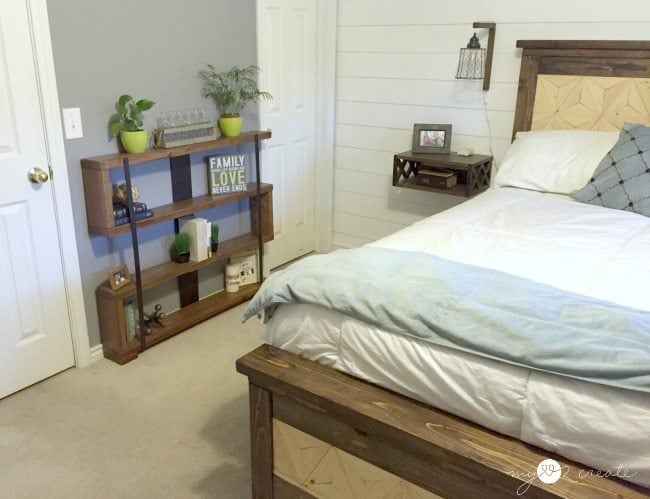
Here is a better shot from the other side. I love how it goes with my Farmhouse Storage Bed and Floating Night Stands, you can also spy my Plank wall and DIY Plug in Sconces.
Now you know why I wanted it to be so narrow, it is a major walkway from my Master Closet to my bathroom. I am super happy with how it looks!
After listening to Gail’s latest episode of DIY with MRL I know where she finds her inspiration, and now you know one of my sources…where do you find yours?
Hugs!
Mindi
see more of Mindi’s posts on MRL below:
[categorythumbnaillist 274]
WOW!! this is awesome! I have a custom DVD/CD storage piece I’ve been wanting to make, and have been stuck on how to do the support part – your piece has given me much needed inspiration! I love your rustic/metal/wood combination, and the metal was the missing piece for my project – thanks! 🙂
I LOVE this bookshelf. Its the perfect size and looks pretty easy to make!
awesome narrow bookshelf! love the staging!
Thank you so so much! You made my day! 🙂
what? staging problems? You know I struggle with it, but oh my, I think it looks beautiful Mindi! I like it best in the first photo (I think) Something about that arrow!
Did I miss the part about securing it to the wall? Is it freestanding? I LOVE those metal bars/bands–they give this shelf an awesome industrial look.
Thanks for listening to my new podcast DIY with MRL. I appreciate it. I NEVER look at crate and barrel for inspiration–that’s gonna change!
gail
Thank you so much Gail, I am glad my staging doesn’t looks as bad as I thought! 🙂
It actually stands fine on its own and because the baseboard pushes the bottom out that 1/2” it helps the top rest on the wall and makes it pretty sturdy. However, for safety reasons it would be very easy to secure to the wall, and I would recommend it especially with small kids around. To secure it to the wall, just drill a hole through the 1/4 plywood back support into a stud in the wall. If there is no stud, a wall anchor would work too. Add a screw under the top shelf and one just above the bottom shelf and it would not move an inch! I was going to mention that in the post but forgot thanks for mentioning it!
Oh, and you will love Crate and Barrel!