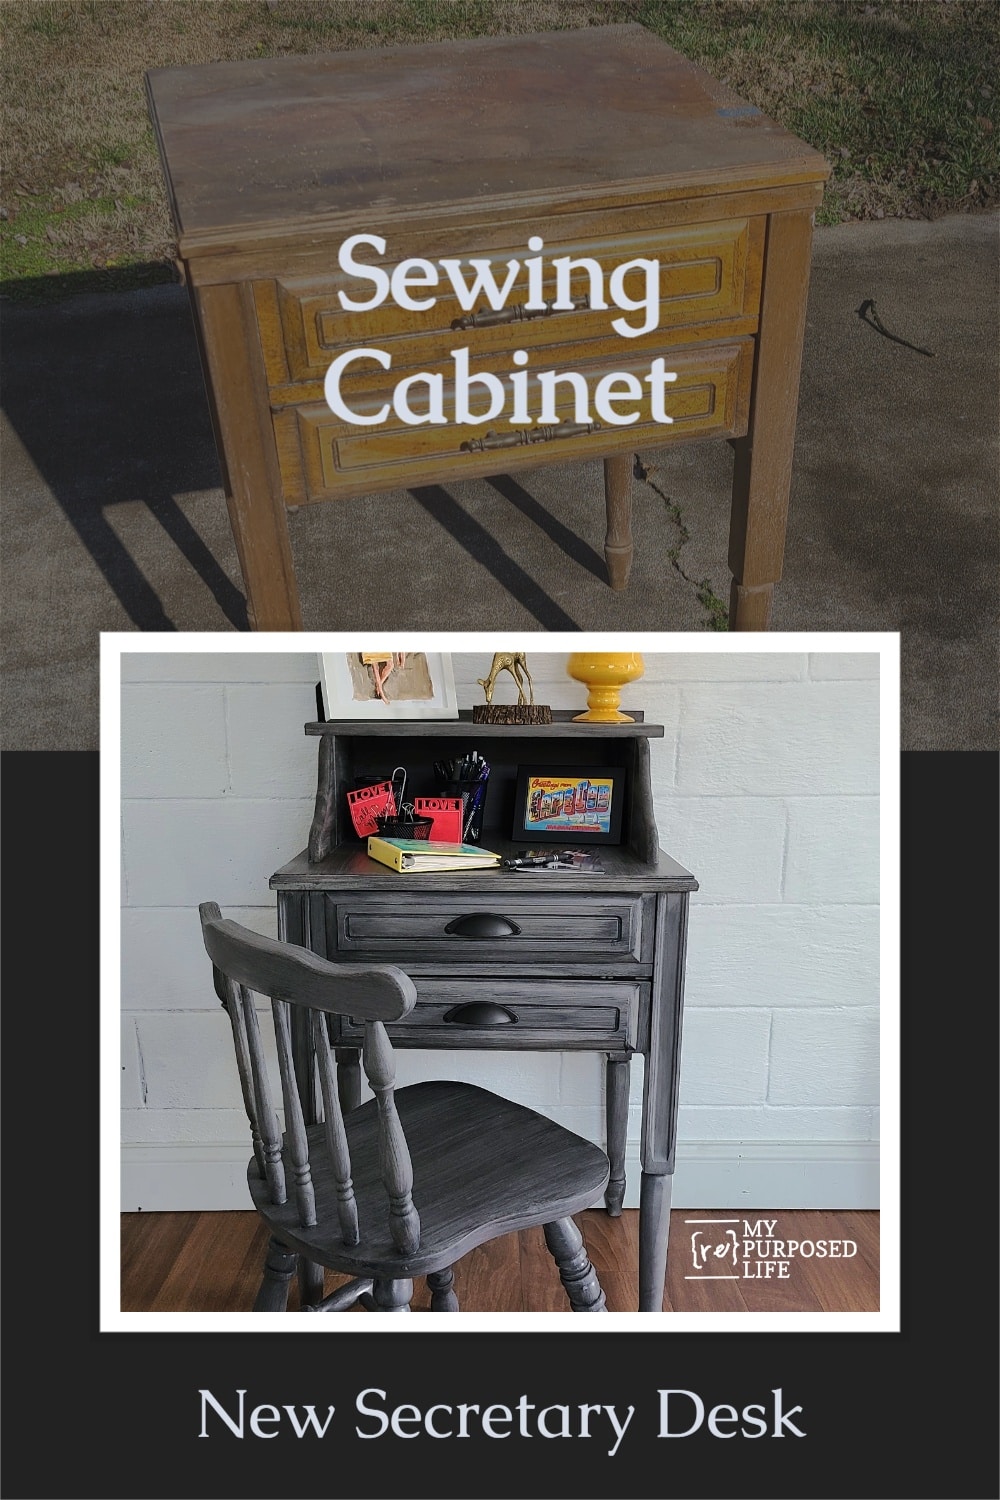
Secretary Desk | Repurposed Sewing Cabinet
As an Amazon Associate, I earn from qualifying purchases.
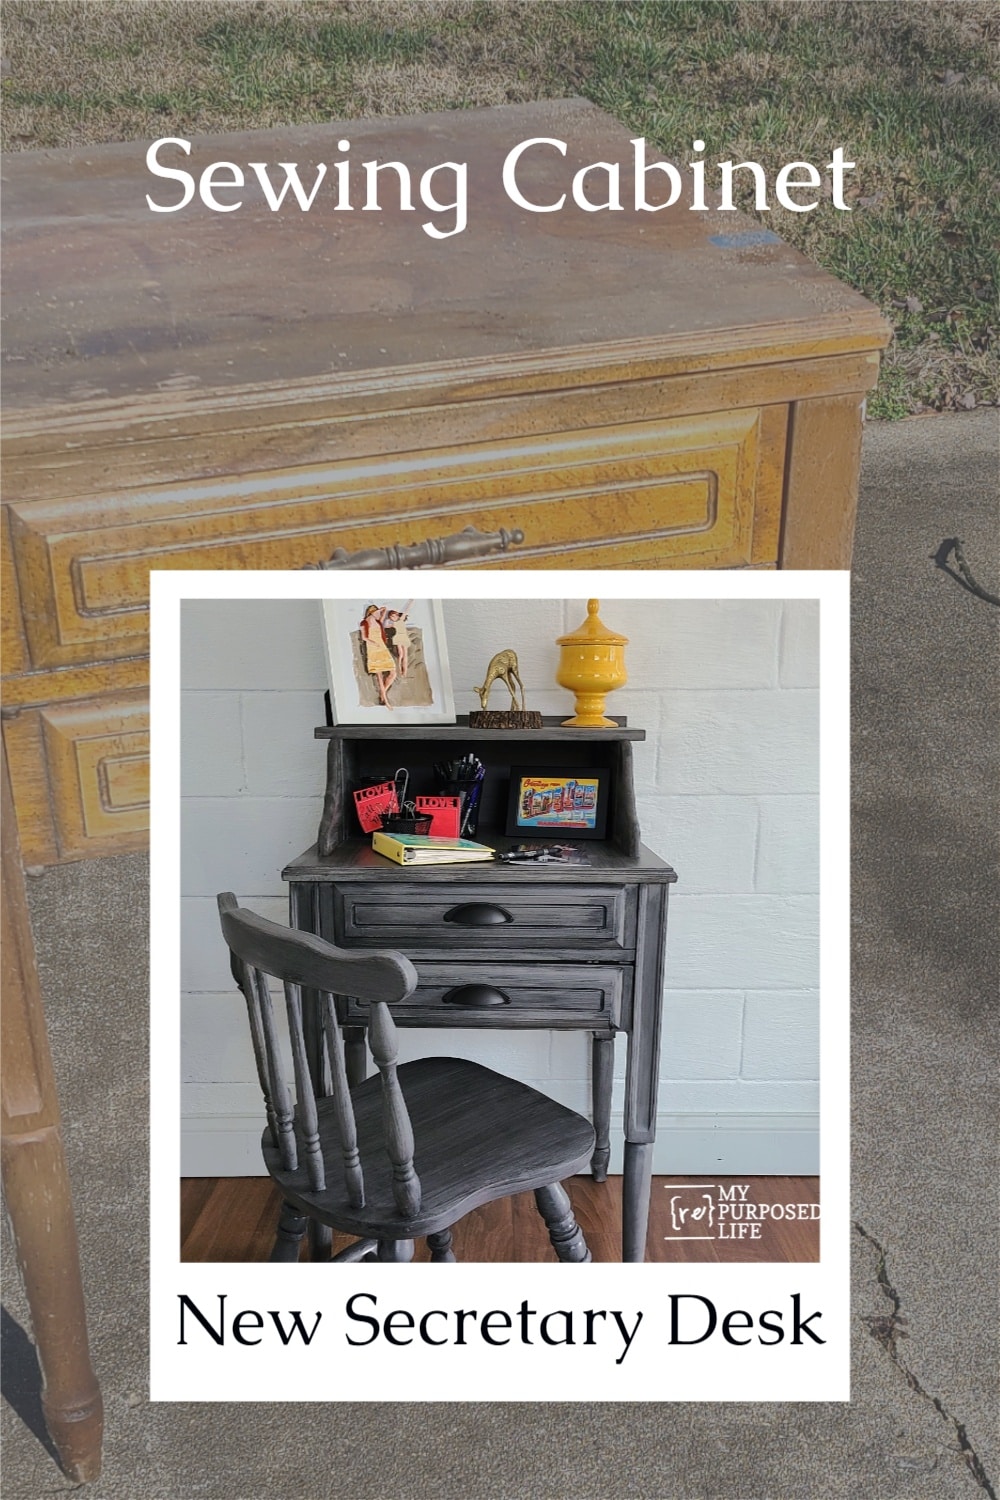
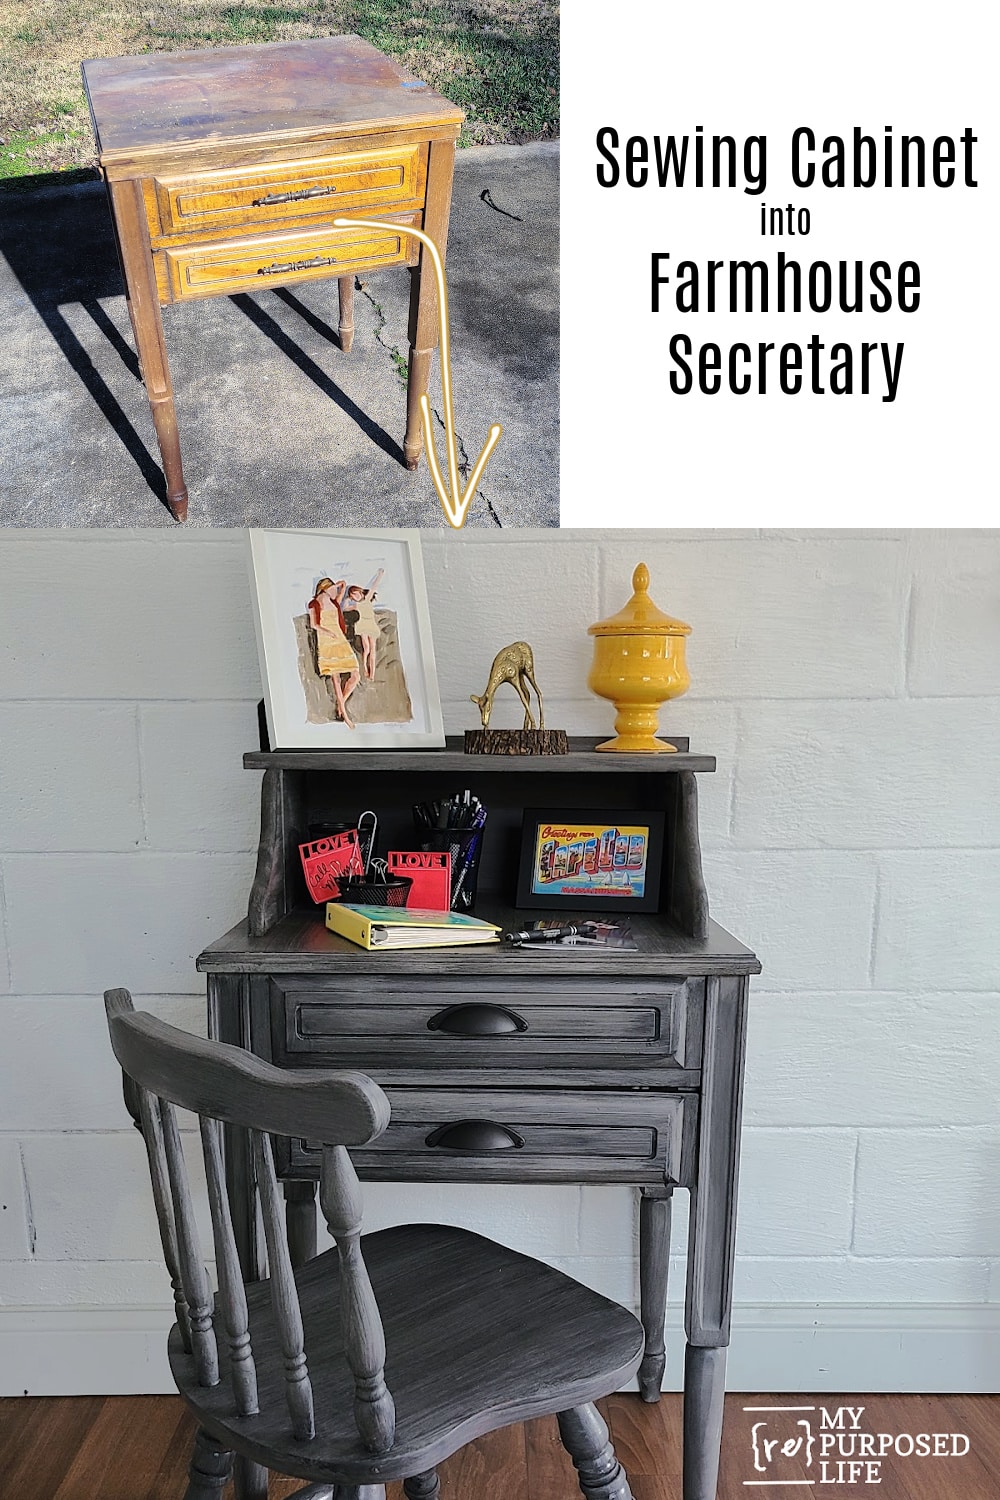
I have repurposed a lot of sewing cabinets, but I turned this sewing cabinet into a secretary desk! Of course you could use it as a library table, or maybe in a nook, perhaps in your kitchen. I found my inspiration for this sewing cabinet turned secretary desk on Pinterest. But upon closer inspection of the pin, I noticed it is actually dollhouse furniture!! Too funny!

FARMHOUSE SECRETARY DESK MADE FROM OLD SEWING CABINET
Let’s see how the new piece came together.
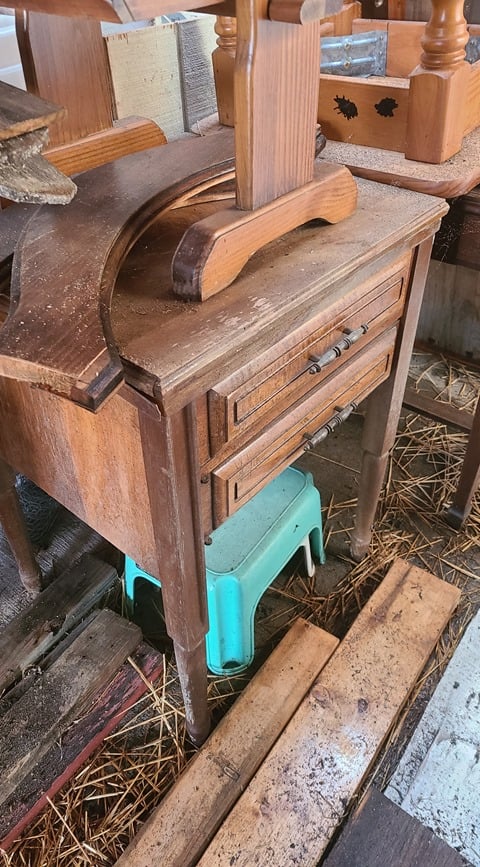
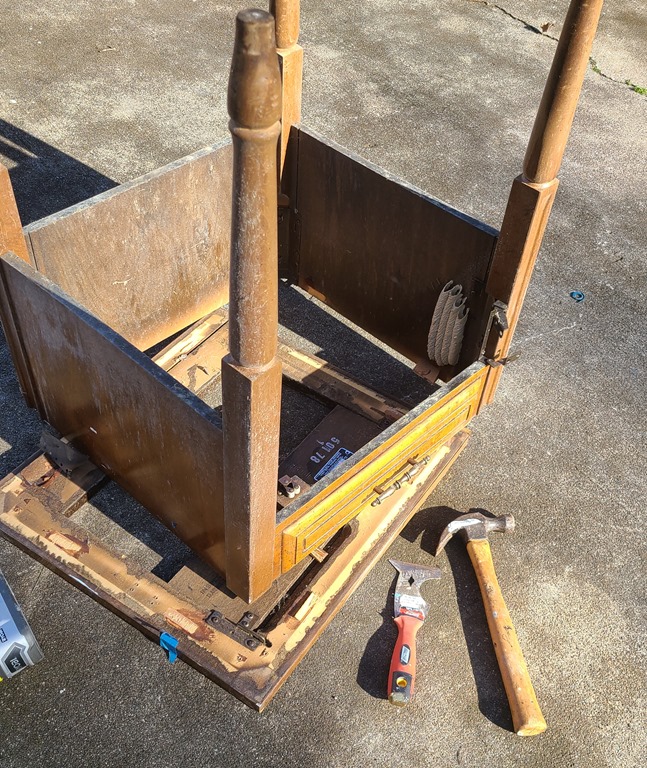
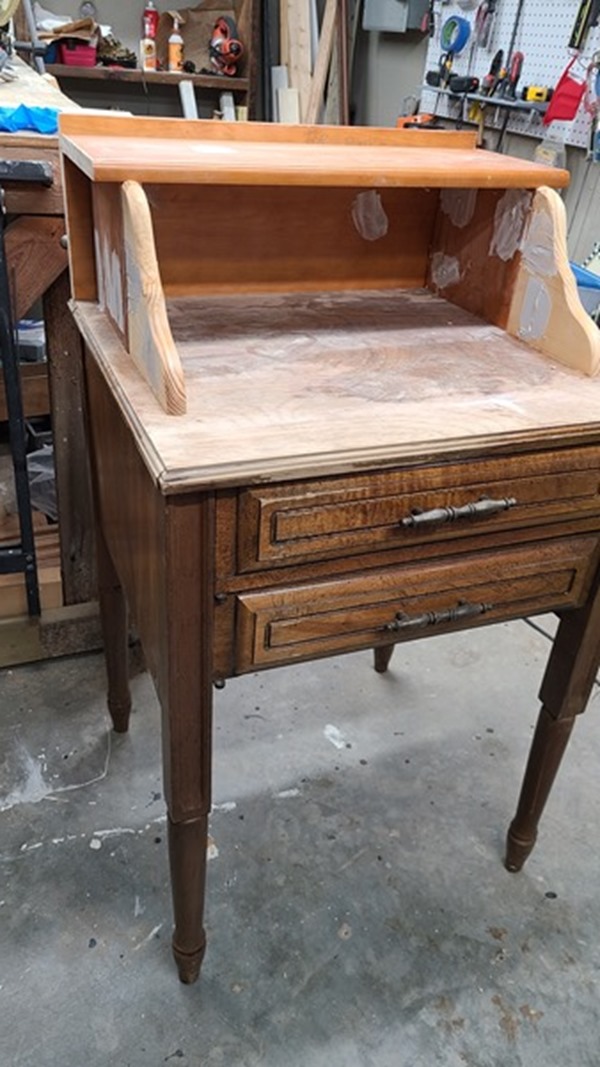
First, I had to dig in the wood shed for a victim. It’s definitely time to organize this place where projects wait for their makeover!
I suppose it could be in worse shape, mostly it just needs cleaning up. What you can’t see from this picture is how H.E.A.V.Y this thing is! I was barely able to drag it out of storage.
DISMANTLE OLD SEWING CABINET
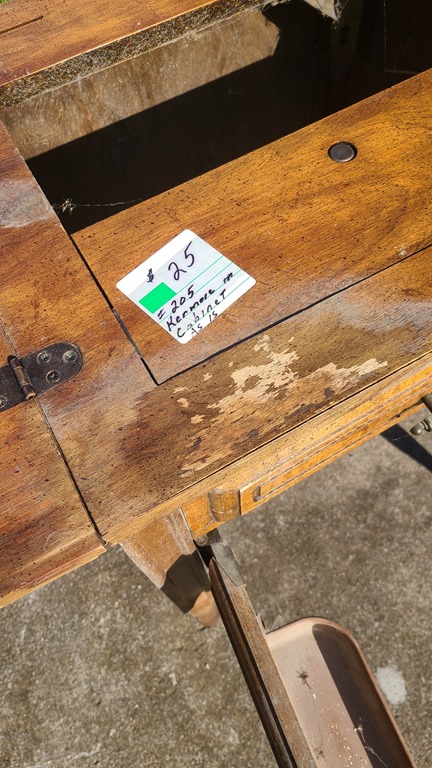
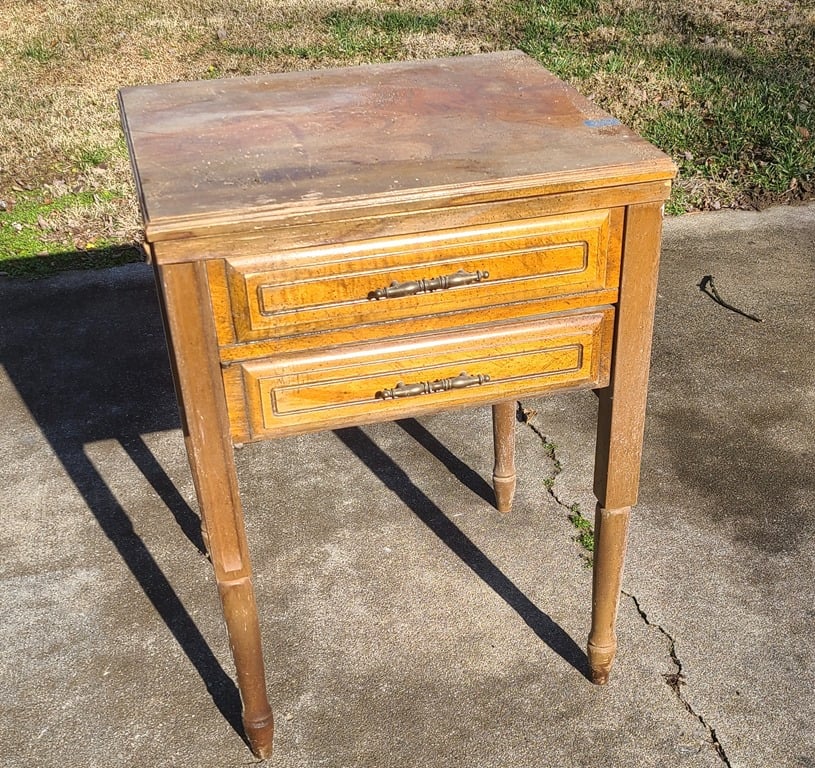
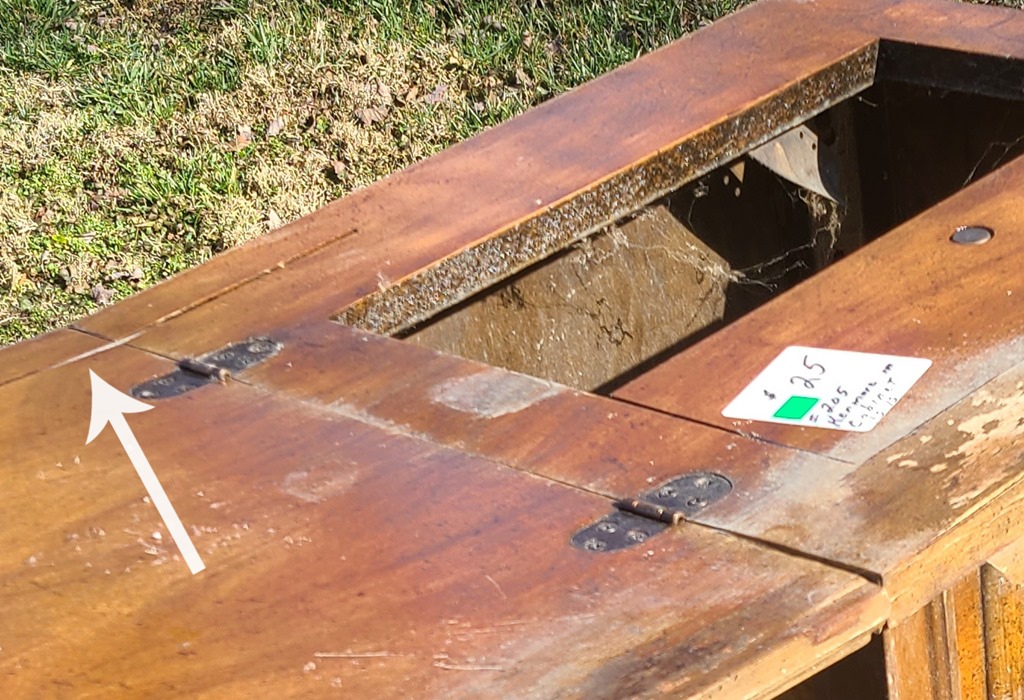
The price tag might say $25, but I know for a fact, I would never pay that much for a project piece.
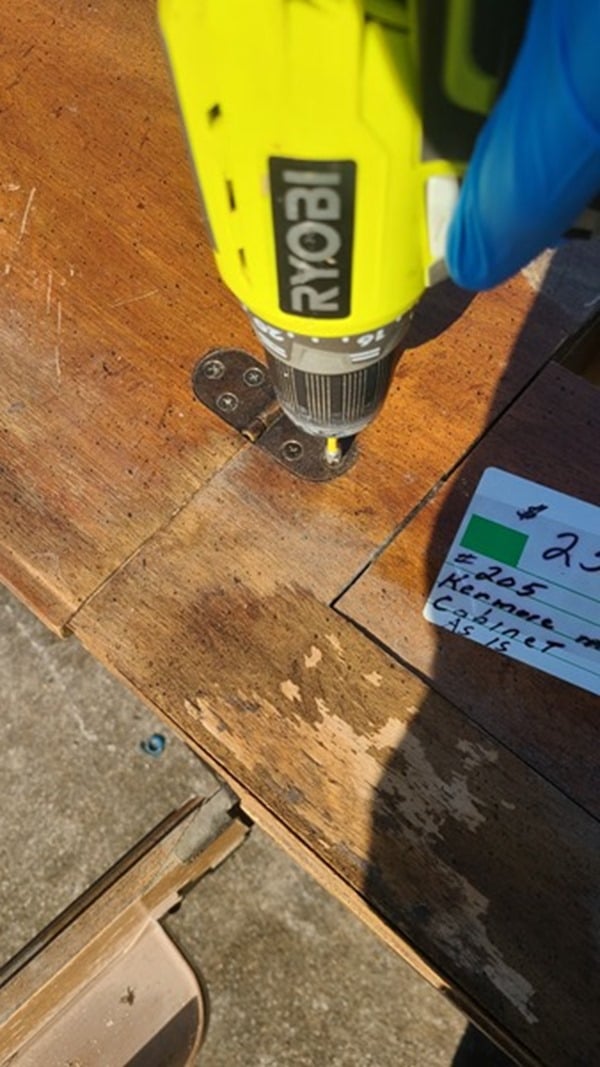
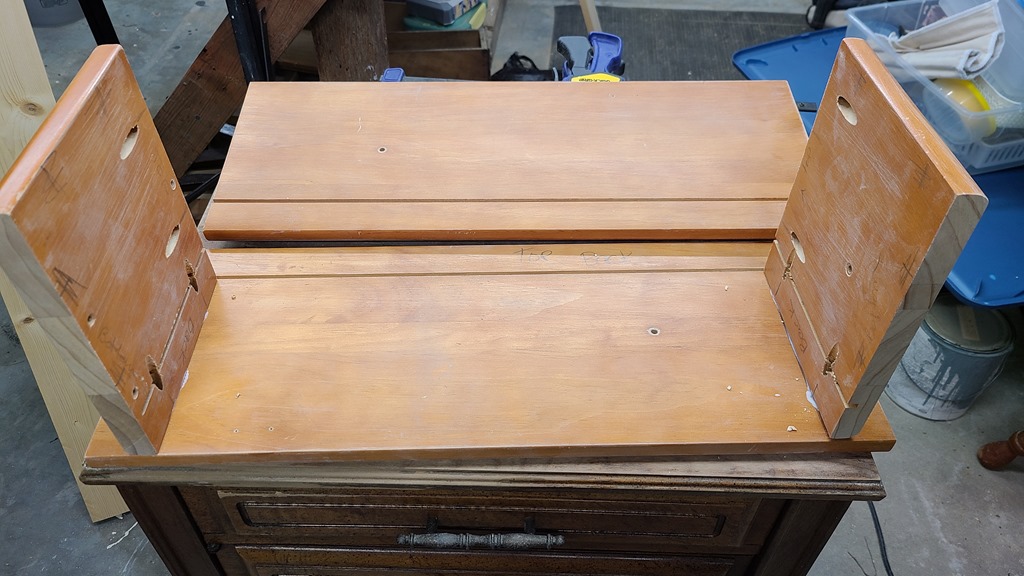
The plan was to work on this project in the basement shop. But, as it was—there was no way I could carry this thing all that way. Step one was to start dismantling the soon to be secretary desk. So, I got busy removing the hinged top.
Next, I got busy removing the frame that actually held the sewing machine. Do you see that stamp? Inspected by Clarence Bennet? That’s quality job 1, when a person was willing to put their name on their work. But—you’ll see later that Clarence may not have had his head in the game this day.
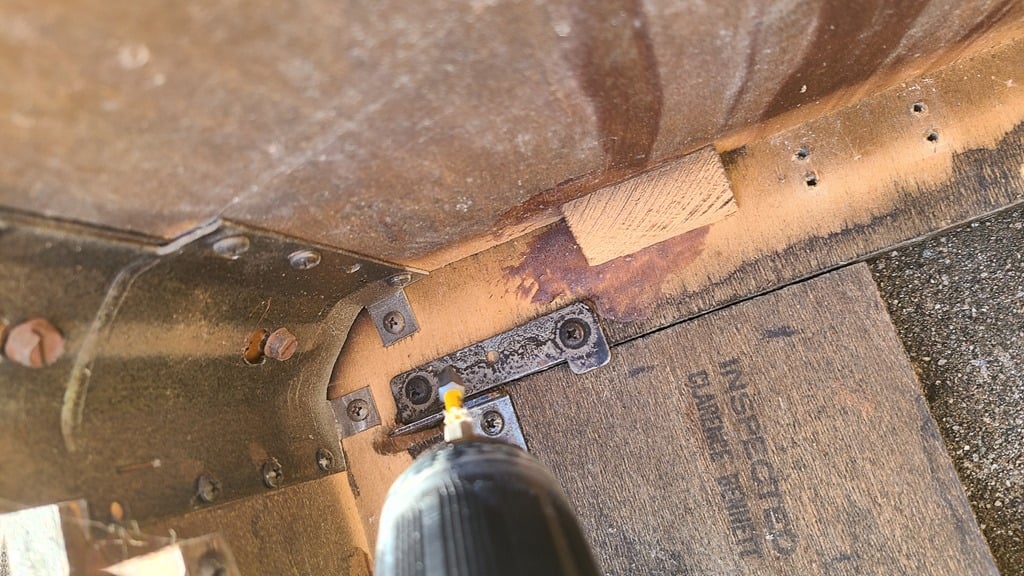
These small pieces were glued in order to help secure the sewing machine frame. I used a painter’s tool to break the glue seal.
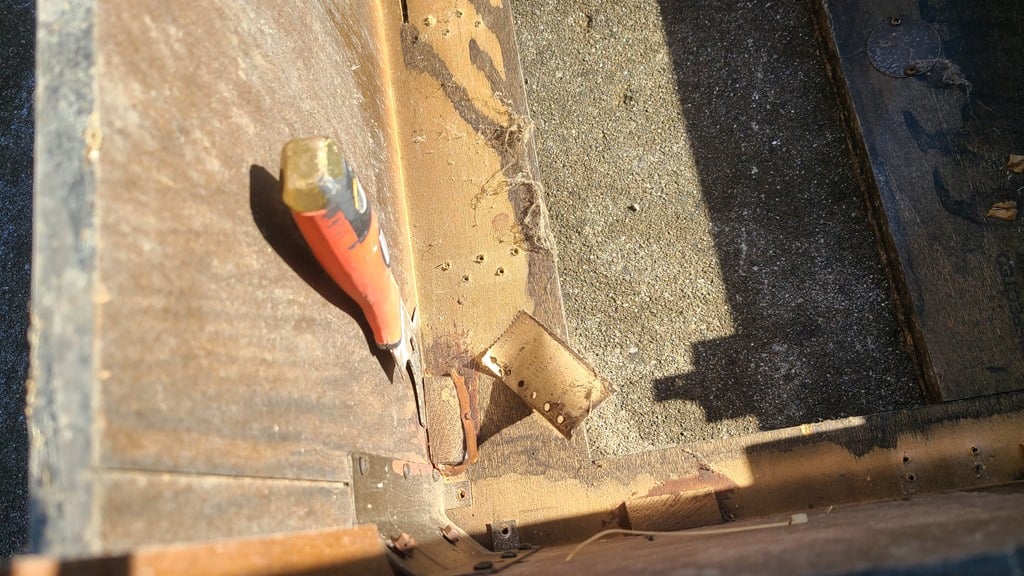
That’s better! If you take your time, your sewing cabinet will be perfect for it’s new use, in this case, a secretary desk!
DIRECTIONS FOR DISMANTLING SEWING CABINET LID
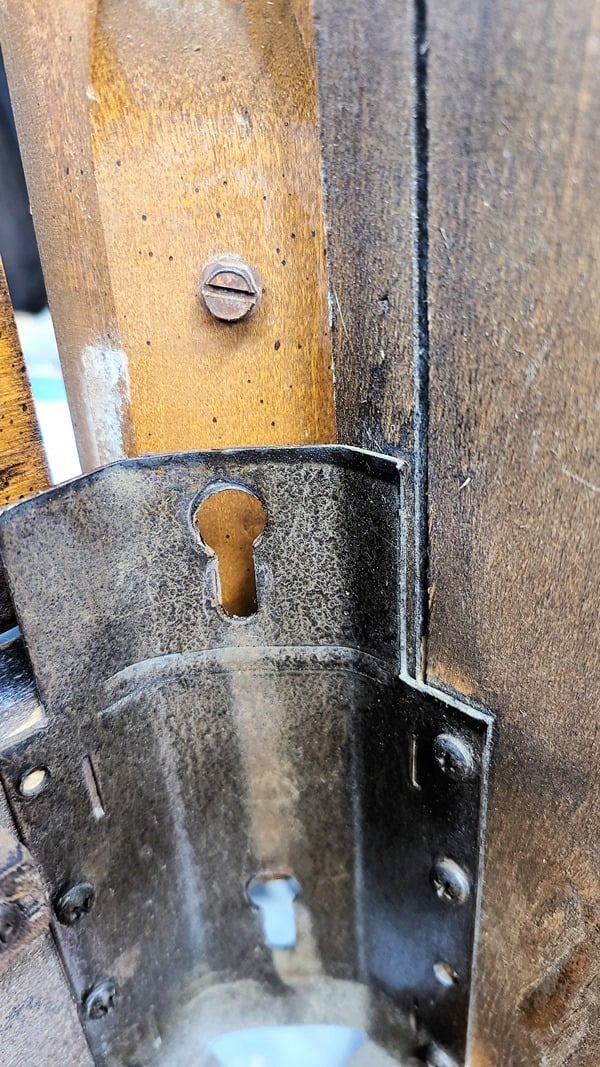
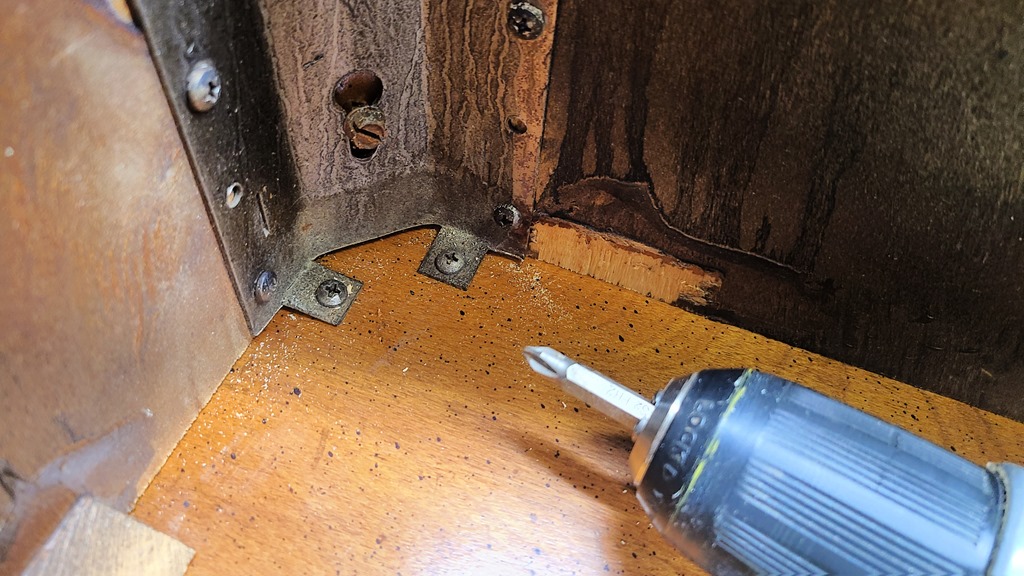
When the sewing machine lid is opened, there is this brace that keeps the lid from getting too stressed. It isn’t difficult to remove IF you know how!
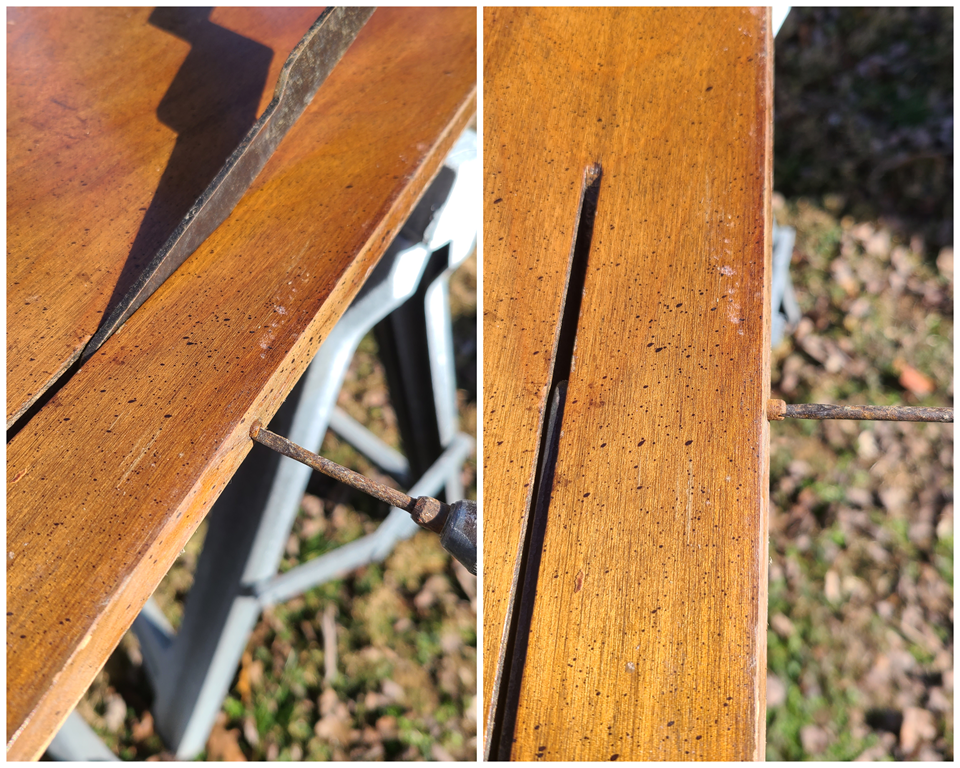
The last time I worked on a lid like this, I didn’t see this tiny screw on the side. I almost messed the lid up trying to pry the brace out. LOOK for the little screw to remove.
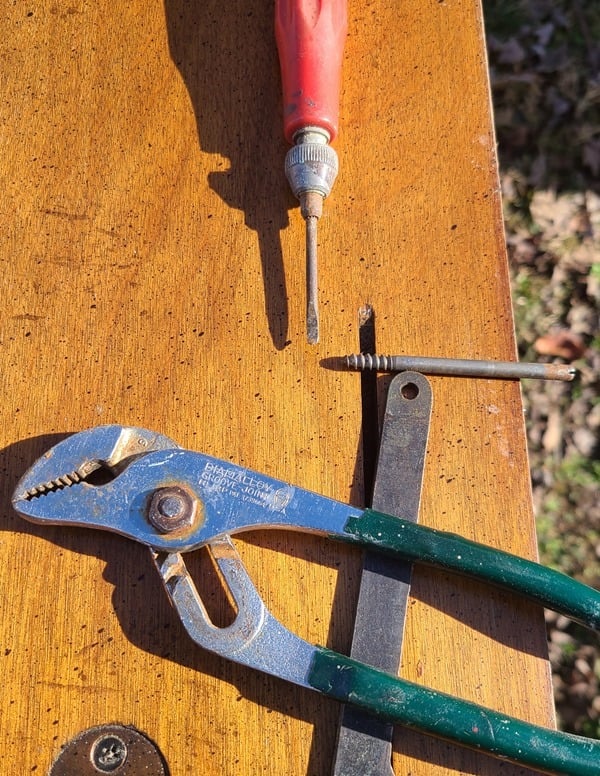
Do you see how long that little screw is? I won’t bother to fill the slotted area, as the bottom of the lid will not be visible. But at least that brace is out of the way.
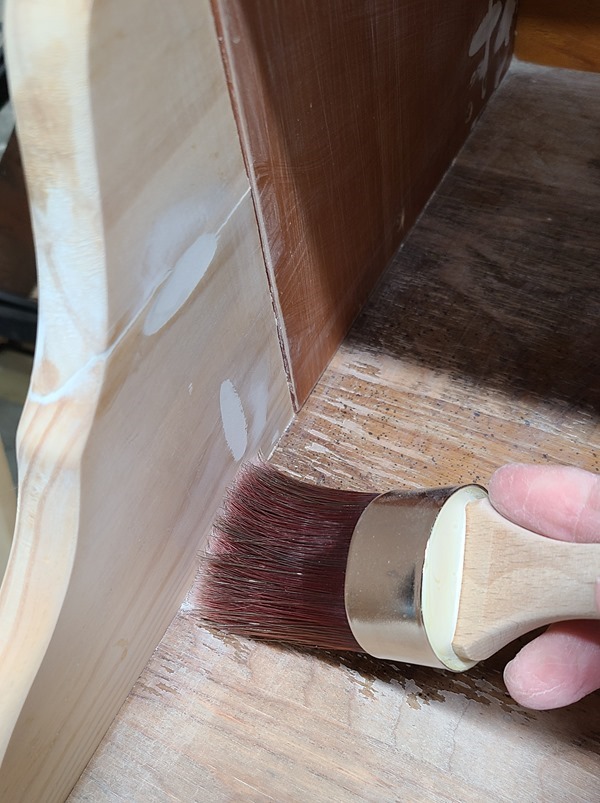
HOW TO CLEAN OLD FURNITURE
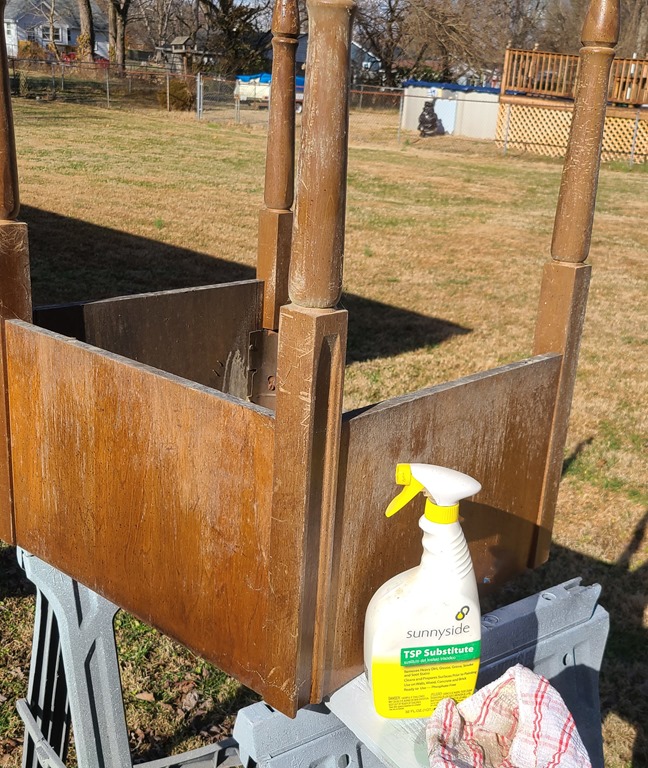
This old thing was really, really dirty. I chose to clean it with TSP substitute and a rag.
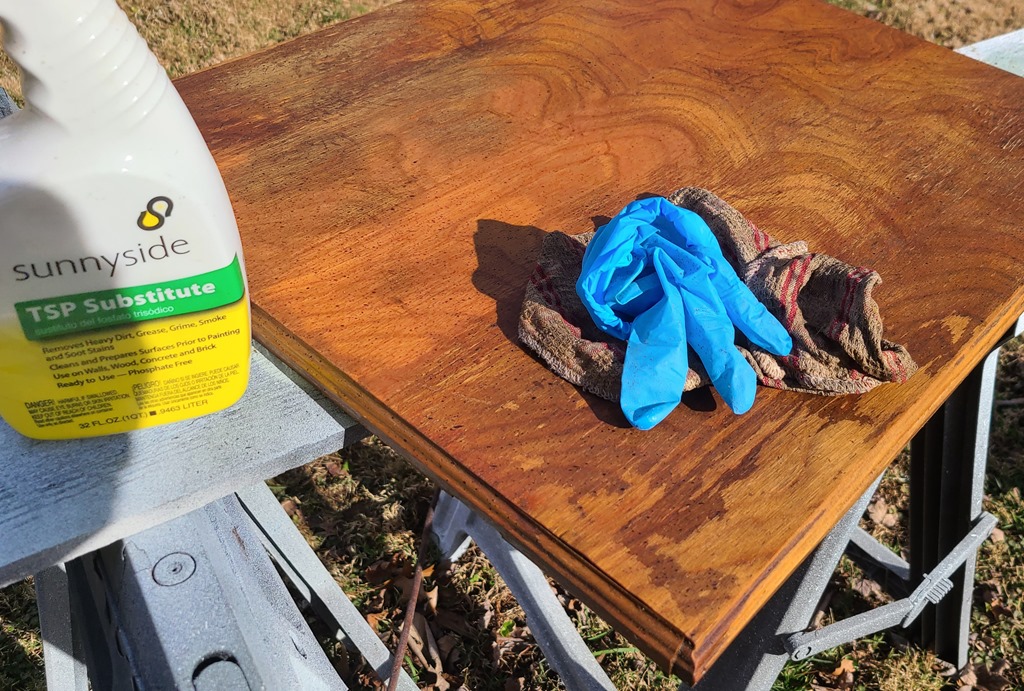
So, now the lid was ready for cleaning. Check out how nasty that rag is. After cleaning with the TSP substitute, I realized that the varnish was in rough shape and I would need to sand the top of the secretary desk/repurposed sewing machine.
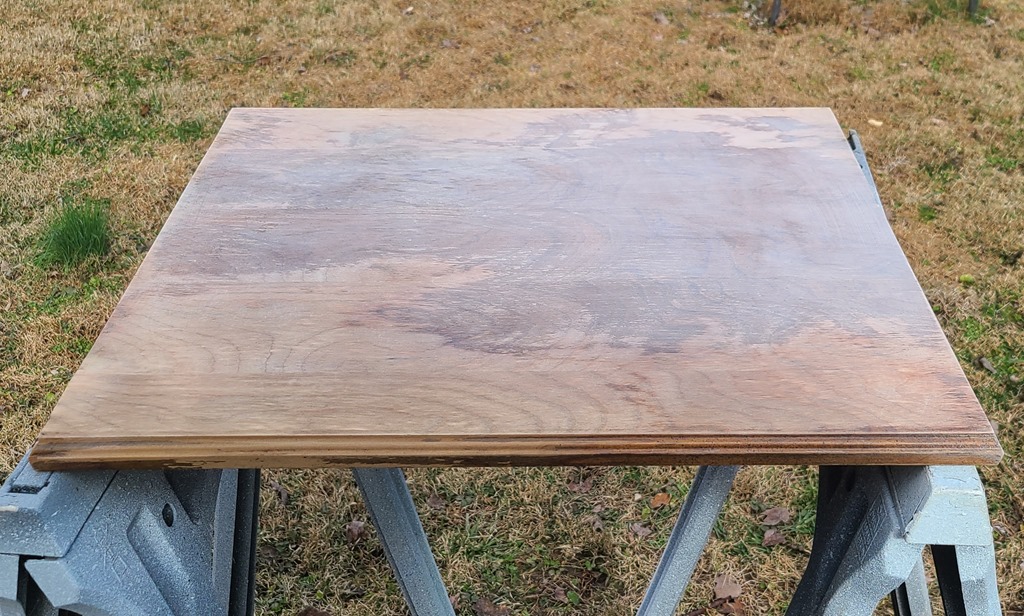
Isn’t that looking better? The top is now smooth and ready to move to the basement shop for it’s makeover into a new secretary desk.
INSPECT THRIFT STORE FURNITURE
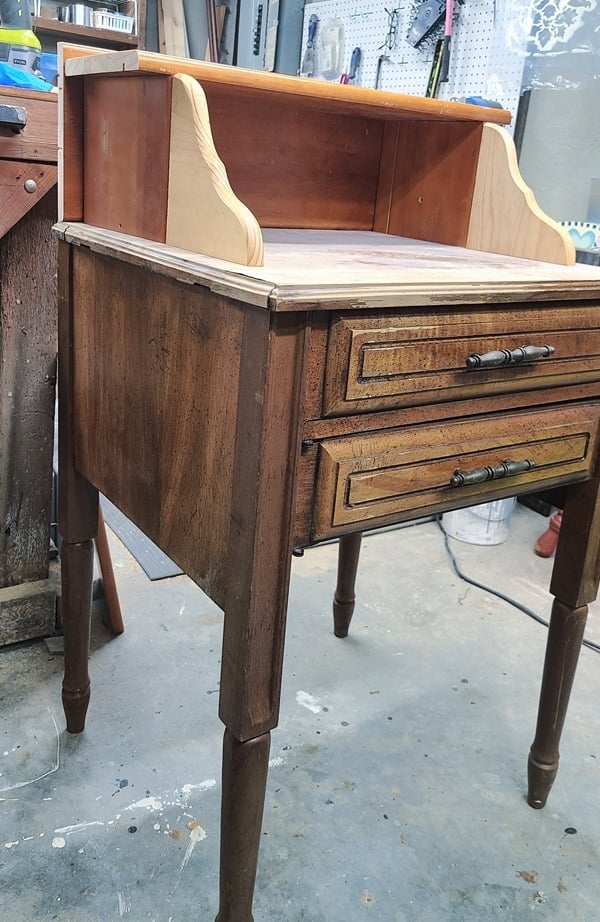
Okay, now we’re in the basement shop, getting serious about turning this sewing cabinet into a secretary desk. I’m about to reattach the top . . . as I’m checking to make sure it’s even on all sides, I notice a problem with the leg. Do you see it? The leg on the right has some detail on it, but the leg on the left is plain! This is why I think Clarence was off his game on the day he inspected this cabinet.
I didn’t take a picture, but the matching leg is on the back left side!
Luckily, the leg was really easy to switch out. All I had to do was loosen a couple of screws and slide the leg upward.
REATTACH ORIGINAL LID TO MAKE SECRETARY DESK
I reused the original screws to attach the sewing cabinet lid, which is now the new top to the secretary desk.
Don’t you think it looks so much better without that extra piece in the way? Back in the day, when I did another makeover, I just glued the lid down. But ever since then, I’ve made it a practice to remove that extra piece.
ADD SHELF AND DETAILED BRACKETS

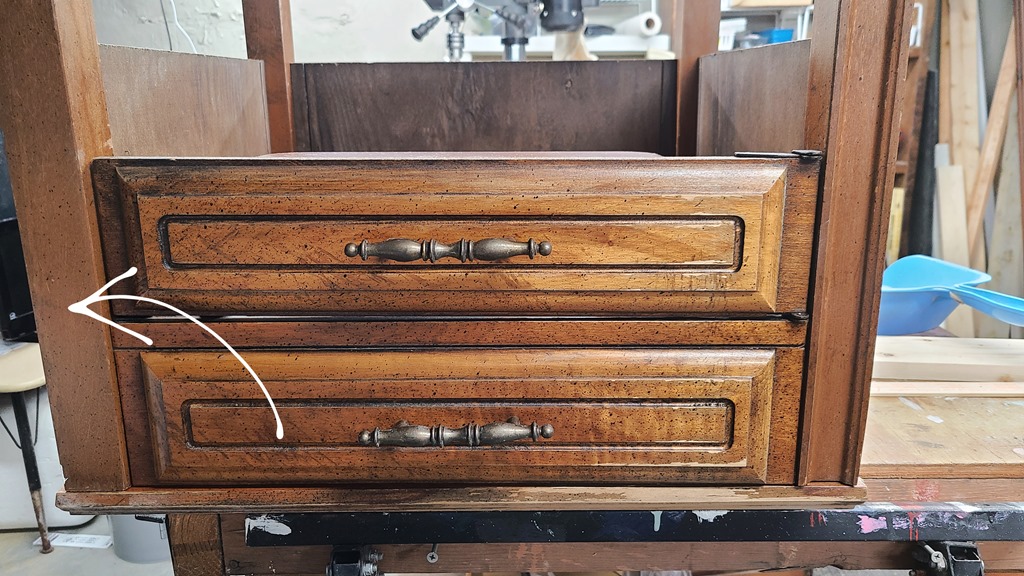
This is where it gets really fun for me. I never draw plans, I just start adding bits and pieces until I get the look I want. Using two different shelf brackets, I try to figure out which I like best. The shelf piece is from a parted out dresser. I had 4 drawer fronts in my stash that were perfect!
It looks like the smaller brackets are going to work best. This is just a dry fit as I figure out a plan for assembling the shelf that will turn the sewing machine cabinet into a secretary desk!!
Looking at all the different wood tones, interestingly allows you to see how it all comes together. After it’s all painted, it’s all going to come together.
SAND PIECES BEFORE INSTALLING
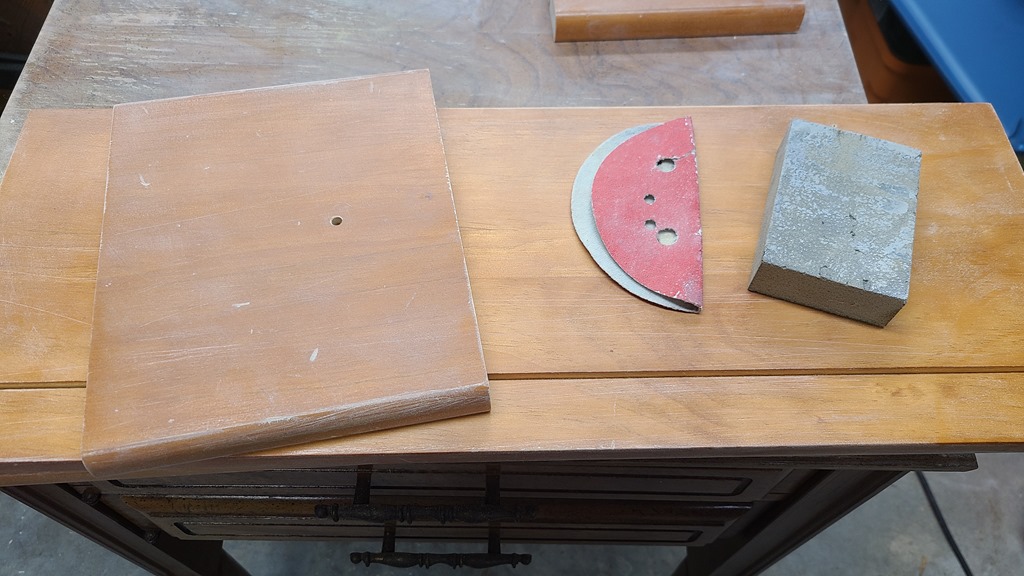
I chose to sand all the pieces to remove the shine before assembling the top portion of the secretary desk.
ASSEMBLE SECRETARY DESK SHELF USING POCKET HOLE JOINERY
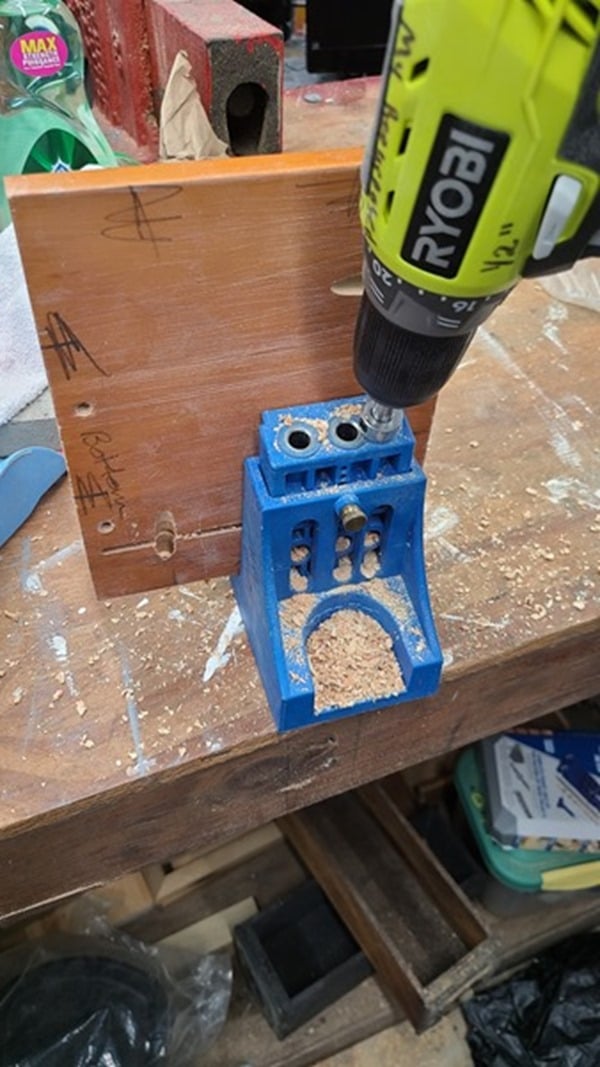
Using the Kreg Jig was an easy decision. To be honest, it was a little challenging figuring out the placement of the pocket holes. If you look closely, you will see I changed my mind a couple of times. I marked the “top” “bottom” and “back” on all the pieces.
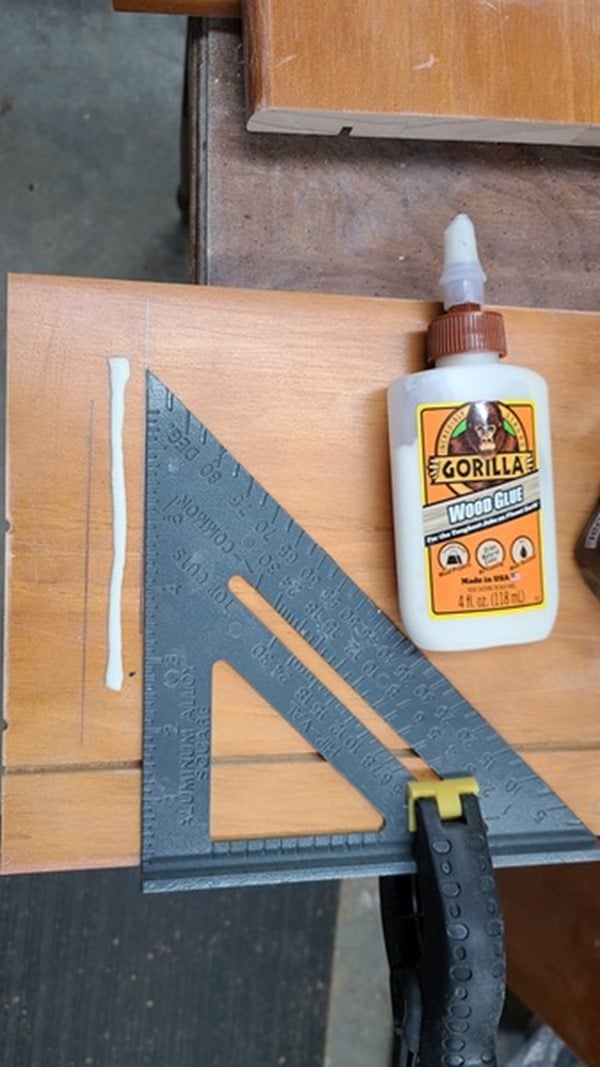
Clamping a speed square insured that my shelf supports would be squared. I used Gorilla Wood Glue on all the joints.
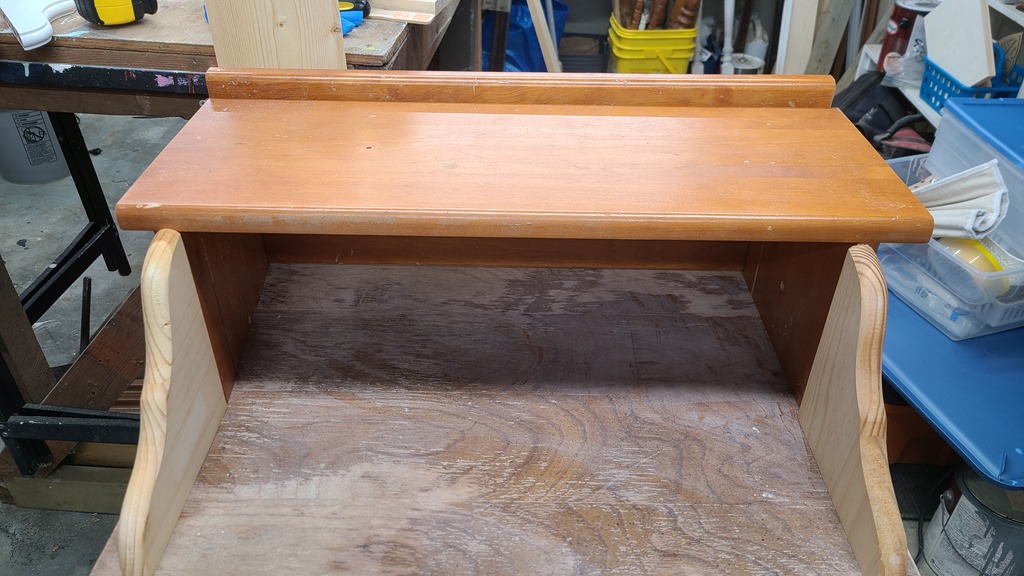
In this image, the shelf is upside down, ready to attach the back.
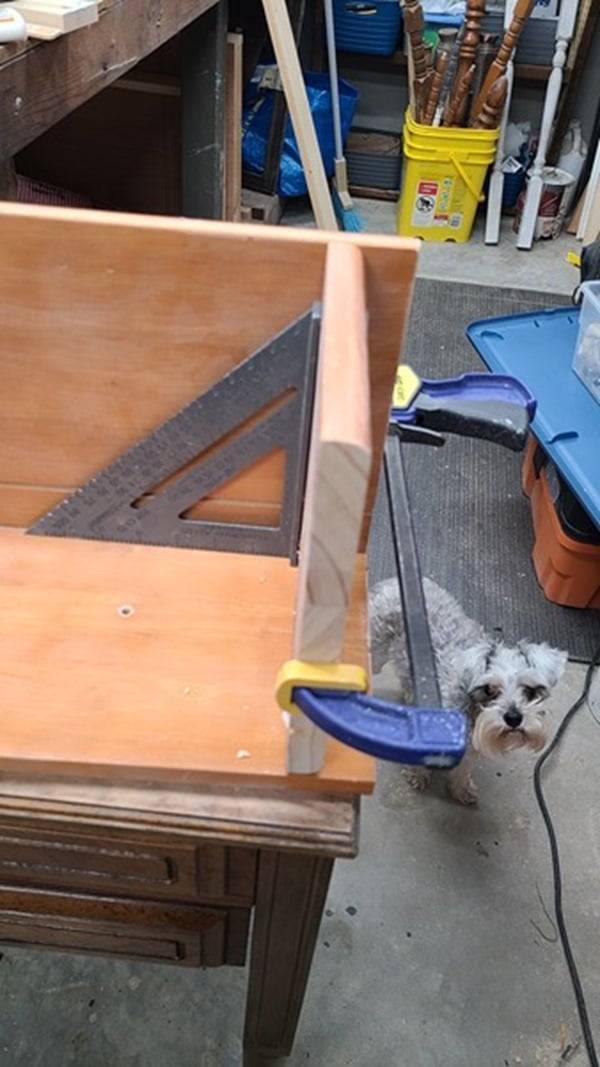
An Irwin Quick Clamp holds the pieces in place while I secure the pocket hole screws. I use the speed square in order to make sure the pieces are squared.
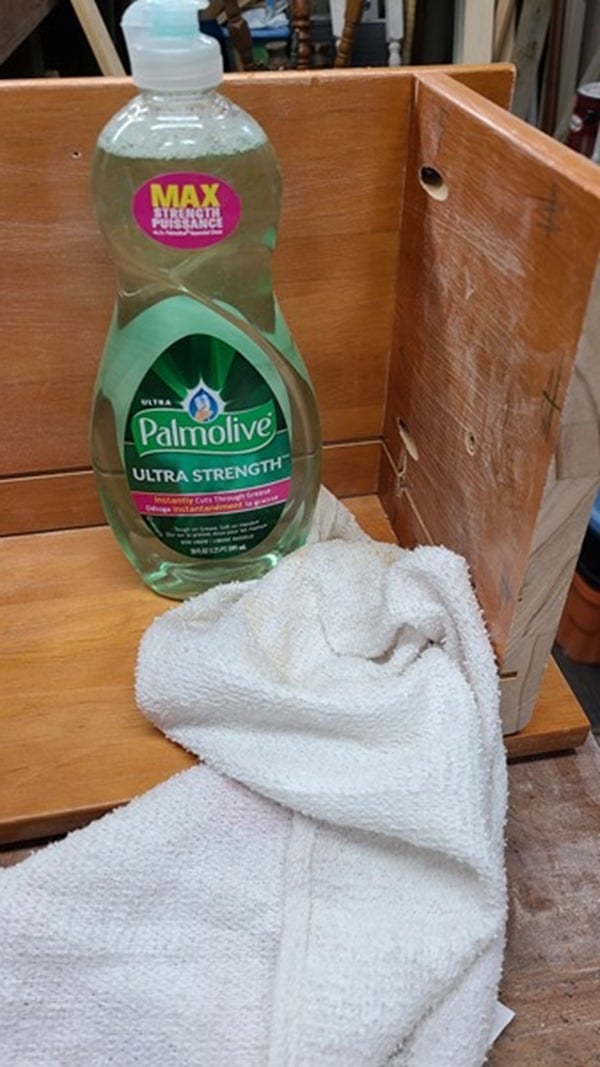
Diluted dish soap is very handy to keep in your shop. It’s great for washing hands, and there’s no need for rinsing. Here, I used it on a rag to wipe away excess wood glue.
PATCH POCKET HOLES WITH DRYWALL MUD

I chose to patch the interior pocket holes before attaching the secretary shelf. Typically, I use drywall mud for filling holes.
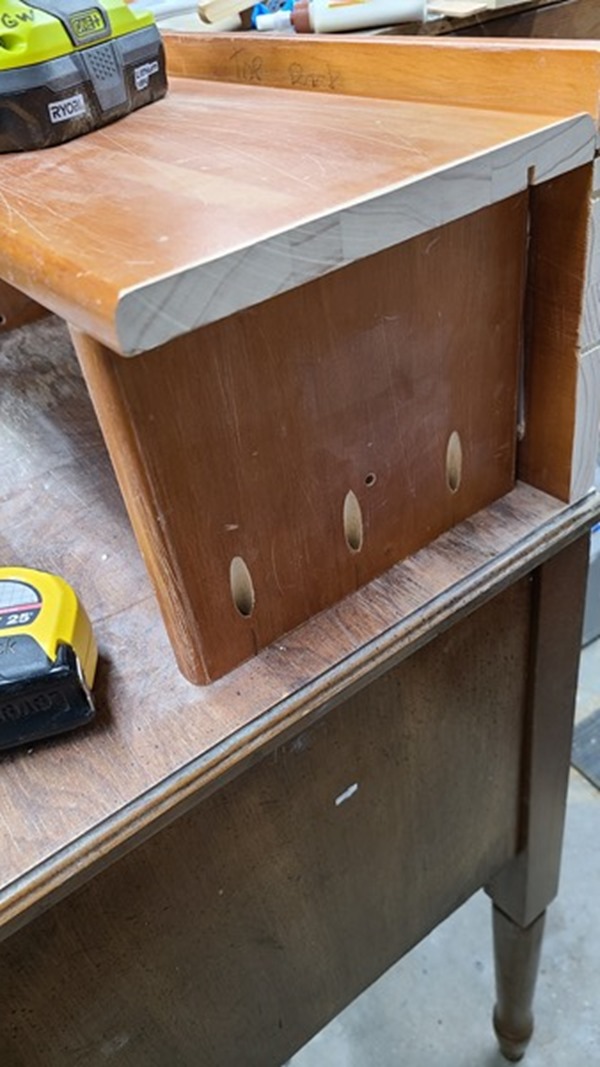
Because, the shelf doesn’t allow room to use a drill, the pocket holes that will attach it to the secretary desk are on the outside of the shelf supports. Not shown, I added shelf brackets to add detail to the secretary desk.
The pocket holes were patched with drywall mud.
After sanding the drywall dust was in all the crevices, I used a clean soft paintbrush to wipe away all the dust.
READY FOR PAINT AND GLAZE
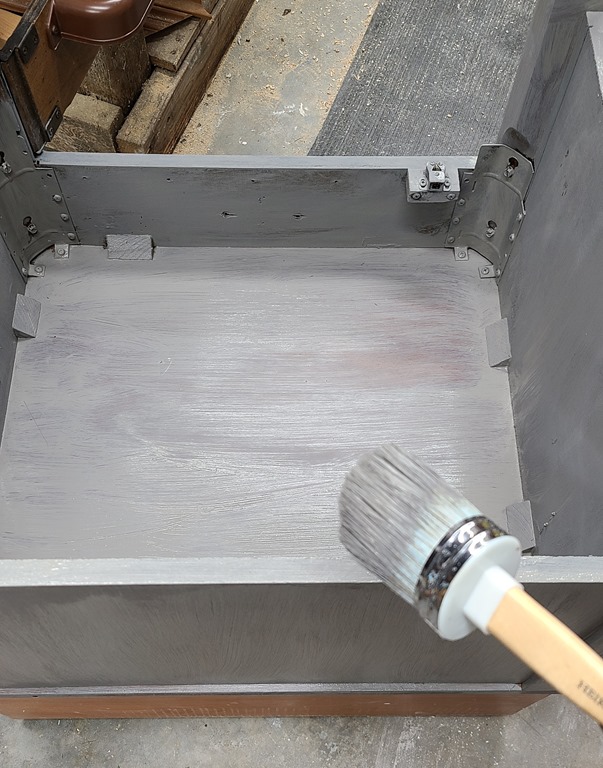
It’s always best to paint the underneath side of your project, especially if you’re going to re-home it.
This is after a couple of light coats of chalky paint.
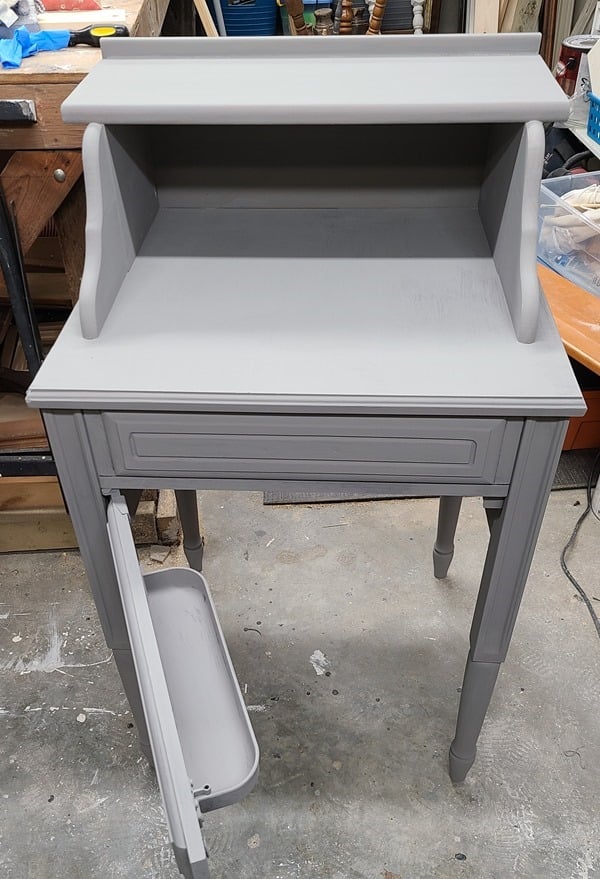
Of course I used my favorite Smoked Gray Glaze. You can see my How To Glaze Painted Furniture for more details. I patched the holes a little because I figured I would replace the dated handles.
ADD NEW HARDWARE | BIN PULLS
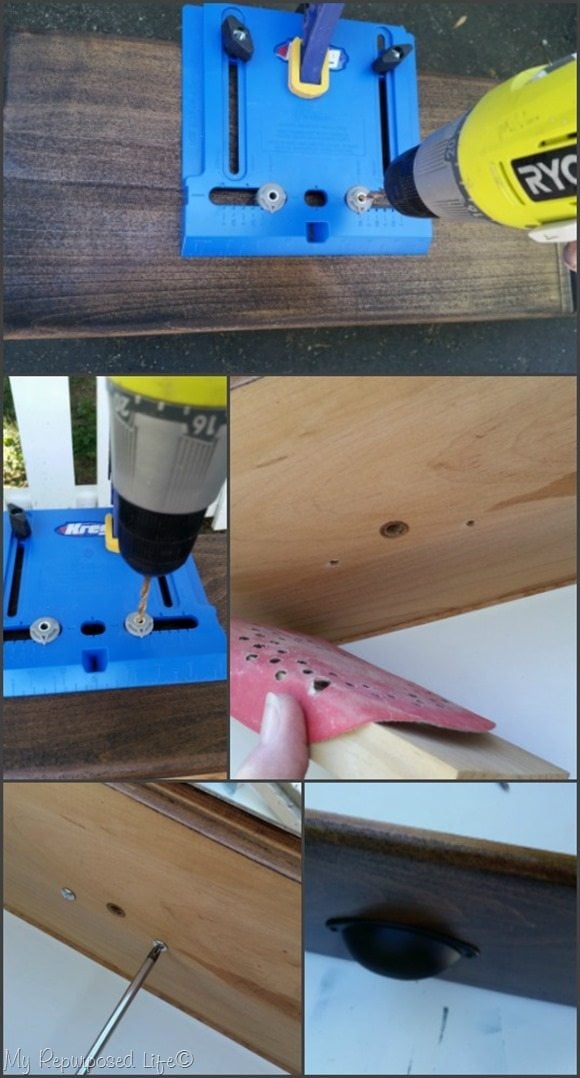
I didn’t take pictures, but I used the Kreg Cabinet Hardware Jig to drill holes for the new bin pulls. Just like I did on this Modified Dresser Project.
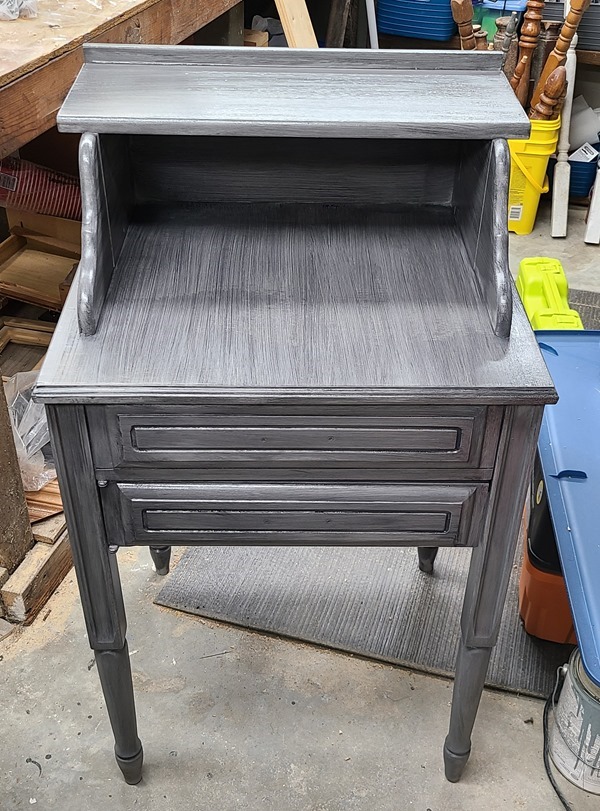
DARK GRAY GLAZED FARMHOUSE SECRETARY DESK
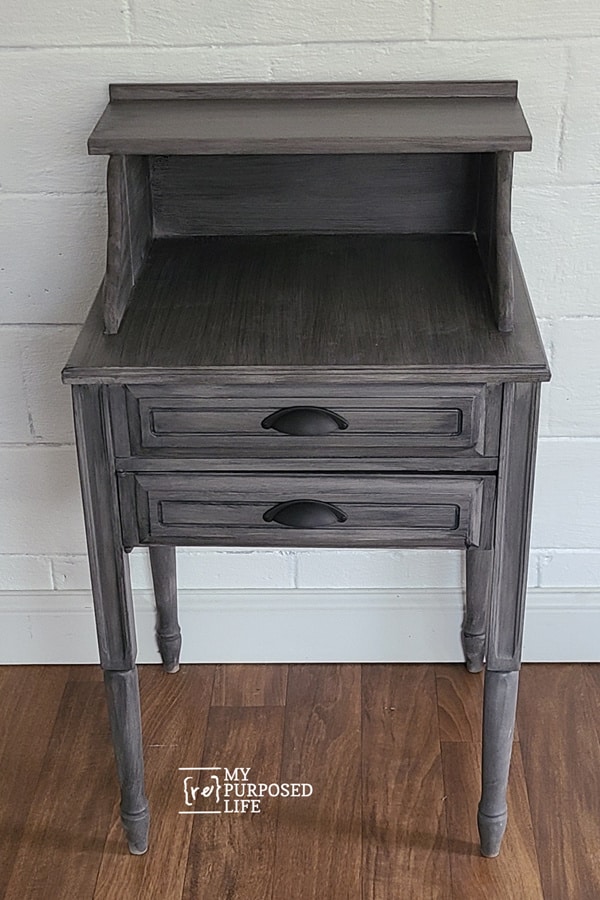
The bin pulls were silver, I painted them black. That jig really makes it so much easier to install cabinet hardware!!
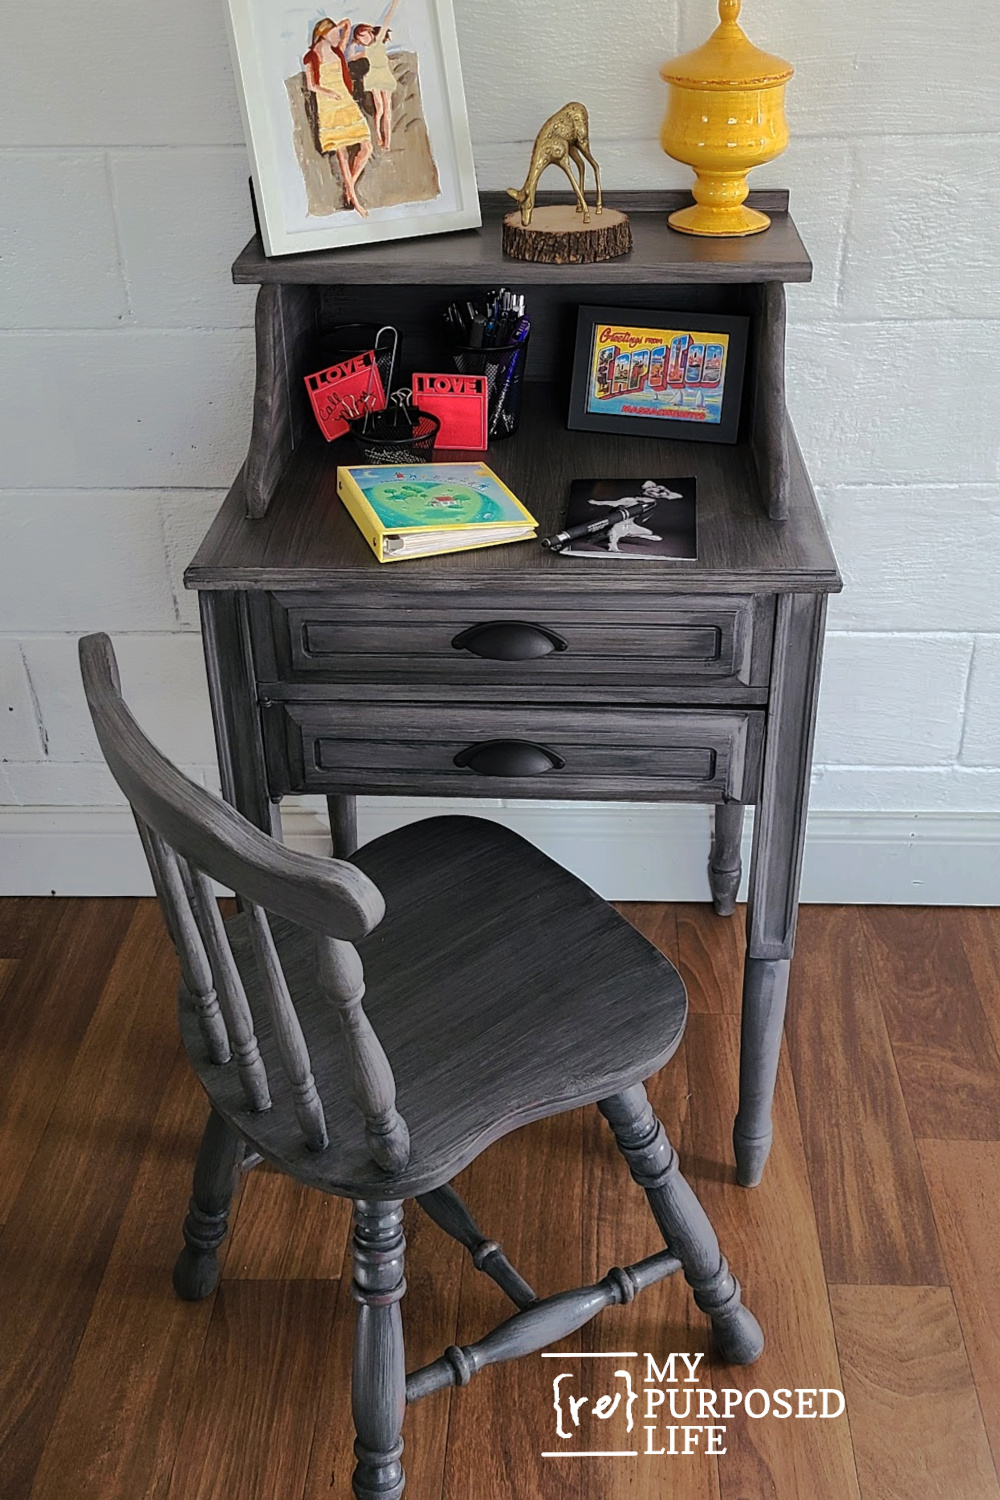
The chair sits a little high, but with the little drawer open, there’s plenty of leg room. Can you imagine if I hadn’t noticed the wrong leg in the front. Surely I would have noticed it in these final pictures. This small farmhouse style secretary desk would be perfect as a laptop station, bill paying center or simply a small side table anywhere!
This old chair needed some work, I may detail that in another post.
gail
Sharing at Funky Junk Interiors Salvaged Junk
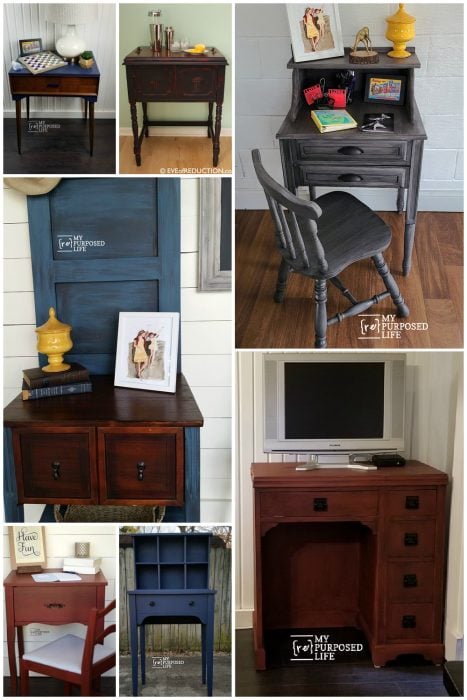
See More Sewing Cabinet Project Ideas
I have time to find 2 sewing tables that match since my grandsons are only 4 and 1 years old. But the big one starts pre-K hopefully in July. If the world has gone back to normal. They will be sharing a room during the day at my house by then. (I really hope so, right now when I try to do nap in the same room they mess with each other until someone cries and nap is over) and it would be great to have a place for homework. I love the little pencil holder.
Yes, as I was working on this, I thought it would make a great homework station. The challenges of doing school at home, right?! This was a really fun project, it’s great to be back to work! BUT, this thing was a monster to get out of the basement by myself.
gail
Great Idea! So stinking cute 😍
Thank you so much Gina!!! It was fun!
gail
LOVE it! I have a very similar cabinet and was wondering what to do with it. Now I know. That came out amazing! It would look great in any small nook that just needs a little something. Or a kids room to use as an at home desk. Great idea! As always, thanks for the step by step how to do instructions.
Thanks Gail! I love to find other furniture pieces that inspire me to make my own project out of bits and pieces!!
I appreciate you stopping by to check it out.
gail
Love it gail!
Thank you!!! It was a fun project to do. I’ve missed working on projects for the last couple of months. Time to get back to work!
gail