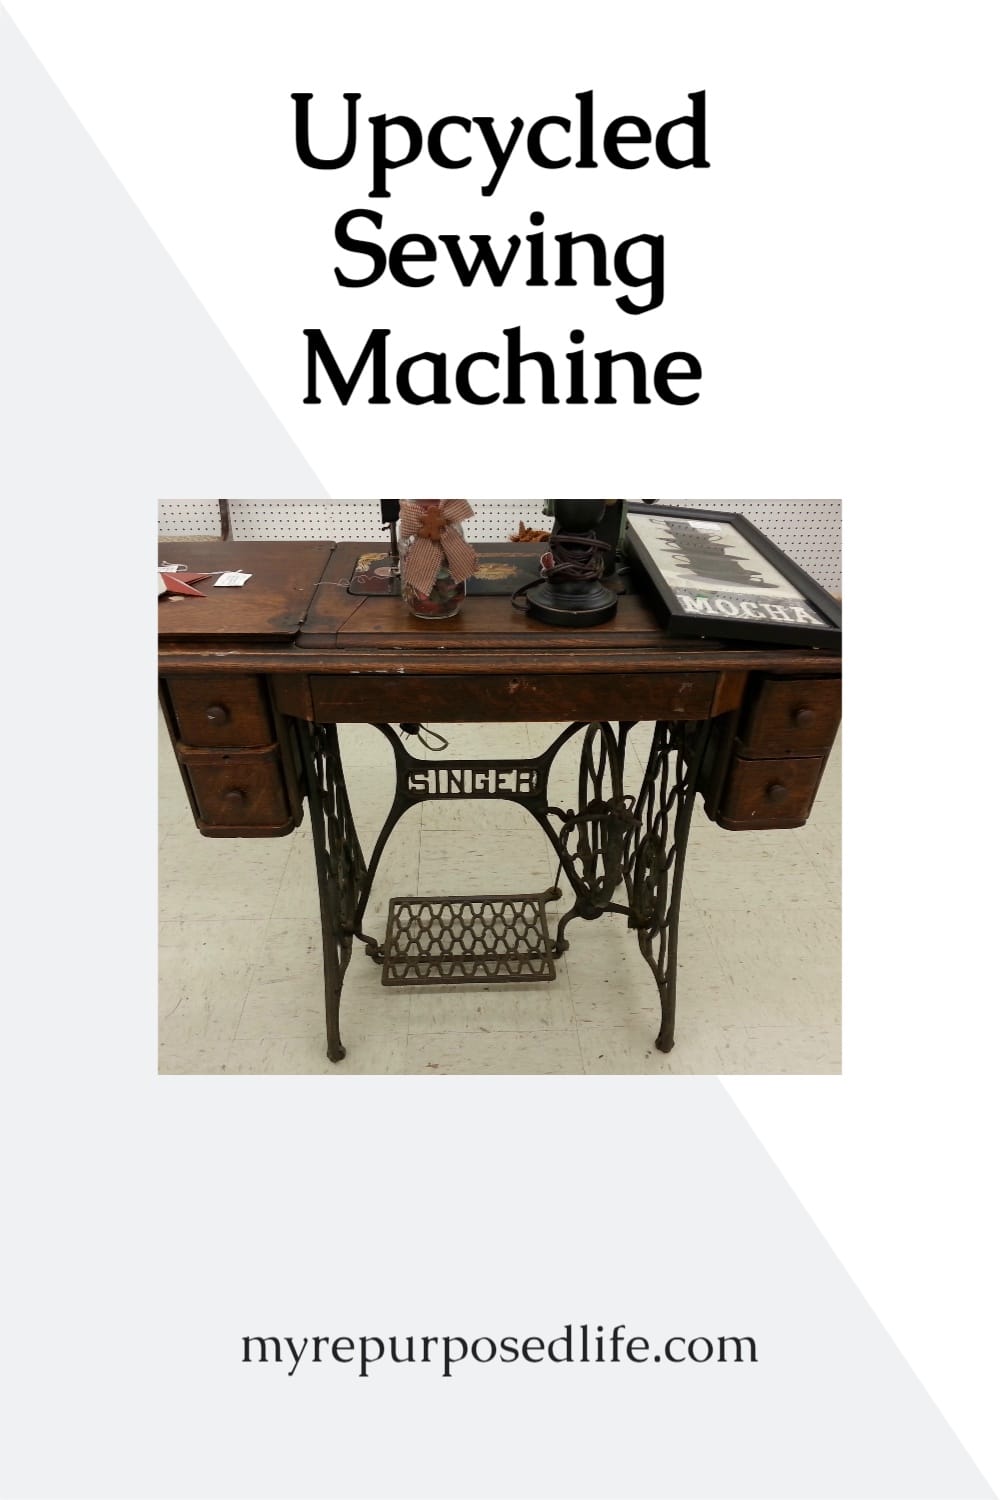
Singer sewing machine into desk,table,vanity
As an Amazon Associate, I earn from qualifying purchases.
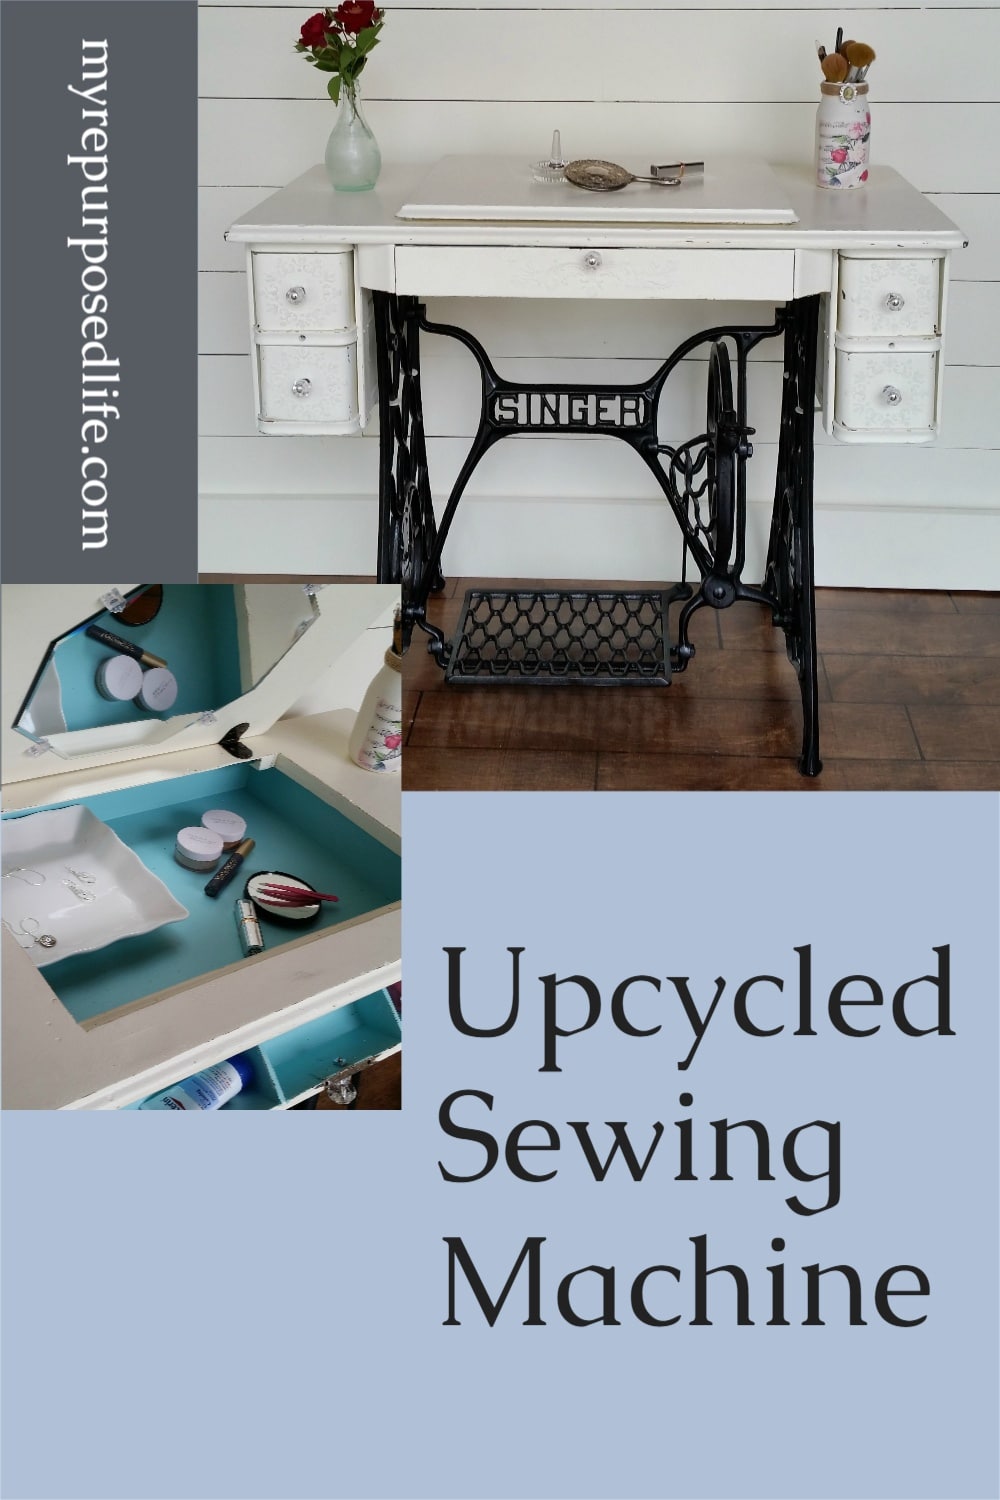
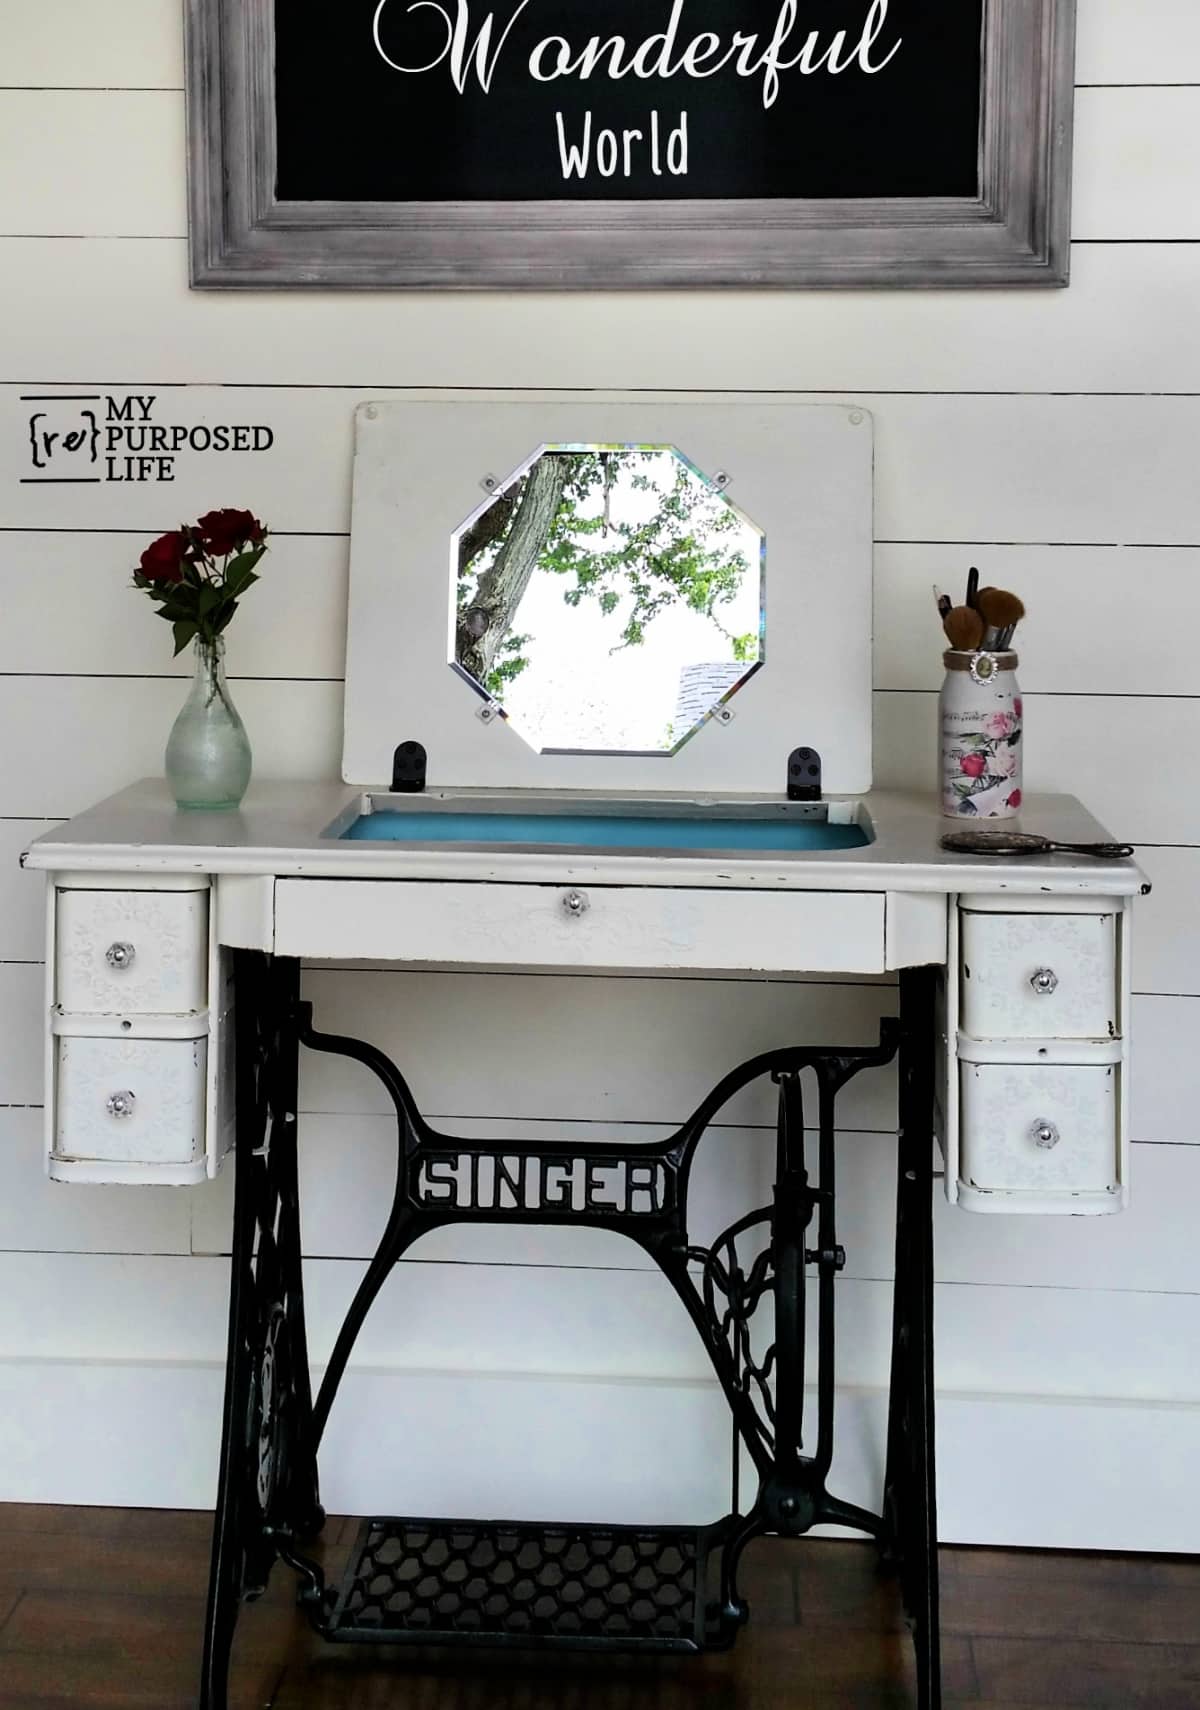
Vintage sewing machine cabinets have so much character, and this Singer makeover gives one a completely fresh purpose. What started as an old sewing machine became a versatile piece that can work as a desk, vanity, side table, or even extra storage in a bedroom or dressing area. I love projects like this because they keep beautiful old furniture in use while making it fit the way we live today.
If you don’t like people painting wood or redoing an antique Singer sewing machine, just walk away now. I understand how people feel about such things, but I’m in the business of repurposing furniture.
Today’s project will show you how to transform a vintage Singer sewing machine into a very versatile makeup vanity, jewelry organizer, desk, or side table.

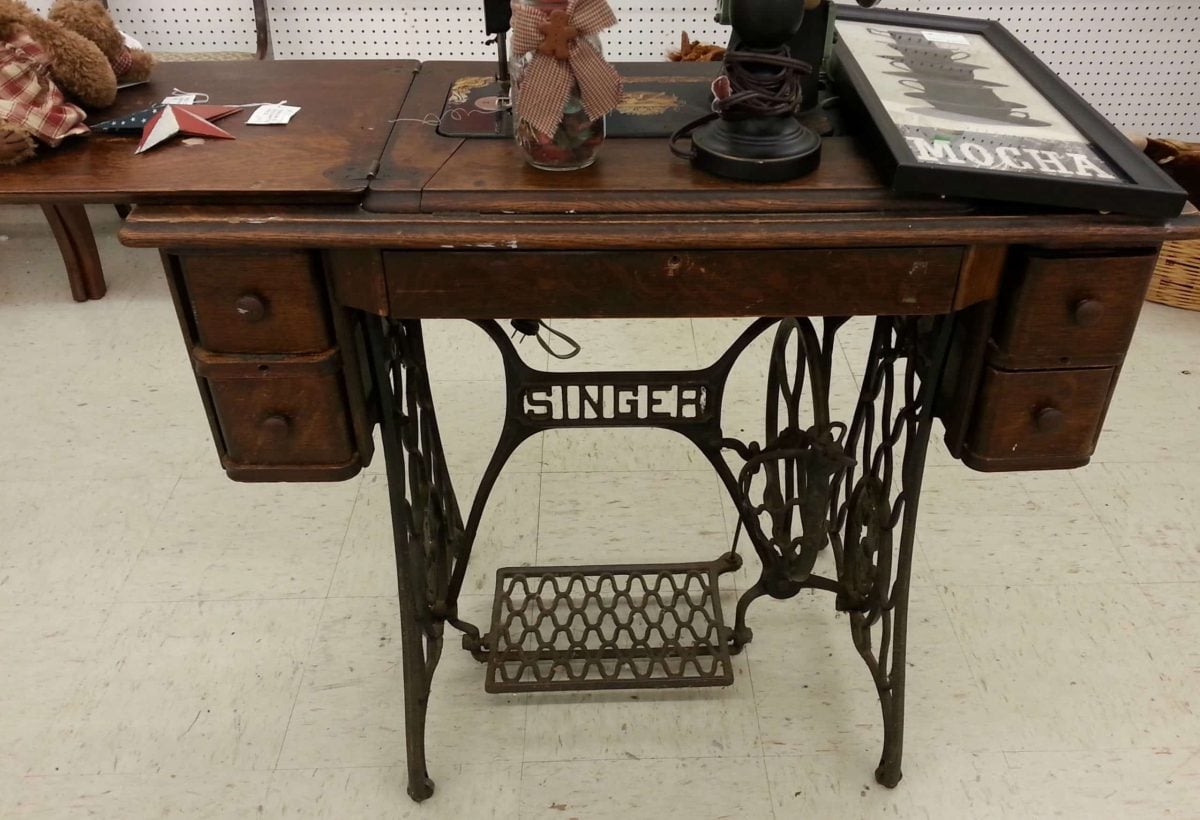
Last year, I spoke about a great find on a sewing machine at a local Vendor’s Village. A whopping $25.
There are many ways to repurpose sewing machines. I’ve already made 2 projects from one machine years ago.
I was looking for something different this time.
Visit the My Repurposed Life Amazon Store to shop my favorite items.
Disassemble the Vintage Sewing Machine Cabinet
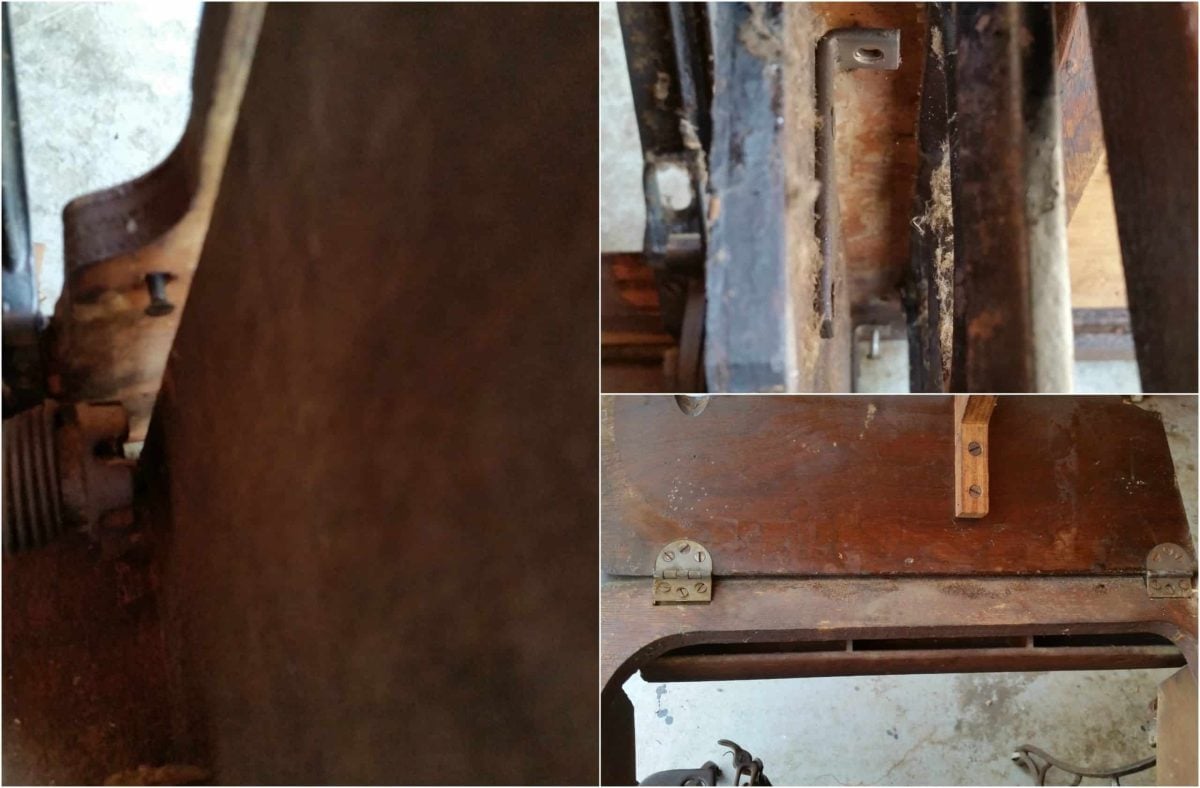
Basically, I began removing all the hardware from the underside.
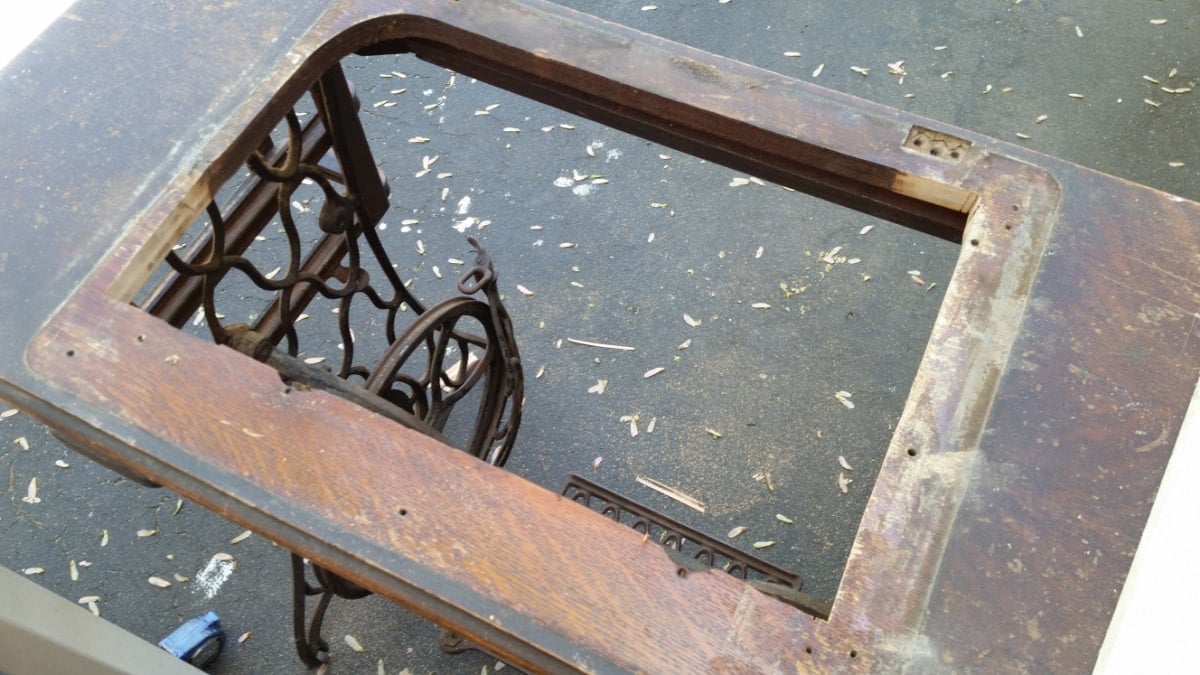
I removed the top portion (lid) that was hinged. Firstly, I removed the screws from the bottom. Then I was able to pry up the rim that the lid was connected to.
Related content: Sewing Machine Cabinet Ideas
Construct a Simple Box Using Pocket Hole Screws
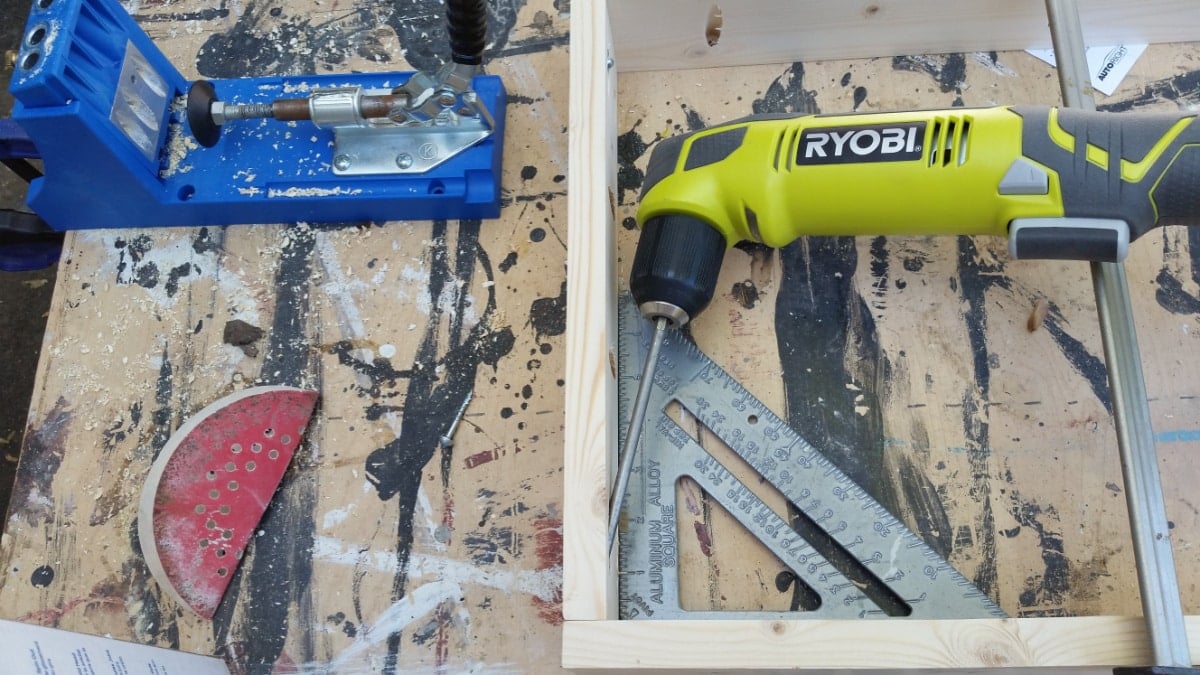
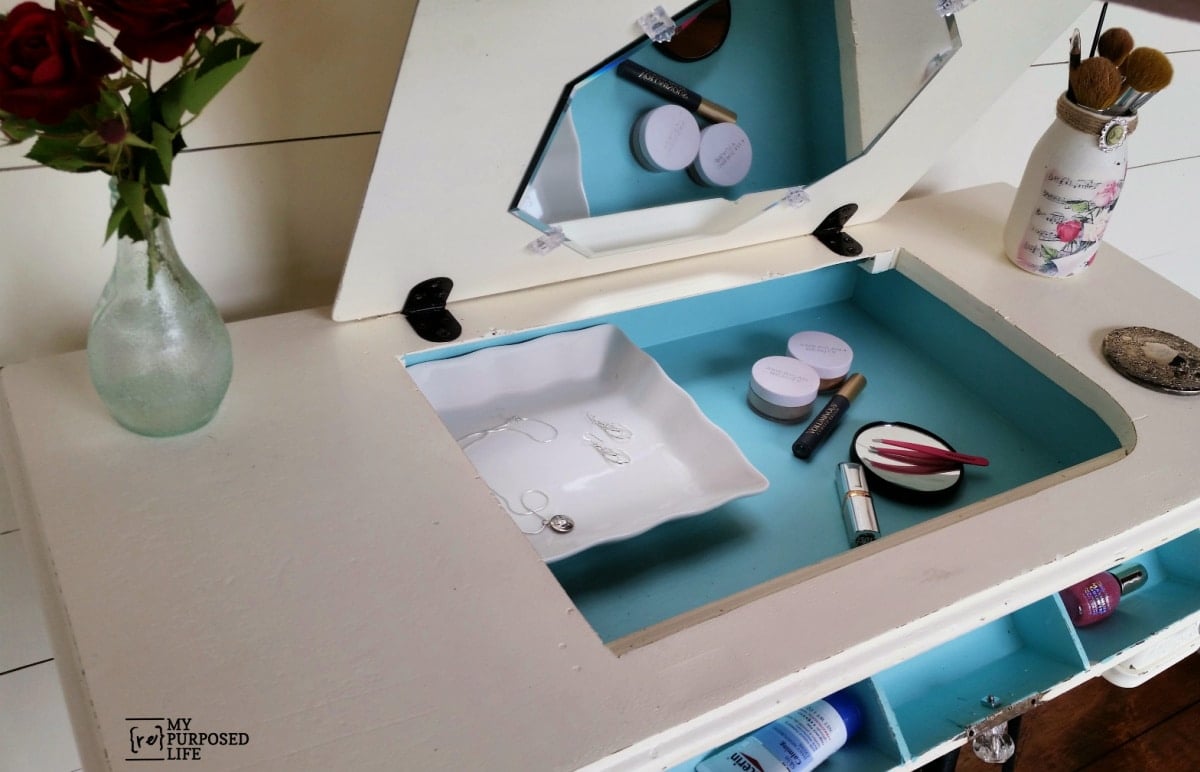
First, I got busy making a box or a tray to fit inside the opening of the original top. I made the box using scrap 1x’s and my Kreg Jig . Because the box was so small, my drill wouldn’t fit, so I had to use my Ryobi right-angle drill.
Need more details on using a Kreg Jig? See my article How to use a Kreg Jig Pocket Hole System
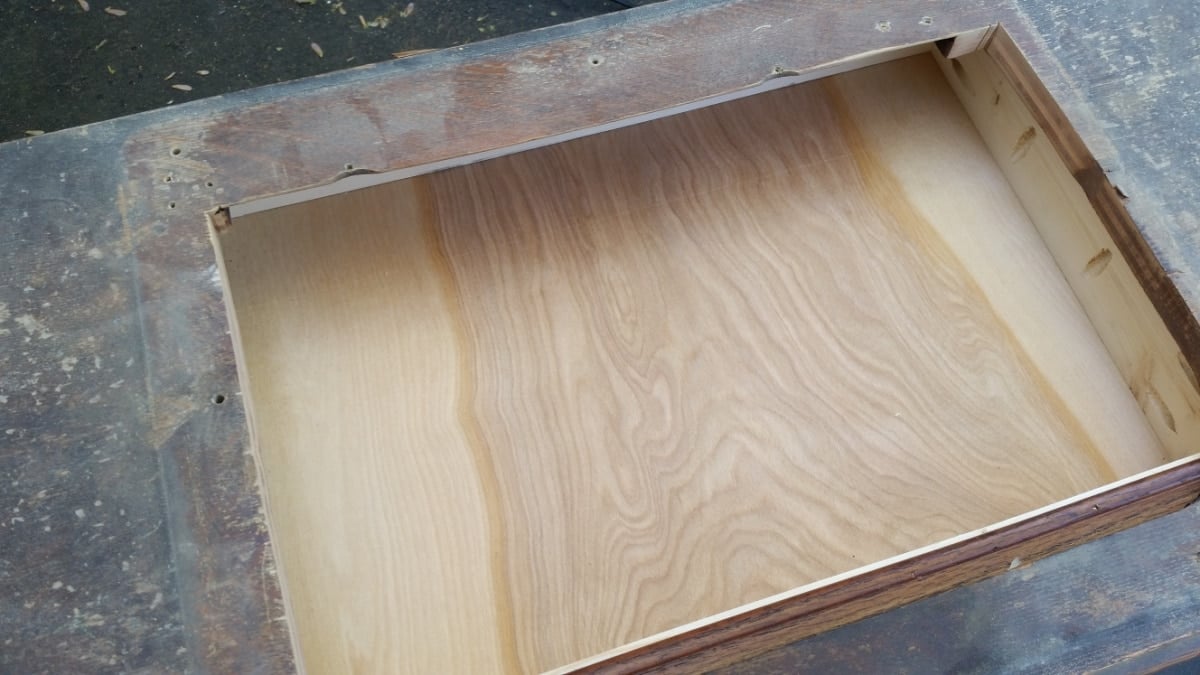
I used some underlayment (thin plywood) for the bottom of the tray. You can see I drilled pocket holes to hold the tray in place.
Tip: I used my Jigsaw to make the opening more of a square. Scroll up to see how the opening looked originally. However, I had to add a small piece of trim in the front.
Remove the Metal Sewing Machine Chassis
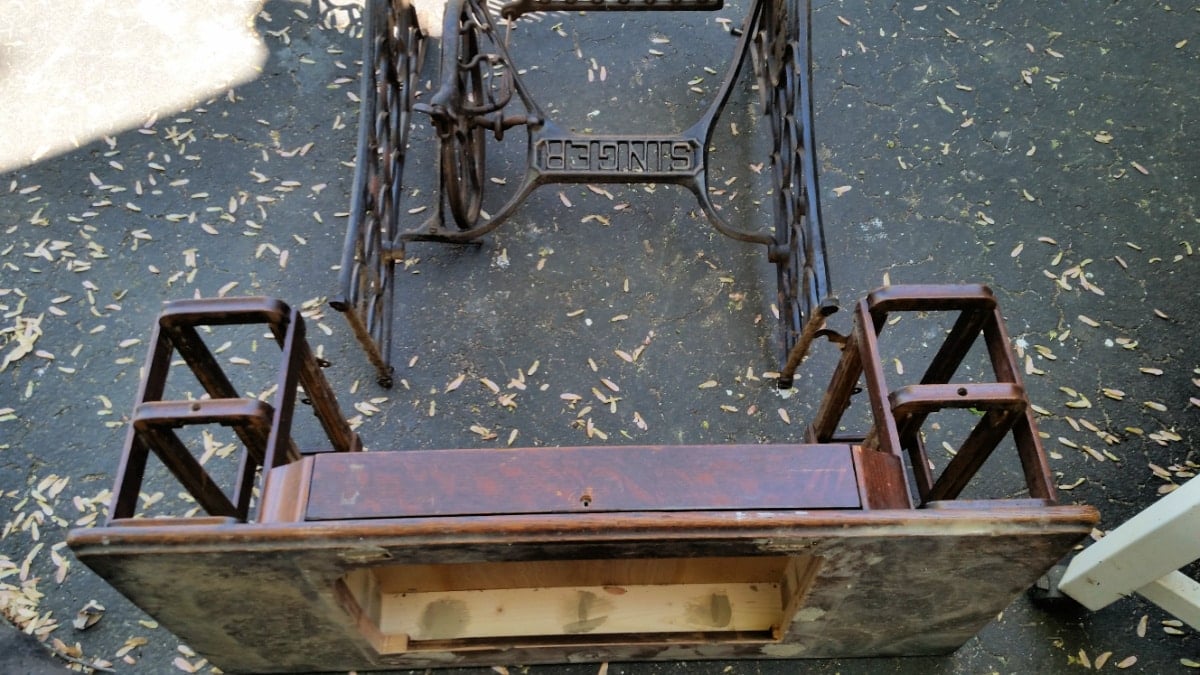
At that point, there were only 4 large screws holding the two pieces together. I separated them so I could spray paint the metal chassis.
After a thorough cleaning, and before Krylon Dual spray paint.
If you only have the chassis of the treadle sewing machine, make a t.v. table, or a unique side table.
Spray Paint the Metal Sewing Machine Base
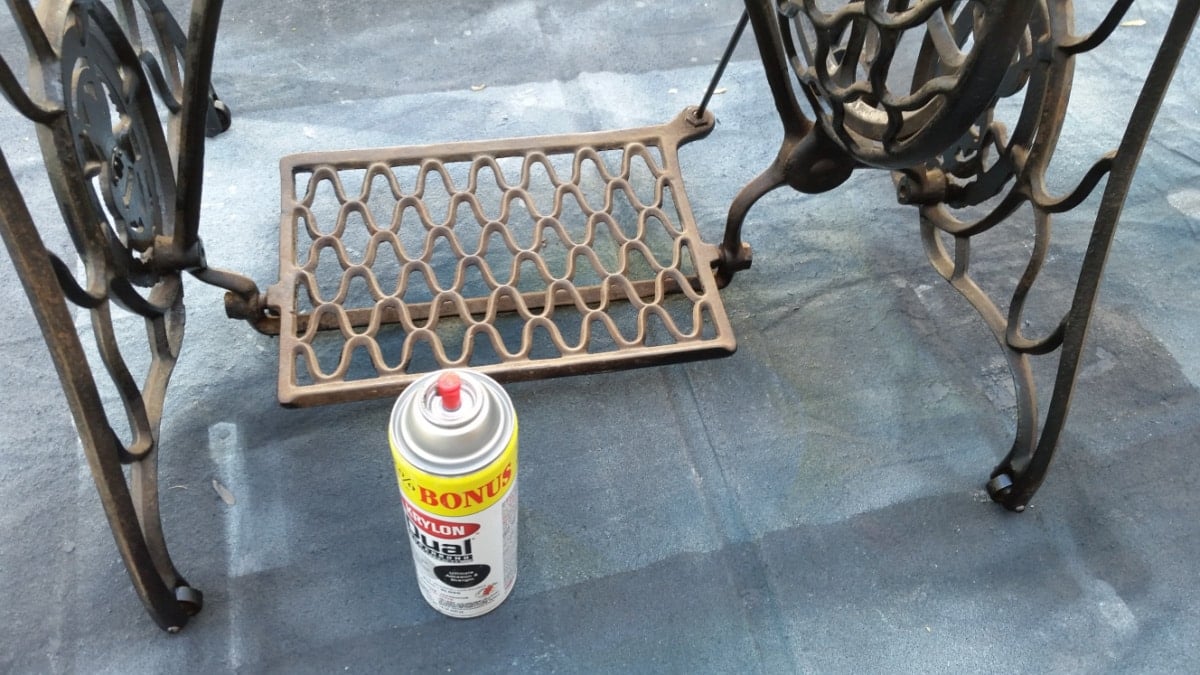
I used Krylon Dual spray paint, starting with the machine upside down to get full coverage of all the nooks and crannies.
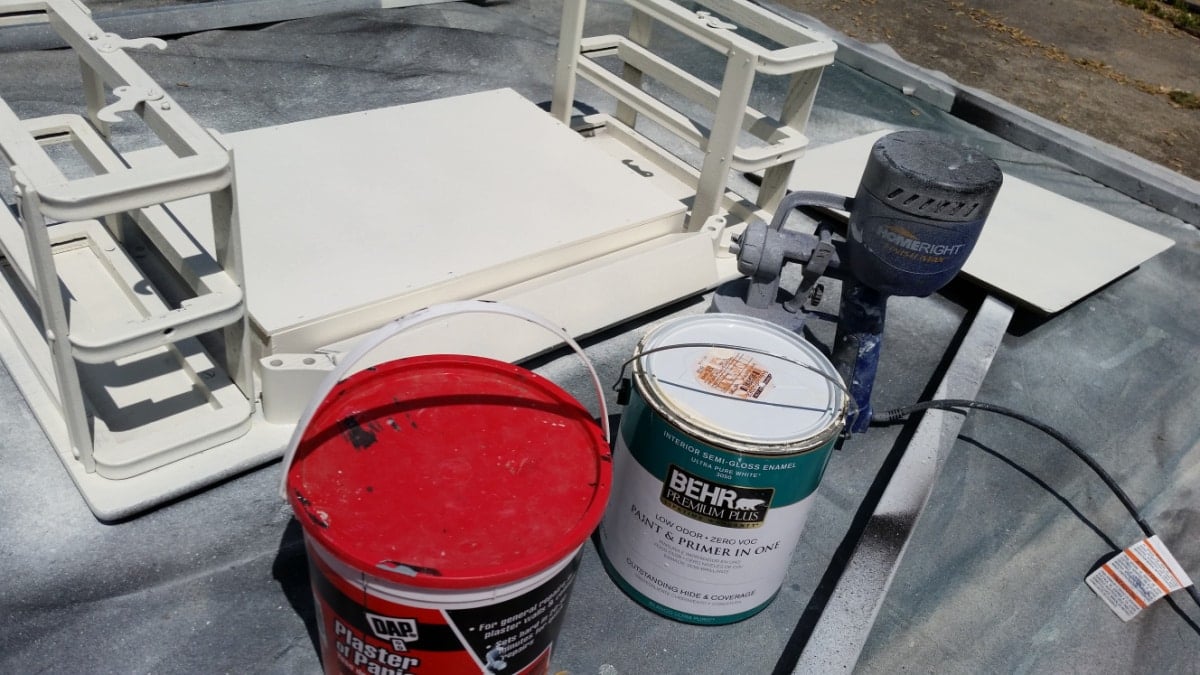
I used my Behr Polished Pearl as a chalky paint primer and sprayed it on with my HomeRight Finish Max.
.
Reattach the Sewing Machine Base
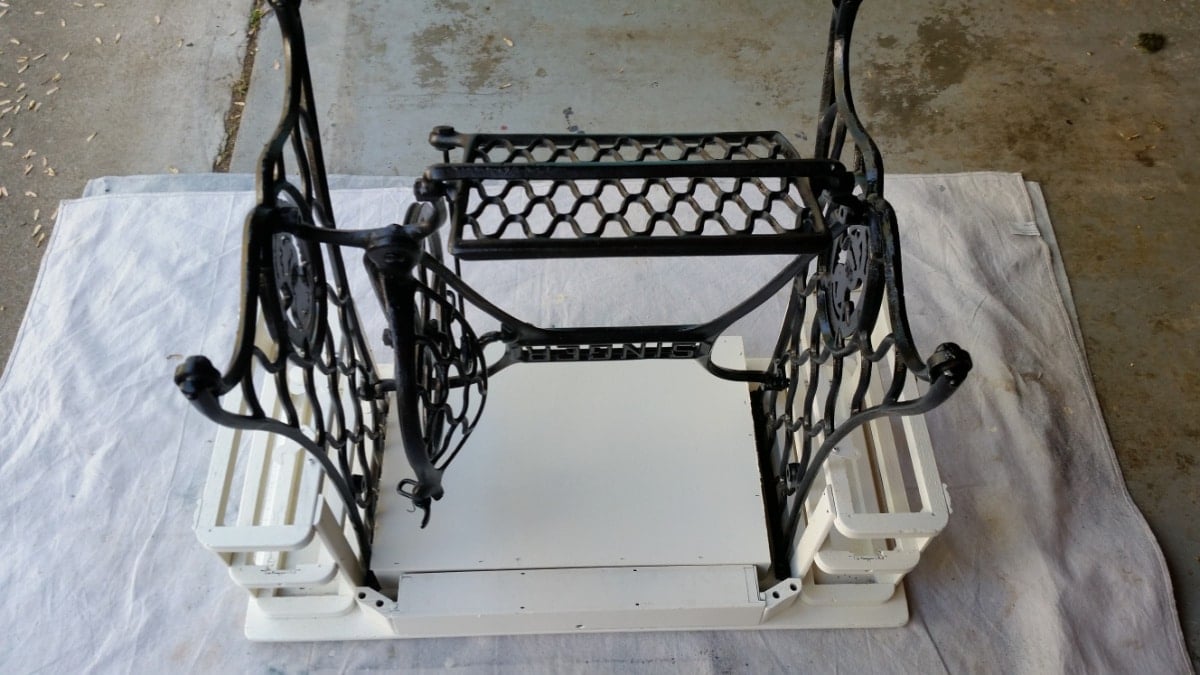
Now it was time to reconnect the chassis to the wooden frame with those four big screws.
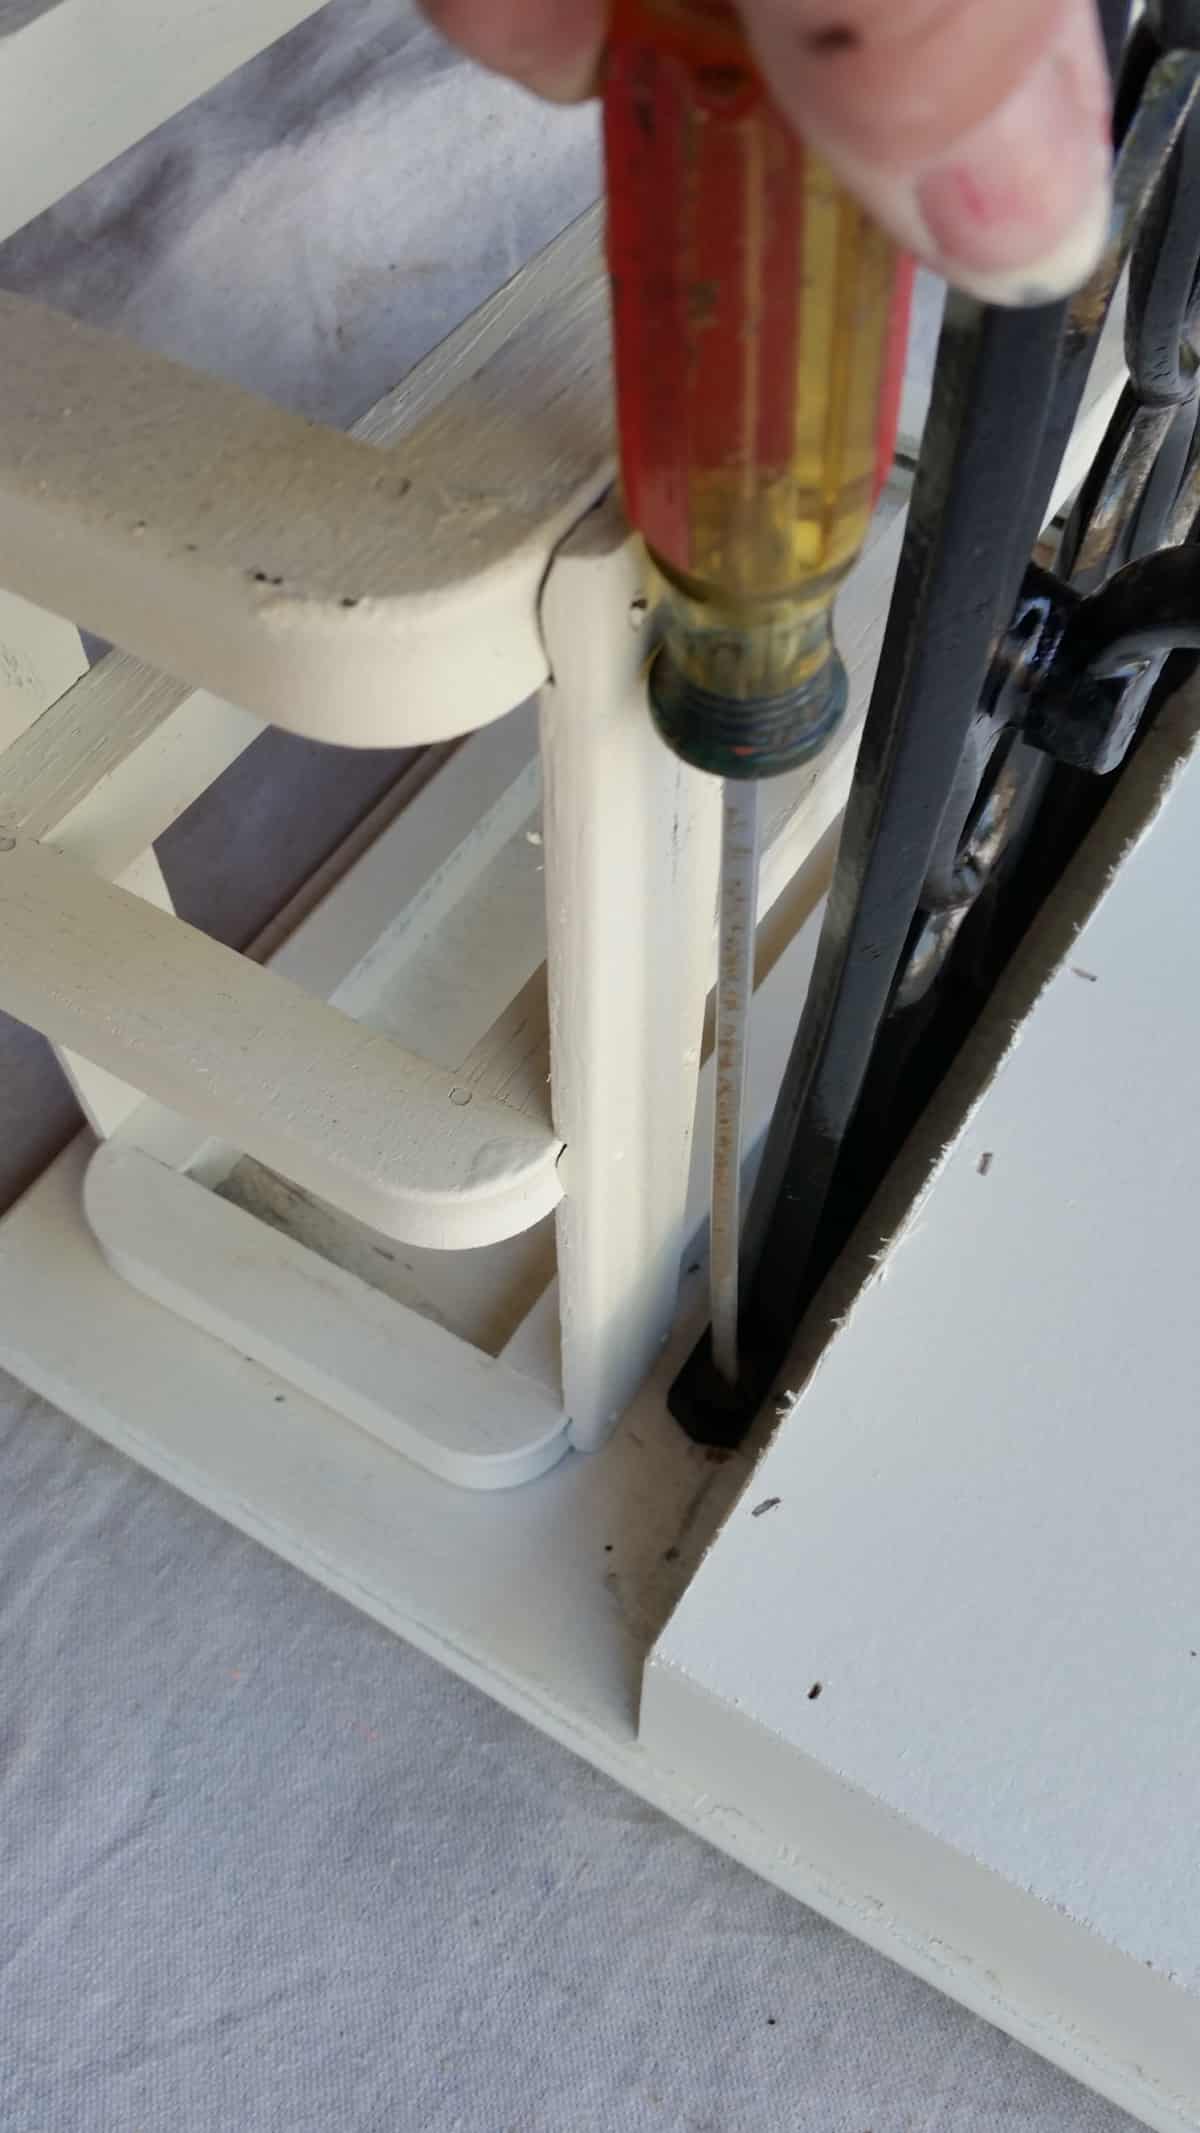
An extra-long screwdriver was necessary to reach the screws.
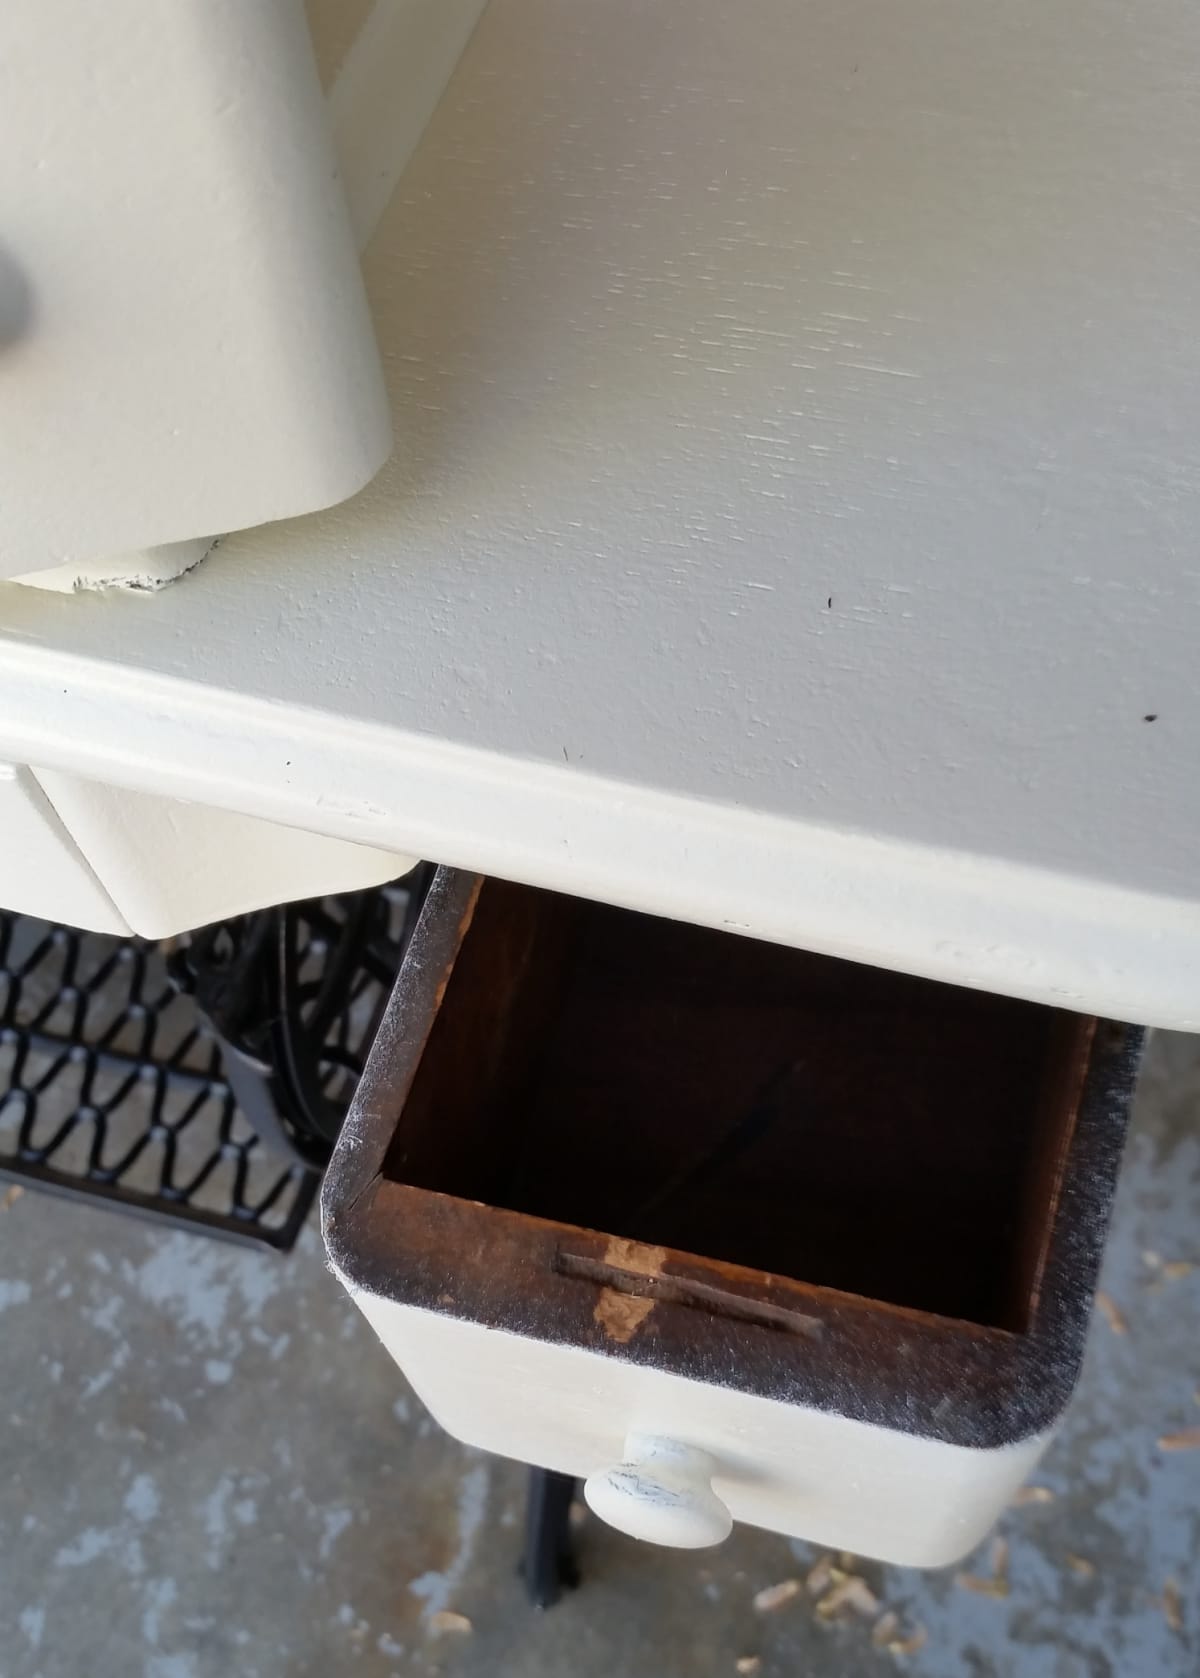
Being a little lazy, I opted not to paint the inside of the drawers.
Embellish Sewing Machine Drawers
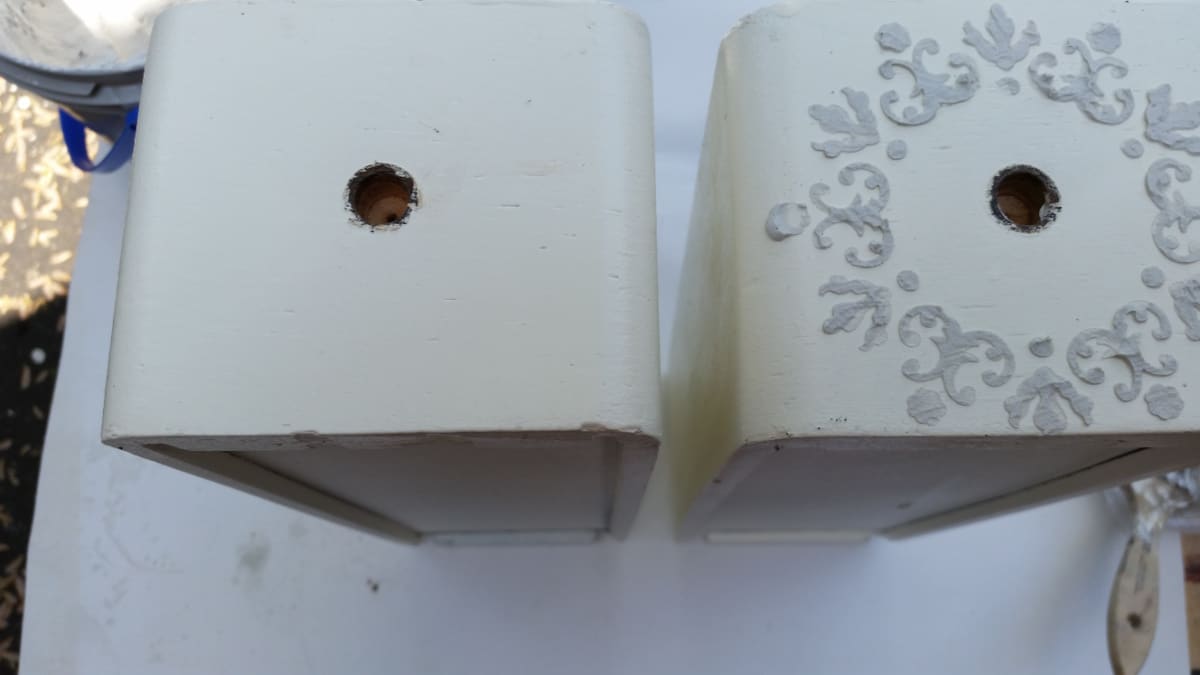
I felt the drawers were a little plain, so I decided to do some textured stenciling.
I began by removing the knobs (to be replaced with glass knobs)
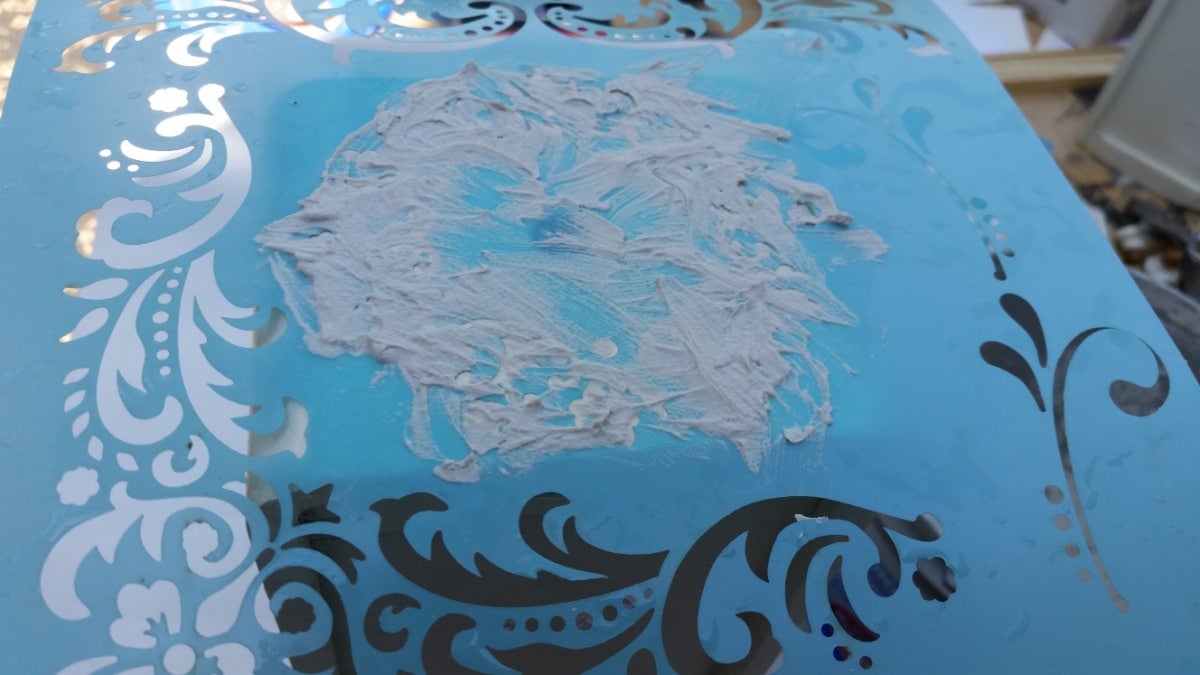
Looking through my stash of stencils, I found the perfect one for this project! Basically, you can use drywall mud to cover over the stencil. I like to use a foam pouncer.
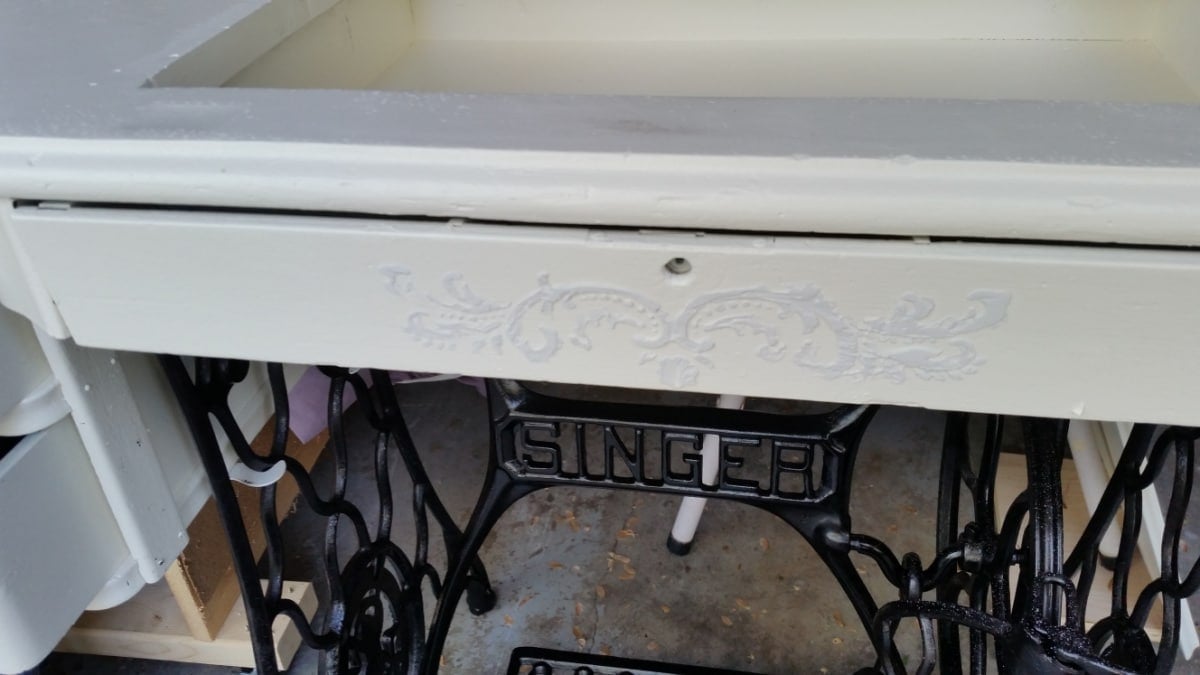
I also did a raised stencil on the front of the long, narrow drawer.
Paint the Interior Storage Area With a Bright, Cheery Color
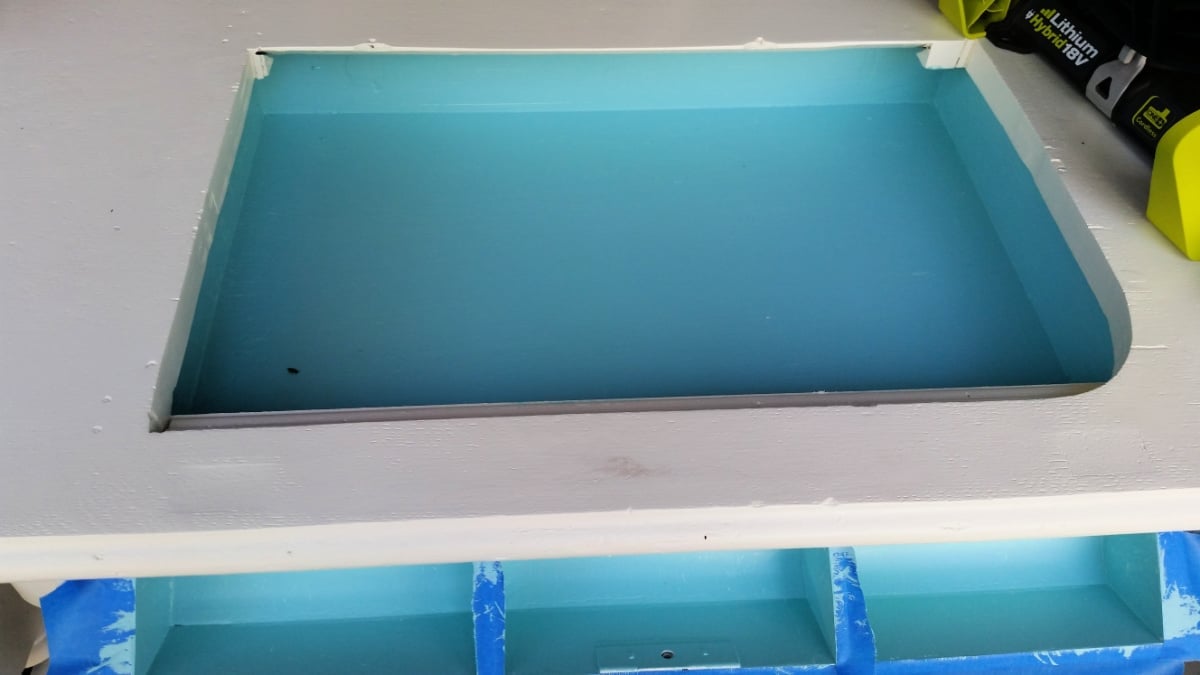
I painted a pretty turquoise inside the tray and the fold-out drawer.
Secure the Mirror With Clips
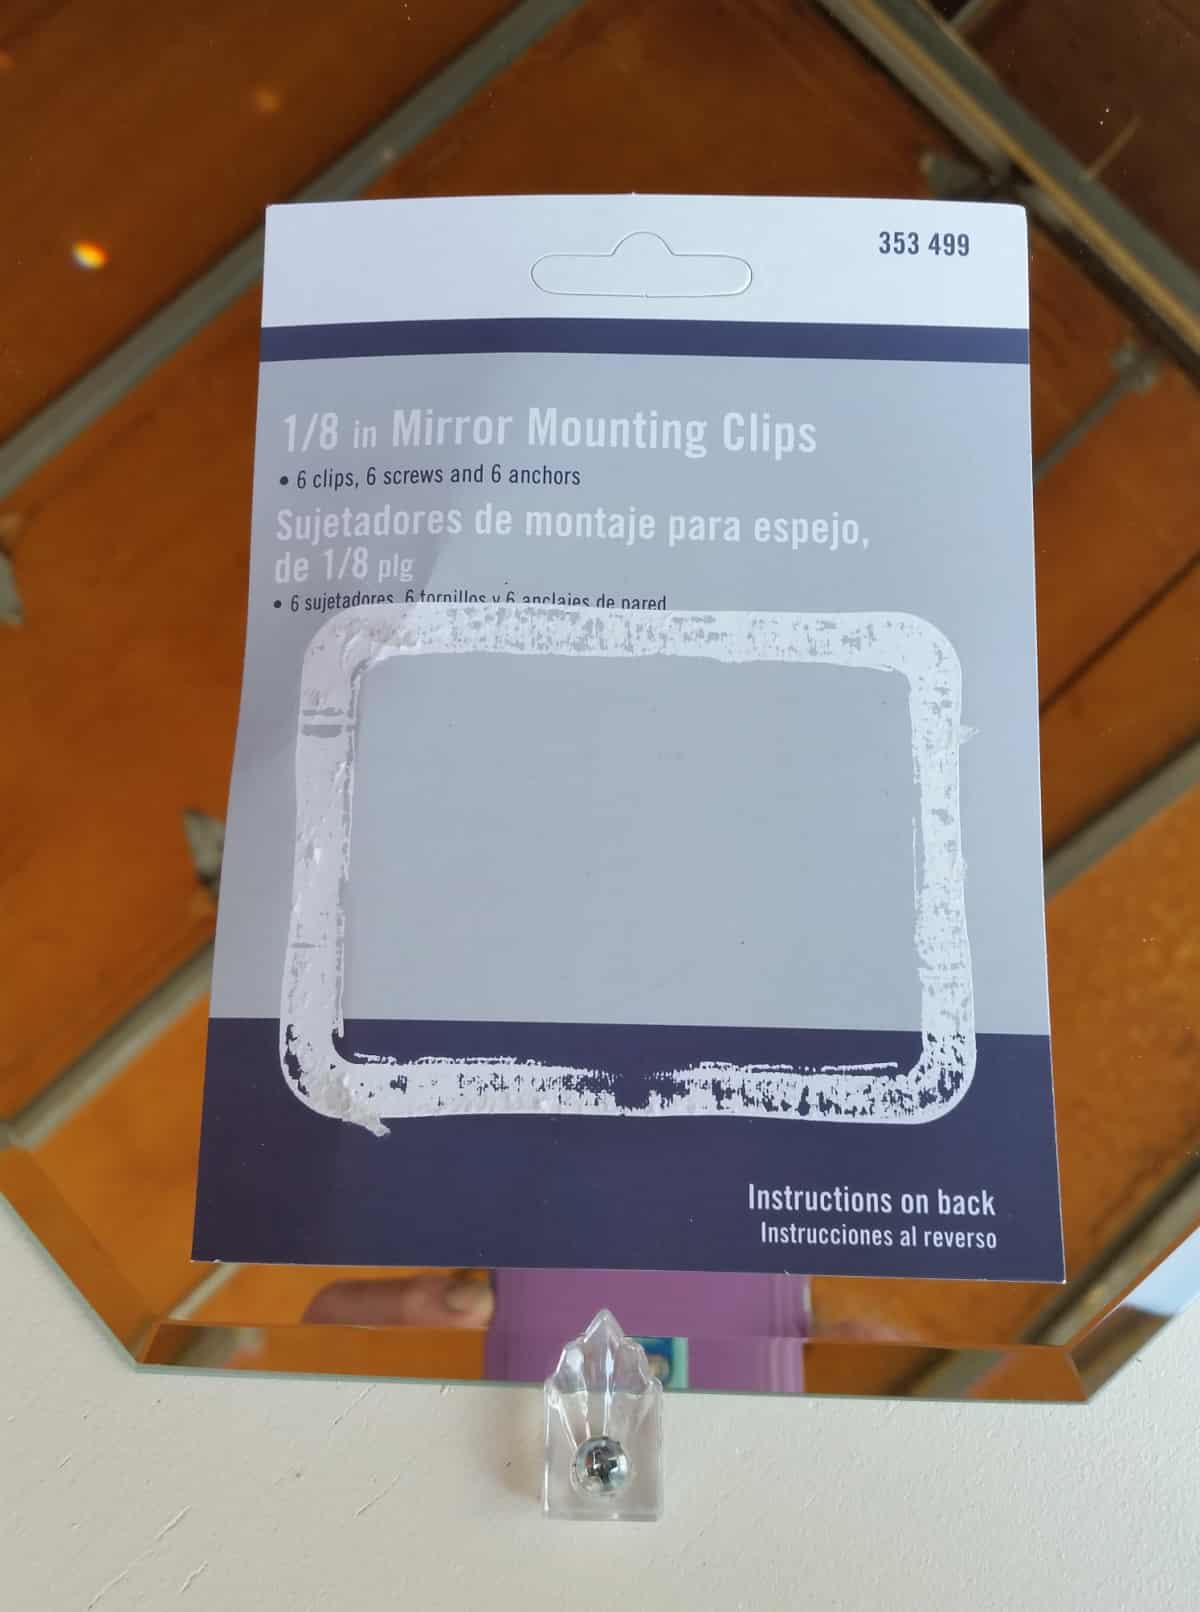
A mirror was purchased at the craft store, and some mirror clips at Home Depot. I attached the mirror to the inside of the hinged lid.
Attach Glass Knobs to the Sewing Machine Drawers
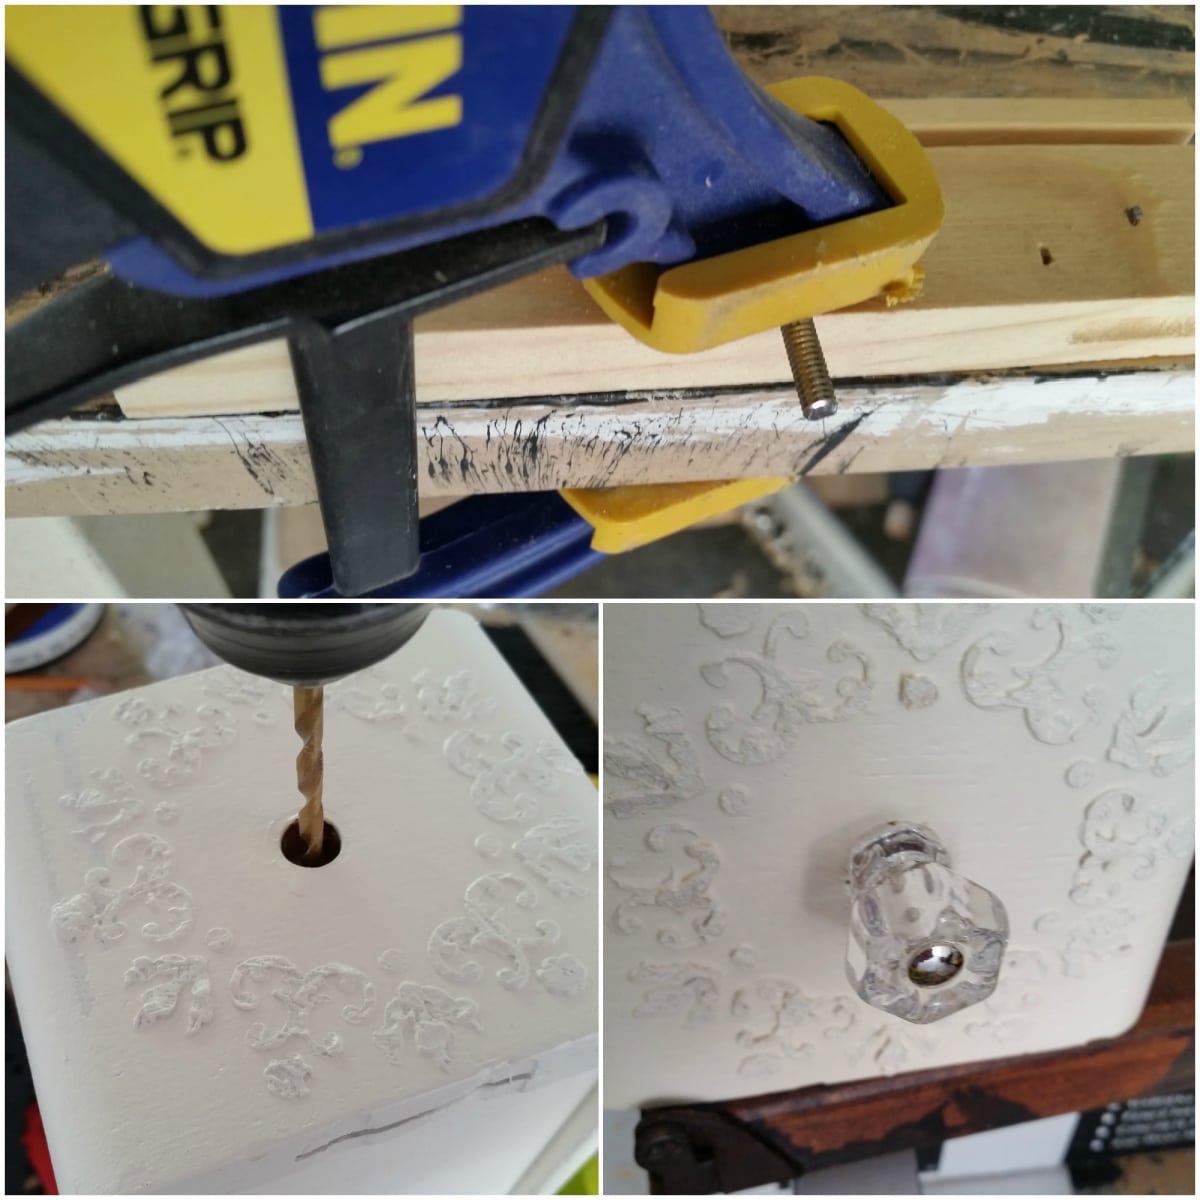
D. Lawless Hardware sent me some 1 inch glass knobs for this project, and they were perfect! The screws were too long, though, so I clamped them and cut them with a hacksaw. I had to drill a hole in the drawer as the old knobs were just pegs.
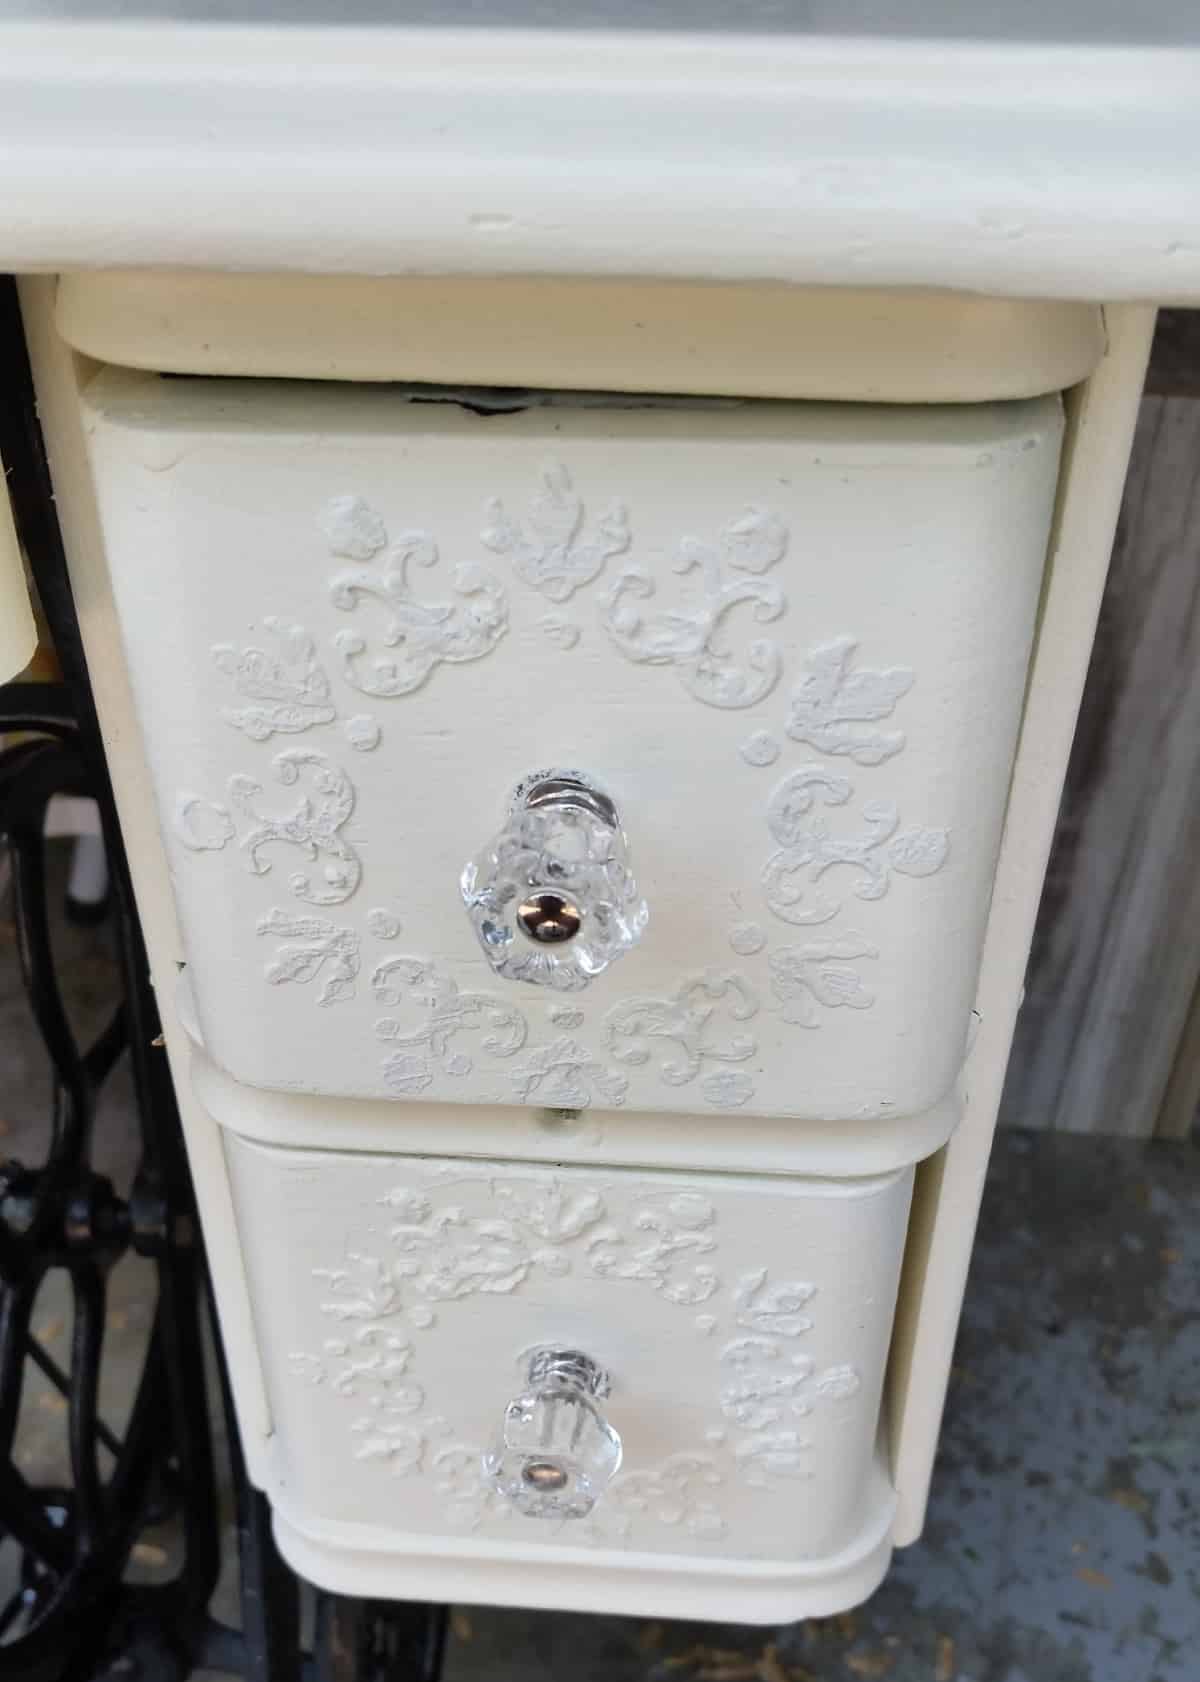
Here is a close-up of the glass knobs from D. Lawless Hardware.

Finally, I did some light distressing because it’s so old and it didn’t look good crisp.
This was a fun project, and I’m happy with how it turned out. I think it will make a great vanity, makeup table, desk, entry table, or jewelry organizer.
This Singer sewing machine makeover is one of those projects that proves old furniture can still be useful with a little vision and a few simple updates. Between the storage drawers, the hidden mirror, and the fresh paint, it became a piece that is both pretty and practical. Repurposing furniture like this is a great way to save something old and turn it into a hardworking piece for your home.
How would you use it?
gail
Related Content: See More Desk Projects Here
See more great projects over at Elizabeth & Co. Be Inspired
Beautiful work! I’m getting ready to refurb my grandmothers cabinet into a plant stand. The bottom metal is covered in rust. Any tips for cleaning it off before spray painting?
I’m a vintage sewing machine collector but I am also practical. I bought two 1916-ish Singer treadle machines in their original cabinets (not cheap, they sell for about $90-200 in my area). One is in excellent shape and still sews beautifully, and one is in terrible shape with a warped battered cabinet and rusted frozen machine. I cleaned and disassembled the rusted machine for spare parts (yes, these are getting hard to find) and now have a cabinet that needs a new life. Your ideas are inspiring — thank you! I plan to restore the cabinet, keeping it as original as I can, but with a new life as a desk/hall table.
Reply
A whole $25 huh? Do you know how cheap that is? Here in Arizona, $50 – $75 is considered cheap if the drawers haven’t been lost along the way. I do love what you did with it though. It’d be darling in a teenagers room. It’ll sell really quickly.
Gail,
This piece is beautiful–I love it. I have a very similar machine and cabinet (though not Singer) and I’ve been wanting to do something with it. I had thought of putting a drop leaf table top on it, but I like your project so much more since it uses all of the cabinet including the beautiful drawers. If you were to sell this, how would you price it?
Thanks for the inspiration–great work!
Linda
I have my grandmother’s functional Singer treadle machine in an oak table with very ornate drawer fronts. I plan to clean it well, oil the wood and metal, hang a mirror above or use a tabletop mirror and use a midcentury white fiberglass swivel chair, for contrast. I just can’t paint it, it’s too beautiful. The drawers should hold most of the makeup and supplies.
My grandmother had one of these old singer sewing machines in her living room. It no longer worked, but I remember playing with the foot pedal every time I went over to her house as a kid. Sewing machines sure have come a long way, but it’s cool that some of these old ones are still around.
I absolutely love this idea and am currently restoring my sewing machine because of it! I do have one question, did you chisel the hinges in with the lid or did you just place them on the flat surface? Thanks so much for the inspiration and help!
Reply
Kelly,
Great question! I did not chisel the hinges, I simply put them on the flat surface.
good luck with your project!
gail
I love the look of this repurposed sewing machine. You did a wonderful job building the box under the hinged top for putting makeup, brushes, pens/pencils, etc. I am feeling inspired!
Absolutely beautiful, I love it as a vanity….a piece you should be very proud of……I have several of the bases that I am deciding what to do with.