
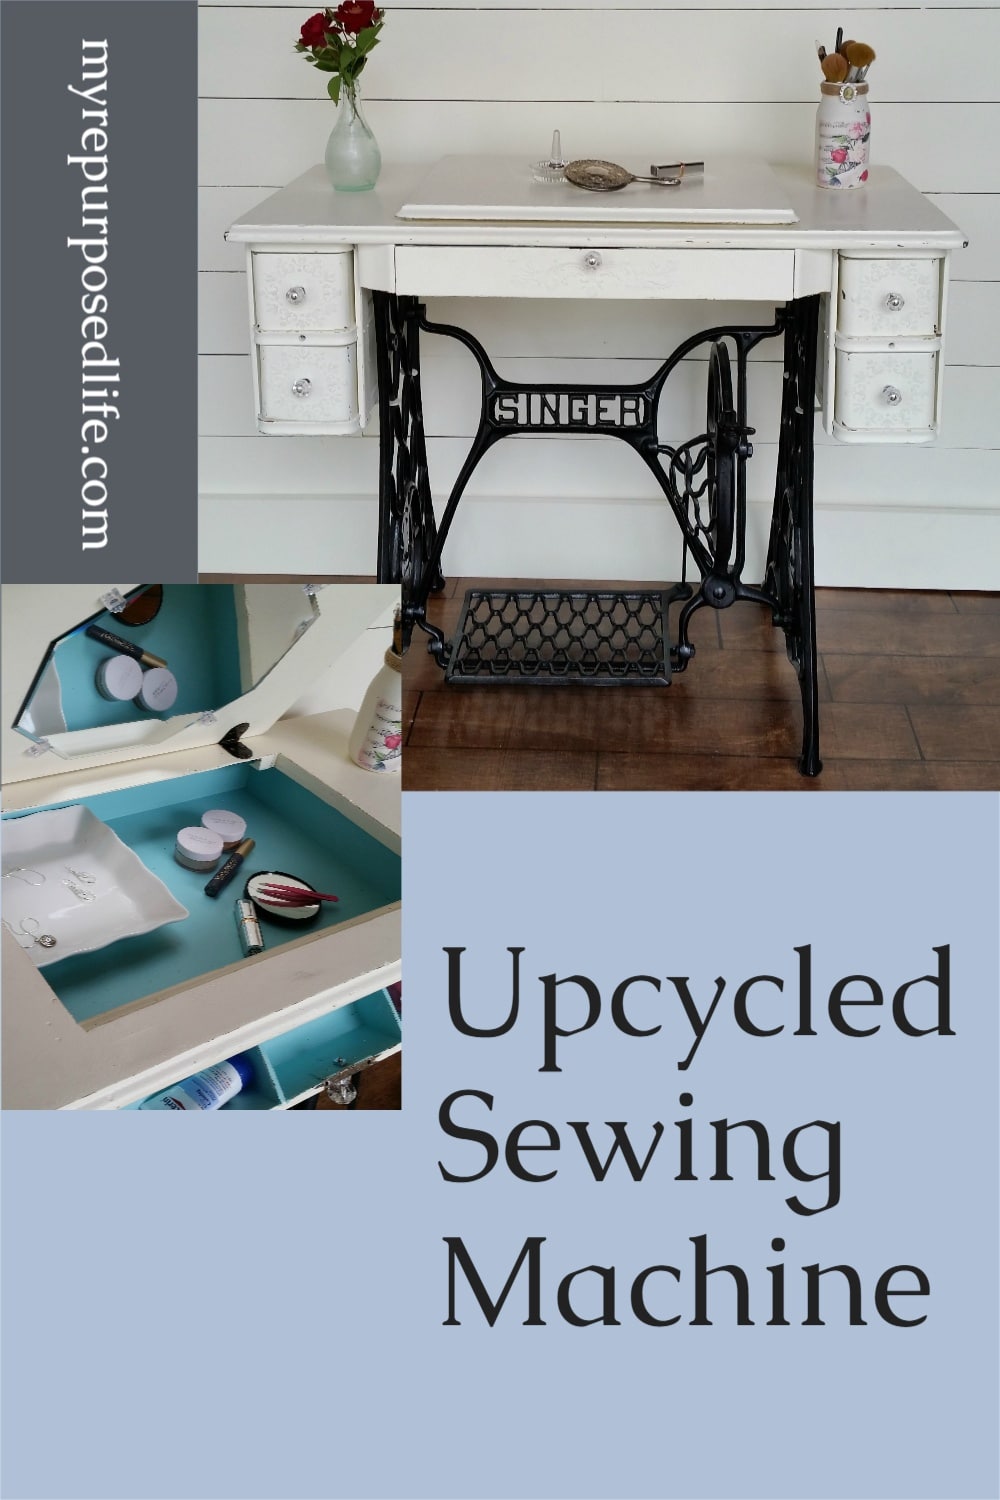
Singer sewing machine into desk,table,vanity
As an Amazon Associate, I earn from qualifying purchases.
If you don’t like people painting wood, or redoing an antique singer sewing machine, just walk away now. I understand how people feel about such things, but I’m in the business of repurposing furniture.
Today’s project will show you how to transform a vintage singer sewing machine into a very versatile makeup vanity, jewelry organizer, desk, or side table.

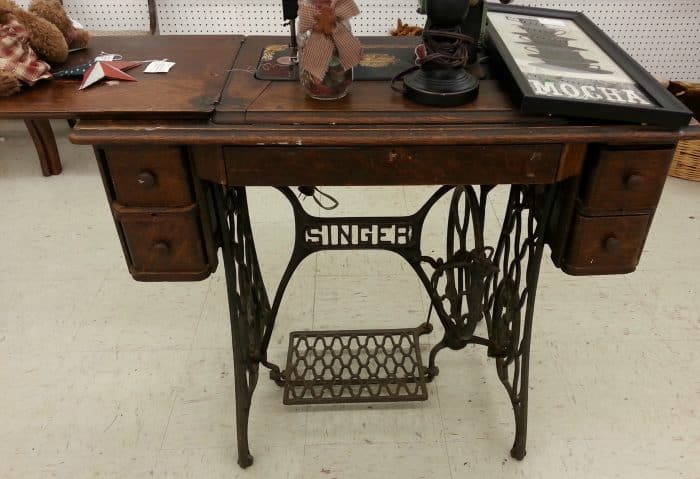
Last year, I spoke about a great find on a sewing machine at a local Vendor’s Village. A whopping $25.
There are a lot of ways to repurpose sewing machines. I’ve already made 2 projects from one machine years ago.
I was looking for something different this time.
Visit the My Repurposed Life Amazon Store to shop my favorite items.
Disassemble vintage sewing machine cabinet
Basically, I began removing all of the hardware, starting from the underneath side.
I removed the top portion (lid) that was hinged. Firstly I removed the screws from the bottom. Then I was able to pry up the rim that the lid was connected to.
Related content: Sewing Machine Cabinet Ideas
Construct simple box using pocket hole screws
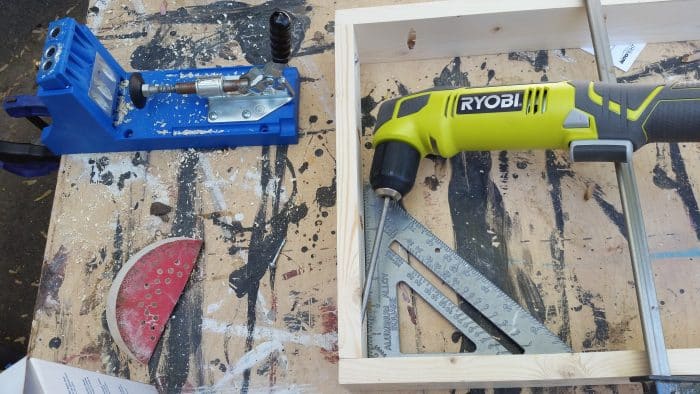
First, I got busy making a box or a tray to fit inside the opening of the original top. I made the box using scrap 1x’s and my Kreg Jig . Because the box was so small, my drill wouldn’t fit, I had to use my Ryobi Right Angle Drill .
Need more details on using a Kreg Jig? See my article How to use a Kreg Jig Pocket Hole System
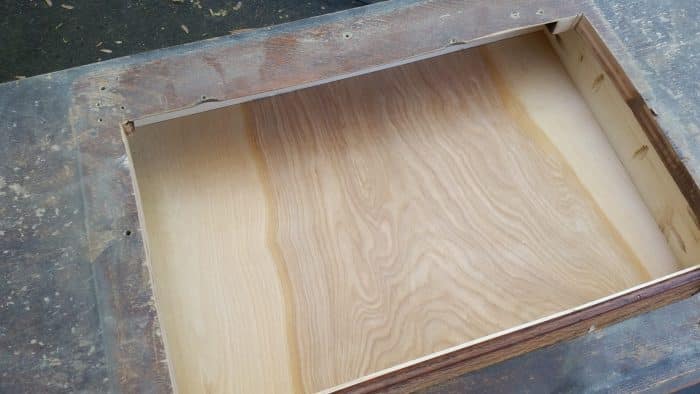
I used some underlayment (thin plywood) for the bottom of the tray. You can see I drilled pocket holes to hold the tray in place.
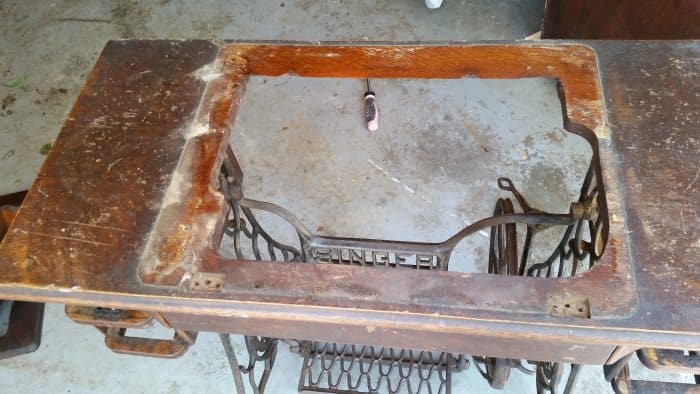
Tip: I used my Jig Saw to make the opening more of a square. Scroll up to see how the opening look originally. However, I had to add a small piece of trim in the front.
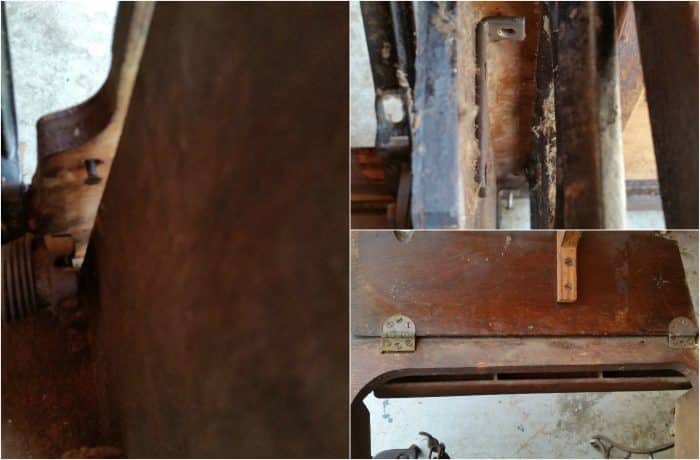
Remove the metal sewing machine chassis
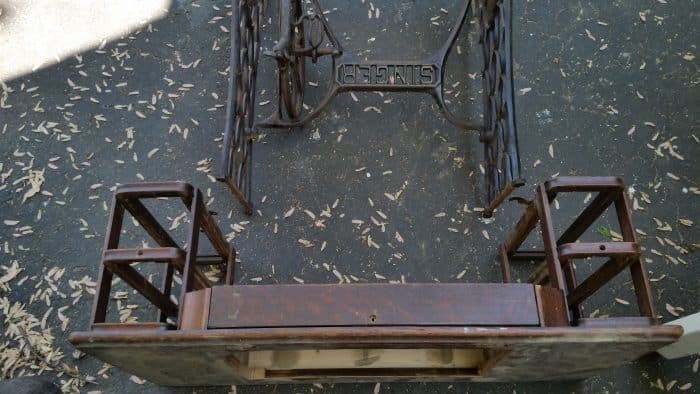
At that point there were only 4 large screws holding the two pieces together. I separated them so I could spray paint the metal chassis.

After a thorough cleaning, and before Krylon Dual spray paint.
If you only have the chassis of the treadle sewing machine, make a t.v. table, or a unique side table.
Spray paint metal sewing machine base
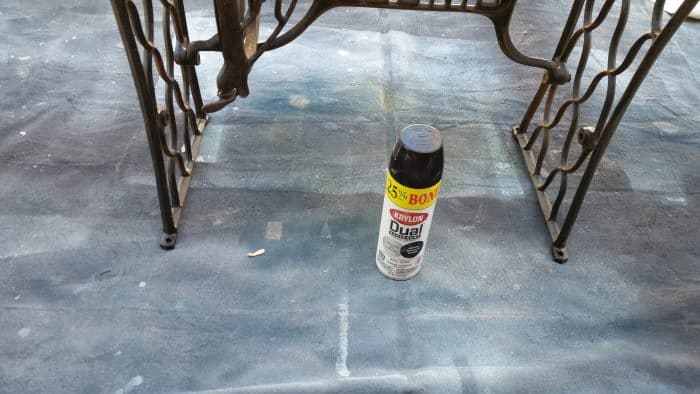
I used Krylon Dual spray paint starting with the machine upside down to get full coverage of all the nooks and crannies.
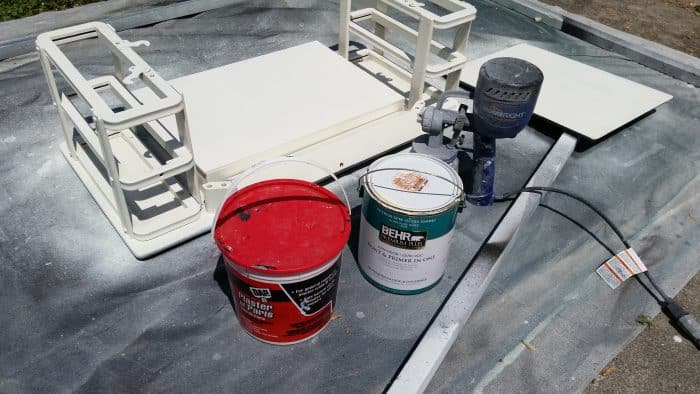
I used my Behr Polished Pearl as a chalky paint primer and sprayed it on using my HomeRight Finish Max .
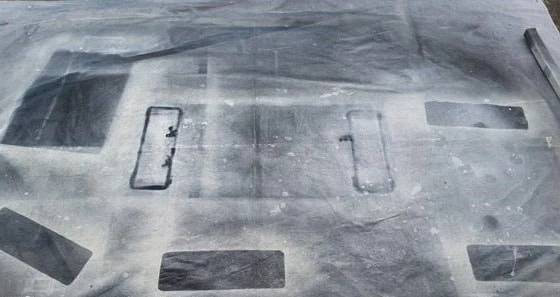
If you follow me on Facebook, or IG you may have seen this picture. Now does it make more sense? You can see the large rectangle was where the lid was, while the four small rectangles were the sewing machine drawers.
Reattach sewing machine base
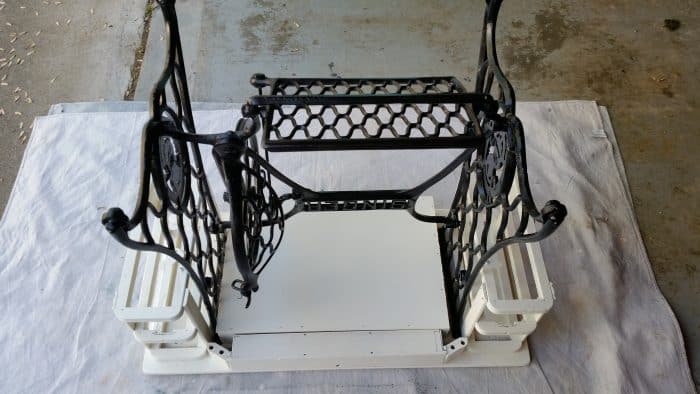
Now it was time to reconnect the chassis to the wooden frame with those four big screws.
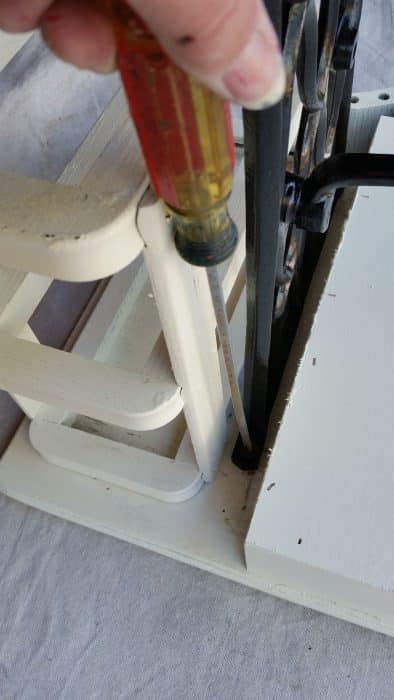
An extra long screwdriver was necessary to reach the screws.

Being a little lazy, I opted not to paint the inside of the drawers.
Embellish Sewing Machine Drawers
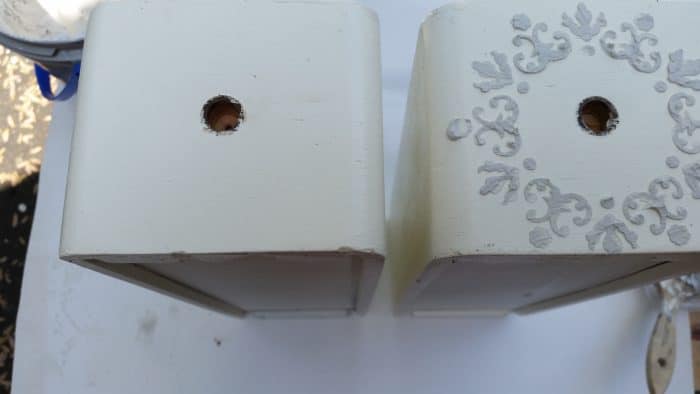
I felt the drawers were a little plain, so I decided to do some textured stenciling. You can read about it here.
I began by removing the knobs (to be replaced with glass knobs)
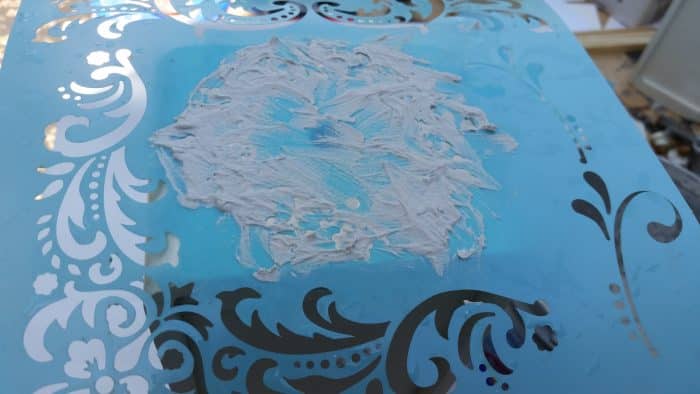
Looking through my stash of stencils I found the perfect one for this project! I don’t really have many suggestions on how to do this. So follow the link above from Sweet Pickins.
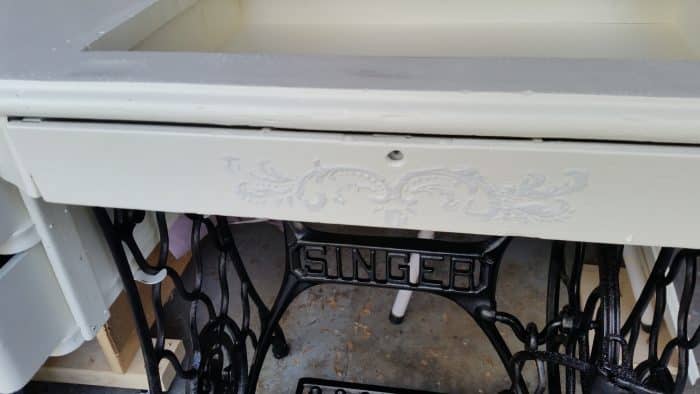
I also did a raised stencil on the front little drawer.
Paint interior storage area with a bright cheery color

I painted a pretty turquoise inside the tray and the fold out drawer.
Secure mirror with clips
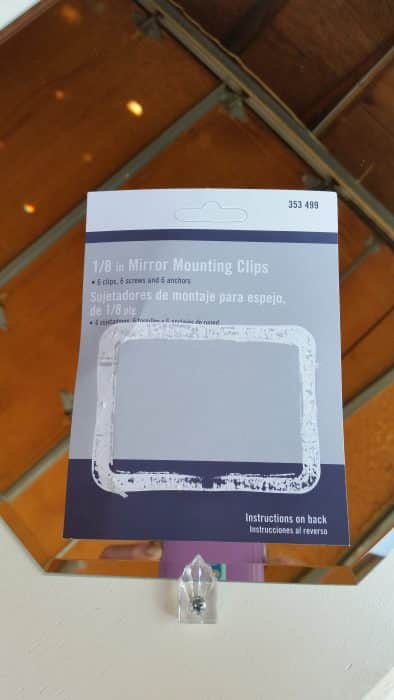
A mirror was purchased at the craft store, and some mirror clips at Home Depot. I attached the mirror to the inside of the hinged lid.
Attach glass knobs to sewing machine drawers

D. Lawless Hardware sent me some 1 inch glass knobs for this project, and they were perfect! The screws were too long though, so I clamped them and cut them with a hacksaw. I had to drill a hole in the drawer as the old knobs were just pegs.
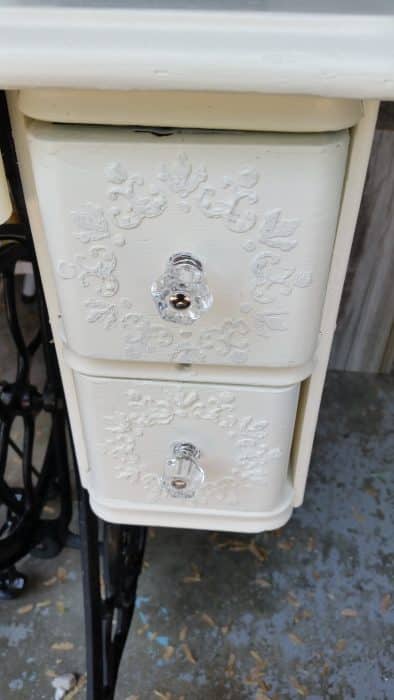
Here is a close-up of the glass knobs from D. Lawless Hardware.

Finally, I did some light distressing due to the fact that it’s so old, and it didn’t look good crisp.

This was a fun project, and I’m happy with how it turned out. I think it will make a great vanity, makeup table, desk, entry table, or jewelry organizer.
How would you use it?
gail
Related Content: See More Desk Projects Here
See more great projects over at Elizabeth & Co. Be Inspired
Bev,
The turquoise was from Home Depot many, many years ago. My daughter bought it for her bathroom and hated it! I had painted it while she was at work (she did pick out the paint) and when she came home she cried. So, she sent the paint home with me and I have used it for years and years. I think I may have enough left for a couple of small projects. However, I’m sorry, I have no idea what the name is.
I have had it in a milk jug for a long, long time. https://www.myrepurposedlife.com/how-to-deal-with-rusted-paint-cans/
Thanks for stopping by!!
gail