Succulent Planters | Rotted Tree Trunk Pieces
As an Amazon Associate, I earn from qualifying purchases.
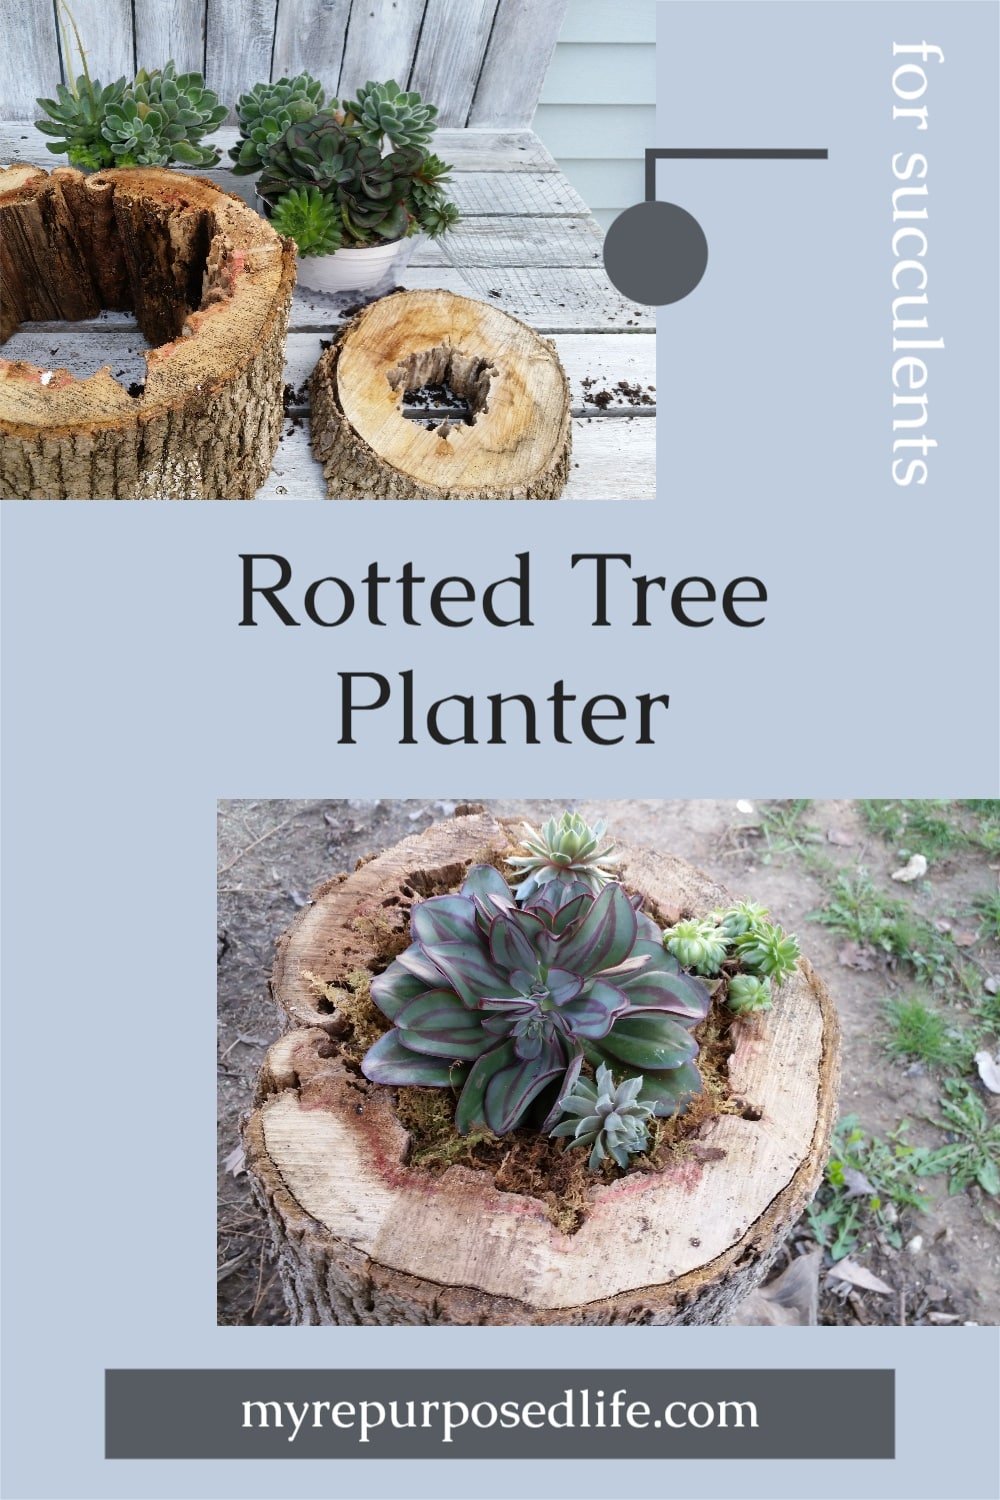
Looking for a unique, natural way to display your succulents? Instead of traditional pots, why not repurpose rotted tree trunk pieces into stunning, rustic planters? This eco-friendly project combines the beauty of weathered wood with the vibrant charm of succulents — creating a one-of-a-kind display that’s perfect for your garden, patio, or even indoors. Plus, it’s a great way to give new life to fallen branches or damaged trees!
I’m so excited to share some easy succulent planters with you today! I could hardly wait till today to show you what I did with some more leftover pieces of my dead tree.

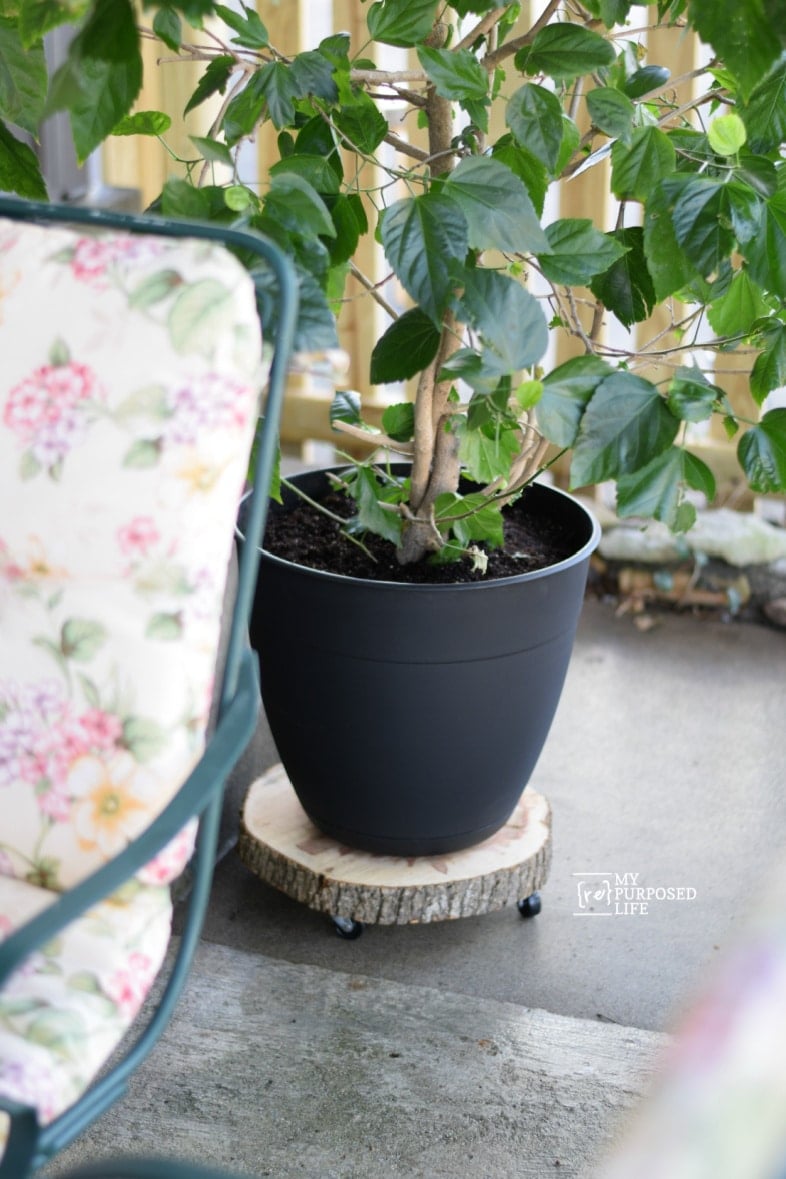
Have you seen the wood slice rolling plant stand? It’s perfect for wheeling around a large plant.

I didn’t show you the rotted pieces of wood cut from the same tree while putting up the picket fence.

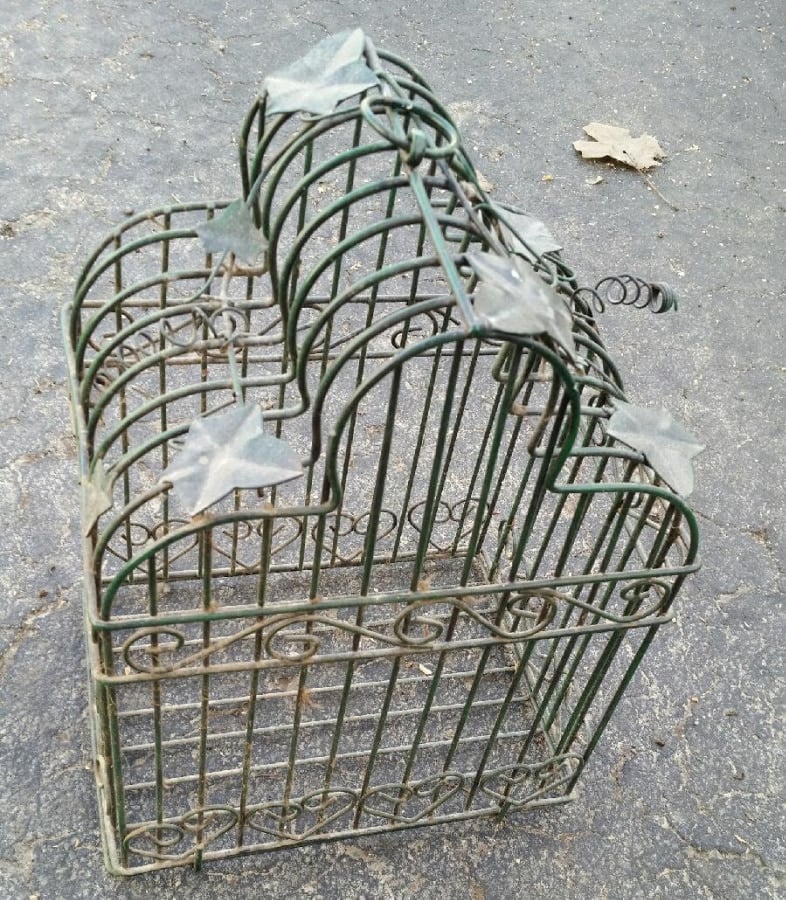
I bought some succulents at The Home Depot to plant in this birdcage planter I found in a dumpster. But after digging it out of the garage, I decided I didn’t like it—well, I sent a picture to Jamie (my daughter), and she said it looked a little “busy.”
Gather Rotted Tree Stump Pieces

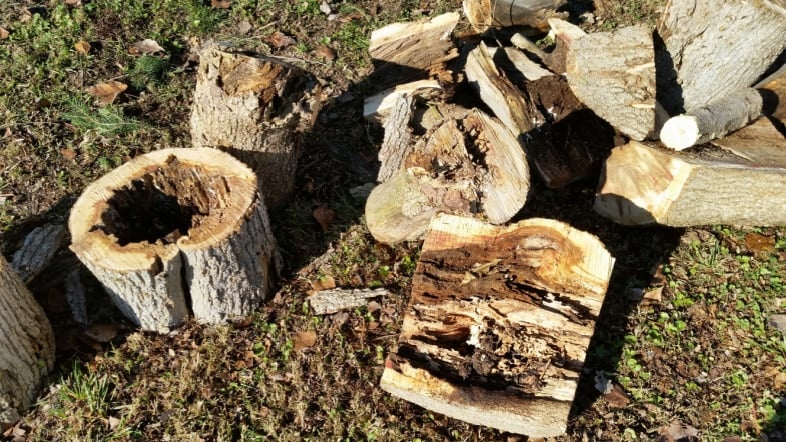
I’ve been saving some of these rotten pieces all winter, not knowing what to do with them.
How to make Succulent Planters out of Rotten Tree Stumps

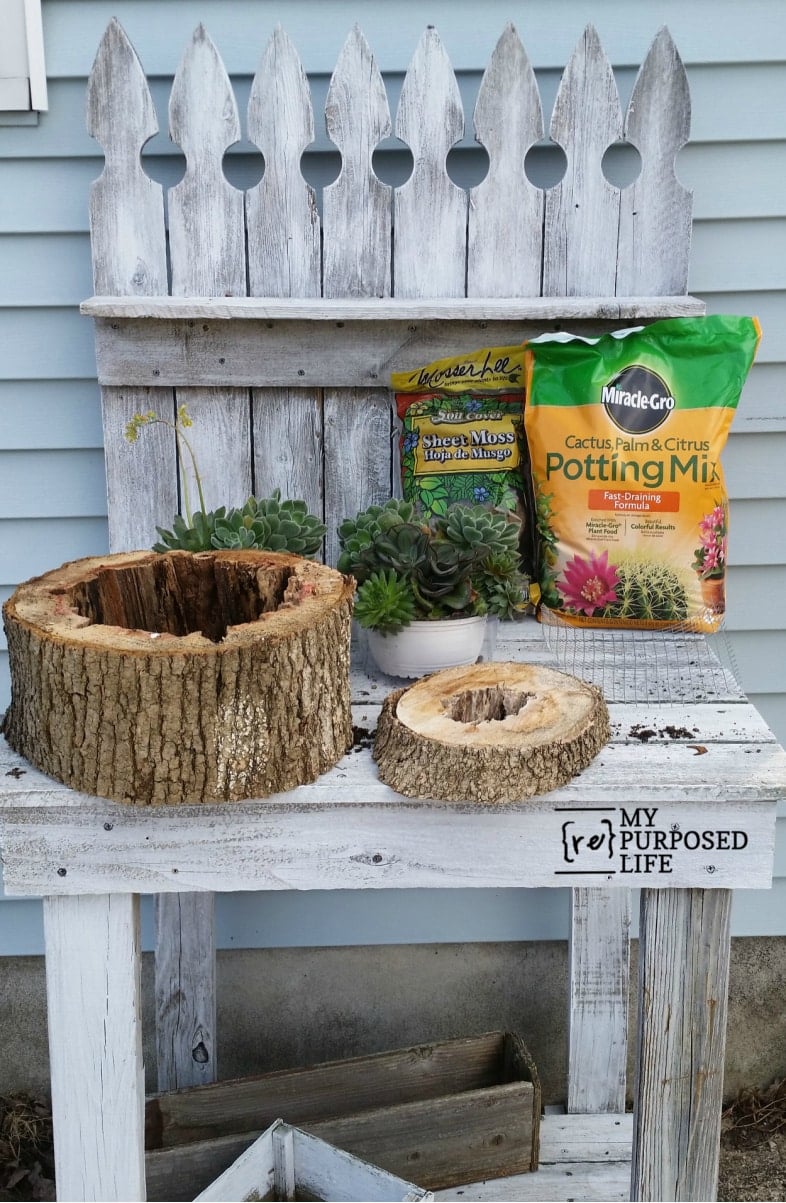
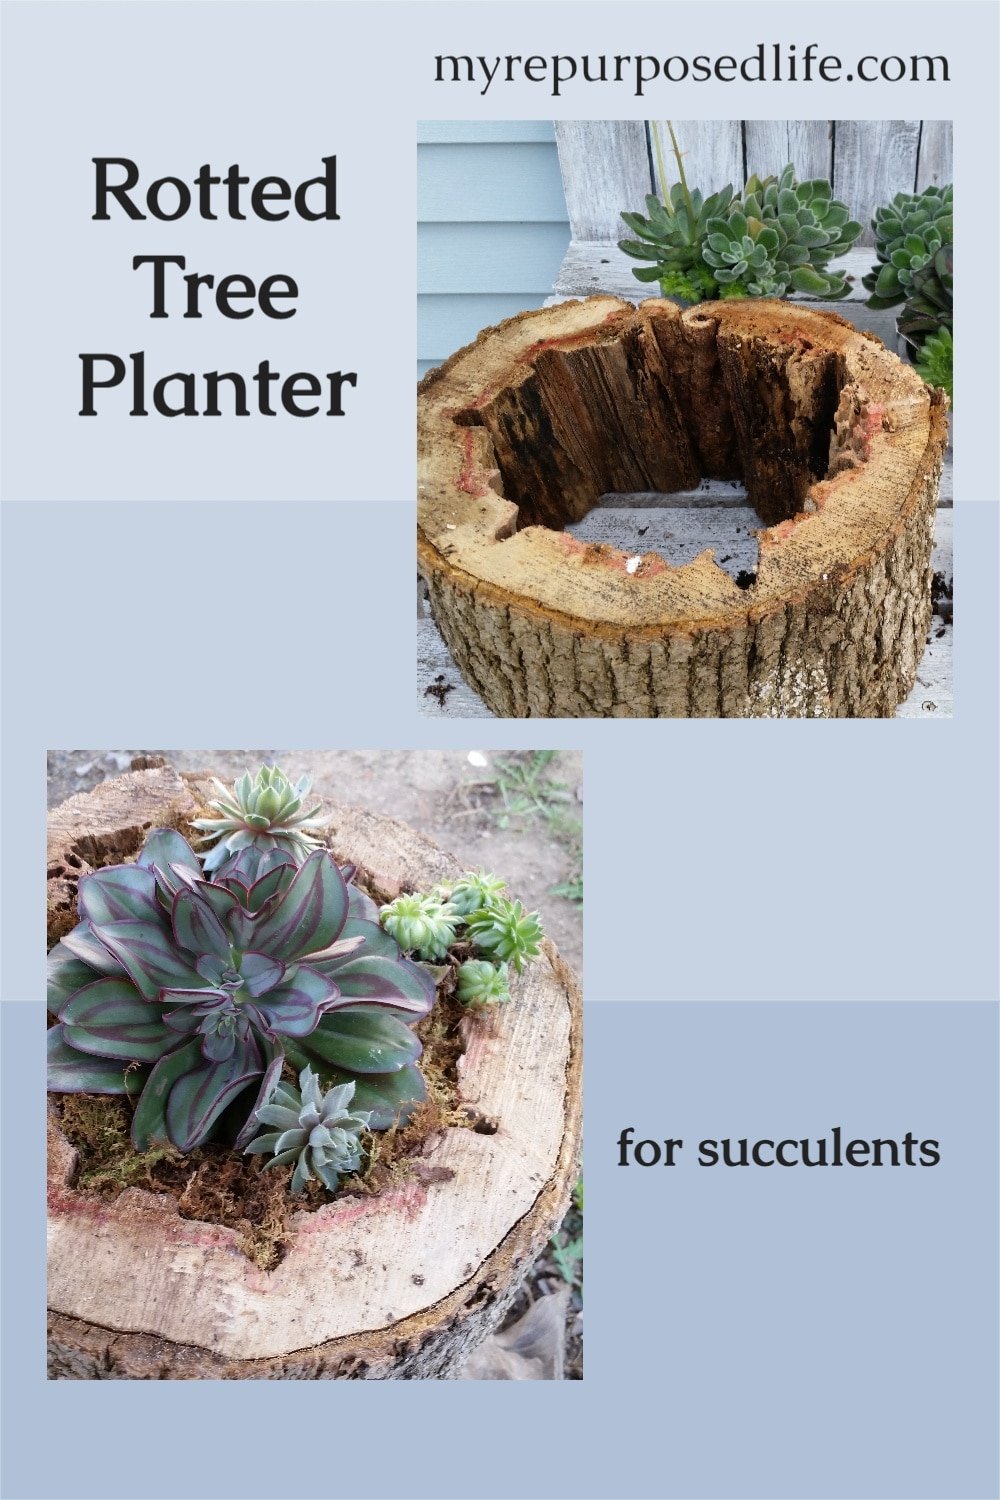
But suddenly, I had a lightbulb moment when I got the succulents on the potting bench. The question was, how do I hold the dirt in the rotted tree trunk pieces?
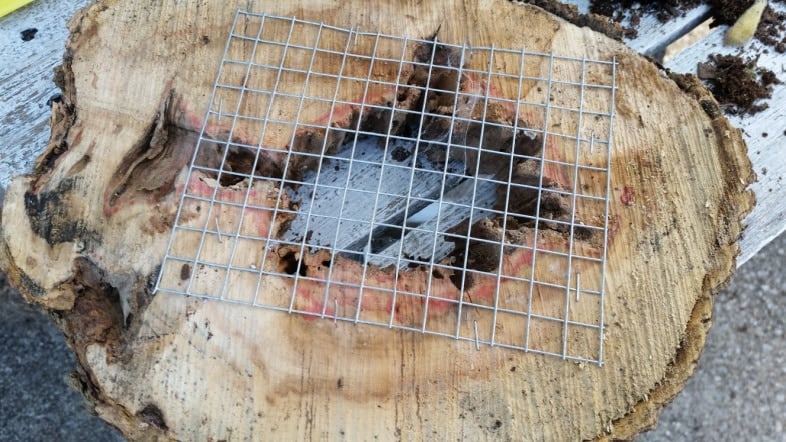
Secure Screening to Hold the Soil in Succulent Planters

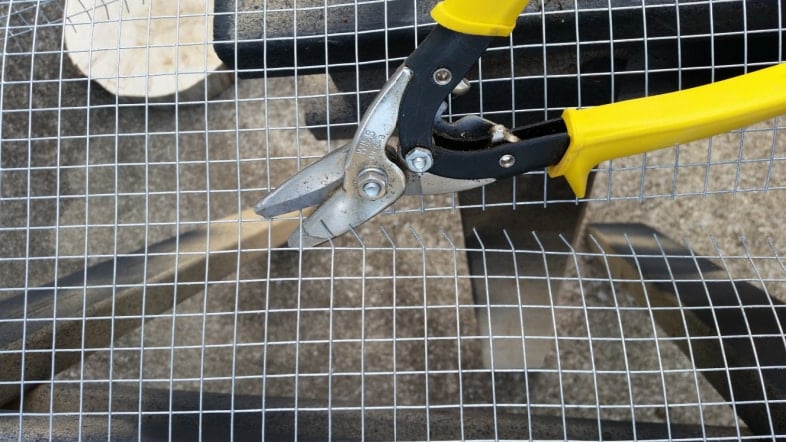
I was thinking chicken wire, but when I went to my stash to get it, I saw this hardware cloth and thought it was a better choice because the openings are smaller.

I used my staple gun to attach the hardware cloth to the rotted tree trunk.

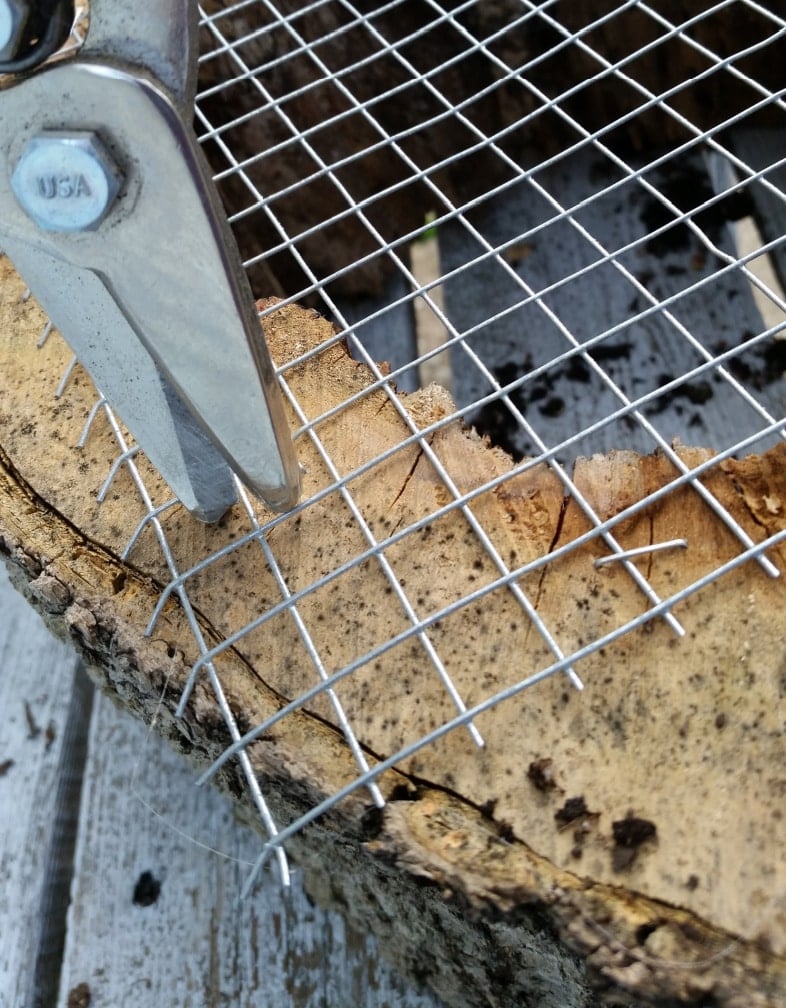
Then, I used the tin snips to trim the excess hardware cloth.

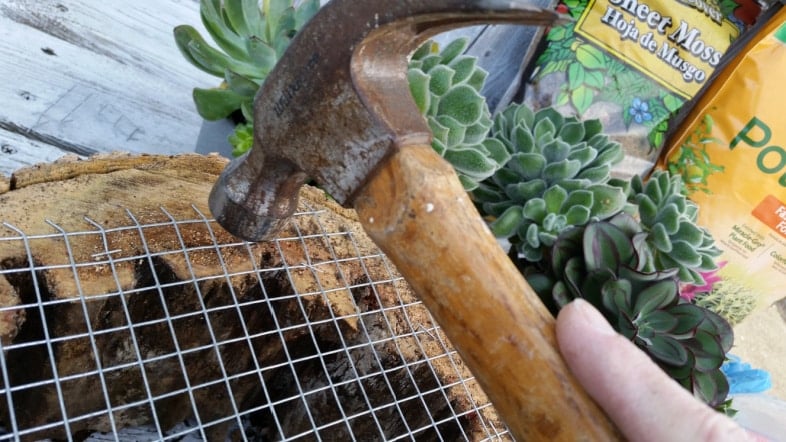
A hammer helped to tap down the tips of the hardware cloth.

How do you keep the dirt from falling through the hardware cloth? I tried to use the plastic pot liner that the succulents came in, but it was not deep enough for this sizeable rotted tree trunk piece.
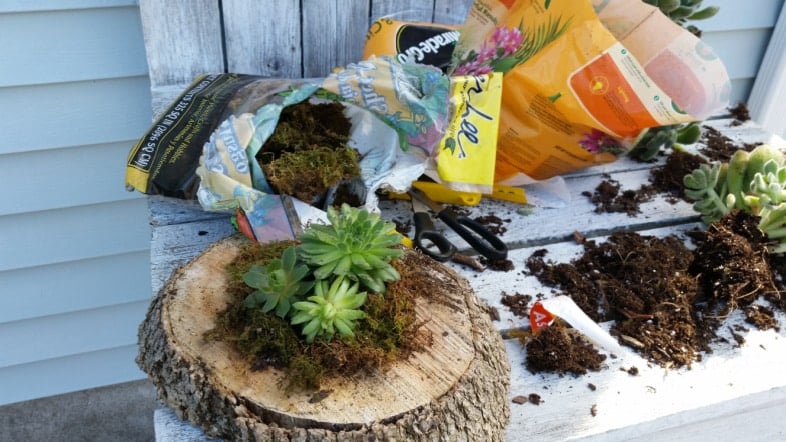
Line Succulent Planter With Plastic

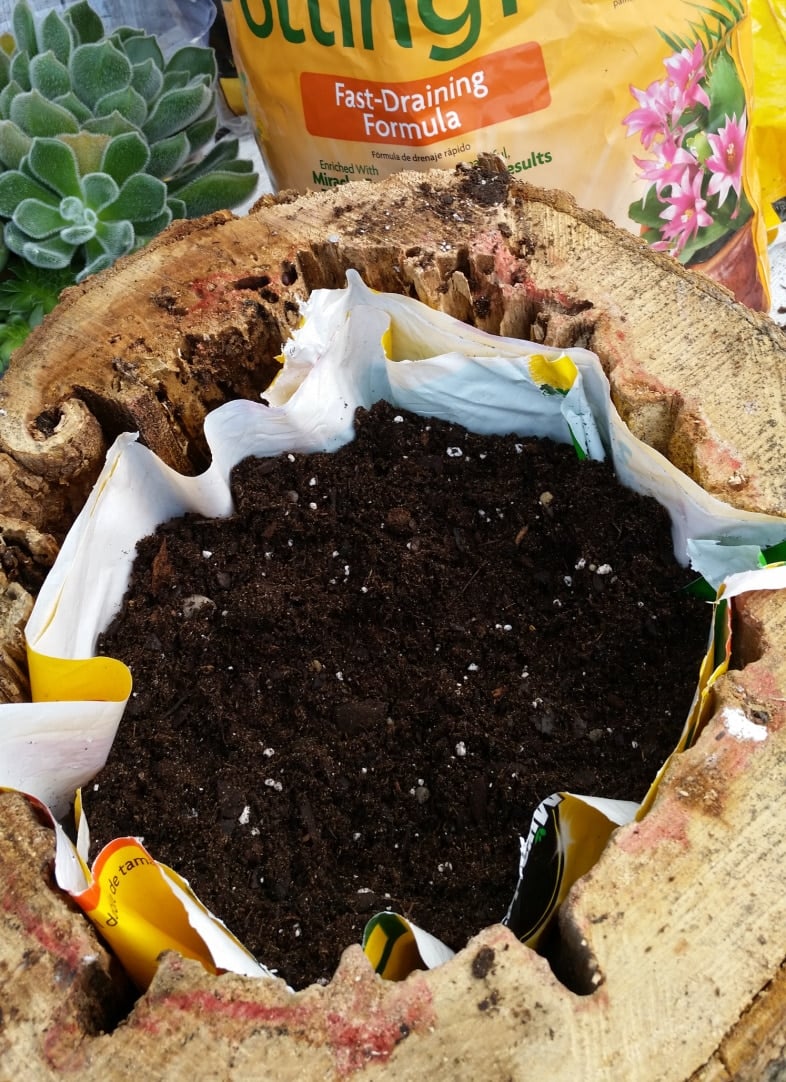
Using what I have on hand is essential, so I used a piece of a potting soil bag to line the tree trunk piece. After placing the bag and soil, I used scissors to trim the excess plastic.

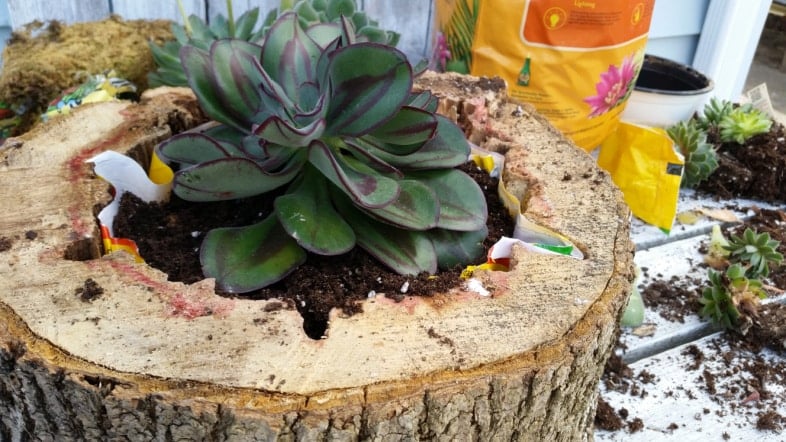
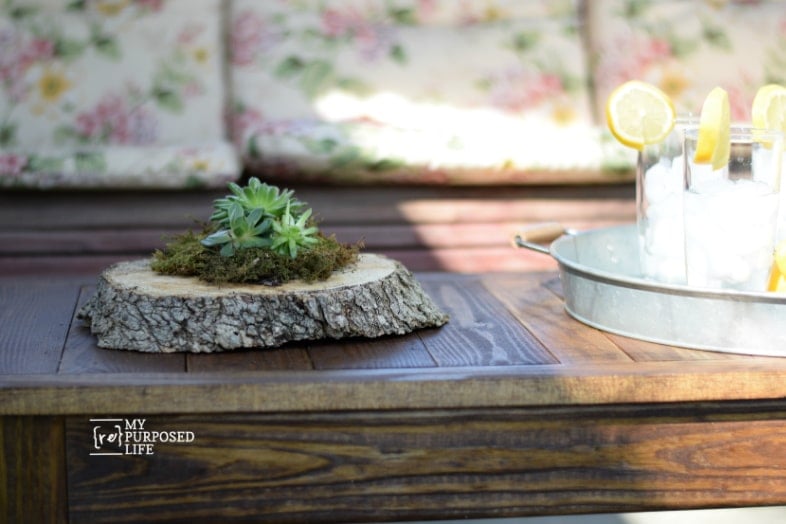
I chose the large succulent for the middle of this planter. Do you know what this plant is called?
Add Moss to Cover the Soil

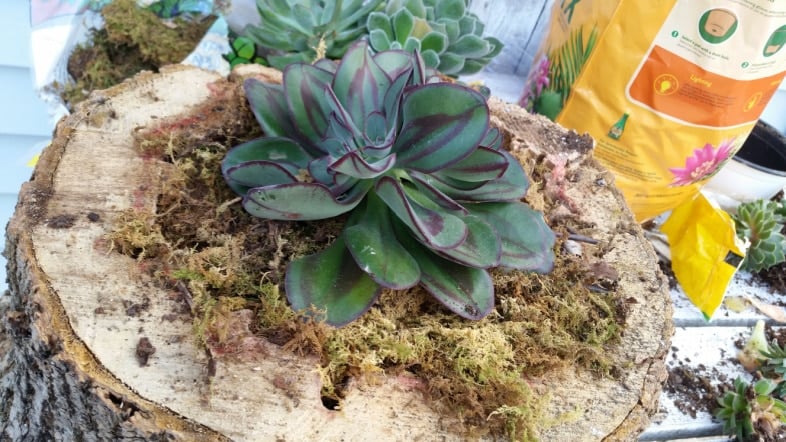
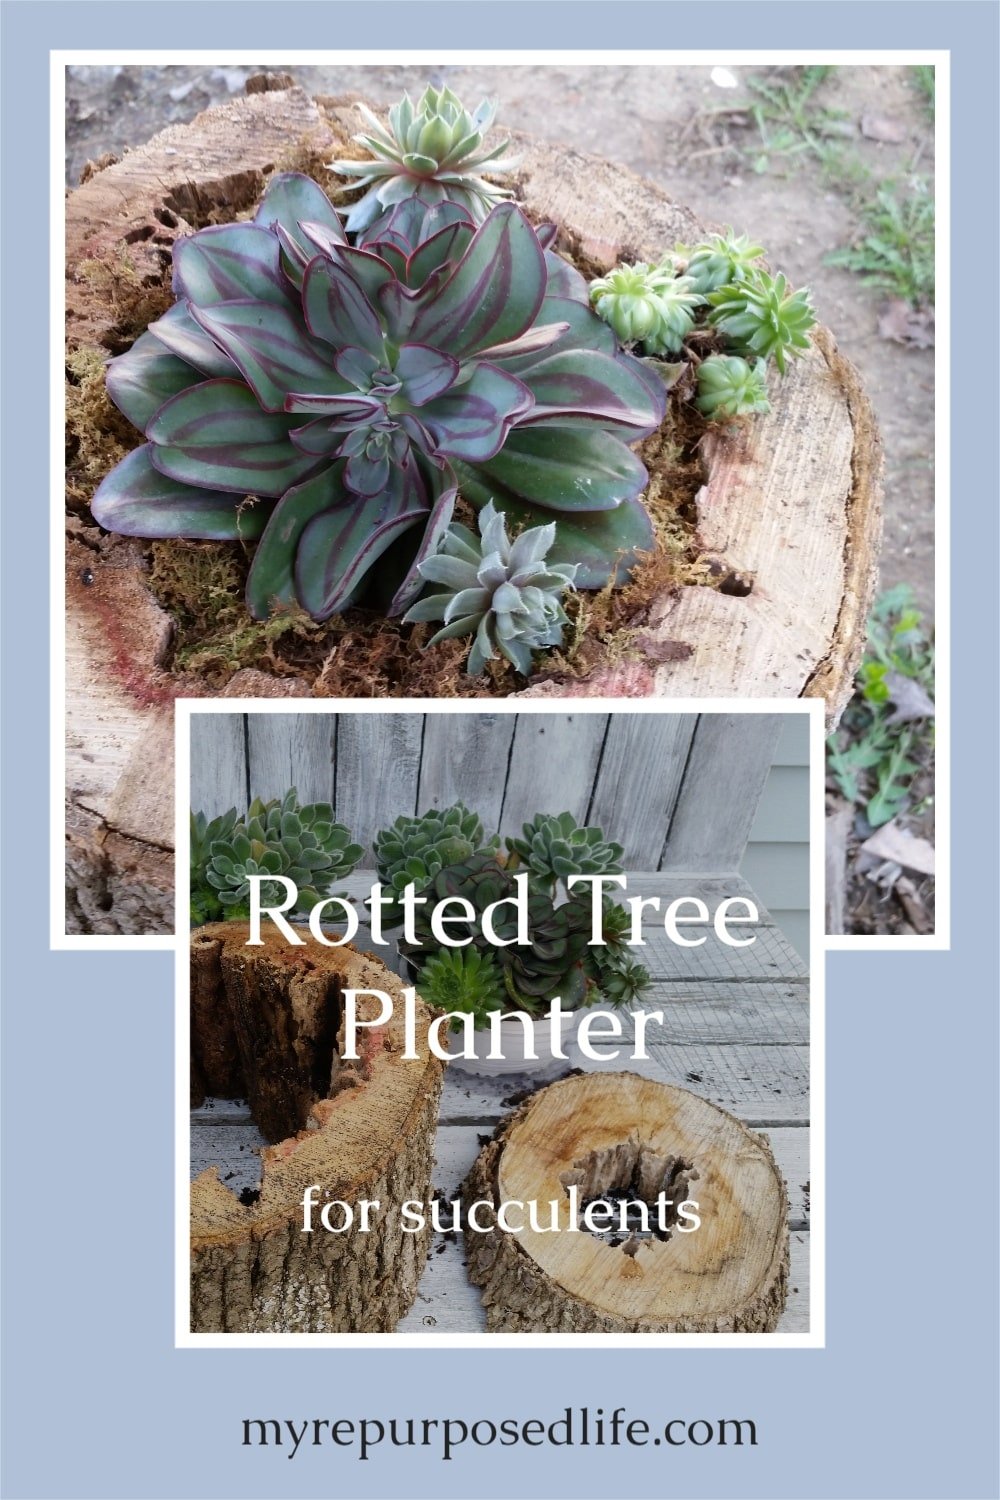
I filled in the top of the dirt with sheet moss. This is where I fell in love with the planter!

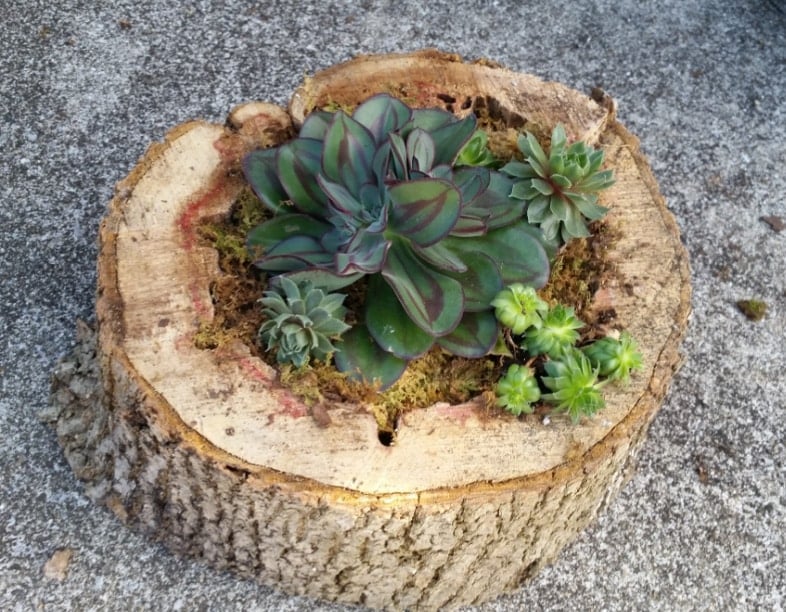
More miniature succulents were used to fill in the gaps.

I seriously LOVE how this rustic succulent planter turned out.


The smaller rotted wood slice succulent planter was made the same way, using hardware cloth stapled and a piece of potting soil bag.

I filled in the voids with sheet moss.
Related Content: Nautical Farmhouse Succulent Planter

Do you love these as much as I do?
How about one more? I had a lot of succulents to use up . . .

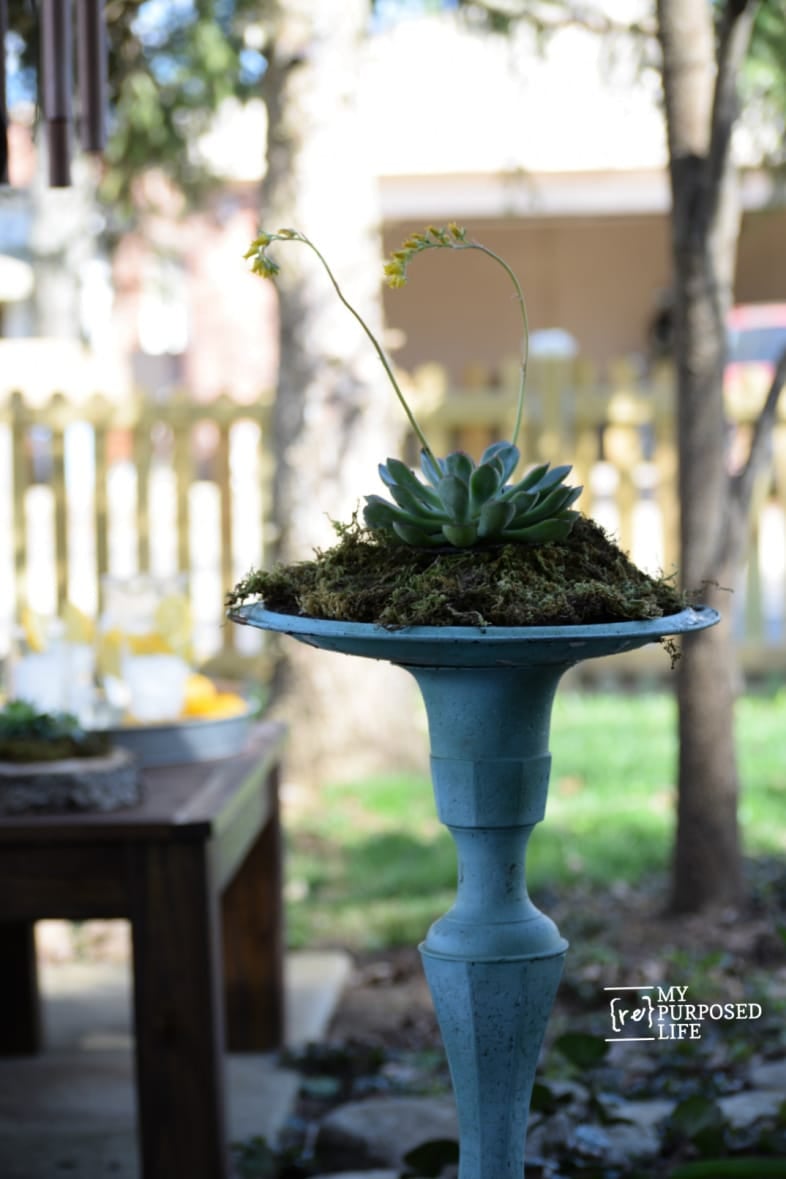
I made this DIY birdbath years ago and thought it was ready for change. Adding soil to the birdbath and placing a small plastic pot holding the succulent made this an easy makeover. The succulent was a little top-heavy, so it needed to be potted. Adding more soil and sheet moss to make it all come together makes it a happy little camper.
So, there you have it! Three easy DIY succulent planters to help decorate my patio (when the weather warms). Which is YOUR favorite?
More unique succulent planter ideas:

- Birdbath with Artificial Succulents
- Rotted Tree Trunk Succulent Planters (you are here, thank you)
- Succulent Garden Decor and Tips
- Wicker Wall Pocket Succulent Planter
- Mop Bucket Succulent Planters
- Succulent Planters Made From Mop Buckets
Here’s another easy succulent planter–a clearance-priced wicker Easter basket.
Related Content: 120 Cheap, Easy, DIY Garden Ideas
gail
Hi – re the rotten tree stump planters – i notice you didn’t remove the bark- doesn’t the bark dry up and fall off? it could also house bugs and stuff right? or do you treat the bark somehow?
thanks in advance Gi
I didn’t remove the bark. I had no issues with bugs, but, yes, it did fall off eventually. That gave an even cooler look to the wood.
gail
Those log pots are really cute and you did a great job styling the plants. Good Job!
I appreciate your sweet comment Mary. I love, love, love plants and unique planters.
gail
I LOVE that you were able to use pieces of that tree- what a great use of resources!!
Thanks for feeding my obsession with succulents. I’m off to Depot to find that plant name! So many projects in this post!
I love these hollow tree trunk succulent planters, Gail! Now if only I had a hollow tree trunk to chop up. An idea to keep in mind, anyway. Thanks for sharing the idea and the tutorial.
Naomi,
Keep an eye out in your neighborhood for someone chopping down an old tree. 🙂
Thanks for your kind words and your comment! It’s much appreciated.
gail
What a great great great gift idea. LOVE it! Very easy, cheap and unique!
Thank you Susan.
It was a fun and easy project.
gail
Hello Gail,
New to your page, but I love it and cannot wait to put some of your projects to use here, I knew you by your first name, I lived across the field from your Nana, and I must say, you look great,
Ellen
Ellen!
How did you find my page? It’s great to hear from you!!! I’m so happy to inspire new friends AND old friends! You can call me Norma! 🙂
Wow, that was a LOT of years ago!
I used this information to plant flowers in 3 hollow logs I have at home. Thank you for sharing this!
Awesome! I have been doing some more planting myself! I’ll be sharing those ideas soon.
Thanks for stopping by and taking the time to leave a comment Janis!
gail
Thank you for sharing. Those log planters make great edges to raised garden beds. Gives the garden an extra boost of color, a whole lot of fancy and pop, and fun to be outside period!!
Great ideas! Thanks for stopping by to check out my succulent planters made from rotted tree trunks!
gail
I have done this for years. I love the look of natural planters. The only thing I do different is instead of hardware cloth on the bottom I use window screen.It keeps the dirt in and let’s excess water drain out. It works perfectly.
Thanks for your input Nancy!!! I’ve never had access to old wood like this before. Not sure when I will again.
gail
Fun idea. I have done a similar project. Have a lot of trees in my yard. We lose a couple every once on a while. Never done the smaller one. It looks great
Thanks for stopping by Kanchana and taking the time to leave a comment on my succulent planters. I was just checking them out today–and gave them a little bit of water. The large one has two really tall blooms on it. I think it’s happy on my patio.
gail
OMG I AM LOVING IT…WE JUST CUT OUR TREE DOWN AND I HAVE SO MANY PIECES OF WOOD TO USE. THANKS SO MUCH FOR YOUR IDEAS can’t wait to get started.
I’m so happy to inspire you to do these projects! 🙂 I just watered mine this morning and they are growing so well, they seem to be very happy in their home.
gail
Another great idea Gail, love it! If I were lucky enough to find such a log and had a chain saw to cut it and were going to leave it outdoors, I might use weed barrier cloth to keep the soil in and still allow for drainage. I have used that method or a piece of window screen for covering the small hole at the bottom of my flower pots to keep some of the soil from running out when I water them. Speaking of plants; I have another tip for anyone that has really large planters, I’m talking the 2-3′ high, 2′ wide pots. Those things hold a lot of soil, they get too heavy and expensive to fill completely with a good potting soil. What I have done for several years is cover the hole with window screen, dump a bunch of styrofoam peanuts in till it’s filled about halfway or so there’s about 12″ depth left for the soil. (I would take styrofoam peanuts home from work every time the shipping/receiving department opened a package and left them to be thrown out – no way! not on my watch) Jiggle the pot so they settle a bit and push them down to pack them in better. They are light as a feather so it can be a challenge keeping them in place initially, especially if it’s windy! Cut another piece of window screen the diameter of the pot for the space above the peanuts. Weed barrier cloth is too flimsy for this part. Place it over the peanuts, make sure the soil is really moist before you start putting the soil in, couple quarts at a time spreading it around and keep pressing it down. The peanuts will continue to compress somewhat with the weight of the soil. Once it seems pretty solid, alternate a few inches of soil, then water, soil, water until it’s where you want it. Then give it a good soak until the water is running out the bottom. The water will compress it more so you may need to add more soil after it really settles. I usually let it sit for a day to dry out a bit before putting my annuals in. Sometimes I find I have too much soil once I have to make room for the plants I’ve taken from their nursery pots. This has worked very well for me for 10+ years on every pot I have regardless of size. One more tip if you plant directly into any kind metal planters/containers. The last time I bought a flat screen TV, it was wrapped in a sheet of flexible foam material. I saved that and started lining my metal pots with a few layers of it. Every time I buy something packed in that stuff, I have to save it! Most plants can’t take the heat but doing this seems to insulate the roots from the hot metal on those really hot days. I’m not a professional by any means and maybe a professional will disagree but it works for me!
Whew! Hope there’s room to post all this. This is my first time ever, posting any kind of comment.
Judy
Judy,
I think you’re making up for lost time. 🙂 Thank you so much for all the great tips! I truly appreciate it, and future readers will also!
Don’t be a stranger, k?
gail
Awesome tips! Thank you!
What would you dip them in or paint on them to prevent critters in the wood?
Amy,
I’m not sure about an organic option, but a general pesticide would work. I suppose you could also use a heat treatment such as your oven or a heat gun.
gail
Wow these are so awesome!! Pinned, so cleaver Gail!! Love love!
thank you Mindi, I really LOVE how they turned out. I appreciate you pinning.
gail
I love this idea. I love all the way that cut logs are being used these days.
Love these, and just made some a few weeks ago. After I brought them inside, I noticed little piles of sawdust forming next to each piece. Carpenter ants! So just be sure to check your logs carefully!
I too have noticed a few small ants, so yes-everyone should check their logs, and possibly even treat them before planting. 🙂
Thanks for your advice Cindy!
gail
Oh I LOVE those Gail. Such a cool repurpose. Glad that light bulb went off 🙂
Omgosh Gail–I totally LUV this!
Yep, I see me doing a couple of these myself now!
Catherine
thanks Catherine! 🙂 I really am so thrilled with how they turned out.
I love those, beautiful!
Great Idea!!
Thanks for sharing,
Helen
that is a cool idea! thanks for showing us how to do it!
oh my word gail i love this, so i will be walking in the neighbors woods looking for rotted tree parts lmao, they already think i am crazy this will add fuel to the fire thanks for sharing xx
sphagnum moss lining
Very pretty, all of them. Nature with Nature, a winning combo! Thanks for sharing.
I love succulents and planting them in the pieces of tree stump rings like that just really sets them off beautifully.
Thanks for sharing with us Gail.
Very, very pretty and great idea!