• Skip to primary navigation
  • Skip to main content
  • Skip to primary sidebar
  • Start Here
  • Shop Favorites
  • About
    • Welcome To My Repurposed Life Home of Repurposed Furniture
    • More About Gail
    • Disclosure
    • Privacy Information
  • Gallery
    • Repurposed Furniture
  • Repurposed Items
    • Building Supplies
    • Miscellaneous Household Items
    • Picture Frame/Chalk Board
  • DIY
    • Home Reno
    • outdoor living
    • Painting
    • Shop Talk
    • Tips for Around the House
    • Build It
      • Furniture
      • Home Decor
      • Storage
    • Crafts
      • Dollar Store
      • Easy
      • Holidays Seasonal
  • Furniture
    • Chair
    • Desk
    • Dresser/Chest
    • Headboard | Bed Parts | Cribs
    • Kids Furniture
    • Table
    • Kids Furniture
My Repurposed Life® Rescue Re-imagine Repeat
menu icon
go to homepage
subscribe
search icon
Homepage link
  • About
  • Start Here
  • Project Index
  • Furniture
  • Subscribe
    • Email
    • Facebook
    • Instagram
    • Pinterest
    • RSS
    • Twitter
  • ×

    Home » DIY » Build It » Home Decor » Wooden Caddy from Bed Slats

    Wooden Caddy from Bed Slats

    Published by Gail | Published September 16, 2016 | Updated April 9, 2019
    As an Amazon Associate I earn from qualifying purchases.

    Pin
    Share
    Tweet

    repurpose-bed-slats-into-floral-centerpiece-or-wine-carrier and painted mason jarsHello My Repurposed Life fans, it's Joan from Scavenger Chic once again. I actually have 2 projects for you this month, a wooden storage caddy and painted canning jars.

    repurpose-bed-slats-into-floral-centerpiece-or-wine-carrier

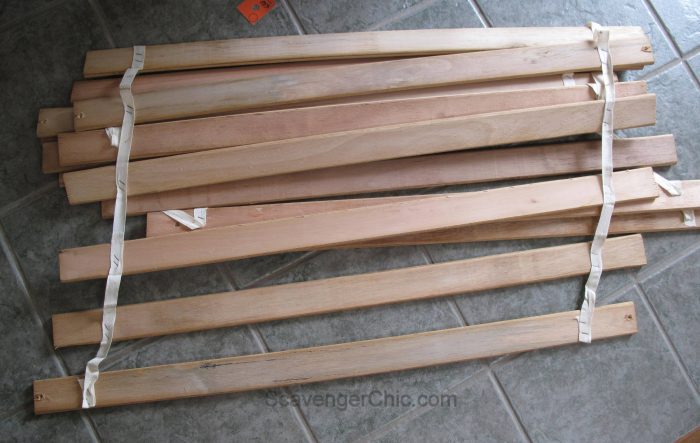
    When I first saw this bundle of wood at the local thrift store, I actually thought it was a set of wooden blinds. But now that I've gotten the bundle home and unwrapped, I'm thinking, bed slats.


    old-bed-slats-make-a-beautiful-centerpiece-scavenger-chic-for-myrepurposedlife-com

    While it was a nice stack of wood and only $2, I couldn't imagine any project I would do with this wood that I wouldn't do with my trusty pallet wood. I passed up this little find and went about my normal errands.

    hobby-lobby-divided-wood-tray-bmp

    My next stop was Hobby Lobby, my favorite stop for knobs and handles. I was just finishing up my coffee table made from a hand truck and I needed a couple of vintage looking handles. That is where I spy this little cutie. 

    My first thought was, "I can make that", and  "that wood I just passed up would work perfectly". Actually, pallet wood would probably work just as well, but it would need a bit more sanding.

    Back to the thrift store, which was luckily just around the corner.

    repurpose-bed-slats-into-floral-centerpiece-or-wine-carrier

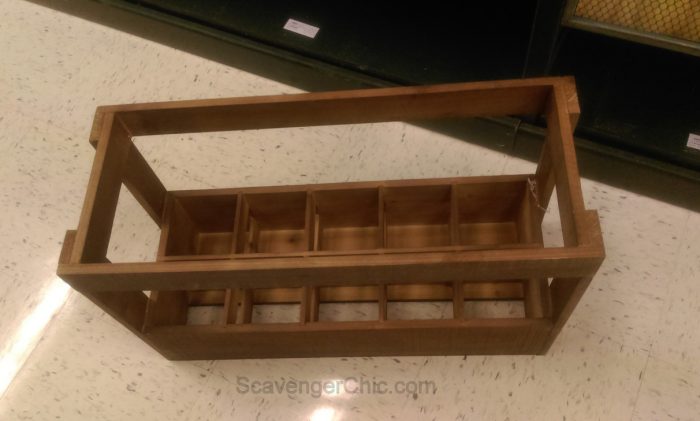
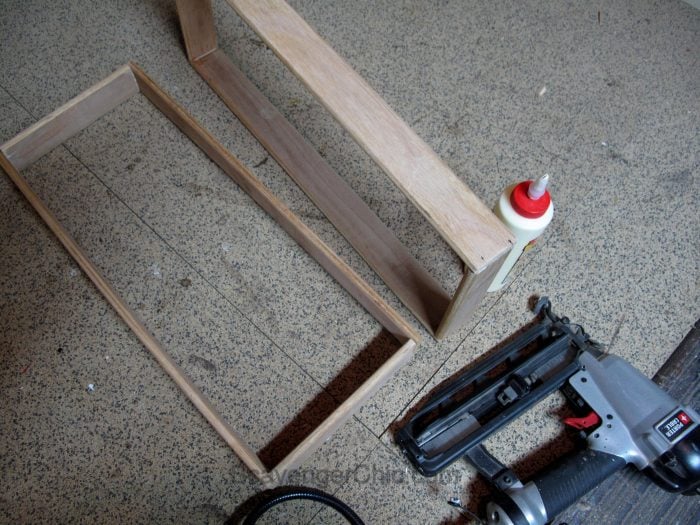
    Starting with the lower part of the box. Cut four 23 ½" slats and  four 9" slats.

    repurpose-bed-slats-into-floral-centerpiece-or-wine-carrier

    I'm going to give you my measurements but depending on the thickness of the wood you use, whether pallet wood, bed slats or 1x3's, your cuts may vary a bit.

    Sand and attach with finish nails and wood glue to make 2 rectangles as shown above.

    repurpose-bed-slats-into-floral-centerpiece-or-wine-carrier

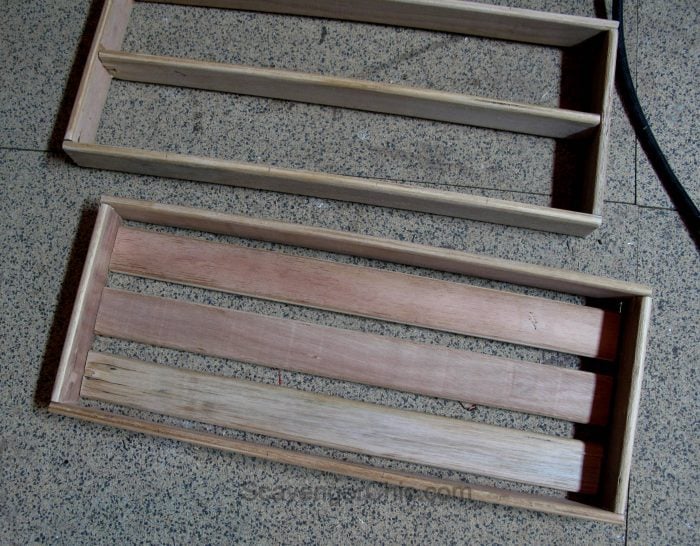
    Measure the inside of your box and cut 4 more slats. Since my wood was ½" thickness, my interior boards measured 22 ½". Again, sand, nail and glue into place as shown above.

    repurpose-bed-slats-into-floral-centerpiece-or-wine-carrier

    Cut eight more pieces of slats, this time the width of your dividers. They should be about 4 inches wide. Nail and glue to the outside board and use just glue for the inside (you won't be able to get your nail gun in there).
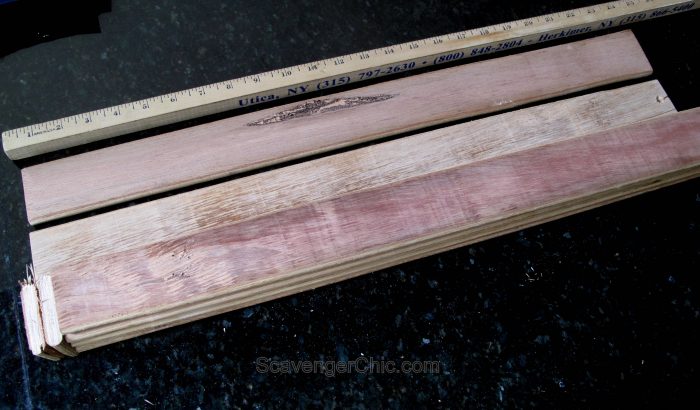
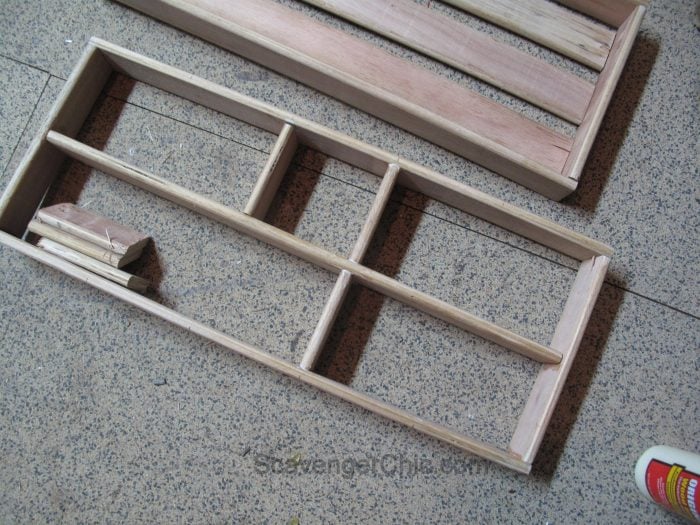
    repurpose-bed-slats-into-floral-centerpiece-or-wine-carrier

    Cut four additional slats about 13" in height for your corners.

    Sand well, and once again, use a generous amount of wood glue and nails to attach. The nails should go into the side pieces where the wood is the thickest.

    repurpose-bed-slats-into-floral-centerpiece-or-wine-carrier

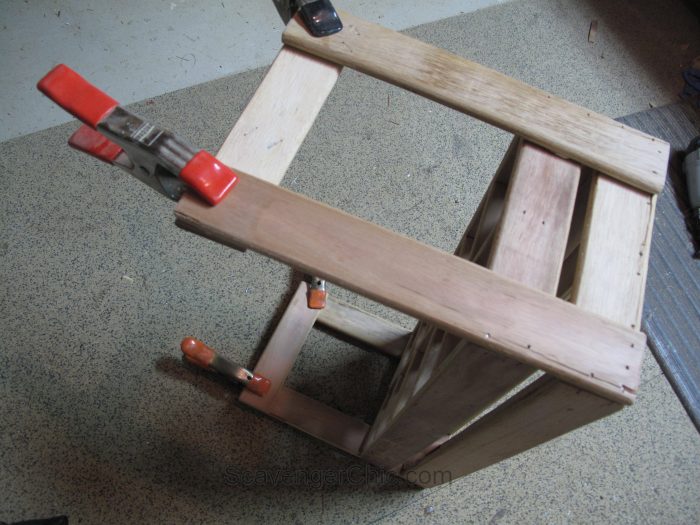
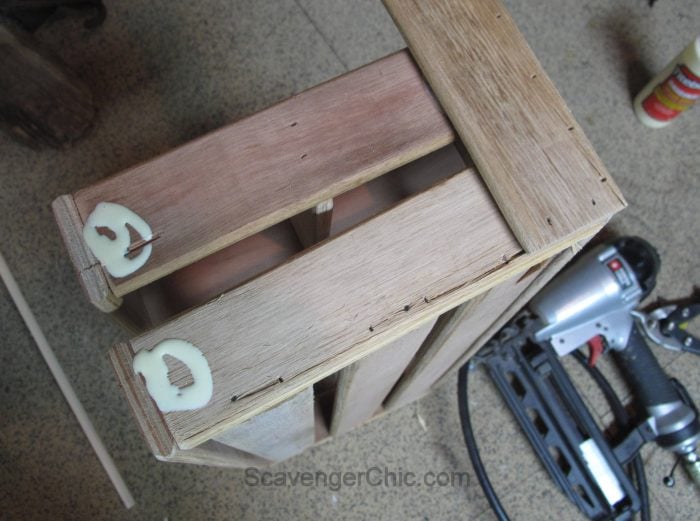
    Measure from outside corner piece to outside corner piece  and use that measurement to cut 2 additional slats. If you're using my measurements, they should be about 9 ½ inches wide.

    Use wood glue and clamps to attach.
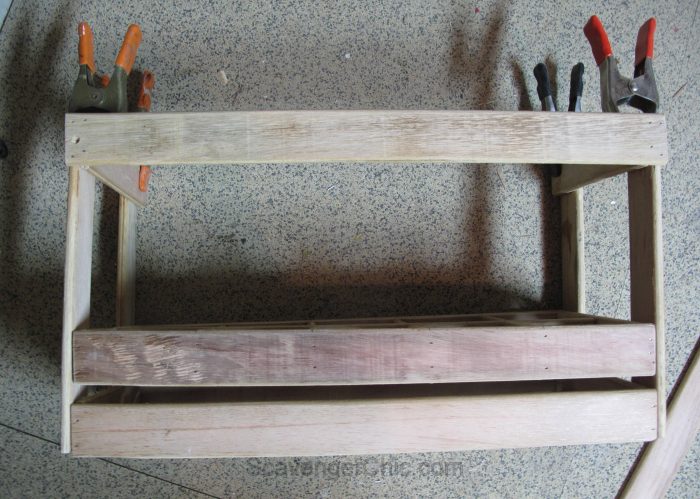
    repurpose-bed-slats-into-floral-centerpiece-or-wine-carrier

    The last 2 pieces to cut...once again measure the distance from corner to corner of the pieces you just clamped. Mine were just over 24"

    Sand, glue and nail.

    repurpose-bed-slats-into-floral-centerpiece-or-wine-carrier

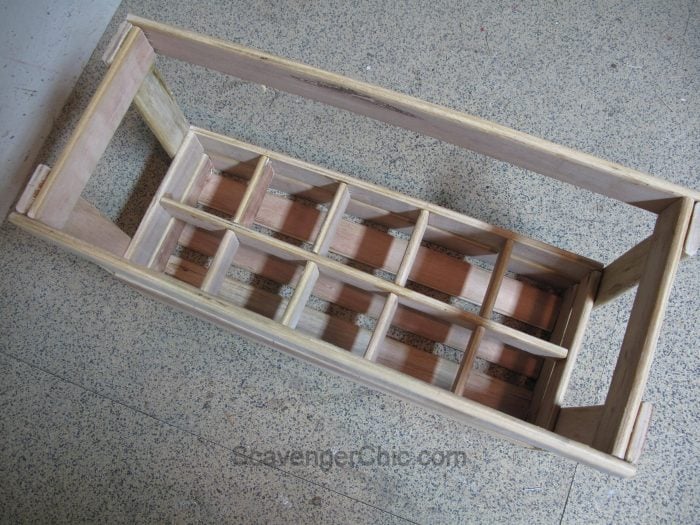
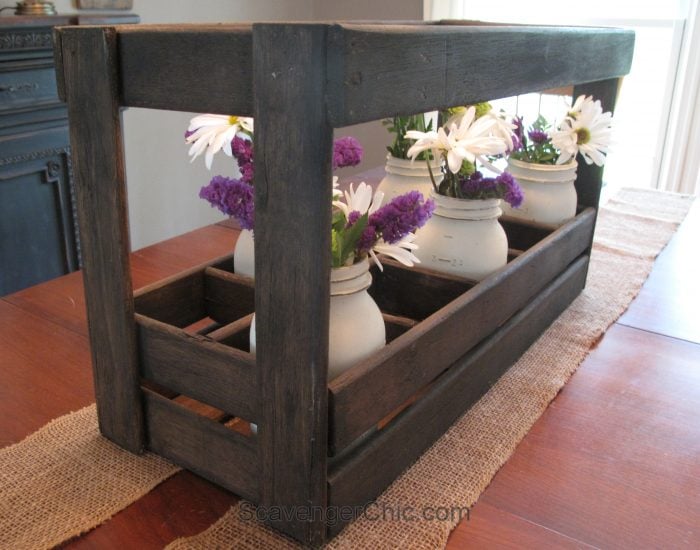
    All finished. You can leave it as is or paint or stain to match your decor. I ended up staining mine a dark walnut.

    repurpose-bed-slats-into-floral-centerpiece-or-wine-carrier and painted mason jars

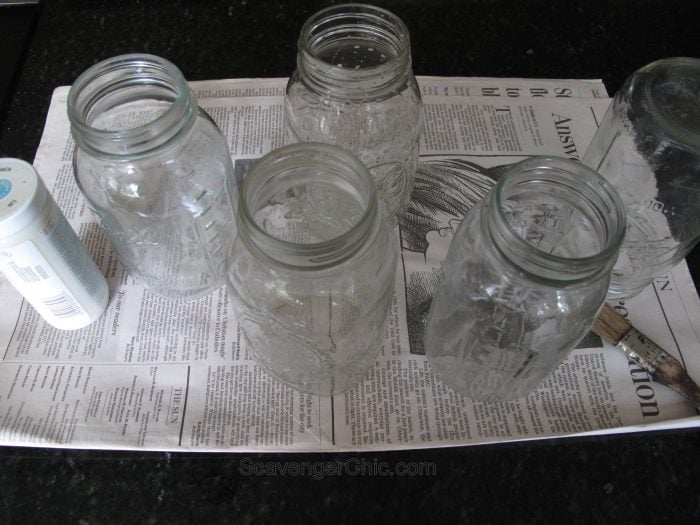
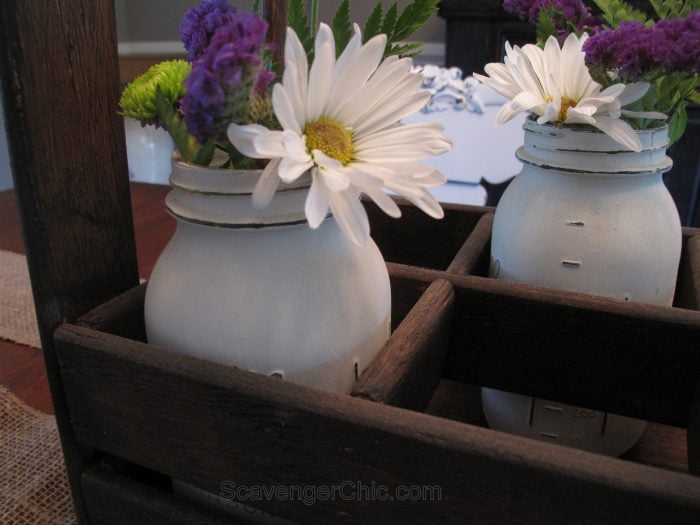
    I have one more project for you, painted canning jars. If you don't have canning jars you could also use spaghetti sauce jars. I believe Classico spaghetti sauce sells their sauce in Mason jars.

    Gather up your canning jars and white chalk paint.

    repurpose-bed-slats-into-floral-centerpiece-or-wine-carrier and painted mason jars

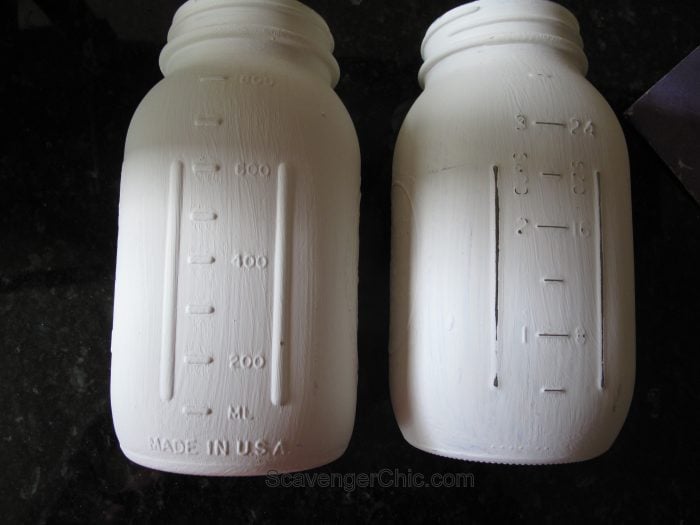
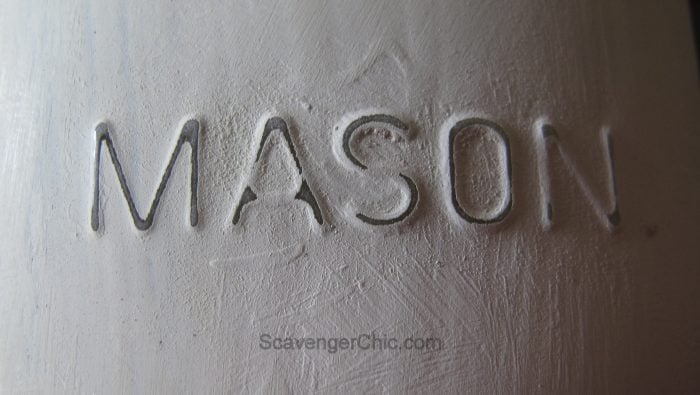
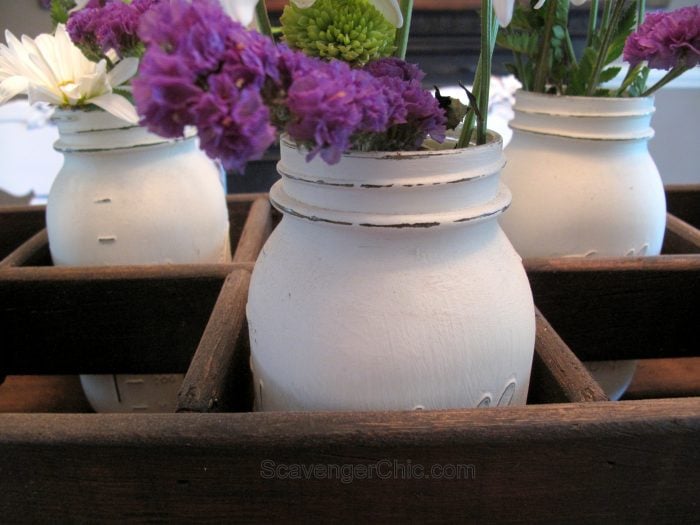
    Turn the jars over on your work surface and give your jar 2 coats of the white chalk paint. When dry, sand off all of the raised areas.

    repurpose-bed-slats-into-floral-centerpiece-or-wine-carrier and painted mason jars

    repurpose-bed-slats-into-floral-centerpiece-or-wine-carrier

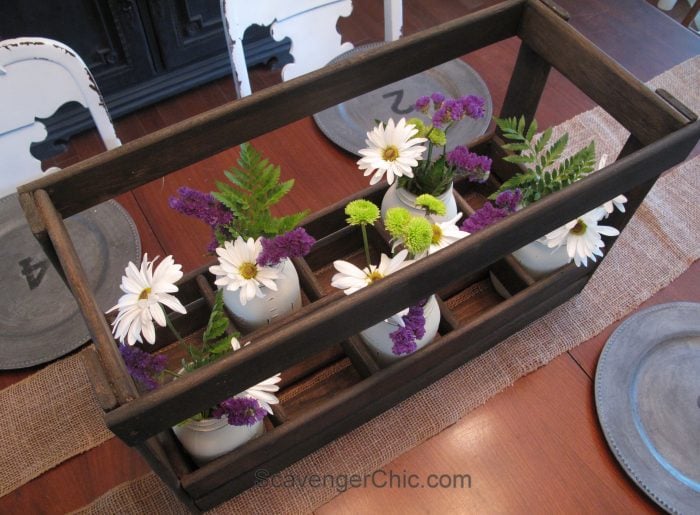
    Use the painted canning jars to decorate your new wooden caddy.

    repurpose-bed-slats-into-floral-centerpiece-or-wine-carrier and painted mason jars
    repurpose-bed-slats-into-floral-centerpiece-or-wine-carrier and painted mason jars

    repurpose-bed-slats-into-floral-centerpiece-or-wine-carrier and painted mason jars

    repurpose-bed-slats-into-floral-centerpiece-or-wine-carrier and painted mason jars

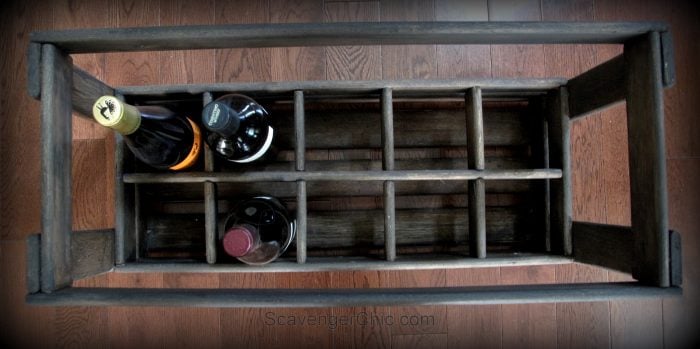
    Of course it could also be used to hold wine, craft supplies, picnic items, desk supplies...the choice is yours.

    Did I mention that the caddy at Hobby Lobby was $65, mine was $2. Now I know you'll want to make one.

    Joan

    see more of Joan's projects here

    see more caddy ideas here


    Pin
    Share
    Tweet

    Related Content:

    • Portable Folding DIY Pallet Bar - great for weddings, tailgating and more!
      Portable Folding DIY Pallet Bar - great for weddings,…
    • Hello Fall Rustic Pumpkin Sign
      Hello Fall Rustic Pumpkin Sign
    • Pallet Wood Shelf
      Pallet Wood Shelf
    • rustic pallet caddy
      rustic pallet caddy
    • Reclaimed wood projects | Fence | Pallets
      Reclaimed wood projects | Fence | Pallets
    • Pallet Board Table - Sofa Table - Coffee Bar - Outdoor Serving Bar
      Pallet Board Table - Sofa Table - Coffee Bar - Outdoor…

    About Joan

    Joan is always searching for new projects and new ideas to try and use. Her goa is to inspire you to fill your own home with unique and fun ideas.

    Reader Interactions

    See comments Cancel reply

    Your email address will not be published. Required fields are marked *

    This site uses Akismet to reduce spam. Learn how your comment data is processed.

    Primary Sidebar

    Hi, there! I’m Gail Wilson, the author and mastermind behind My Repurposed Life. I’m obsessed with finding potential in unexpected places and believe that with a little hard work and imagination, any old thing can be made useful again—myself included! I hope you’ll enjoy the journey and pick up a few tools along the way… literally!

    More about me →

    Join Our Mailing List

    ​

      Click the topics you're interested in below:

      Subscribing above means you agree to our Privacy Policy​

      Footer

      ↑ back to top

      SEEN ON

      Might I Suggest

      • Start Here
      • Furniture Makeovers

      Newsletter

      • Sign Up! for emails and updates

      About

      • Gail's Favorites on Amazon
      • About

      As an Amazon Associate I earn from qualifying purchases.

      Copyright © 2023 My Repurposed Life · Privacy Policy · Disclosure