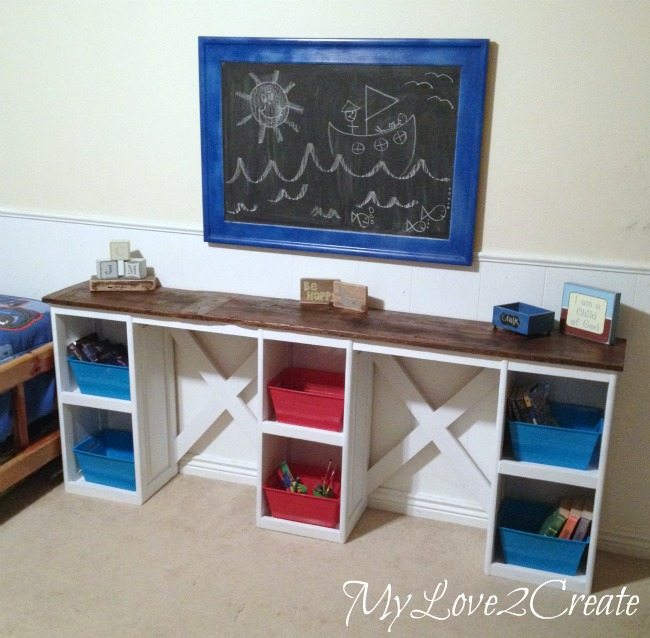
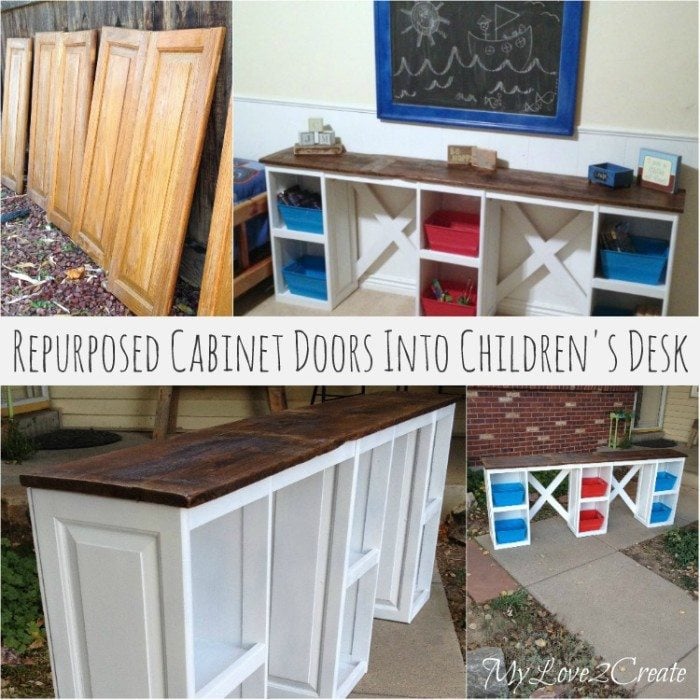
Repurposed Cabinet Doors into a Desk
As an Amazon Associate, I earn from qualifying purchases.
It was warm and sunny, the puppy didn’t chew up the carpet, and I cleared out some of my hoard and made it into something useful.
I give you, Repurposed Cabinet Doors into a Desk …
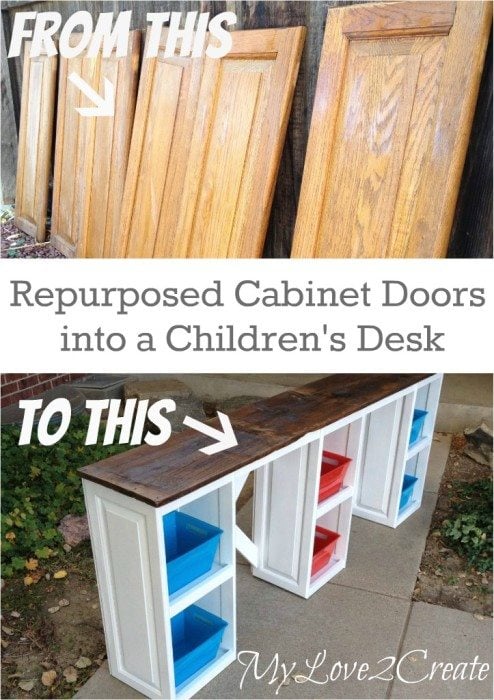

I have had these cabinet doors for a while. They caught my eye on a rainy day, well pouring actually. It was a classic drive by spotting. I slammed on the breaks, made a quick U turn, and threw them in my trunk, saving them from the trash. They were pretty grimey, but they came home non the less, and I gave them a good cleaning with TSP.
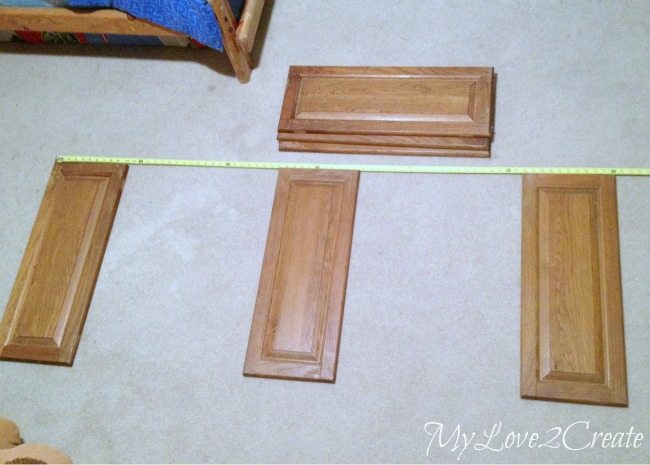
I have thought of many ways to repurpose them over the months, but this desk idea won out in the end. I started by measuring the wall I was going to use to see how long it needed to be, and then began trying different options on the floor with the cabinet doors.
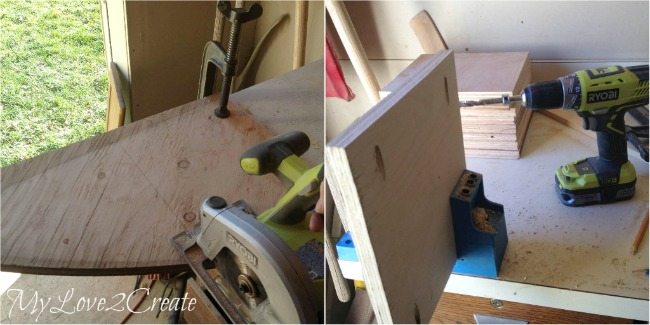
Once the size was determined, I set to work cutting shelf boards. I used the same plywood scraps that I used in my Drawers and Drawer Slides, Master Closet Makeover post. On the left I am cutting them with my Ryobi Circular Saw, and on the right, drilling pocket holes on two sides of each board. I cut 9 shelf boards.
Need more details on using a Kreg Jig? See my article How to use a Kreg Jig Pocket Hole System
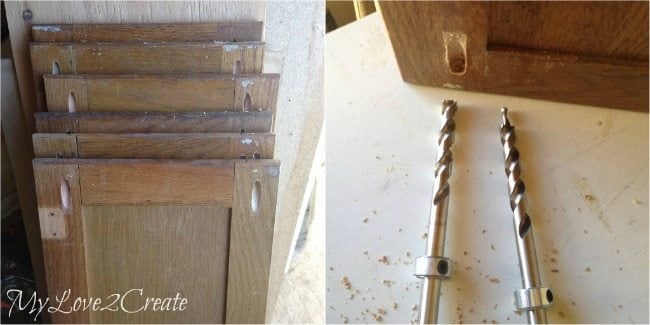
For attaching the desk top later on I drilled pocket holes in the top of each cabinet door. While drilling one of my pocket holes my bit broke inside the cabinet! What? That has never happened before. I guess it is two years old and I use it all the time…luckily I had a spare, because had a feeling it was on it’s way out…phew!
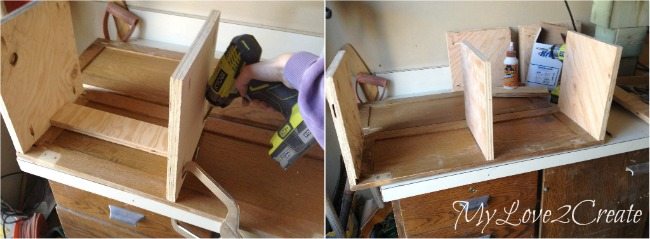
Next, I was ready to attach the shelves to the cabinet door. I attached the top and bottom shelves flush with the ends. For the middle shelf I measured where I wanted it and used a spacer board to keep all three sections the same without having to re-measure. I used my Kreg Right Angle Clamp to hold my boards in place while I drove in the first screw, this is the best clamp ever! I also made sure to use my Gorilla Wood Glue. 🙂
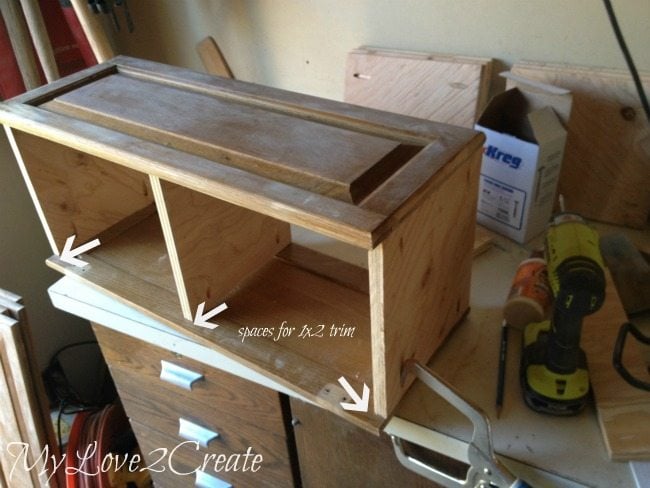
When I measured for my shelf size I made sure to leave room for my 1×2 trim that I was planning to add. You can see here I am attaching the other cabinet door.

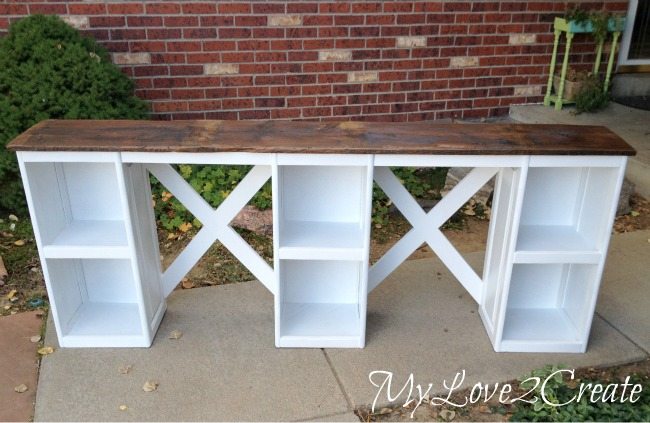
Here are all three sections built.
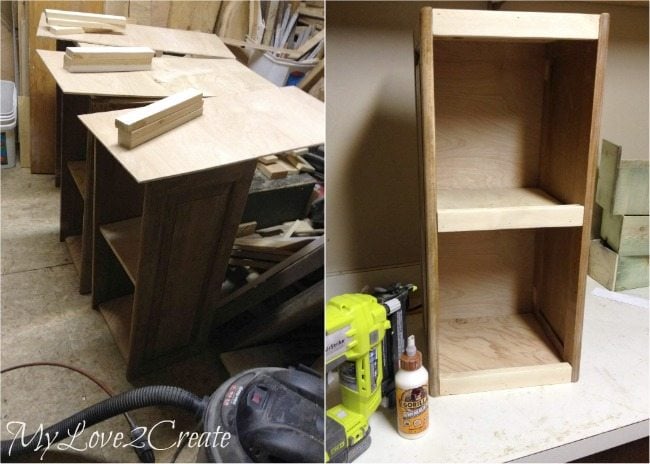
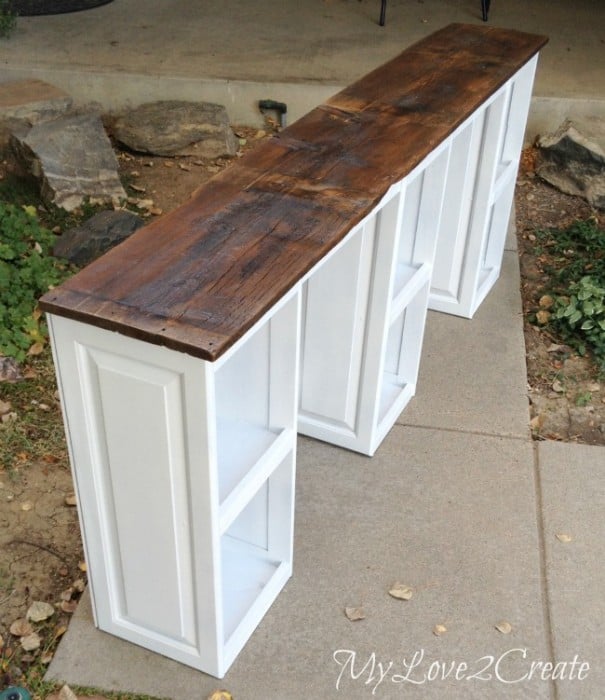
I just had to add the back and the 1×2 trim. My Father-in-law totally hooked me up with some awesome free wood when his neighbor was moving. That is where I got the nice 1/4 plywood backing, I had the 1×2 in my stash. I measured and cut them to size and glued and nailed them on.
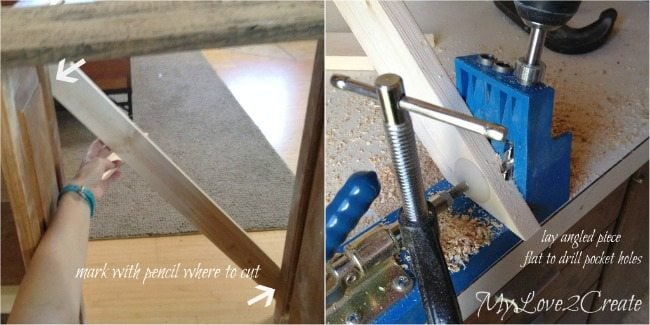
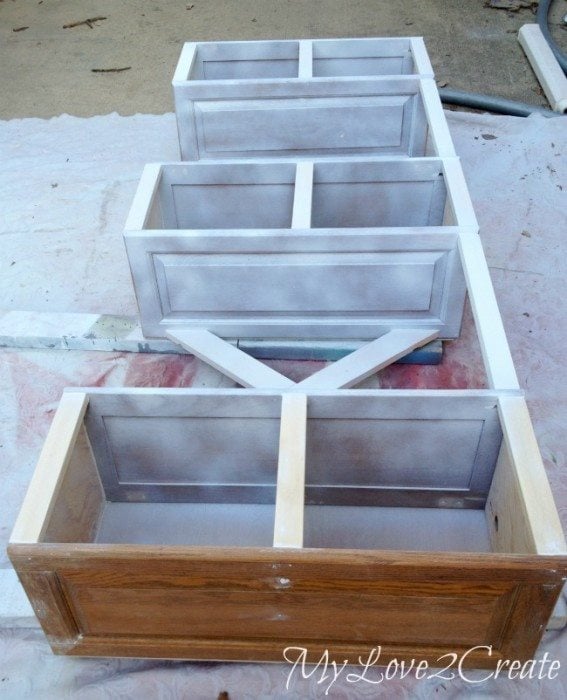
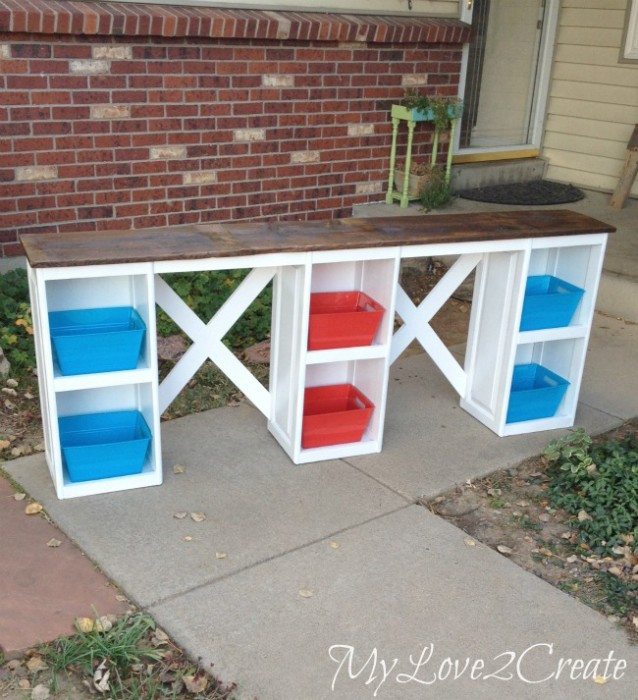
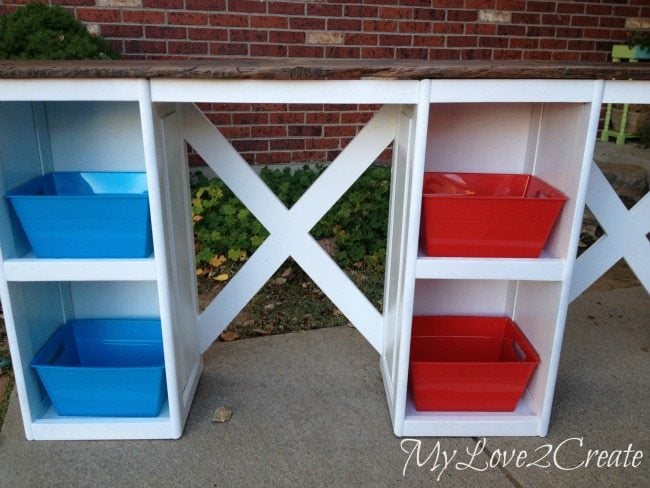
With the sections built I had to come up with a way to connect them. I ended up trying an X pattern, because I have always want too, and I love they way they look.
Disclaimer: So just be aware, I was winging it, and this may not be the best way to do it. Mmmkay? My sister-in-law gave me some old bed slats and they were perfect for this job. I placed the 1×3 where I wanted it, and marked with a pencil where to cut. Then I drilled pocket holes in each angled end.
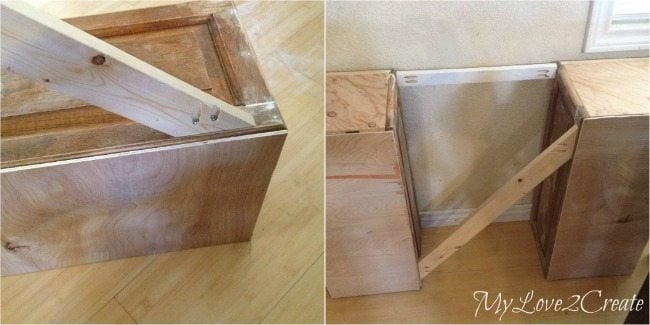
I attached the first side with the cabinet laying down. Then to help me out, I used the wall to keep my shelves from moving while I attached the second side. I also cut and attached another 1×2 trim piece for the top to connect the shelf sections in the front.
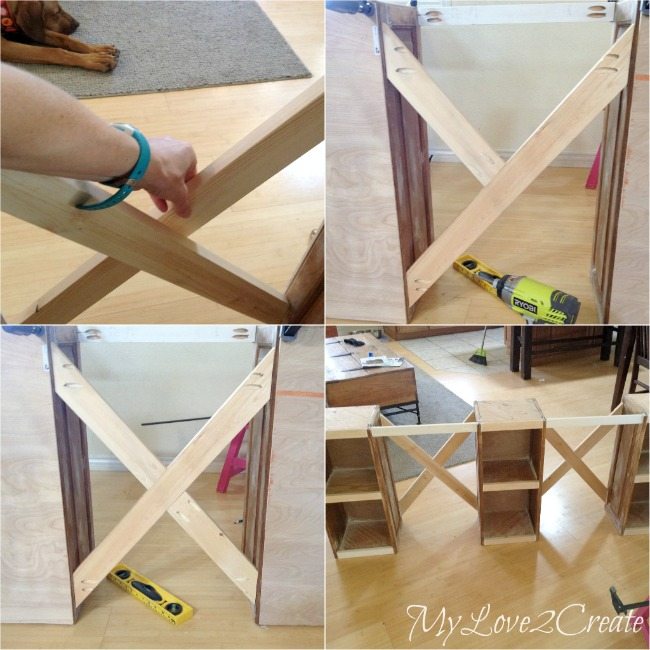
To complete the X pattern I used the same method, except I cut two pieces, and attached them one at a time. And that was it, not too bad! They are not perfect, but I am good with that, especially for my first time. 🙂
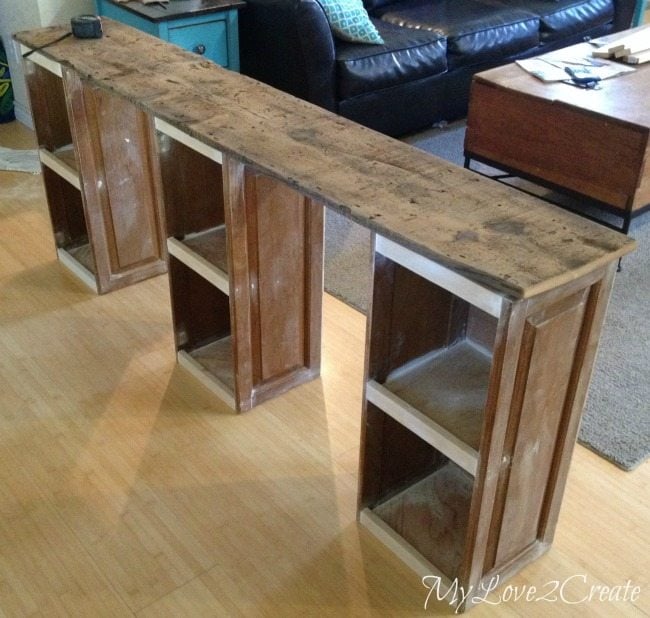
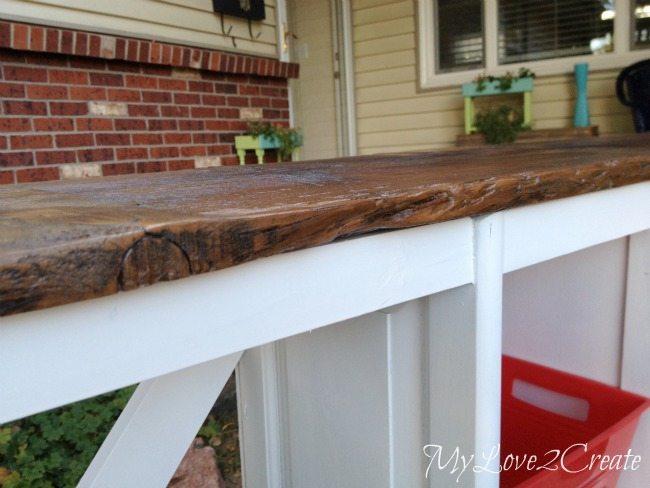
You may recall my Cubby Shelf Makeover that I shared last month. I really loved the reclaimed wood top I put on it, so I went to see if I had a piece of that 70 year old barn wood to fit for the desk top. Yay, I had one left in the right size, sa-weet! I actually did this before I attached the shelves together. I needed the overall length so I knew how far apart to have the shelves spaced.

WHAT AN EASY, USEFUL AND CHEAP PROJECT. THE LOCAL ‘HABITAT’ SELLS ODD DOORS LIKE THIS FOR A COUPLE OF BUCKS.TY
I just came across your post on Pinterest. I had to re-pin it! Your project is wonderful.
Thank You for sharing.