It’s Mindi again from MyLove2Create here to share my latest build with you! I dusted off the cobwebs on this headboard and finally built a Kingsize Headboard Bench!!
I have been wanting to make one for years. I must admit I love how it looks on my porch. However, this beauty is heading to my daughter’s dance studio for some much needed seating in the lobby.
You may remember my Cubby Shelf Revamp, well this bench is going to the same place. 🙂
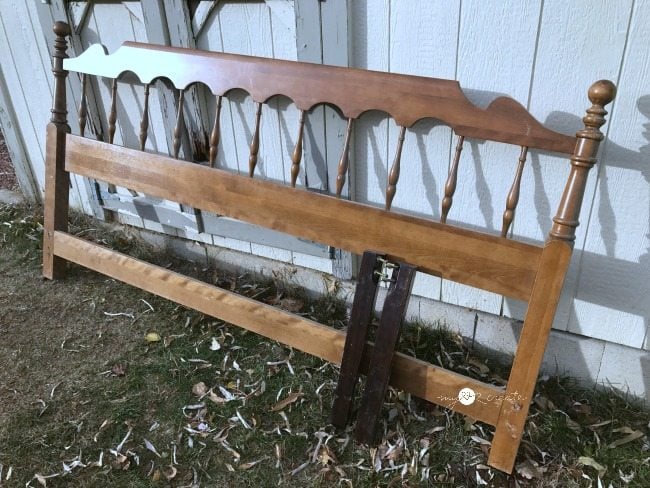
I picked up this headboard several years ago off the side of the road with a free sign. It is seriously huge, at 79” long. The legs you see are from a table my friend gave me, which I have gotten some good use out of, I used part of the top in my Kitchen Island with Pantry Storage, and cut the legs down and used half of them on my Mudroom Storage Bench, I used two of the cut down legs for this bench and I still have two left.
The first step to any headboard bench-decide on the legs
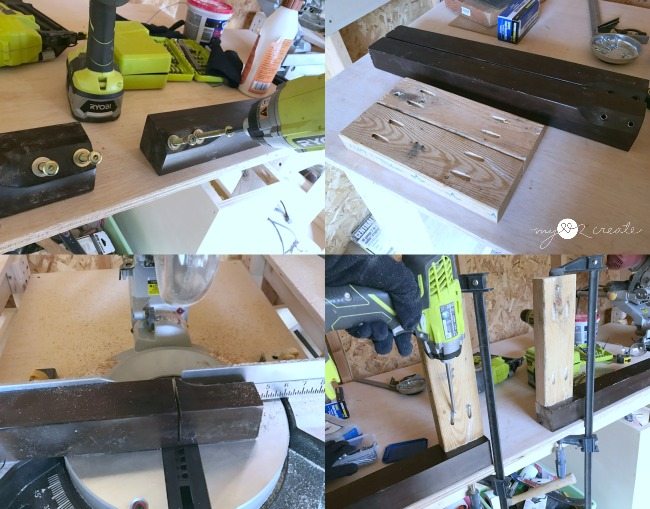
In order to cut the legs to the size I needed I had to remove the bolts. I had these 2×4’s with pocket holes already drilled from another project, they must have been cut wrong, and they were the perfect size so I decided to use them for side aprons.
I cut my legs at 17 1/2” and attached the 2×4 side aprons with 2 1/2” pocket hole screws and wood glue flush to the top of the legs and outside edge. The side aprons are 11” long. I wanted to keep the bench seat shallow because of limited room in the studio, you can adjust the aprons to make it deeper if you desire.
Next, I glued and clamped the leg and apron piece to the headboard. You want to make sure it is level and square, and adjust your clamp as necessary. Then I attached the side apron to the headboard with 2 1/2” pocket hole screws. I did this on both sides.
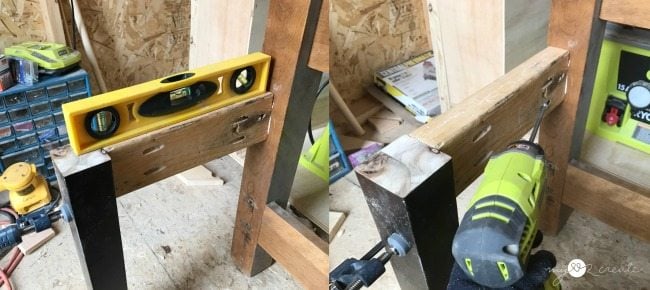
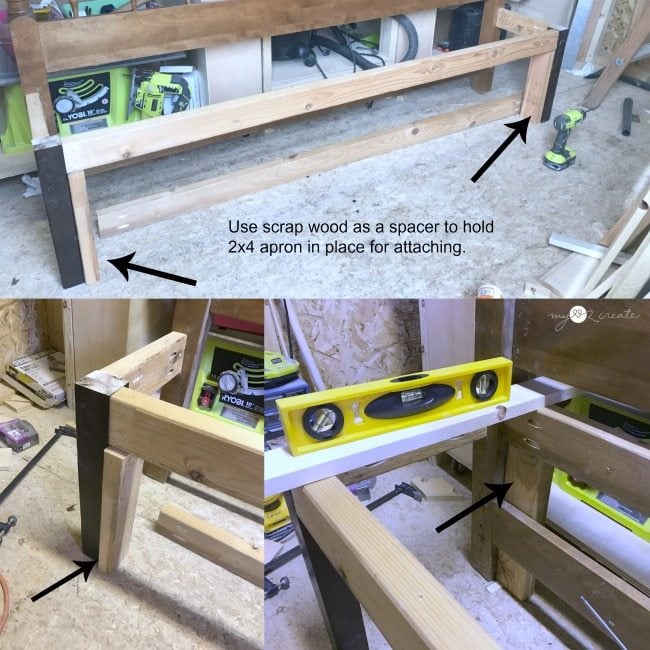
Make sure kingsize headboard bench is level
In addition, I checked to make sure the legs and aprons were level with each other before attaching them to the headboard. I just used a 2×4 to hold my level.
Attach front apron
I didn’t have clamps that were long enough to hold my front and back aprons in place while I attached them, so I used some scrap wood cut to size to be my spacers and hold up my 2×4 aprons. Then I glued and screwed them on with pocket holes on the inside, and of course checked for level on front and back too.
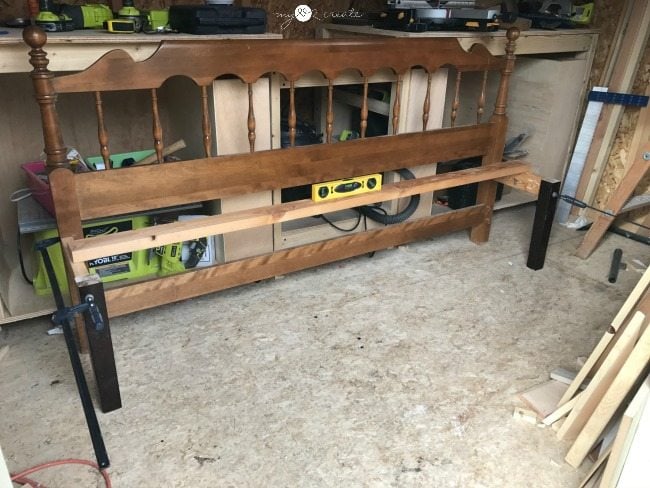
The kingsize headboard bench came together quickly
This is what I had so far. This really was a quick build, I love how fast it came together.
Pocket holes on braces make this bench sturdy
Using more scrap 2×4’s I drilled 1 1/2” pocket holes with my Kreg Jig, and used 2 1/2” pocket hole screws to attach the seat supports. I made them flush with the top of the front and back aprons. This is a super sturdy bench!
You may need to notch your seat where it meets the kingsize headboard
The only thing I had to purchase for this bench was my seat boards. I originally was going to get 1×8’s, but they would have cost twice as much as the 2×8’s. So I got 2-2×8’s and 1-2×2 board to make the seat. I am glad they were cheaper because I like the thicker stock for the seat better anyway!
I notched out the back 2×8 boards to fit around the headboard legs and then put the boards on for a dry fit. It was perfect!
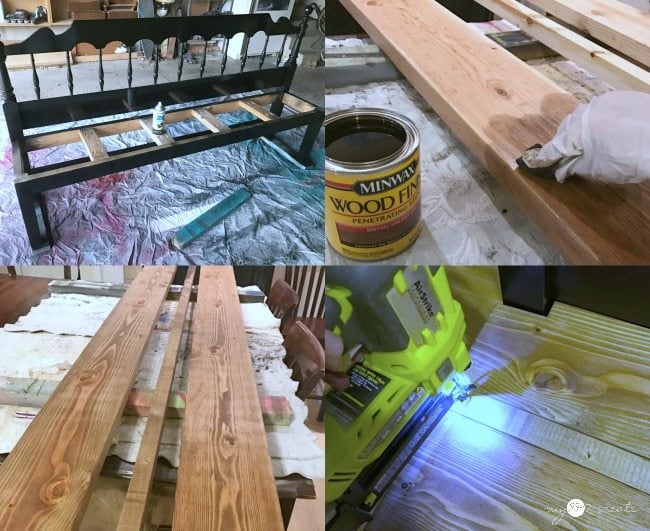
Paint and stain king size headboard bench
To paint I went with a black semi-gloss for the headboard, and then stained the seat boards with Special Walnut. When everything was dry I attached the bench seat with 2” nails from the top into the sides and middle supports. I also added some screws underneath through the support boards. The bench top was sealed with three coats of poly, sanding with 400 grit between coats 1 and 2 to make it nice and smooth.
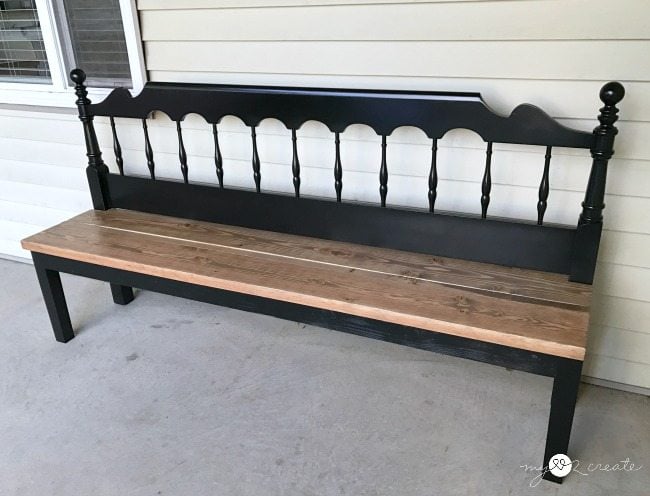
Very large headboard bench on porch
I love how it turned out! I opted not to put arms on it because that way the dancers can sit on the ends as well to put on their shoes.
It looks very “Kingly” don’t you think! Ha ha, pun intended. 🙂
I told the dance studio I wanted to volunteer to make this last year…ummm, I think better late than never is a good rule of thumb. I am happy I finally just did it…and it only took one day to build so I am feeling a little sheepish! Oh well, my life is crazy right now so it’s all good.
I think I want one for my porch…I guess I should be on the look out for kingside headboards!
Gail is the queen of headboard benches, and she actually inspired the other two I made when I first started building, you can check them out here. Have you ever made one?
Thanks for reading and come and visit me anytime! Merry Christmas!
Mindi is a wife, mother, runner, dancer, and a lover of all things fun and DIY.
A few years ago she discovered blogs and fell in love with the idea that she could do things she had always dreamed of doing. Like build furniture from pallets, and make cool projects for her home.... Mindi was inspired by other bloggers that empowered her to create.
Mindi decided to give back and possibly reach someone out there that has a desire to create like herself. She believes we all have that desire in some form or another, and we all DO create in our own way, every day. Whether it be crafty or not, even creating happiness in others is a gift that many share.
Mindi loves to learn and use that knowledge to make beautiful and useful things for her home.
9 Comments
I love the headboard bench. However, I wish there was a pdf I could download to follow along.
Thanks for pinning! You probably know, that just looking at Mindi’s headboard bench, now I’m itching to make one. They’ve always been my favorite project to make. 🙂
Mindi,
You know how much I LOVE headboard benches, and this one is at the top of my list! Aren’t they so fun, and so quick? 🙂

 I didn’t have clamps that were long enough to hold my front and back aprons in place while I attached them, so I used some scrap wood cut to size to be my spacers and hold up my 2×4 aprons. Then I glued and screwed them on with pocket holes on the inside, and of course checked for level on front and back too.
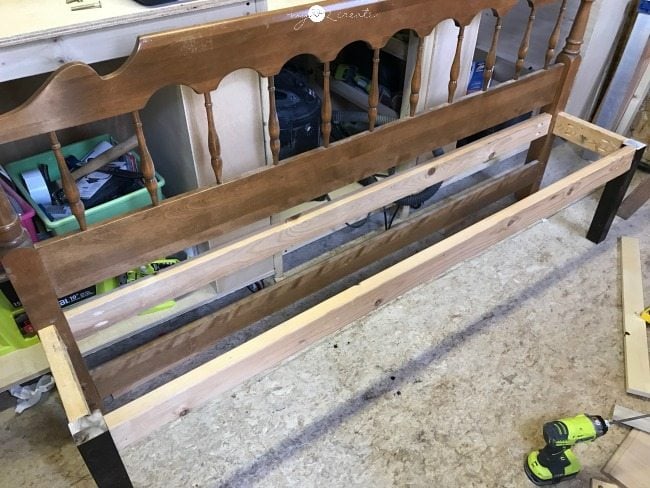 This is what I had so far. This really was a quick build, I love how fast it came together.
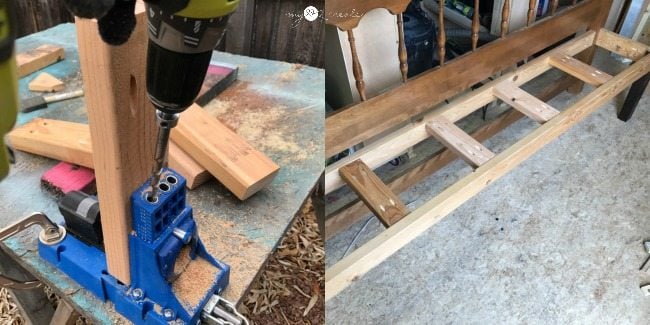 Using more scrap 2×4’s I drilled 1 1/2” pocket holes with my Kreg Jig, and used 2 1/2” pocket hole screws to attach the seat supports. I made them flush with the top of the front and back aprons. This is a super sturdy bench!
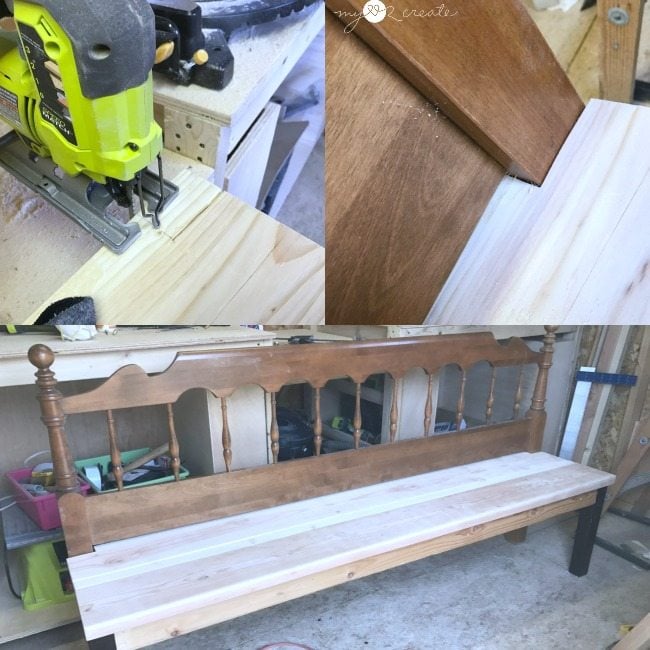
 It looks very “Kingly” don’t you think! Ha ha, pun intended. 🙂
 I told the dance studio I wanted to volunteer to make this last year…ummm, I think better late than never is a good rule of thumb. I am happy I finally just did it…and it only took one day to build so I am feeling a little sheepish! Oh well, my life is crazy right now so it’s all good.
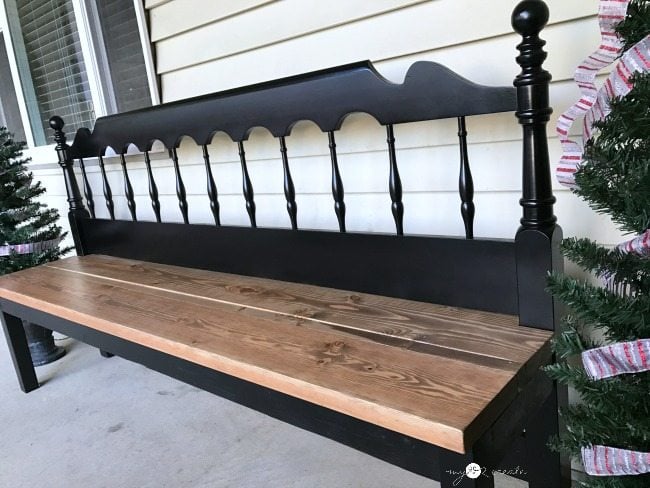
I love the headboard bench. However, I wish there was a pdf I could download to follow along.
Thank you Charly for your comment. I don’t have that capability at this time to allow PDF downloads.
gail
Charly! I’ve done it. I finally figured out how to do a PRINT PDF EMAIL option at the bottom of each blog post. I hope this helps you!
gail
Did you sand the headboard before painting it black?
This is really beautiful ~I would have a hard time parting with it! God Bless You, Happy Easter!
Thank you Mary! It was hard to see it go, but it is getting lots of love at the dance studio! Happy Easter to you too! 🙂
Pinned this too, it’s awesome Mindi.
Thanks for pinning! You probably know, that just looking at Mindi’s headboard bench, now I’m itching to make one. They’ve always been my favorite project to make. 🙂
Mindi,
You know how much I LOVE headboard benches, and this one is at the top of my list! Aren’t they so fun, and so quick? 🙂
Thanks for an awesome post and tutorial.
gail