
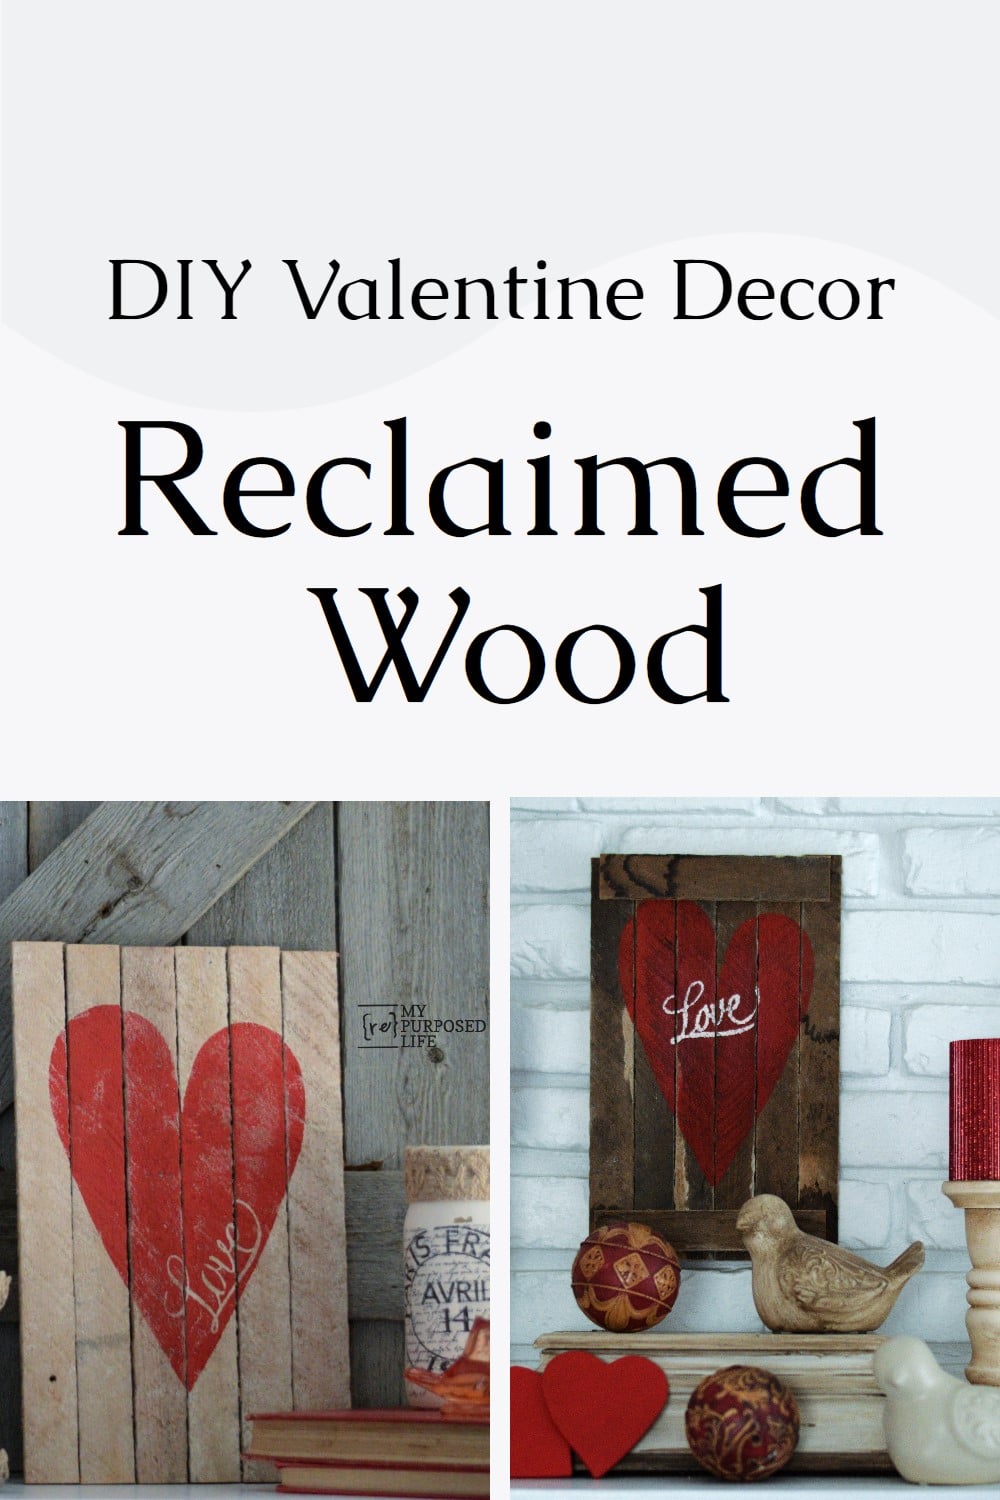
Valentines Day DIY Decor
As an Amazon Associate, I earn from qualifying purchases.
Are you looking for the easiest Valentine’s Day DIY project ever? That’s what I was doing. Valentine’s Day is fast approaching, and I needed to share a project with you, my friends! I wanted to do something you all could do, and I think I found the perfect project that anyone can do, regardless of their skill set, tools, or supplies.
Don’t be Discouraged if You Don’t Have Free Junk
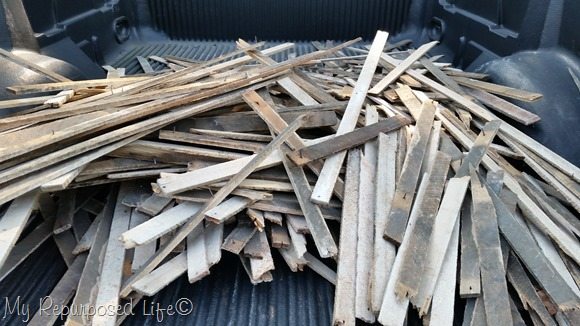
Last September, I collected this free lath wood from a “flip house” across town. It was hot, and there were mosquitos and dust everywhere. There was a lot more where this came from, but since I didn’t know what I would do with it, I left a lot behind.
Visit the My Repurposed Life Amazon Store to shop my favorite items.
Valentine’s Day DIY With Reclaimed Wood
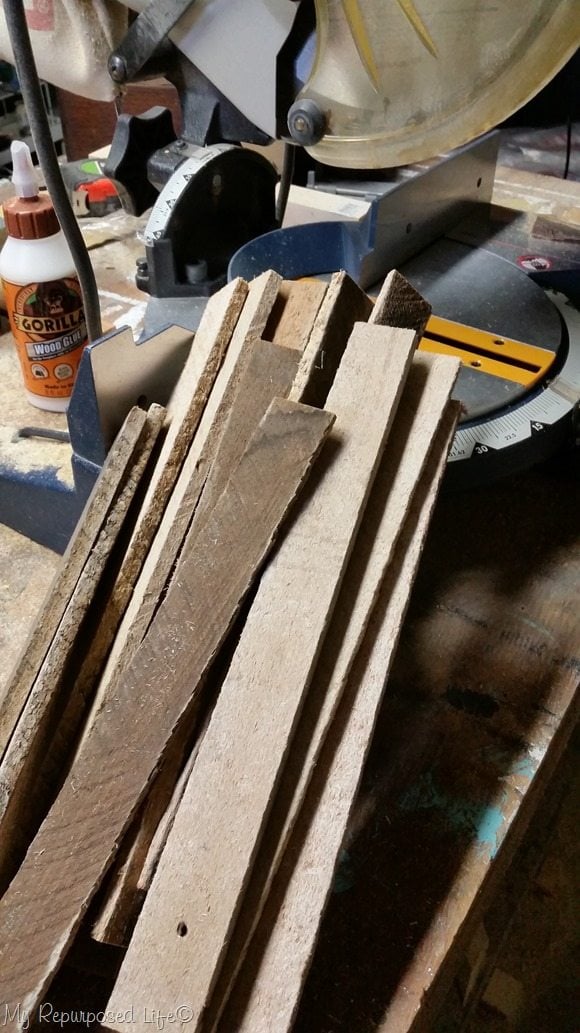
I cut my lath boards on my compound miter saw. If you don’t have junk lying around like I do, you could purchase some shims or even use some paint sticks for this project.
Cut a Stencil
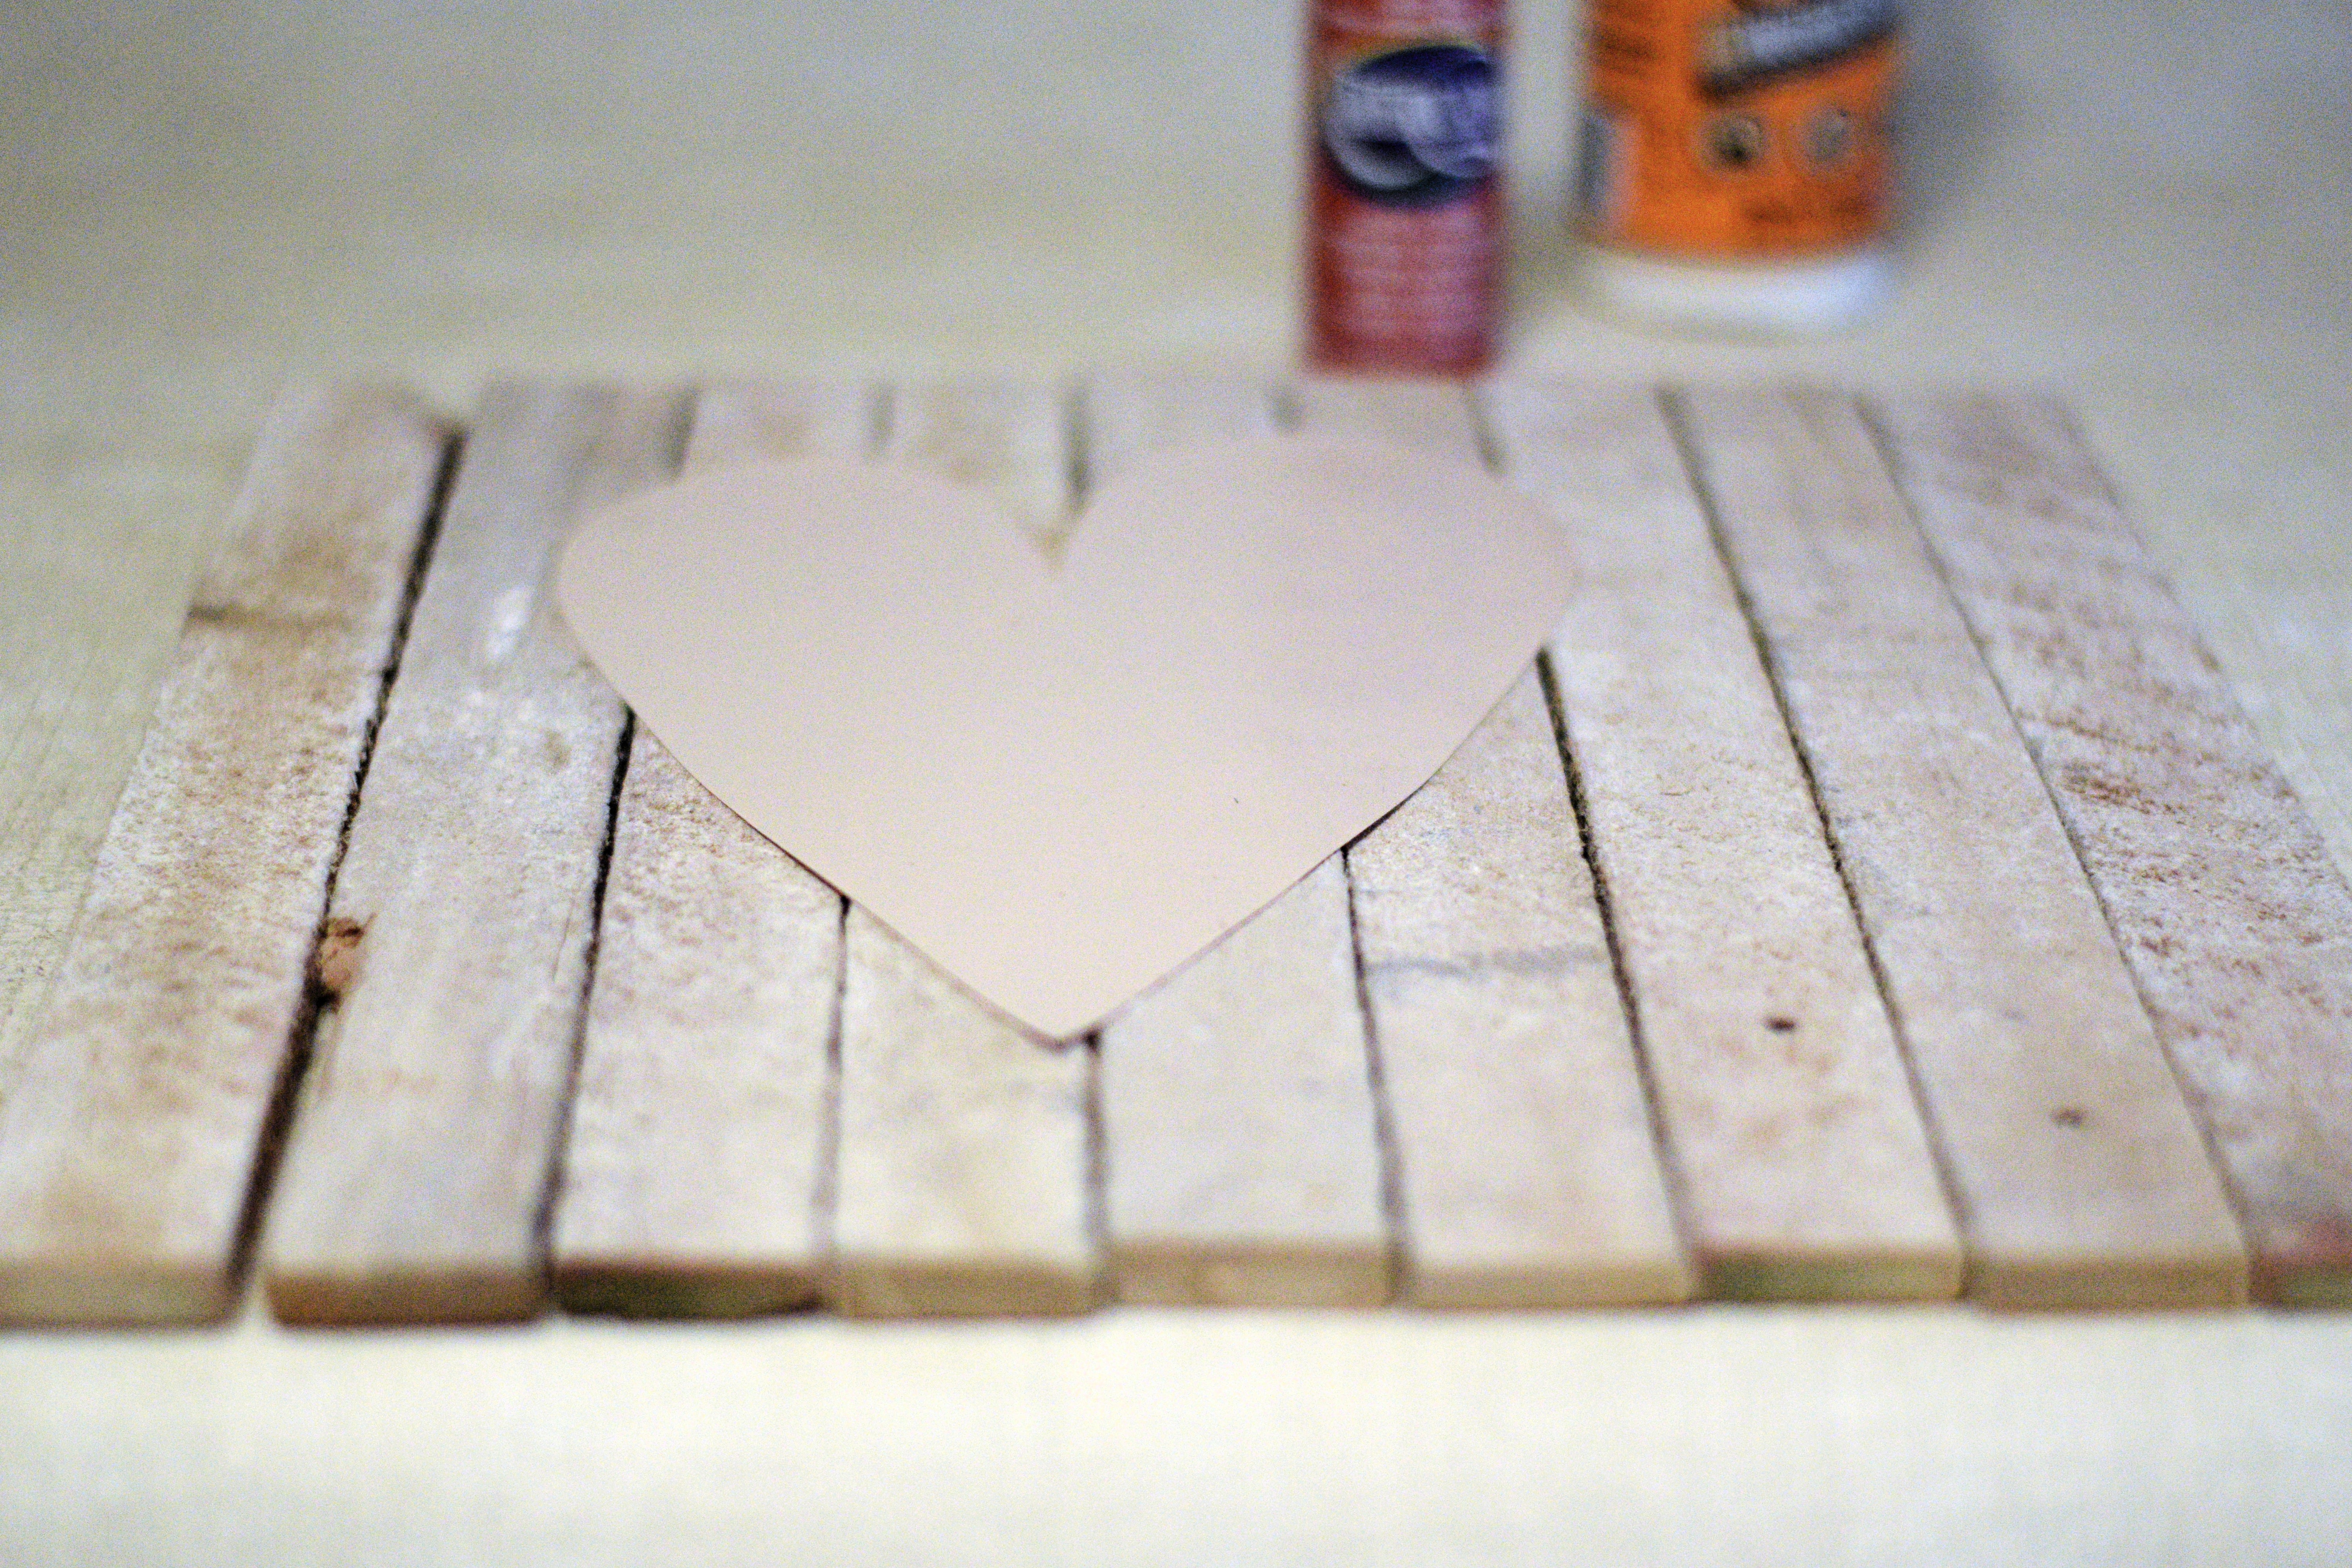
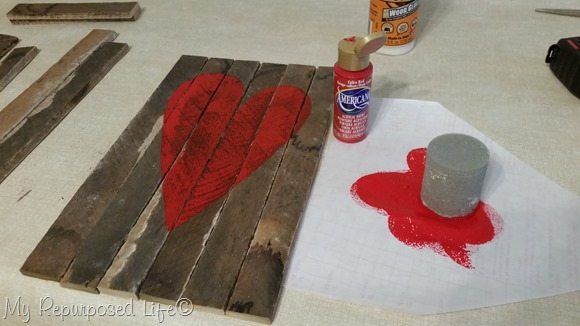
I used my Silhouette Portrait to make a contact paper stencil. What? You don’t have an electronic cutting machine? No problem! Just cut a heart shape out of some newspaper or cereal box. We all learned to cut a heart shape in grade school, right? Just fold your paper and cut that shape!
I was jumping all over the place with this Valentine’s Day DIY project, so the step-by-step photos may seem a bit out of order. Hey! It’s the way I roll….
Initially, I was going to make a square sign, 12×12.
How to Use a Contact Paper Stencil

But after laying out my stencil, I realized that a rectangle would be a better option for this easy Valentine’s Day DIY project.
I used some DecoArt Americana Calico Red and my favorite Martha Stewart Foam Pouncers to apply the heart-shaped design on the boards.

I got ahead of myself. Oops! I started pouncing the paint on and realized I needed to put my LOVE stencil in place. See, I told you I was all over the place with this project.

I removed the heart stencil; if you look closely, you can see the LOVE stencil in place.
Making a “Love” Stencil

voila! I removed the LOVE.
Then I was trying to figure out if I wanted the cross boards to be on the white side of the small Valentine sign or the rustic side.
I laid the contact paper stencil on the back side of my boards and stenciled it.
After removing the stencil, I decided the LOVE might look better in the middle of the heart.
Using the Negative Contact Paper Cutout

I used the negative portion of the contact paper stencil to paint the LOVE in the middle of the heart.
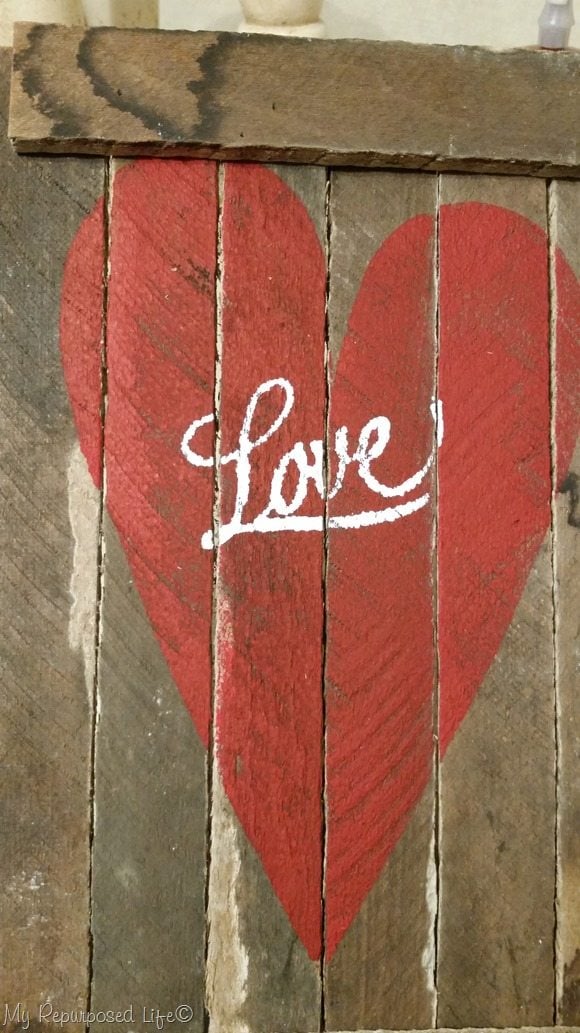
If you don’t have a Silhouette, you can easily use a paint pen or Sharpie or paint the word with a paintbrush.
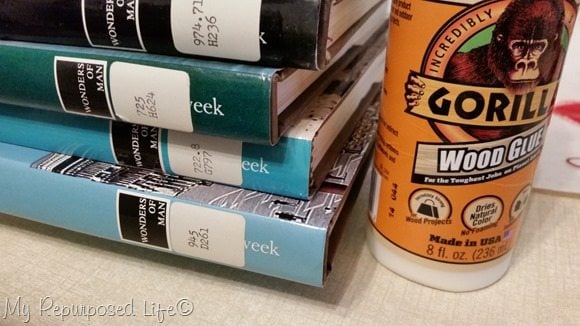
I chose to put the cross boards on the rustic side of the Valentine sign. I used Gorilla Wood Glue weighted down with some thrift store books till it was set up. You could use your hot glue gun instead.
Easy Valentine’s Day DIY decor


This was the perfect easy Valentine’s décor to use some of these old lath boards. Don’t you agree?


I’m having a hard time deciding which side I love best! Here is the rustic side on my mantel with the DIY scrap pile candlesticks I made from random bed parts.
So, as a recap, here’s a supply list for you.
- scrap lath boards (you can use shims or paint sticks)
- heart stencil
- glue (Gorilla wood glue or hot glue)
- red paint
- LOVE sticker or a paint pen
If you don’t have access to a saw, the paint sticks would be the best option. Valentine’s Day is approaching, but you still have time to do this project!
How about a sweet pallet board Valentine’s decor? I love this one from DIY Beautify
Here are a couple of other quick Valentine’s Day décor ideas.

Easy Scrabble Tile Valentine Ideas

Do you decorate for those more minor holidays like Valentine’s day?
gail
Be careful with lath! It’s almost always full of mold, and if you put too much of that indoors, you are going to make yourself sick! It happened to me! I have major sensitivities now that I hung so much lath up in my house. Use a better quality wood. Lath is also treated with toxic chemicals.
I’m sorry that happened to you, and I appreciate you sharing that with us.
gail
what a great idea. i think using shims would work out for me. thanks for the idea!
I have yet to find lath just lying around but I can see doing that project out of pallet wood 🙂 I love nice quick projects with big impact.
So cute! I like both sides! I have been thinking of doing a valentine’s day mantel…I haven’t gotten to it yet! I love yours!
Love this. I love making signs from old wood pieces. Beautiful
You are so creative, I love how you take odds and ends and build everything. I look forward to your posts.please keep them coming. No this is the first time I have posted this.
You are so creative, I love how you take odds and ends and build everything. I look forward to your posts.please keep them coming.
the project looks okay, but it’s not the kind of wood i would work with. lathe is extremely dry, splits easily, it’s too thin to work with, you tend to pick up splinters fast because of its roughness, and not even good to burn. when burning lathe, it snaps, and pops embers all around the fire pit. my personal opinion is that lathe is”t good for anything. don’t waste your time picking it up. let the contractor throw it away. that’s what HE got paid for. spend your time picking up better junkie wood. sorry if i busted your bubble, but you wanted me to speak my mind. not everything that’s free is good.
Edward,
Good points from the POV of a practical person. But this is a little quick project to make a temporary decoration, not about a new firewood source. And Gail didn’t complain about splinters, so i expect she didn’t have a problem with that. With your warning at hand other crafters might take notice, but i imagine that if splinters were the issue, with anyone’s project, everyone reading this blog would be aware of that from the get-go and act accordingly.
You might have helped by pointing out that to remove those splinters, were it necessary, one can paint on a coat of white glue, let it dry and then peel off the glue– and the splinter. It’s worked for me every time, so far, while building a trellis for my grape vines.
Life is short, enjoy it, and let the DIYers learn for themselves whatever they need to learn about.
I kinda think it’s nice you bothered to read in the first place……cheers, friend, and happy decorating to you……
And thanks to gail for inviting us to speak our minds…….
Great points from you as well MJ.
Nope, no splinters, and I love FREE wood, no matter where it came from or who was paid to remove it. All I had to do was pick it up. The guy who was paid to do it earned his money. 🙂
Super tip about the glue. Since I don’t have anyone to help me remove splinters, this is one I need to remember.
All opinions are always welcome.
gail
Isn’t it great to live in a free country where everyone can speak up? (Well, so far, anyway…)
Gail, Do try not to embed the splinters in so far that the glue can’t reach them! Which would require a minor surgical procedure to do on yourself……ouch!!!
I’m going to use what I have and try to get a wooden valentine made for my sweetheart’s new DIL’s wall. Pallet scraps in this case. I should be lucky enough to get house parts from a place with walls of wood lathe…!!!!!Not gonna happen where I live.
MJ,
don’t get me wrong, I wasn’t criticizing the project. It came out well and looks good. Lathe hasn’t been used in such a long time, and whatever is still on the walls has been up on the walls even longer. Like I stated previously, it’s very dry, brittle wood. Most times you find it, they are in short unworkable pieces. From my POV not even worth the trouble to work with. For the time, effort used and cost, it’s not feasible. It’s cheaper
to purchase that at the dollar store. Ladies, ask you man for his opinion on working with lathe. You time will be well spent using a better medium, and longer lasting as well.
It’s just beautiful, Gail (on both sides!) I just love lathe, don’t you? Your display photos are lovely as well, very pretty set up with the candles, etc.
My husband and I totally remodeled a 1912 4-square house 2 years ago. We saved a ton of the old lathe. Since then we have made hundreds of little boxes from this wood. I put them through the planer first and before brad nailing them together we sand the individual pieces on the belt sander to remove splinters. These are used to sell my homemade soaps in. The more holes in the wood (knots and nail holes) the better they sell. We just hope to have saved enough lathe for future projects. He just made me a valentine heart using some of the damaged old flooring we could not savage. I had in the back of my mind that we should have tried lathe. I just may do it yet!
how awesome Rosanne! A planer…. on my wish list!
thanks for sharing your ideas.
gail