How to paint on glass with DecoArt
As an Amazon Associate, I earn from qualifying purchases.
Painting on glass can feel a little intimidating because it is so smooth and slick. The good news is you do not need fancy tools or expensive supplies to achieve a pretty, durable finish. If you have a plain vase, thrifted jar, candle holder, or even an old window that needs a second chance, this is an easy way to add color and personality in one afternoon.
Plain glass can look a little boring, especially when you find a stack of it at the thrift store for next to nothing. With a little DecoArt paint and the easiest “stencil” ever, you can turn a simple plate into cute seasonal decor in under an hour. I’ll show you what I used and how it turned out, plus a couple of design ideas you can copy with whatever you have on hand.
How to Paint on Glass
Supplies to Paint on Glass
For this project, you will need:
- DecoArt (Americana) Gloss Enamel
- Some glass ( I used a clear plate and a white plate)
- Alcohol (to clean glass as recommended by DecoArt)
- Stencils (I used a doily heart and a homemade heart)
- Spray adhesive (not necessary, but it helps to hold your stencil in place)
- Paint brushes (I used a stencil brush and a makeup sponge), stamps or any other items you have around
I had a transparent glass plate from a thrift store that I thought would be perfect for this project.
More easy Valentine’s Day Ideas Here
Clean Your Glass With Alcohol
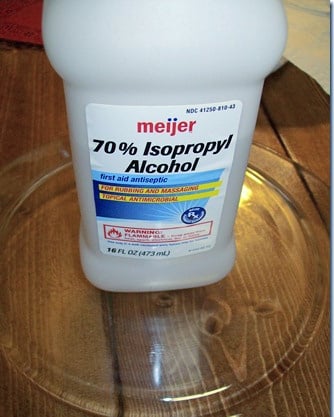
DecoArt recommends cleaning your glass with alcohol. This is similar to what I do when I make a bowling ball gazing ball.
Use Spray Adhesive For a Temporary Hold

I sprayed my doily with a spray adhesive to adhere it to the plate. To create a temporary bond, spray and wait a few minutes before applying the doily to the glass.
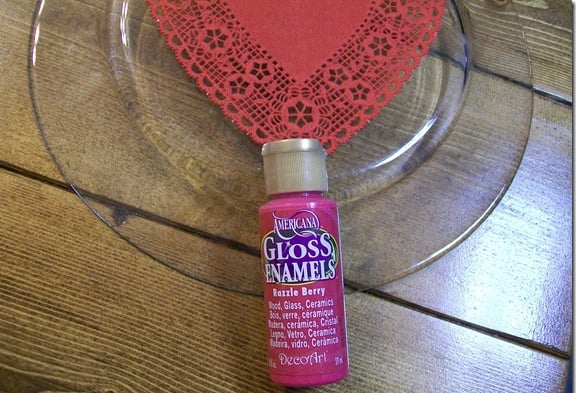
I used American Gloss Enamels in Razzle Berry. DecoArt has so many fun colors!
Use Craft Paint and a Paper Doily
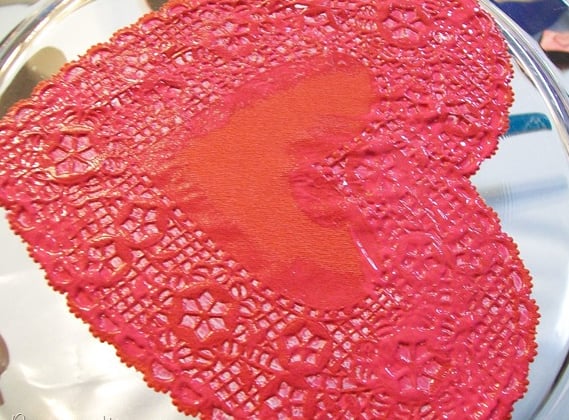
First, I used a stencil brush to dab the paint over the holes in the doily.
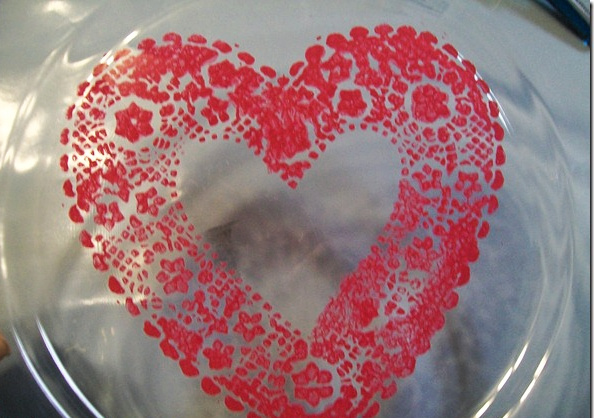
Then, I carefully removed the doily before the paint dried. Look how dainty it looks!
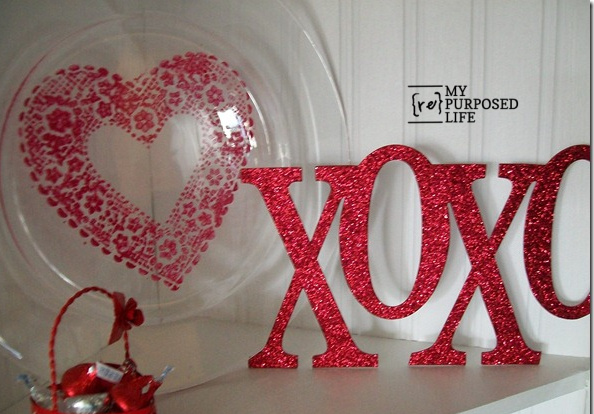
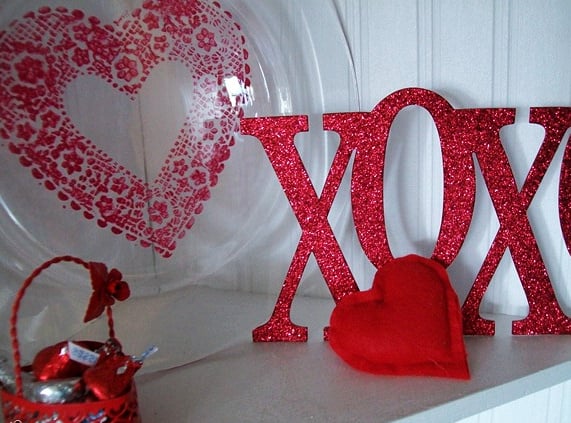
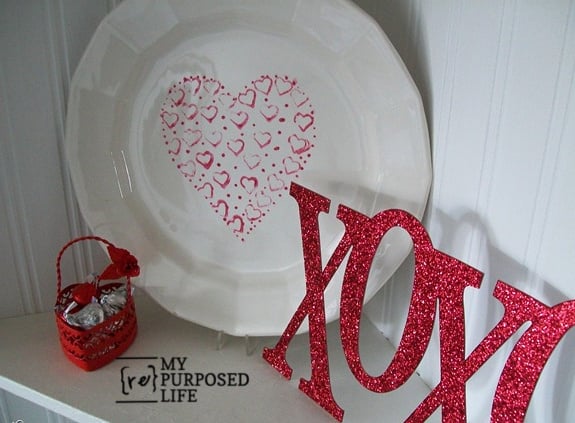
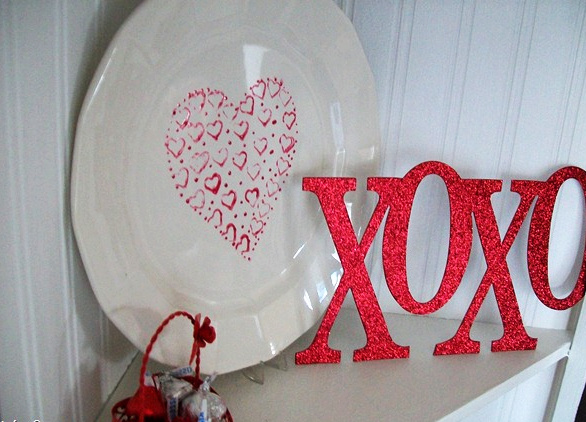
I added a few other Valentine’s items to increase the red. The items are staged on my DIY corner cabinet.
It was so much fun that I decided to try another.
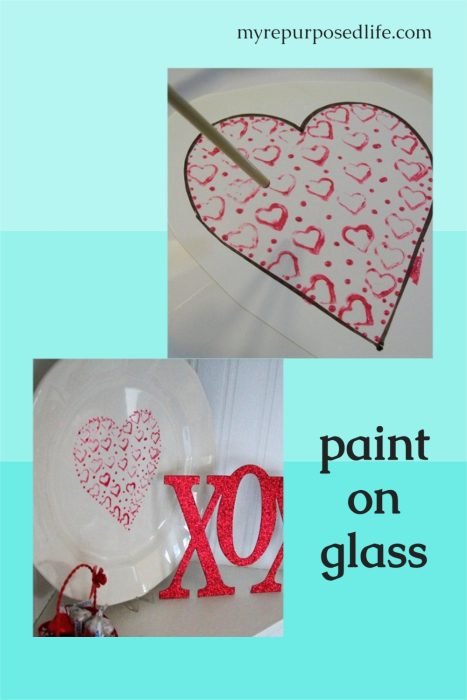
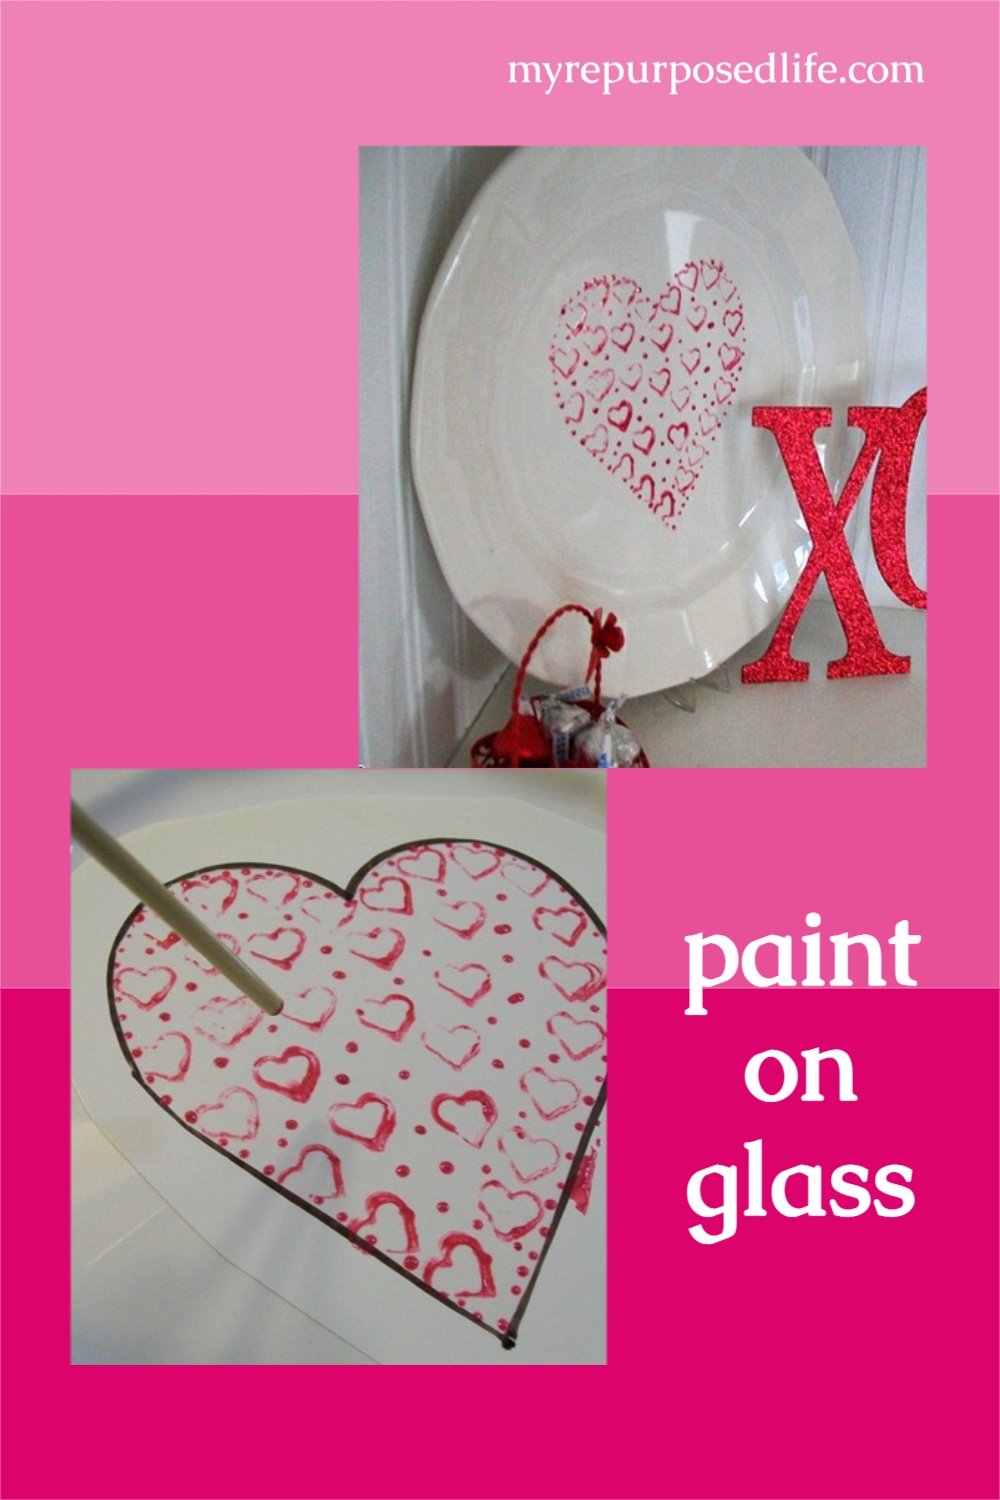
Simple heart stencil
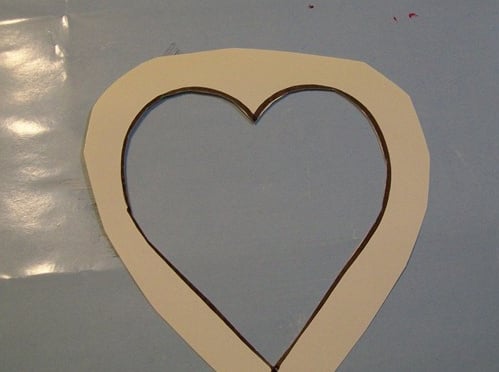
Whenever I need a quick homemade stencil, I use full sheet label stickers. (peel and stick) I traced a heart and cut out the center.
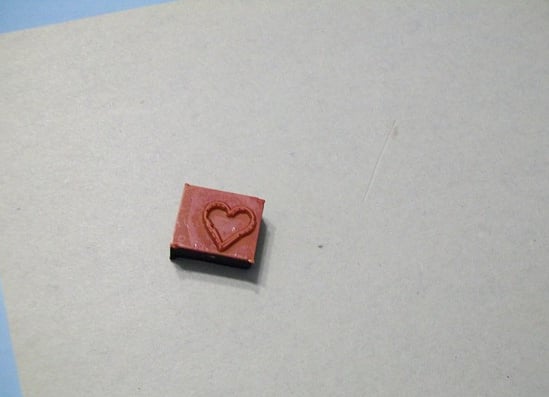
Then, I searched through my teacher’s belongings. I found this cute little heart stamp.
Dip the Paintbrush Tip into the Paint
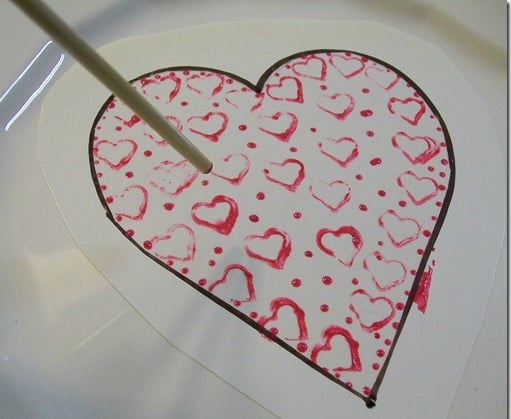
After peeling off the large heart “sticker” pattern, I inked the stamp with DecoArt Gloss Enamel Razzle Berry Paint and stamped hearts randomly.
I thought it needed something to fill in the blank spots, so I used the end of a paintbrush dipped in paint to add some dots around the edge to give “structure” to the heart and more dots wherever I felt I needed some more color.
Did you know I have a lot of little plastic trays leftover from my teaching gig? Yep, I was a pre-k teacher for nineteen years! They are useful for these craft projects.
So Simple, Even the Kids Can Do It!
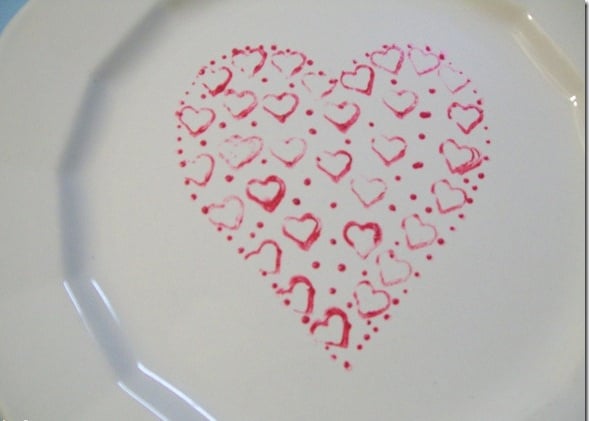
Voila! Cute pink heart on a white plate! I have added some red Valentine’s items again.
Easy Paint On Glass Project
This is easy. If it’s too late for you to do this for Valentine’s Day, this could work for many other holidays. Easter is right around the corner! Wouldn’t colorful Easter eggs look great on a plate like this?!

From the DecoArt site:
- When painting on glass, allow the first coat to dry thoroughly before applying additional coats to avoid lifting. To use design patterns for transparent glass, position and secure the pattern with tape on the inside or reverse side of the glass item. Pattern lines are easy to see through the glass, so transferring them is unnecessary.
- Wash tools and clean the work area immediately after use.
- Close the lid tightly when not in use to prolong shelf life.
- Allow to air-cure for 21 days, or allow the painted project to dry for 48 hours. Place in a cold oven, set the temperature to 325 degrees, and bake for 30 minutes. Turn off the oven and crack the door open. Allow your project to cool down before removing it from the oven. Note: Not for direct contact with food.
- To remove dry paint from the project before baking, soak the items in warm water to soften the paint.
I let these air-cure for 21 days. I’m not sure the transparent plate could be placed in the oven.
Bonus!! The transparent plate can be used for food (because the paint is on the underside)
If you have a stash of clear glass hiding in a cabinet, this is your sign to pull it out and try again. Once you get the hang of it, you will start spotting glass at thrift stores like it is free crafting supplies. If you give this a try, I would love to hear what you painted and what color you chose. Leave a comment, and if you share yours on social media, tag me so I can cheer you on.
What are you working on for Valentine’s Day?
gail
See more repurposed glassware project ideas here
You actually maje it seem so easy with your presentation but I find this matter to be actually something that I think
I would never understand. It seems too complex and very broad for me.
I am looking forward for your next post, I’ll try to get the hang
of it!
Each time I see these they make me smile. I’m featuring your plates in the PoPP Spotlight.
Both plates are so cute! I love your ideas and they seem easy enough even for me to try! 🙂
http://www.shannonsews.blogspot.com
This is great! Love it!
You should come link this up to my weekly Thursday through Sunday Making It With Allie Link Party! I think it would make a Fabulous addition!
AllieMakes.Blogspot.com
I love this idea!! I bought some of the hearts from the dollar store – I would have never thought to use them as a stencil!!!
I really like the doily plate! They’re both so cute.
We’re going out of town next month, and the thing I’m most excited about is going to Hobby Lobby and stocking up on paint! I’ll have to check out their glass paint.
Hi Gail~
Both plates are so beautiful! You did a wonderful job on them. 🙂 And thank you for letting us know about DecoArt making glass paint. I will tuck that piece of information away for future use! 🙂
I hope you have a good day!
Blessings,
Jenni
belle & sparrow
Its charming! I just had a stenciling lesson yesterday from a friend, so I feel ready to try that out!
How cute Gail… you are right the possibilites are endless with this process. Thanks for sharing.
Love the xoxo sign, did you make that?
Hugs, Deb