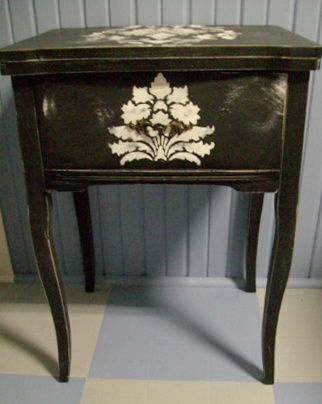
Repurposed Sewing Table Stenciled
As an Amazon Associate, I earn from qualifying purchases.
Grab yourself a cup of coffee or a Coke, cause my tutorial on this repurposed sewing table is going to be a long post!
")
")
It had been 19.00, but then they discounted it to 10.24.
How To: Repurposed Sewing Table
")
Dismantle Sewing Table
")
Someone had put in a support board for the machine. I removed that board and any hardware that was inside.
")
Then, I tipped the machine upside down and took some measurements of the width and depth of the “box”.
Add a Shelf
")
I cut a board that I had left over from Modern Glass Shelf. The shelves of that project were very heavy and they came packaged in plywood. I used my combination square to measure the position of the shelf.
This post contains affiliate links
")
I used my Kreg Jig to make pocket holes to hold the shelf in place.
")
Here is the shelf installed.
")
Primer Several Projects at a Time
")
I primered the sewing cabinet when I did Jan’s bench and the Amazing Grace and Kiss Me Goodnight signs.
Paint Repurposed Sewing Table Black
")
Next, I used my sprayer to paint it black when I did the the signs.
")
I had sanded the finish off the top so it had a smooth surface after being painted.
Add A Stencil
")
I used my Damask harmony stencil from Cutting Edge Stencil to give the top some pizzazz.
")
You can also check out how I did this same pattern on a mirror.
Distress Paint and Stencil
")
I wanted to sand the image so that it would not be raised at all. Because I wanted it to appear that it was part of the original design. I sanded the black to distress it.

Cathy and I have done a few other side tables, do you like green or blue green?


This side table would be great for a laptop.

The laptop could be stored neatly inside.

This sweet little repurposed sewing cabinet into a side table has already found a new home!
Check out the updated louvered door hall tree:
")
")

For now I’m finished with it. Jamie may use it in her booth as is. If she doesn’t then I will list it on Craig’s List and “build to suit”. 
gail
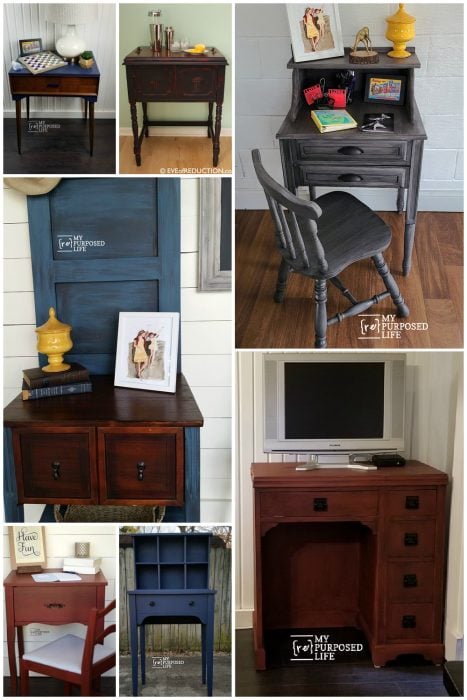
See More Sewing Cabinet Project Ideas
Nice! I love the stencil idea. I too have one of these cabinets waiting to be redone. Curious about the door in the front. In the pics you were painting it with it open, you hadn’t sealed it shut. Does it still open in the finished piece?
Lisa,
It’s long gone and I don’t recall exactly. But I’m pretty sure I would have mentioned it had I glued the front shut. 🙂 Sometimes when I upcycle sewing machine tables, I take the FRAME off the top, then secure the LID to the base where the top no longer is functional.
Hope this helps!
gail
Thank you for this post! You give me hope that I can re-habilitate a free sewing machine table I got a thrift store, but it has a laminate top, with presseed particle board with real wood legs. I think I will do what you did remove all the pieces place a custome fit wood plank and use it as a table stand! I will keep you posted 🙂
I’m so glad I found this post! I’m upcycling this exact sewing cabinet! I need a small desk downstairs for a sort of “mommy station”…laptop, general office supplies, bills, coupons etc. I was having trouble figuring out how to finish it as well as how to go from having the little flappy inside bottom piece to having a whole shelf in there.
It’s going somewhere out in the open downstairs, so it needed to match the traditional decor…despite my desire for something fun and funky. But staining is more work than I’m willing to put in (I’m 6 months pregnant), and a solid color paint would be boring. I wanted it to stand out without looking out of place. I love the stencil idea!!
Thanks for the inspiration!!
Super cute! Great job. I love the use of the stencil. What a steal at that price.
Oh my goodness WAY cool Gail!!!!!! LOVE it.. you just keep stretching MY imagination! 🙂
Debra
DesignHouse Inc
http://homedefined.com
wow those projects are wonderful… i am especially taken by you stenciling… looks so old and cool