Chair Back Wall Shelf | for guest room
As an Amazon Associate, I earn from qualifying purchases.
I have another repurposed project, a chair back wall shelf made from my $2 thrift store chair. I’ve already made a chair seat wall shelf. Not bad to get two projects out of one $2 find, eh?
 I have a lot of chairs, but even so, I couldn’t pass up this deal.This one caught my eye because I really liked the lines of the rungs.
Dismantle the chair
 The first line of business was to disassemble the back from the seat—a few whacks with a rubber mallet and it was a done deal.
*affiliate links in this post help you find deals and makes me a buck or two-for that I thank you*
 I used the miter saw to cut it right above that brace. I’m experienced with this sort of thing, if you are not-do not attempt this. Use a jigsaw instead.
 This is what I was left with after trimming it.
Trim the seat on the table saw
 This is the back portion of the original seat. I already used the front portion of the seat in the original project wall shelf.
Check for fit
 This is sort of a dry fit, to see if I like the size of the shelf and to see if it fits from side to side.
Pocket holes offer secure hold
 I tried to secure the shelf to the back with my Airstrike Stapler, but it just wouldn’t hold. I decided to use my Kreg Jig and pocket hole screws to give a really secure joint.
Learn how to use a pocket hole jig.
 Using a quick clamp made this task a lot easier. It was really hot and sunny so I was chasing the shade and ended up working on my potting bench.
Patch and paint
 The holes were patched with spackling then sanded.
 Whipping up a batch of my diy chalky paint primer was the quickest way to paint this new project . . .
 . . . while I was working on other projects.
I switched things up this time. I used Behr Satin for the chalky paint primer and then did a couple of light coats of satin as a top coat.
Wax DIY chalk paint
 Miss Mustard Seed wax was applied with a sponge, then wiped it back a little after it set up.
Distress small areas with an emery board

To give it some light distressing, I used one of my cheap emery boards I buy on Amazon.
Attach d rings for hanging
 I attached d rings a little too low on the chair back shelf—having to end up moving them up right under the pocket holes to give it the best fit to hang on a wall.
 Sometimes it’s the simple projects that make me smile the most! I love how this shelf project turned out.
 I think it would be perfect for a guest room or guest bath.
 How about for the kitchen?

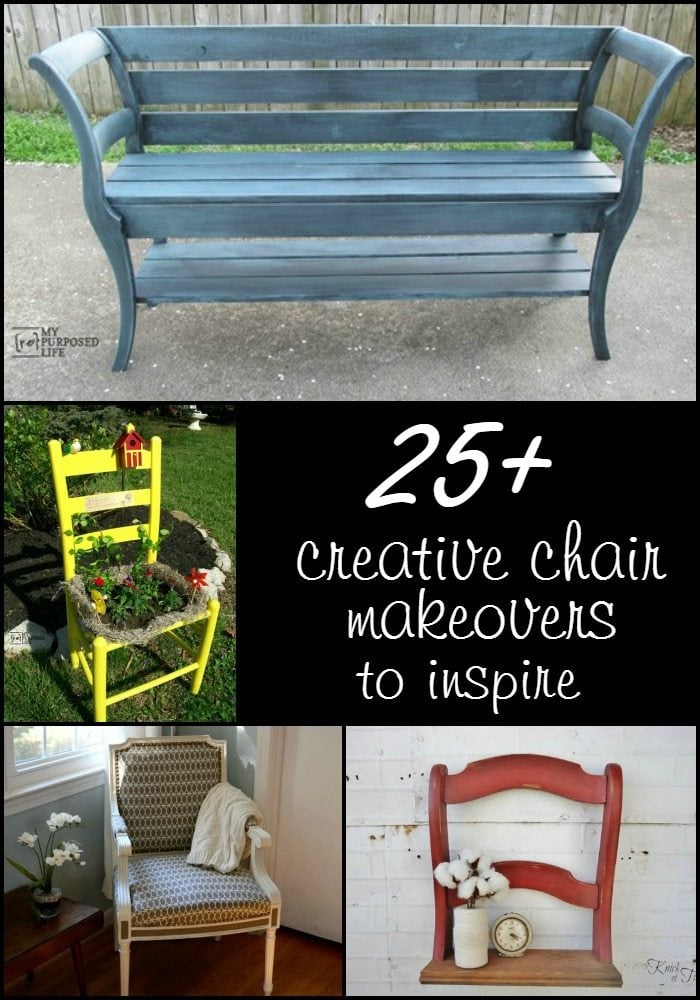
Be sure to check out some other project ideas for old chairs by clicking the image below.
gail
See one of my first, and an all-time favorite chair projects here
See more Random Chair Projects here
sharing here: Creativity Unleashed
Gail!
Hey there! I suppose I would suggest that you read this post https://www.myrepurposedlife.com/how-to-use-a-kreg-jig/ Probably would suggest the K3. I used it exclusively for years.
Good luck, happy building!
gail
Gail!
Hey there! I suppose I would suggest that you read this post https://www.myrepurposedlife.com/how-to-use-a-kreg-jig/ Probably would suggest the K3. I used it exclusively for years.
Good luck, happy building!
gail
Gail!
Hey there! I suppose I would suggest that you read this post https://www.myrepurposedlife.com/how-to-use-a-kreg-jig/ Probably would suggest the K3. I used it exclusively for years.
Good luck, happy building!
gail
Gail!
Hey there! I suppose I would suggest that you read this post https://www.myrepurposedlife.com/how-to-use-a-kreg-jig/ Probably would suggest the K3. I used it exclusively for years.
Good luck, happy building!
gail
Gail!
Hey there! I suppose I would suggest that you read this post https://www.myrepurposedlife.com/how-to-use-a-kreg-jig/ Probably would suggest the K3. I used it exclusively for years.
Good luck, happy building!
gail
Gail!
Hey there! I suppose I would suggest that you read this post https://www.myrepurposedlife.com/how-to-use-a-kreg-jig/ Probably would suggest the K3. I used it exclusively for years.
Good luck, happy building!
gail
Gail!
Hey there! I suppose I would suggest that you read this post https://www.myrepurposedlife.com/how-to-use-a-kreg-jig/ Probably would suggest the K3. I used it exclusively for years.
Good luck, happy building!
gail
Gail!
Hey there! I suppose I would suggest that you read this post https://www.myrepurposedlife.com/how-to-use-a-kreg-jig/ Probably would suggest the K3. I used it exclusively for years.
Good luck, happy building!
gail
Gail!
Hey there! I suppose I would suggest that you read this post https://www.myrepurposedlife.com/how-to-use-a-kreg-jig/ Probably would suggest the K3. I used it exclusively for years.
Good luck, happy building!
gail
Gail!
Hey there! I suppose I would suggest that you read this post https://www.myrepurposedlife.com/how-to-use-a-kreg-jig/ Probably would suggest the K3. I used it exclusively for years.
Good luck, happy building!
gail