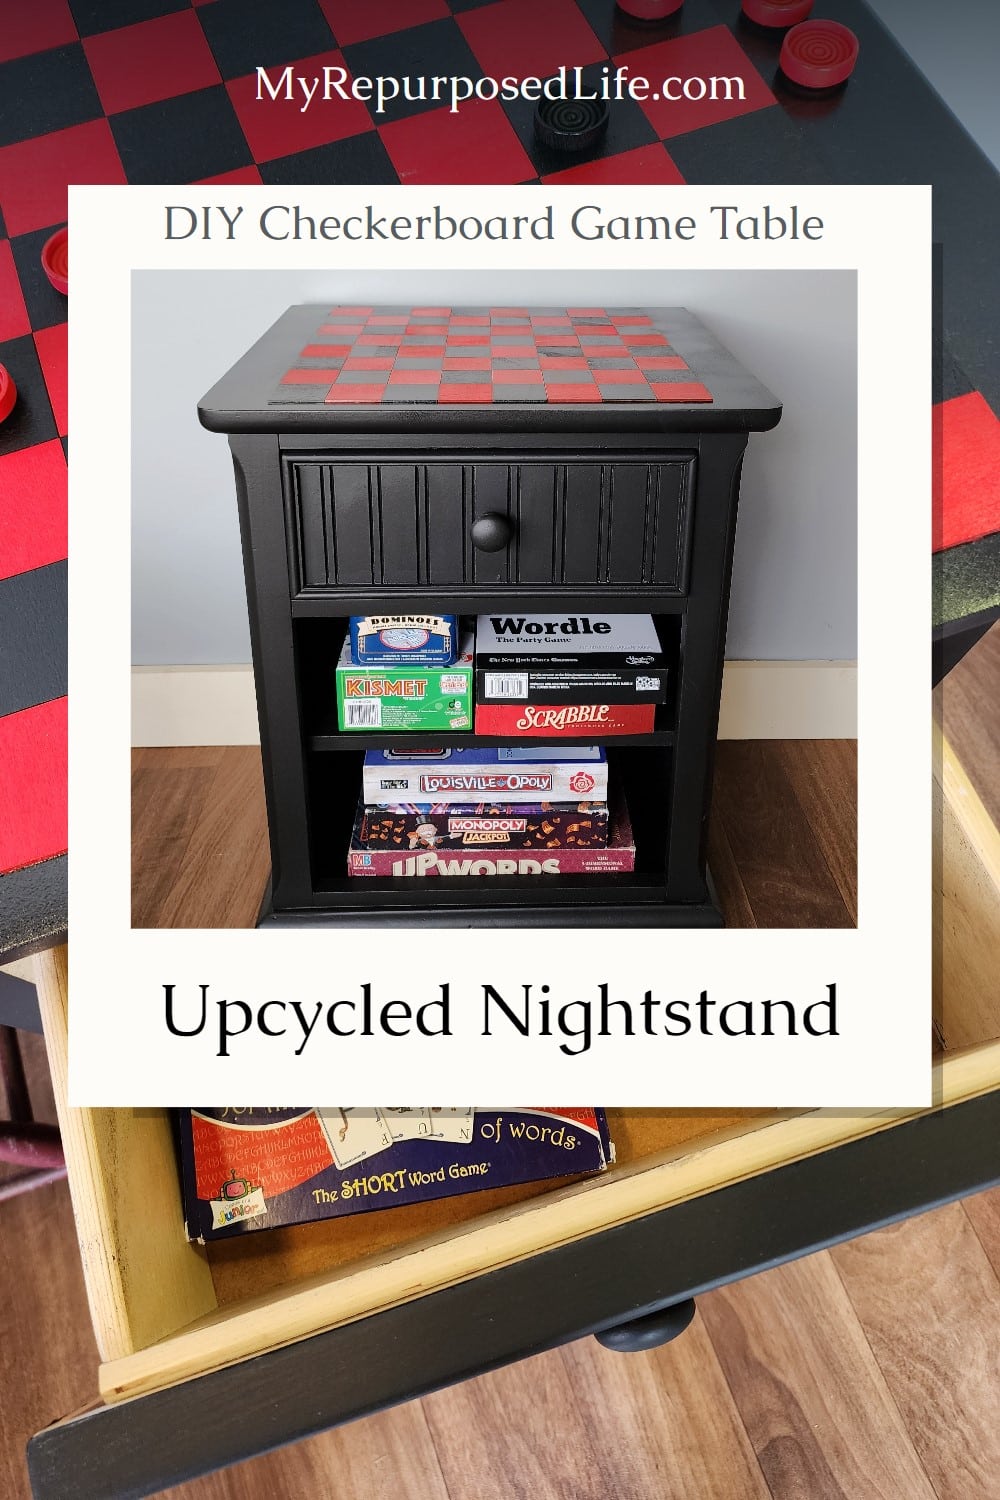
Checkerboard Game Table | Upcycled Nightstand
As an Amazon Associate, I earn from qualifying purchases.
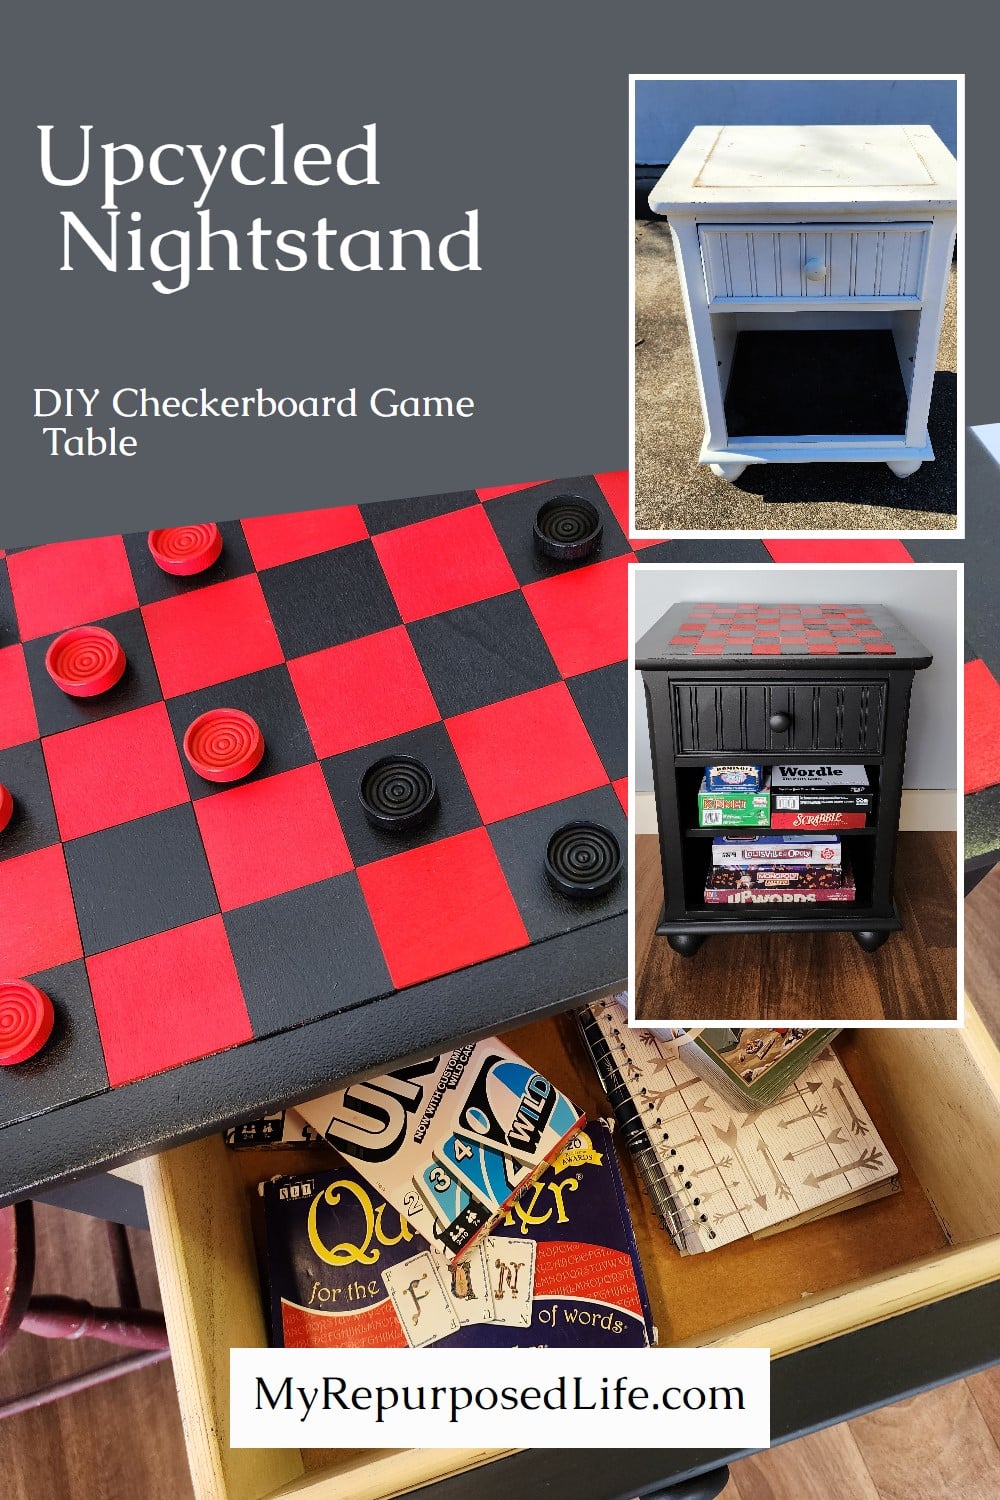
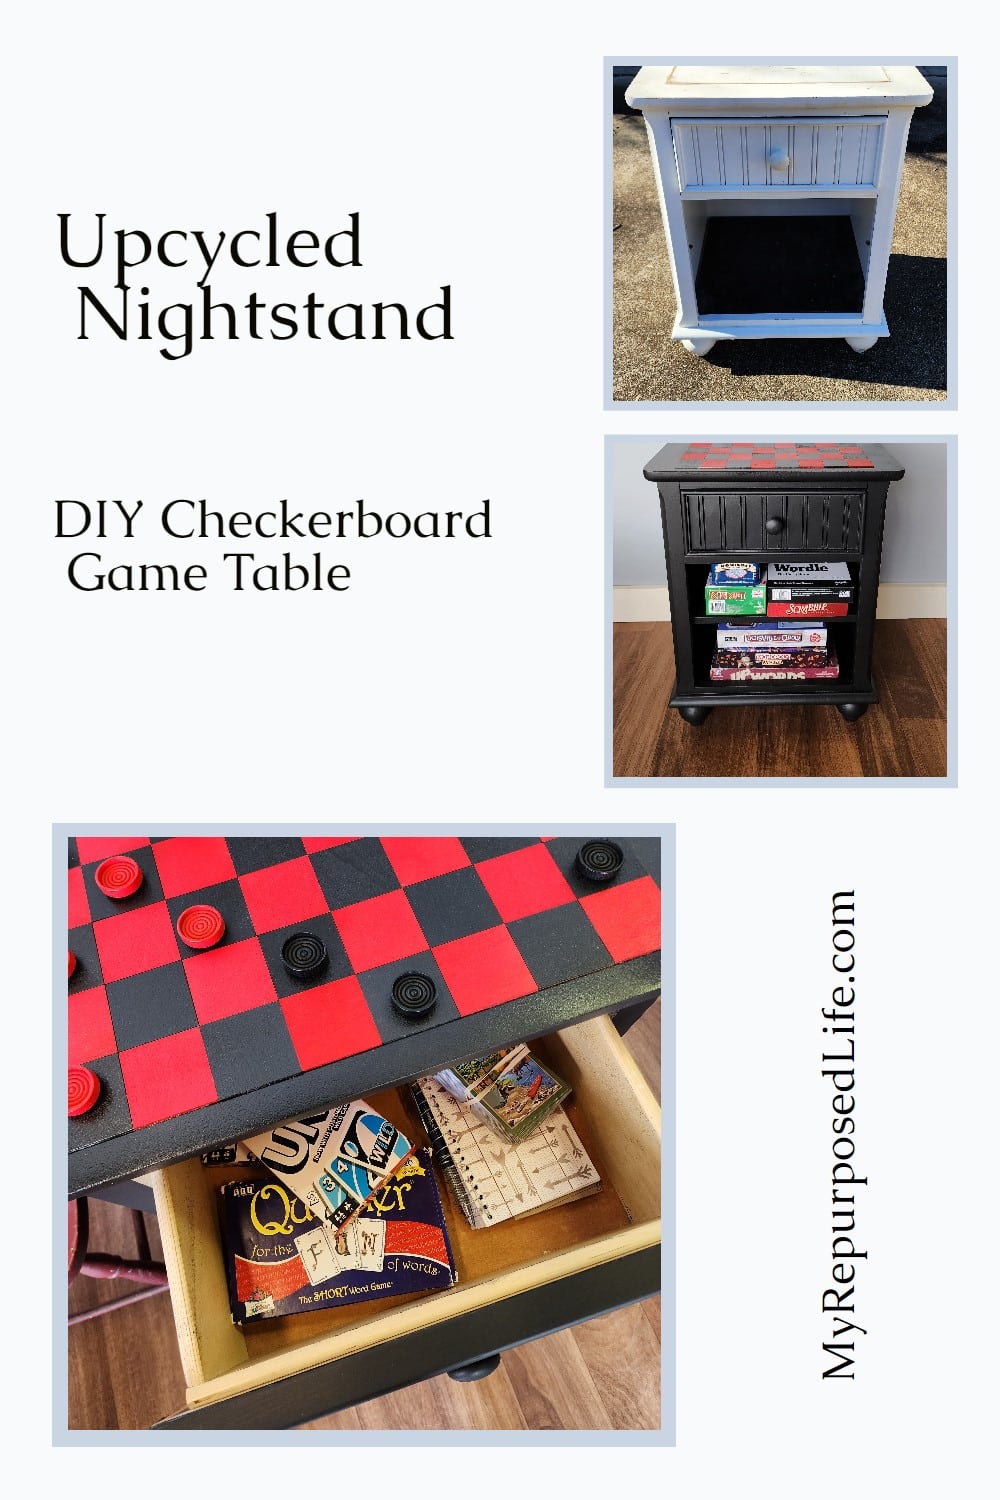
Easy DIY nightstand upcycle — make a checkerboard game table
So, my friend dragged home a nightstand for me. She found it on the curb, and thought it would be perfect for the checkerboard game table I was thinking about making. She had been with me at the junky store while I was looking for the perfect side table to turn into a fun game table.
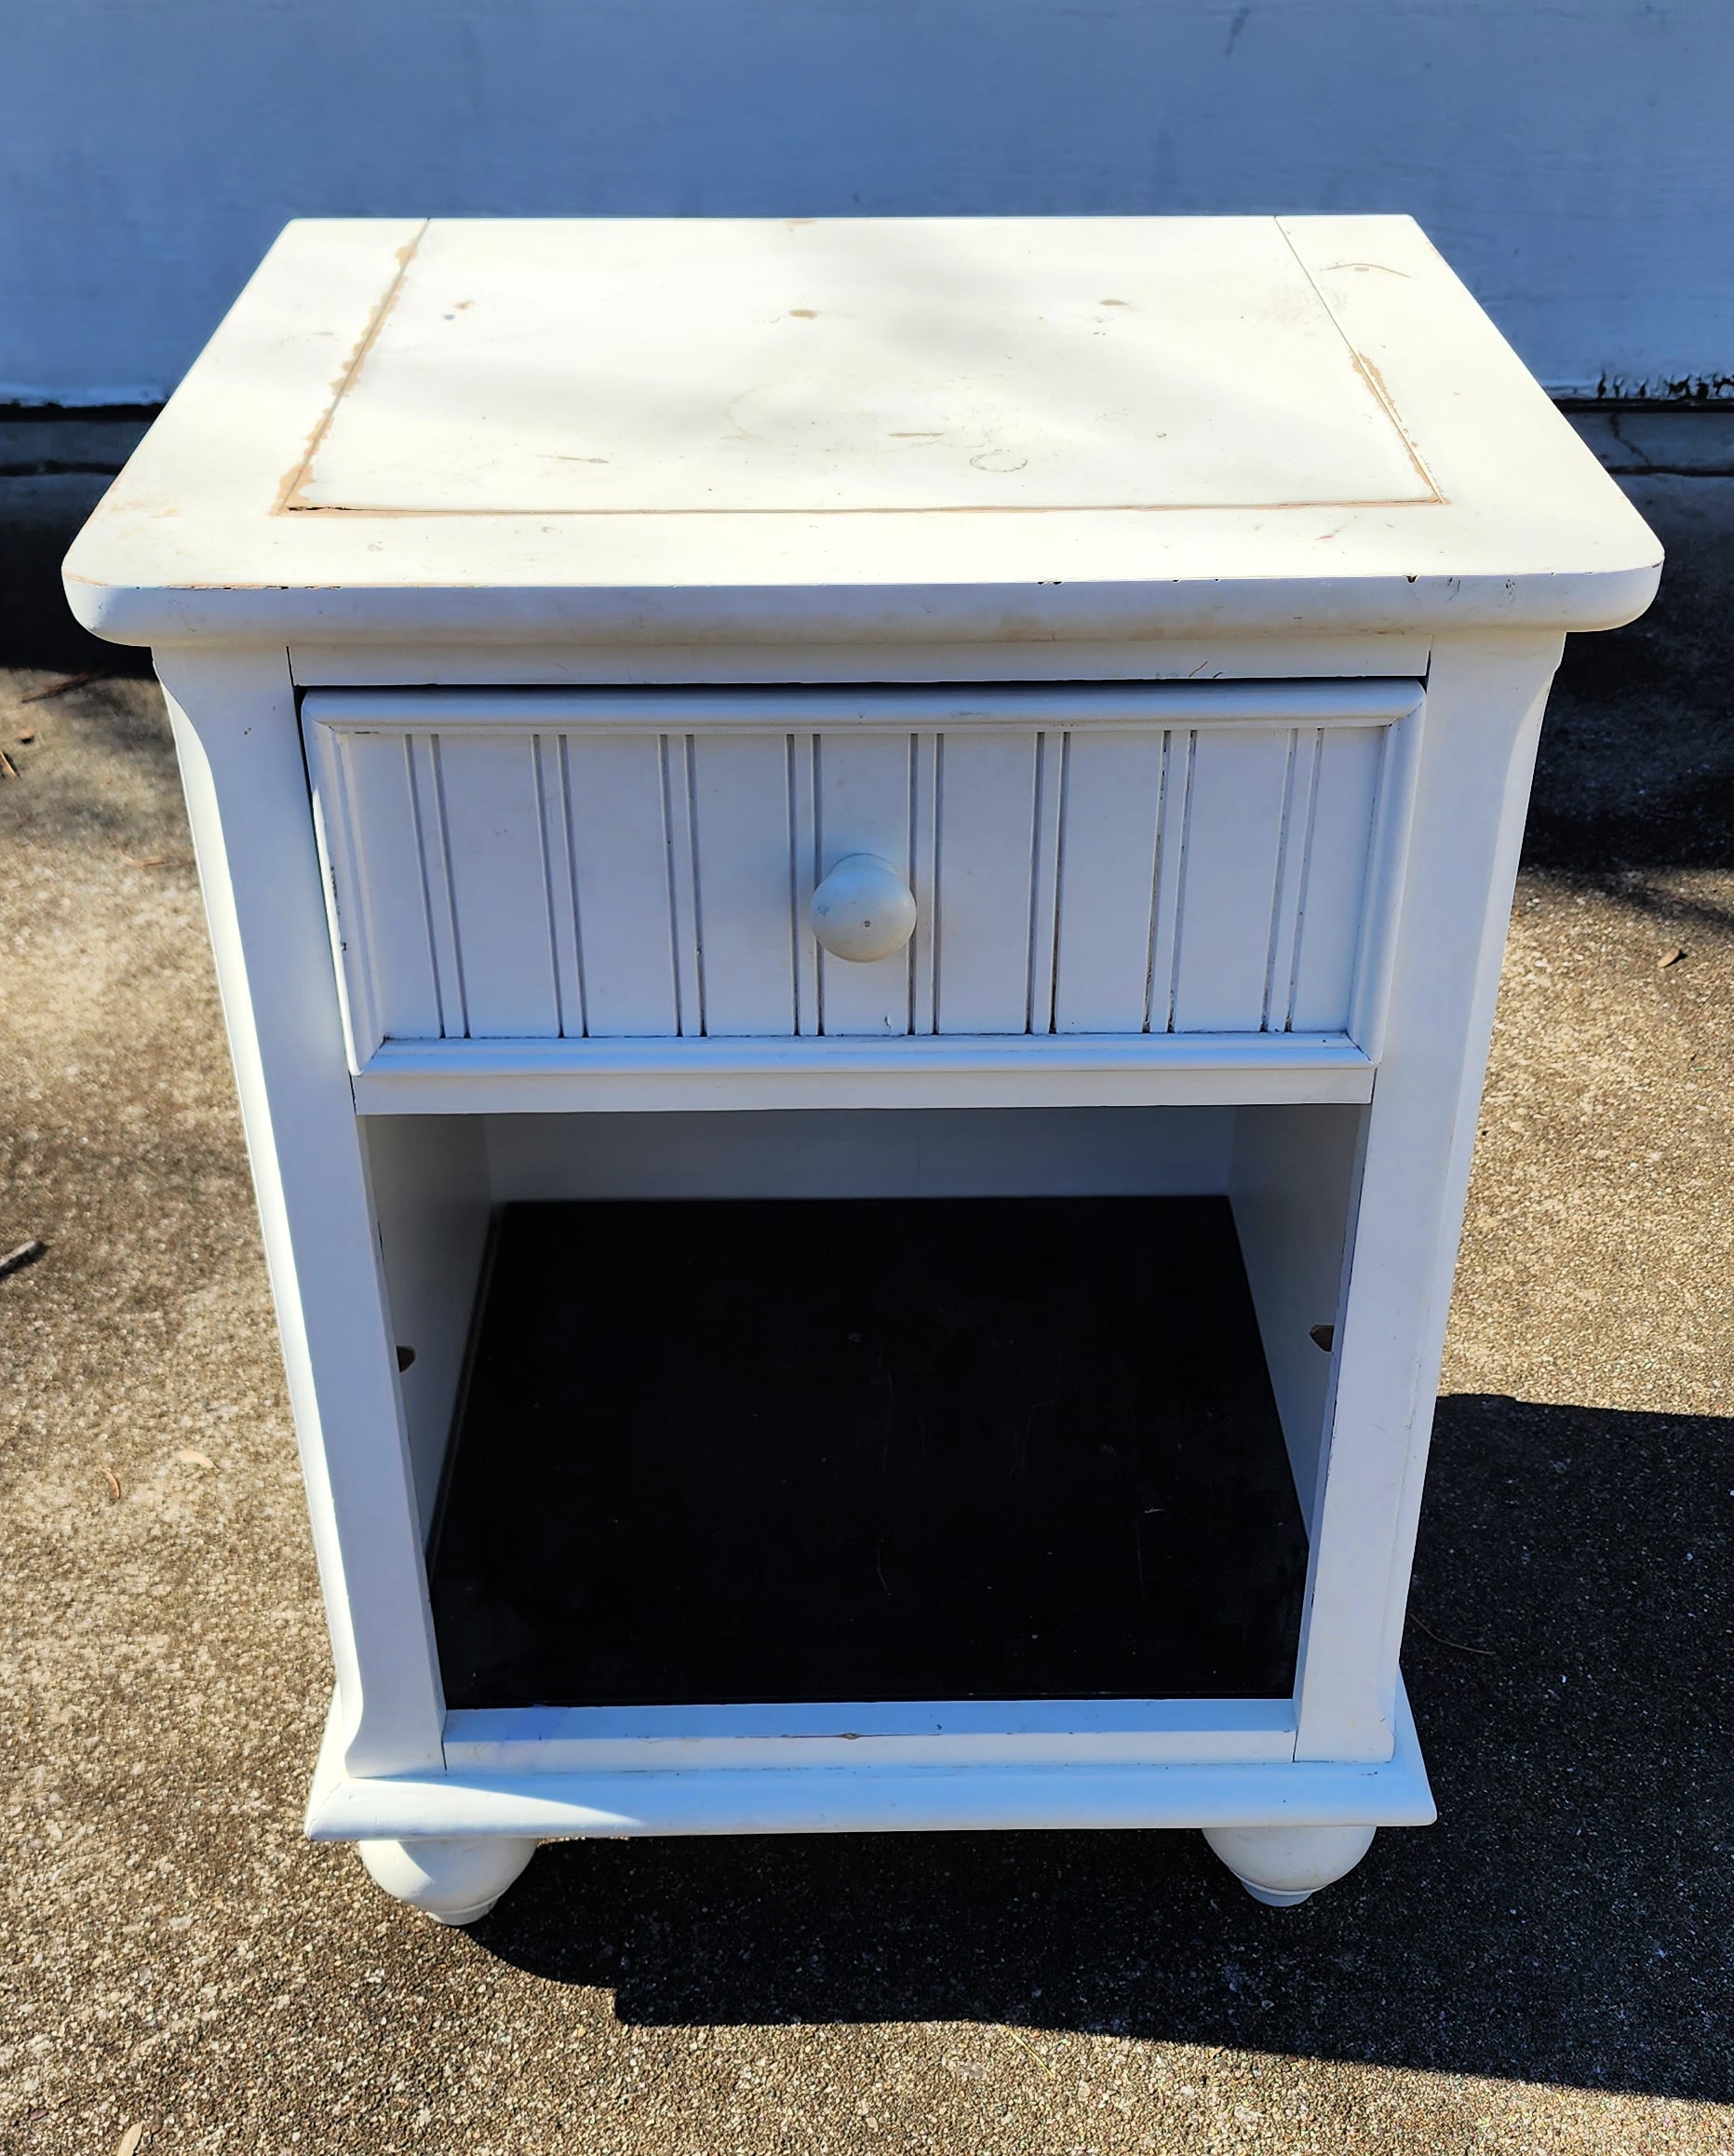
You can’t do better than FREE! Especially when it’s delivered to you by one of your best friends. The nightstand is less than perfect, but I think I can bring it all together. The drawer can hold checkers, and the bottom can hold tons of games for the kids. There is a shelf resting on the bottom of the nightstand.
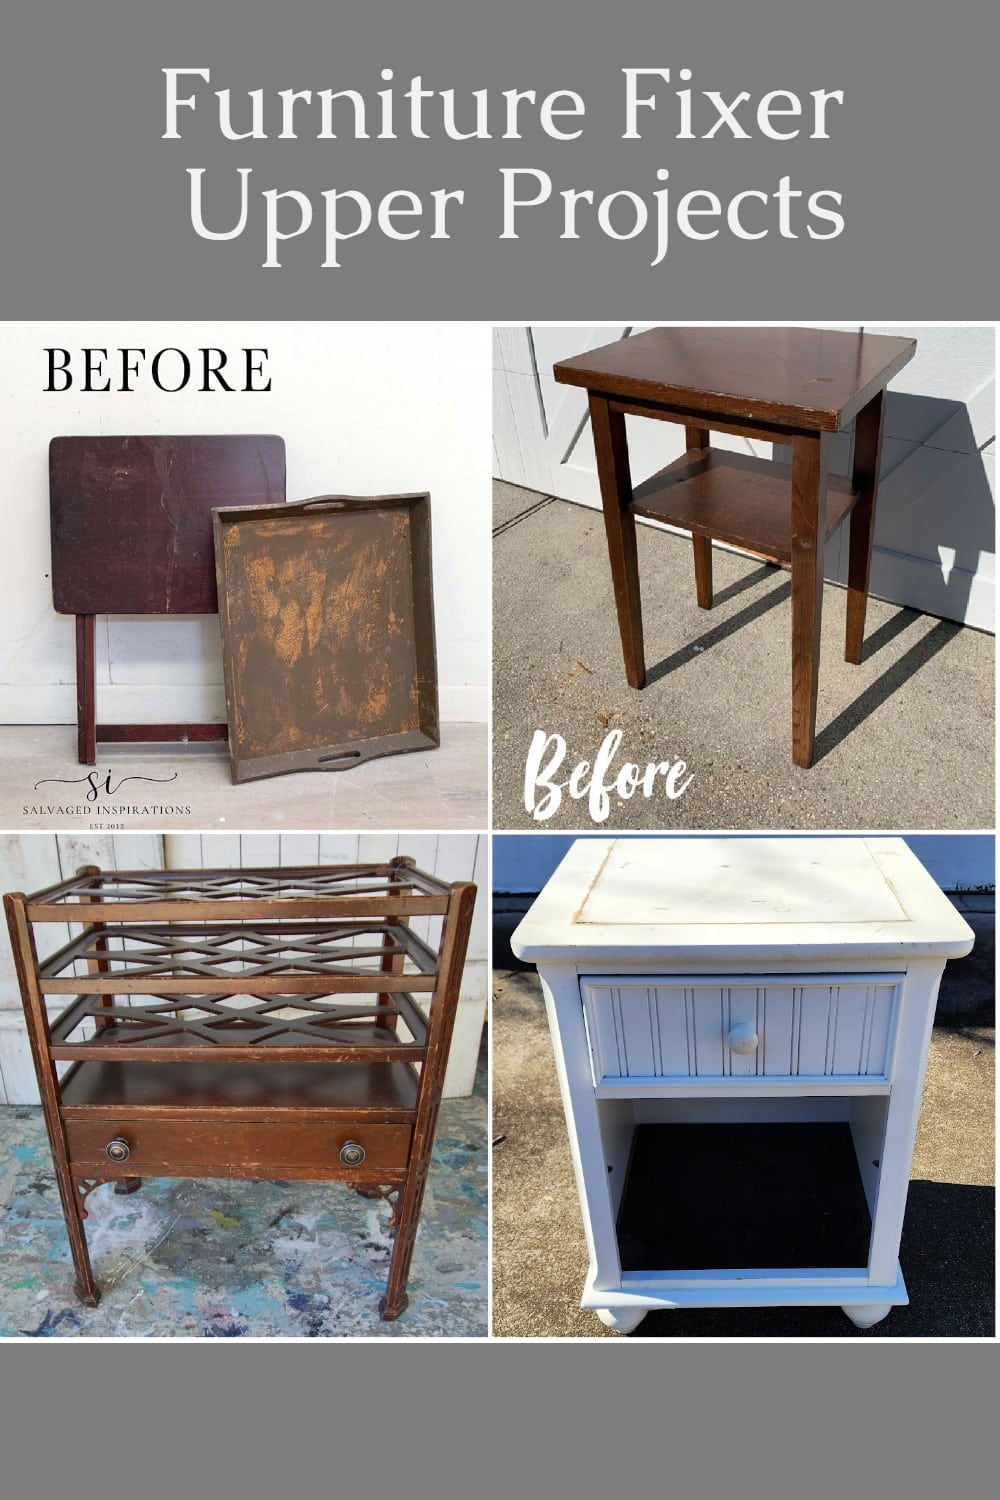
By the way, it’s furniture fixer upper day! Be sure to check out the awesome projects from my friends at the bottom of this post!
Use varying grits of sandpaper

These are the three grits of sandpaper I use most, 60, 150, and 220.

The top of the curb find nightstand was in really rough shape. Most of it is not real wood, that’s why it’s raise, most likely due to water damage. I began with the 60 grit, then moved on to 150, and finally 220 to make things as smooth as possible.
Visit the My Repurposed Life Amazon Store to shop my favorite items.
General Finishes Milk Paint | Finish Max Paint Sprayer

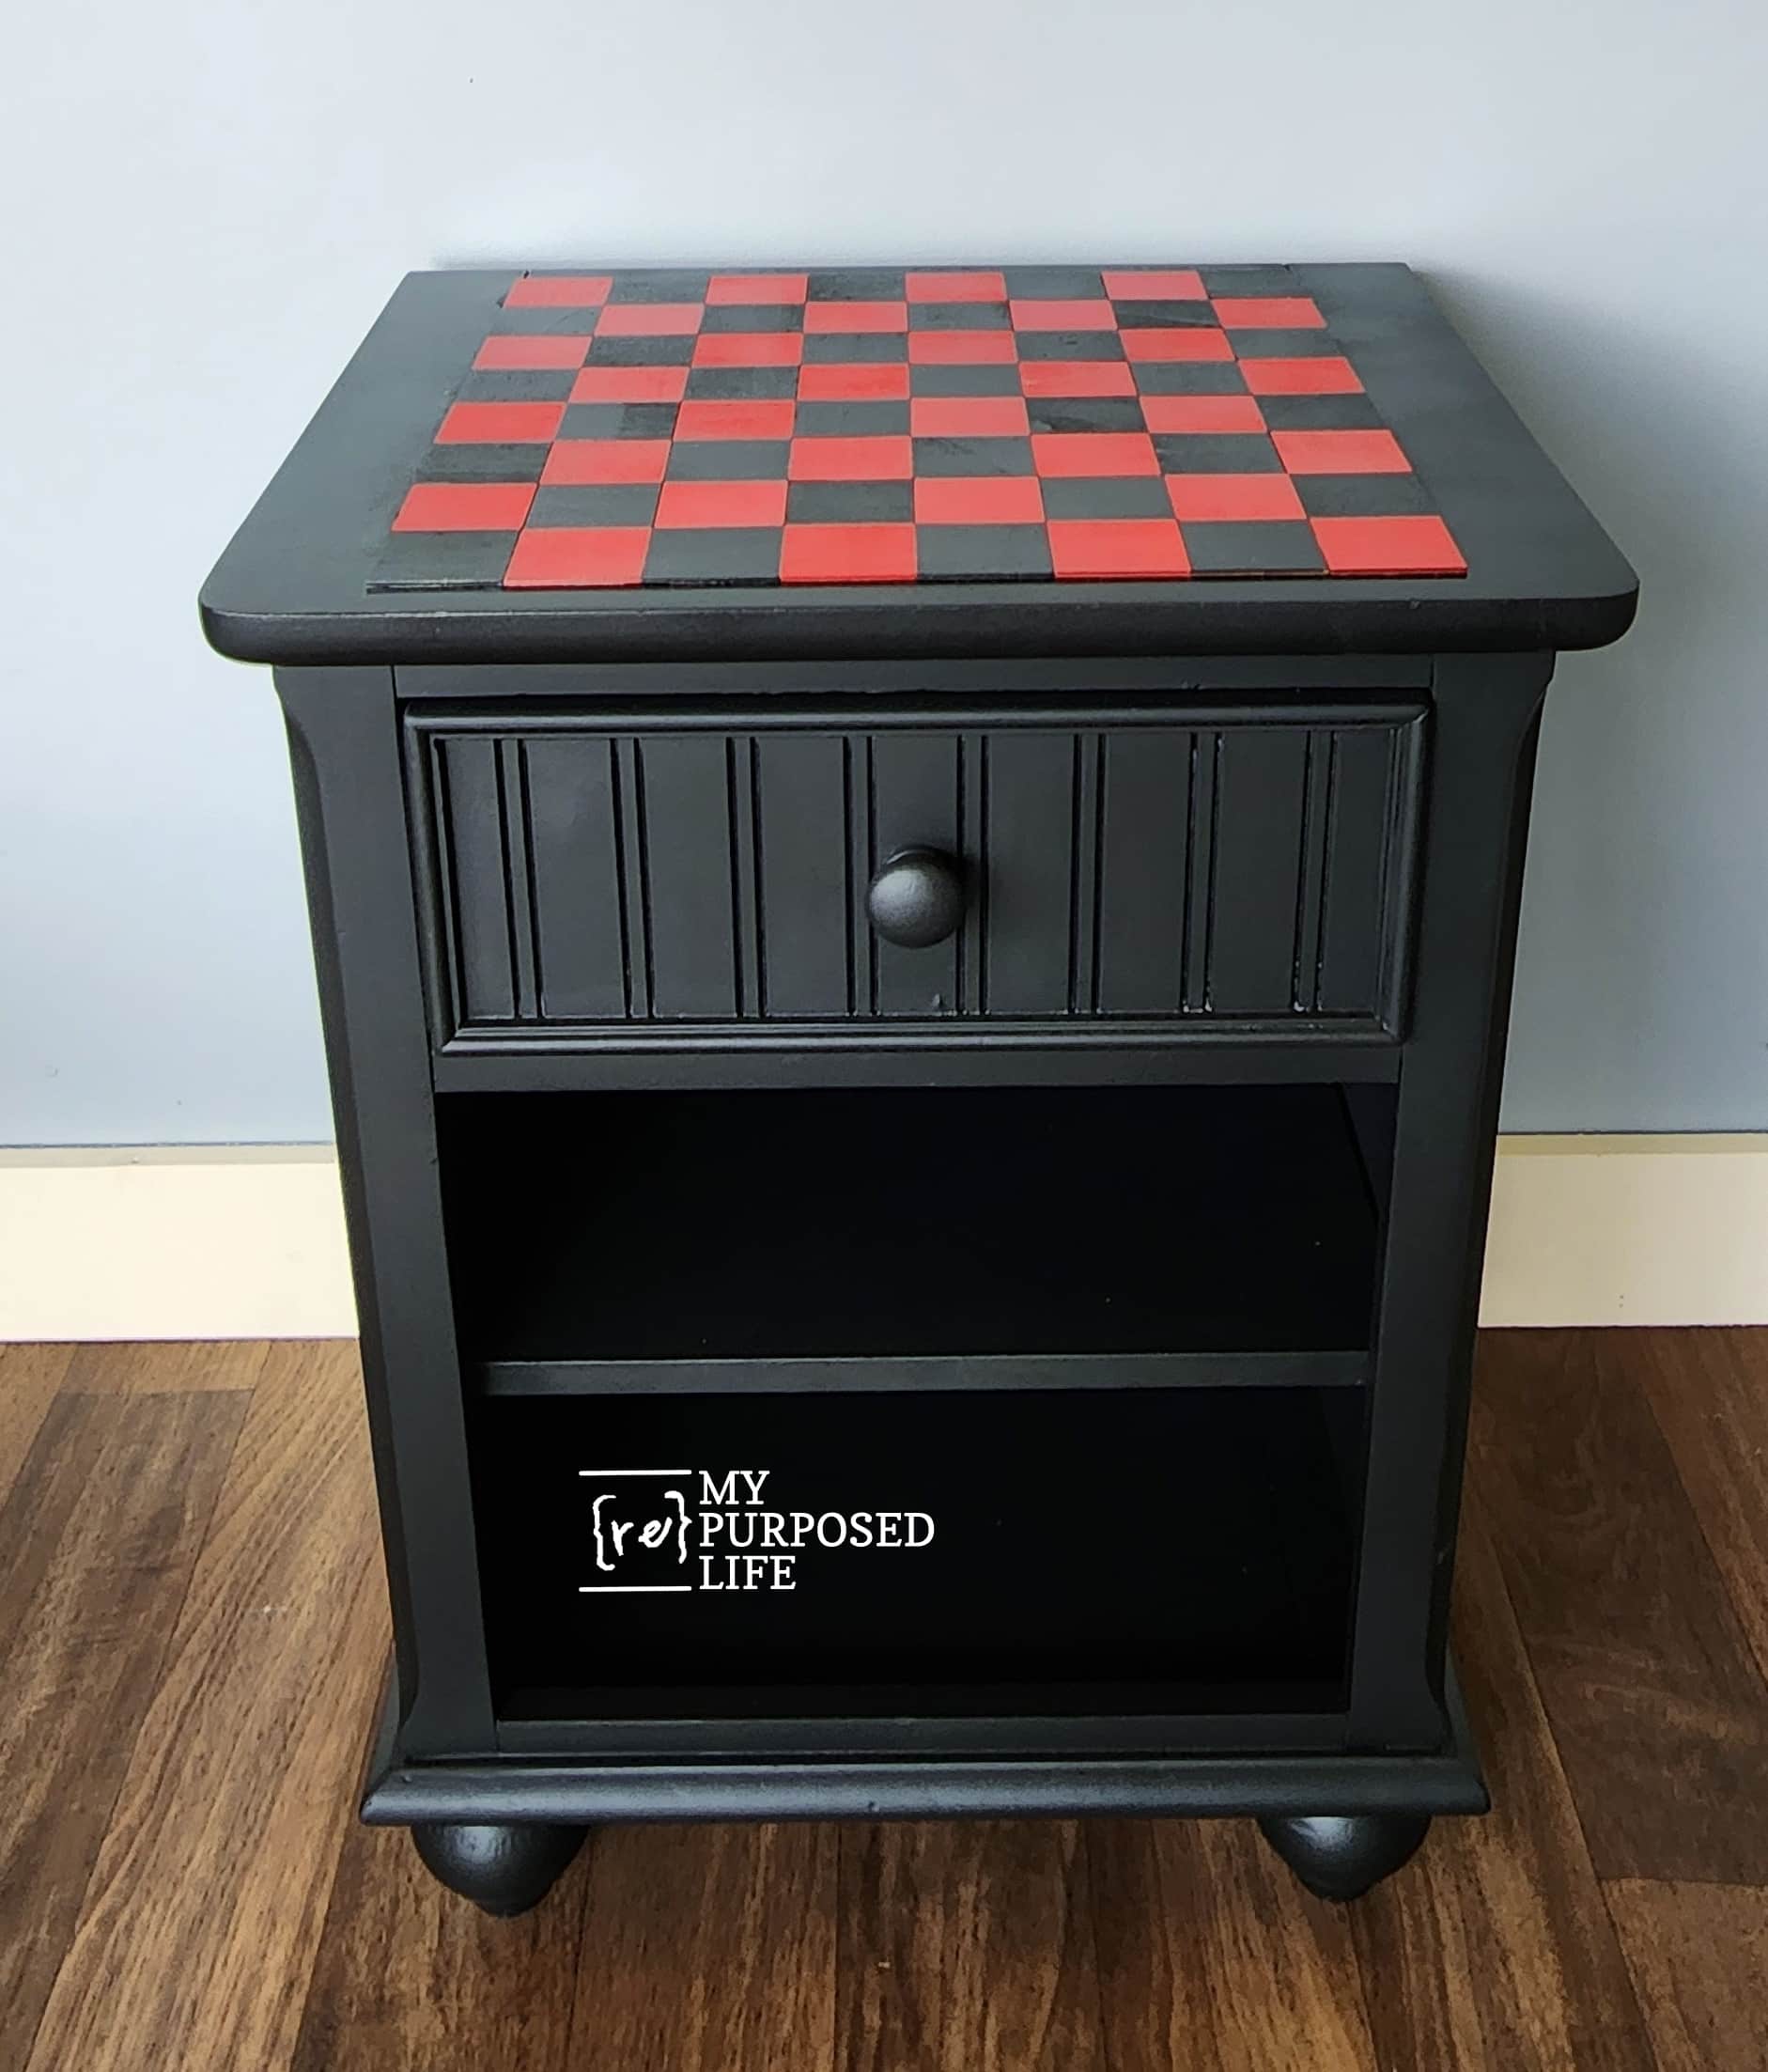
Have you ever seen my pretty black nightstands? This is the same paint I used on those pieces. I chose to use my Finish Max Paint Sprayer to make this job quick and easy!
DIY Game Table | Sand Between Coats of Paint

Do you sand between coats of paint? If you don’t, you should. Especially on flat horizontal surfaces where you want a really nice finish. What do I use? I use brown craft paper that comes in Amazon packages. I crumple it up until it’s soft, then sort of burnish (light sanding) the first coat of paint. Depending on the paint, you may need to wipe off some dust before applying the second coat of paint. The top is still a little rough, but because the nightstand will be a checkerboard game, it’s all going to work out.
Paint Underside of Furniture Project

Please don’t neglect to paint the underside of your furniture project. This is really important if you’re flipping furniture! You don’t want your buyer to load something in their vehicle and see the “naked truth”.
Painting Black Furniture

The Finish Max Paint Sprayer has very little overspray and allowed me to paint all these projects with one quart of paint. Did you see last month’s FFUpper project? That sweet little drum table?
Are you going to paint the checkerboard game on top of the nightstand?

That’s a great question! Of course, you could tape off the checkerboard pattern on top of the nightstand if you want to. But, not me! I’ll be using 64 two inch wooden squares to make the checkerboard game pattern on the top of the nightstand.
The wooden squares will help disguise the poor quality of the nightstand table top.
How to Spray Paint 32 Wooden Squares Quickly

If you look closely, you will see that I have three rows of rolled tape holding the wooden squares in place. This method proved to be perfect for painting so many wooden squares quickly and easily. The red paint was not shiny enough to suit me, so I have the squares a quick shot of a glossy clear coat.

After removing the red wooden checkerboard squares, I was able to use the same tape to spray paint the black squares. Two squares were “test” painted black to see which paint to use.
DIY Checkerboard Game Table

Look closely, can you see the line I drew to keep my wooden squares straight? I clamped yardsticks on each side to keep me in line! Of course, I used my favorite Gorilla Wood Glue to attach the red and black checkerboard squares.

Working slowly, one row at I time, I alternated red and black wooden squares on the top of the checkerboard game table.
How Many Squares on a Checkerboard?

There are sixty four 2 inch squares on my checkerboard game table. Yep, 32 red, 32 black. It actually went pretty quickly and luckily, I didn’t make any mistakes in the red and black pattern!
Do you love it? It doesn’t get any better than a DIY game table with a checkerboard top!
Maybe YOU think it would have been easier to tape and paint the red and black checkerboard pattern? Not me, I’m so, so pleased with how this easy project turned out. As you can see, I have painted and put the middle shelf in place.
Game Table with Storage

The old nightstand has so much game storage. The shelves hold a lot of board games.
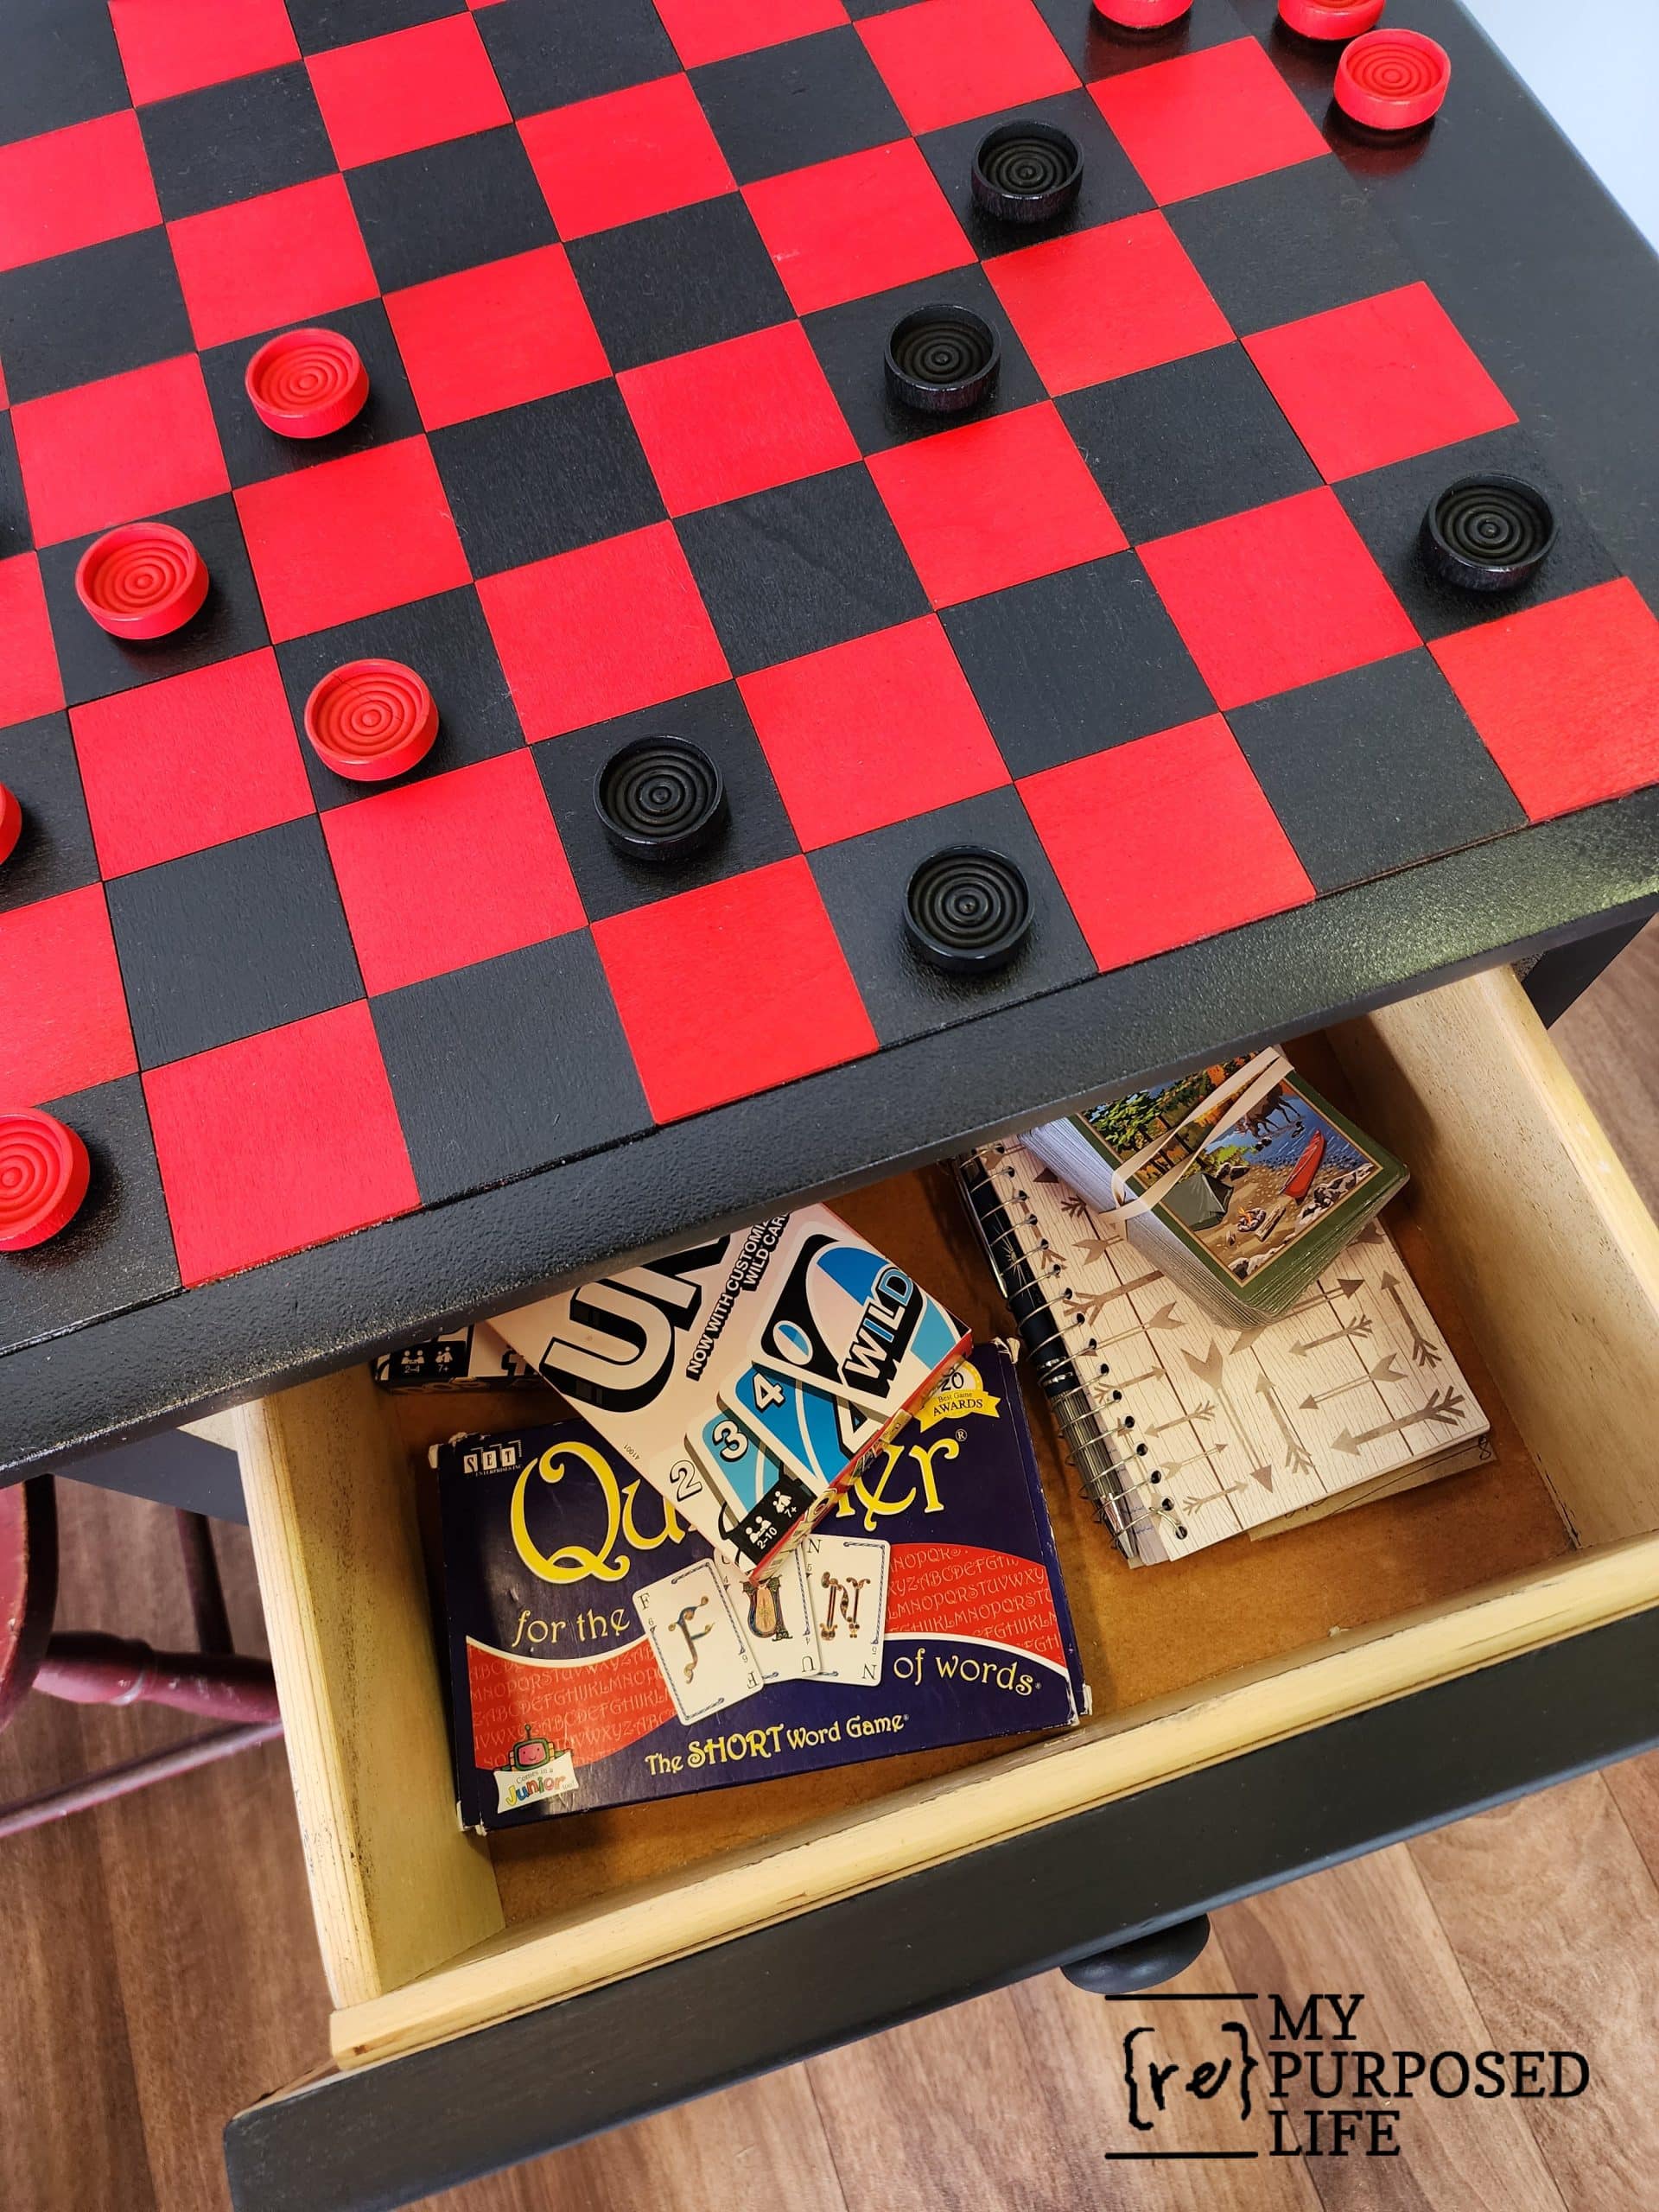
The drawer holds cards, checkers, and score books. Have you ever played Quiddler? It’s a very fun word game that you can even play solo!

Won’t you pin it before you go?
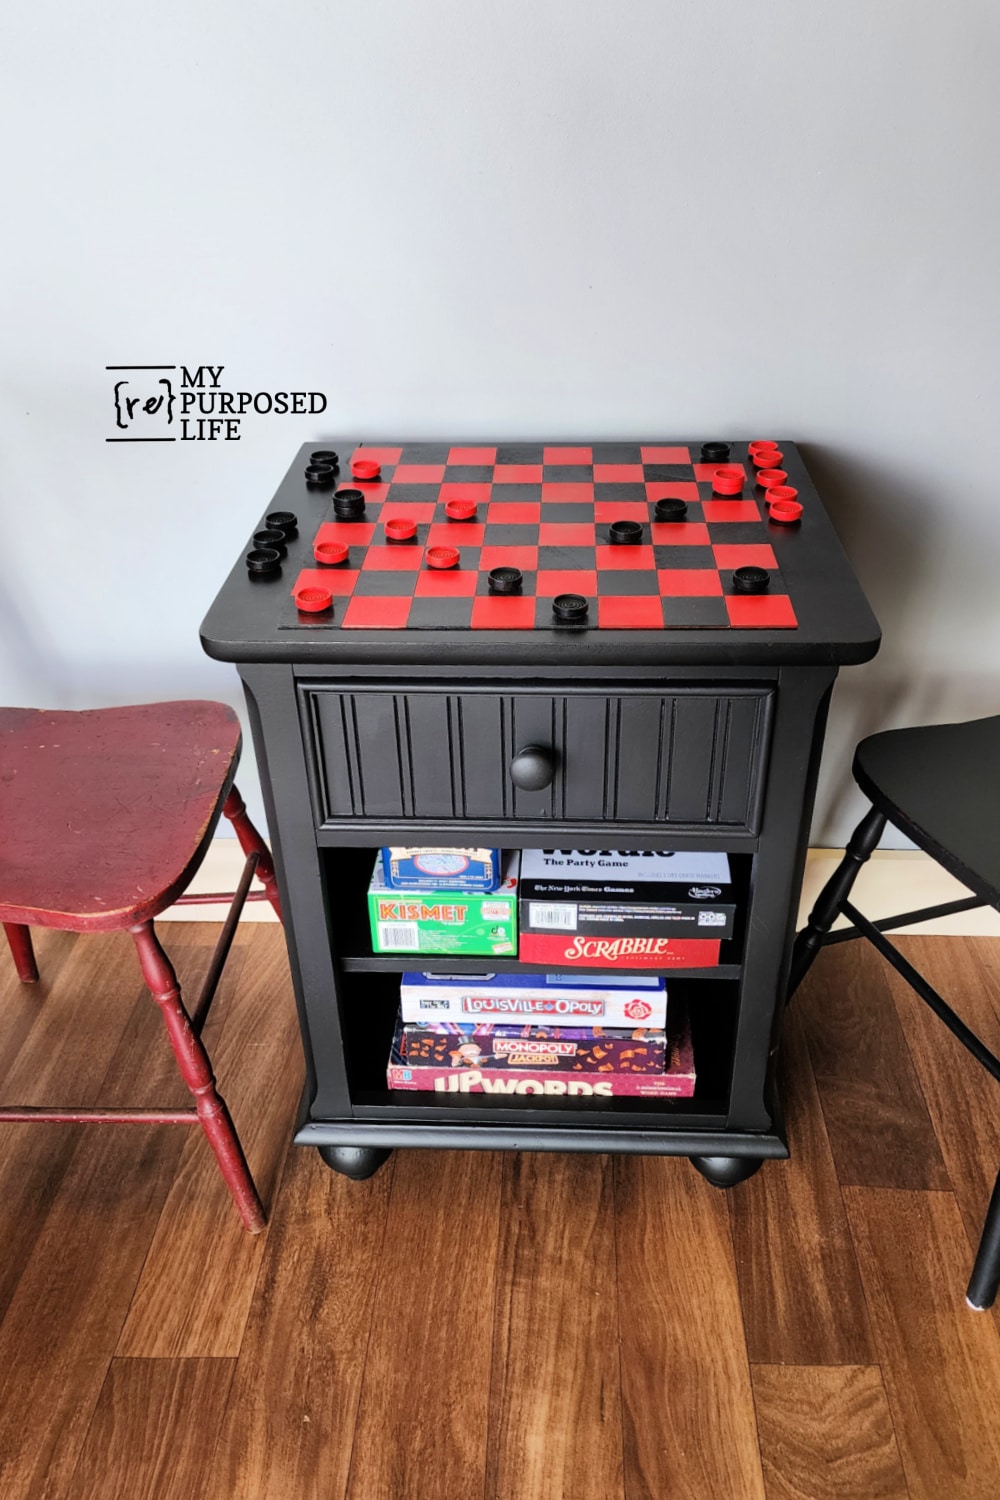
Good News! This little guy has already been sold in my booth. It was snagged up in just a couple of days. I wonder what games are stored in it now . . .
Be sure to check out the rest of the fabulous furniture fixer upper projects below!

- Tropical Paradise TV Tray Makeover
- How to Update a Side Table with Paint
- Using Spray Paint to Quickly Transform a Table
- Upcycled Nightstand into a Game Table (you are here)
Furniture Fixer Upper Tour Projects
If you love seeing old furniture get a second chance, be sure to visit more Furniture Fixer Upper Tour makeovers. Each project starts with good bones and ends with a fresh new story.
See more Furniture Fixer Upper makeovers here
You will find everything from small side tables to large statement pieces, all transformed by talented DIY bloggers who believe in saving furniture rather than replacing it.
Super clever! This is such a cool idea. Especially for a roughed up nightstand. I have a few of those laying around (and have been for a while) but am now inspired! Thank you!
So happy to inspire you Kelly! Nightstands are great for repurposing and upcycling! I’ve used them for desks, hall trees and more! Just search My Repurposed Life nightstand for more great ideas!
gail
Love it! You did a fantastic job with the painting – of every piece! What a great idea for an old table!
Thanks so much Barbara! I was happy to find a great (easy) way to quickly paint 64 wooden squares!
gail
What a great idea for this little table, Gail! I love how you remedied the water damage on top by covering it right up! XOXO
Thanks so much Christy. I’ve been wanting to do this kind of project for a while now.
gail
What a great upcycle Gail! And I love that you used the painted wooden squares for the top. It adds so much. Congrats on the quick sale! 🤗
Quick sale is always a PLUS, right Denise?
Thank you for your sweet comment.
gail
The checkerboard wooden squares are the perfect idea! I so dislike painting squares on a tabletop!
Thanks Carol…. I would have lost patience if I had to paint those squares!
gail
You make it look so easy!!! Lol All your projects turn out so nice!!!
Thanks so much! Sometimes I run into problems. I was lucky that this gameboard came together so easily.
gail
So Creative! Love it!
Thank you Rebecca!!! I appreciate it!
gail