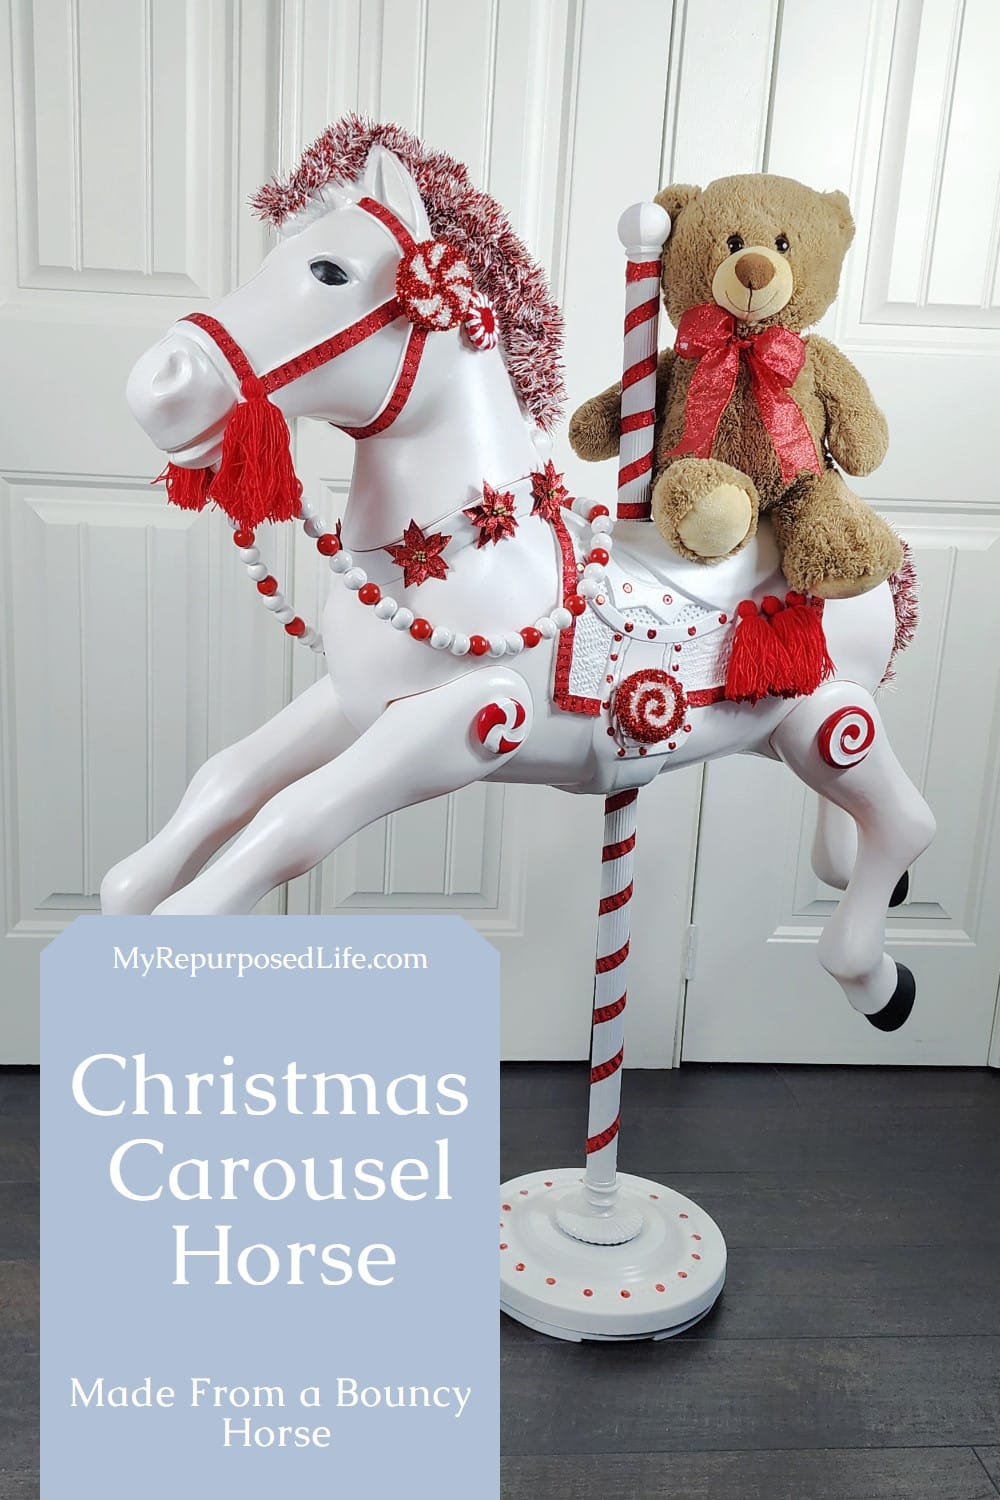
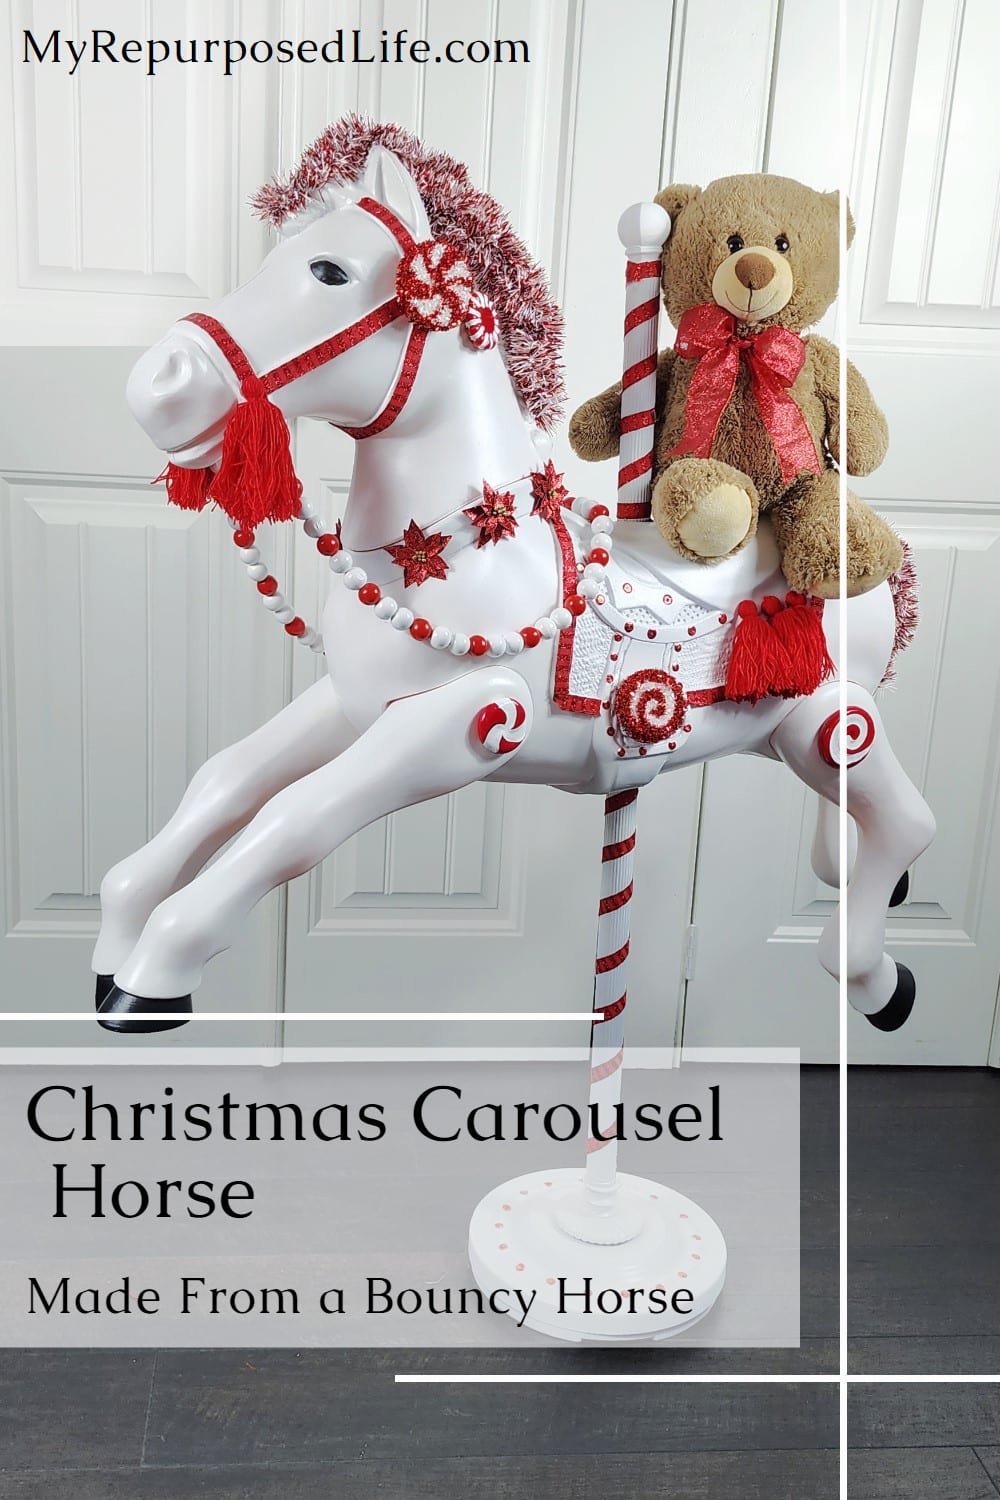
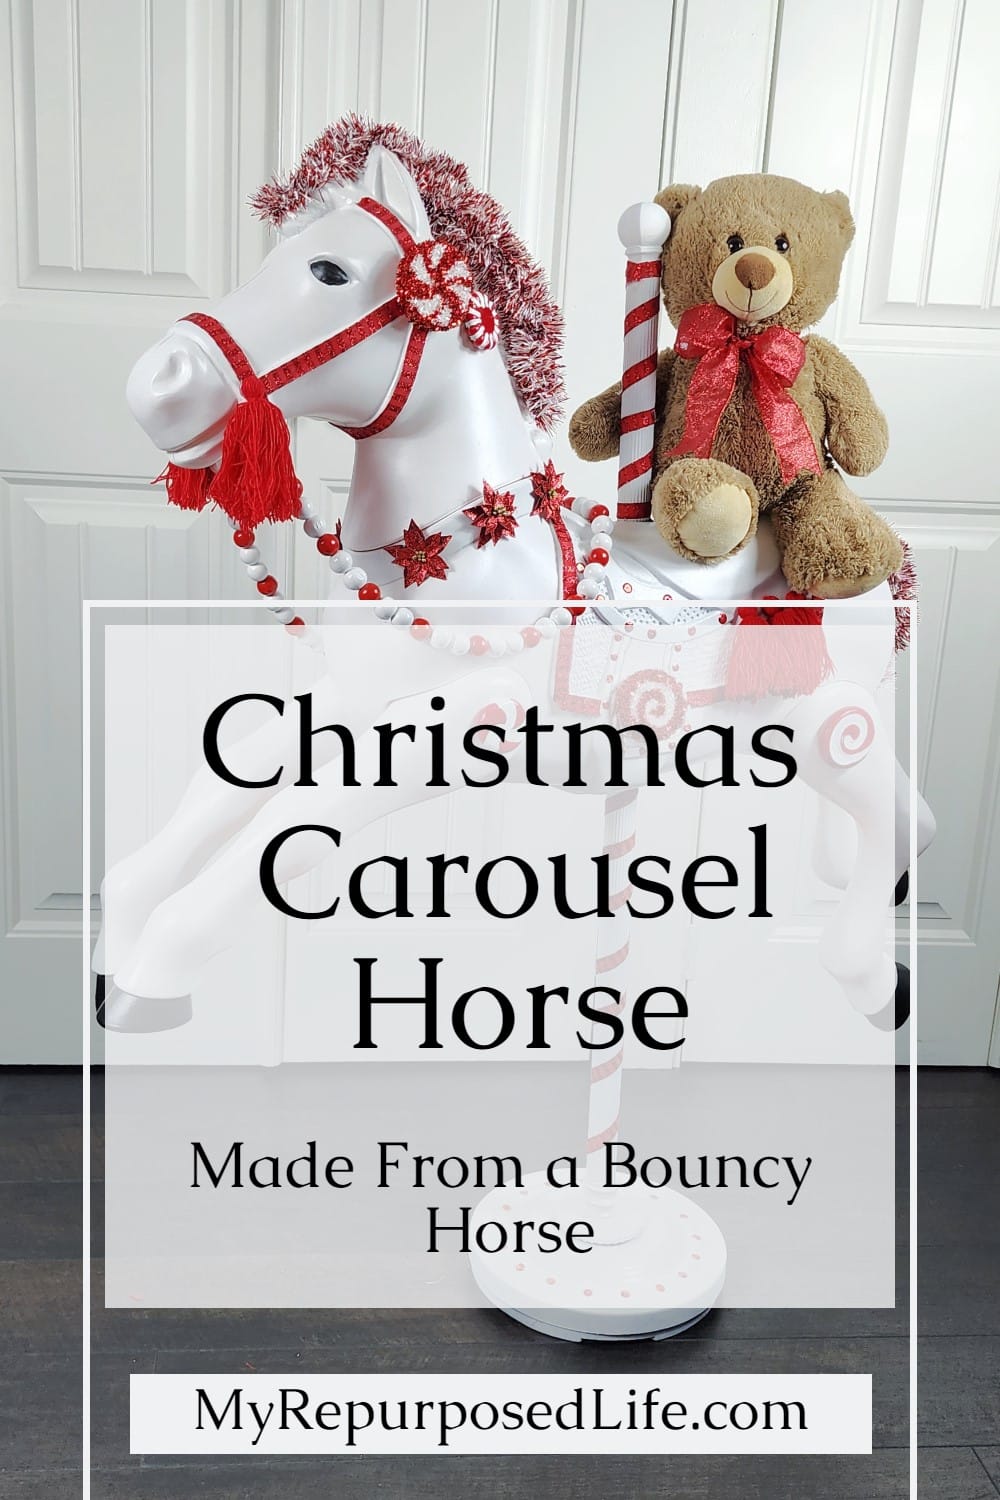
Christmas Carousel Horse | Bouncy Horse
As an Amazon Associate, I earn from qualifying purchases.
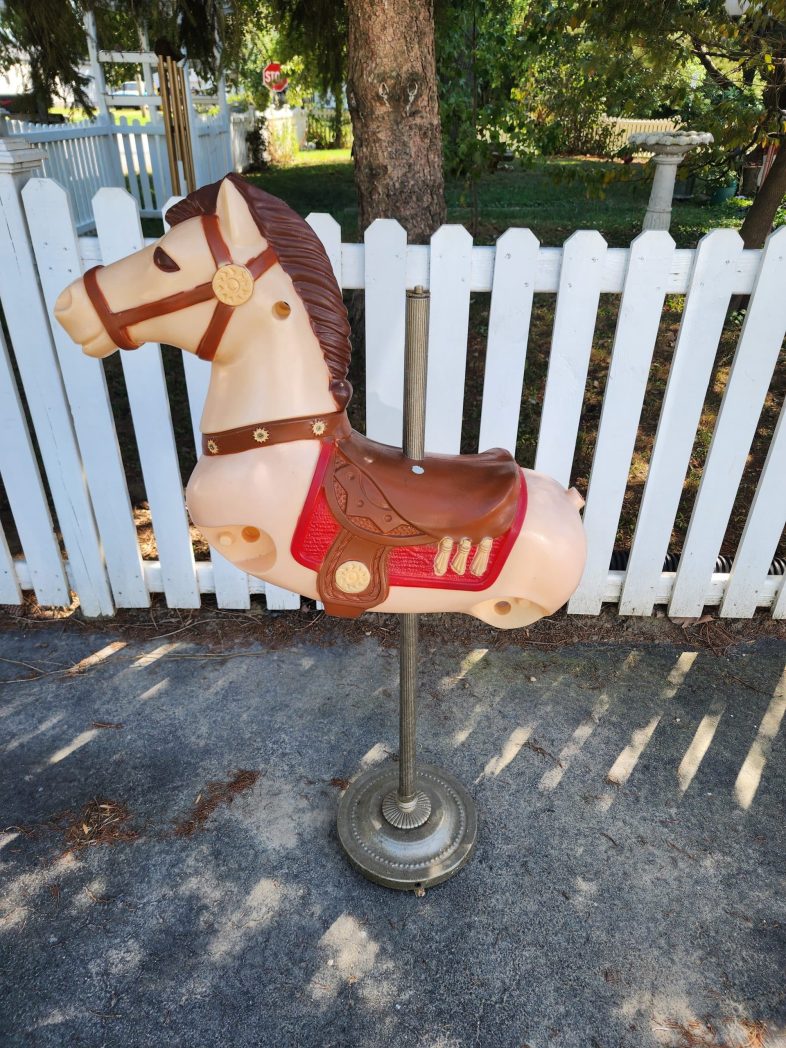
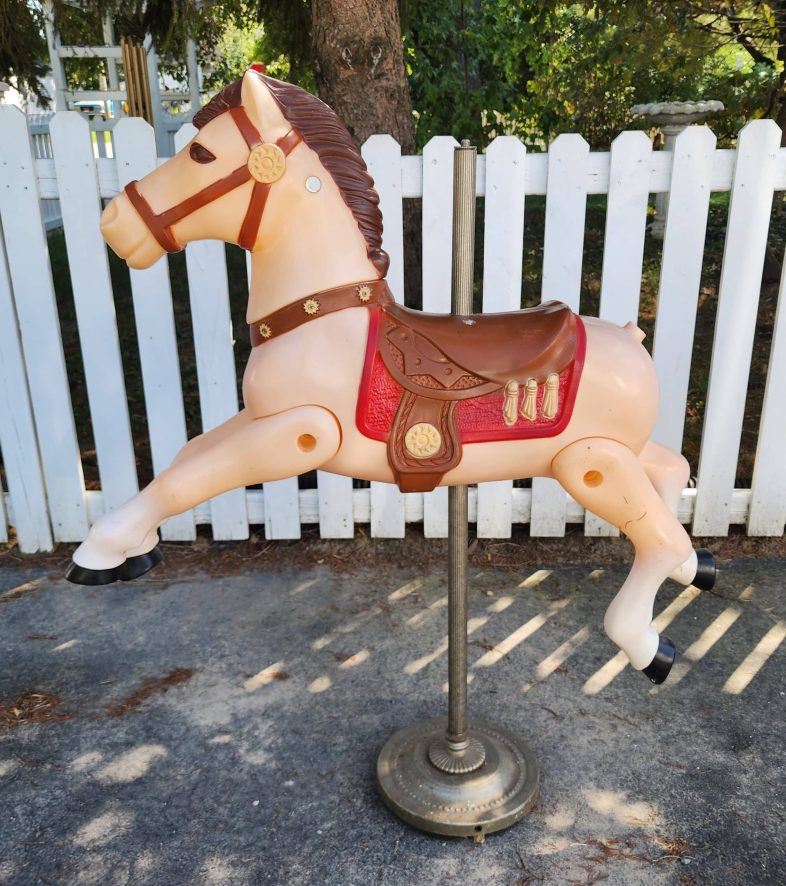
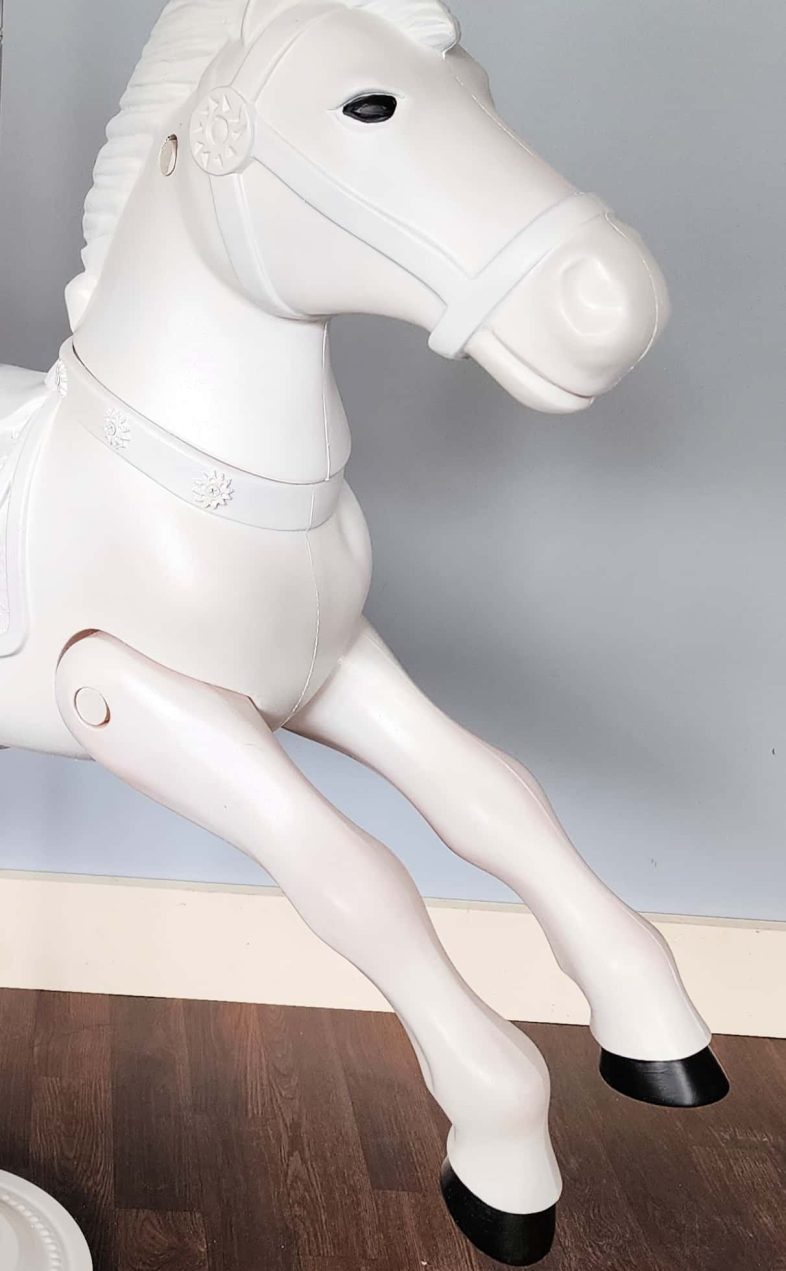
Some Christmas projects start in the craft aisle. This one started beside a dumpster. When I spotted this worn out bouncy horse headed for the trash, I could instantly picture him all dressed up as a Christmas carousel horse, ready to greet guests at the door. If you love nostalgic holiday decor and a good trash to treasure makeover, this simple project will show you how to give a forgotten spring horse a second ride around the tree.
I’m happy to share this fun Christmas Carousel Horse made from a kid’s bouncy horse. Many of the hobby horses are called Radio Flyers. This spring horse is a cheap knockoff. In any case, when I saw the daycare worker haul it to the dumpster, I was thrilled!
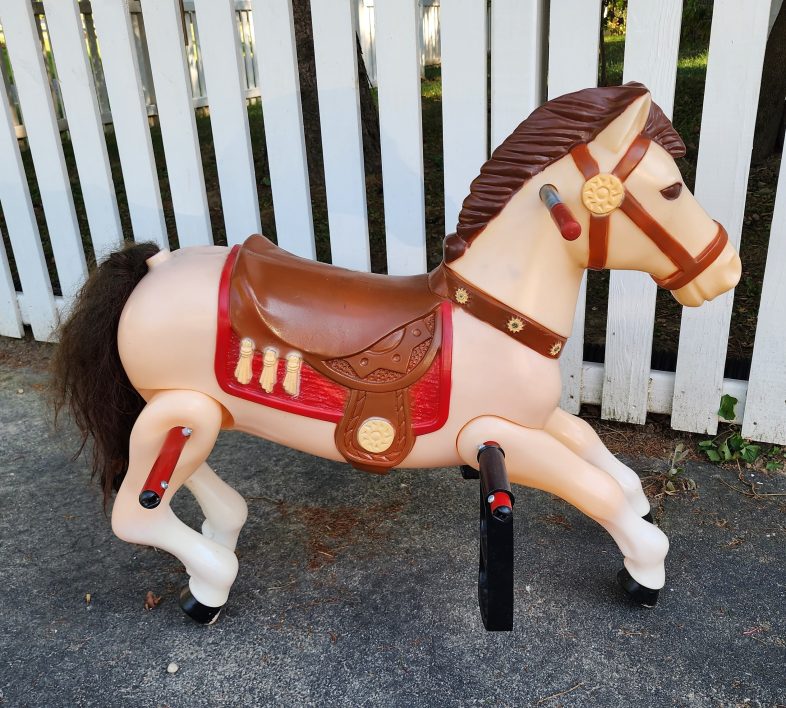
Honestly, the child’s spring rocking horse was nothing special, but I hoped I could turn it into a unique Christmas Carousel Horse.


This is our Thrift Store Day. Be sure to check out all the projects below.
How To Turn A Bouncy Horse Into A Christmas Carousel Decoration
Turning a hobby horse (bouncy horse) into a carousel horse decoration for Christmas can be a fun and creative project. Here’s a step-by-step guide to help you get started:
Dismantle Your Hobby Horse
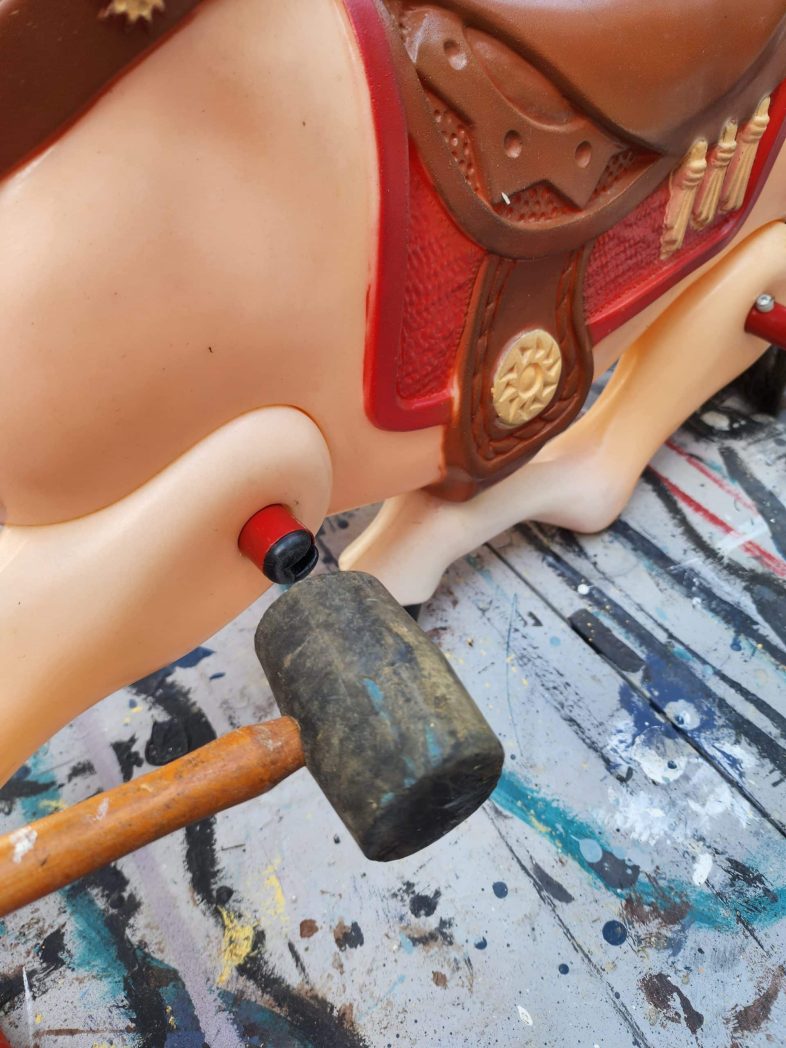
I recommend taking photos before you begin to dismantle your spring horse. A rubber mallet will tap the footrest free. Do this for the other footrest and the handgrip.
What Kind of Stand Do You Want For Your Carousel Horse
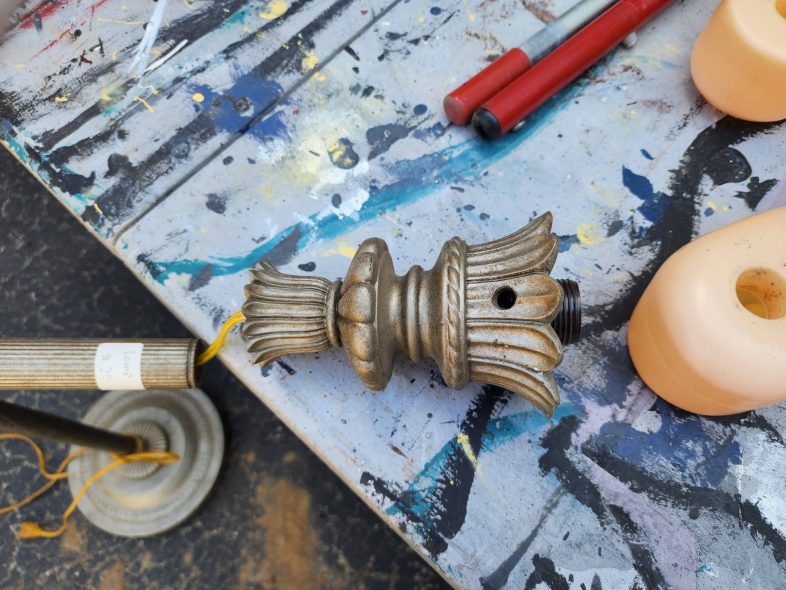
You will need a stand to turn a spring horse into a carousel horse. I chose an old lamp and took it apart.
Reconfigure Lamp Base
Lamps generally have three sections that can be easily unscrewed. In addition, they have a weighted base!
I separated the pieces and found a large washer to fit in the joint between the lower two pieces.
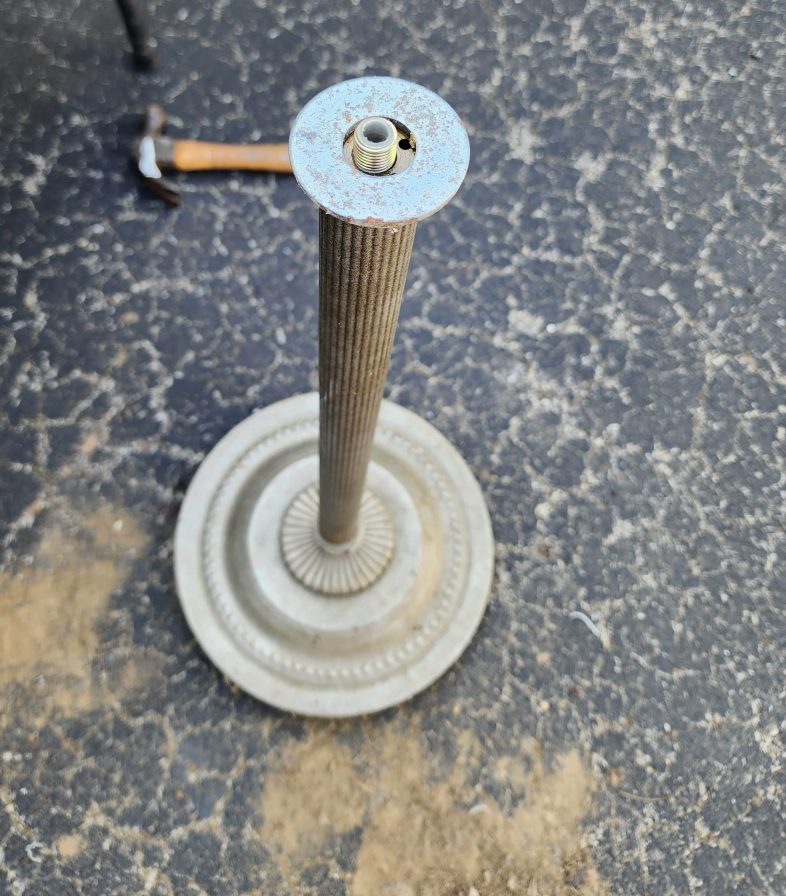
Drill Hole | Test Fit
I learned a lot while making the bouncy horse actually look like it used to be on a Merry-Go-Round.
A few mistakes were made. When you make your project, please get it right the first time!
I used a hole saw to drill through the plastic; I think it’s like blow mold. Mistake #1 was drilling the lower hole directly under the upper hole, which made the horse sit oddly. See the image above.
Another hole was drilled next to the original hole on the horse’s belly. It now has the proper tilt on the lamp base.
However, if you look at an actual carousel horse, you will notice that the rod is NOT in the middle of the saddle. I should have drilled the hole closer to the base of the mane.
Perhaps you wouldn’t even have noticed had I not told you?
Paint Your Carousel Horse
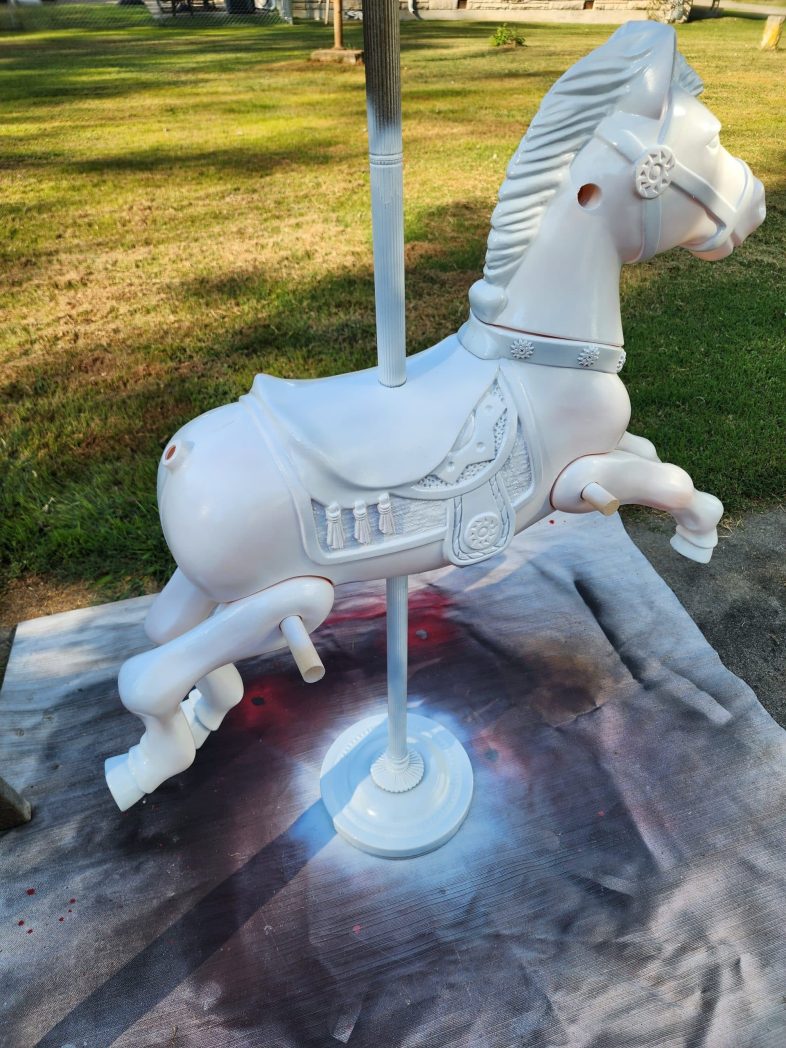
Not shown: I found two dowel rods in my stash to hold the legs on while spray painting.
Did you notice in the “before” picture that the tail was hair? Some spring rocking horses have plastic blow-mold tails, but this one didn’t. To make the project easier to maneuver while painting, I opted to install the third lamp piece.
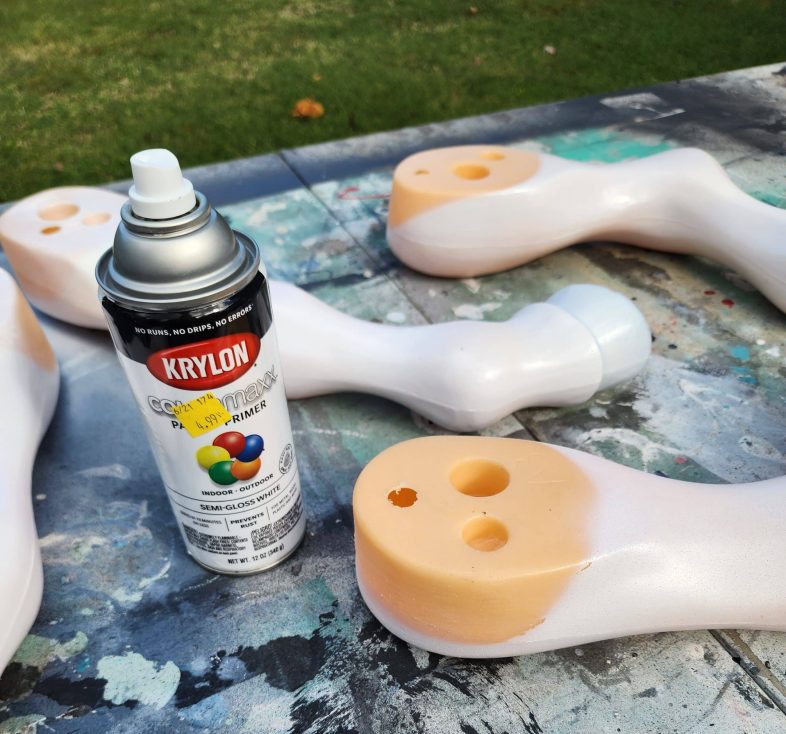
After a closer look, I could see hints of the original color. I dismantled the legs again and spray-painted the joints on the legs and on the horse.
I then cut the dowel rods to length before I reassembled the pieces. Your dowel rod sizes may vary. I was fortunate to have scrap pieces on hand that fit perfectly. However, the hand grip holes were smaller than the footrest holes. You may need to adjust yours accordingly.
The wooden dowel rods were secured with Gorilla Glue.
Note The Detailed Areas
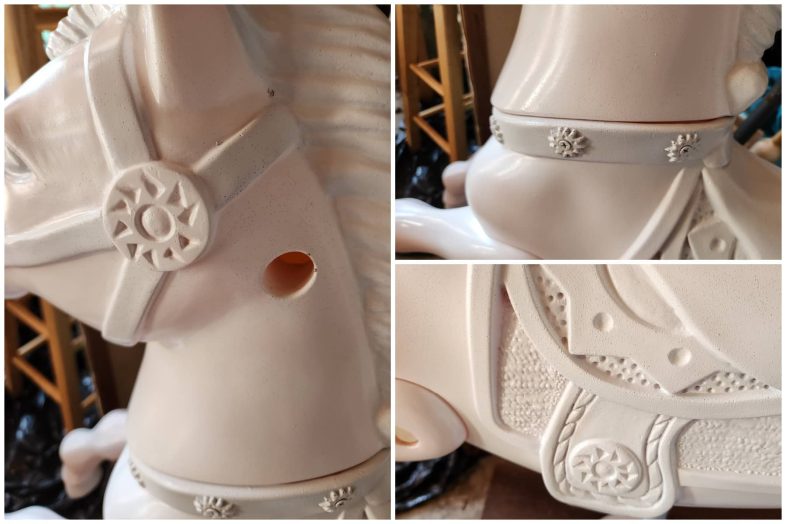
Before shopping for embellishments, I took close-up photos of the detailed areas of the spring hobby horse body. This made finding items at the store to decorate my Christmas Carousel Horse easier.
You may decide to paint the details on your project, but I’m not good at painting tiny details.
Paint Eyes And Hooves
Painting the hooves and the eyes made such a huge difference in the look of my sweet pony!
Turn The Hobby Horse Into a Christmas Carousel Horse
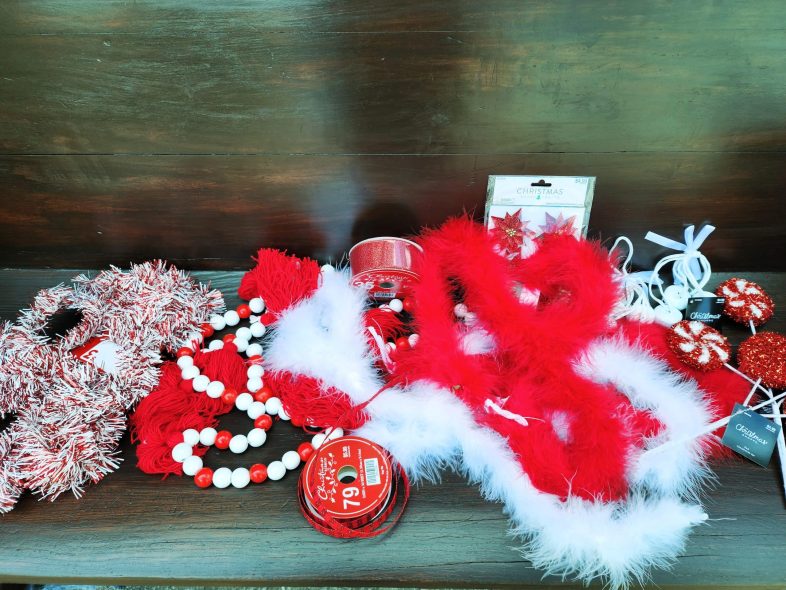
These are some of the items I purchased for the Christmas Carousel Horse. After I painted his hooves and eyes, I decided to call him Jolly.
From this point on, to keep it simple, I’ll mostly share where I put what and how. At one point, things went seriously wrong. I promise you will spot it right away.
Embellish Bouncy Horse
Initially, I tried to use double-stick tape for the bridle (red glitter ribbon). When I ran out, I switched to hot glue, and that worked better. The key to a nice, clean look is to remember that “less is more.”
The poinsettia flowers were a peel-and-stick design. Again, I decided to use hot glue instead.
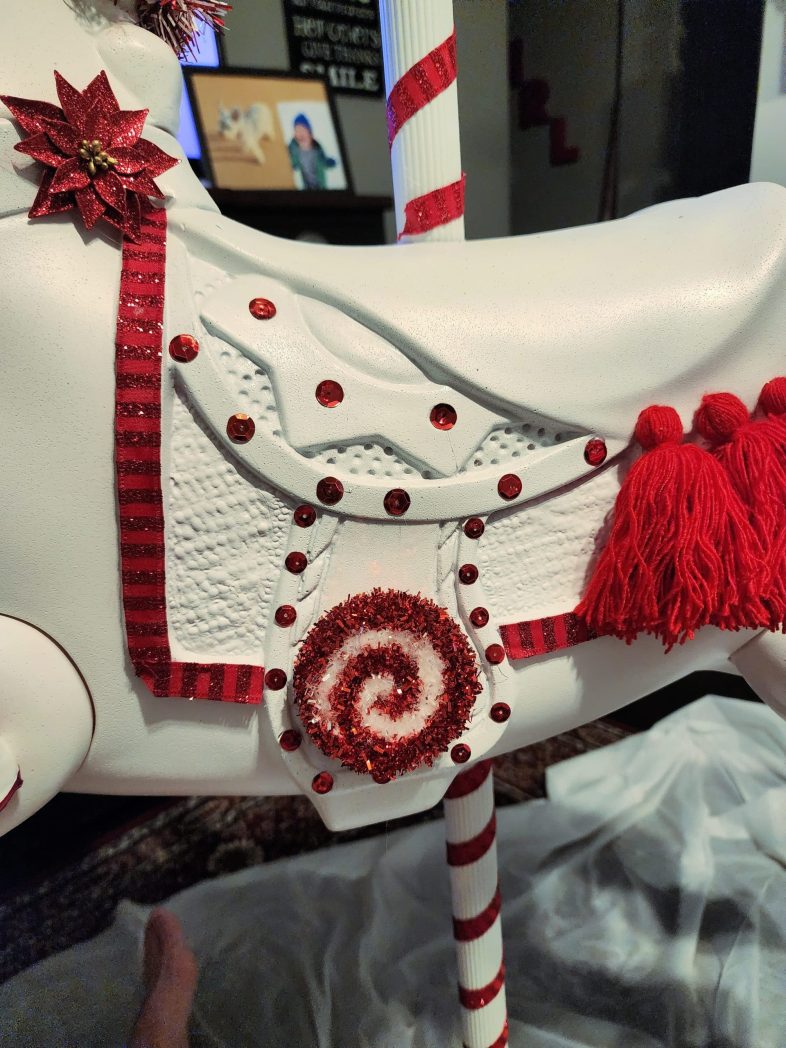
I found a fabulous beaded garland. Do you remember seeing that in the photo earlier? I planned to use the garland for the reins and the tassels for the fake tassels on the hobby horse saddle.
The large glittered pinwheel pieces are part of a floral pick I dismantled. It had three pieces, two of which are visible in the photo above.
Adding A Mane To The Carousel Horse

The man was made from two boas. One white boa and one red boa were intertwined to mimic a candy cane. The furry-looking mane was hot-glued on. The tail (at this point) was just stuffed in the empty hole on the bouncy horse’s rear.
Did you spot it? This is where I was disappointed with the overall look of the Christmas Carousel Horse.
Related Content: Repurposed Christmas Projects
Wood Bead Reins
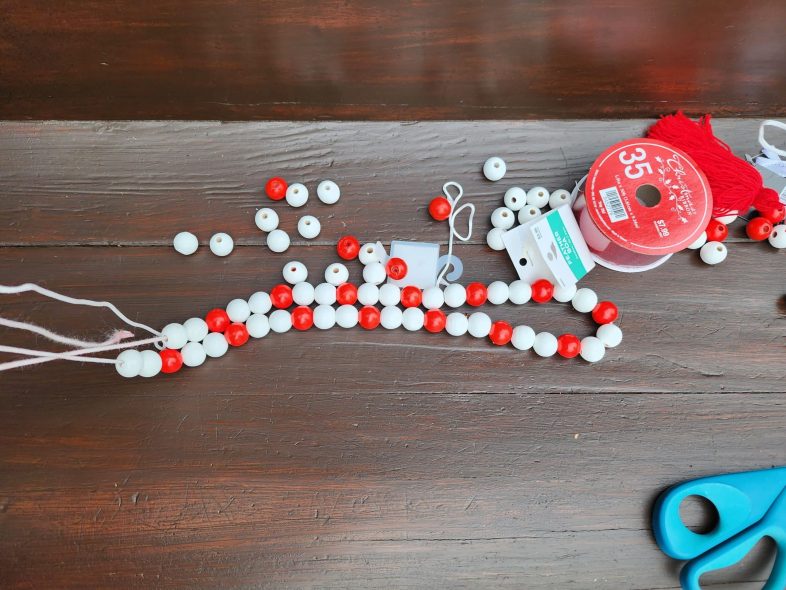
I moved on to the reins. To get to the tassels, I had to remove the beads, so I had to thread the wooden beads back onto the twine. I chose to keep the same pattern of two white beads and one red bead.
Do you remember when I mentioned changing the ribbon from double-stick tape to hot glue? I had to remove the bridle to affix the reins. In this image, you can see I have the twine knotted. In the end, the knot was removed, and the ends were hot-glued in place.
Something Isn’t Quite Right
The bridle was reattached, and tassels were added at the bit. Adding the glittered red ribbon must have been a challenge for me; as you can see, the bottom goes one way, and the top, the other.
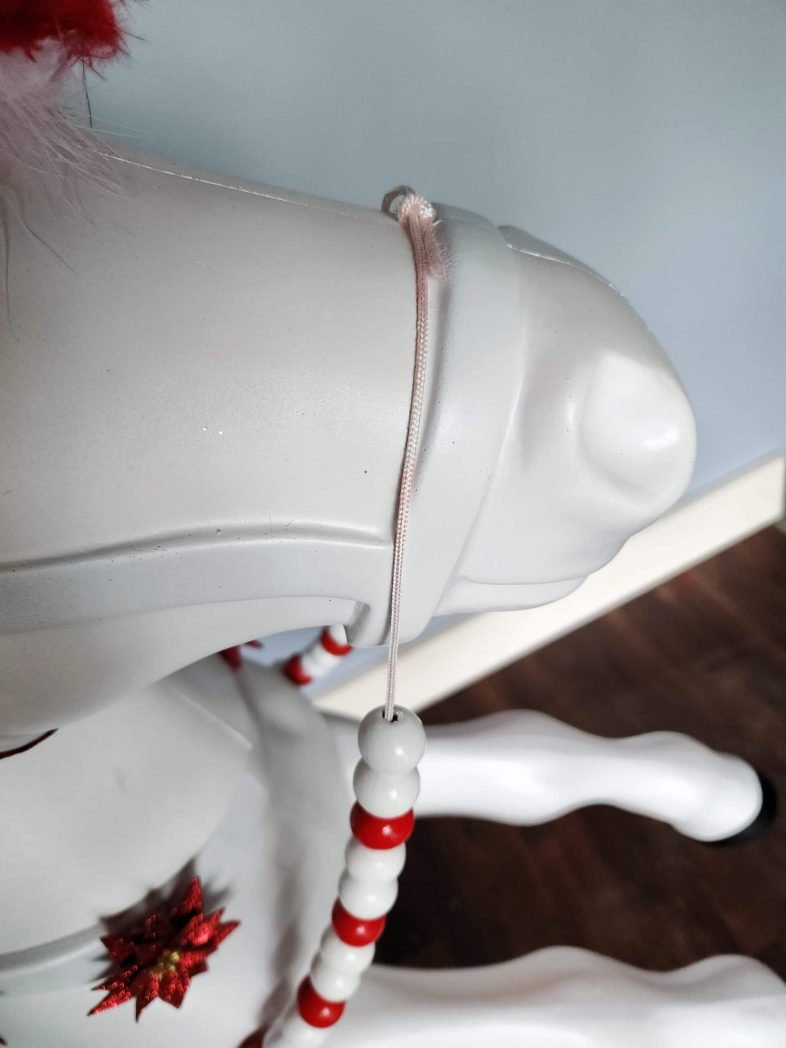
The white jingle bells are a placeholder until I find the right piece to complete the carousel rod.
This is when I decided that the boa mane and tail were not working for me, so I took a break.
Replace Boa Mane and Tail
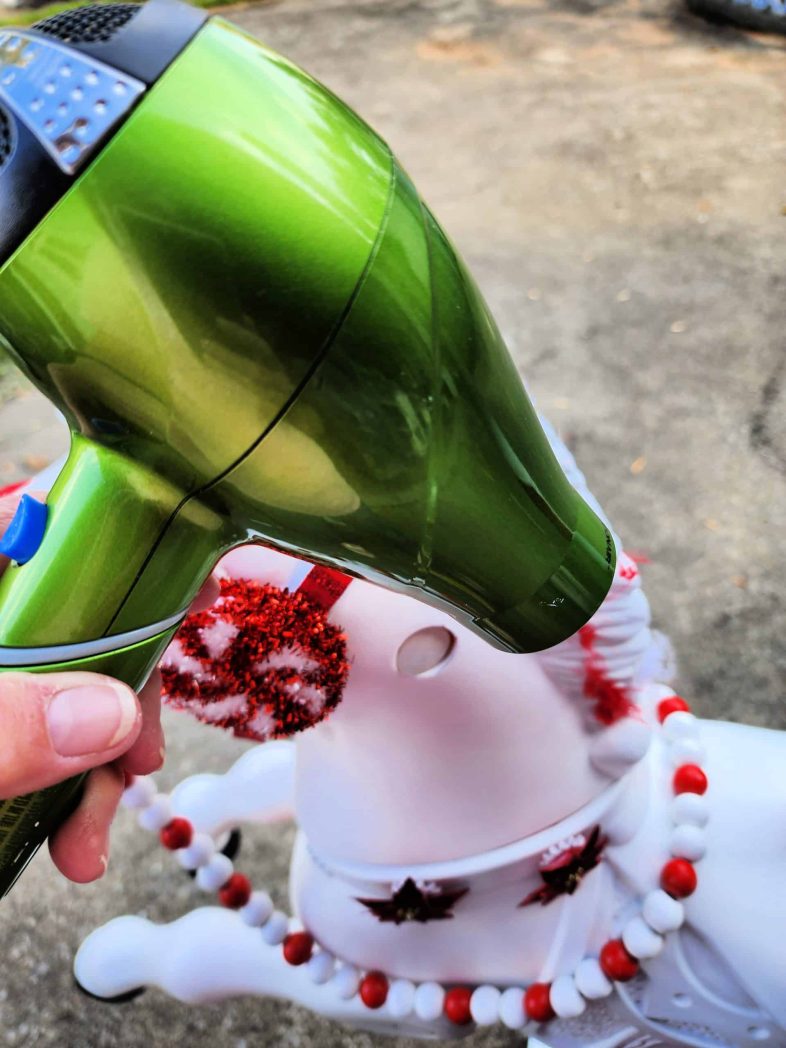
A lot of the boa came off, but I needed a hair dryer to remove the remnants of feathers and hot glue.
Let’s Try This Again
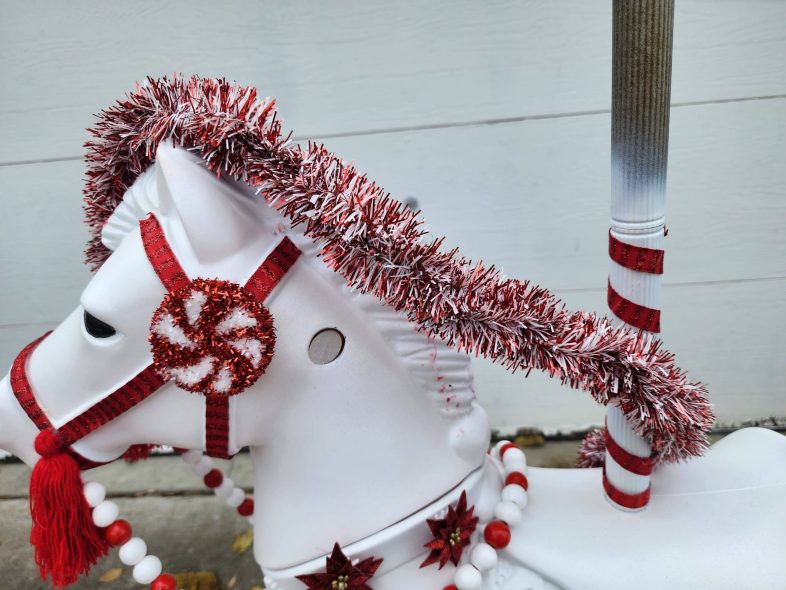
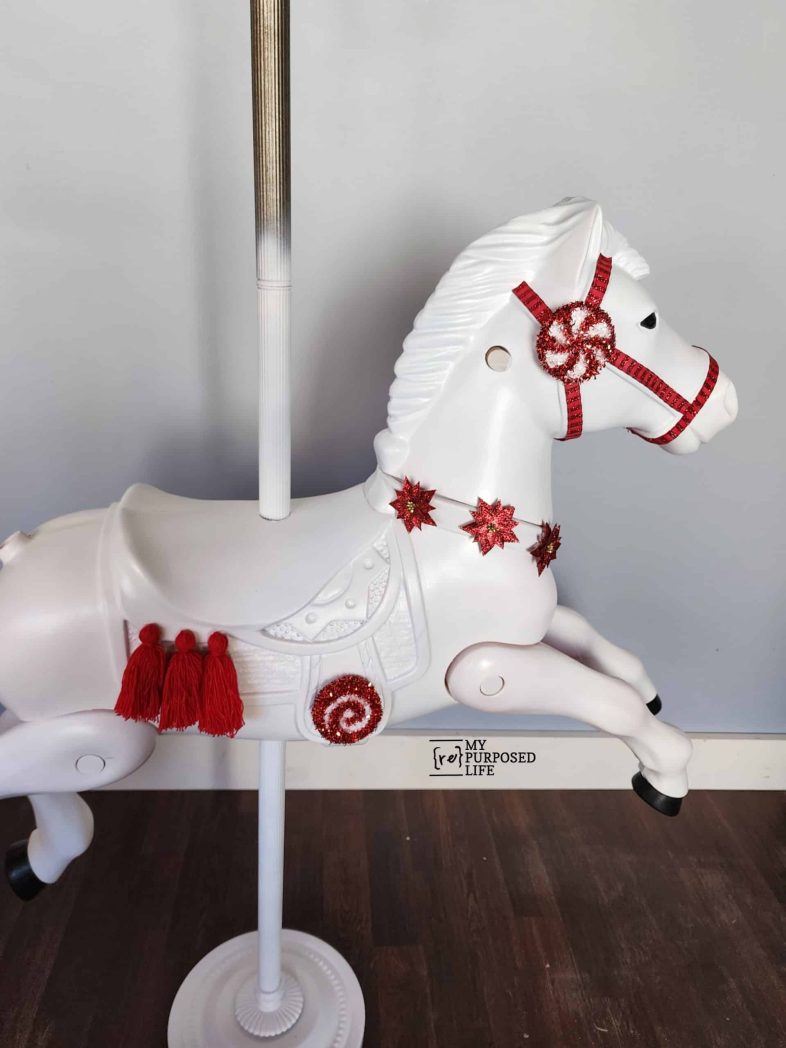
If you’re observant, you may recognize this red-and-white garland from the materials photo. The garland was very long, so I folded it and then twisted it. Then, it was secured with a hot glue gun. I haven’t mentioned it, but I use a Ryobi battery-operated glue gun. It’s convenient for indoor or outdoor use when you don’t have access to electricity.
More Bling For Jolly The Christmas Carousel Horse
The weather turned cold. I had to bring Jolly inside. The images aren’t the best quality.
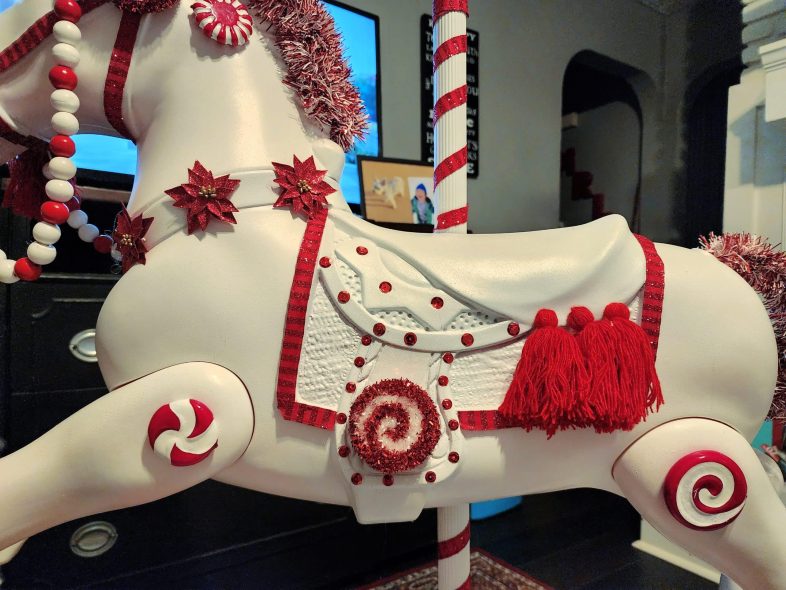
When I went back to Hobby Lobby to get more items to cover the hand grip and the hole for the footrest, I found a bag of assorted red sequins! I felt there was too much white left on the saddle and blanket, so I outlined the blanket with more red glittered ribbon. The sequins were perfect for the small divots on the saddle.
Another floral pick was used on the bouncy horse’s joints to cover up the wooden dowel rods.
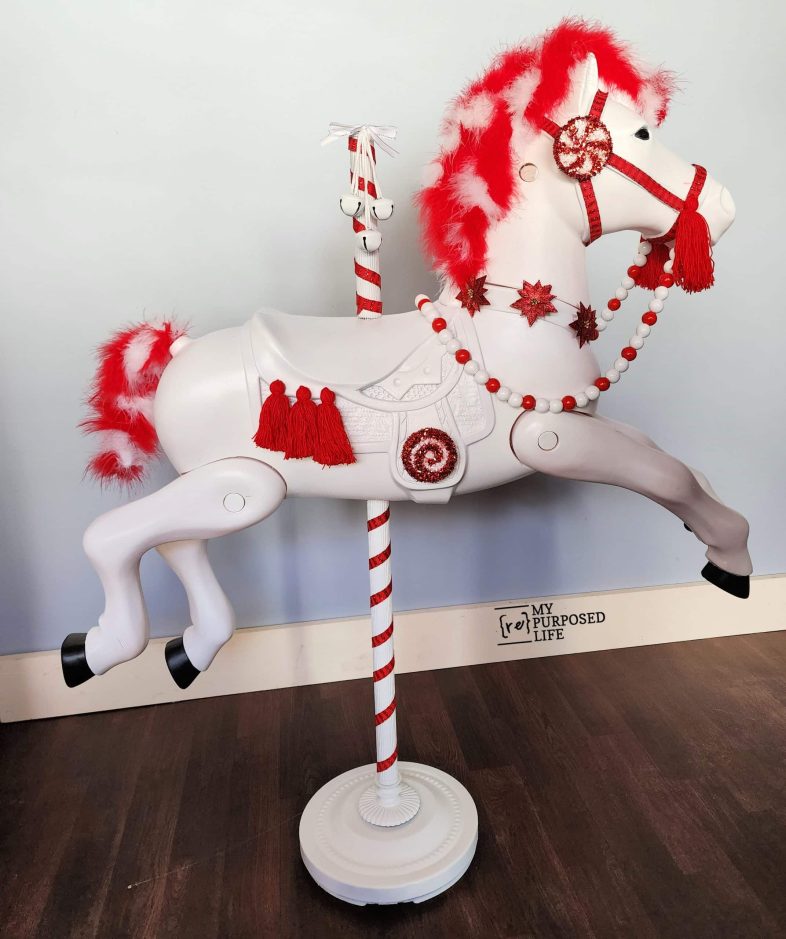
I think Jolly is finally done!
Jolly The Christmas Carousel Horse
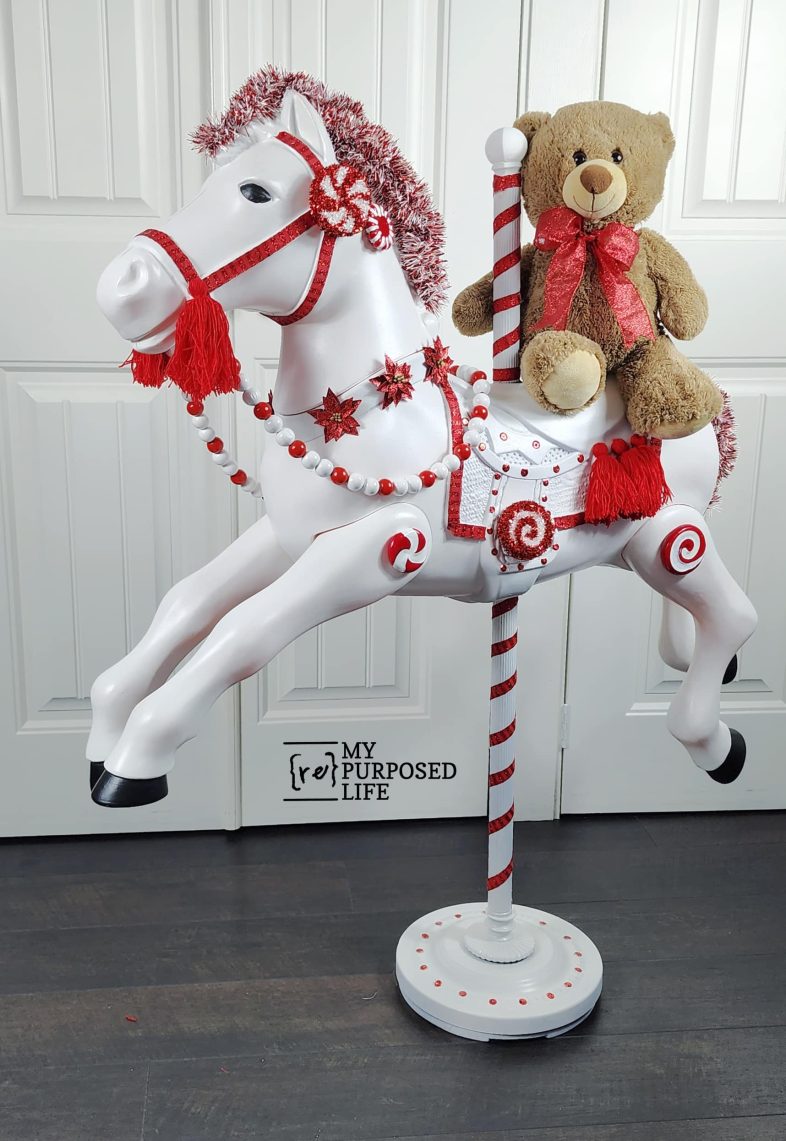
Does he make you smile, too? Oh, I forgot to mention that I put red sequins on the base of the Christmas Carousel Horse stand.
Whether your bouncy horse came from a thrift store, a yard sale, or the side of the road, a little paint and a few trims can turn it into the star of your holiday display. I hope Jolly inspires you to look twice at the toys and castoffs that cross your path this season and imagine what they could become. If you make over your own Christmas carousel horse, I would love to hear about it and see your colors. Be sure to pin this idea so you can find it again when the perfect pony trots into your life.
I would love for you to pin Jolly before you leave to check out all the fabulous projects below:
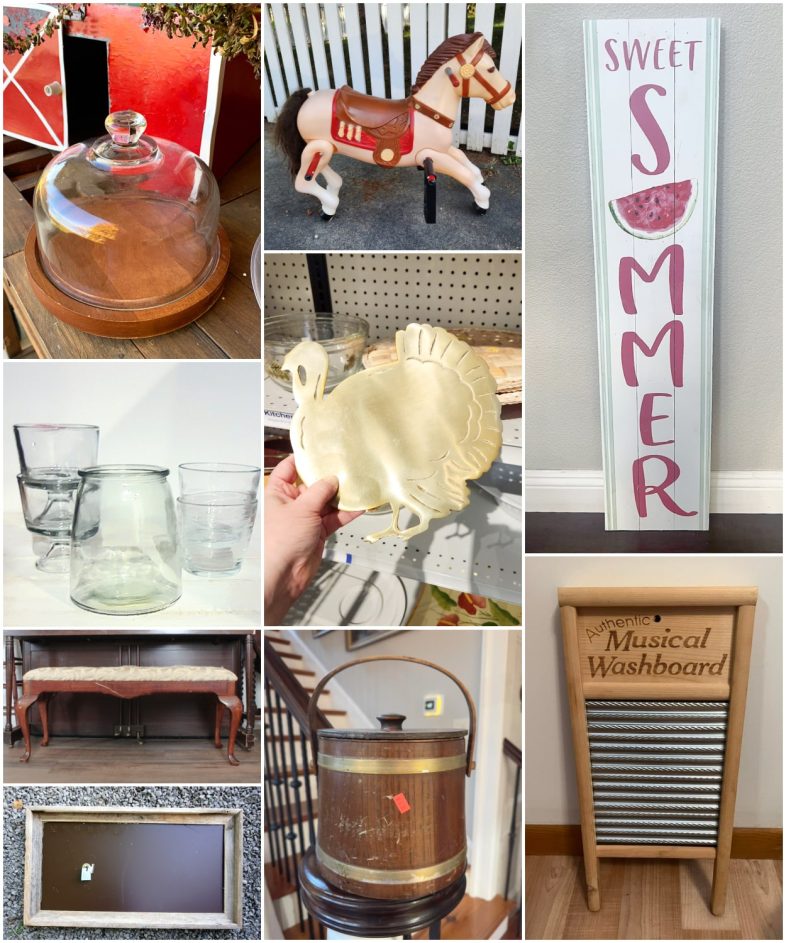
- Cheese Dome Repurposed For Christmas
- Christmas Carousel Horse You are here, thank you!
- How to Make Snowy Votives
- Thanksgiving Wreath with a Brass Trivet
- DIY Christmas Joy Sign
- DIY Upcycled Piano Bench
- Magnetic Board Paint Makeover
- Ice Bucket Christmas Tree Stand
- Musical Washboard Christmas Decoration
Wow! This is spectacular! I love it. So festive and cheery, I’d love to have him on my porch!
awww thanks for your enthusiastic comment Florence!
gail
Wow, Gail! Totally taking me back to my childhood when I had one of these. This is beyond creative and would be so fun on our front porch.
awwww sweet memories, thank you so much Christy. This has been on my to-do list for many years. Just had to wait until I found a FREE bouncy horse.
gail
Love and love some more. I wish I could find one like you did. Too sweet.
Awww, thank you Katherine! I appreciate your kindness. I was lucky to be in the right place at the right time. I saw the worker take it to the dumpster and I was right on it!
gail