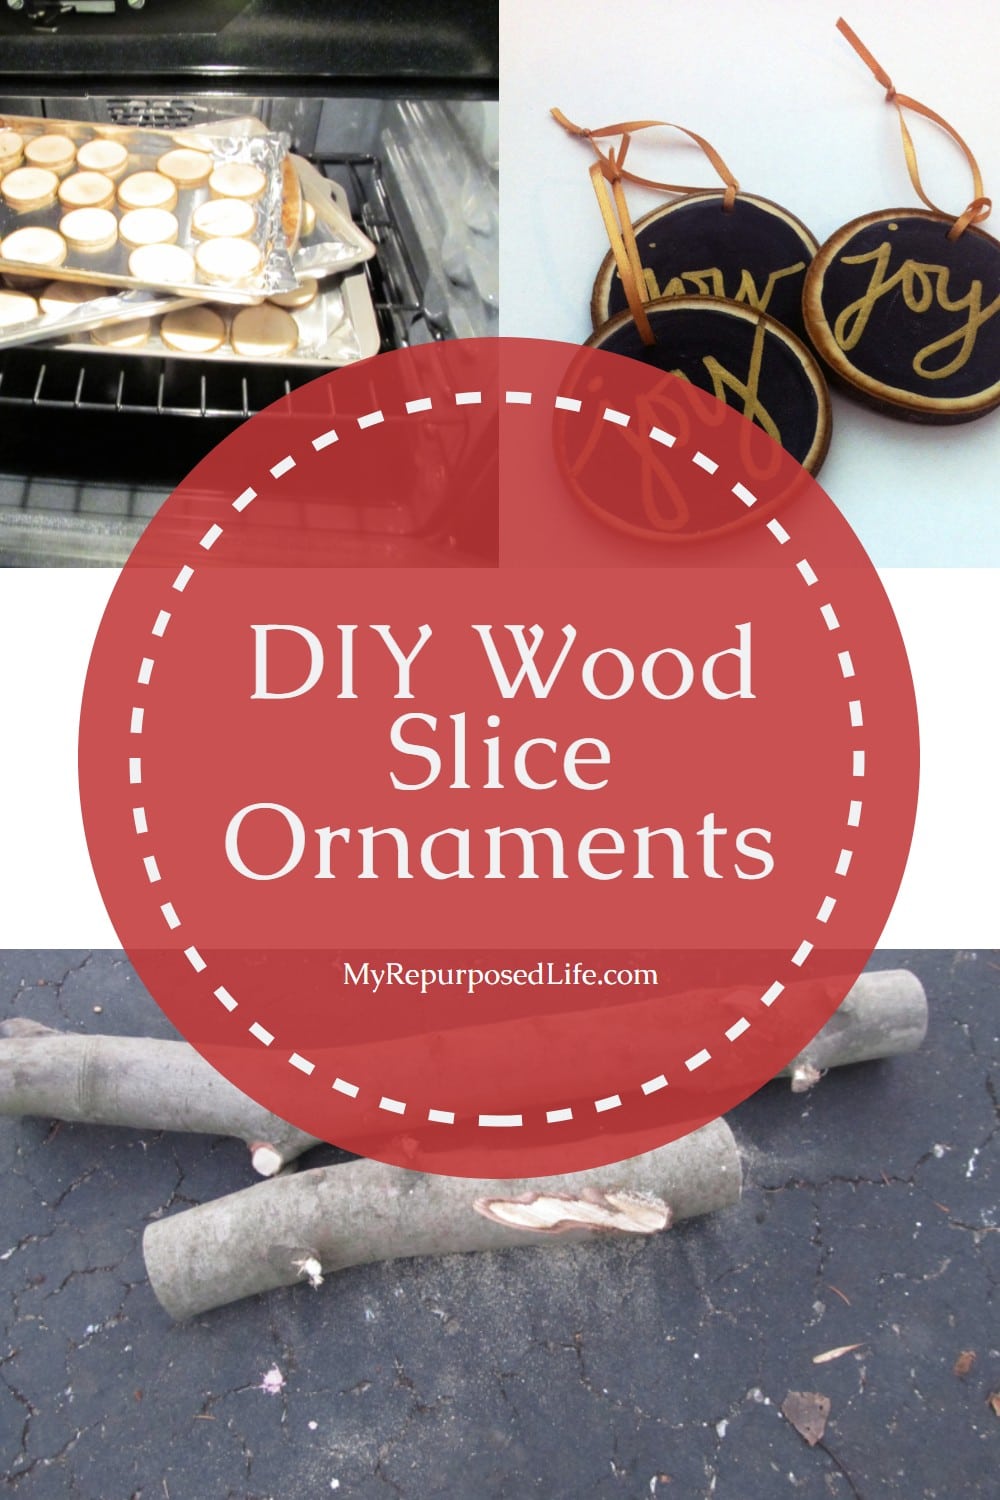
Wood Slice Ornaments from Tree Branches
As an Amazon Associate, I earn from qualifying purchases.


Turning a fallen or trimmed tree into Christmas ornaments is a simple way to keep a favorite tree around a little longer. These wood slice ornaments started with branches from the big maple that shaded my yard for decades, but you can make the same project with any branches or even store-bought slices. In this tutorial, I will show you how to cut, dry, and decorate those little rounds safely so they become hand-painted keepsakes for your tree, gift tags, or memory ornaments for family and friends.
There are several ways to go about this. Did you know you don’t need a chainsaw to do this project?
When is it Time to Cut Down a Tree?
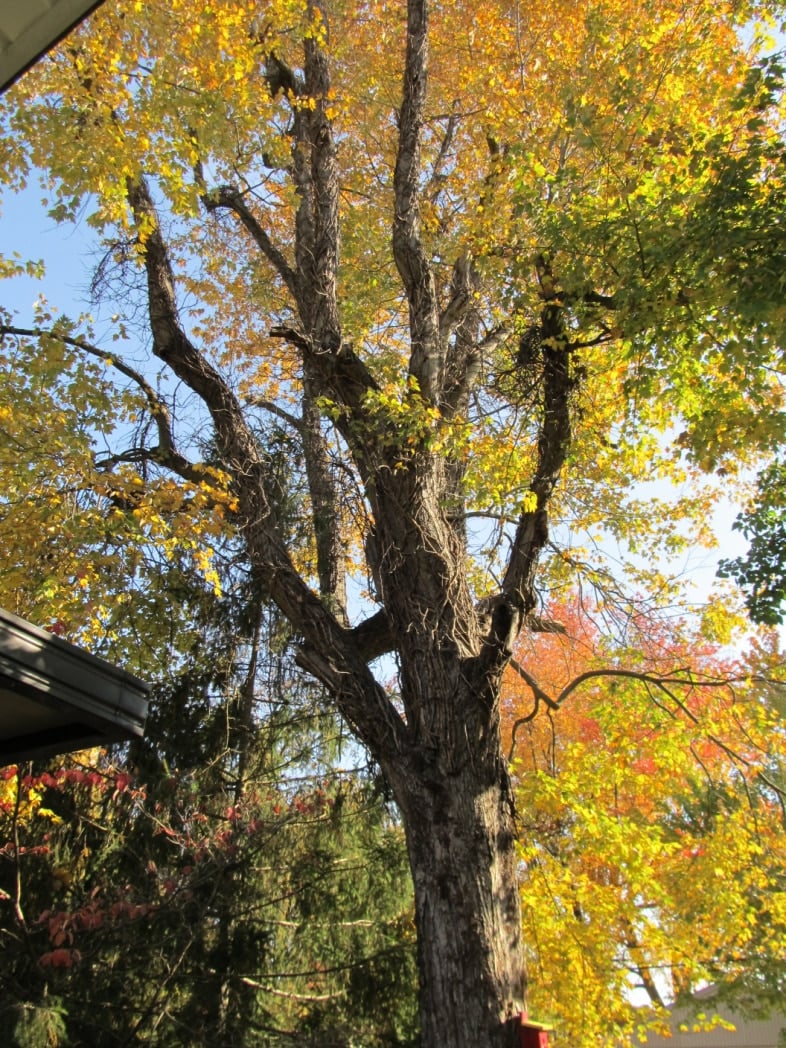
In early November, I lost an old friend. This water maple tree, which is older than me, has given me shade for the last 37 years. It had seen better days. Every time a storm rolled through, I expected it to fall on the house. Part of it did fall on the patio cover, causing me to get it replaced. Within a few weeks of having the new patio cover, another piece fell on it without causing damage, but I knew it was time to say goodbye.
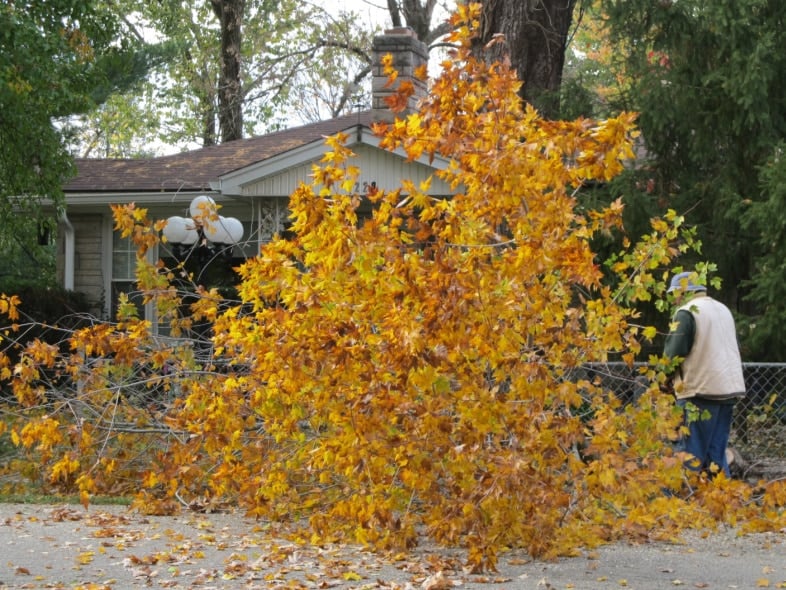
I watched from across the street as the workmen took it down. Each limb they brought down looked big enough to be its own tree.
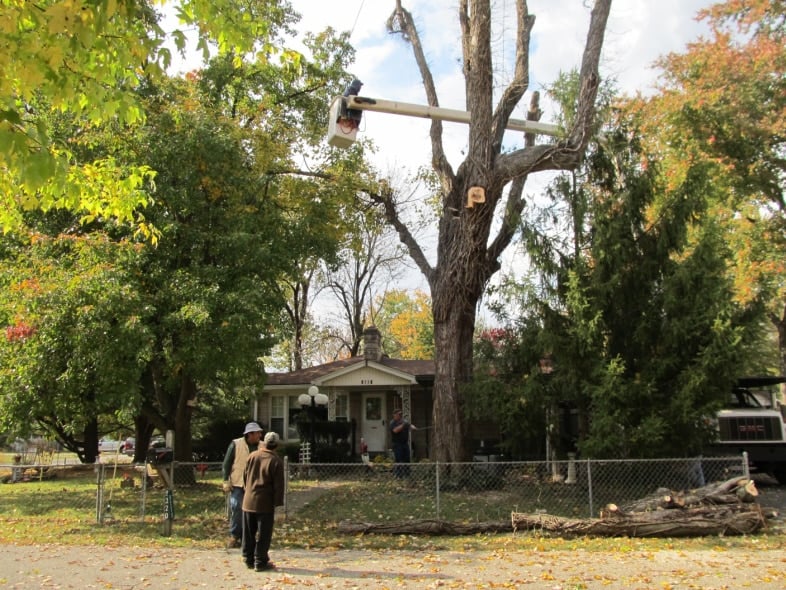
The workers did a good job. It took 2 days to get it down. The second day was much colder, and I watched from the house.
Goodbye, old friend! I’m going to miss you.
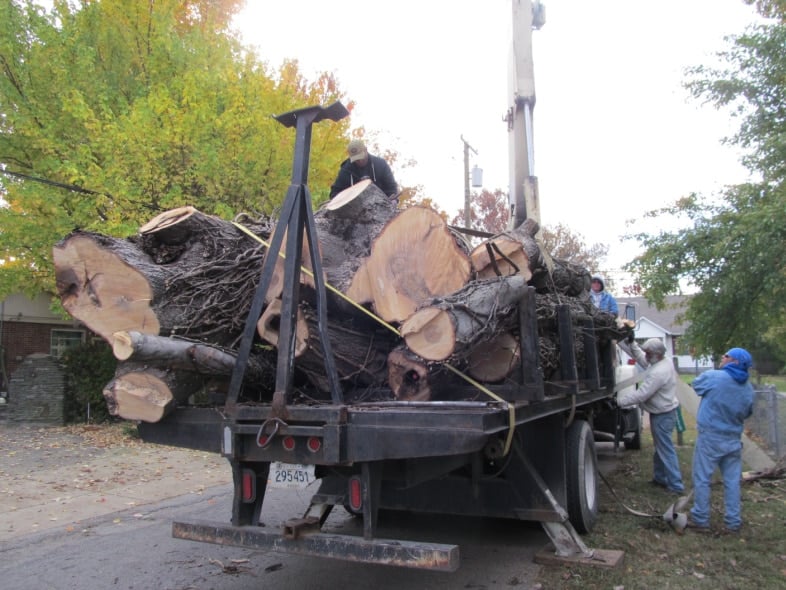
Large Tree Yields Large Logs
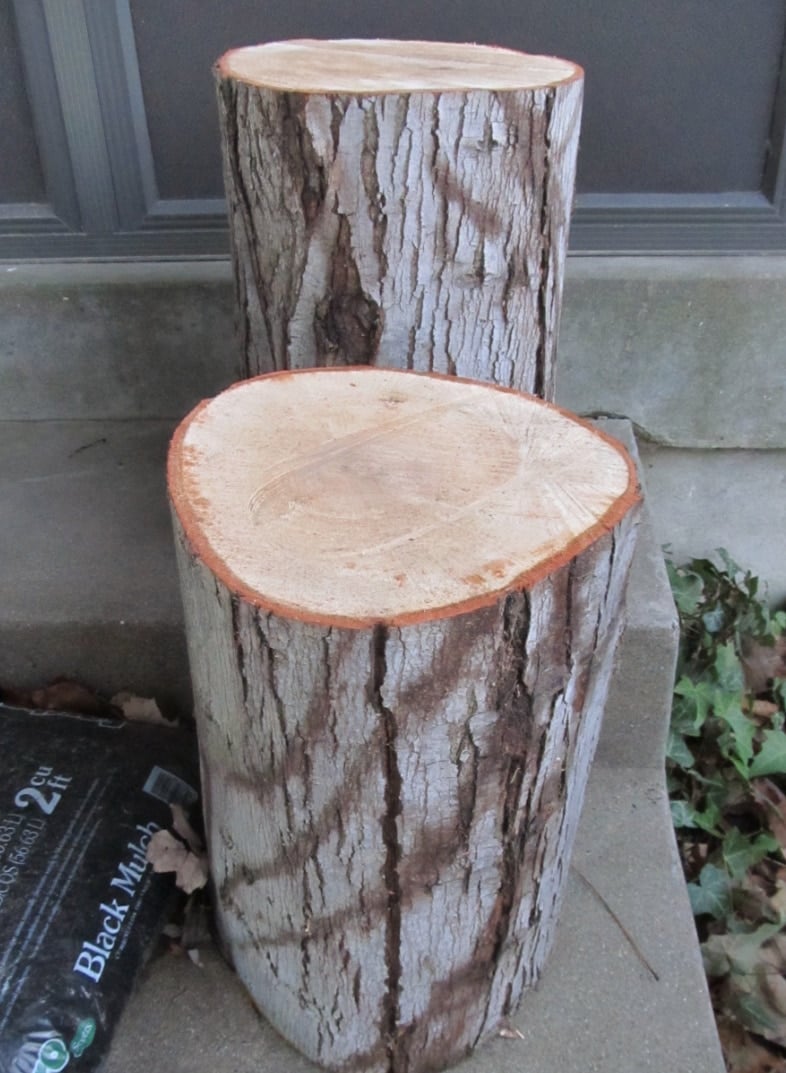
How much of the wood did I keep? Not as much as I wish I had. The tree guys used their chainsaws to cut me these two larger pieces for future projects.
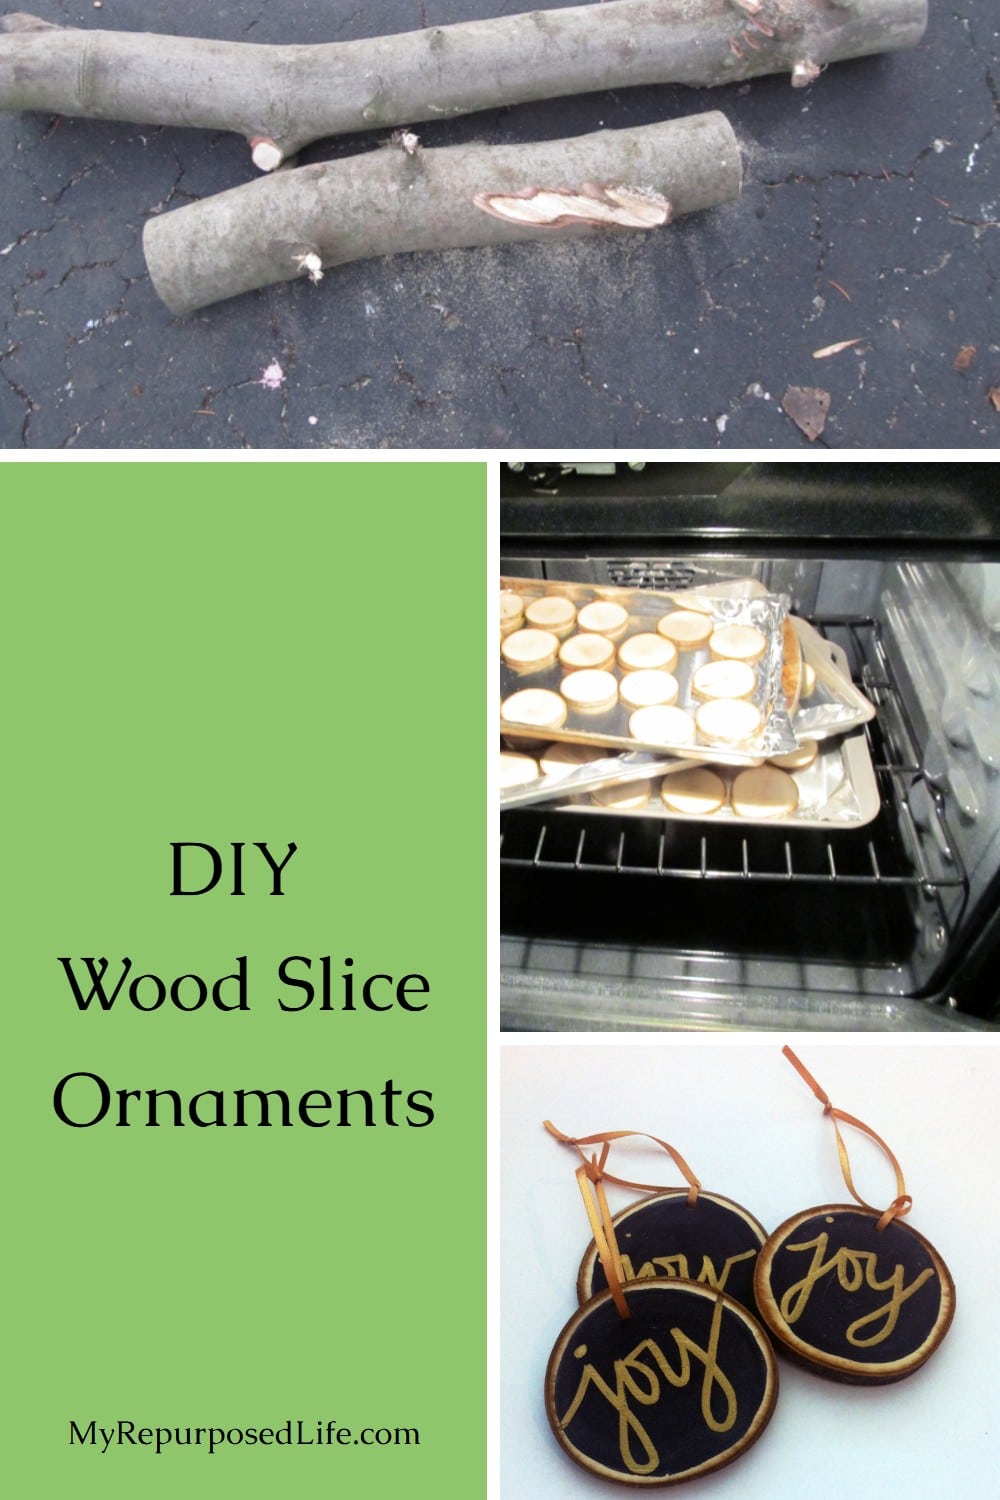
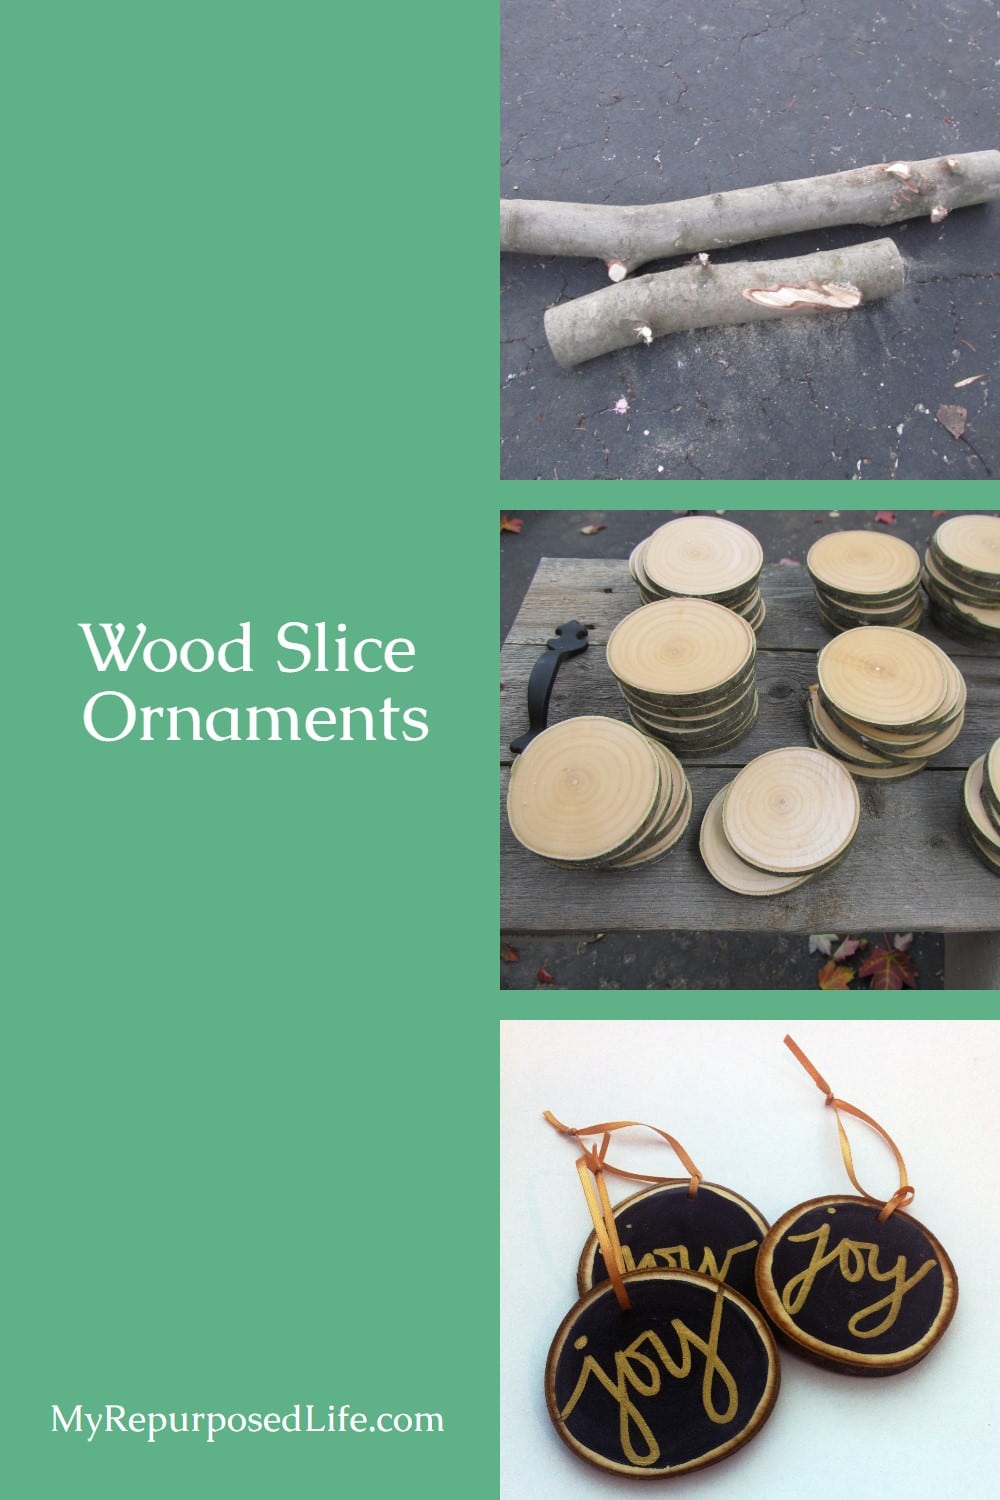
Smaller Branches to use for Wood Slice Ornaments
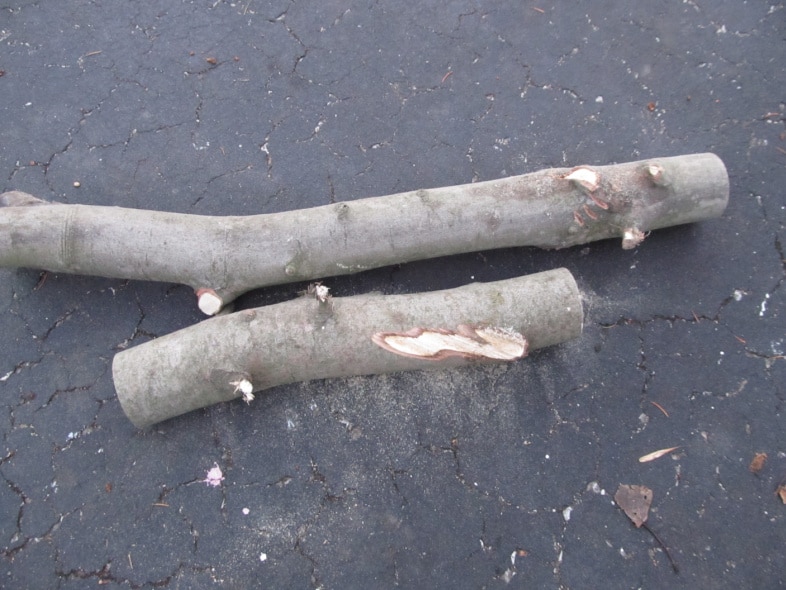
These are a couple of the smaller limbs I used for these ornaments. Do you need a chainsaw to do these projects? No, you do not! Check out my How To Make a Tea Light Log Candle Holder post.
Carefully Cut the Branch on the Miter Saw
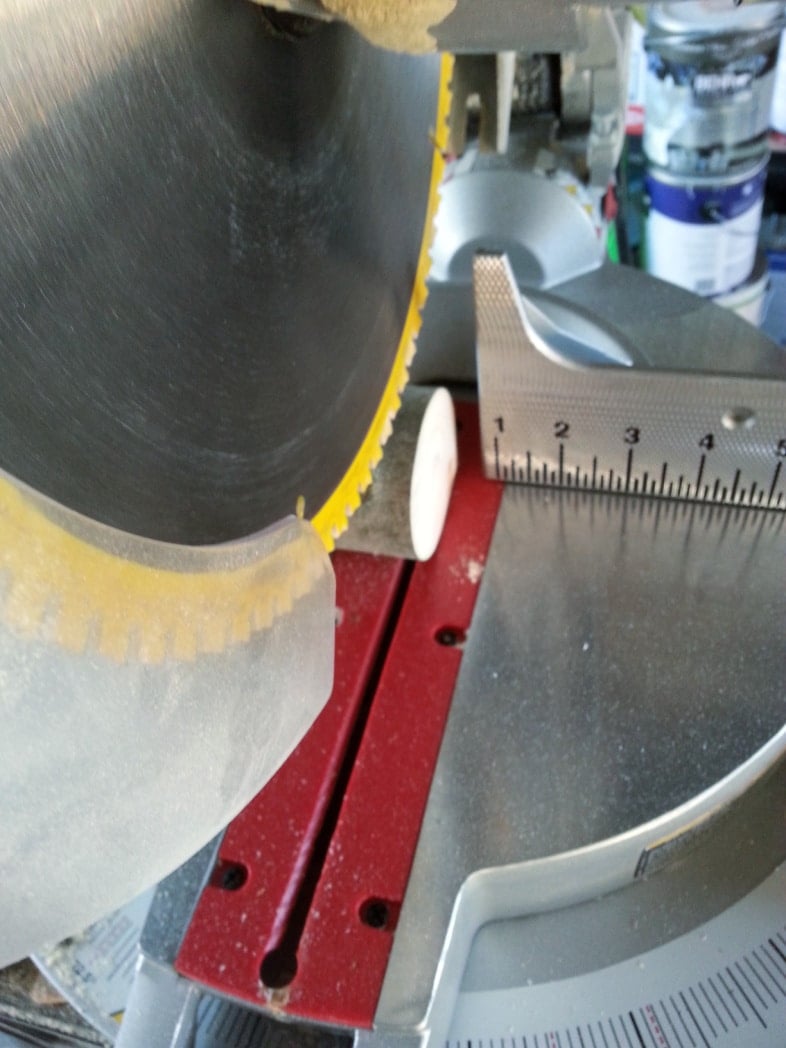
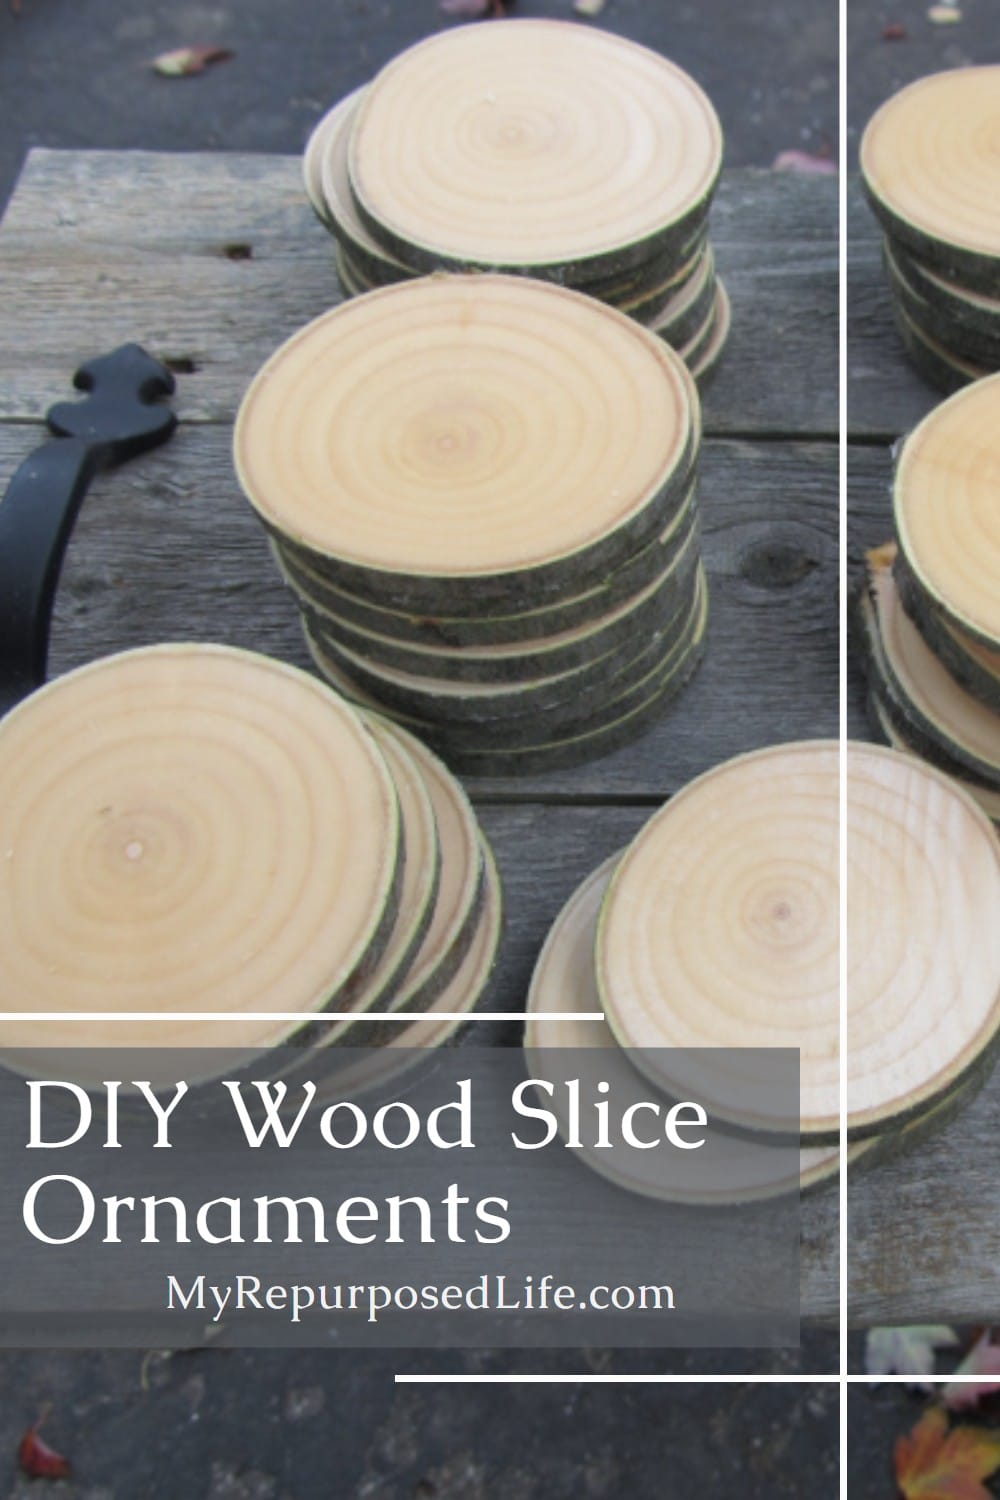
I carefully cut the wood slices from the small branches on my compound miter saw.
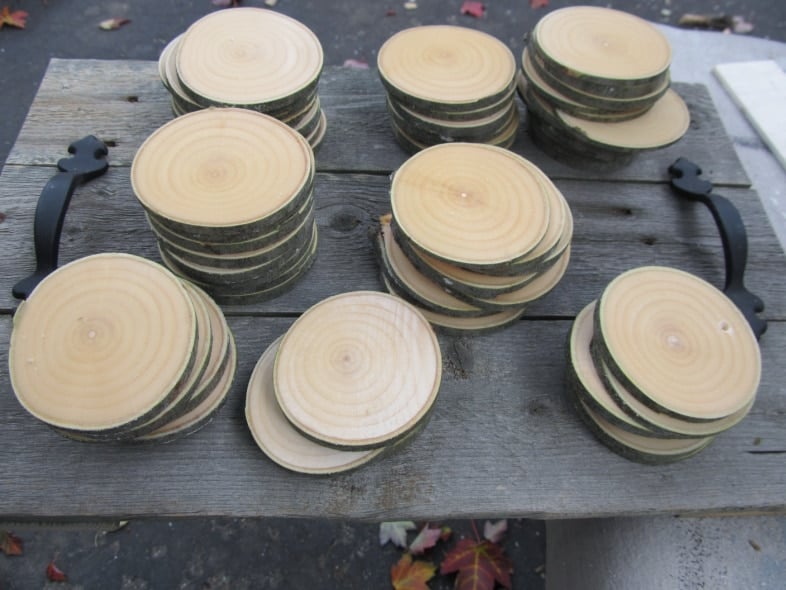
The wood was green…which I think added to the smoothness of the slices. I didn’t have to sand these wood slices at all.
Dry Wood Slices in the Oven
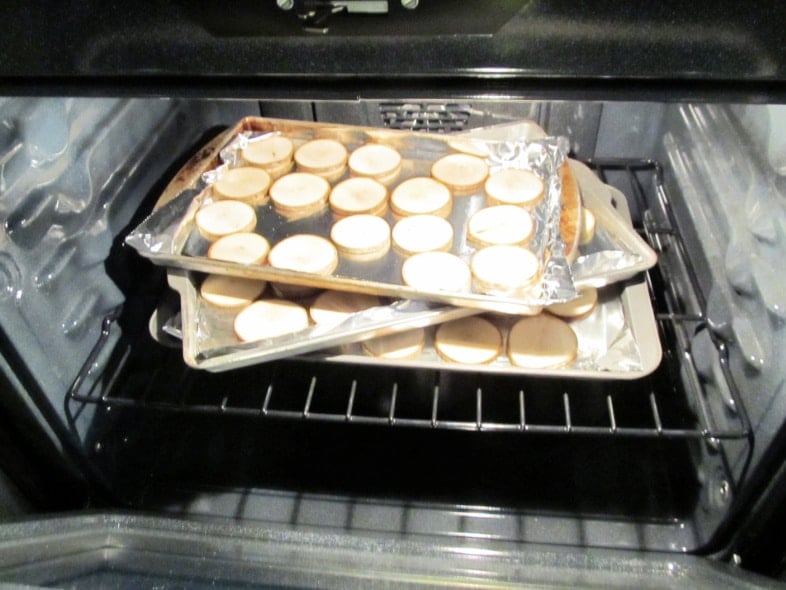
Because the wood wasn’t aged/cured, I decided to dry the pieces in my oven. I put them in a warm oven (200°) for one hour. The key was to get them off the cookie sheets as soon as they were slightly cool, so they wouldn’t “sweat” and become damp again.
I put the discs in a gift bag and took them to Jamie when we did the show Making Merry in Berry Hill.

Jamie painted the ornaments with DIY chalk paint and then wrote on them with a gold paint pen. Aren’t they beautiful? This is a special ornament because it was made from a tree Jamie had played in as a child. Jamie gifted them to our family at our annual Christmas party.

I made the JOY chalkboard wood slice ornament. My handwriting isn’t very neat, so I’ll show you below how to fix that!
Did you know you can buy your Wood Slices on Amazon?
Yes, you can buy these, and I know many people have made them, but knowing these wood slice ornaments came from MY tree makes them all the more special.
UPDATED TO ADD:
Chalk Couture Transfer on Wood Slice Ornaments
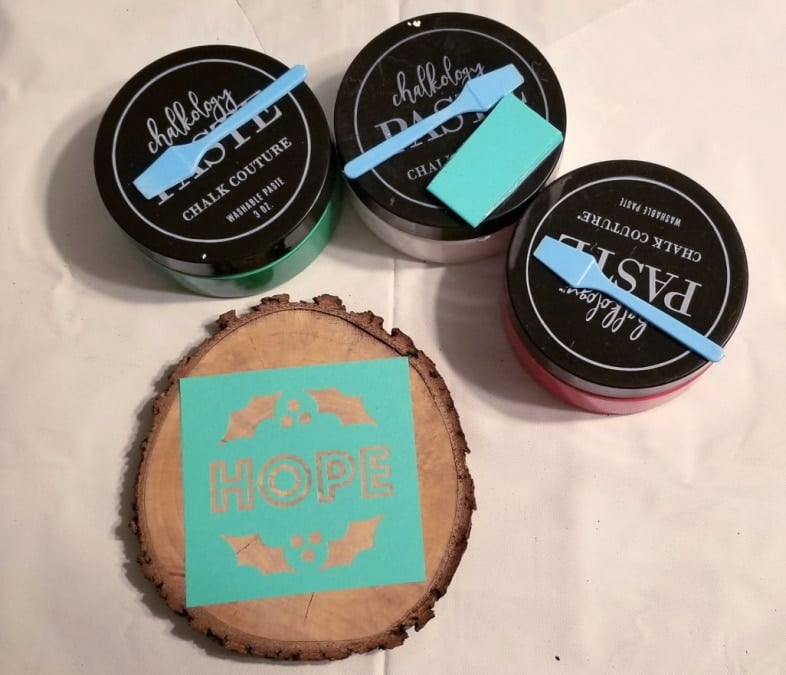
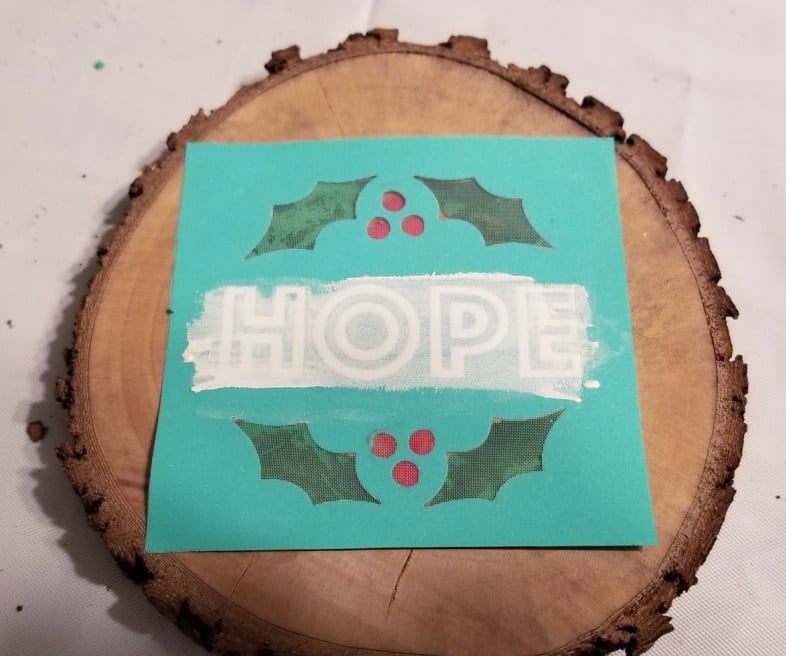
Using my miter saw, I cut another wood slice and embellished it with a Chalk Couture Transfer from The Junky Chalker Shop. I chose three colors of chalk paste.
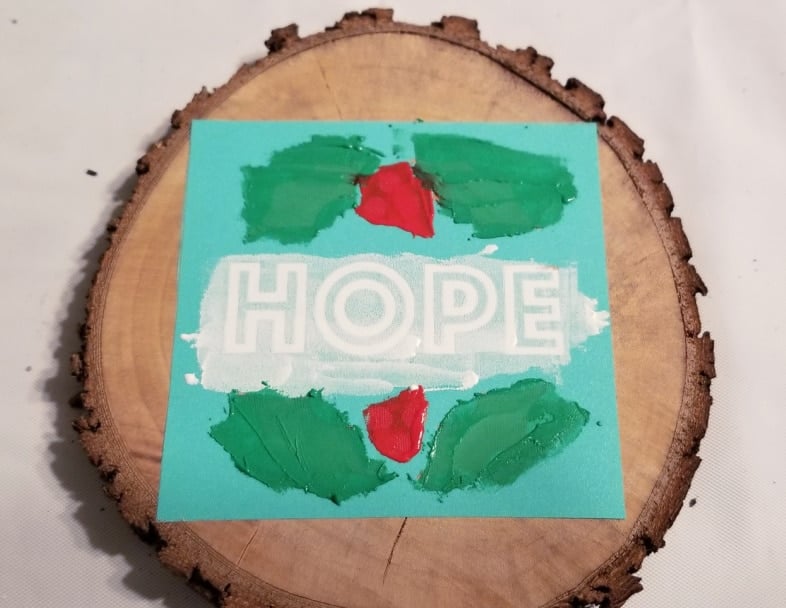
Applying the chalk paste is easy, but challenging when you use three colors in such a small space. I did HOPE first, and it dried a little too fast.
If the chalk paste dries before you remove the transfer, this happens.
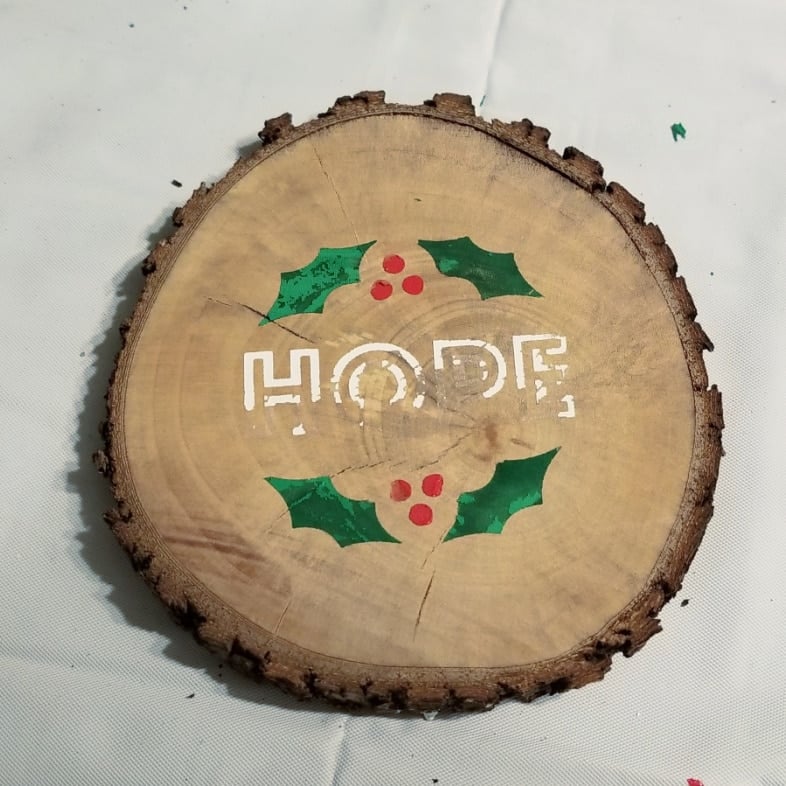
That’s not a problem! I washed the transfer and reapplied it so I could fill in the missing parts of the word “hope.”
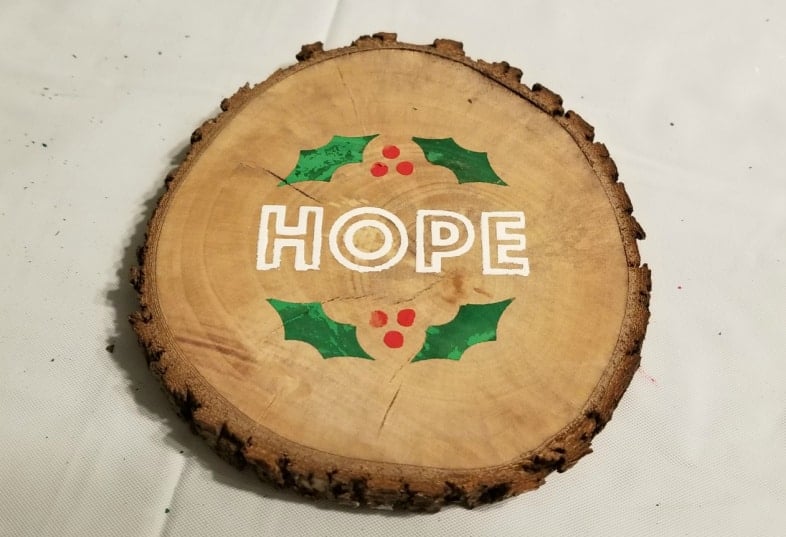
See? So much better!
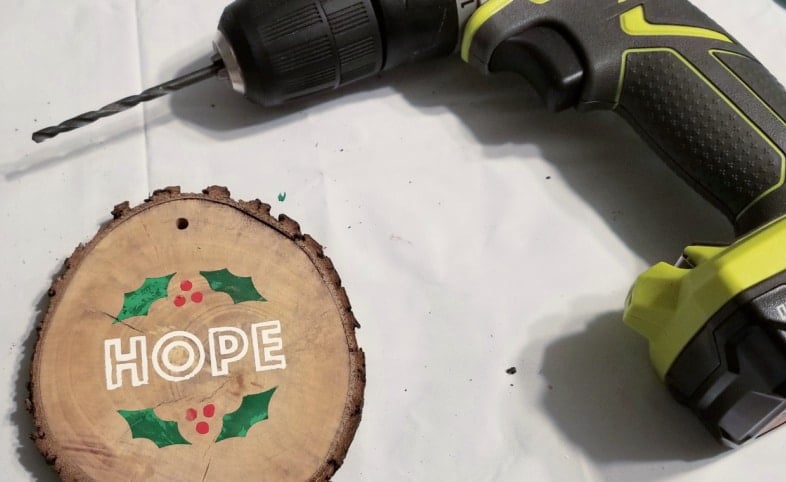
Next, I drilled a small hole to add baker’s twine to hang my new wood slice ornament!
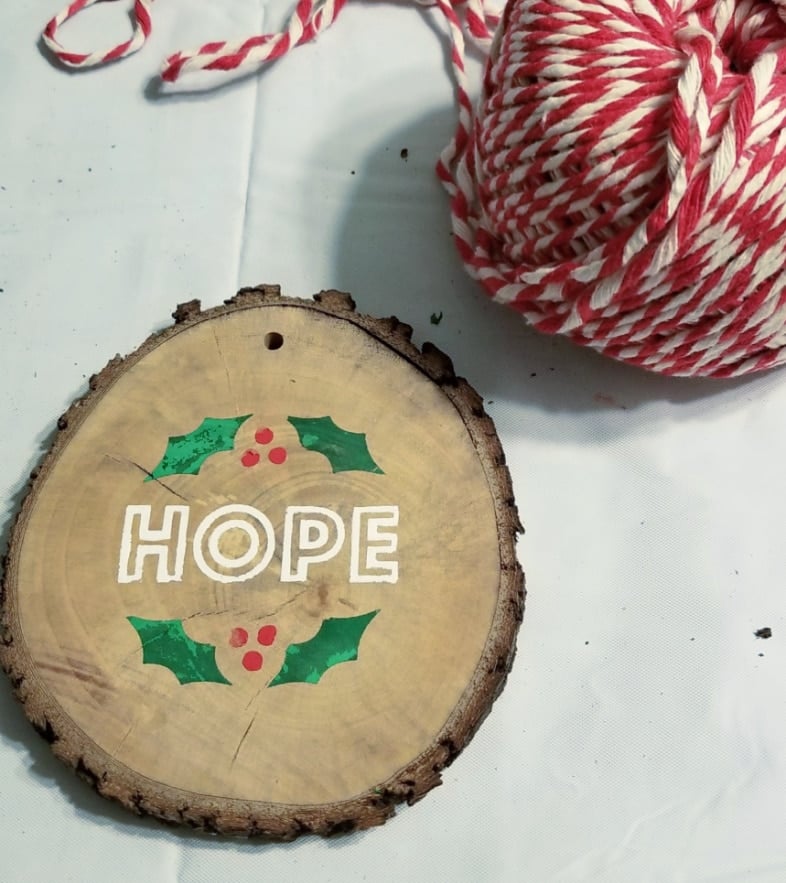
The red-and-white baker’s twine will be perfect for this handmade ornament.
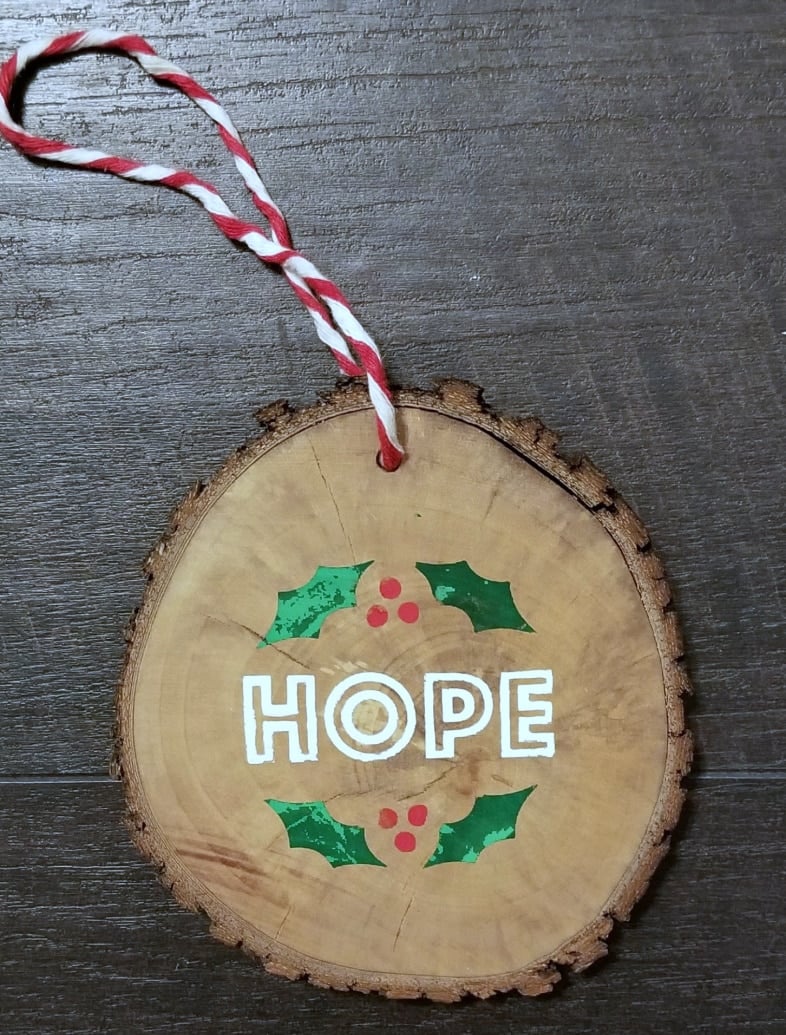
This wood slice ornament is a little larger, perfect for an oversized Christmas tree! Speaking of Christmas trees, have you seen my Collapsible Christmas Tree Stand Box?
So, there you have three easy ways to decorate wood slice ornaments. Which will you do?
gail
Related Content: Easy DIY Happy Meal Ornaments for the Kiddos.
Gail, I love your site and all your creative ideas. Even though the loss of your tree was a few years ago, you still have the good memories in your ornaments. You taught me an important step in advising to dry the wood slices in the oven. I had problems with cracking/splitting when I made slices from a oak tree we lost, but didn’t know what I was doing wrong – You solved that. Thank you for bringing joy, instruction, inspiration to us all. Have a beautiful Thanksgiving too. Kathy
Kathy,
I’m so happy you found my tutorial helpful, even though it is older content. 🙂 You comment put a big smile on my face. Wishing you a wonderful holiday season from me to you, your family and friends! I love this time of year.
Happy Crafting!
gail
I wish I had the foresight when we had to have our beautiful Sycamore taken down. We not only lost our tree but all the wildlife it supported. I missed the birds and lizards. We lost the shade it provided and the music of the breeze rustling through her leaves.
I enjoy your emails and projects! Thank you for sharing.
I now also regret selling my Singer sewing machine when we moved! LoL I have been looking for a sofa table that has character and I prefer handmade.
Thank you for your ebook! Going to read it now.
Happy Thanksgiving 🦃
Colette,
Thank you so much for your sweet comment. It made my day. I hope your Thanksgiving was full of fun, food, family!
gail
What a beautiful way to preserve the memory of the tree! Can’t wait to see what you do with the larger pieces.
Alexandra
EyeLoveKnots.com
I love what Jamie did with those! She has really nice writing too! I am sure they will be treasured forever. What a great idea!
A nice memento to have, for sure. I like the gold on black. Please keep us informed about how they last. Will the bark stay on, will they split? Some of my tree creations have and some haven’t.
Sad that it had to come down but so happy you got to save a few pieces of it…and now have a reminder of your old friend each holiday season. If trees could only tell the stories of the adventures played out in the protection of their limbs. Merry Christmas Gail and may the New Year bring blessing abundance!
We are constantly having limbs fall, and have had to take two trees down. DL has used some pieces for live edge tables, and we have wood curing for a new dining room table, but I love these quick and easy projects!
Great idea Gail! I like making things out of tree limbs too. Merry Christmas!
What a CUTE idea! You could write a new message every year! Love it!
You’ve become such a good “cyber” friend…hope we get the chance to meet in person someday. Wishing you and your family a Merry Christmas and an awesome New Year!! Already looking forward to what amazing things you will bring to us next year!
Love these…duh…I wouldn’t have thought to dry them in the oven. You are just so stinkin’ clever!!! Merry Christmas to you Gail…and Happy New Year too. Can’t wait to see what all you bring us to see in 2014..
How sad to lose such a beautiful tree,but how nice to have some mementoes from it. They are lovely. Merry Christmas