Decoupage Knobs | Antique Dresser Makeover
As an Amazon Associate, I earn from qualifying purchases.

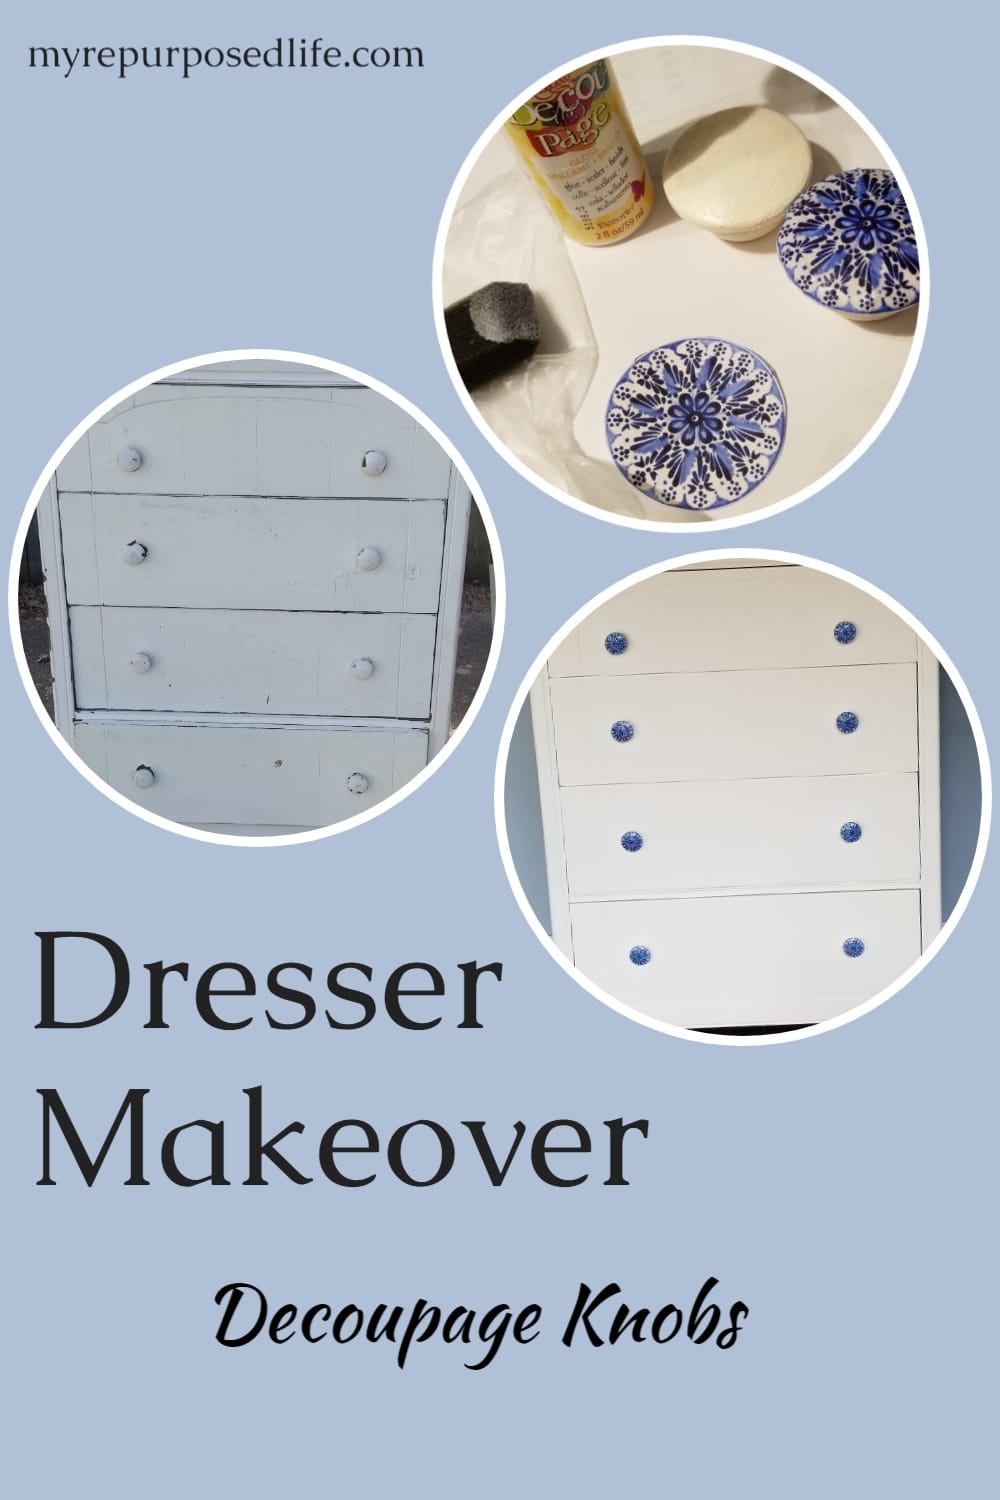
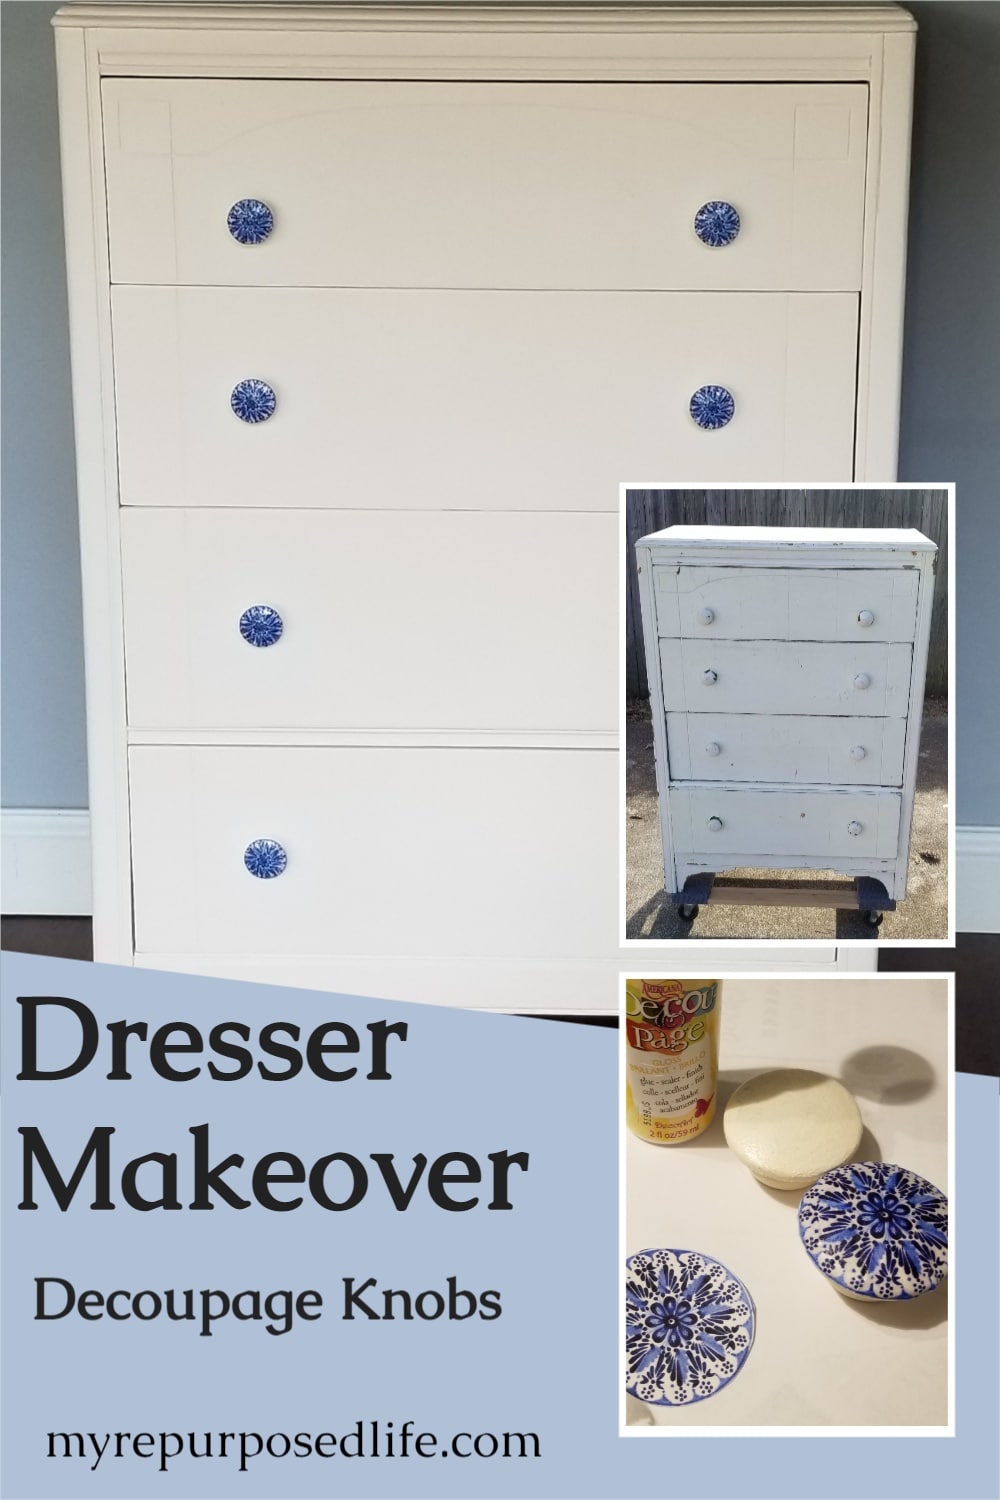
Seeking an effortless way to update an outdated dresser? This antique piece got a fresh new look with decoupaged knobs that rival the stylish ones you’d find at Hobby Lobby, only these are totally DIY! With just a little creativity and a few simple supplies, you can transform plain wooden knobs into charming, one-of-a-kind accents.

Here is the after! This old gal has seen better days. She’s still not perfect, but for her age, she’s in pretty good shape!
How to do an Antique Dresser Makeover
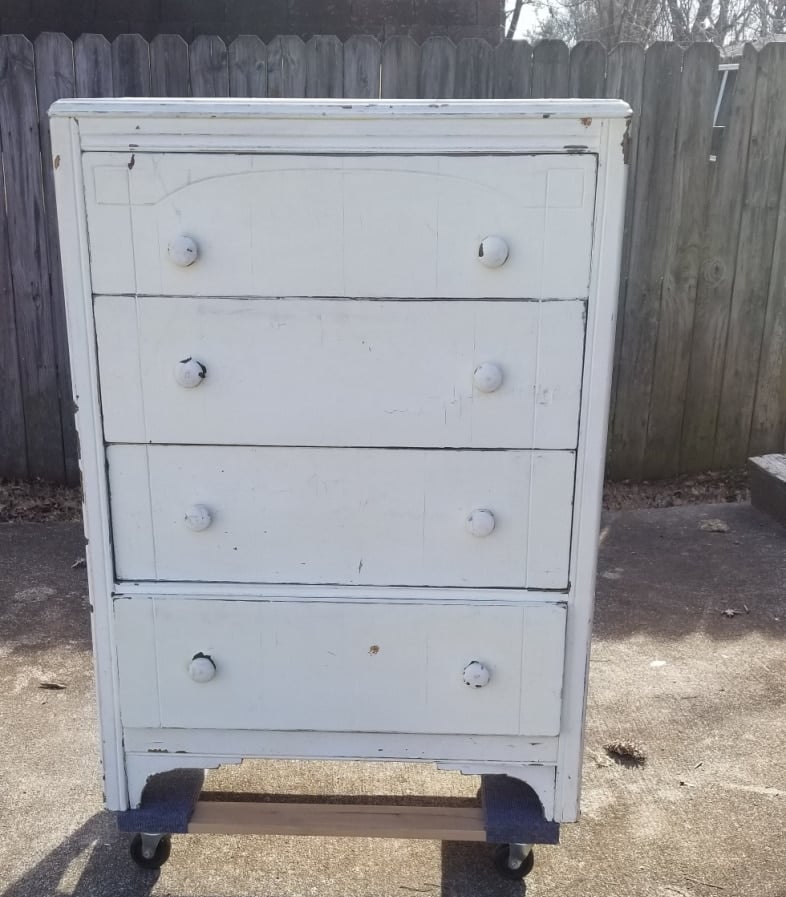
This is how it looked when I got it in January. Amazingly enough, the drawers are in great shape! But the dresser itself was pretty chippy. I opted to sand it instead of using a paint stripper.
Examine and Address Any Issues That Need Repair
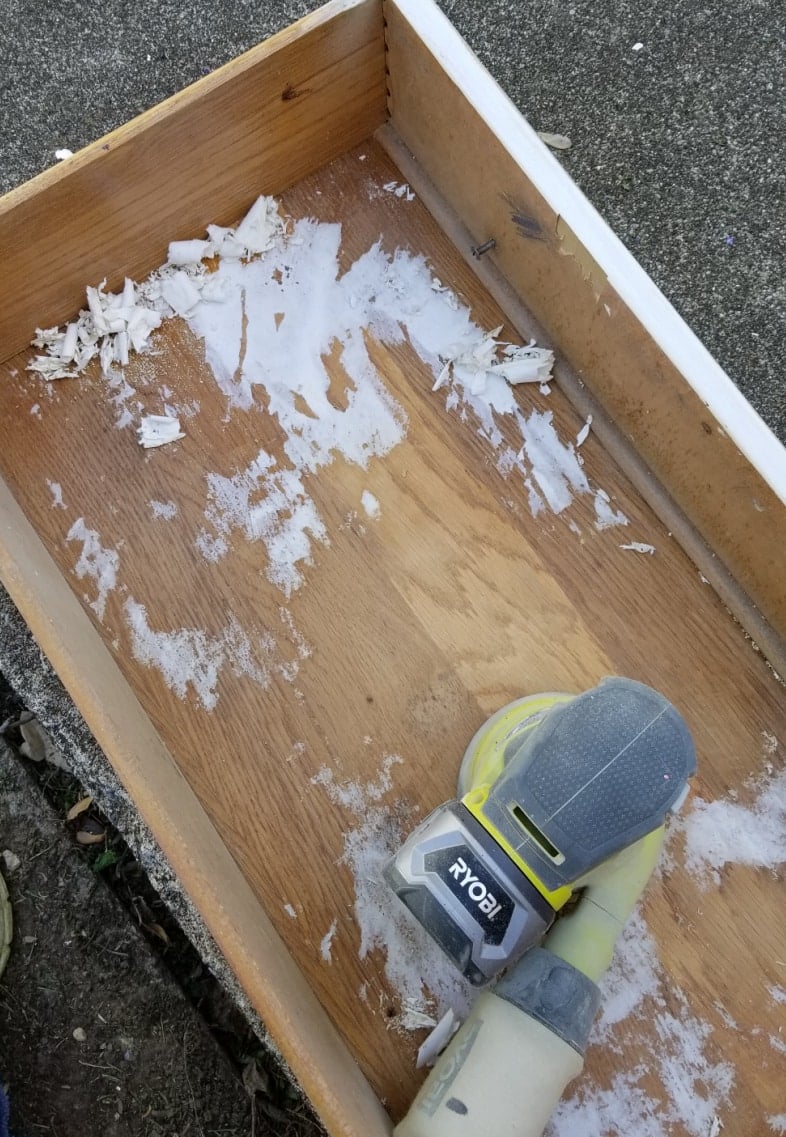
The orbital sander was even used to help remove the shelf liner inside the drawers.
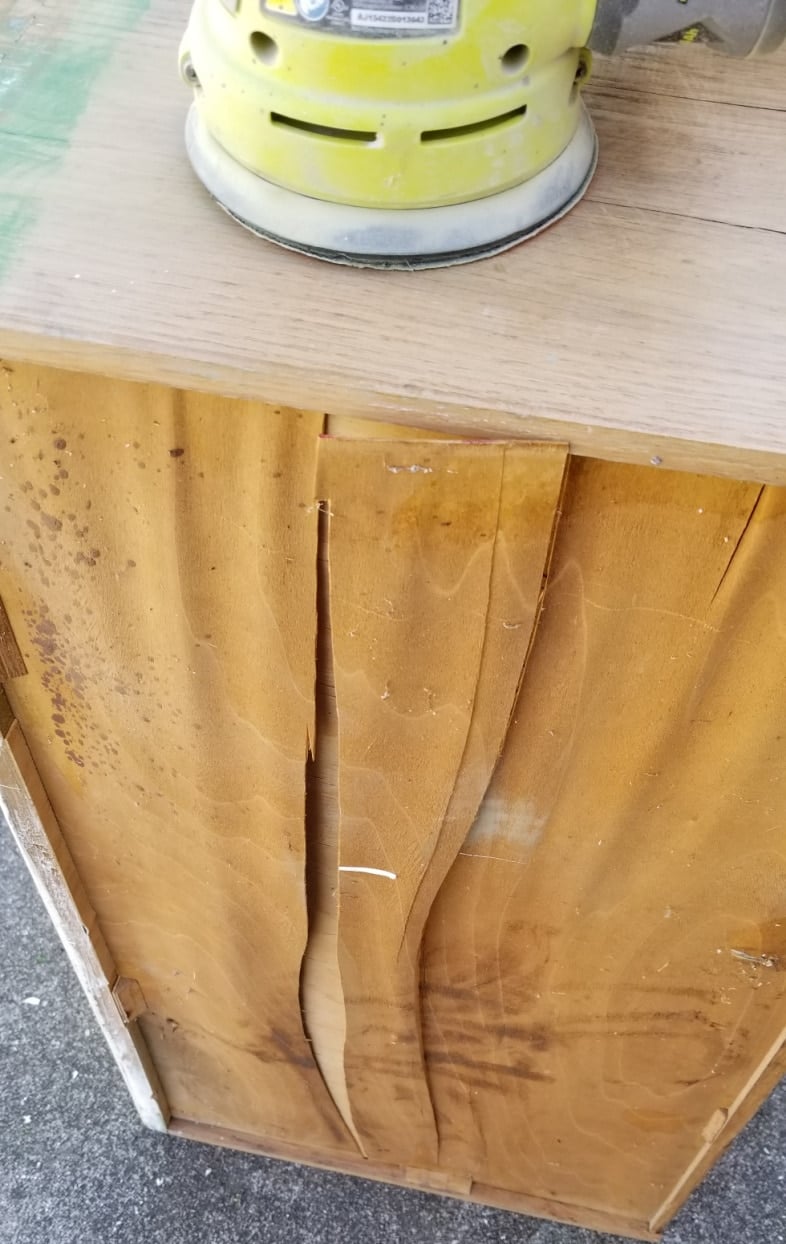
The lower drawer likely had some moisture issues, as evidenced by the peeling veneer. No problem! I just helped it along by removing the thin layer of wood. Problem solved!
Sand and Patch Rough Areas of the Chippy Dresser
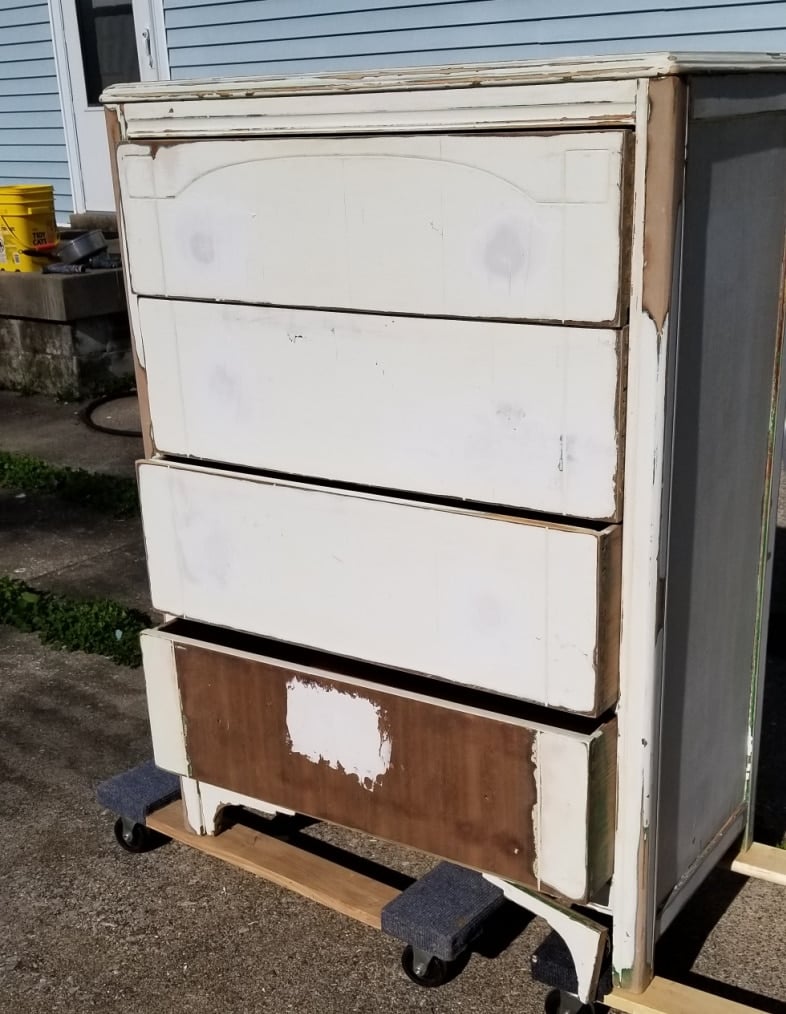
Here is the dresser (chest of drawers) after I tackled it with a sander and patched some of the bad places with drywall mud. The lower drawer had more issues with veneer. When the veneer was removed from the front panel, a large knot was exposed, resembling a crater. I filled it with mud as well. The small piece of trim was reattached with my nail gun.
Prepare to Paint With HVLP Paint Sprayer
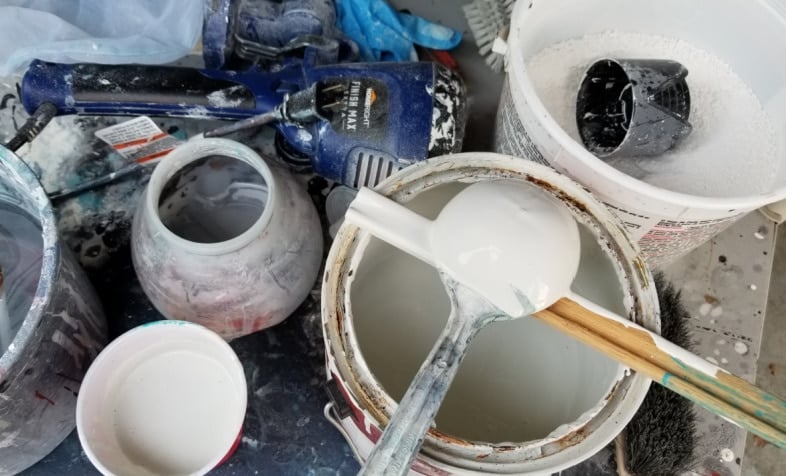
Because the dresser was still a little glossy I opted for my regular diy chalky paint primer made with some oops paint and plaster of paris.
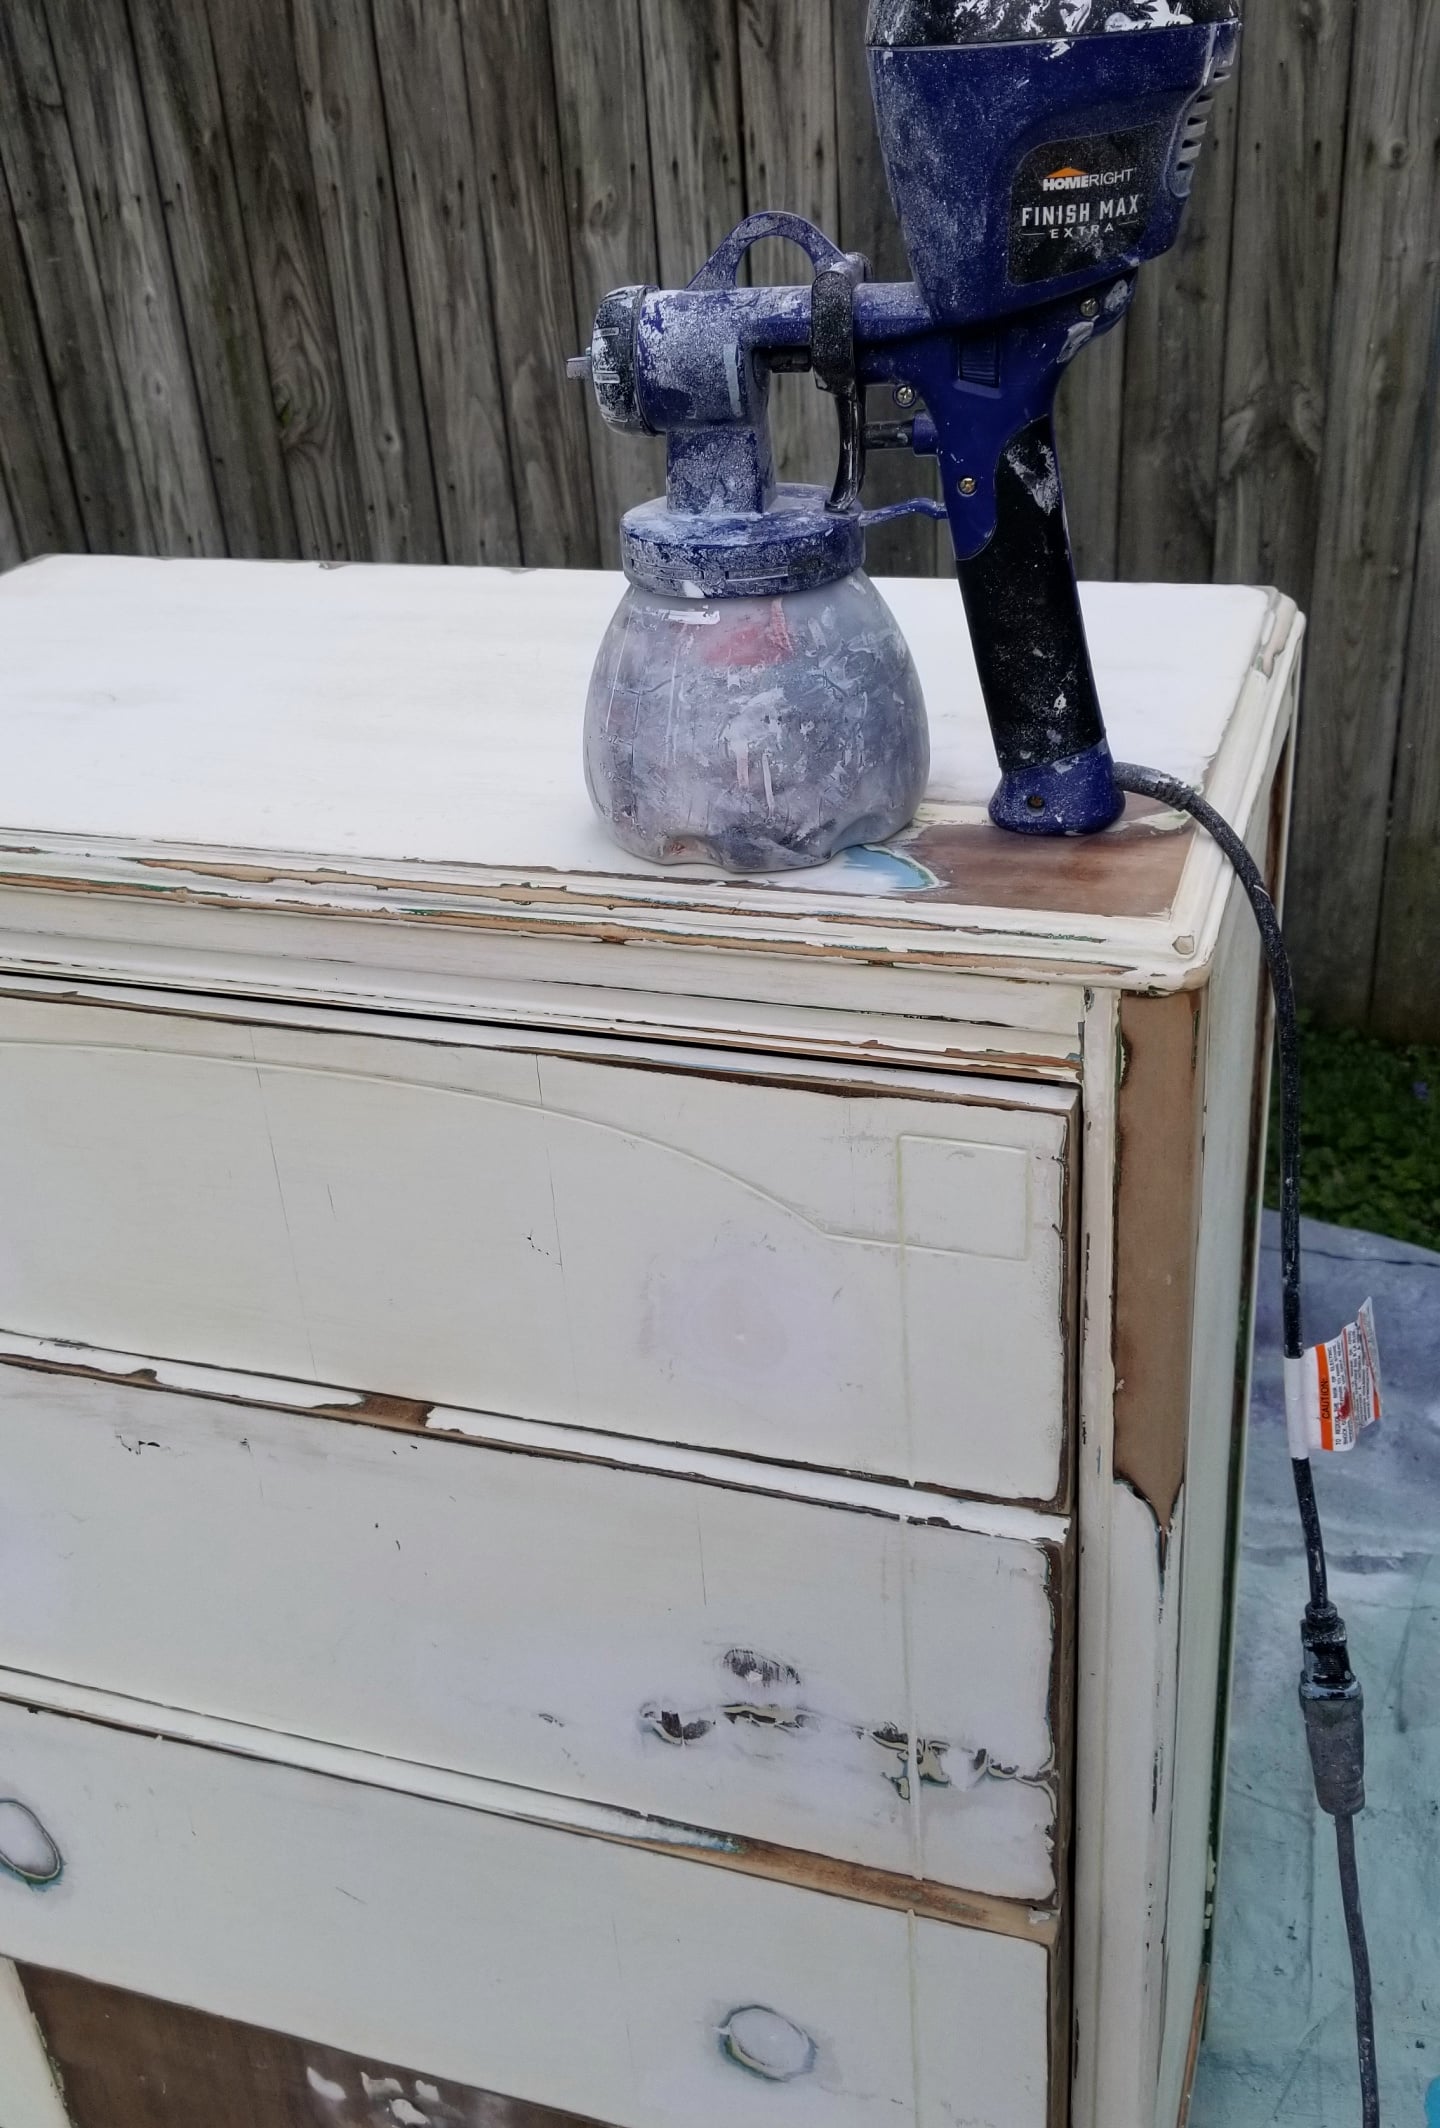
After lightly sanding all the places I patched, the dresser was ready for painting with my Homeright Finish Max Extra. I used the blue nozzle and didn’t dilute the paint.
Apply Light Coats of Primer With a Paint Sprayer
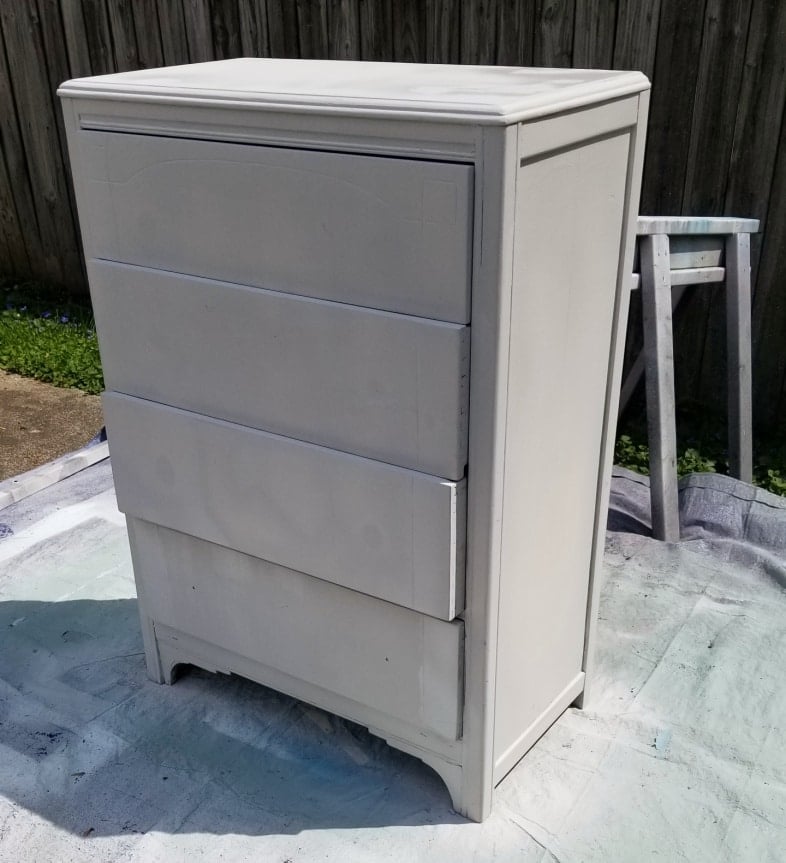
It’s always so fulfilling after I get that first coat of primer on a piece of furniture. Having it all one color makes me smile.
Apply Several Light Coats of Top Coat With a Paint Sprayer
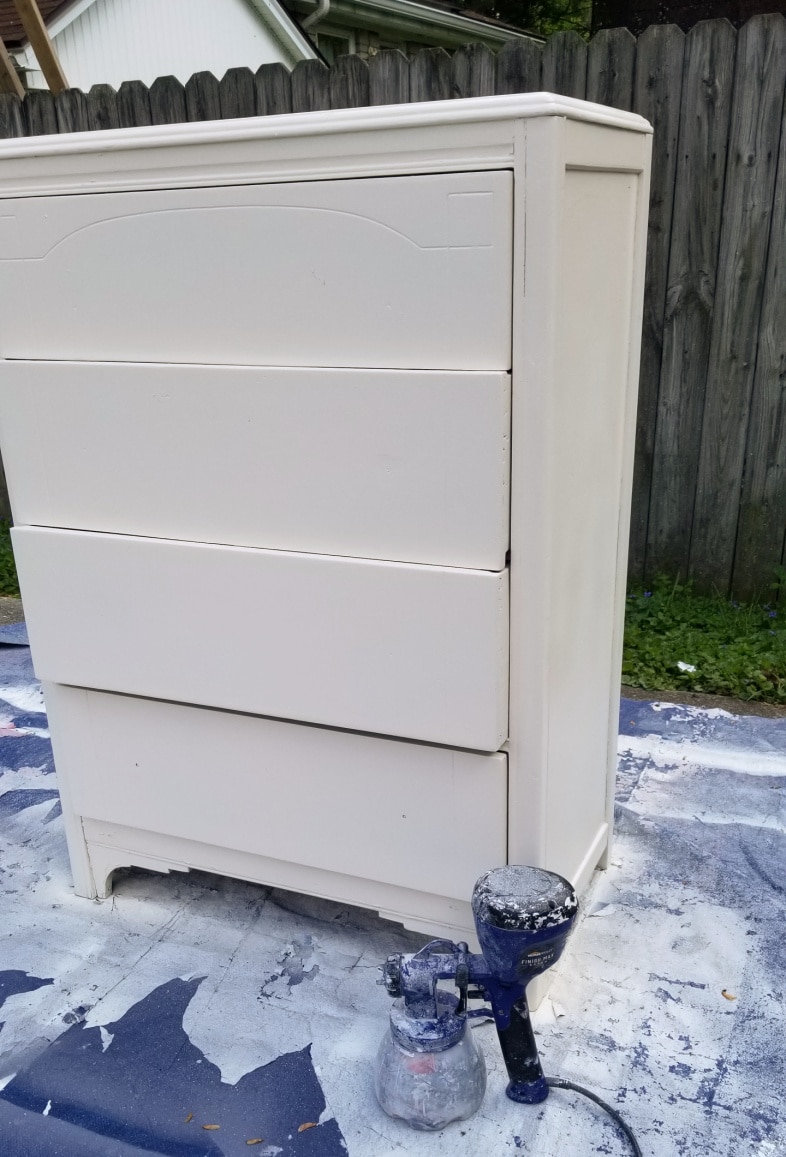
The next day, I applied three light coats of a semi-gloss top coat from Behr. This Polished Pearl is my favorite color of white.
TIP: Paint the dresser with drawers in place.
How To Decoupage Wooden Dresser Knobs
Remove Existing Paint
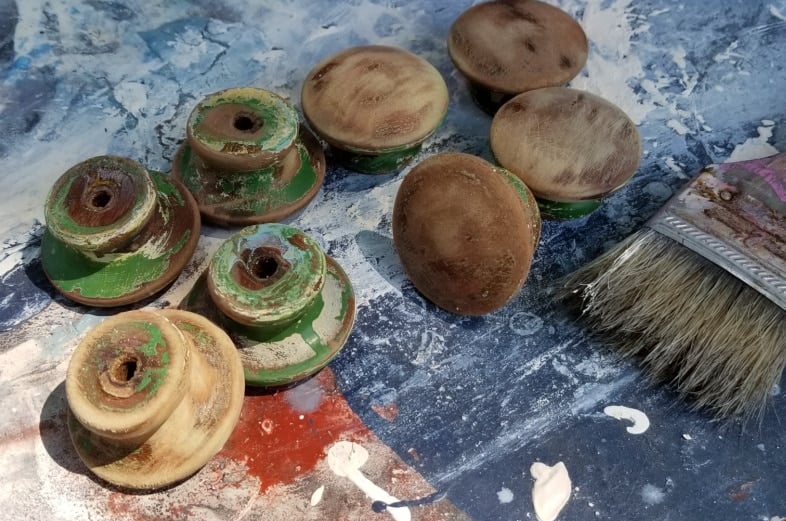
These original wood knobs had several coats of paint. Instead of stripping them, I felt I had nothing to lose, so I soaked them in a pan of water overnight. The next morning, the paint peeled off relatively easily. I gave them a couple of light coats of paint with a very loved cheap chip brush. The tops of the knob got the least amount of paint, while I concentrated most of the paint on the underside.
Apply Light Coats of Paint to the Original Wooden Dresser Knobs
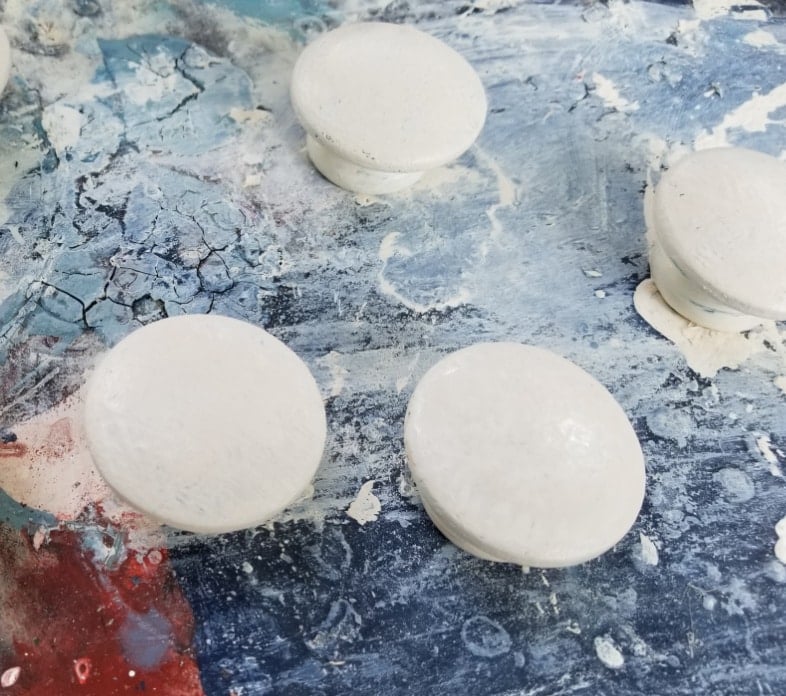
Already they look so much better! But wait! There’s MORE!
Print and Cut Images to Decoupage Knobs
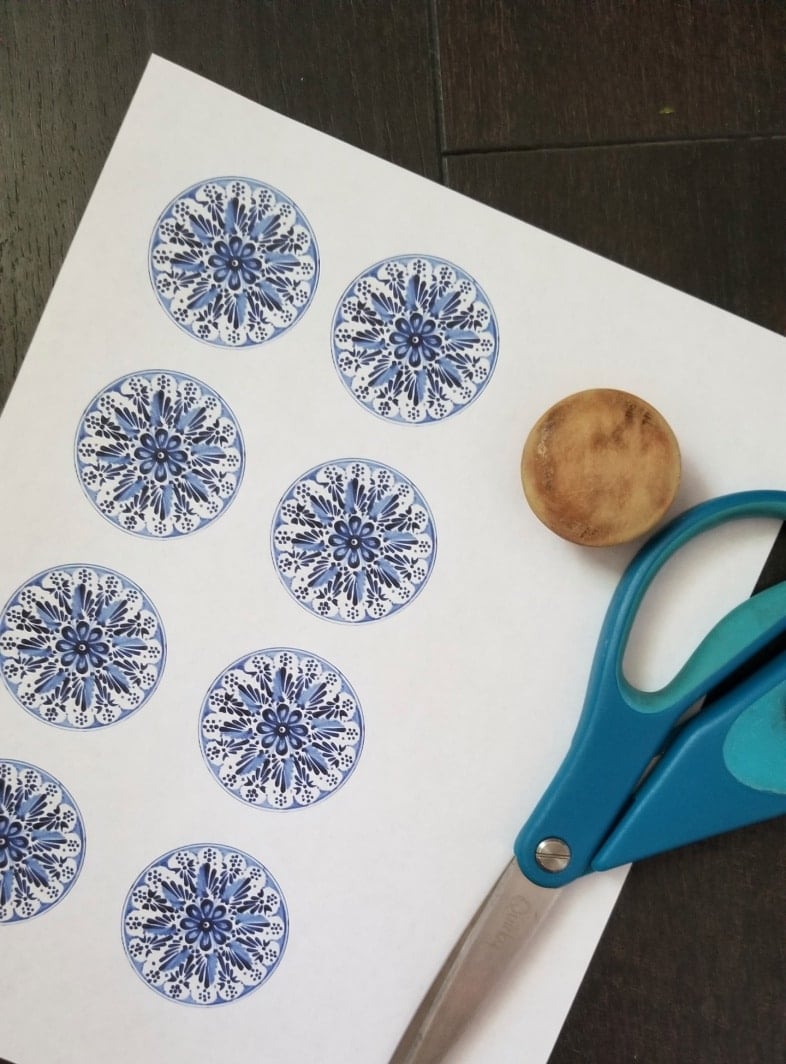
I downloaded pretty images from A Piece Of Rainbow. After I downloaded the photos, I uploaded the one I wanted to use in Picmonkey and made several circles as one image. The image was printed on my inkjet printer onto regular printer paper. Cutting out these circles reminded me of my teaching days. You have no idea how much material teachers of young children actually cut out over their lifetime.
Use Glossy Mod Podge to Make Faux Ceramic Dresser Knobs
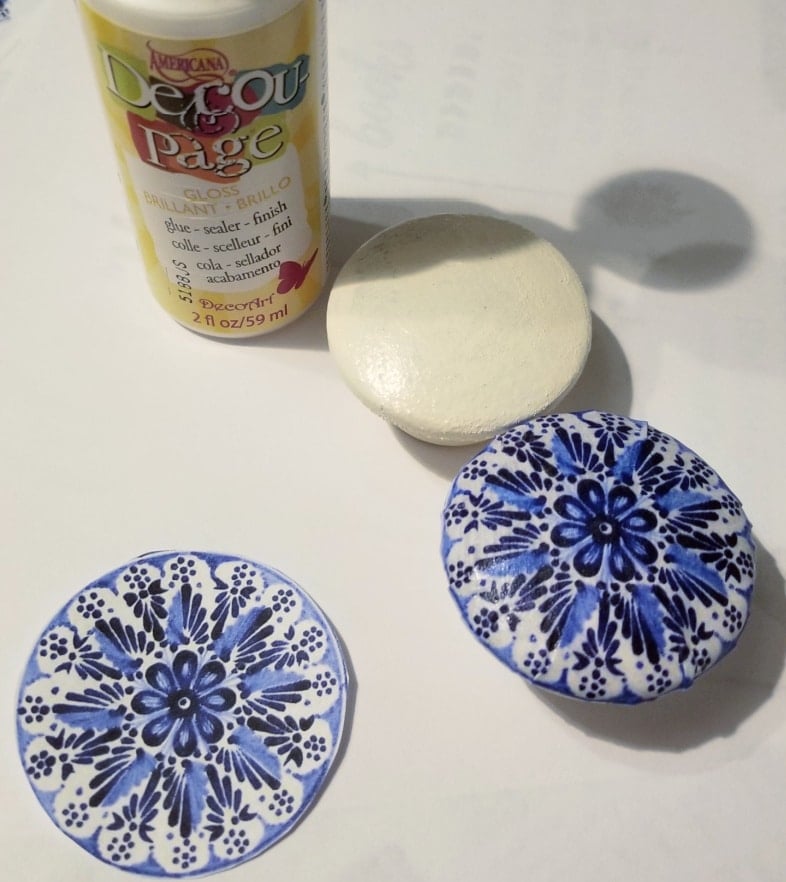
Using a foam paint brush and Glossy Mod Podge, I applied the fun paper cutouts. I did my application a little differently than my friend Anika.
Shape Paper for Decoupage Knobs in Palm
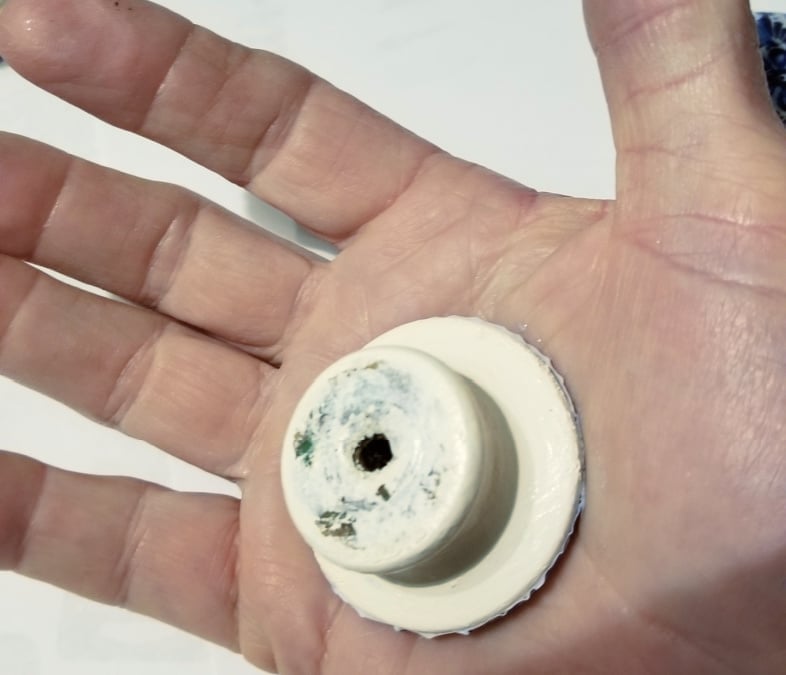
Applying a thin coat of Mod Podge on the back of the paper and another thin coat on the knob, I centered the paper and placed it in my palm. Holding the knob in my palm allowed the paper to flow smoothly over the edge of the knob. Each knob received about 2-3 more coats of the glossy Mod Podge to give them a shiny appearance, similar to glass or ceramic knobs.
Install Original Knobs Onto the Dresser
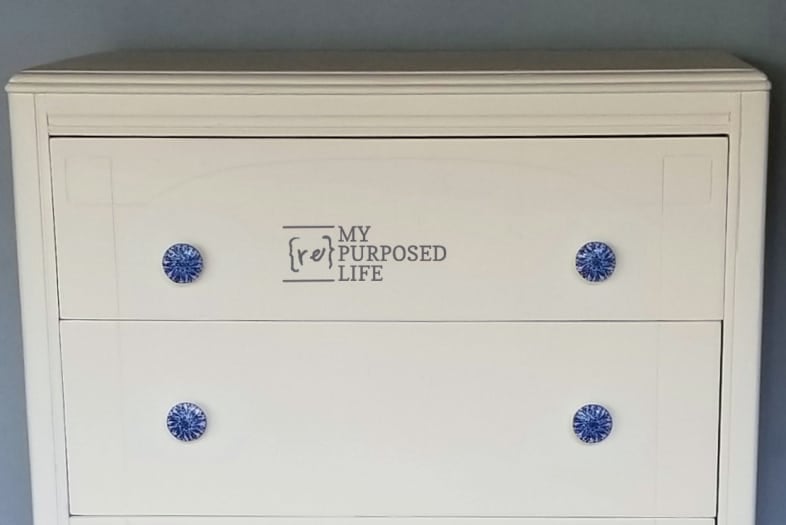
I LOVE the way the original knobs look on the dresser now with their new outfits! Decoupaging the knobs was so quick and easy, you really should try it very soon!
I wish I had used this decoupage knob technique on the craft desk makeover I recently did!
I hope that if you love this idea, you’ll pin it on Pinterest for later.
See the latest Small Updates | Big Change
gail
Beautiful as always!!!! I especially love your comment about how much stuff we teachers have cut out in our lifetime…I can relate to that. The knobs turned out so well! As always, your blog is my go to blog for anything furniture/fix up. I would love to meet you in person some day – you seem so down to earth and are so wise and fun and entertaining – and all that good, fine friend stuff – I bet we would hit it off! Please keep the projects coming!
Laurie,
Your kind words put a big smile on my face during a trying week! Thank you so much for your sweet comment. Most people who meet meet through the blog, say I’m just like they thought I would be. (in all honesty, I’m probably louder and a little crazier than most people think–but it’s because I’m easily excitable about what I do.)
gail
Just goes to show the magic of paint – then there’s those incredible knobs. What a smart save. You sure do know your business Gail, Passing on good tips – thanks . Dresser and knobs look so fantastic, love it. I’d love to have that dresser or high boy as it’s sometimes called. Enjoy rest of week
OMG! I love the knobs and the rescue. This is great!
Thank you so much Angie! Knobs can be so expensive. I’m happy I have found an option to use on my repurposed furniture projects.
gail
Love the decoupage idea for the knobs! The pattern is so pretty. I also call a tall dresser a chest of drawers.
Thank you Tammie for your sweet comment. Happy to hear so many people are in the Chest of Drawers camp with me. 😉
gail
I would also call that a chest of drawers. A “dresser’ often has more than one set of drawers (side by side) but it’s only 3-4 drawers tall. Love your knobs!
Thank you Nancy! I’m really happy with how the knobs turned out with the pretty paper decoupaged on them.
gail
Once again Genius!!
I recently bought drawer knobs like this design that were made in India.(24 in a bag on Amazon) They were pretty cheap, but only a few matched! I replaced my antique hanging loop pulls with them. They look lovely, but I will do your idea next time! I didn’t paint my dresser,chest and commode table. They are old, but aren’t valuable at all except to me. The patina plus the wood is priceless to me!
I have my mom’s dresser that I refinished instead of painting. I don’t paint everything, just most things. 🙂
Please let me know how the knobs turn out when you get around to them.
gail
I love this dresser. You did a swell job!!!
Thank you so much Donna! Even someday down the road should the drawers not work-it has a lot of years left. They just don’t make ’em like they use to. 😉
gail
I think you should put either dark or black wax in the carved out lines on the drawers, it would really add to the detail.
I thought about that Cheryl, but they are sort of strange from years of paint and sanding. If I thought I could get them crisp I would. But I think it would need to be a color to compliment the knobs. 🙂
gail
What a great idea. Looks really easy to do. I love the old dresser. Wish I could put mud, sand and paint myself for a beautiful redo like the dresser lol.
Have a great week Gail.
hahahah ain’t it the truth Bonnie! Wishing you a fabulous week as well!!!
gail