How To: Turn A Desk Into A Tall Chest | Before And After Photos
As an Amazon Associate, I earn from qualifying purchases.

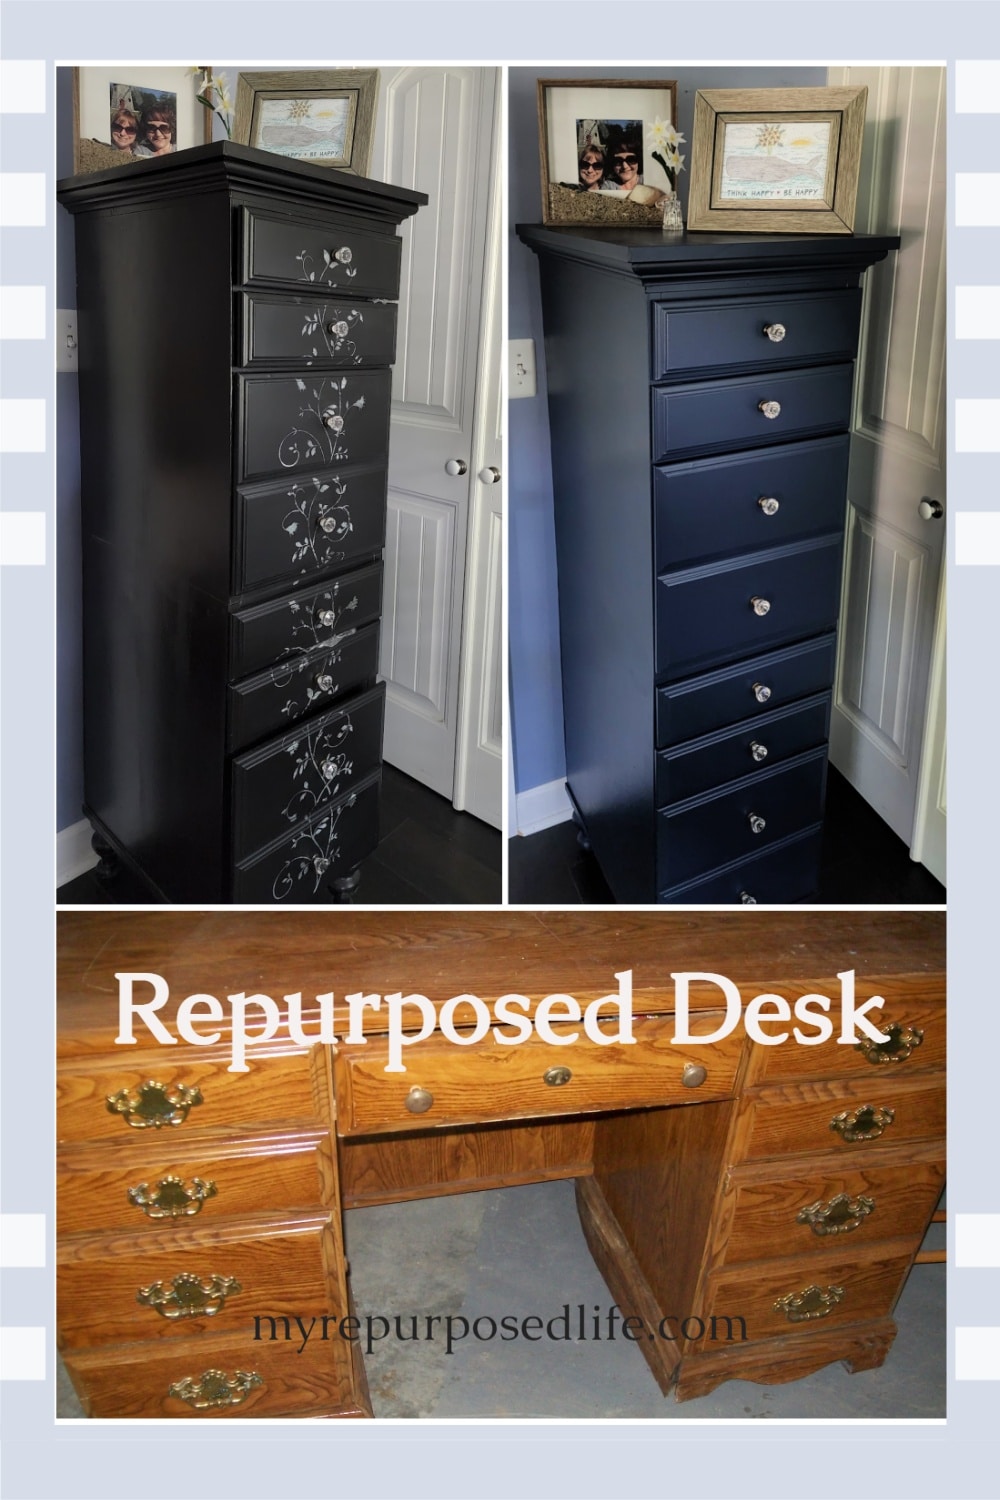
Turning a repurposed desk into a new piece of furniture is much better than throwing it out. I’m sure you’ve seen a lot of repurposed desks into nightstands. But have you ever seen the two-drawer sections stacked?
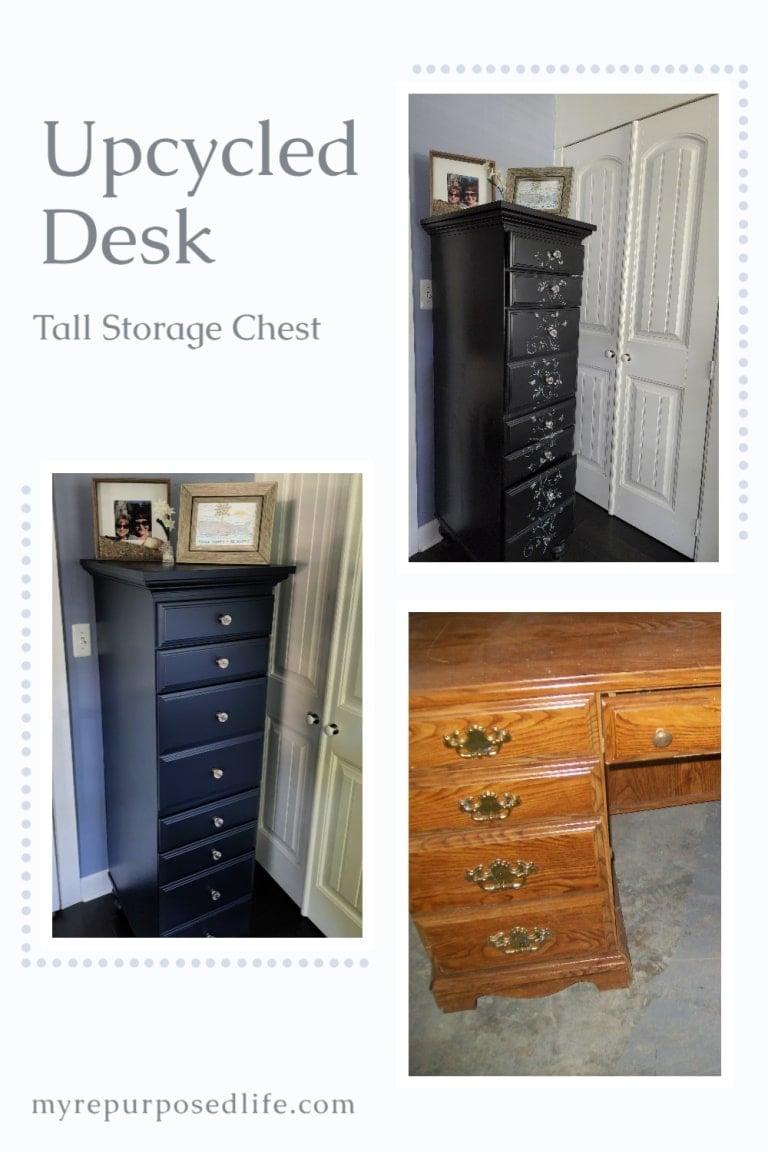
UPDATE! I painted this piece, and I love the new look. But FIRST, let’s take a look at how I built this unique chest out of a desk!
My favorite repurposed desk had been the one I repurposed into a kitchen island. But now I have a new favorite.

This is a long post: grab something to drink and a snack, folks!
The desk enjoyed quite the life back in the 90’s:

While my daughter Jamie was still playing with Barbies, 🙂 However, it had been stored in the basement for about ten years.
Does your desk have missing drawers? See how to work around a desk with missing drawers.
Let’s see how I repurposed this desk into a tall lingerie chest . . .
Perfect Repurposed Desk Candidate

The vintage desk had seen better days. Unfortunately, there was some water damage on the bottom trim. In addition, you can see some separation of the knee-hole board in the back.
Dismantle Desk
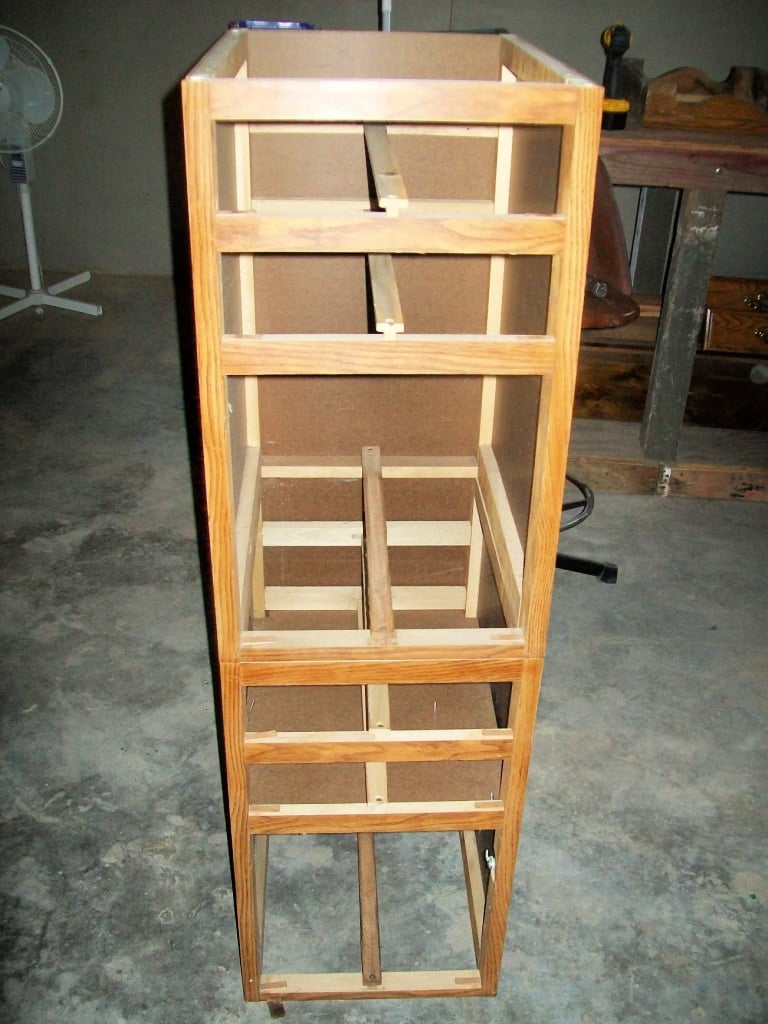
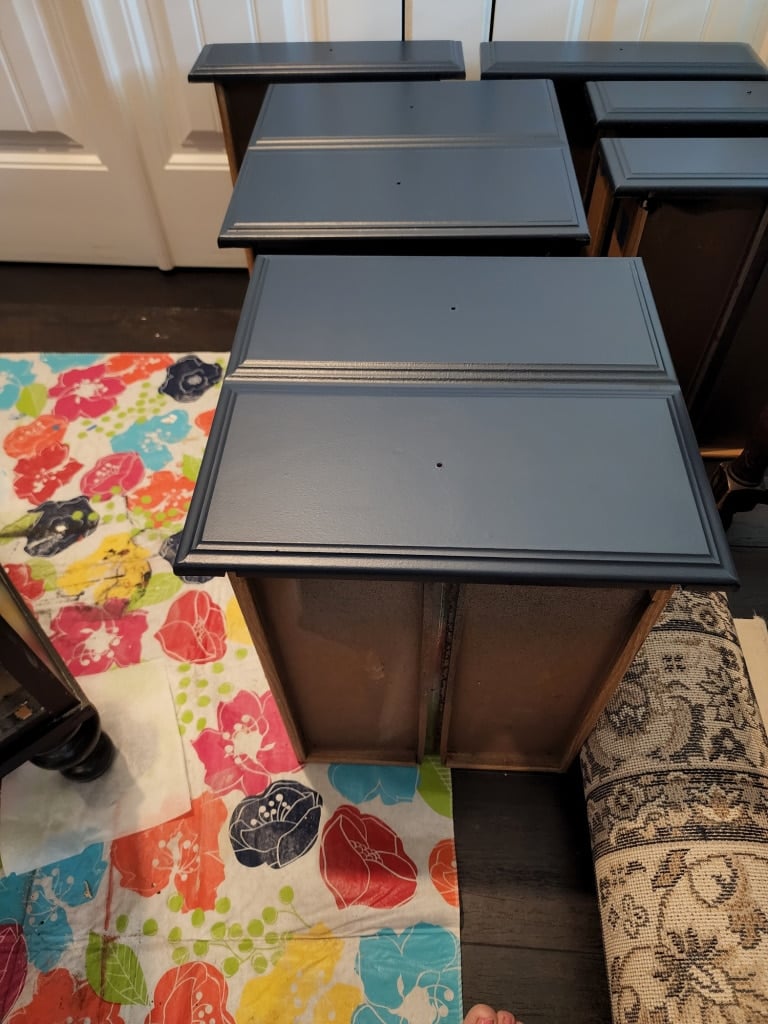
To begin, I removed the top of the desk and all the bottom trim pieces, stacking the left side on top of the right side to see if my vision would work.
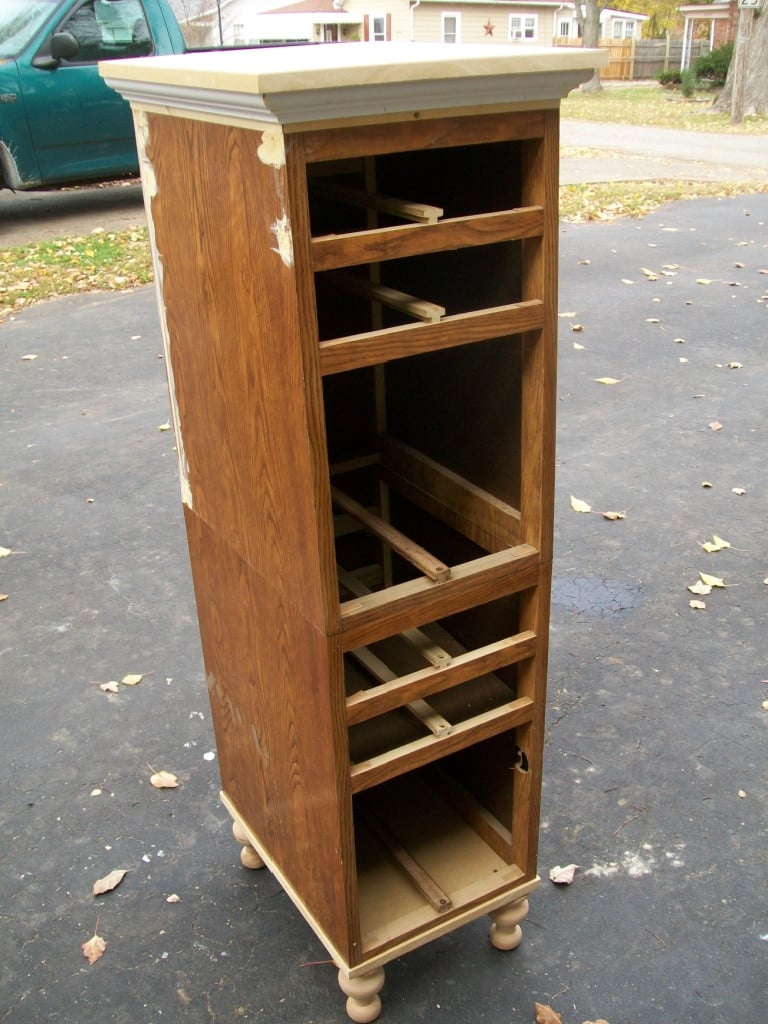
Add Base to Chest

It’s a good idea to test your fun feet before moving forward.
How to Add Legs to Furniture
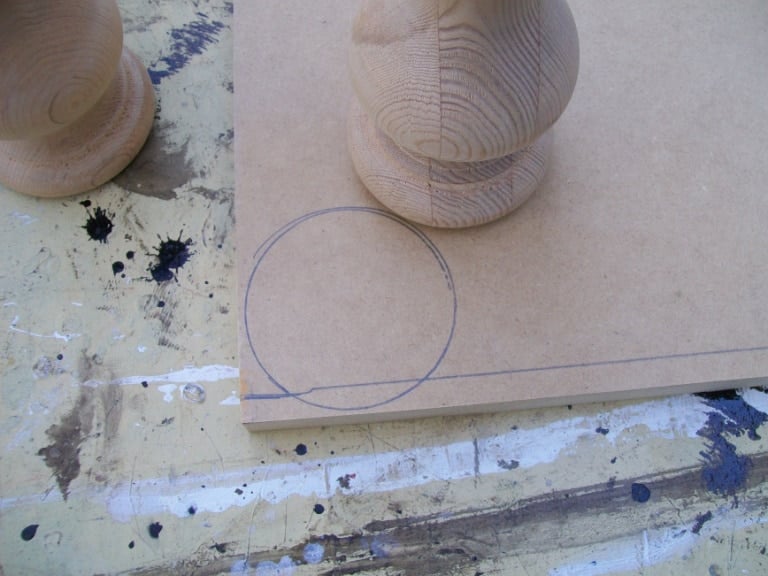
Indeed, I thought they would work. I got busy attaching them. I first drew circles around each of the four feet. The bottom and top of this cabinet are pieces of MDF I had left over from when I built my media center.
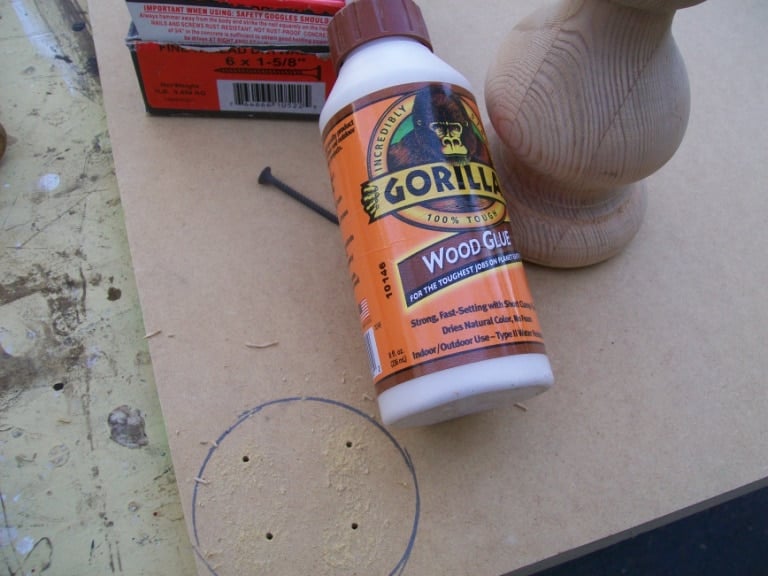
TIP: Drill four pilot holes inside each of the circles. Gorilla Wood Glue was used for extra hold with the screws.
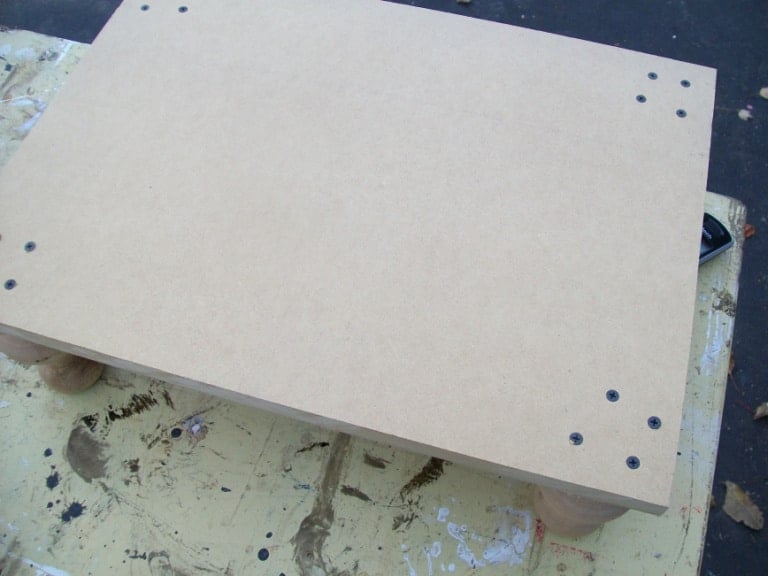
Drilling the pilot holes is a must to get the screws successfully into the feet.
Add Trim to Lingerie Chest
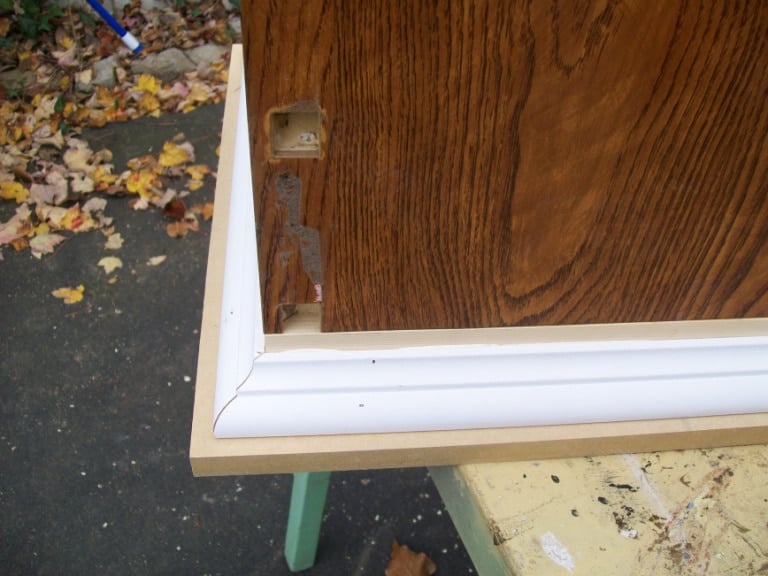
I had to beef up the top of the new lingerie chest to get the crown molding to clear the drawers. Later, I filled those large holes with some wood putty and then drywall spackling.
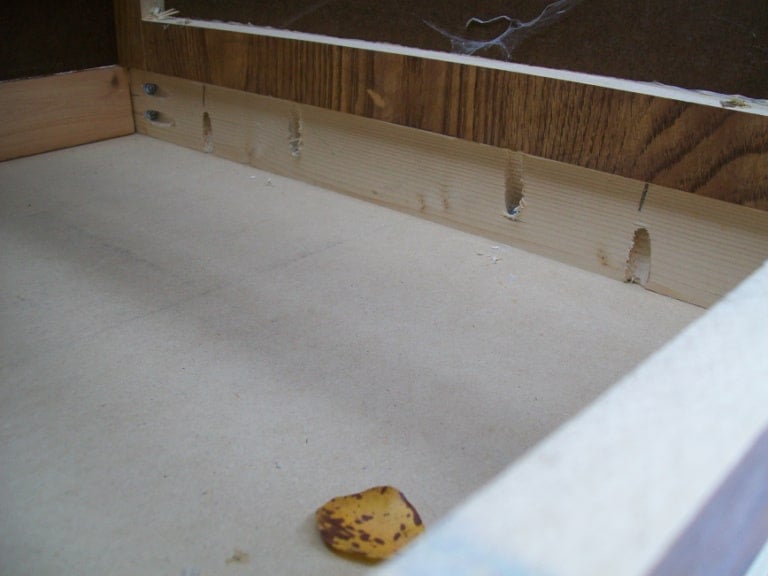
I cut some 1x down to size and attached them with pocket holes using my Kreg Jig.
Need more details on using a Kreg Jig? See my article How to use a Kreg Jig Pocket Hole System.
Using the original drawer sections of the repurposed desk, you can see that had I put the MDF directly on top of the drawer tower; I would not have had room for the crown molding trim.
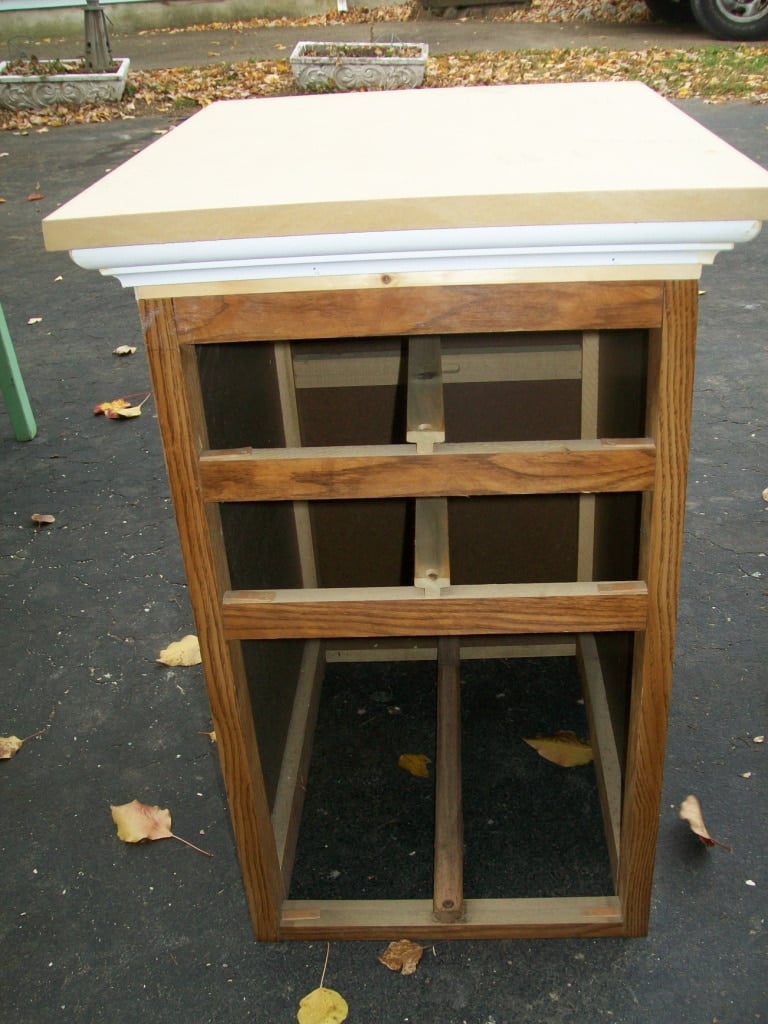
Attach Two Drawer Sections
I used some of the original holes and some pocket holes to attach the two pieces to change the repurposed desk into the lingerie chest. However, the two pieces were still a little unstable.
Add A Plywood Back
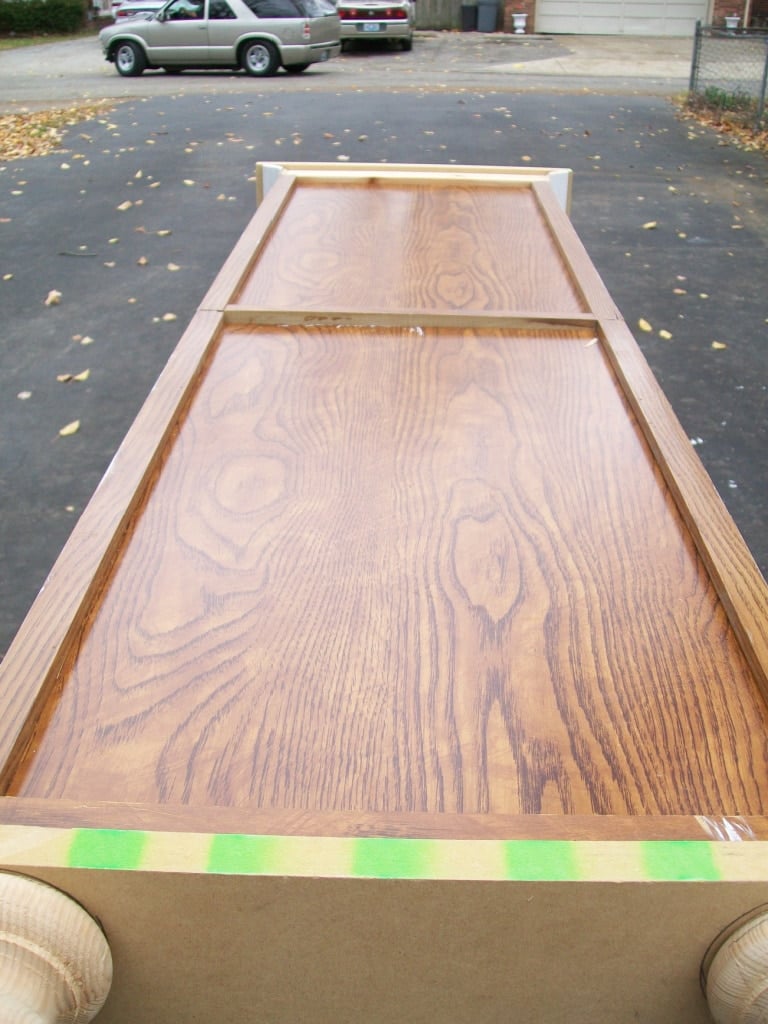
You know how that cheap furniture has cardboard backings that you tack on with those little nails to keep is “squared up”? I decided my tower needed a little strength in the back.
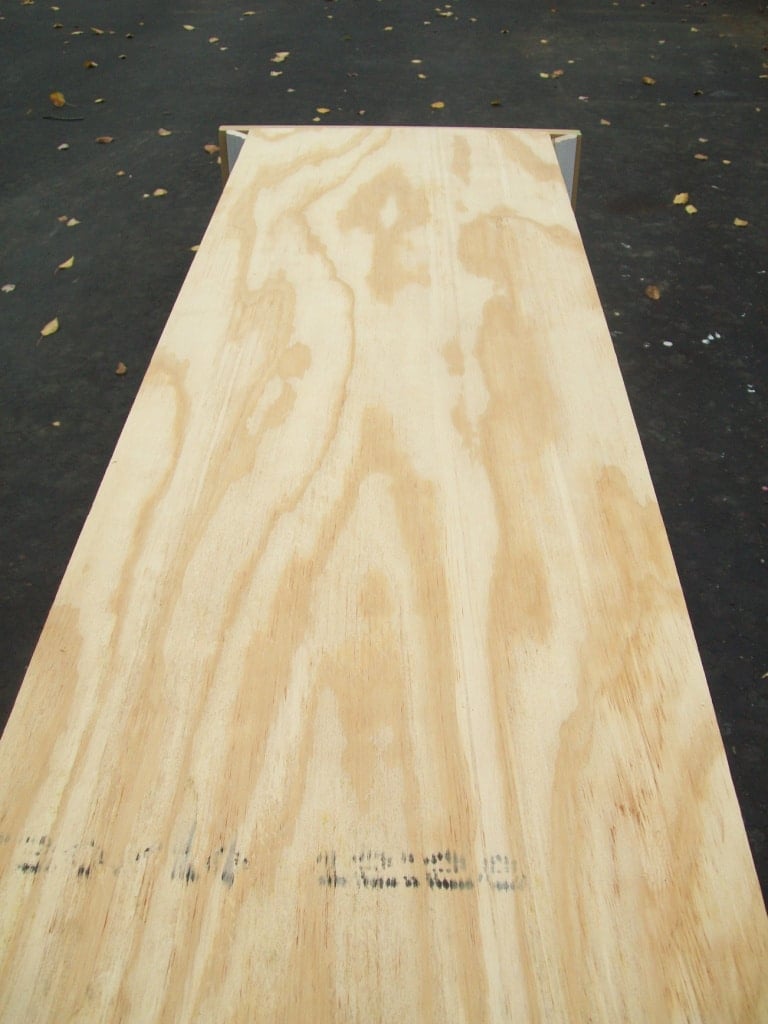
In other words, I used a piece of thin plywood to make it sturdy and keep it square. It worked perfectly!
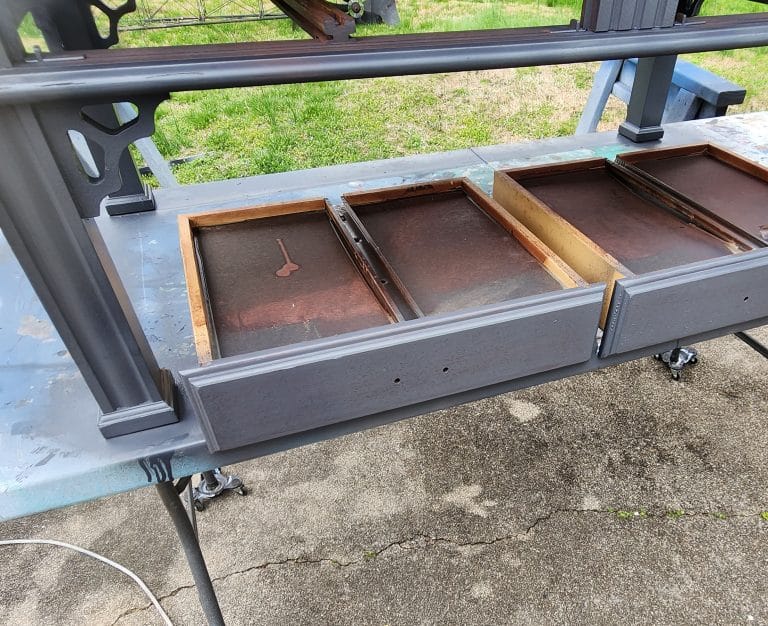
Primer and Paint For Lingerie Chest

It’s time to start painting. Oh, do you see those two pieces of Gorilla Tape on the drawer front? I filled all the original drawer pull handles with wood putty.
TIP: To prevent seepage, use tape to keep the putty from coming through the back side.

Painter’s tape was used to hold plastic in place. I didn’t want to paint the drawers because I wanted them to slide in and out easily, and they were still in pretty good shape.
Note: There is an easier way to paint a drawer without taping plastic to protect the drawer. Flip the drawer upside down. See more details here:

I used my HomeRight Finish Max Fine Finish Sprayer to apply some primer to all the pieces.
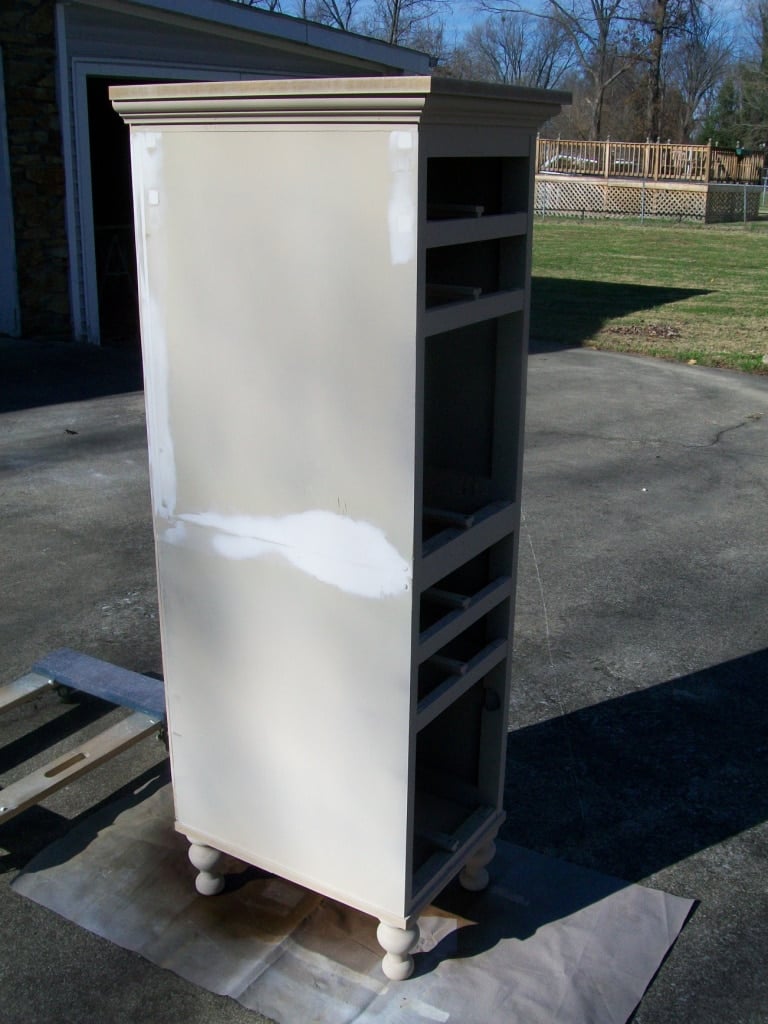
After a coat of primer, I saw that I still needed some patching. I used spackling for this.
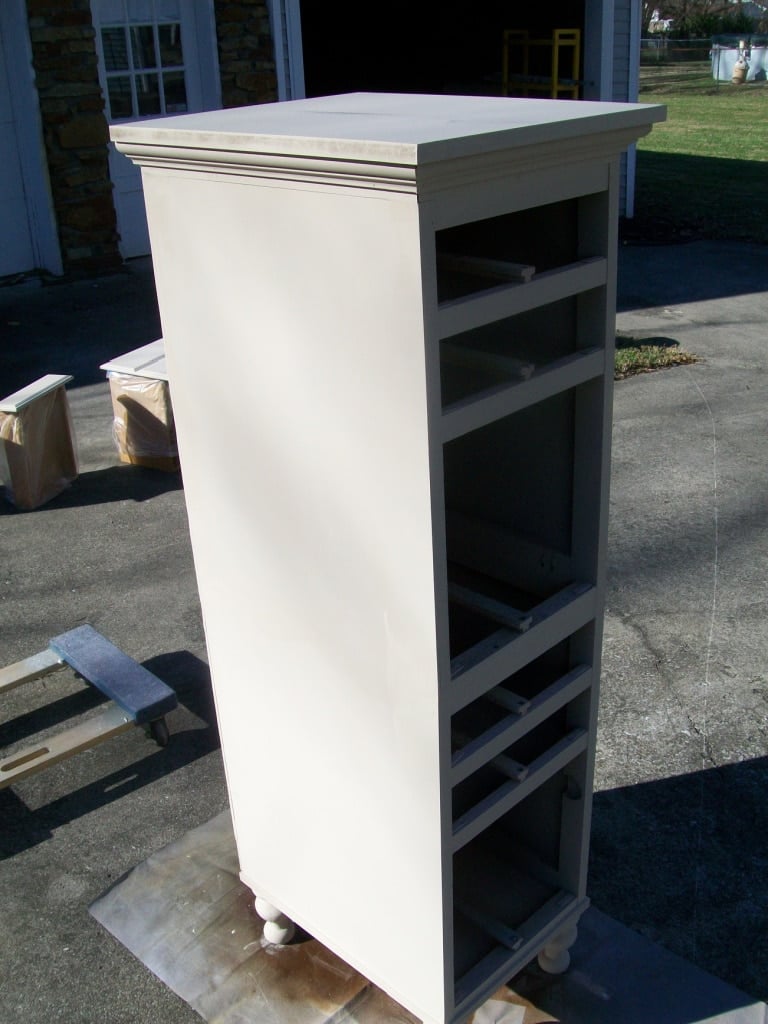
Here, it is sanded and another coat of primer. Looks better, but not as good as I would like, hence the nickname “Tower of Terror.” In hindsight, I wish I had put Luan or bead board on each side of the repurposed desk chest, similar to how I did on this Upcylced T.V. Cabinet.
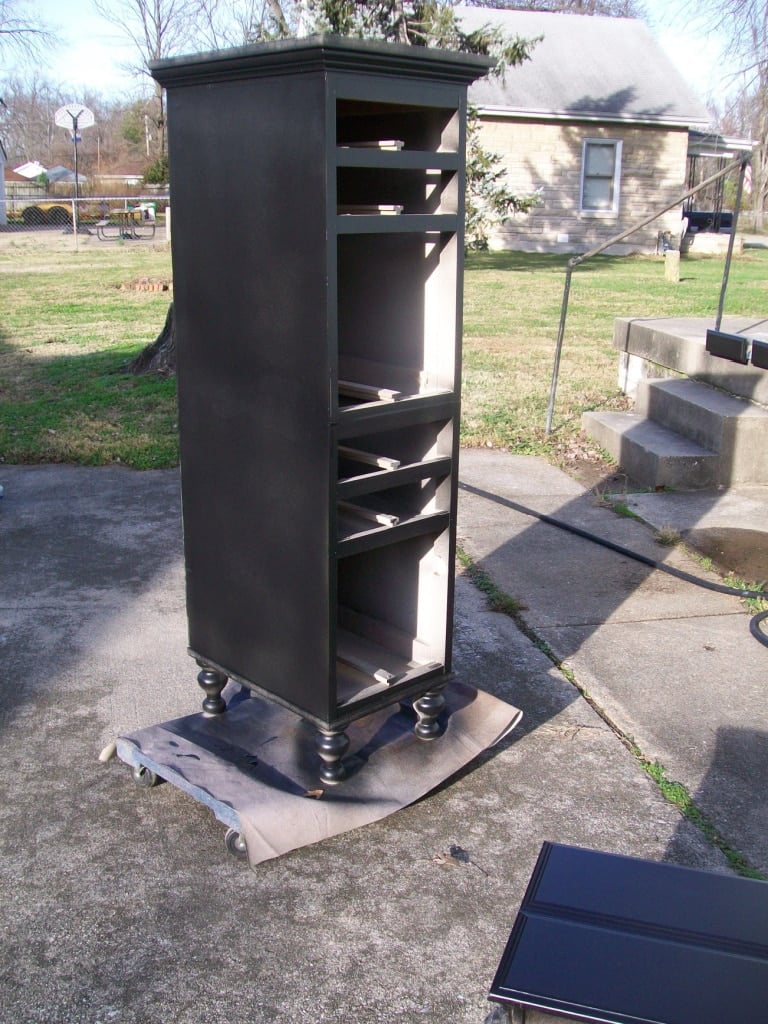
After the first coat of black paint.
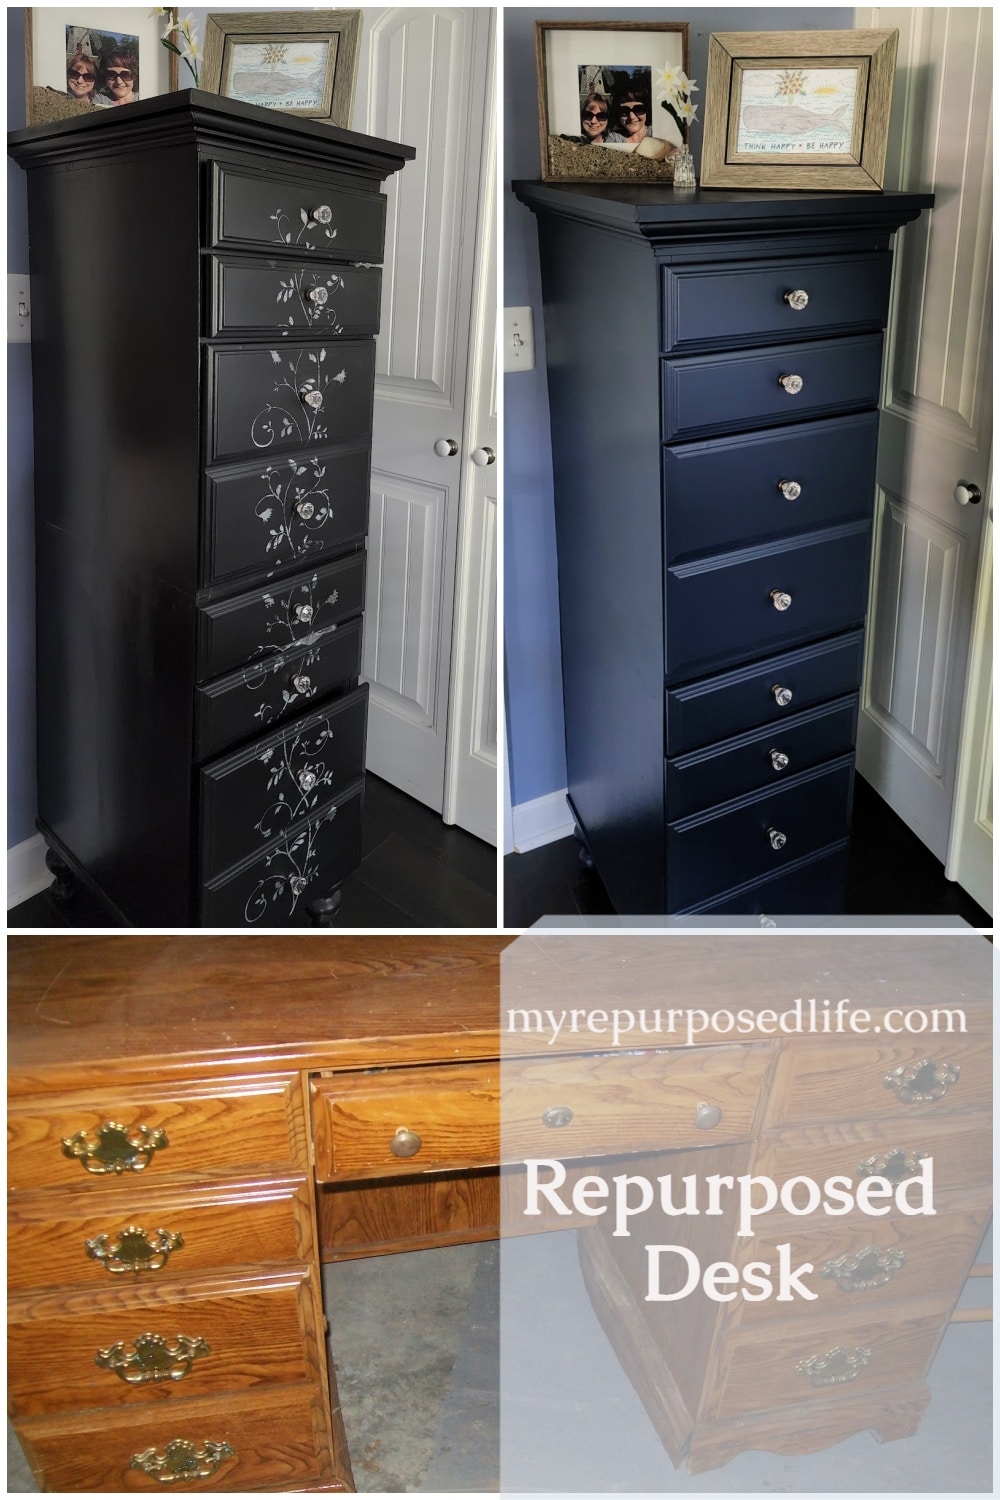
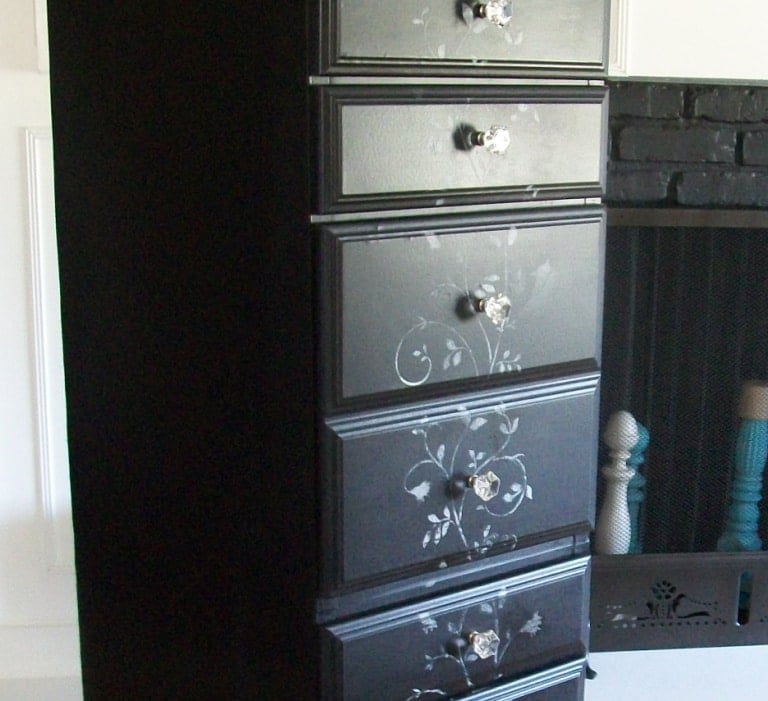
Embellish The Drawers With Stencils
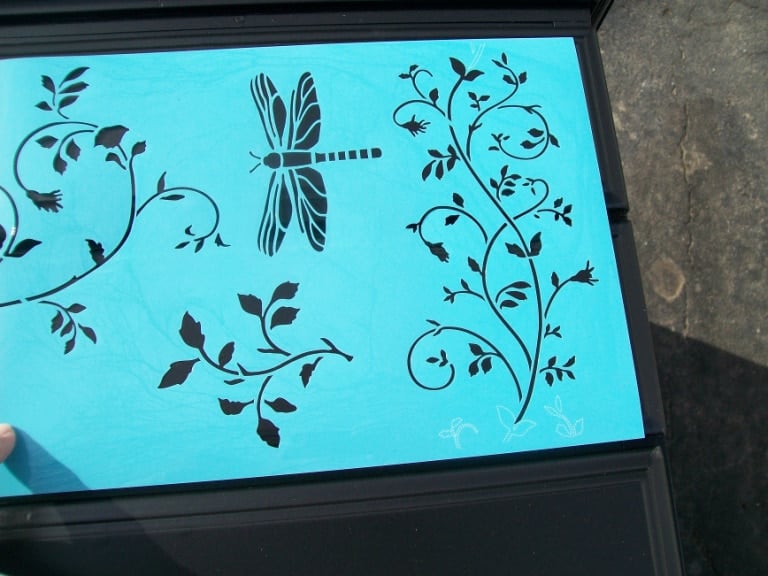
Way back when I received some great product compliments from Plaid/Martha Stewart, these fantastic stencils were part of that selection. I’m trying to figure out which stencil I want to use. I decided this one (far right) is too small.
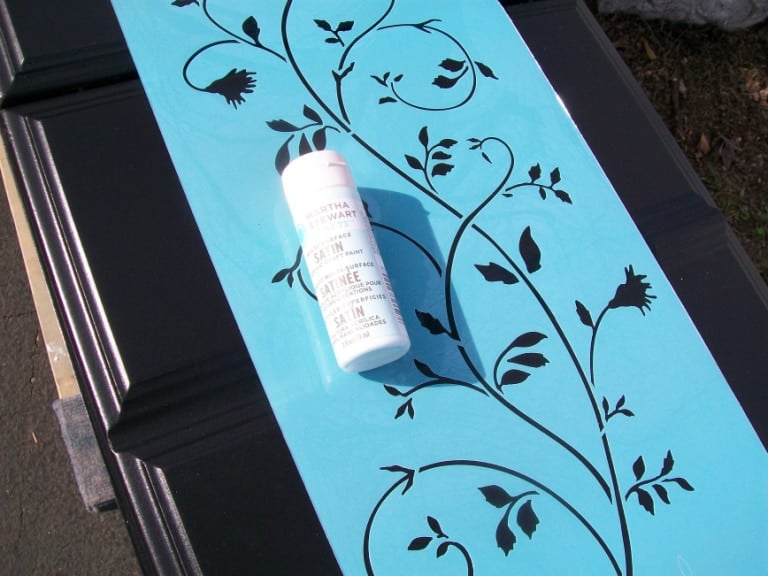
The larger version seemed like the best fit. I used some of Martha’s craft paint, it was a very light shade – actually a shade of blue. An aged gray look was the end goal.
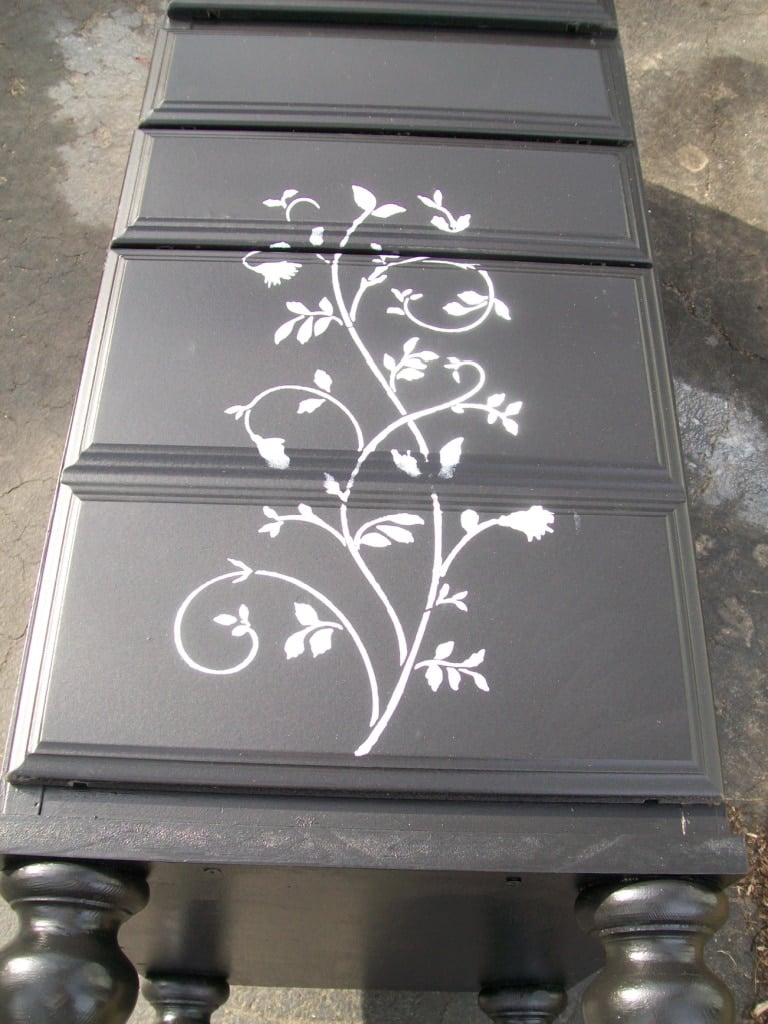
After I painted on the first stencil sheet, I decided it was too “stark”. I was looking for more of a faded (aged) look. I didn’t want to sand back the drawer, so I used a damp paper towel and scrubbed/scraped off some of the paint I just painted. No pictures of this step—sometimes time is of the essence, and a blogger doesn’t have time to pick up the camera!  I laid the chest down on its back to do this step. Doing it this way, I didn’t have to tape my stencil. I used my hem guide to ensure equal space on the left and right sides.

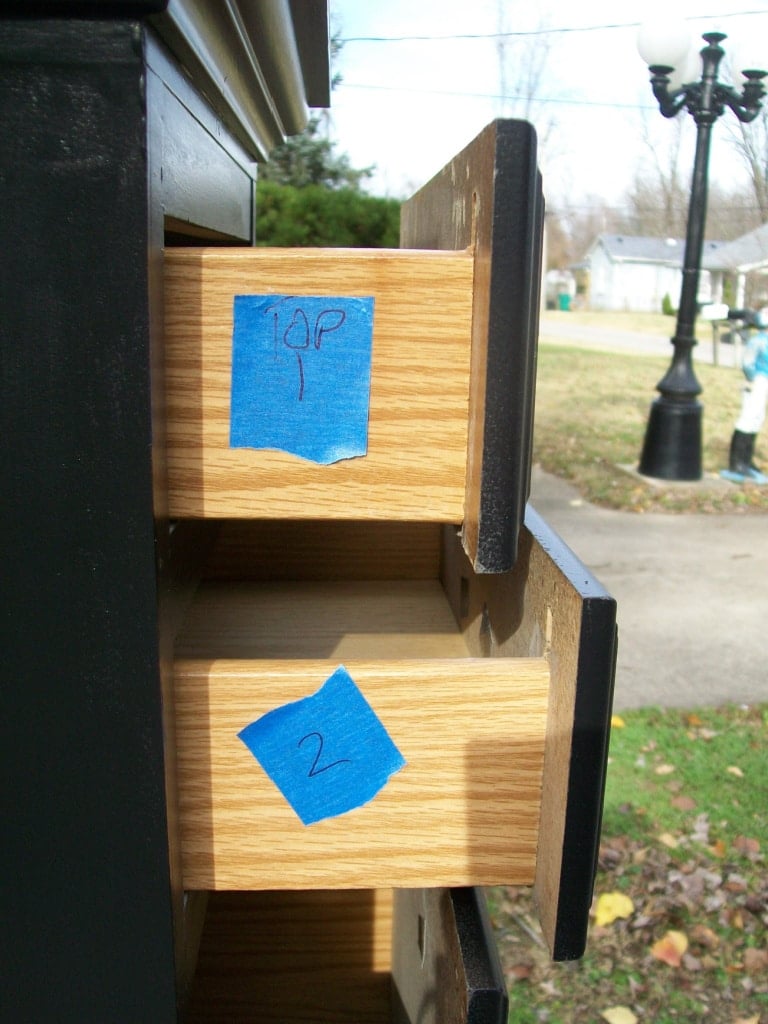
After I painted the stencil, I marked the drawers with painter’s tape to get them in the correct order when I moved the tall chest into the house.
Install Glass Knobs
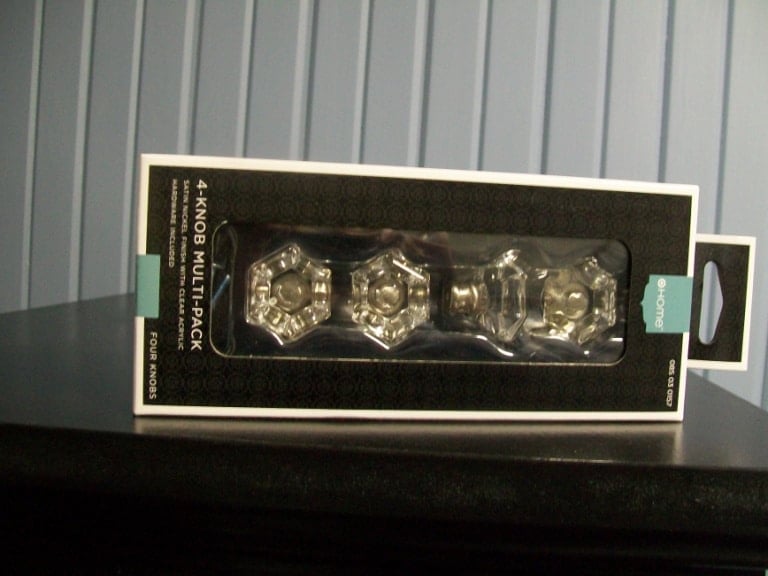
Time for some knobs! I loved these pretty glass-look knobs.
How To Use A Hardware Jig
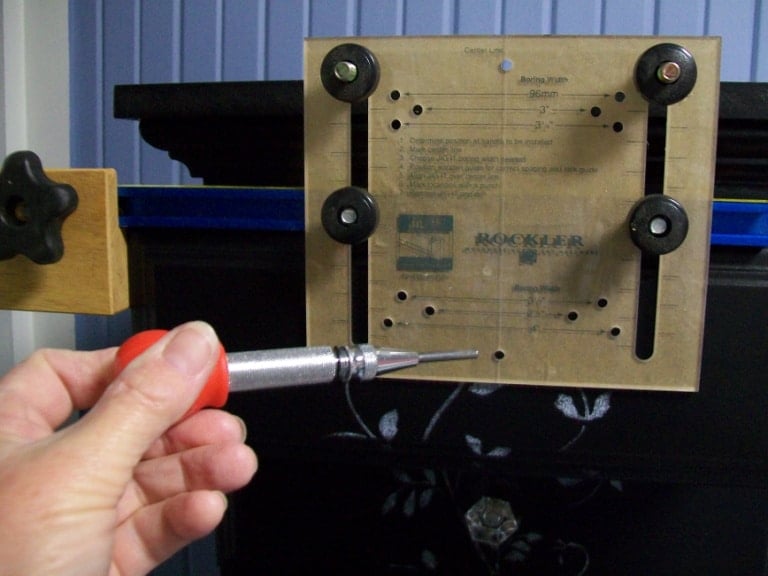
If you’ve ever tried to center hardware and get it the same on each drawer, you know how difficult it can be. This handy Jig from Rockler makes it easy.
The block on the left lines your hole from left to right, while the plastic piece centers your hole from top to bottom. The automatic center punch “dents” a little hole that guides your drill bit. LOVE it!
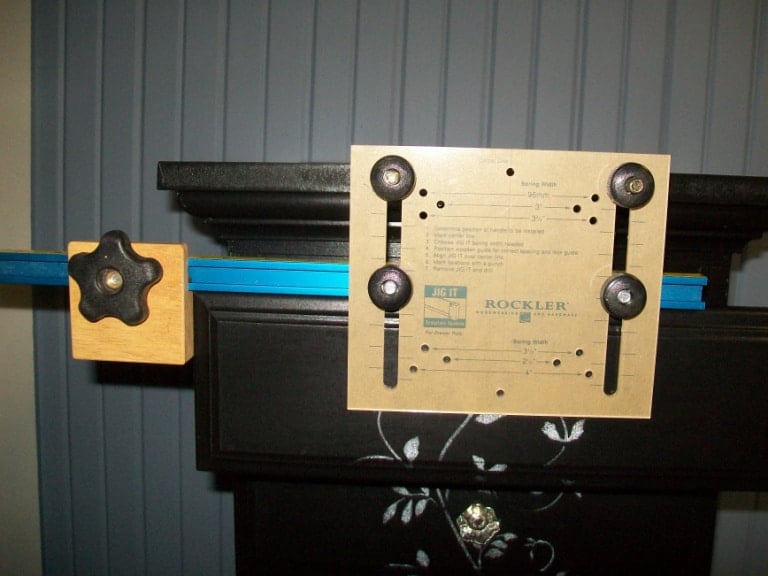
You can see how adjustable this hardware installation jig is. It is invaluable.
The knobs were installed in no time!
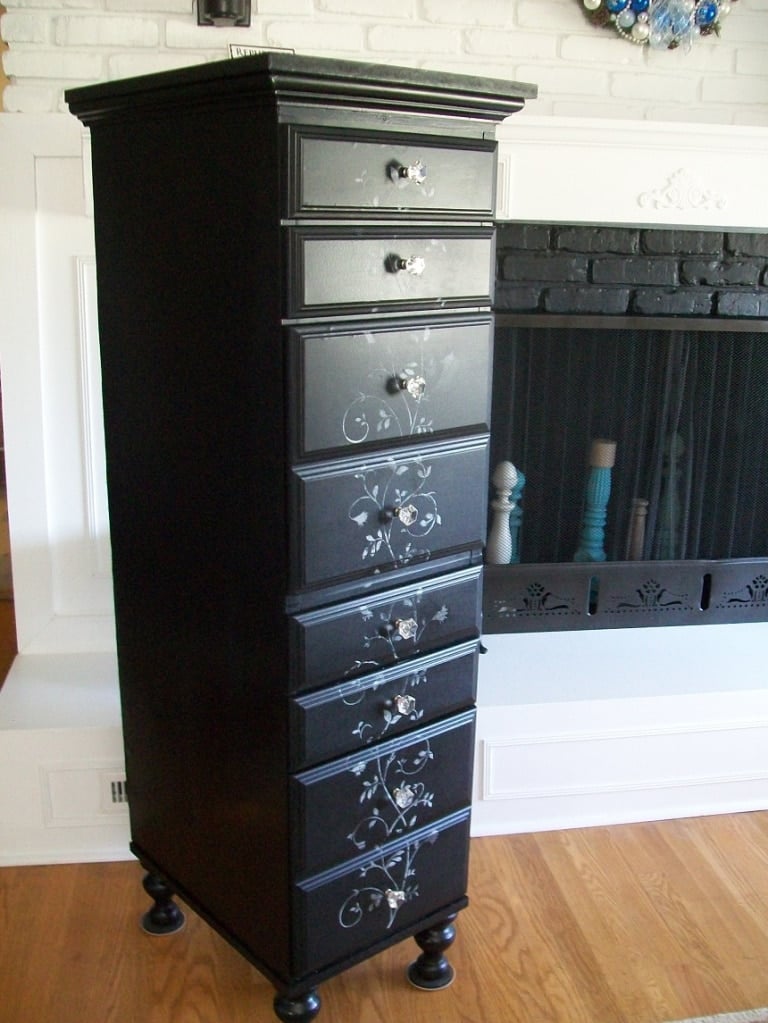
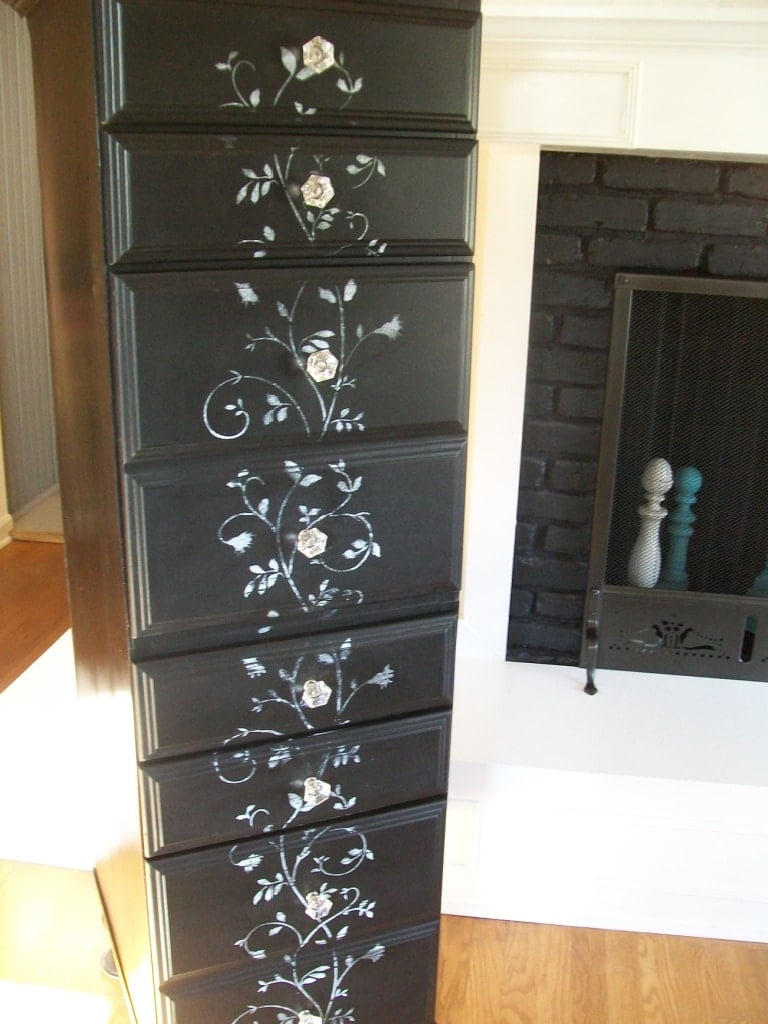
You can see that although there are actually SIX drawers from the original repurposed desk. I like that the two deep drawers appear to be two rather than one. Therefore I put EIGHT knobs on this chest.
This repurposed desk turned into a lingerie chest can be multi-purposed. I’m unsure which room it will land in, nor what I will use it for. It can be used for office/tax papers, lingerie, or jewelry. The deep drawers could hold file folders if used as a file cabinet. If used to organize accessories, the smaller drawers could hold belts, while the deep drawers could hold handbags or boots.
What would you store in the “tower of terror?”
Edited to add: I have placed this beauty in my bedroom. The larger drawers hold some boots. The smaller drawers hold all my blog stationary stuff like business cards, stickers, etc. The top drawer holds my orphan socks, which the dryer didn’t eat!
Featured In Today’s Woman

Okay, now for the update! I still use this upright storage in my bedroom. It seriously doesn’t get any better than this for storage. All that drawer space with such a small footprint!
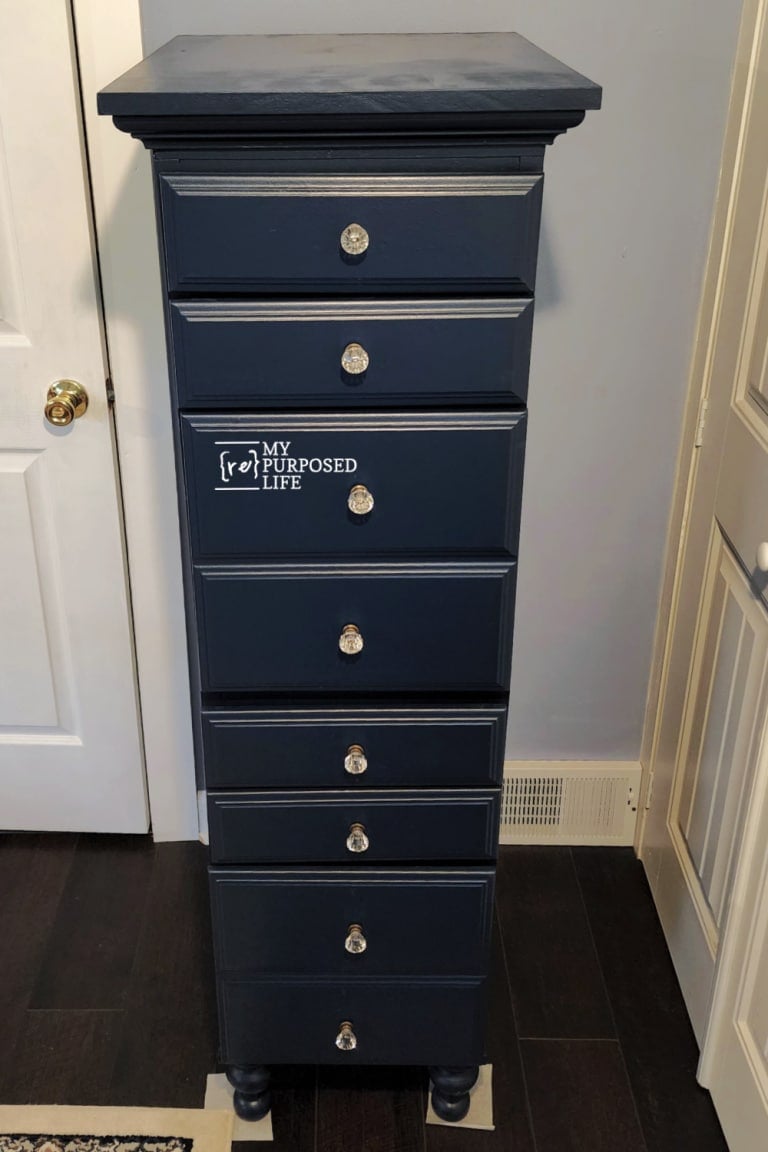
Black Lingerie Chest made from a Desk
I still love this storage solution as much as ever, but I built it in 2011!

This is my current throw rug in the bedroom. It’s from IKEA, but they probably don’t have it anymore. I keep things for years and years when I love them.
A few days ago, I posted on Facebook asking what color I should pull from the rug. The choices were dark blue, gray, or off-white. Weeks ago, I decided to paint it Polo (navy blue) but as I started working on it, I had second thoughts. Many, many people said dark blue. I think gray came in second.
So, I stuck with my original plan of Polo. After all, I bought a quart for this project, I should use it, right?
Easy Paint Makeover
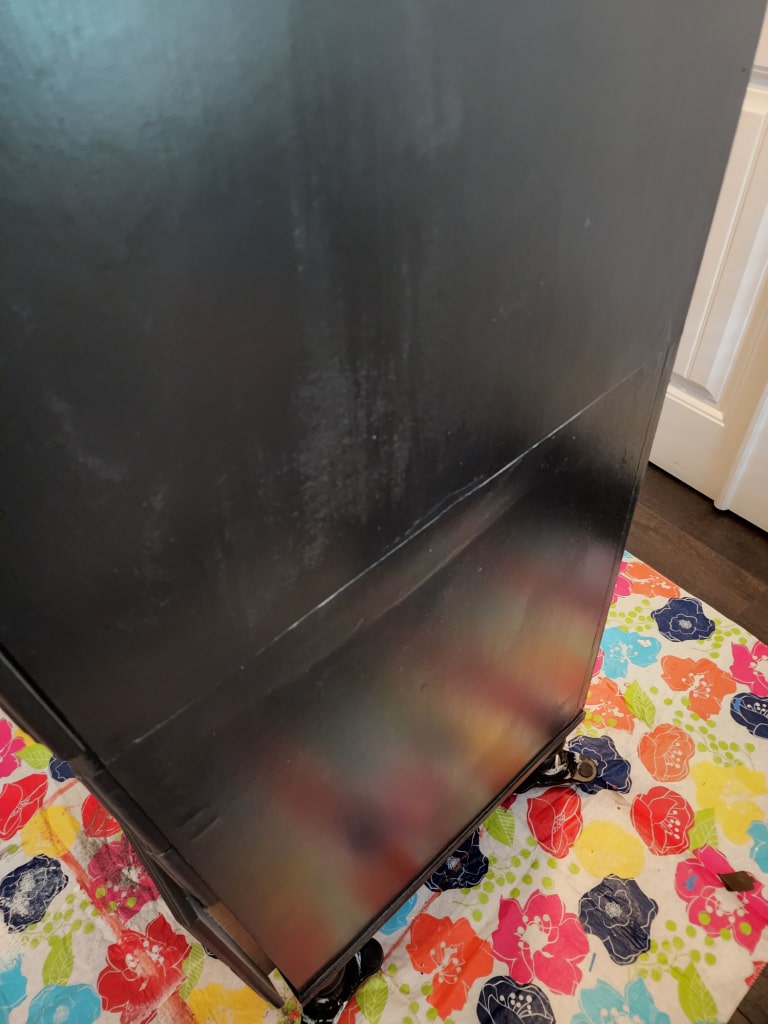
It’s always bothered me that the “joint” where I connected the two drawer sections was so visible. Well, I guess it didn’t bother me much since I’ve never done anything about it. You could add thin plywood along the entire length to hide the seam. That would make this a much easier project for a novice.
In this photo, you can see I’ve already patched the side and started painting the drawers. Because it was so hot outside, I opted to paint this lingerie chest in my bedroom.
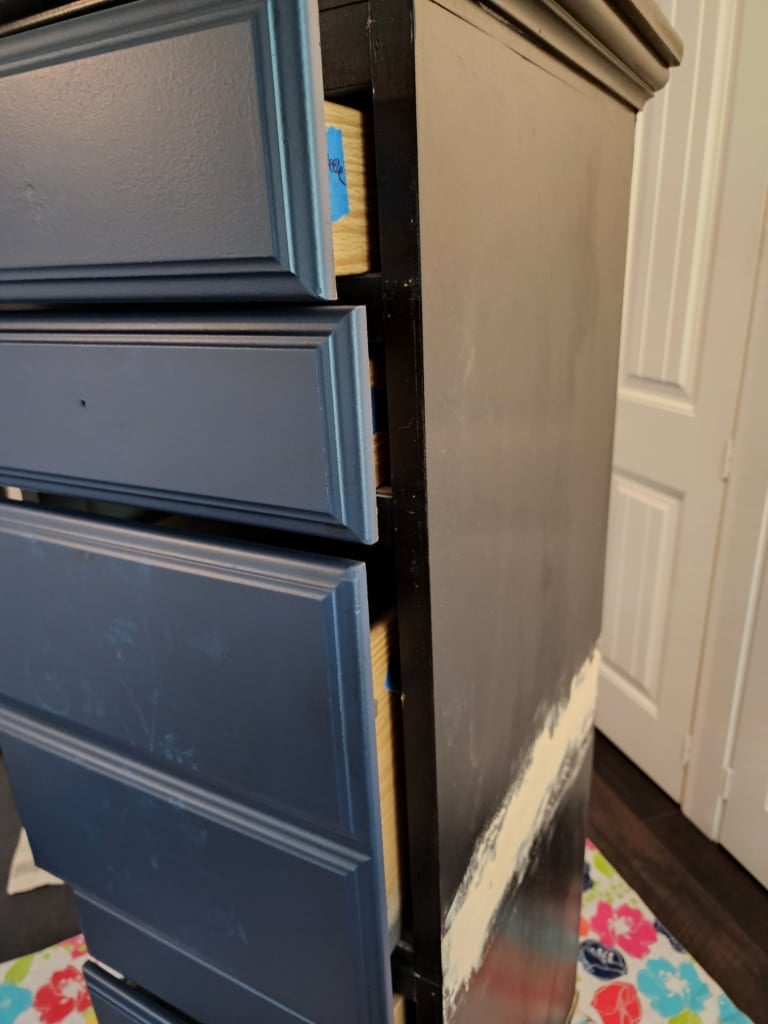
Honestly, when I started with the drawers, I still wasn’t 100% sure I would go with blue. I use All in One Paint from Heirloom Traditions., always doing a very light first coat after prepping the piece to get the best look. I sanded the stenciled drawers lightly to keep the flowers from showing through on the final coat. You can see they are still visible after the first coat.
Related Content: Navy Blue Furniture Projects
Foam Roller for Painting Furniture
I used my small foam roller for 99% of the lingerie chest. A small paintbrush was only used in the corners.
This image is after a second coat of Polo on the drawers of the lingerie chest. I sanded the seam, and it’s almost ready to paint.
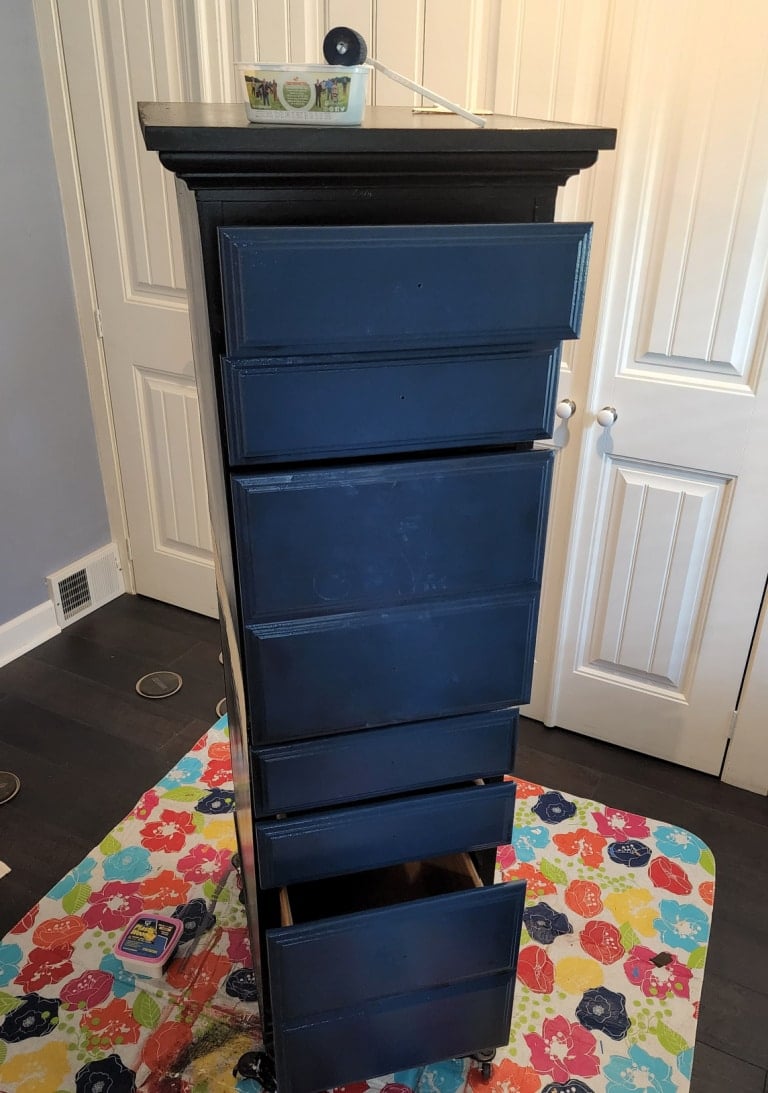
After the drawers were dry, I removed them to paint the facing and the rest of the lingerie chest.
If you remember, the top is MDF, so it doesn’t paint up very well. Notice the parchment paper under the feet to keep paint off the floor. Let the paint cure a little before doing one more coat on the top and sides. The small drawers got two coats, and the larger drawers got three coats.
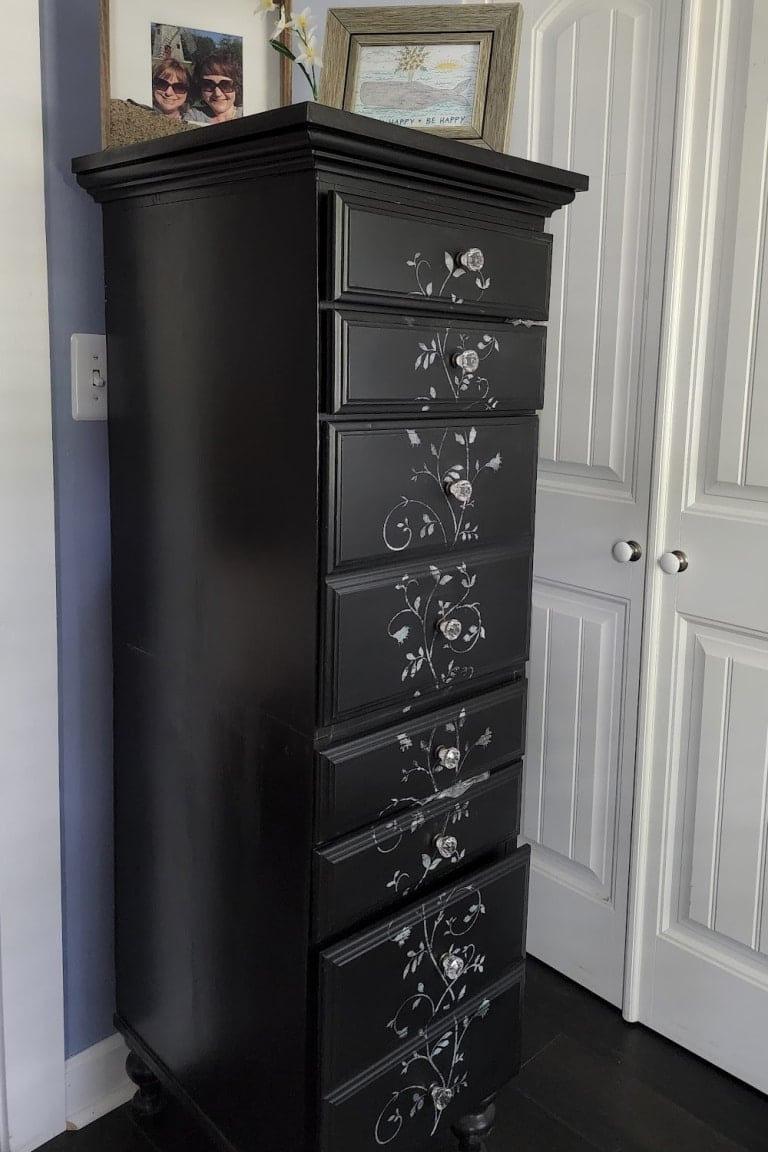
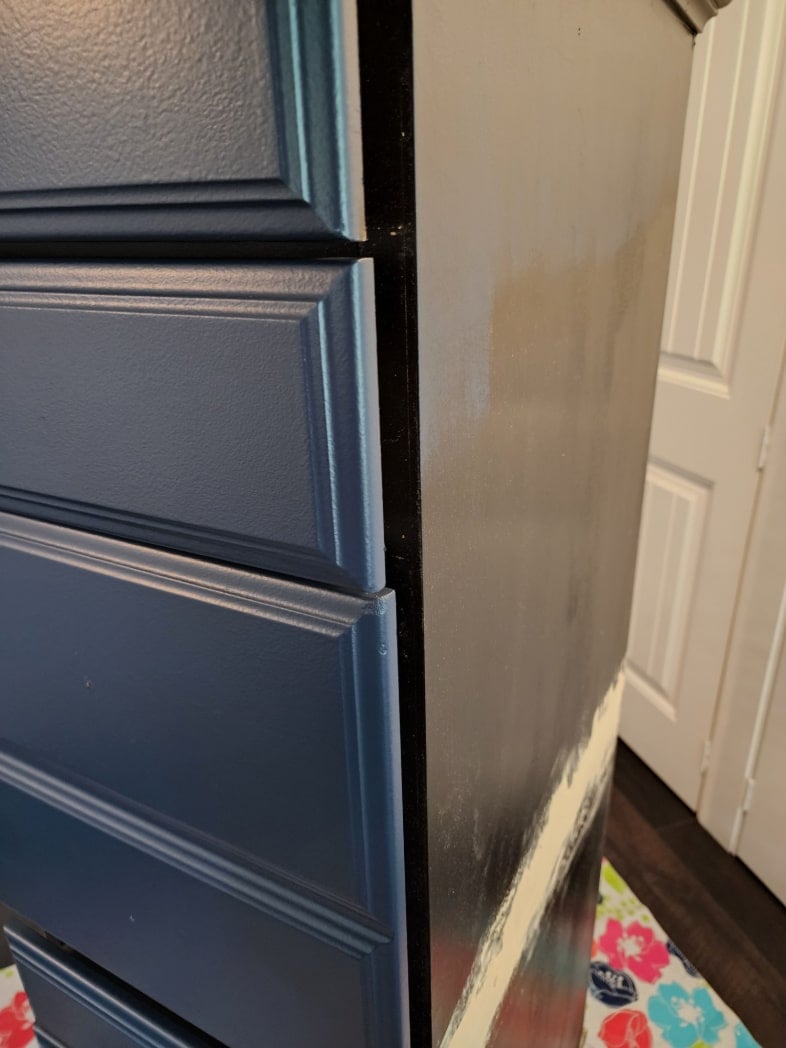
Now, the makeover is complete!
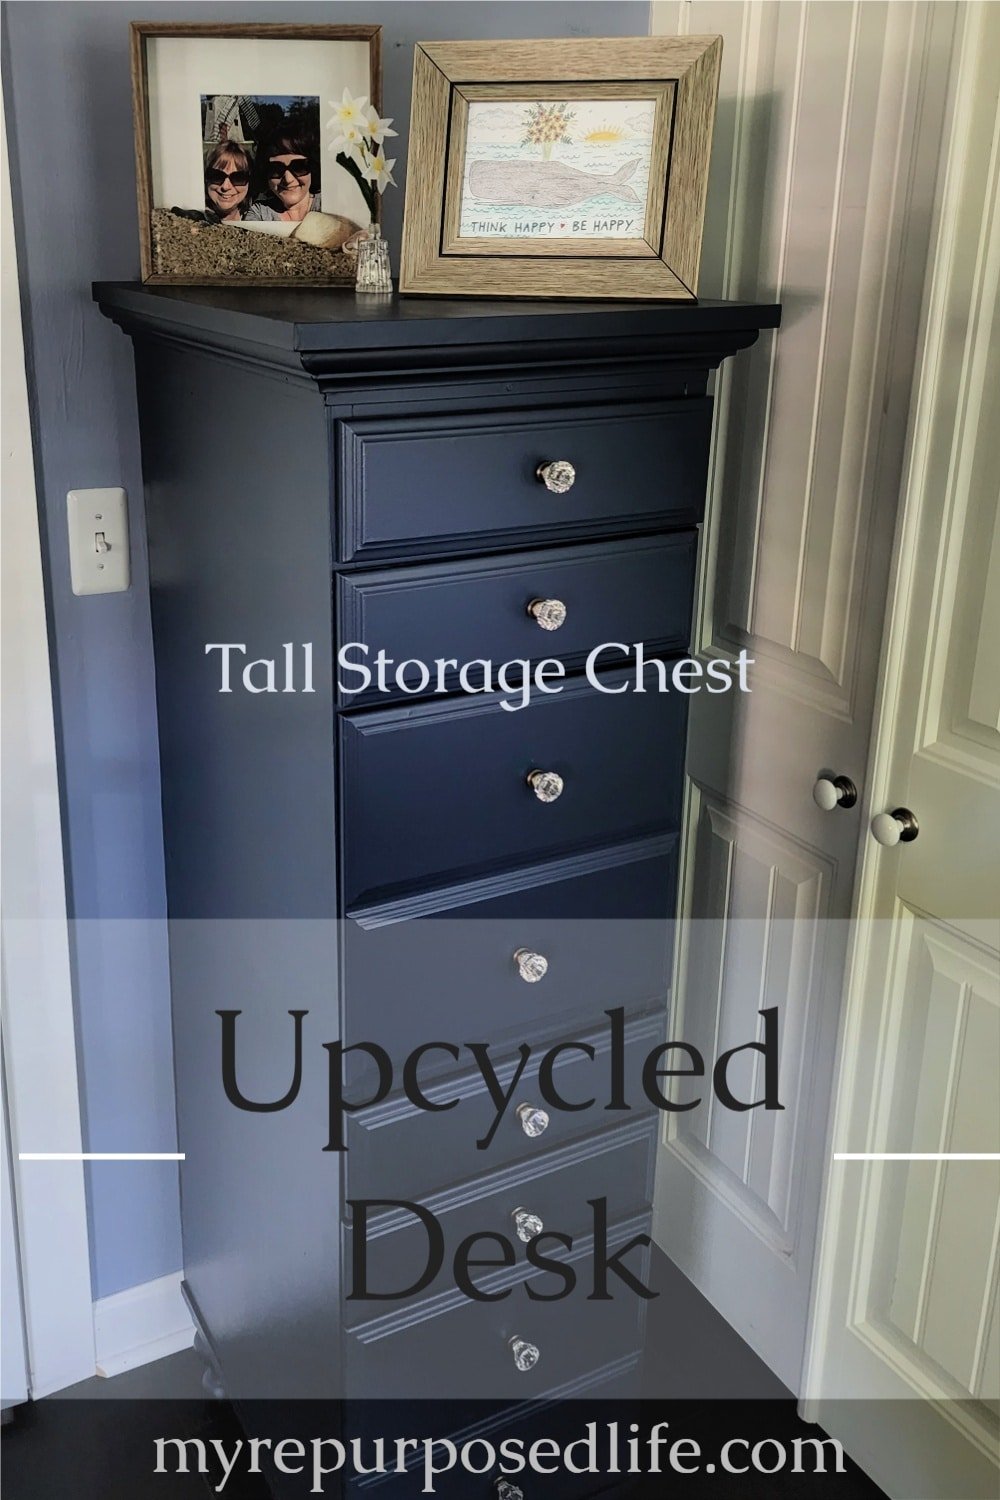
Blue Storage Chest Made from a Repurposed Desk
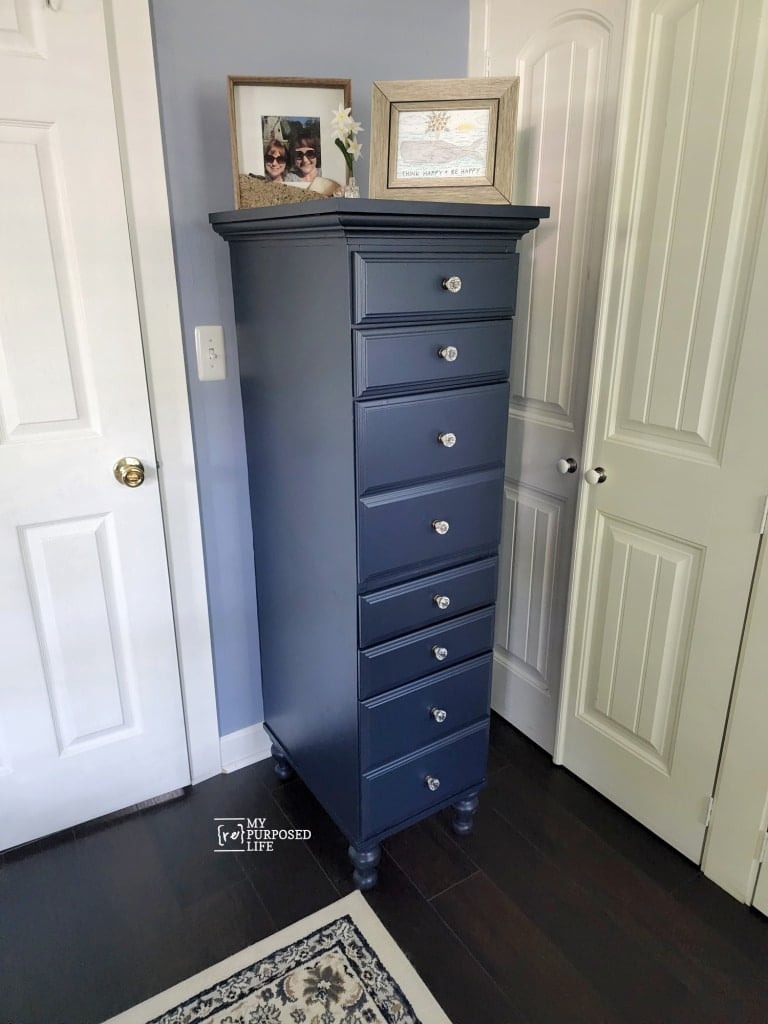
Personally, I think the lingerie chest looks right at home now, much better than it did before.
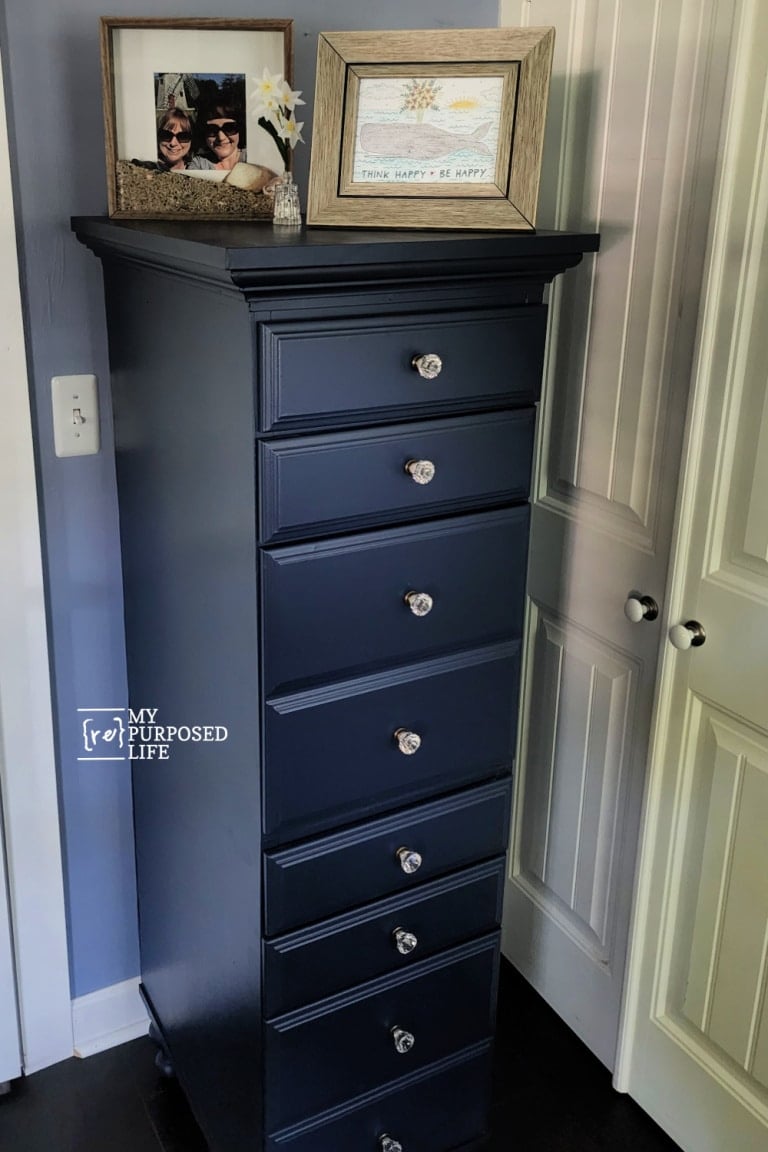
Items atop the tall chest are favorites from my trip with my daughter Jamie. On the left is a keepsake shadow box I made with mementos of the trip. On the right is a postcard I picked up from an artist in Nantucket. The small perfume bottle is left over from projects I made in 2009.
What do you think of the new color? I’m seriously ready to make another project out of a repurposed desk; what about you?
gail
Related Content: More Upcycled Desk Ideas
Sharing at Funky Junk Interiors
Hi Gail, I friggin love this idea. I am gonna keep my eye out for a desk like this to repurpose. I have a tall boy/lingerie cabinet that I bought on Marketplace. Love it for bead storage. Want another on but have not been able to find one. Now I can come to your blog to repurpose a desk like this when I find one.
Cheers, Debra
PS. Casters don’t work for me. Like what you’ve done better.