How I Disguised My Sump Pump – The Basement Laundry Room Renovation Continues!
As an Amazon Associate, I earn from qualifying purchases.


Do you need to disguise a sump pump? I do!
Although I still need to do a lot of work to the basement, for now I’m concentrating on the corner that houses my new washer and dryer. When I say I really enjoy doing laundry down here, I mean it. It’s been several months now. I thought the newness would wear off and the eventually I would have mountains of clothes all over the place as before, but being so bright and clean, it motivates me to stay on top of things.
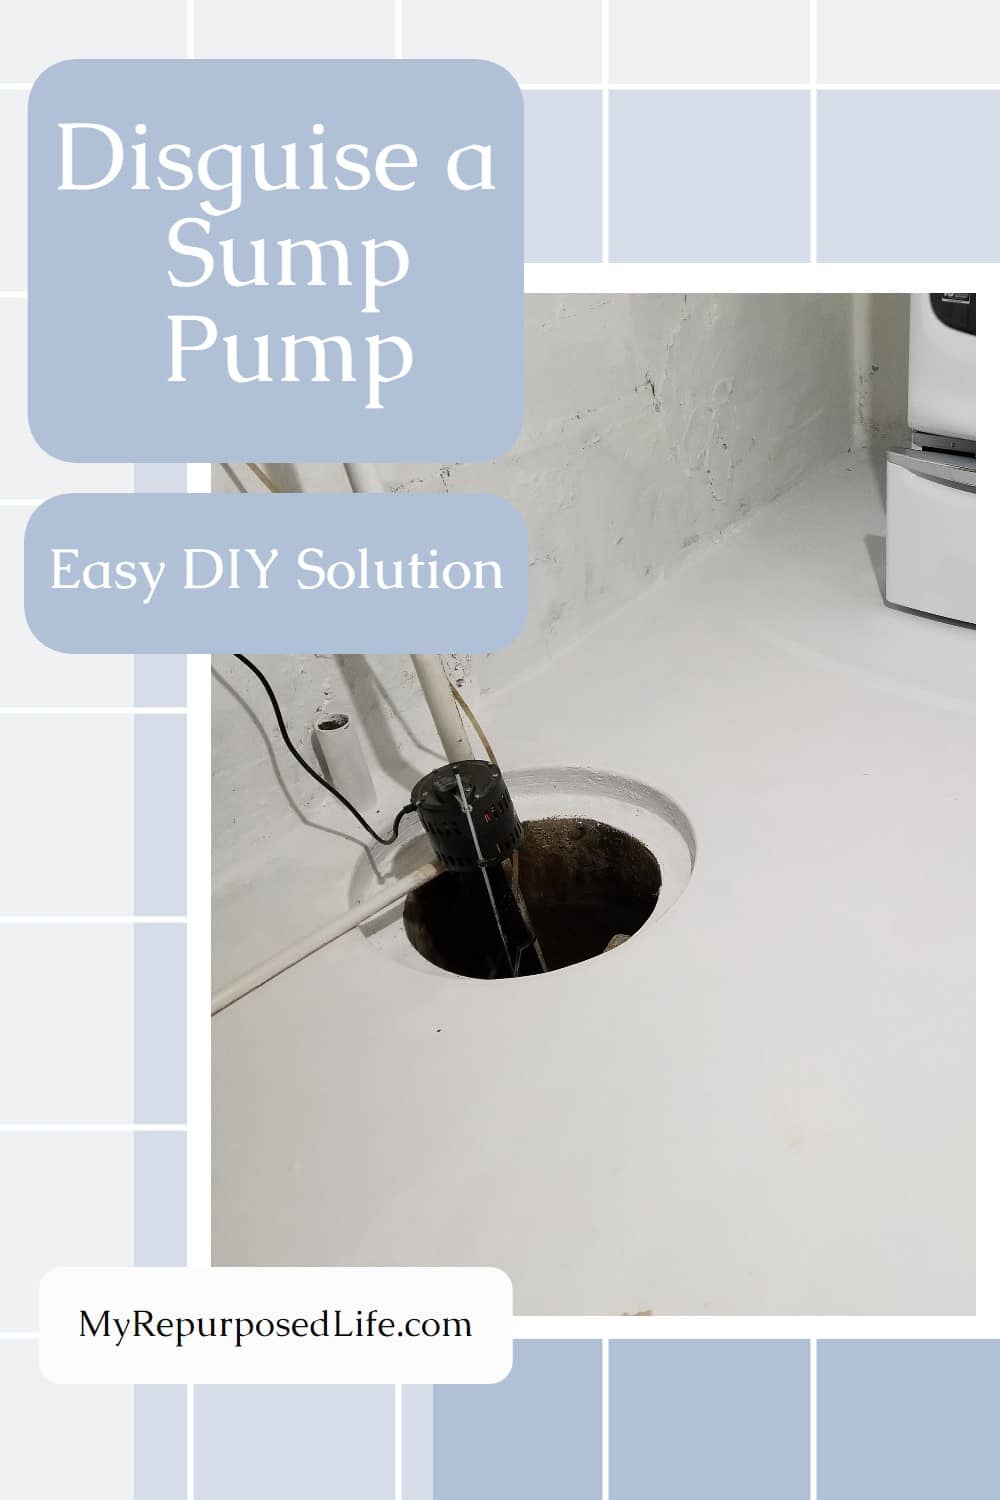
As I continue to work on my basement laundry room, I’m gearing up to tackle the largest eyesore: the sump pump. Since my laundry room is in the basement, a sump pump is a necessity – but it’s so ugly. Sump pumps are not pretty, but when I say it’s a necessity, I know from experience.
Sump Pump Failure
We had record rains last month and I kept a close eye on the workshop in the garage and basement to make sure there was no flooding or leaking. Then I dropped the ball! The day after it stopped raining, I didn’t check on the basement. I had a fan running all day to dry out some water seeping in through cracks in the floor.
Not wanting to leave the fan on overnight, I went to the basement to turn off the fan at 11:15 pm. Uh Oh! The sump pump malfunctioned and the basement was holding about 2” of water in about 2/3 of the floor area. I nervously waded through the water to see what was causing the backup. The float had gotten hung up and it hadn’t kicked on for hours. I was able to get it to kick on and pump out the water. Thankfully nothing was ruined. I’ll talk more about that as I tell you how I have covered up this necessary eyesore!
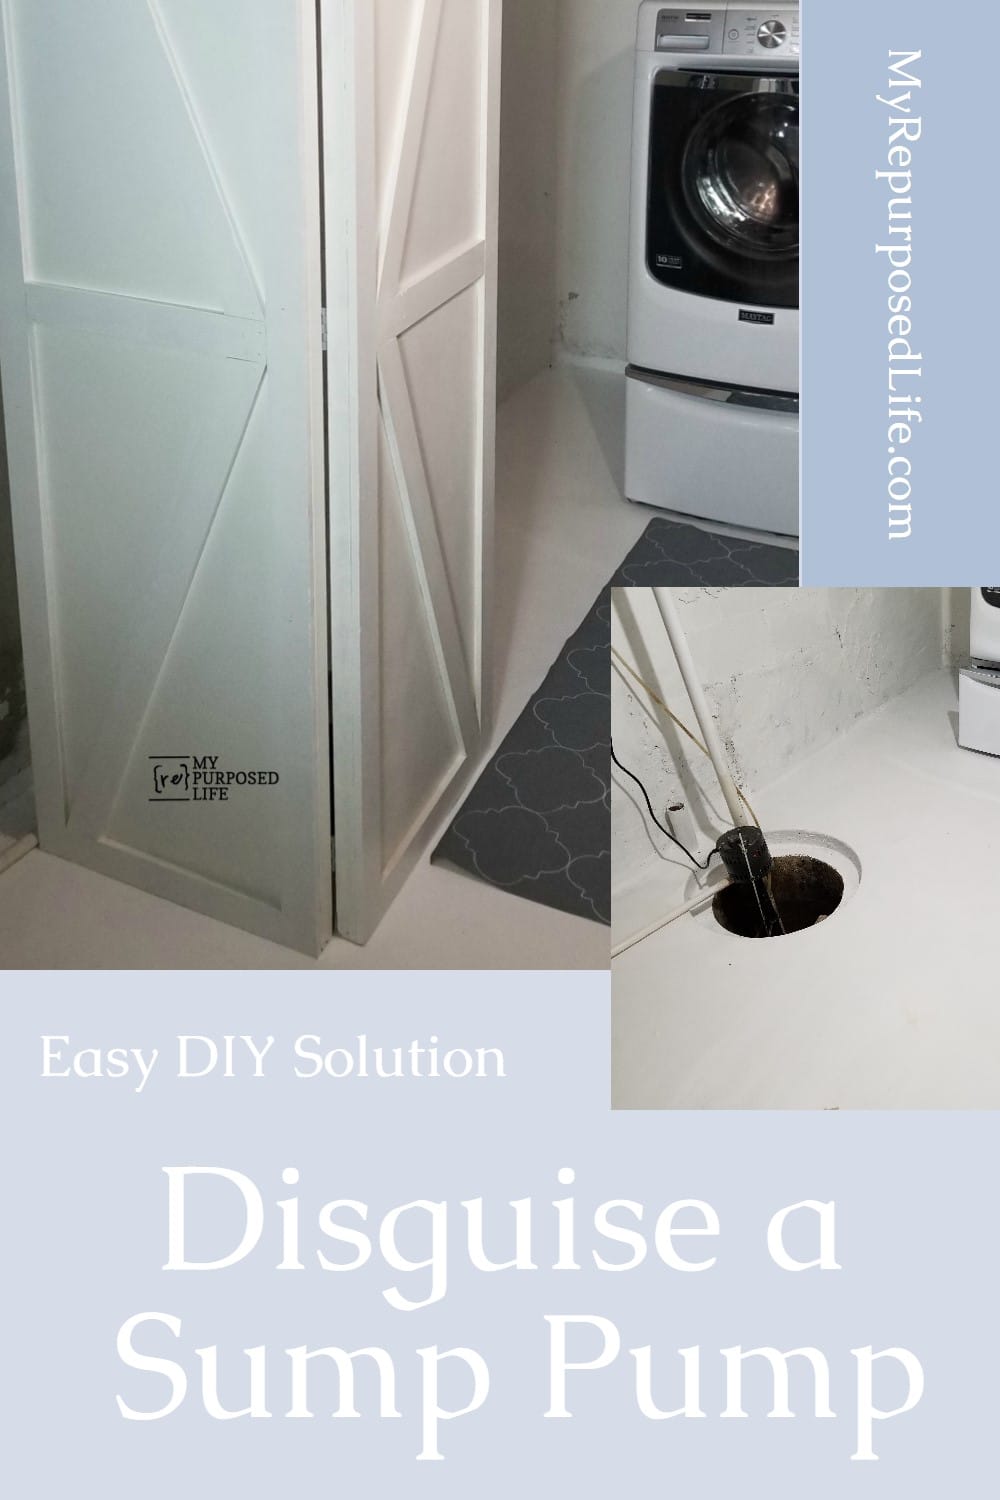
Cheap Hollow Core Doors

I recently scored these two hollow flat panel closet doors and decided they would be perfect to disguise the sump pump and the pvc pipe.
Easy Paint Technique

When I paint flat surfaces such as this, I generally pour a little paint on the project and then spread it with a brush or in this case a small roller. A wide 9” roller would cover faster, but I feel it’s a big waste of paint in the end.
Beef Up The Plain Doors that will Disguise Sump Pump

The doors were a little plain, and I had thought about making them look like barn doors but wondered what wood I could use. As I was beginning the project I remembered these trim boards I had. They are about 1/2” thick—just what I was looking for. I took a few quick measurements to make sure there was enough to do what I wanted.

The wide planks were ripped on the table saw. Did you know I’m happiest when sawing wood? I think these planks were cedar because there seemed to be a sweet aroma as I ripped them.

The boards aren’t perfect, but that’s okay. I love using reclaimed lumber for projects like these faux barn doors. It was quick and easy to frame out both doors.
Don’t get tangled with the angles!

Making the cross braces match up came together better than other projects I’ve done in the past. Because the doors were perfectly squared I was able to cut the angles at 22.5°. The first end was easy to cut.

For the opposite end I marked them with a square to get a good fit.

Perfect fit! I’m loving how the doors are coming together.
Attach Hinges

After securing all the boards with wood glue and a nail gun, I was ready to add hinges. I used the hinges that came with my bi-fold closet doors-you know the ones I turned into French doors for my wall to wall closet makeover.

I couldn’t wait to stand them up to see how they looked. Thenk I put some thought into whether the centers should come together at the hinges, or the opposite side of the doors. I felt this looked better. What do you think?
I had to wait several days to get help moving these doors to the basement. Hinging them together and adding the extra weight became too much for this old gal to handle!
Where did the Sump Pump go?

The doors work perfectly to disguise the sump pump and the tall pipe that runs up to the rafters.

Look at my new fresh space! The sump pump is still there, but it’s no longer an eyesore. I have to do a double take now when I walk into my basement laundry space. The diy laundry cart still makes me giddy. I use it all the time.

The old table has been in the basement for probably 50 years. It was here when I moved in 42 years ago. I had only used it for storage, but I gave it a fresh coat of paint and now use it for folding clothes. The cheap plastic garment rack also got a fresh coat of paint and now looks right at home in my refreshed basement laundry space. The rug is a stenciled piece of vinyl wallpaper. When the basement flooded, I simply rolled up this faux rug and took it outside to hose it off. The paint stood up through the flooding and the washing. A real rug would have been difficult to clean and dry.

What’s your favorite part of my new space?
So, I used these doors to disguise a sump pump, but they could be helpful in a lot of other areas of your home. Maybe you have a water heater you want to hide? It could even give you some privacy for a home office in the main living area of your home. The possibilities are endless.
gail
I love the faux rug!
Thank you so much Rosalie! 🙂
gail
A beautiful way to cover the sump pump! We also put 2 dehumidifiers in our basement. But, not on the basement floor. To be safe, we put them on top of 2 over turned plastic milk crates. Keeps them up off the floor. You can empty your dehumidifiers in the sump pump! No need to carry the water outside. They prevent any damp smell in our basement.
I also have a dehumidifier in the basement. I have a small hose connected to it that flows right into the crock so I don’t have to empty it. I also have it on a timer so that it doesn’t run all the time. 🙂
gail
Sounds like you’ve got it covered! Good work!
Gail,
I can honestly say I had never heard of a sump pump before but you disguised it perfectly. The laundry room is coming together so pretty and after all those years you should feel proud of all your hard work. I am sure after raising a daughter you don’t need no new rules about baby proofing and would be just as careful with your grand baby as you were with your daughter. Yes there is new fangled stuff at keeping them safer but I believe common sense goes a long way also. Again so happy for you and your daughter!
Bonnie,
Thanks for your sweet comment. I really am enjoying the laundry space so much more. Yes, we will all be keeping Eli safe from harm. It’s been a long time since I’ve been around a little one and things really have changed a lot. 😉
gail
I love that you covered the sump pump without impeding its function. I would think that you would want to keep little Elias out of the basement all together. Baby proofing your home for visits is really important and takes time to do. The safety 1st products are the best that I’ve found. I’ve tried other brands that were a lower price, and you get a product that your grand baby will be able to get past. My baby proofing is getting higher up the wall as my grandson grows. He can now open doors. Some of baby proofing is not arthritis friendly, and that’s a big problem for me, but he’s well worth it. I’m sure that Jaimie and Andy have already begun the baby proofing. So excited for you. You’re a grandmother!!!!!
Jennie,
You are so right, Eli will not be going in the basement until he’s ready to help mops with projects. Since he’s two, we have to think higher also. 🙂 Not sure he’ll be visiting very much in the near future, so I’ve got some time to think about keeping him safe here.
Yes, Jamie and Andy are definitely already in the mindset. I gave them some items for Christmas to get them started.
The only ones I need to keep away from the sump pump are Lulu Mae and Matt the Cat!
gail
love how it looks such a great job.
My favorite part is your laundry cart and that huge table to fold clothes on!
I hate doing the laundry but if I had a space like this maybe I’d like it better too! I’m impressed with your woodworking skills, I must get my other half to show me how to use some of his tools, then I could do some of the many projects in my head
Emma,
Thanks for your sweet comment! I’m happiest when I’m sawing and piecing stuff together. Plus, now I can be happier in my new laundry space, and so much more efficient. 😉
I’m self taught with woodworking, so if you can just watch the hubs, you’ll learn a lot!
gail
Ingenious, Gail! Looks fabulous and also brightens up the place even more.