DIY Octagon Mirror | It’s easier than you think
As an Amazon Associate, I earn from qualifying purchases.
I am excited to share my DIY Octagon Mirror today!
Hey, it’s Mindi again, from MyLove2Create. I have been contributing for Gail for quite a while now and I just wanted to thank you for your support! I really appreciate you letting me share with you and I love all your wonderful comments, you are the best!! So Thanks a bunch, it means a lot to me. 🙂
")

If you follow me on my blog, then you know that I am supposed making over my master bedroom right now. Slowly but surely…you know life, with six kids, and now summertime…(sigh)
Since I finished my Plank Wall I have been debating on what decorative pieces I could add to the room. With a slim to none budget, I have been contemplating different DIY projects. When I went to my shed other day I had a moment of inspiration, and I knew that this piece of wood…
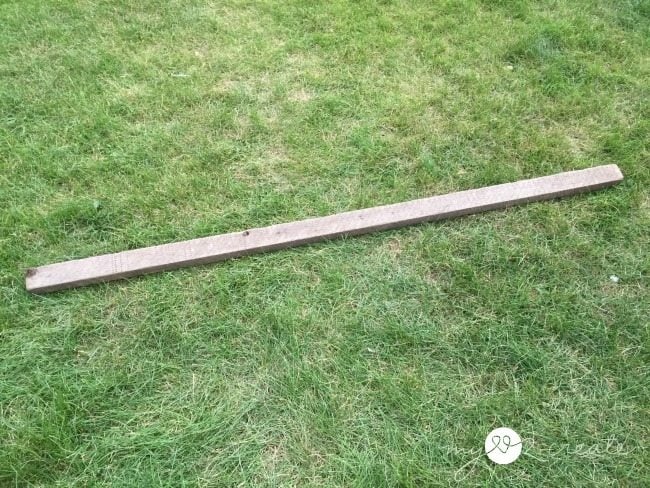
…needed to be made into a decorative mirror, and I knew the perfect shape. An octagon. A DIY octagon mirror!
Octagon mirror 8 pieces of wood cut at 22.5°
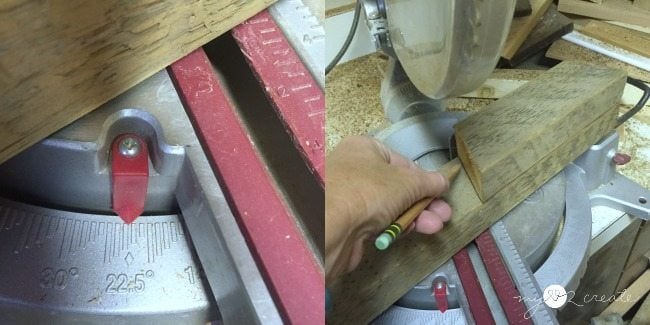
With a little luck, I figured out that my 8 pieces needed to be cut at 22.5 degrees ends NOT parallel (which means the angled cuts are not parallel). Since my board was not terribly long I figured out that I could get all eight pieces cut if I made my long sides of each piece at 8 1/2 inches long. I set my Miter saw at 22.5 degrees and cut an end, then flipped my board and cut the other end. You can see after the first piece, I could use previous pieces to measure and cut.
Kreg Jig Pocket Holes Octagon Mirror
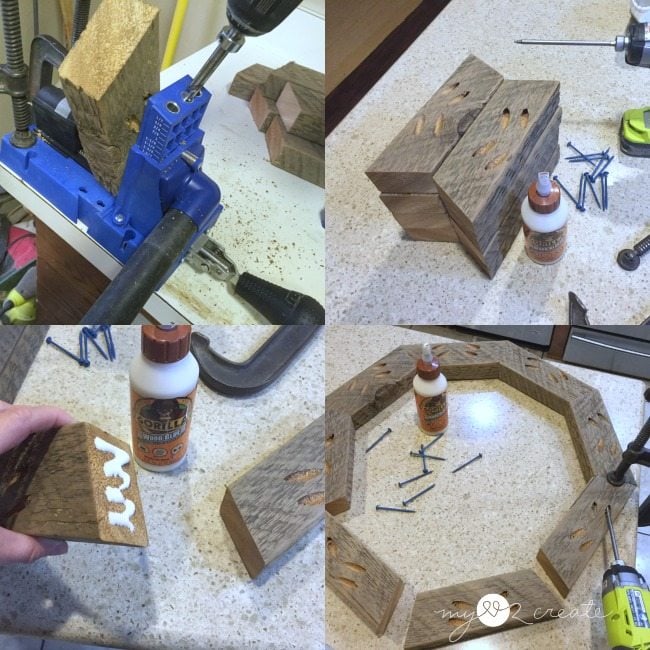
With all eight pieces cut, I knew the best way to attach them would be with pocket holes. I drilled 1 1/2 inch pocket holes (since the wood was 1 1/2 inches thick), and used 2 1/2 inch screws to attach them together, and of course I couldn’t forget Gorilla Wood glue. 🙂
*Tip* Always clamp your boards when attaching wood with pocket hole screws, it makes building much easier.
Need more details on using a Kreg Jig? See my article How to use a Kreg Jig Pocket Hole System
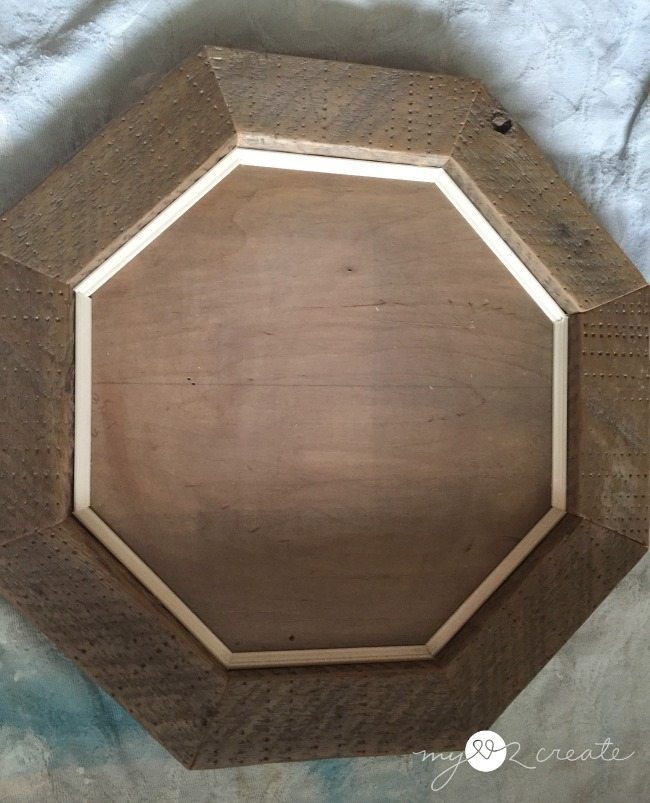
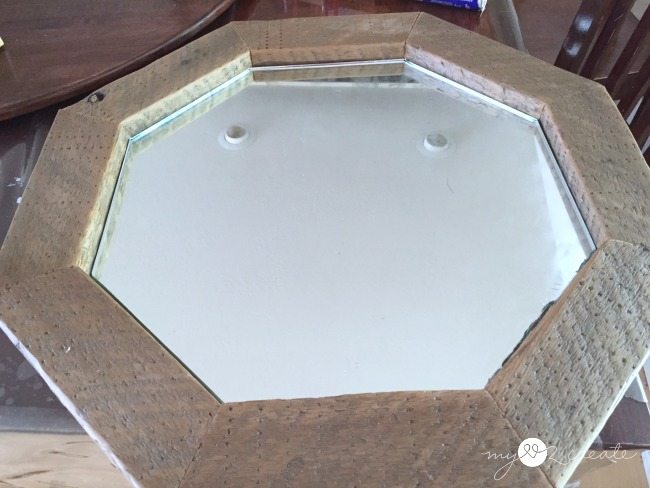
Mark and cut backer board for DIY octagon mirror
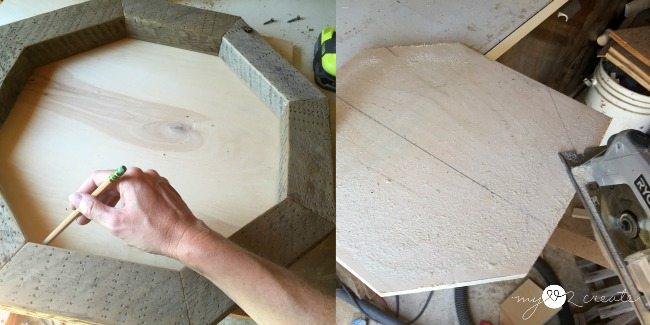
I found a scrap piece of plywood to use as my center piece, and used my new octagon frame as a guide to trace onto my plywood. Then I cut it out with my circular saw.
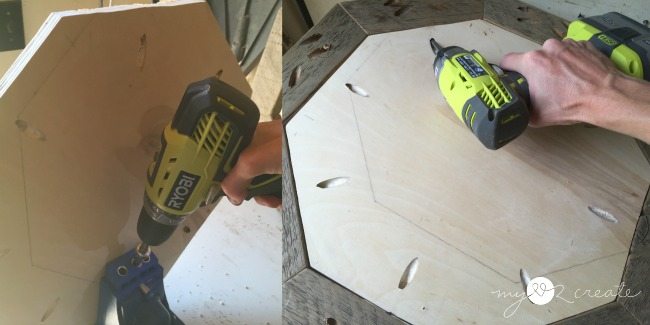
I used pocket holes to attach the center plywood, this time drilling 3/4 pocket holes, and using 1 1/4 inch screws. I attached the plywood flush with the back of the frame.
If at first you don’t succeed (cutting a glass mirror)
Up next…cutting a glass mirror. Eeek!
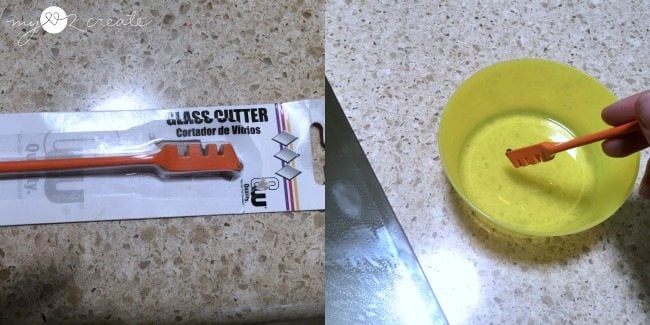
Up until this point I was pretty confident, but I was about to embark on new terrain, and I was a little wary. I had gotten a piece of mirror off the side of the road in someone’s trash a few years back and it has been collecting dust in my garage ever since…well not anymore, time to woman up, and try something new!
To cut glass or mirror you need:
- a simple glass cutter (I got mine at Home depot for a project I haven’t done yet, ha ha, so I was glad I had it on hand, I think it was less than $5)
- some oil (I used vegetable oil, that is what is in the yellow bowl, it helps to get a good score)
- some type of ruler or straight edge to run your glass cutter against
- a piece of glass or a mirror
- safety goggles and gloves
- a few good how to cut glass youtube videos 🙂
Mark the mirror
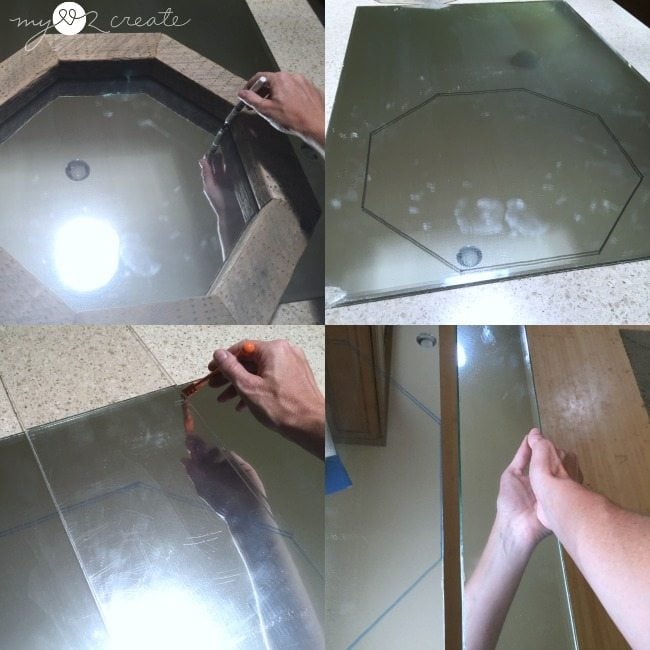
I started by tracing my shape onto my mirror with a dry erase marker. I lined up my straight edge to where I needed the glass to be cut, dipped my glass cutter into oil, and scored it down the glass. Then with the scored edge on the edge of a table I snapped off the mirror (I was wearing goggles, but I had forgotten my gloves, oops). It came right off, if I applied enough pressure, I was a little scared at first, but once I got the hang of it it wasn’t too bad!
Please note, the top two photos above were of my first attempt and I used black marker, I couldn’t snap off the small piece on the bottom of the mirror it was too small (top right photo). Let’s just say using a hammer wasn’t my brightest idea…
Try again (to cut a mirror)
My second attempt I used a blue marker (bottom two photos above) and it went better, I will share my mistake in a second. I will not give a full tutorial on cutting glass, I watched a youtube video, or two…and suggest you do the same.
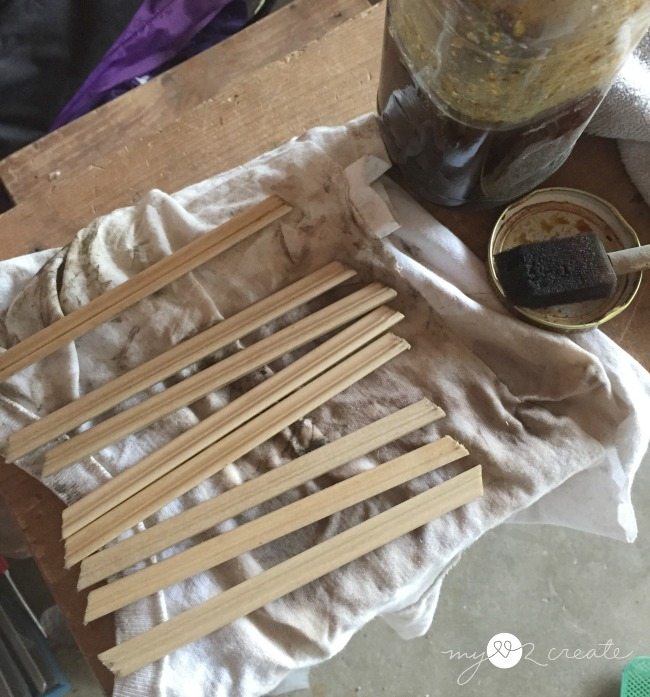
Trim will hold octagon mirror in place
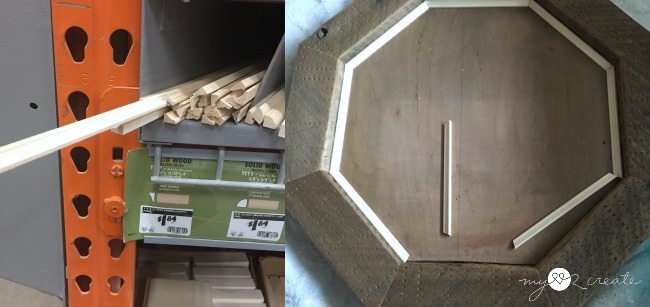
This project would have been free, except for this decorative trim I purchased. I wasn’t planning on using trim, but when I messed up my scoring on my last mirror cut, I had to break off the glass mirror a bit to make it fit, and it didn’t look so pretty. Gotta love the learning curve right!?
I knew this trim could cover my mistake, and make the mirror look good, so I bought it and cut it the same way as my octagon frame, just smaller. The long ends on my trim ended up being about 6 1/2 inches after measuring the inside of the frame.
Stain everything to match
A quick dry fit is always a good idea. You may have noticed that the plywood has been stained, I ended up staining the trim for the diy octagon mirror with the same thing.
I used my “natural stain” that I used on my Camping Crate. This was just after I brushed it on, it darkened a little more after this shot.
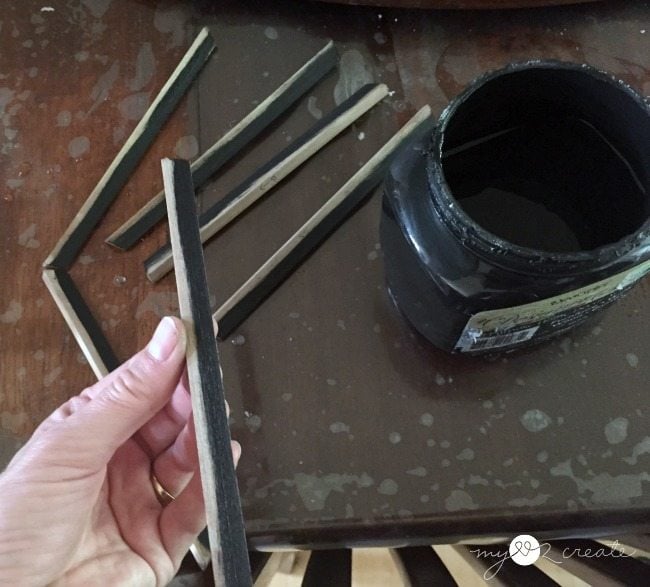
When the trim was dry, I brushed some black paint on the bottom so it would not reflect wood into the mirror. Now I was ready to put it all together!
Assemble your DIY octagon mirror
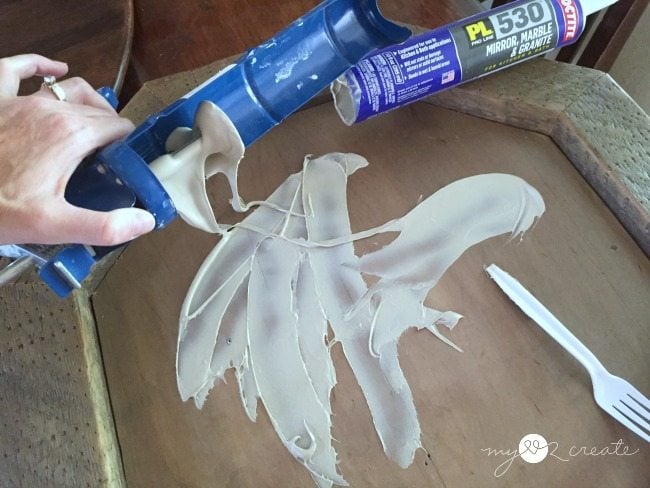
Right….I think this picture says it all, except I have no idea what happened! Lol! My caulk gun went haywire or my mirror glue container did…not sure which malfunctioned. A plastic fork saved the day and I smeared the special mirror glue all over the plywood. I love happy endings. 🙂
With the glue in place I could add my less than perfect mirror. I was sooo close to doing it perfect the second time, you can see my botched edge on the bottom right…oh well I think the trim was the finishing touch anyway. 🙂
Can I use hot glue on my woodworking project?
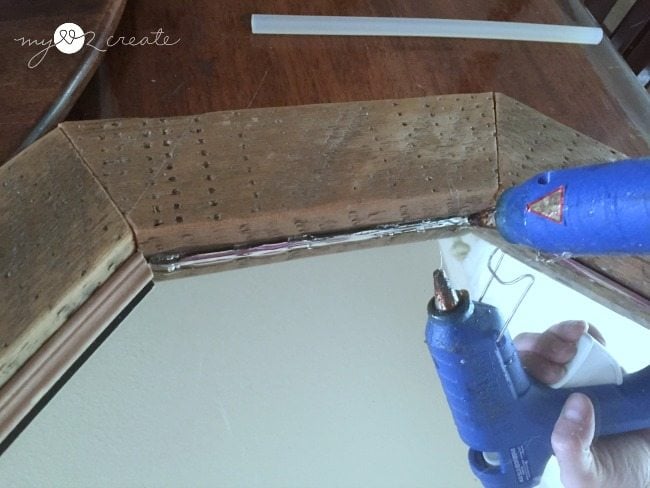
I just added a little hot glue to the edge and placed the on trim. Super easy, and I was done! Oh yeah, and add a d-ring or picture hanger the back, to hang it up.
Amazing DIY Octagon Mirror
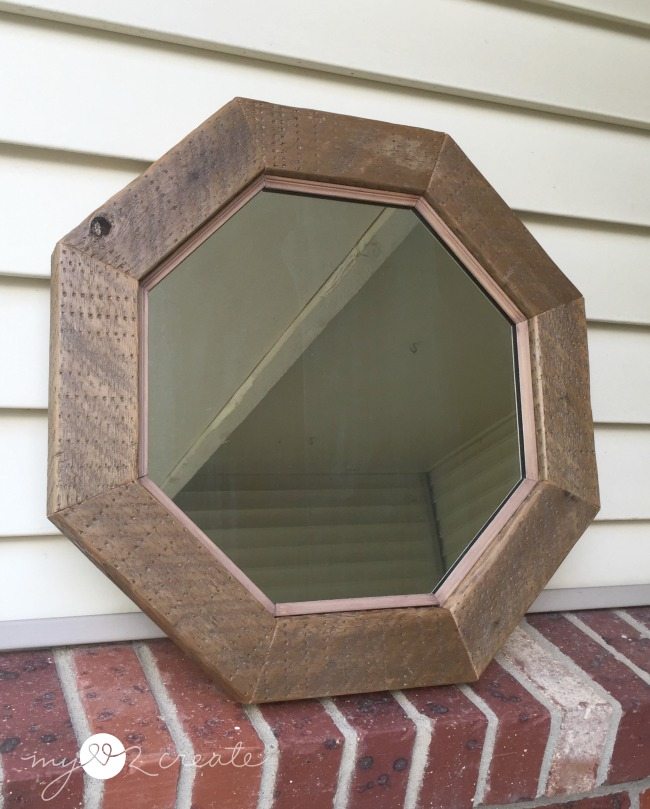
I totally just made my own DIY Octagon Mirror, and sort of learned a new skill in the process! Man that was fun!
I am not sure where this will go in my room yet, but I think I will enjoy it somewhere around the house until I decide.
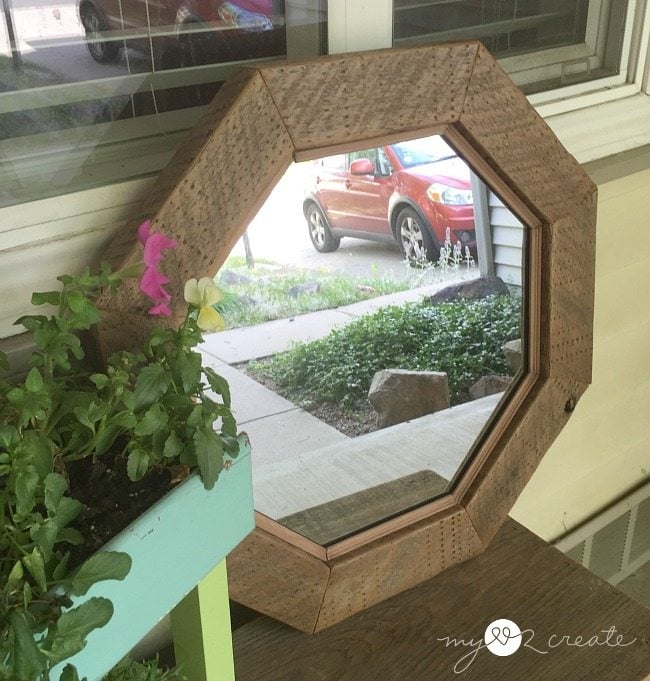
The reclaimed wood has such character and gives it some charm.
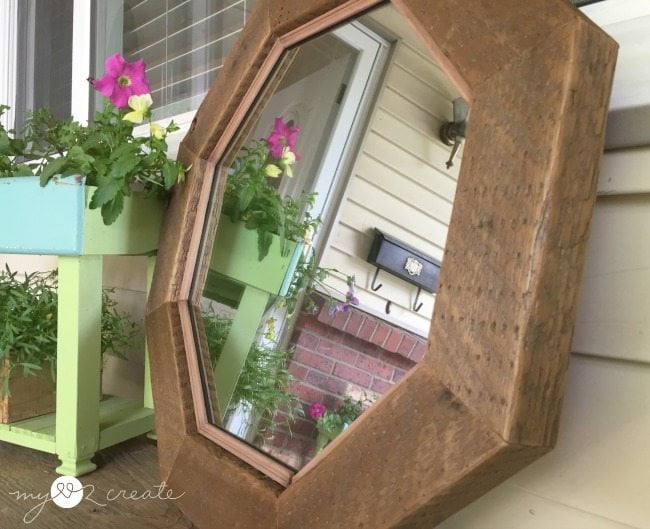
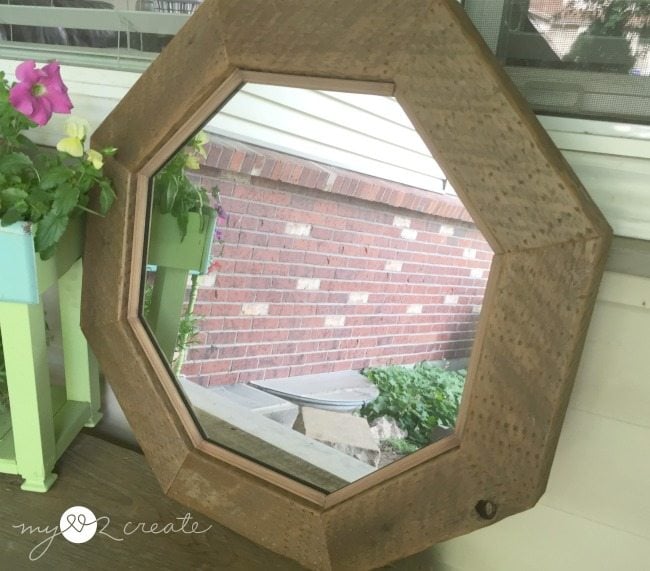
It is hard to take photos of a mirror, but at least you are getting a pretty view of my favorite old drawers into porch planters!
So what do you think? Have you ever tried to cut glass or mirror before? Even though it didn’t turn out perfect for me it was fun to try something new!
Hugs!
Mindi
Mindi: I ABSOLUTELY love this mirror. I may have missed this part, but what are the dimensions? I have an old 18″x 24″ mirror that I would love to make over.
Thanks for sharing your boo boo’s I know first hand how frustrating they can be.
I think the added trim, makes the mirror look so professional. Love, love, love it.
Aww, Dee you totally made my day! Thank you for your sweet comment on my mirror! I am loving it too! The dimensions of my mirror are just under 21 inches on all sides, it is between 20 3/4 inches and 21 inches, but that is with the wood. The actual mirror section is 15 1/2 on all sides (I would say square, but is is an octagon, ha ha).
Thanks for your response. I am thrilled to see that my mirror fits within your dimensions. Now I just have to get the nerve to cut a mirror.
I have followed My Re-purposed Life for a .long time and love all the stuff you and Gail make.
PS to Gail: I am almost finished with the Deacon’s bench that you tutored me on. It is just too darn hot here to spray paint outside for the final coat. Thanks for all your help.
ohhh, I can’t wait to see it Dee! I hear ya about the heat! stay cool!
gail
Hi Gail: It has been super hot here in Texas 100 degrees and humid.
What is the maximum temperature you can use a spray painter outside? I really would like to get this bench finished, but am afraid the outside temperatures are way too high. It is about 80 in the mornings.
I have bought the fabric for the padded seat and itching to get this done. It looks good but needs another finish coat of paint.
Thanks again for your help.
Dee
I think the temperature would really depend on the paint manufacturers recommendations. After all your hard work, I’d hate for it to go bad because of the heat and humidity.
I hope you get this reply…. it wouldn’t let me reply directly to you. You can email me if you have any further questions.
gail
Love the finished look Mindi, pinned it.
Mindi,
Your mirror turned out great! I like that you added the little trim to hold it in place (cover up the oops) 🙂 It looks like it was the plan all along.
The shape and the chunkiness are fabulous. Super job!
that caulk gun? whoa! what a mess! I think you have more patience than I do. 🙂
gail
Great mirror, Mindy. I like how you share your “oops” moments, we all have them! I haven’t cut mirror, but I have cut plexiglass and it’s kind of the same, scoring and breaking. And it doesn’t always go as planned.
I love this! Amazing shape. Love the rustic nature of the wood. Awesome! 🙂