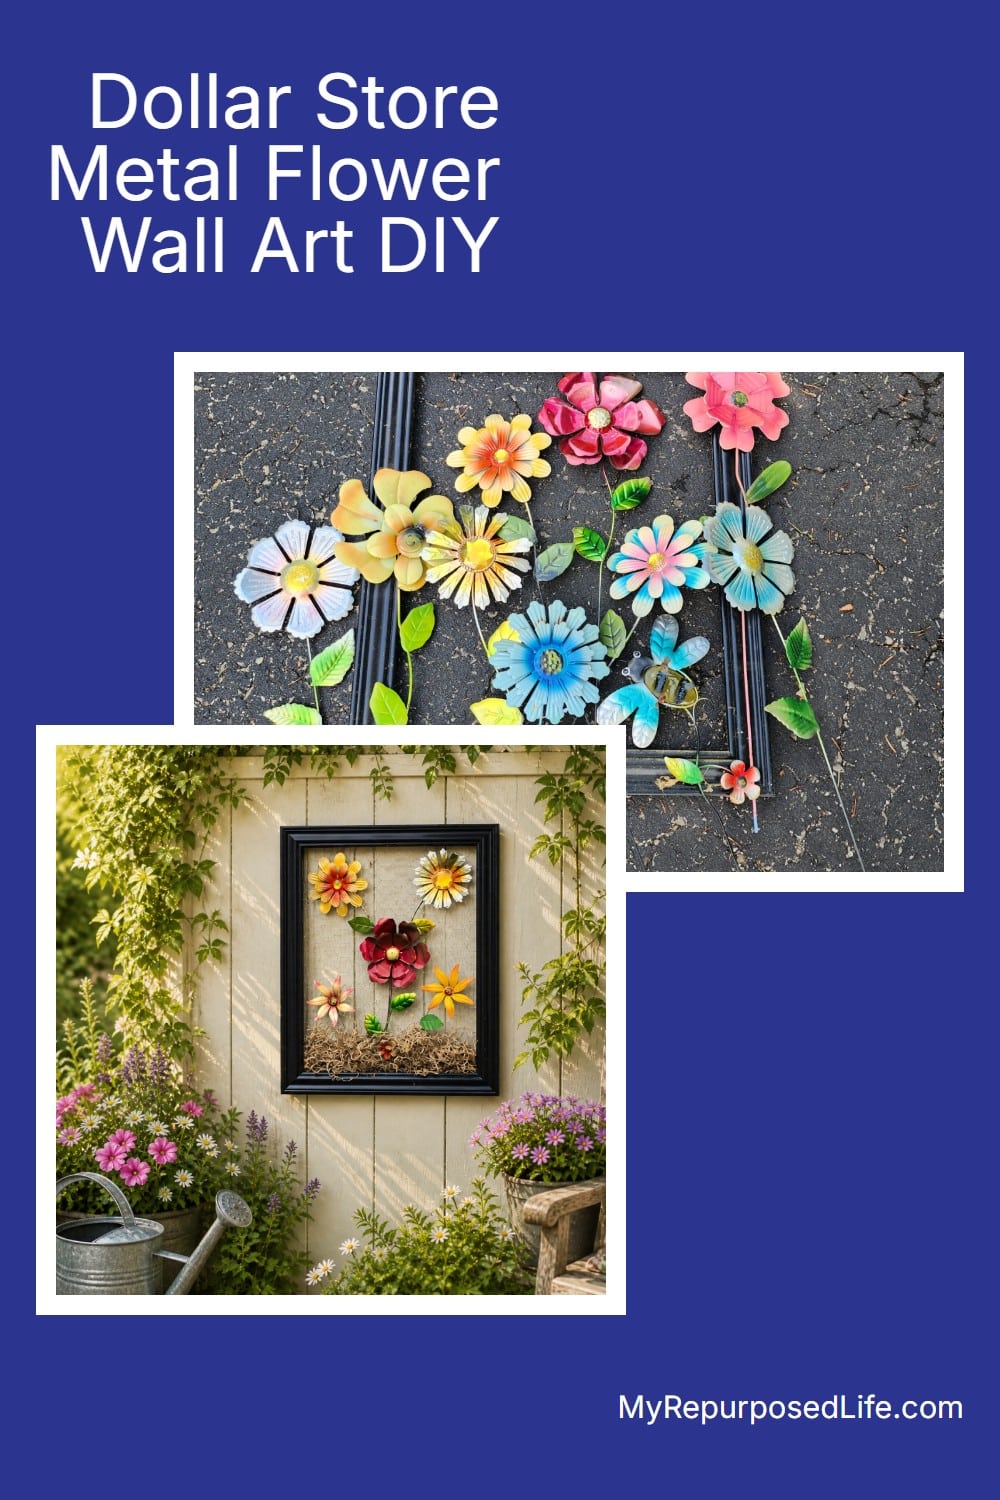
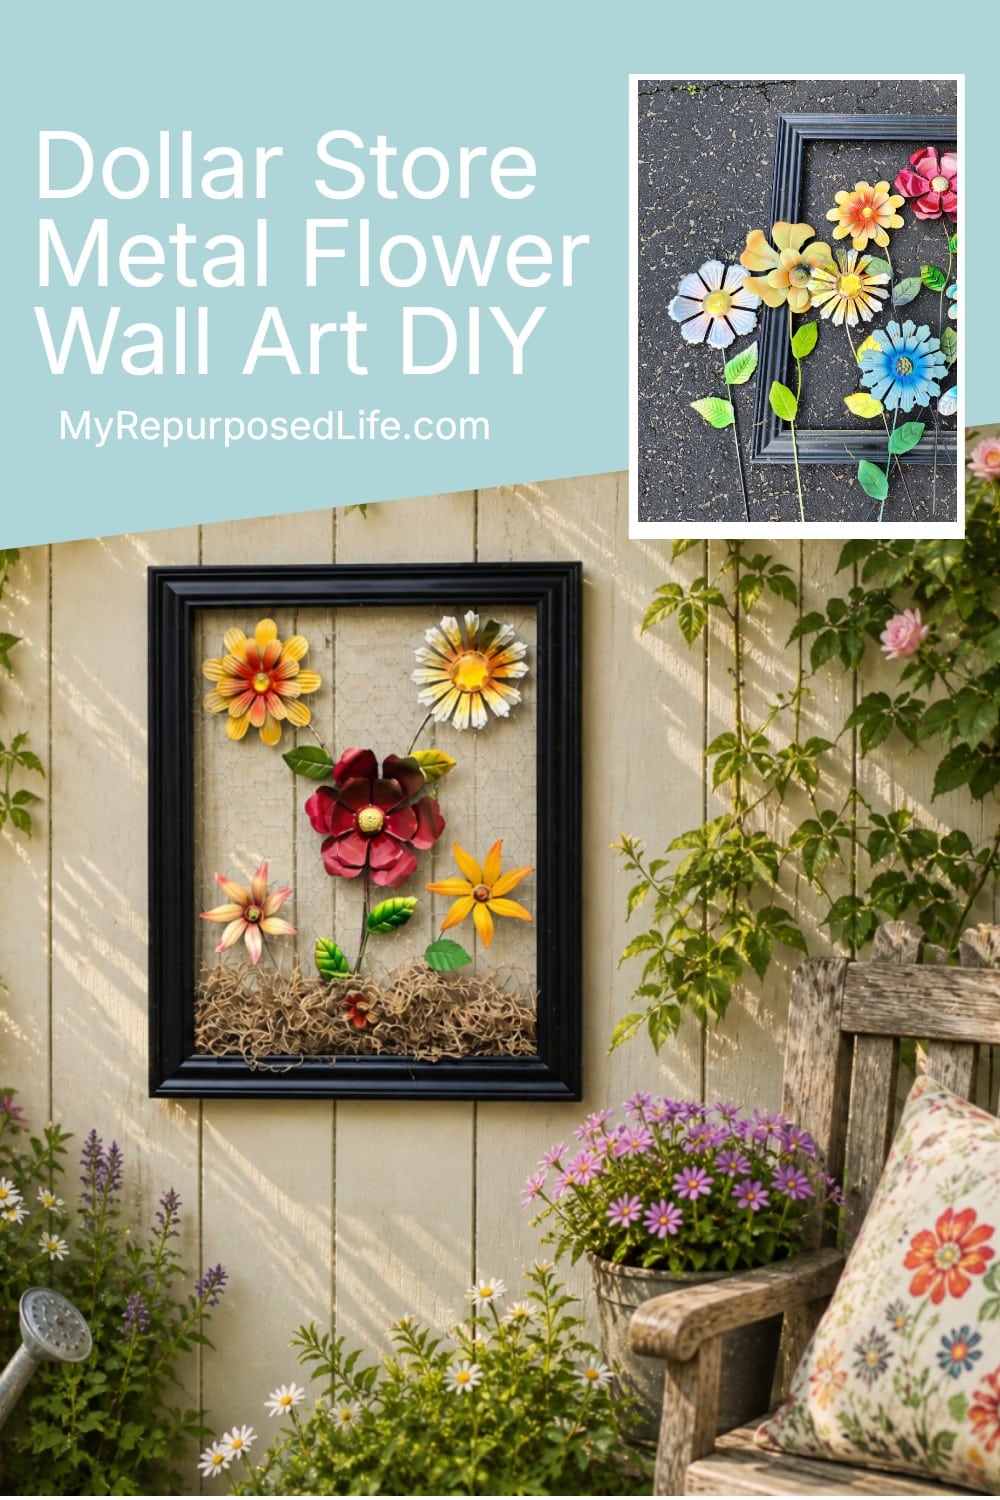
Dollar Store Metal Flower Wall Art
As an Amazon Associate, I earn from qualifying purchases.
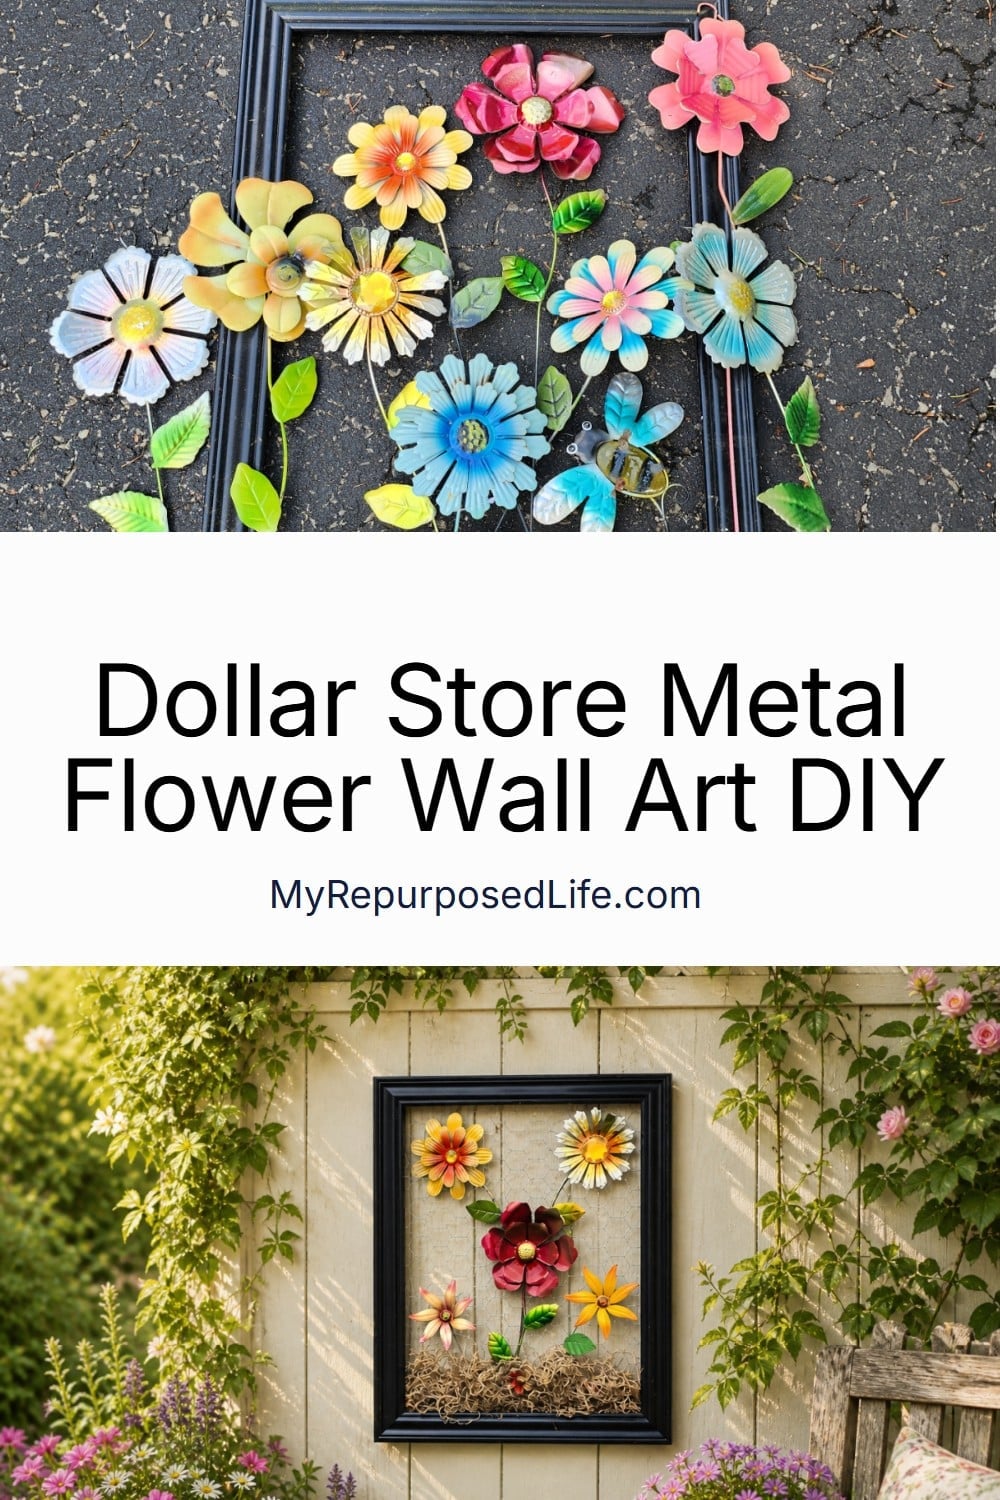
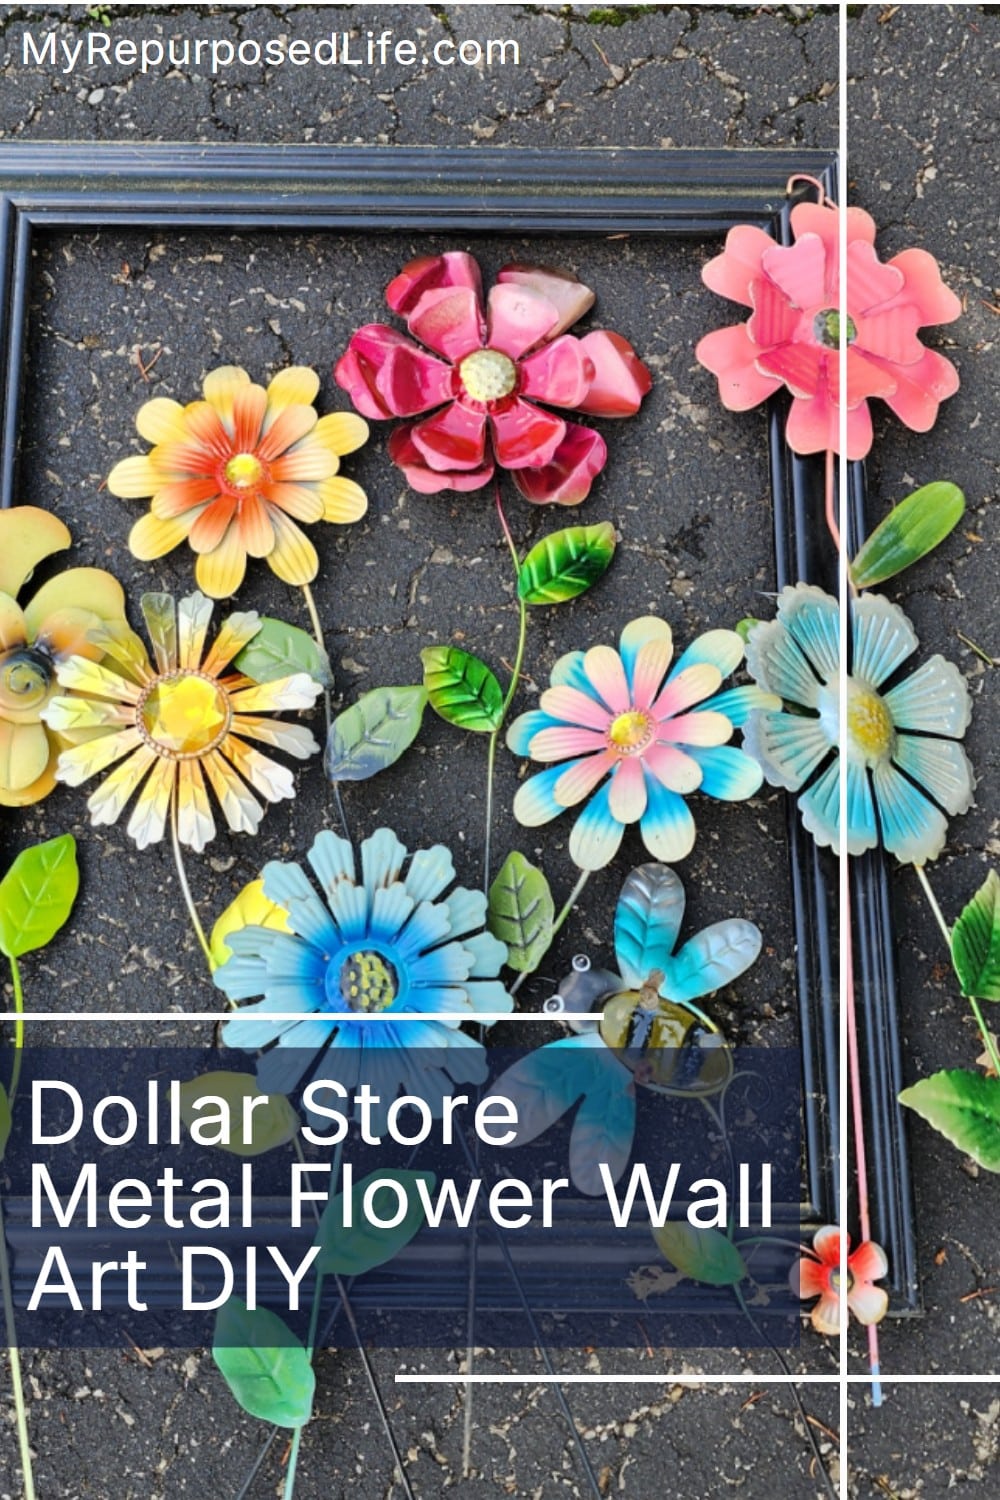
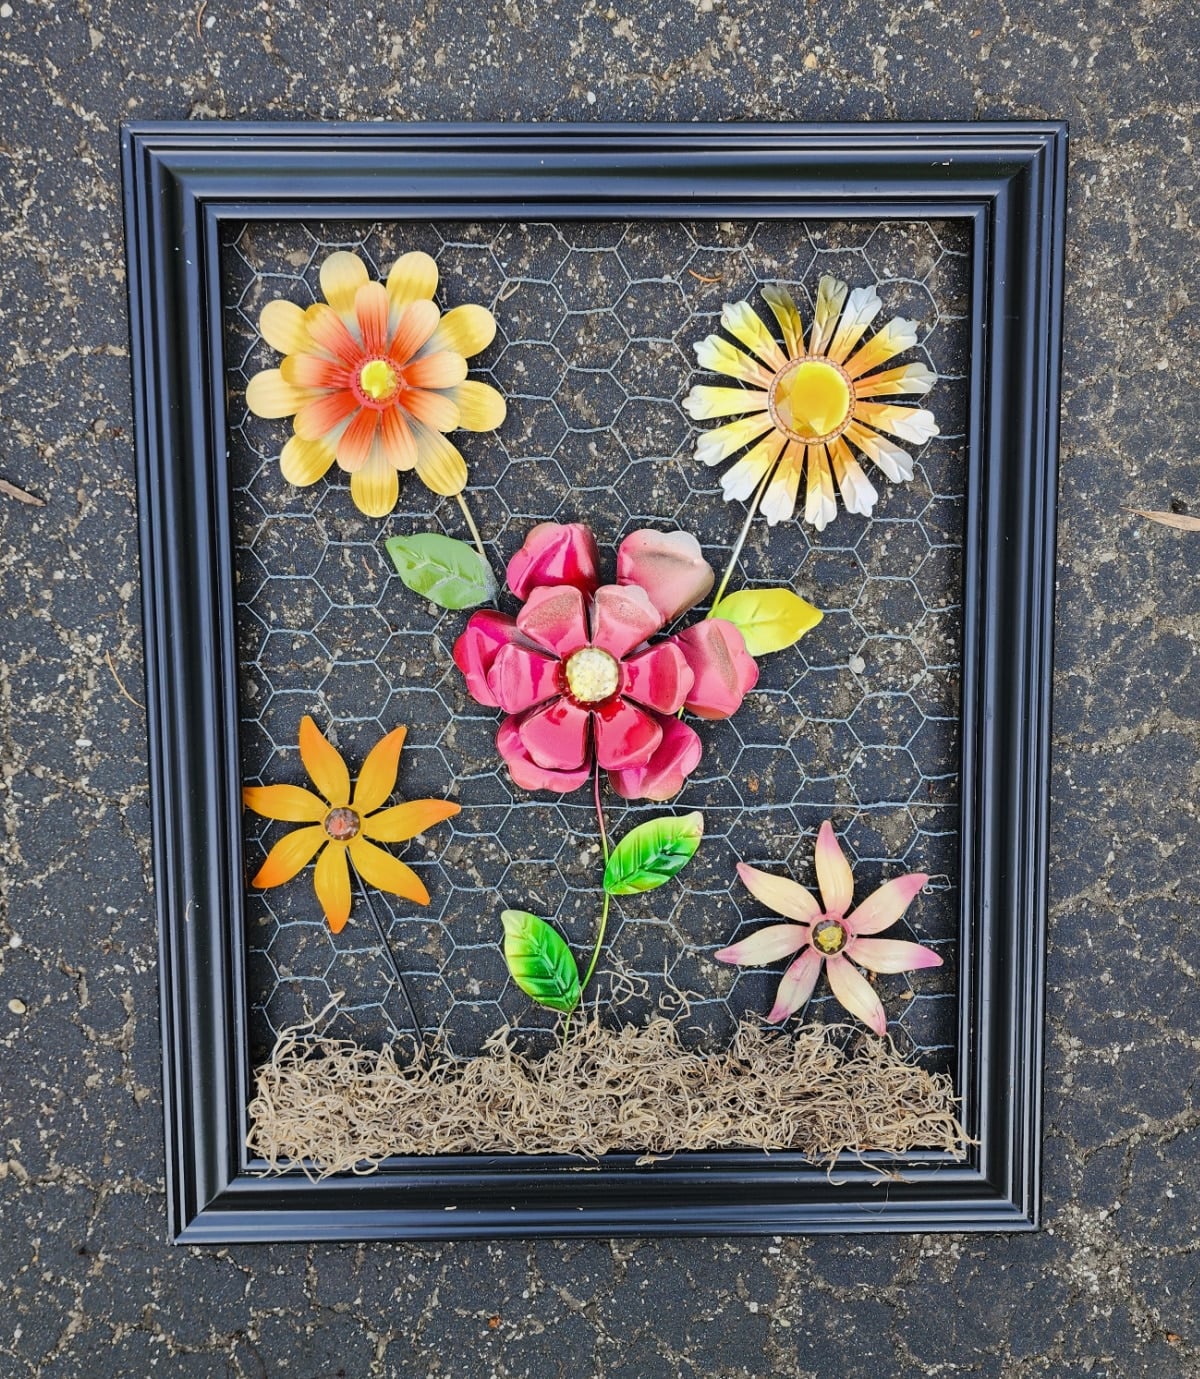
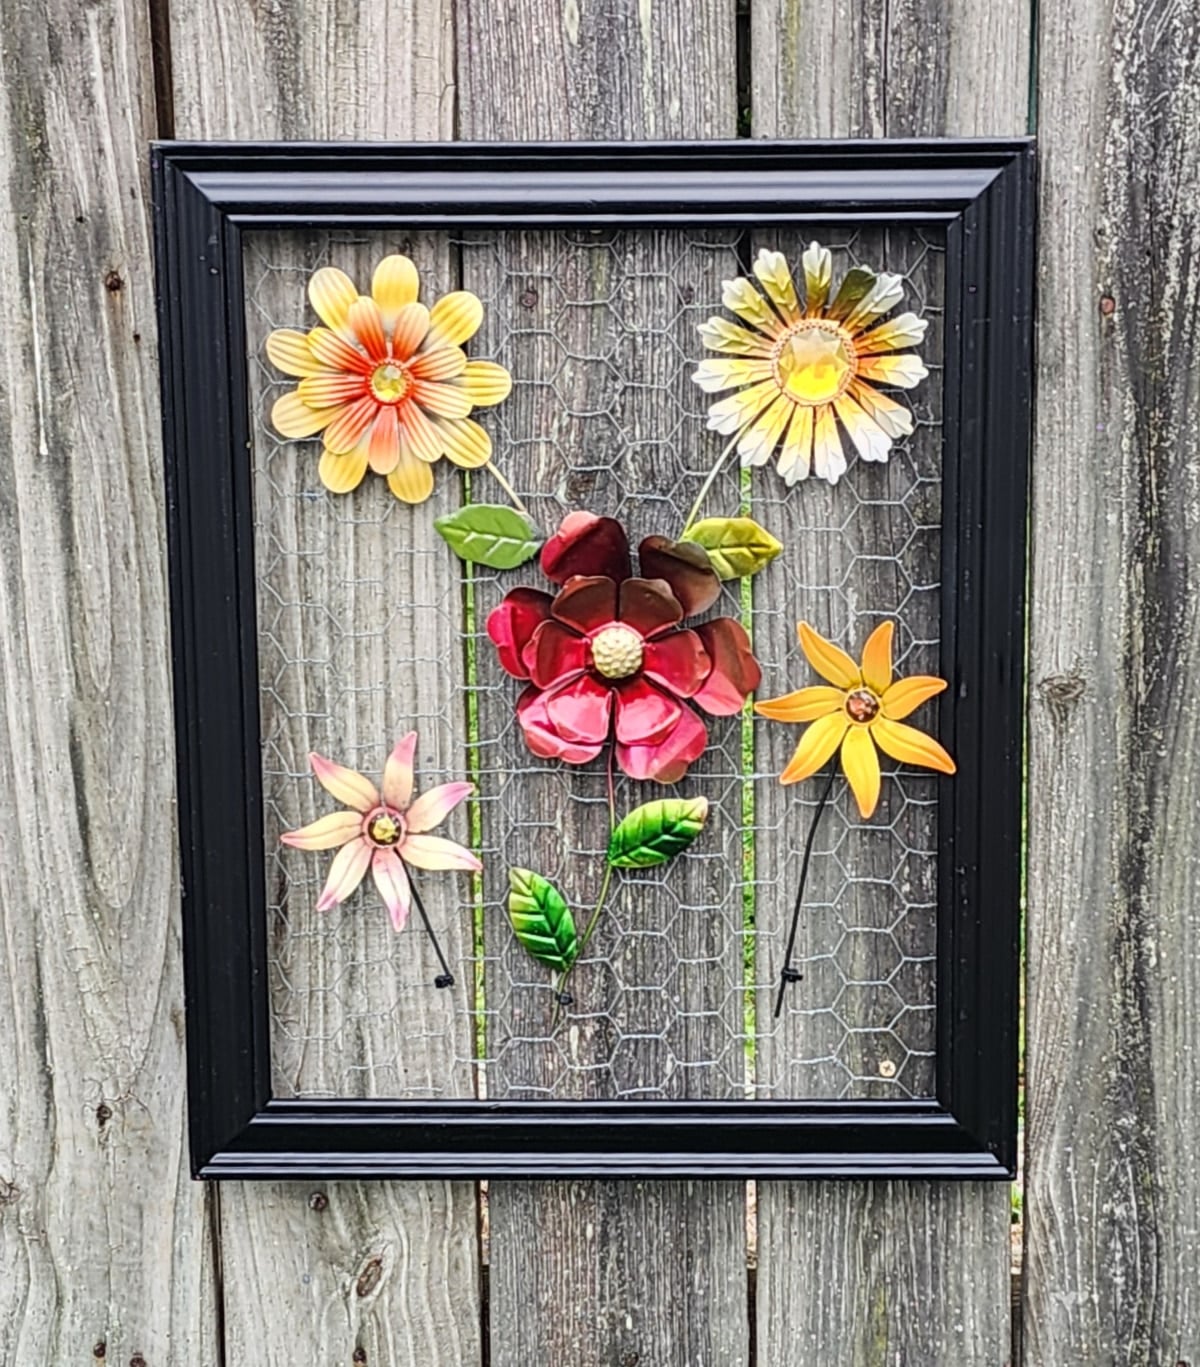
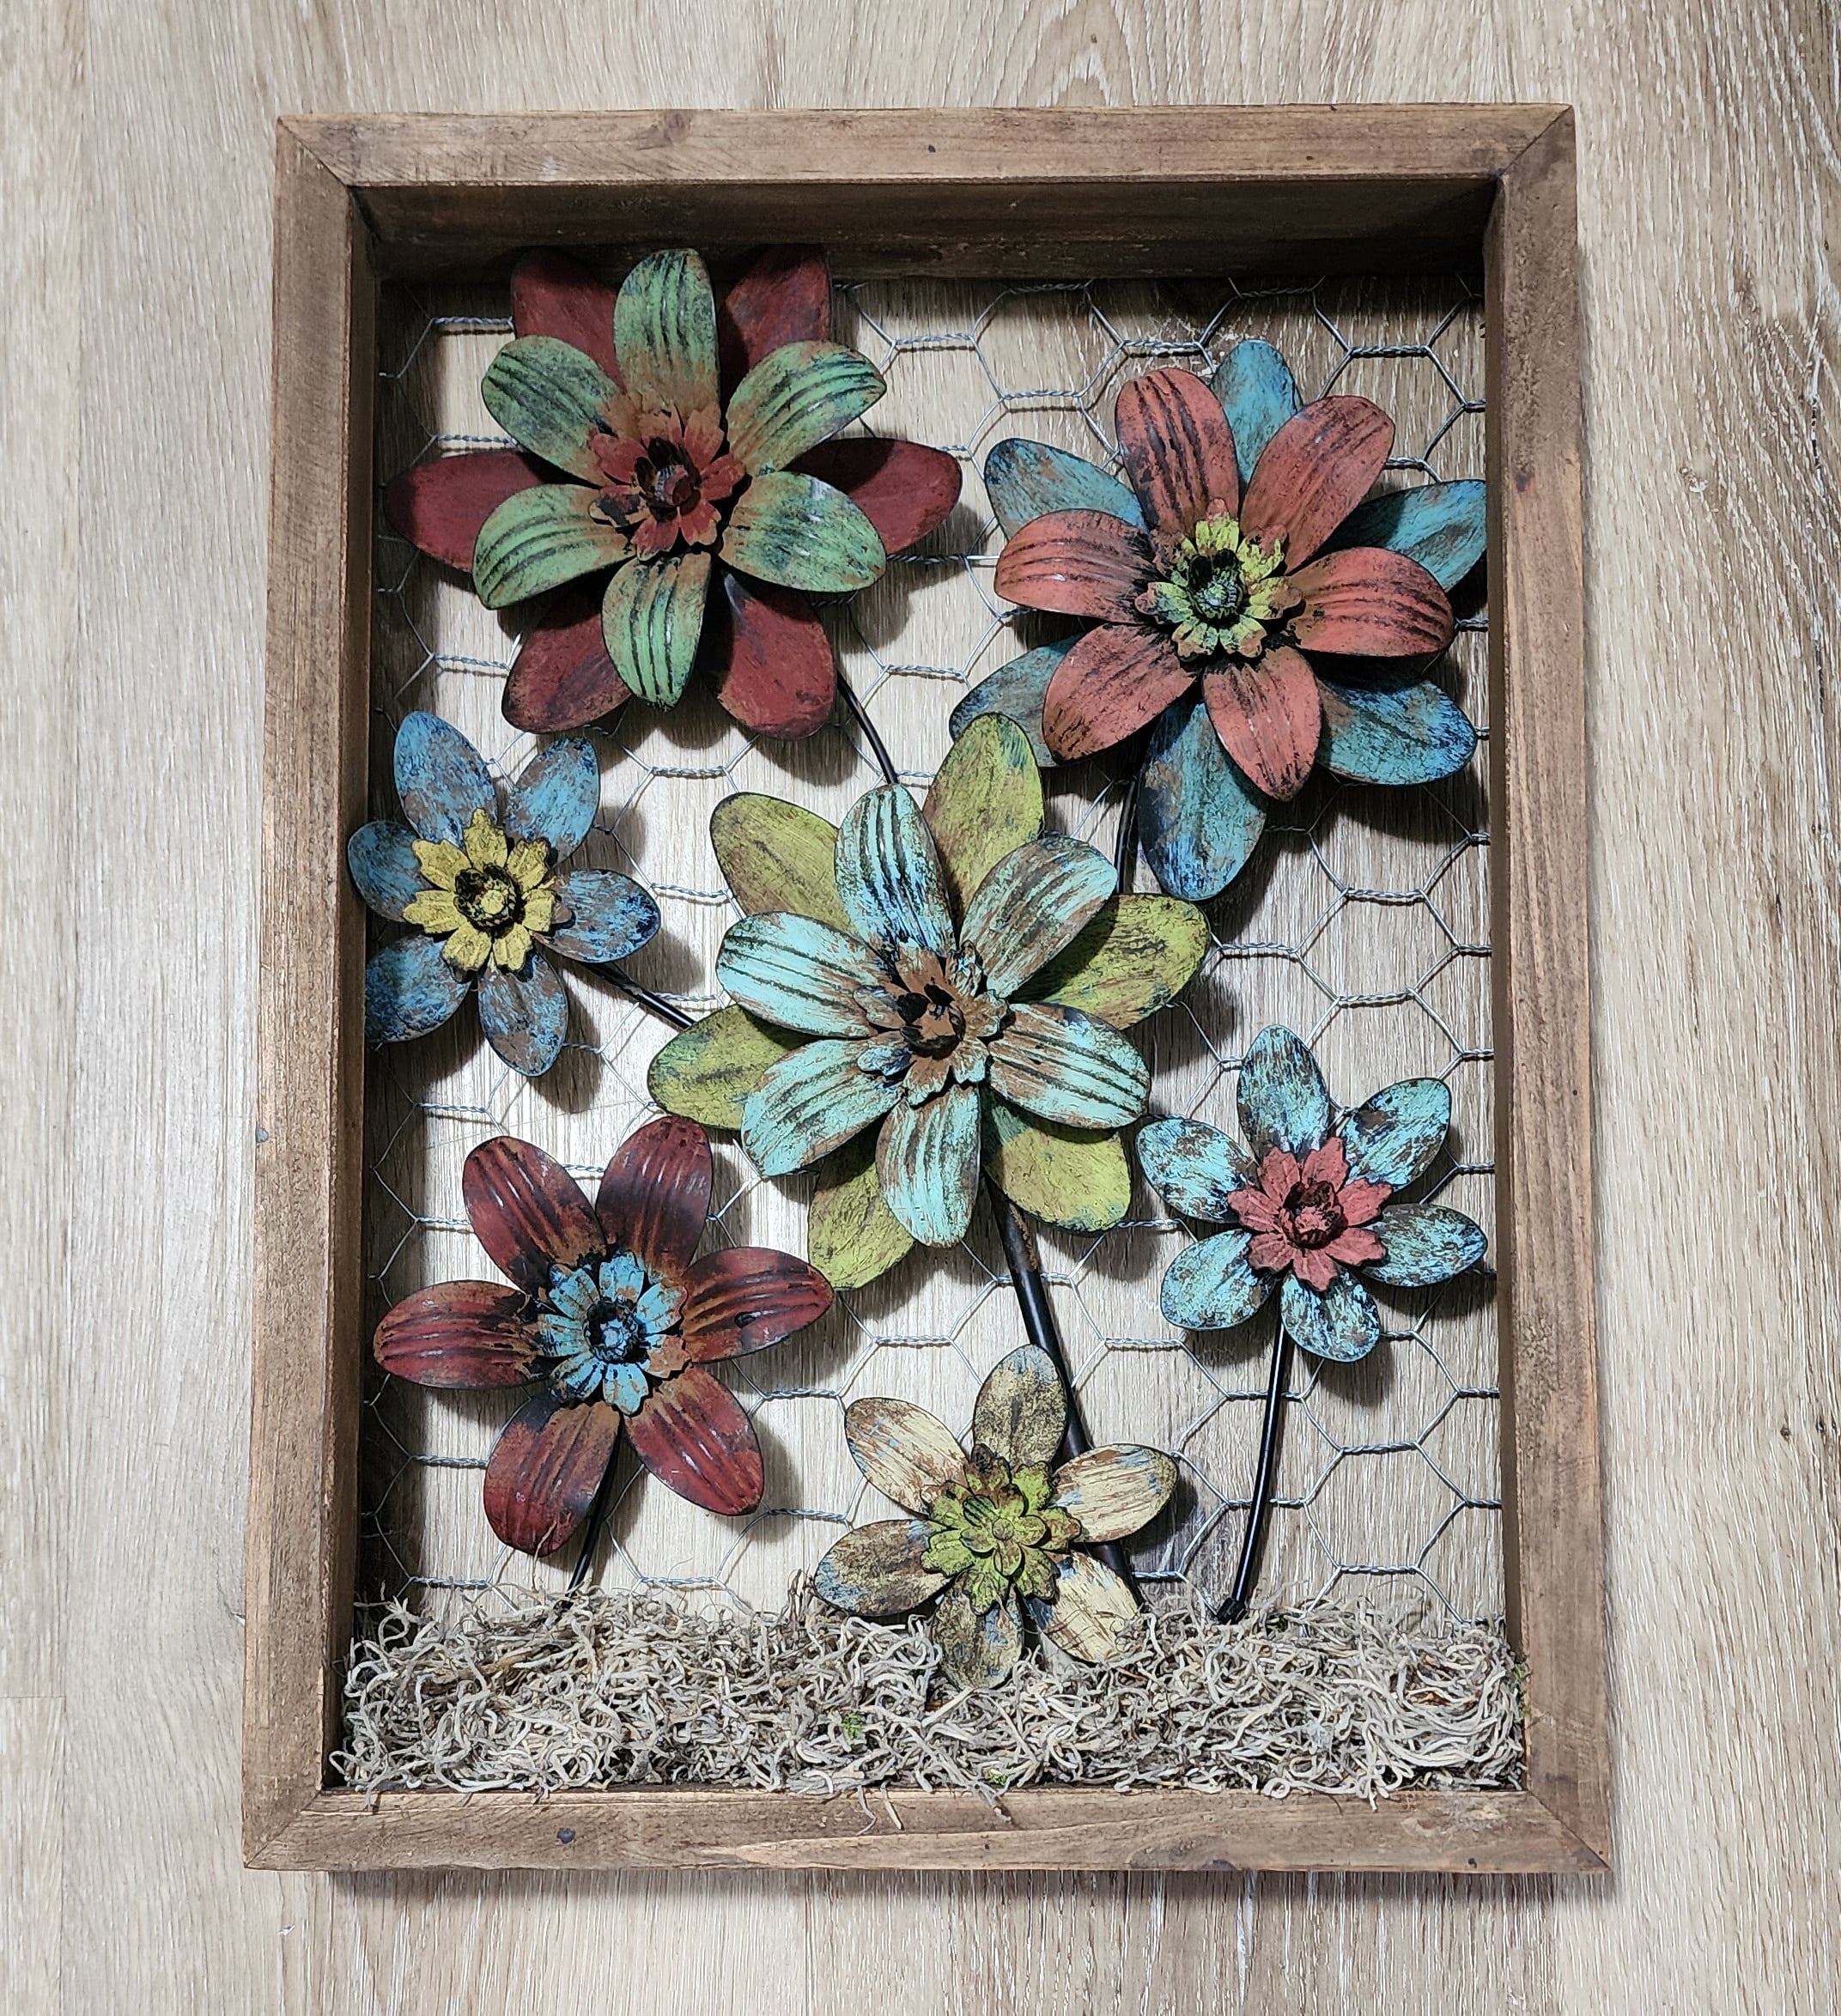
Dollar Store Metal Flower Wall Art in a Thrift Store Frame
Dollar Store metal flowers are easy to find, but they don’t have to stay in the garden. For this project, I paired a few weathered metal flowers with a thrift-store wooden frame and chicken wire to create colorful wall art. It’s part garden junk, part home decor, and exactly the kind of repurposed project I love.
One Dollar Black Thrift Store Frame
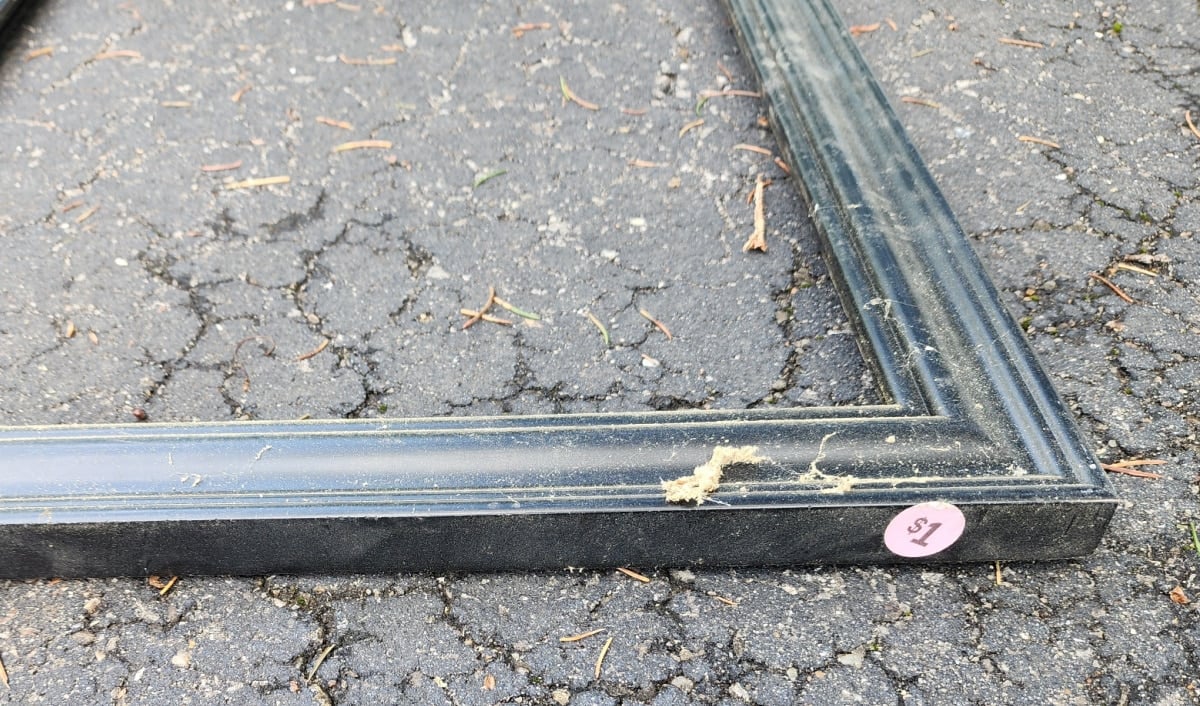
I never pass up a good picture frame, especially at a great price. There was nothing special about this black wooden picture frame, but it was perfect for this month’s Thrift Store Tour!

Framed Metal Flower Wall Decor
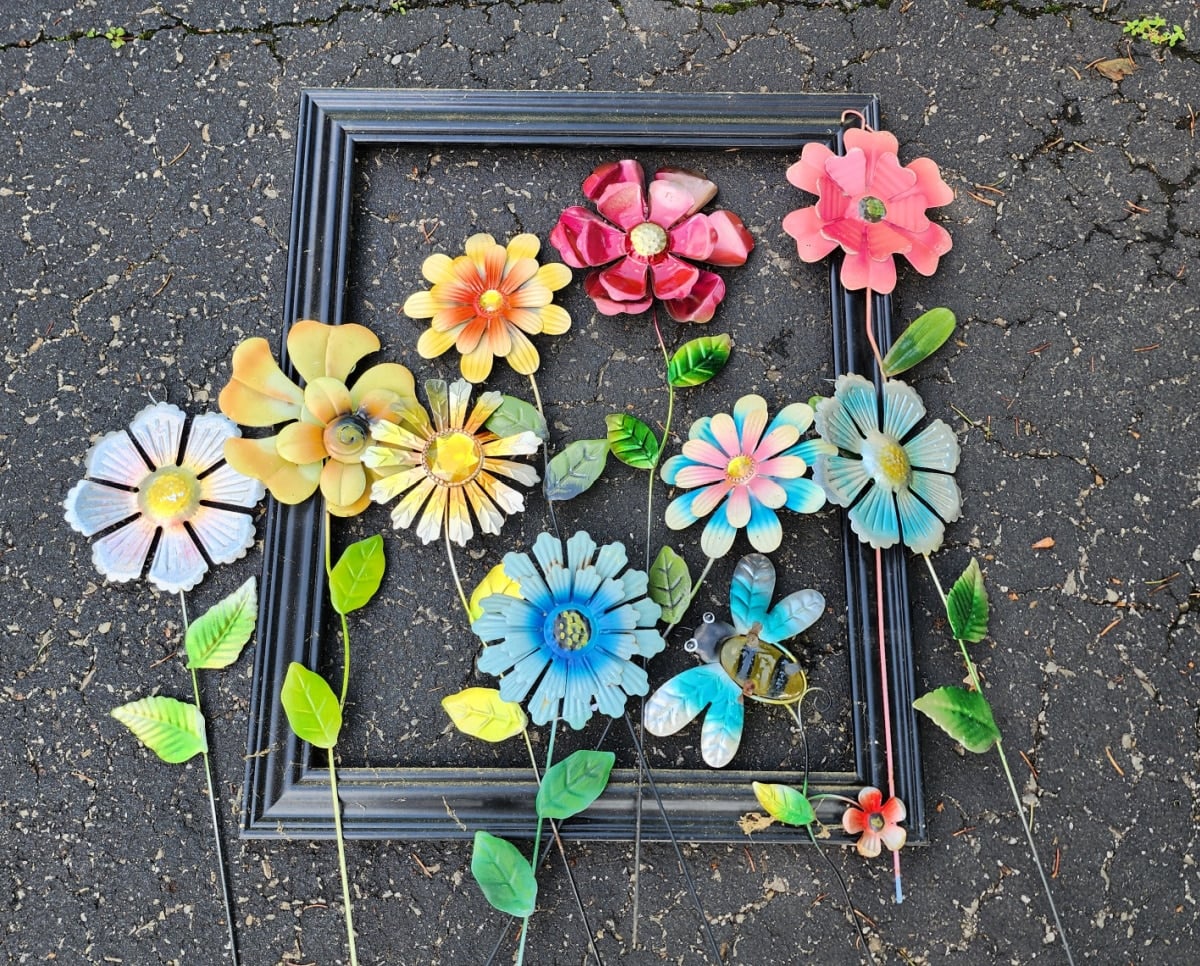
I’m also a sucker for Dollar Store Metal Garden Flowers.
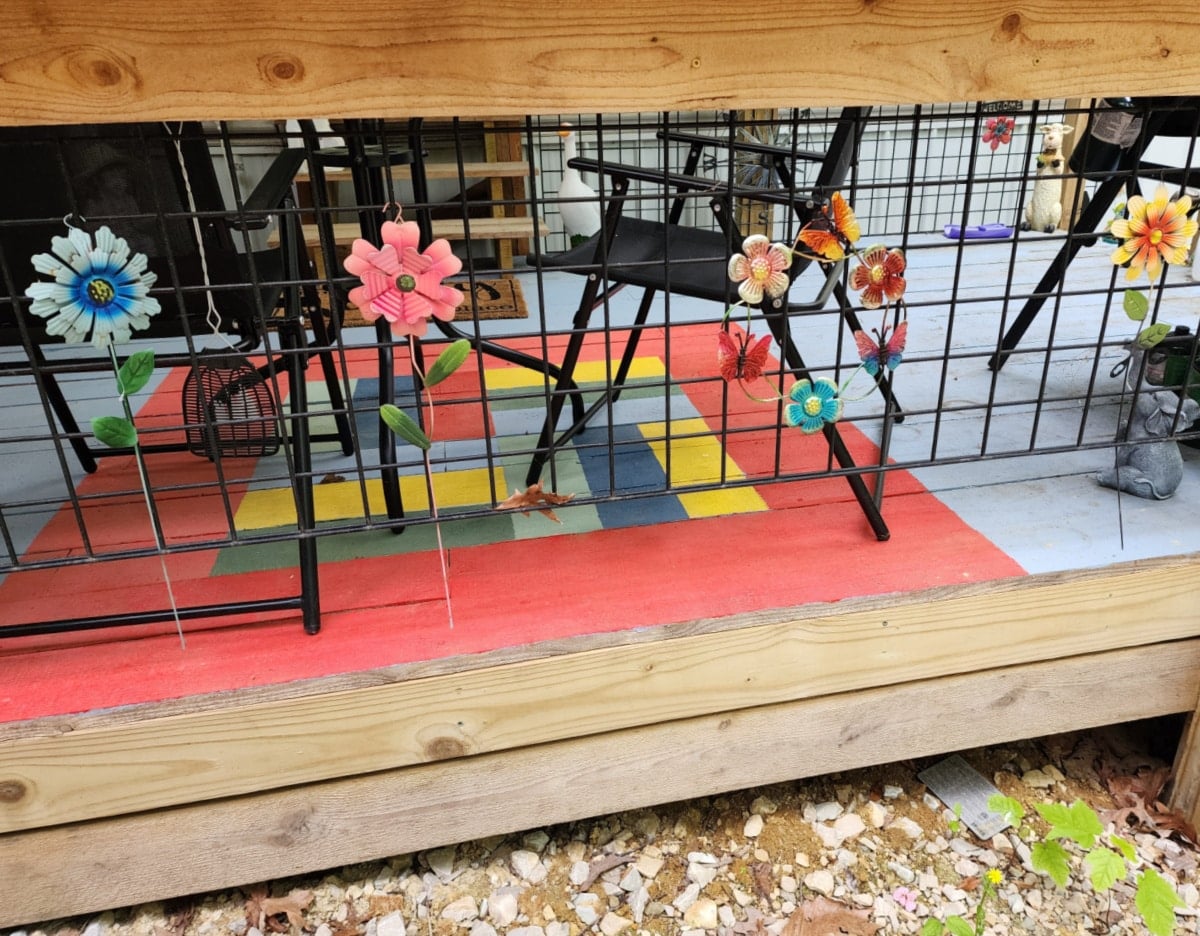
A few of the metal garden flowers used in the project came from The Hideaway porch.
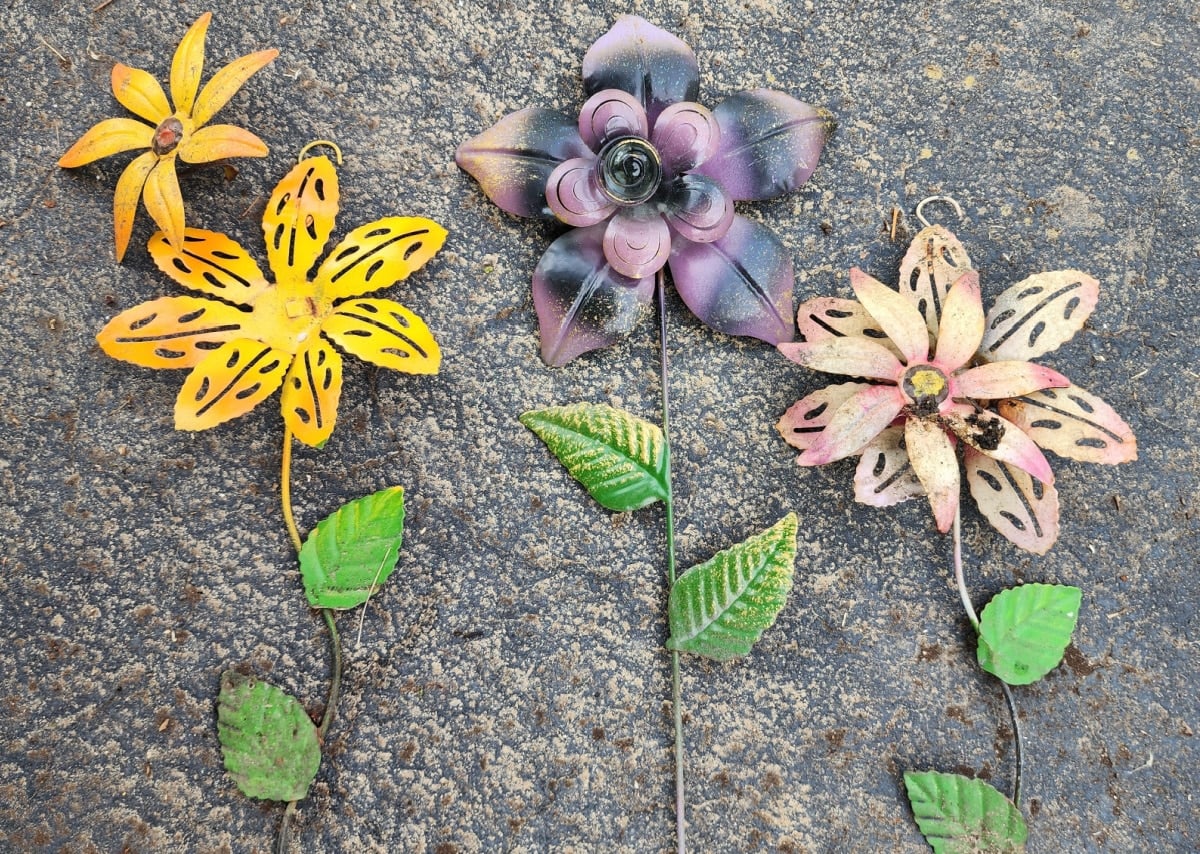
I grabbed a few less-than-perfect specimens from my hosta garden at home.
Save this project to Pinterest
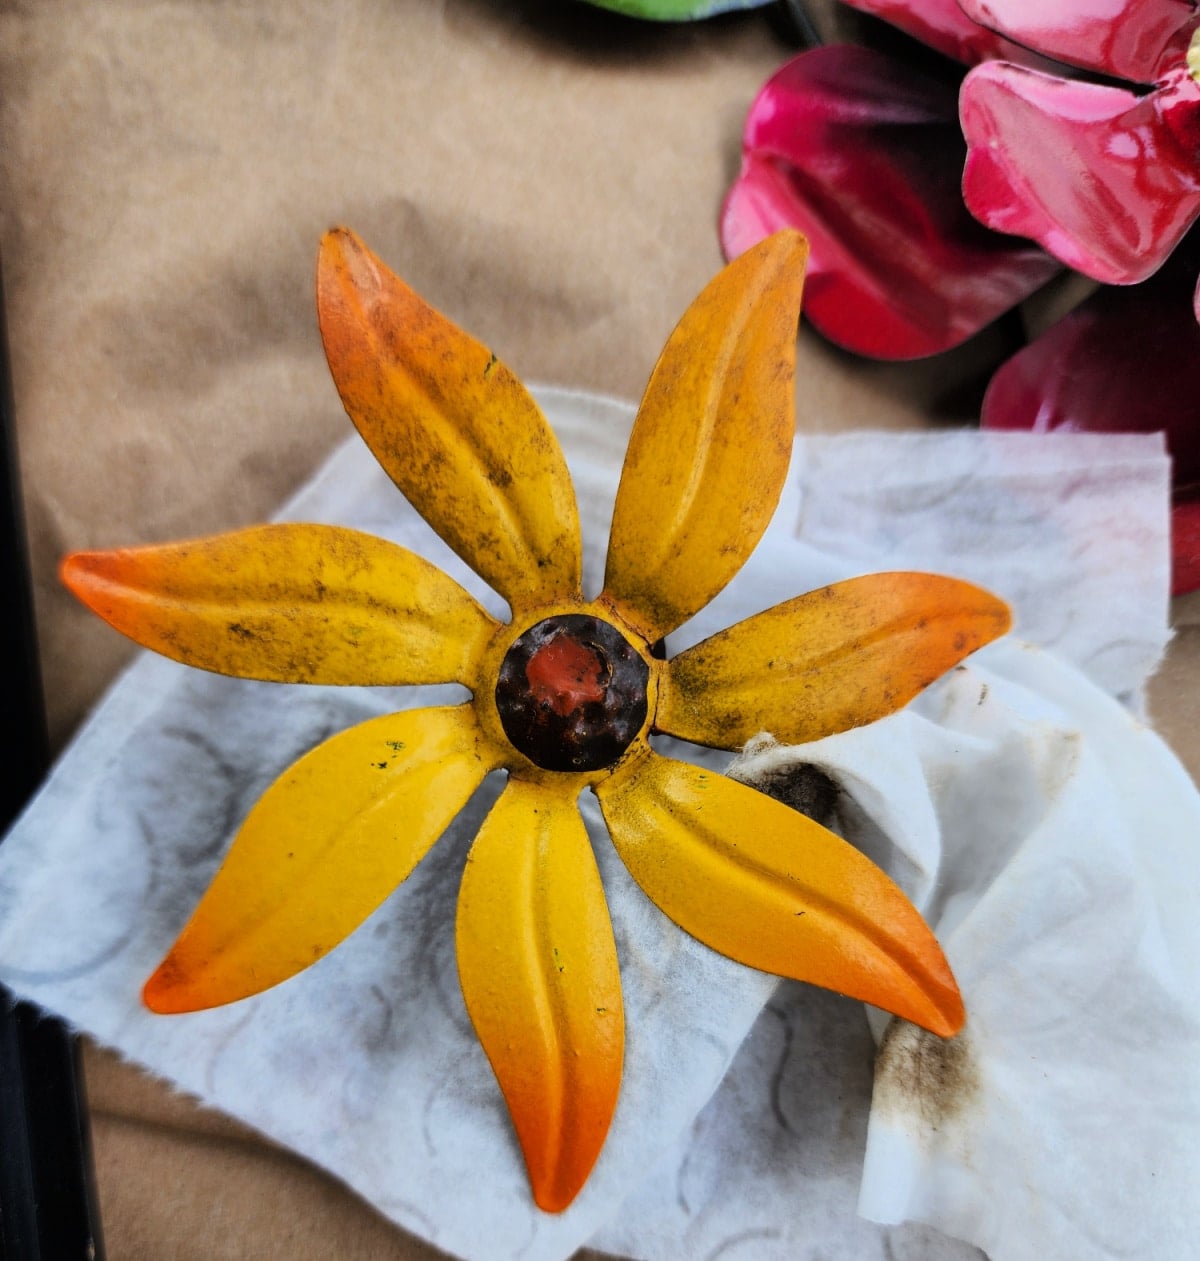
Clean the Upcycled Metal Flower Decor
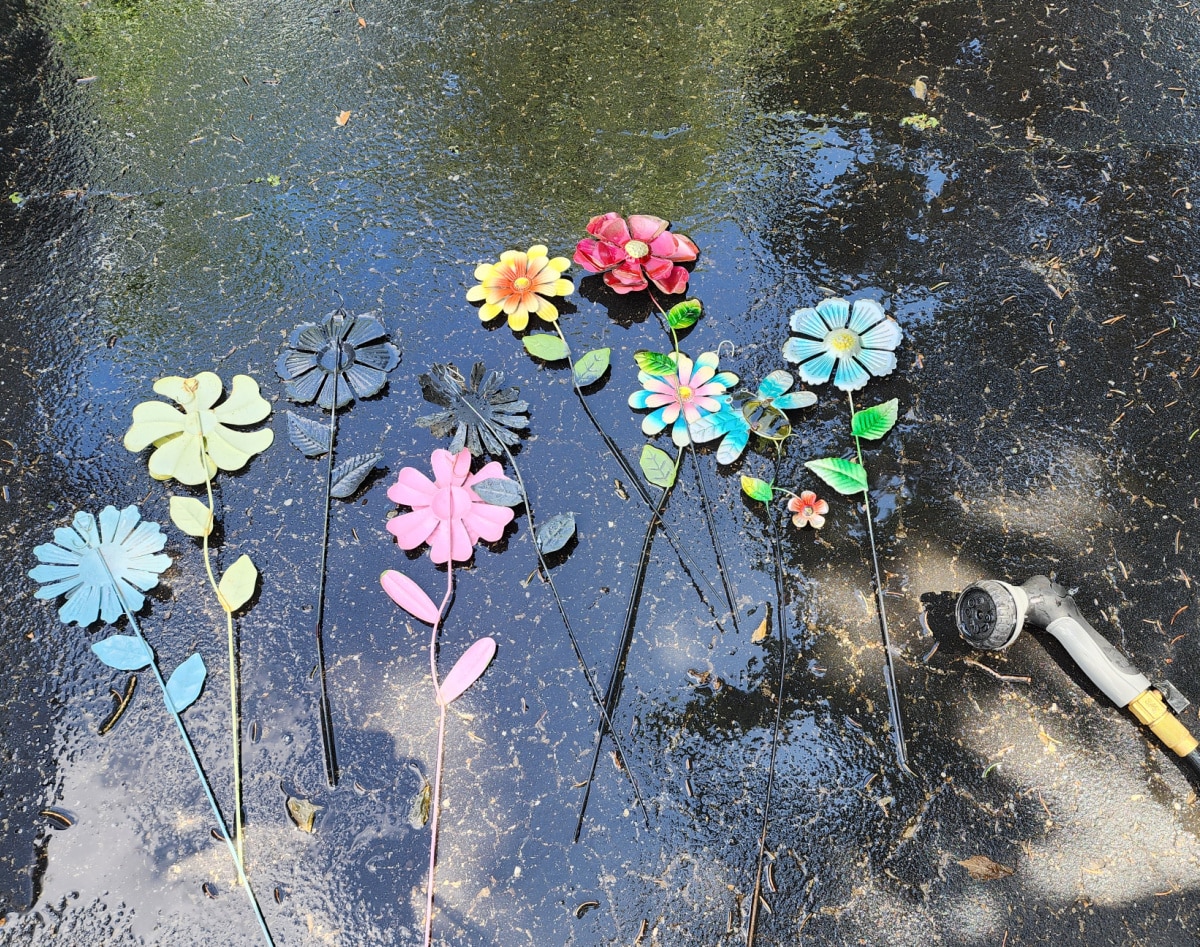
Cleaning the flowers was easily done with the garden hose.
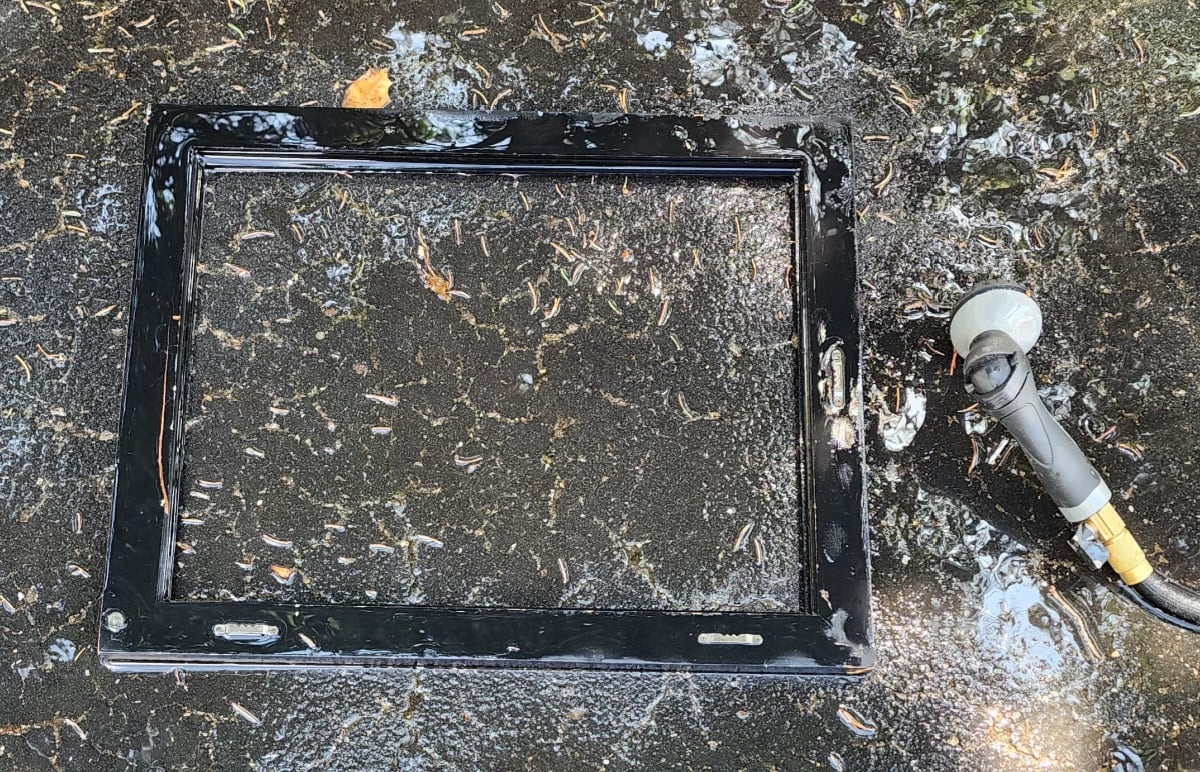
Because the wooden picture frame had been in storage for so long, it also got a swift cleaning.
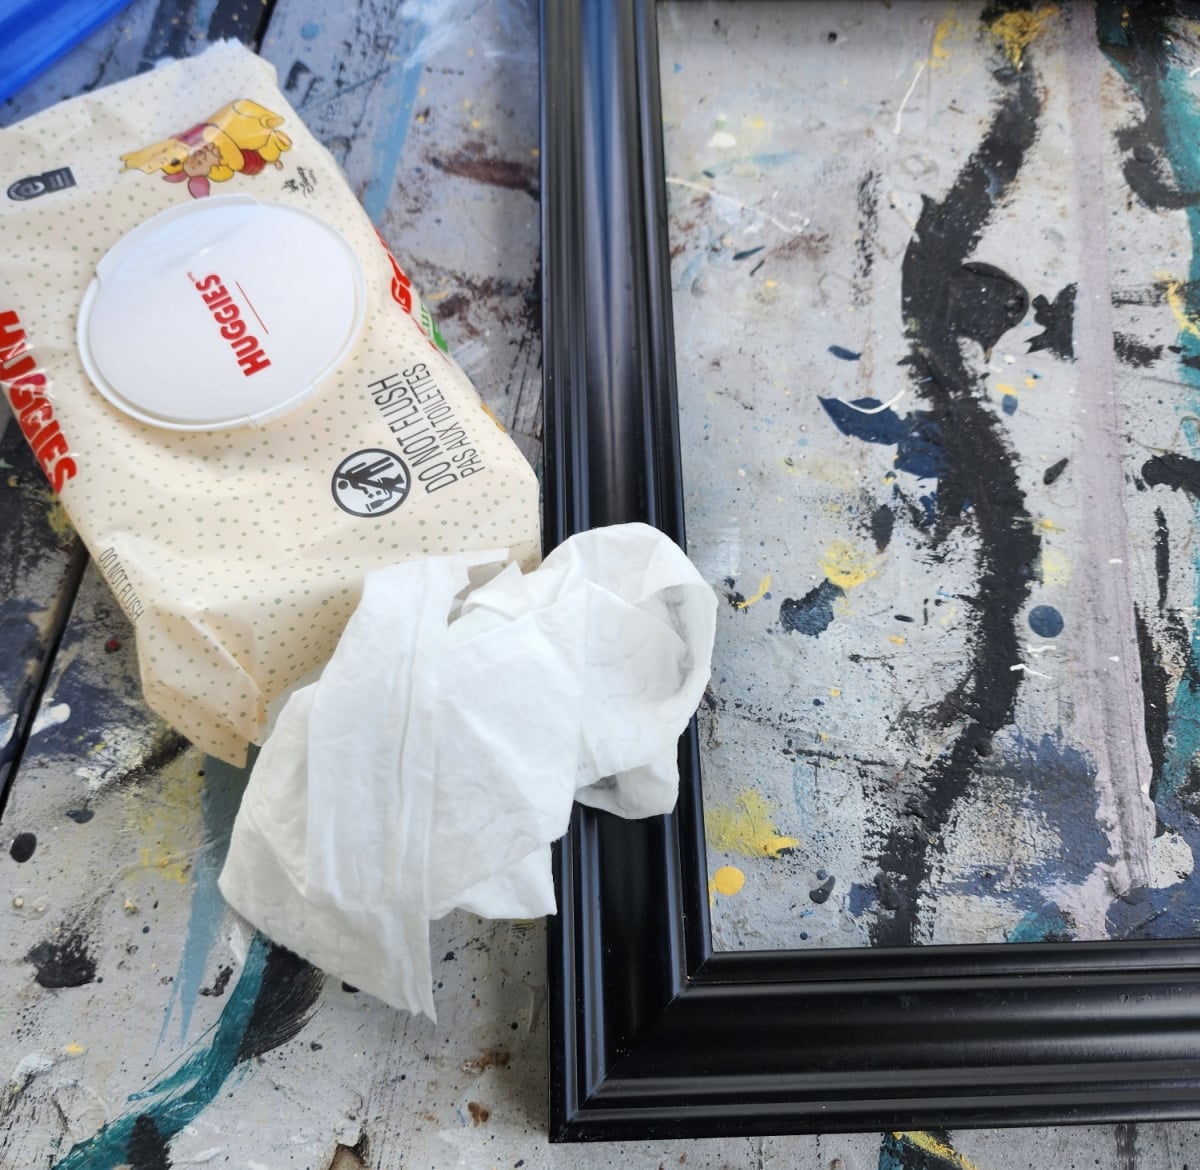
There were some paint specks on the picture frame, so I used some baby wipes to remove them.
Repair Wooden Picture Frame
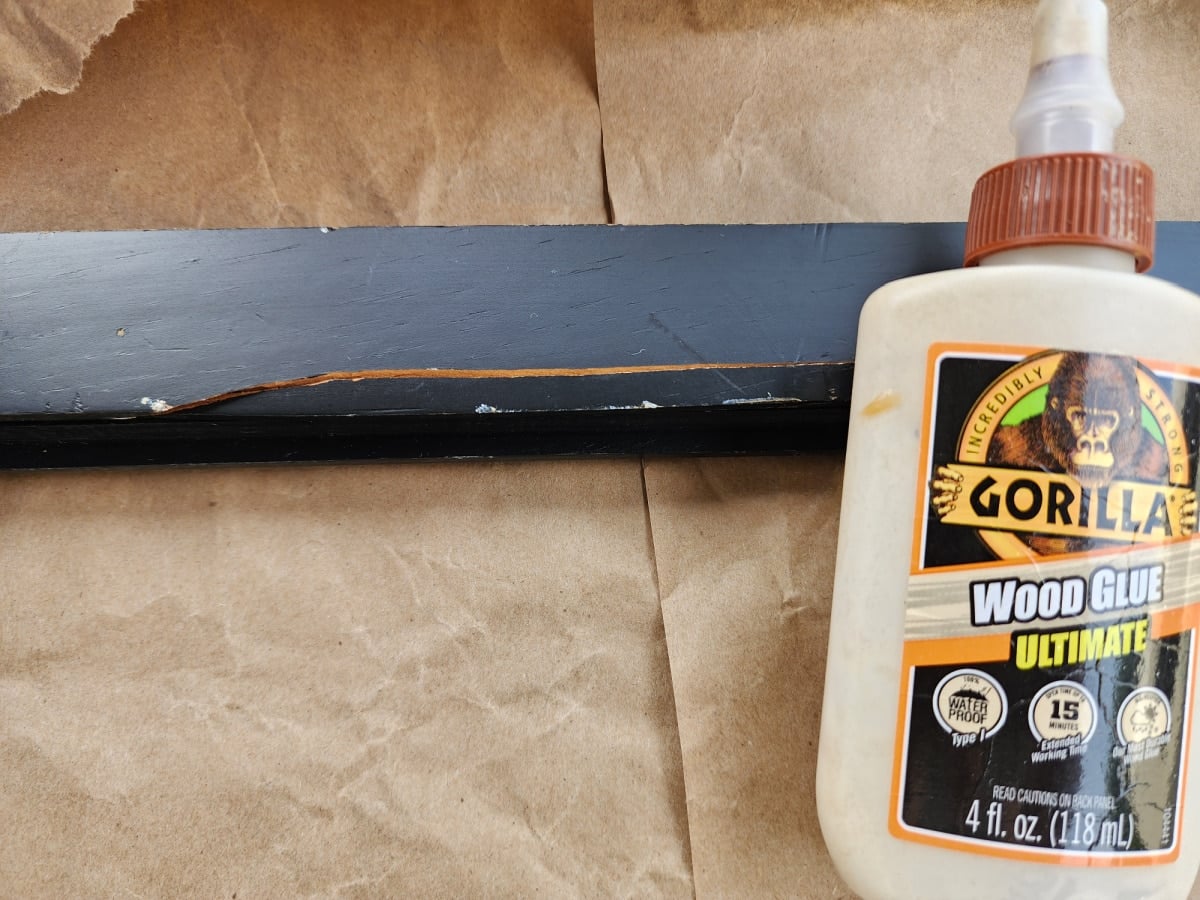
While cleaning the wooden picture frame, I noticed there was a crack on the back. I grabbed some Gorilla Wood Glue to make the repair.
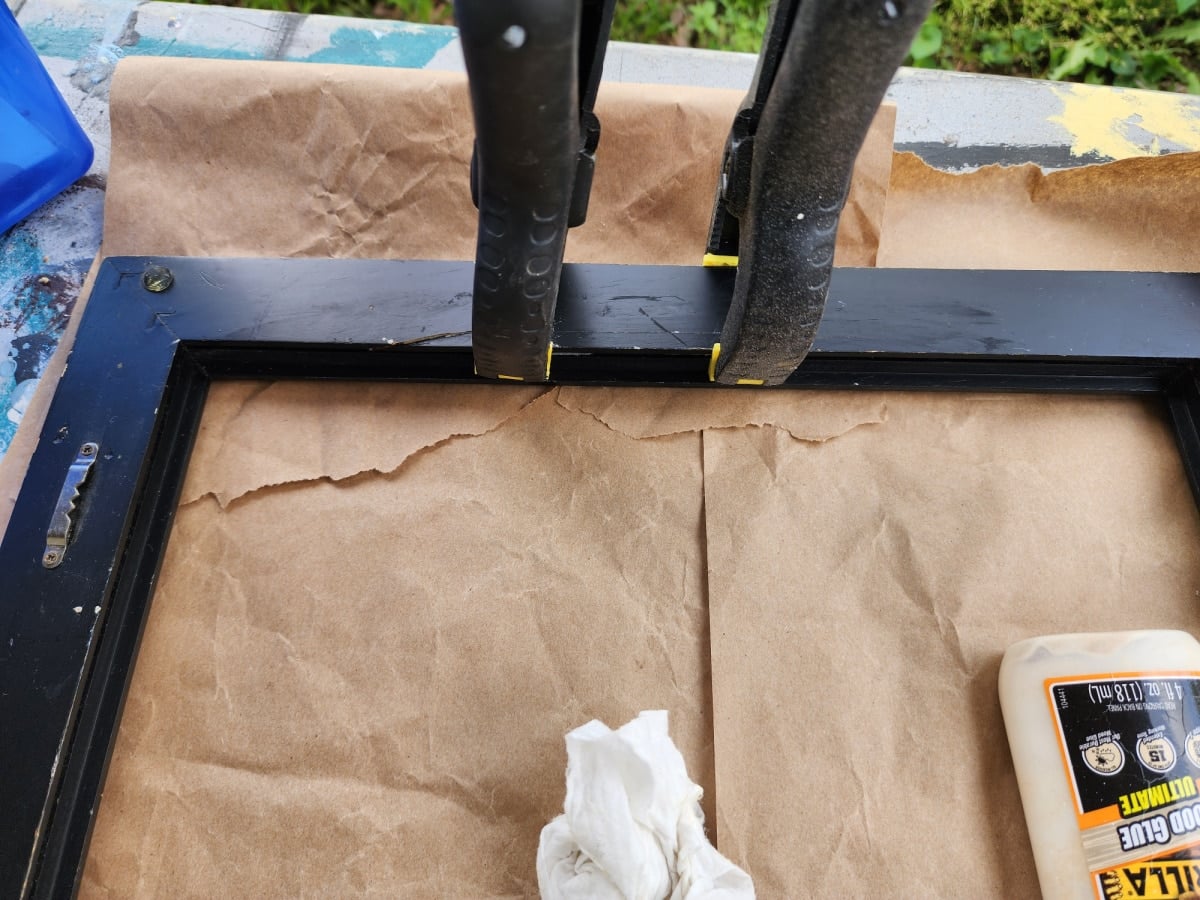
After applying the wood glue and clamps, I used a baby wipe to wipe up any excess glue that oozed out. TIP: You don’t want your clamps so tight that all of the glue oozes out.
Prepare Metal Flowers
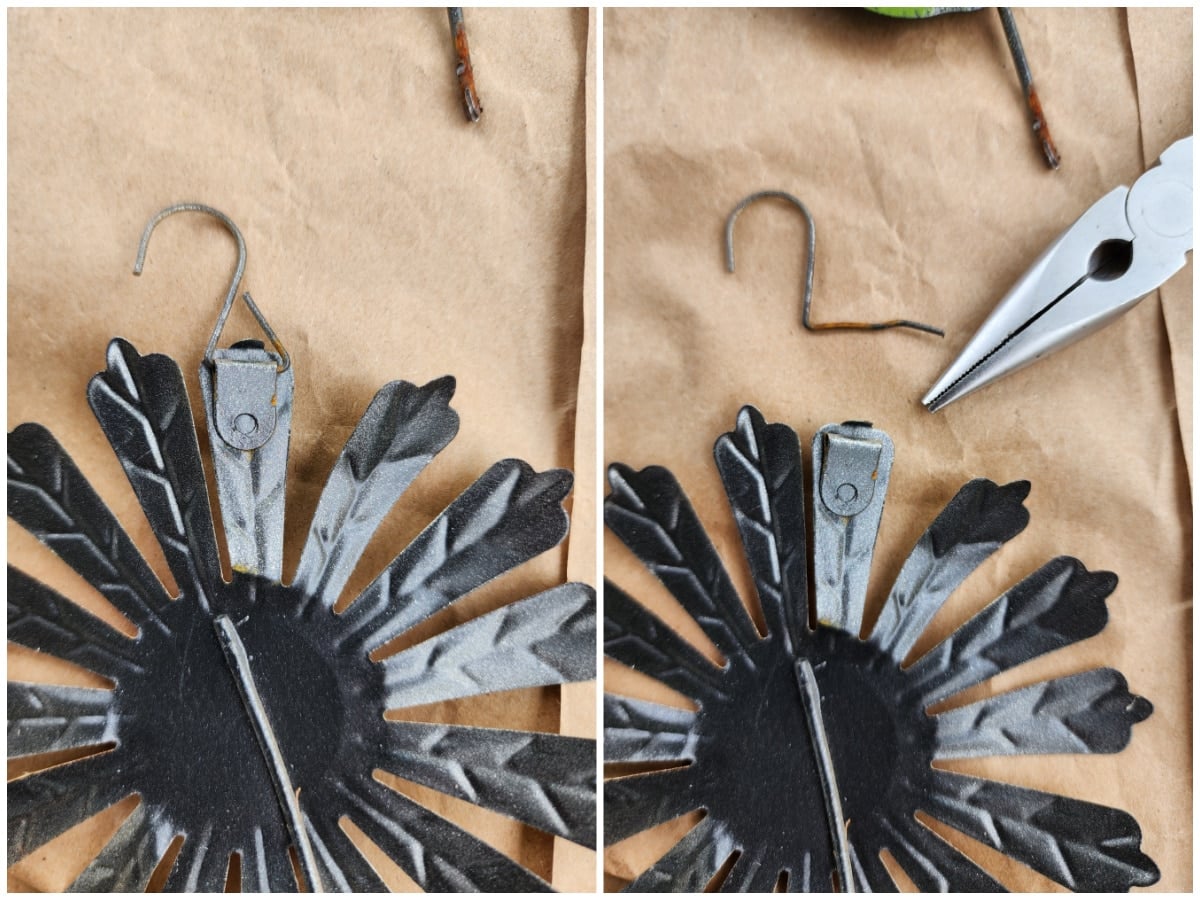
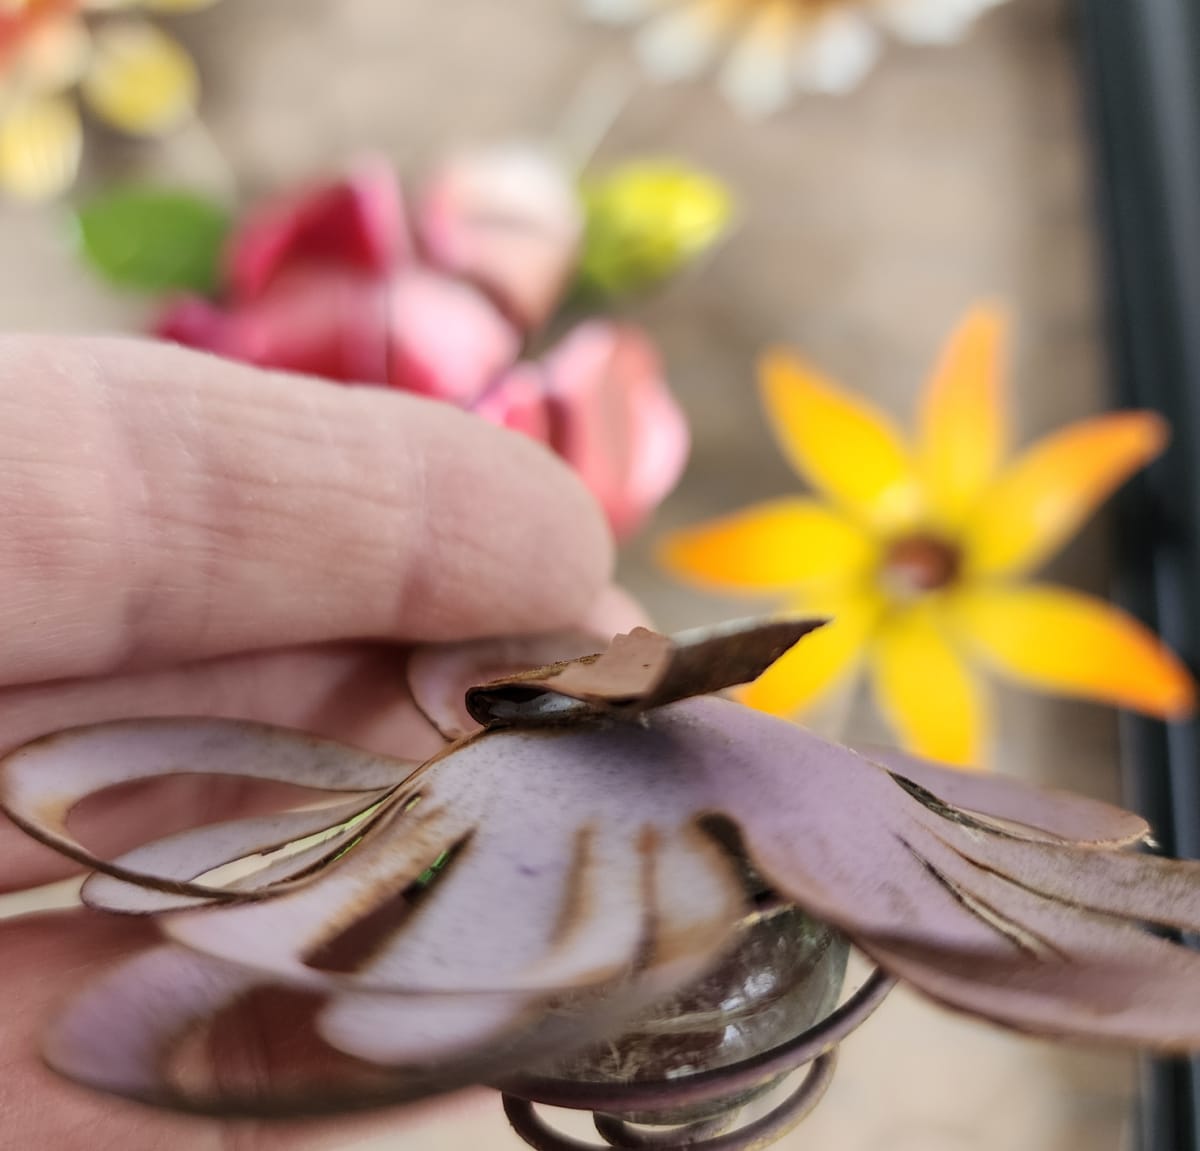
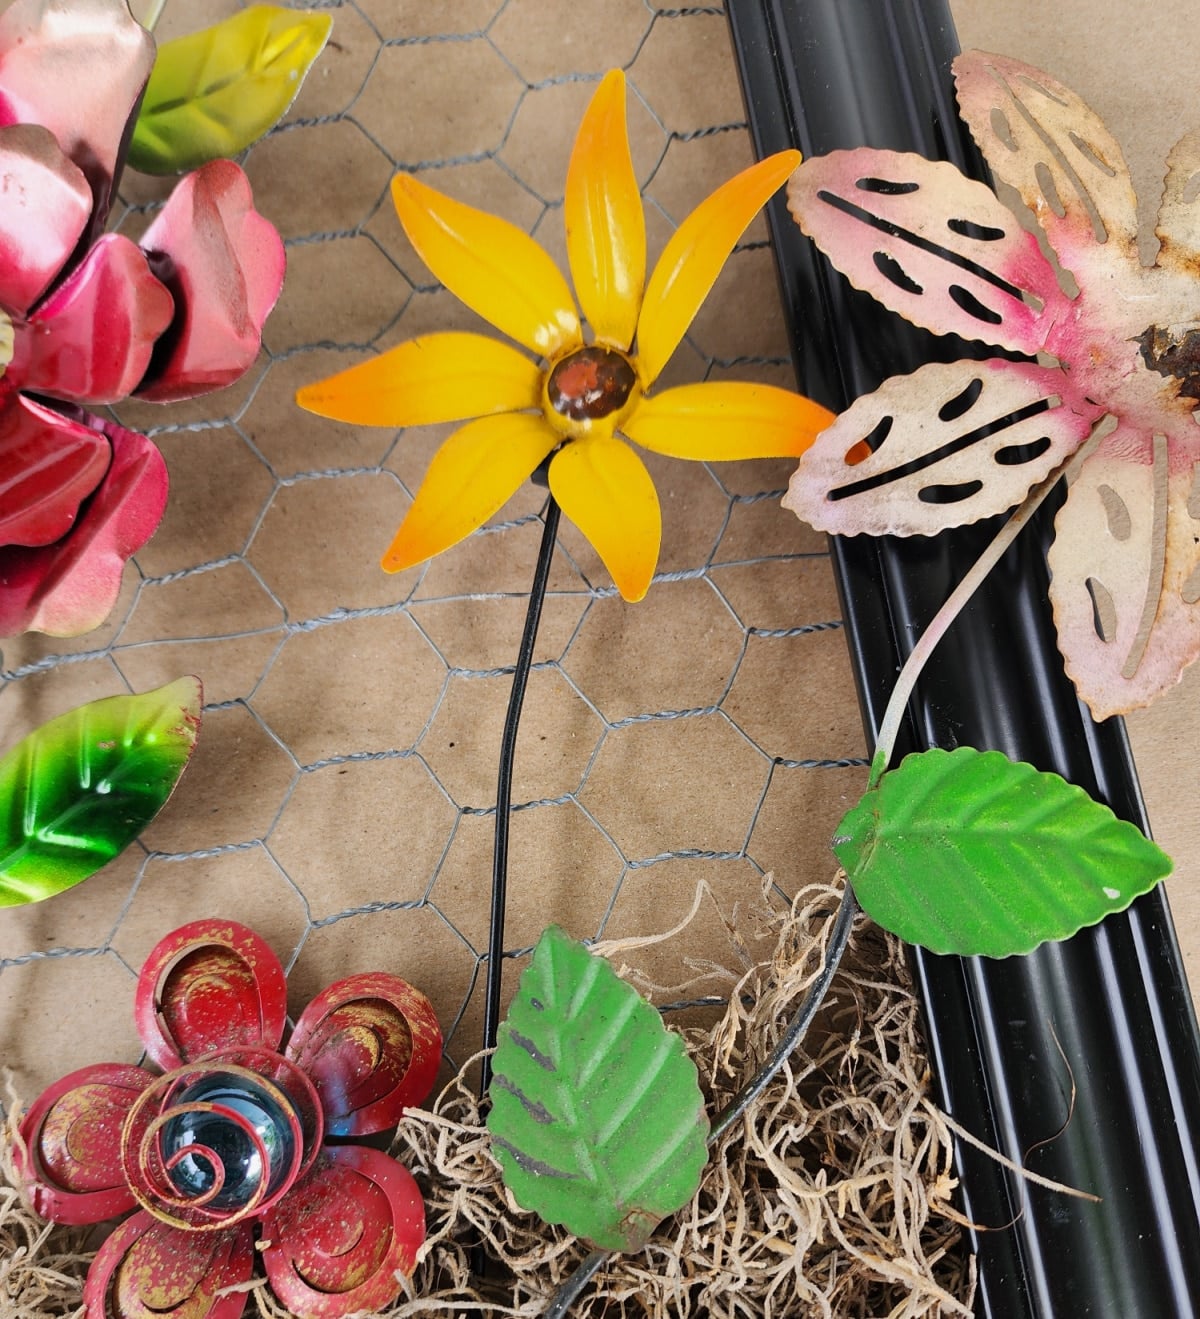
Because this type of decor can be placed in the ground or hung from a fence, it has small metal hangers. I used needle-nosed pliers to remove the hook.
Baby wipes were also used to clean years of dirt. Notice- this flower doesn’t have a stem because it was actually the centerpiece of a larger flower.
I used part of a stem I had cut off of another piece. Later, I’ll share how I changed out this stem.
Designing Framed Metal Flower Wall Decor
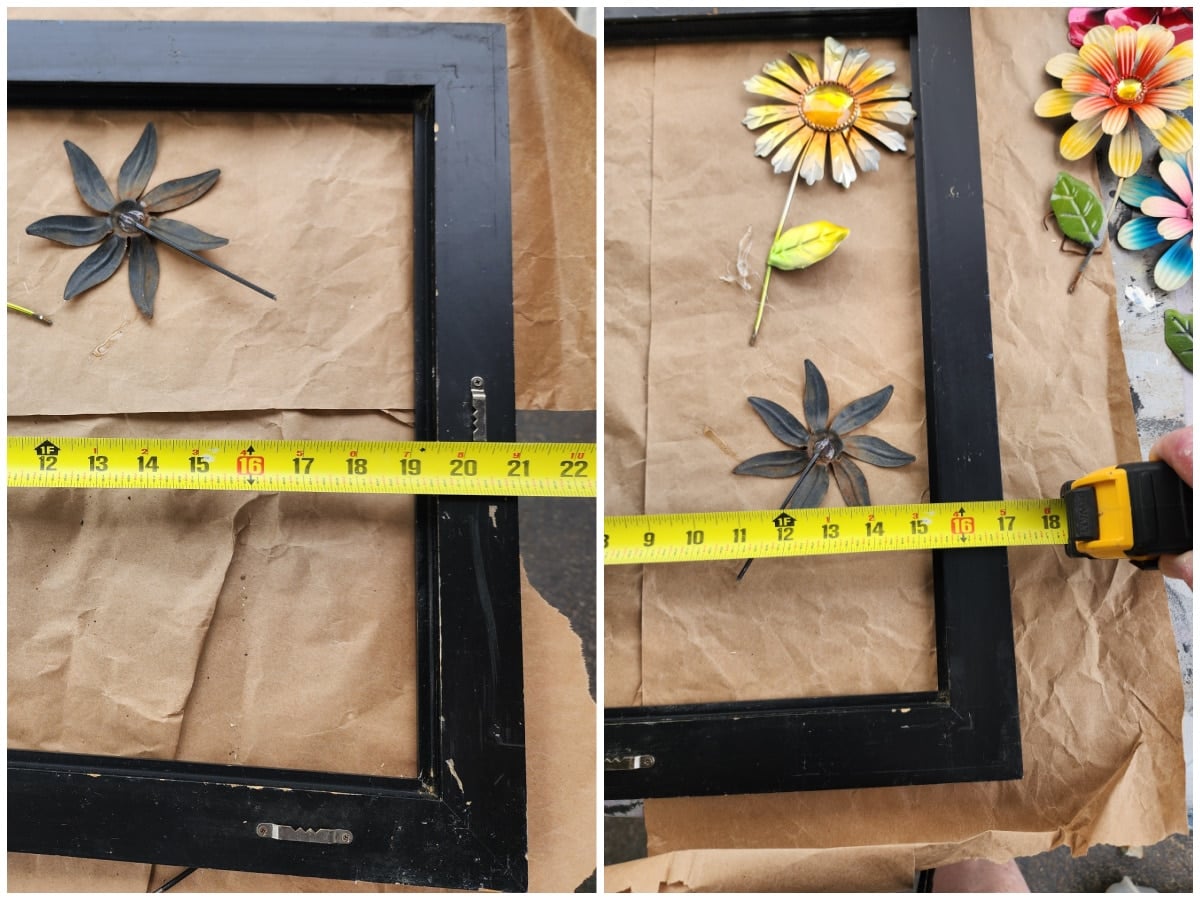
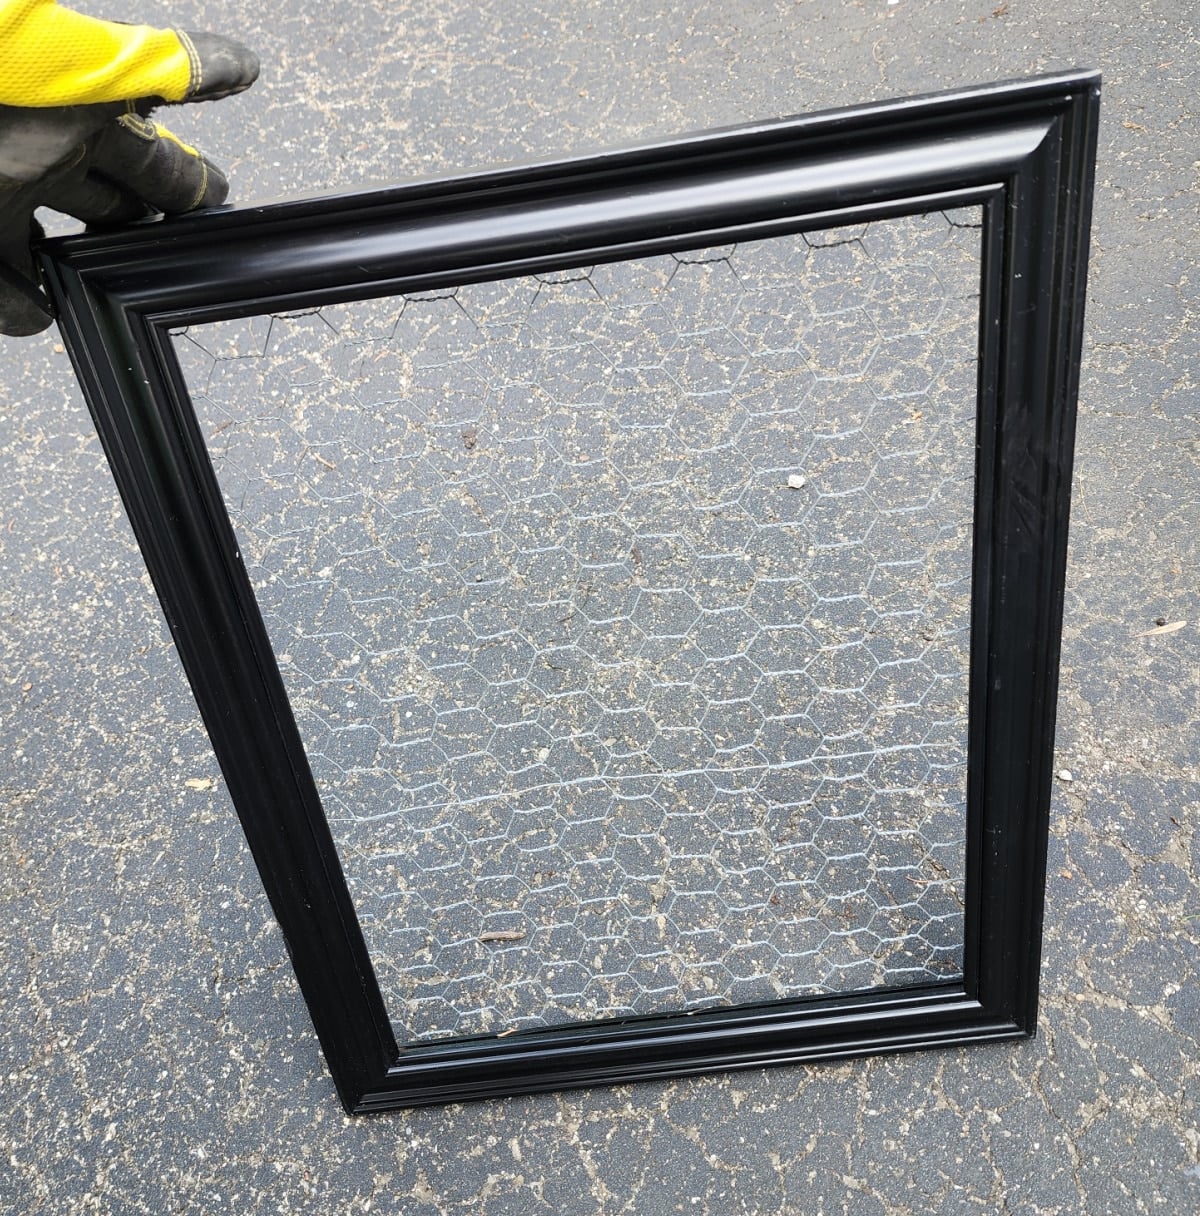
This frame measures 17 x 21. I considered using it in “landscape” mode, but I felt that it looked better in “portrait” mode.
How to Add Chicken Wire to a Picture Frame

I’ve used chicken wire on past projects, so I was fortunate to find this roll in storage.
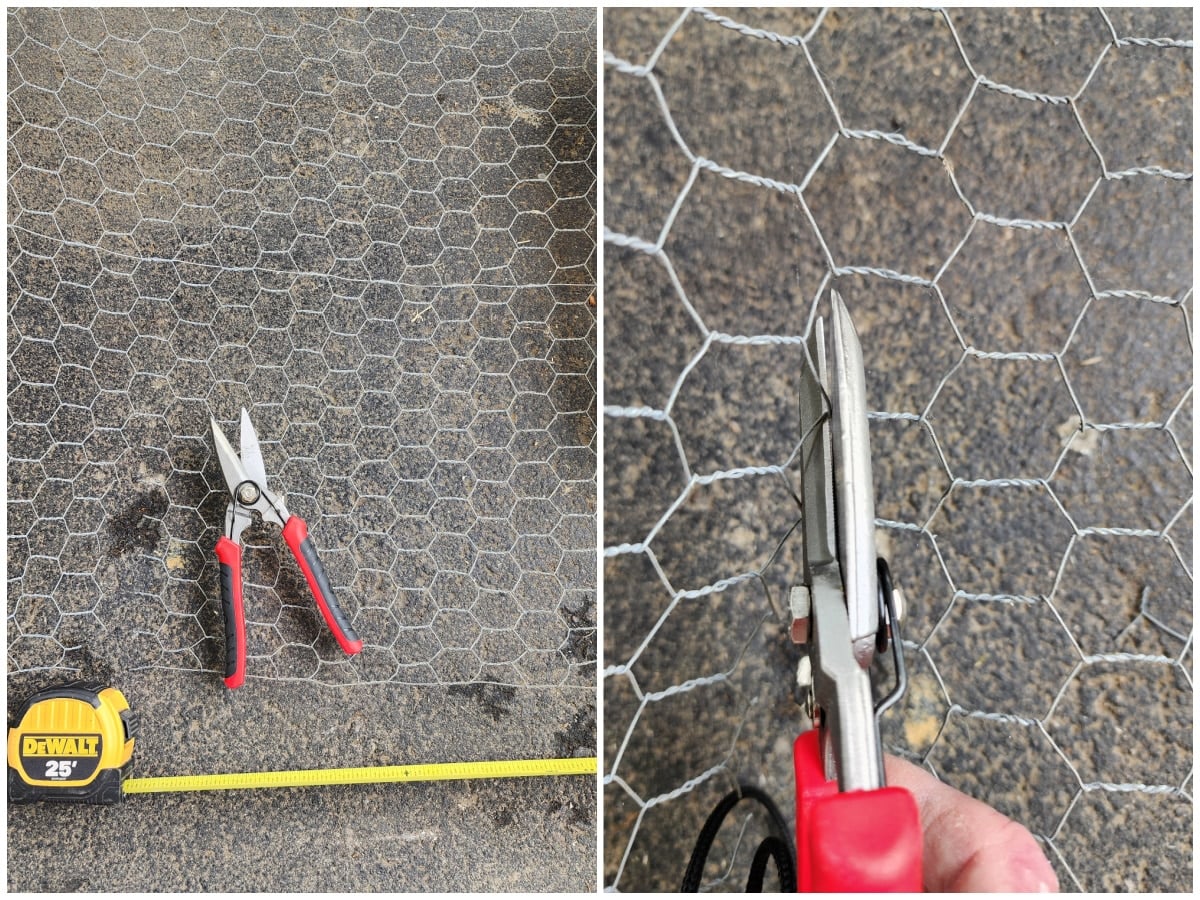
Use caution when cutting chicken wire. I cut the chicken wire to size, making sure to cut along the outer edge of the hexagon pattern and leave the twisted wire joints intact.
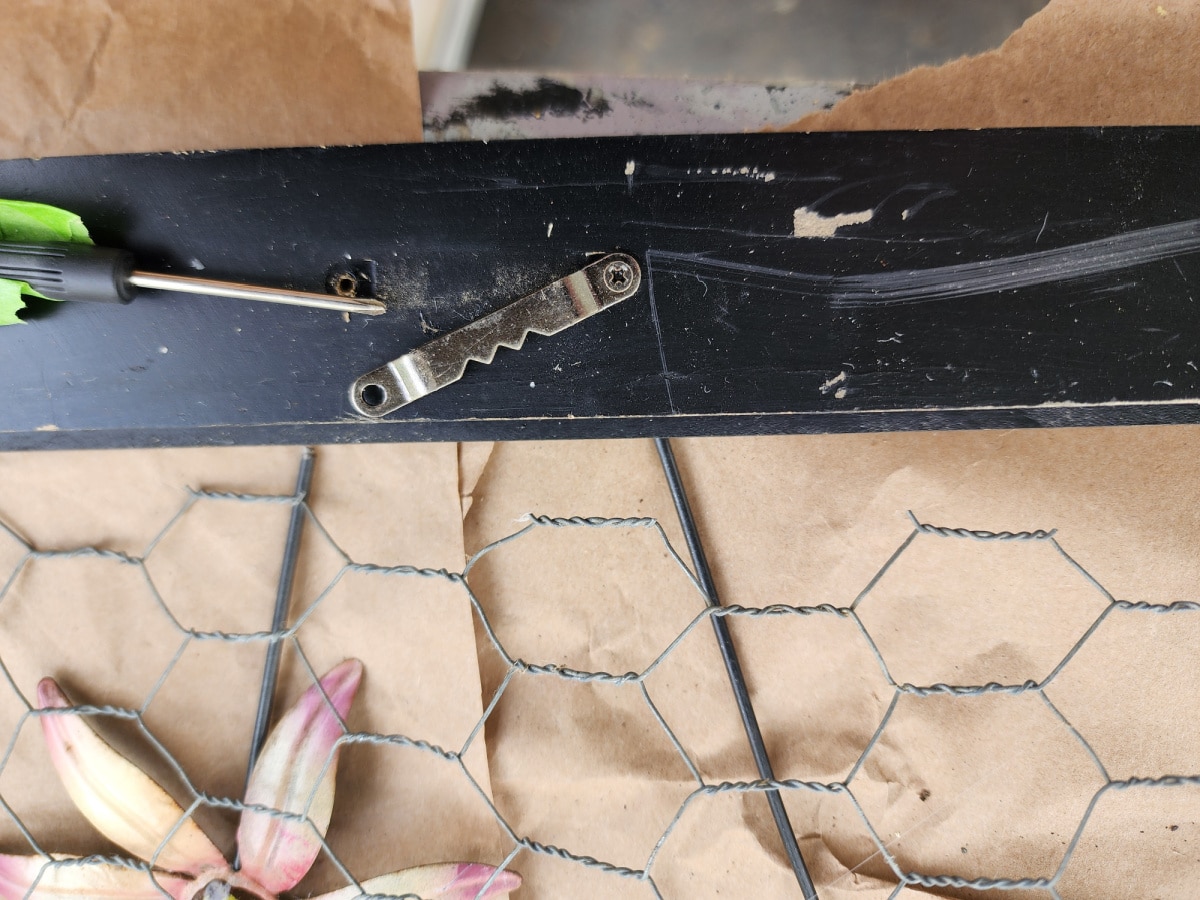
As I began attaching the chicken wire, I realized I hadn’t removed the sawtooth hangers. There were three, allowing the frame to be hung in either direction.
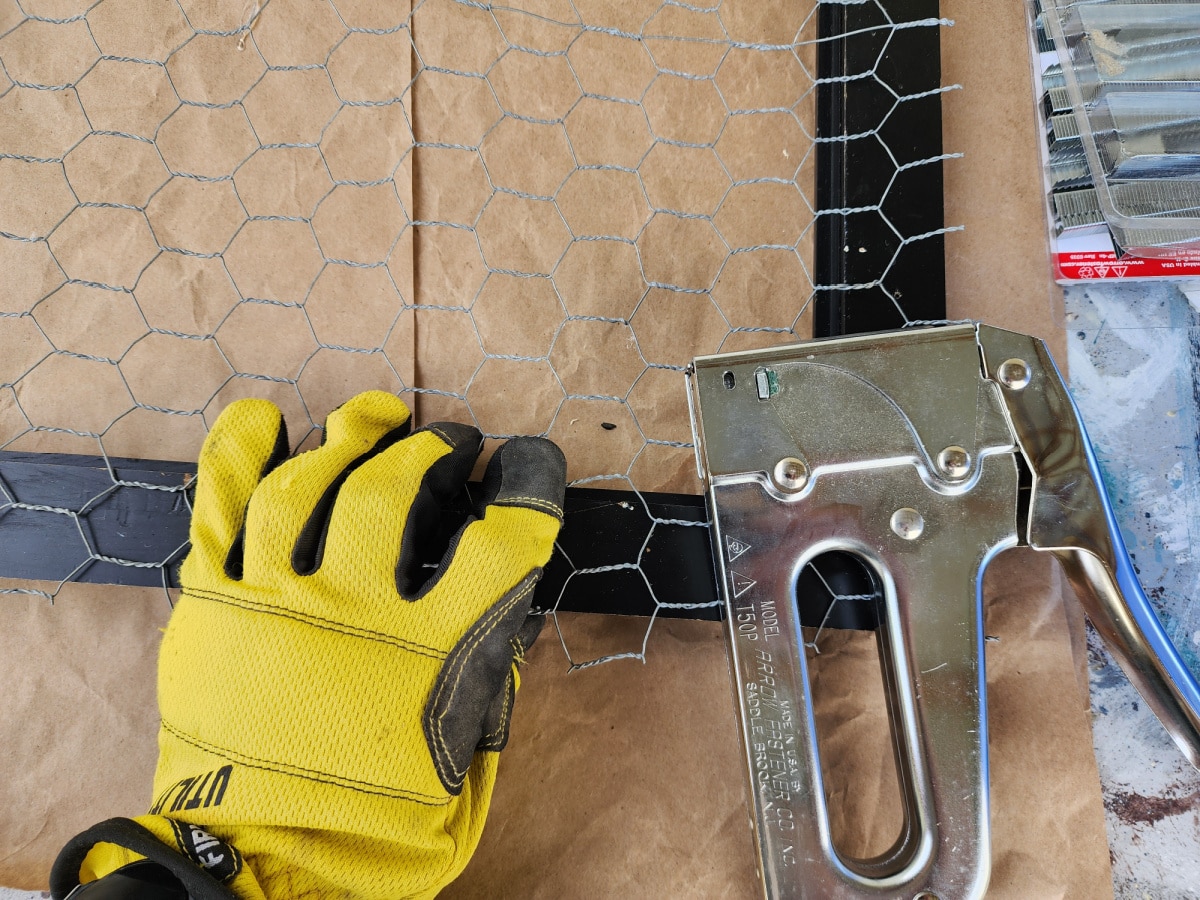
I began by attaching the chicken wire to the center of each side and stretching it tight.
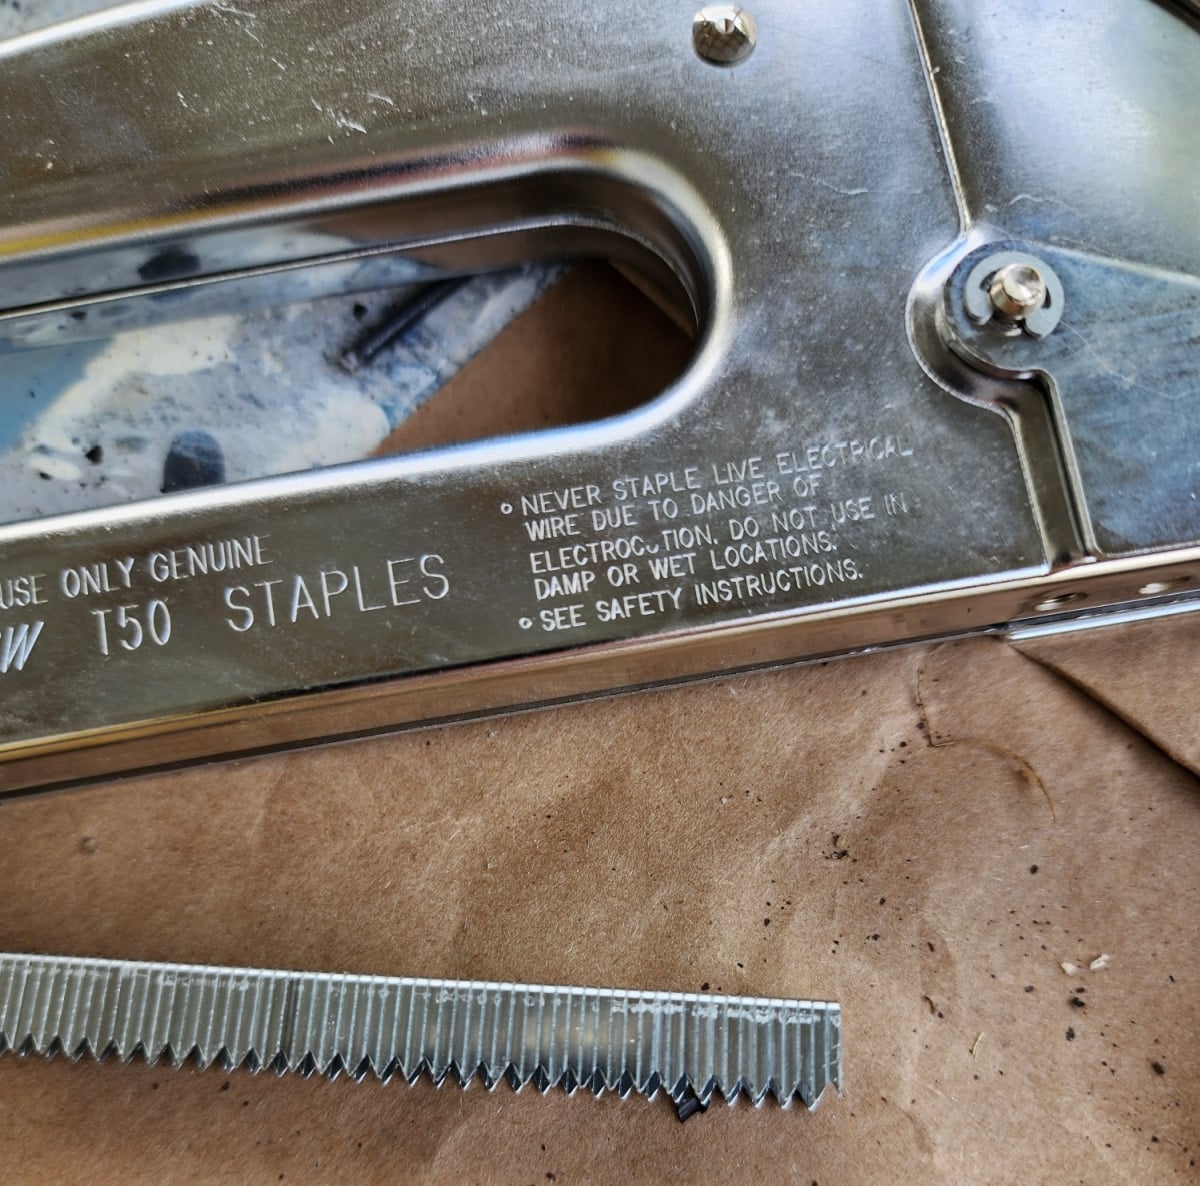
If I’m being honest, this is where I tell you I’ve never been very good with a staple gun. When I’ve done upholstery work, I always seem to end up tapping too many staples with a hammer. While looking through my selection of staples, I noticed these pointed staples.
Please leave a comment below if you have advice about using a staple gun successfully.
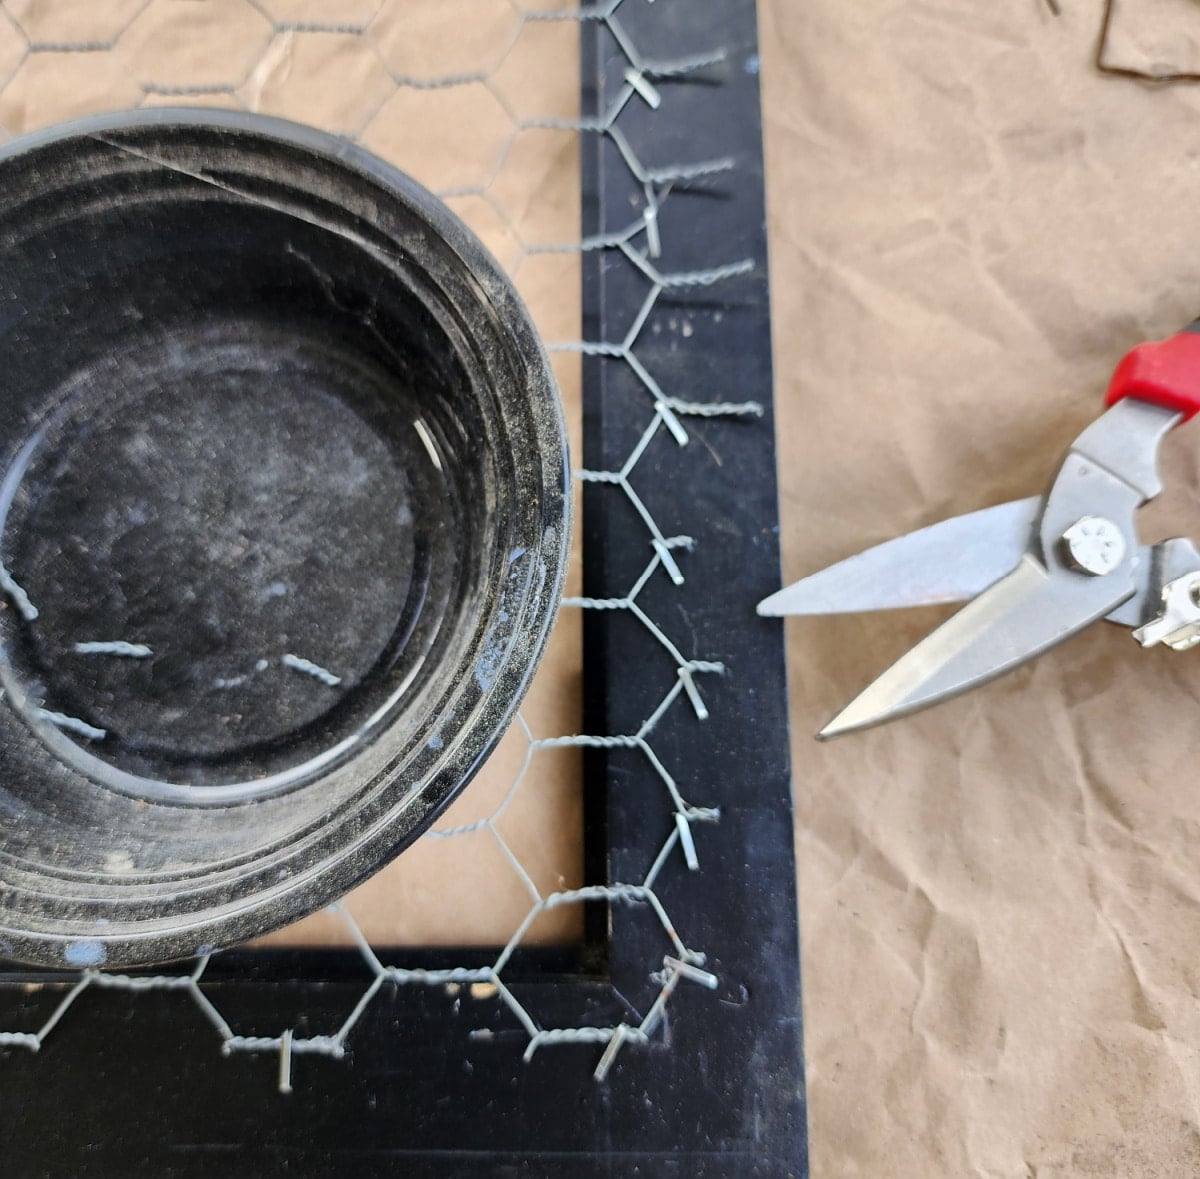
These staples held the chicken wire or hexagonal wire mesh well. I used my snips to trim off the twisted braid pieces. More about finishing touches on the back later.
If your chicken wire has a seam or joined section, try placing it toward the bottom of the frame, where it can be hidden with moss, ribbon, flowers, or other embellishments.
Save this project to Pinterest
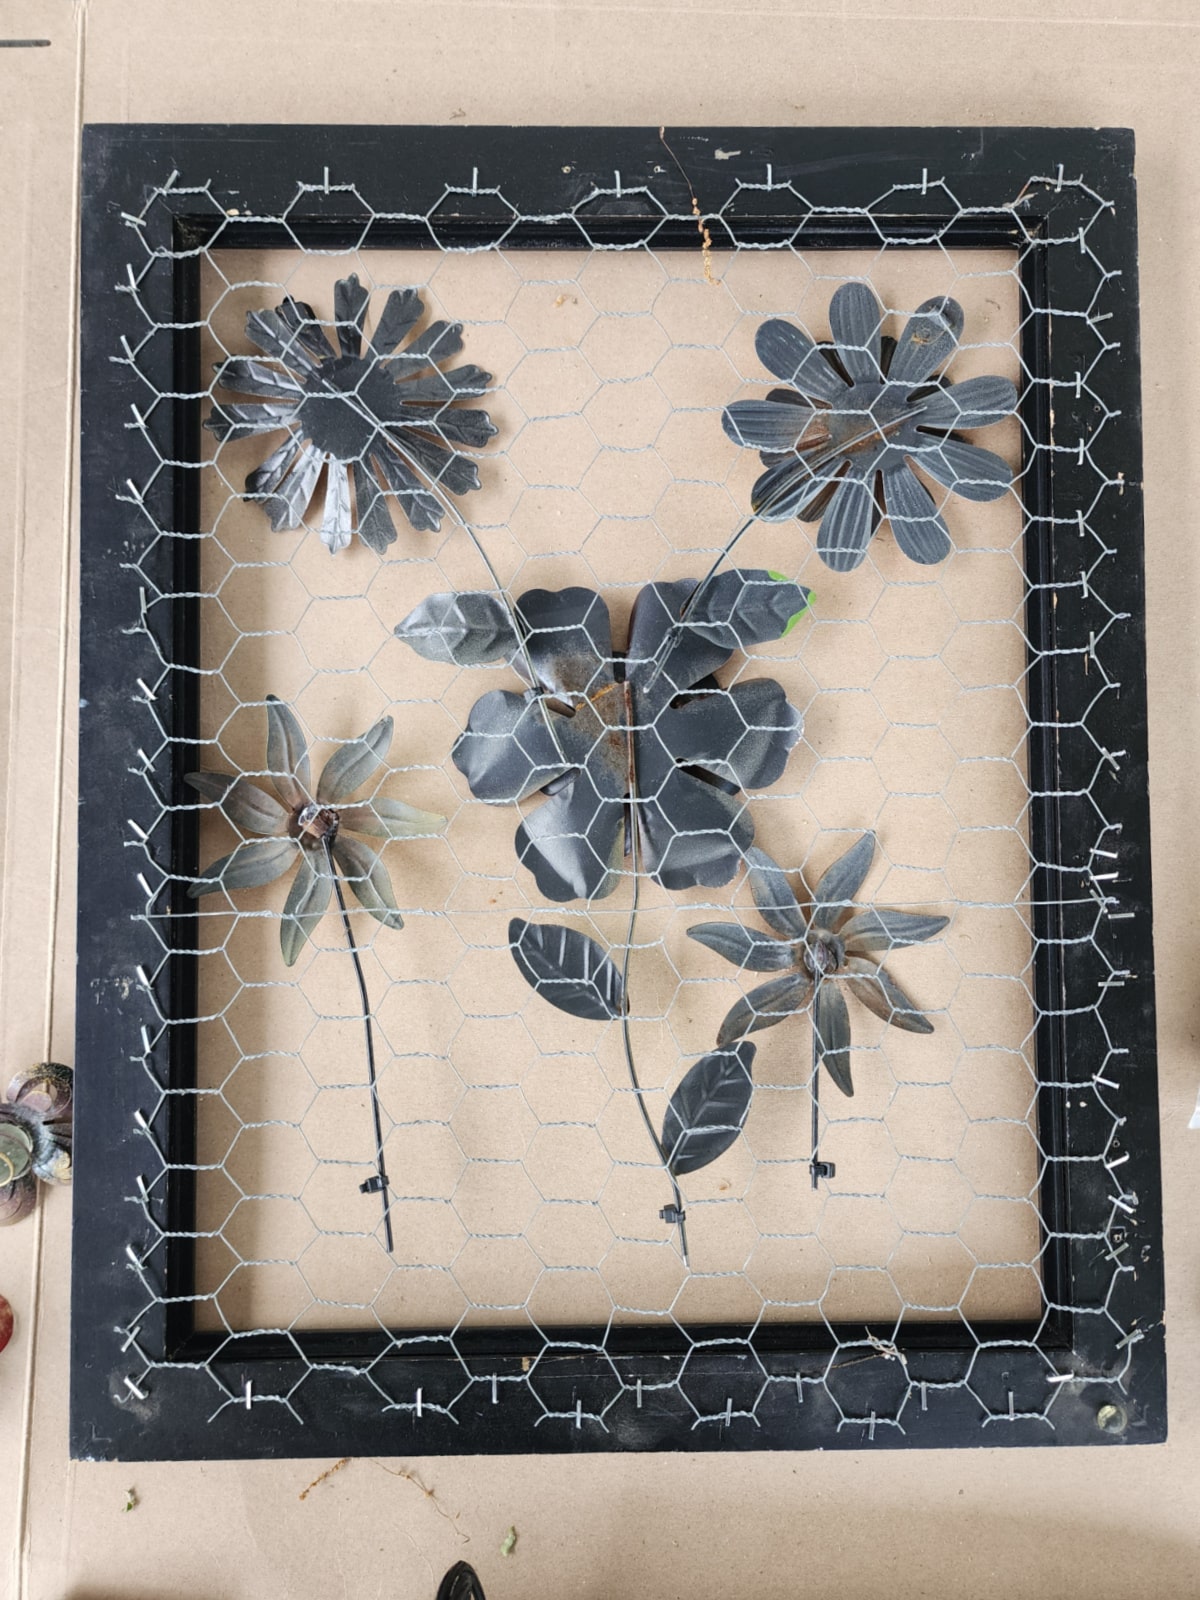
Designing the Upcycled Metal Flower Decor in a Wooden Frame
During this “dry fit” of the arrangement, you can see that the seam is less noticeable.
At this point, nothing is attached. I sent a few pictures to my friends, and one of them requested to see it on a lighter background instead of on my blacktop driveway.
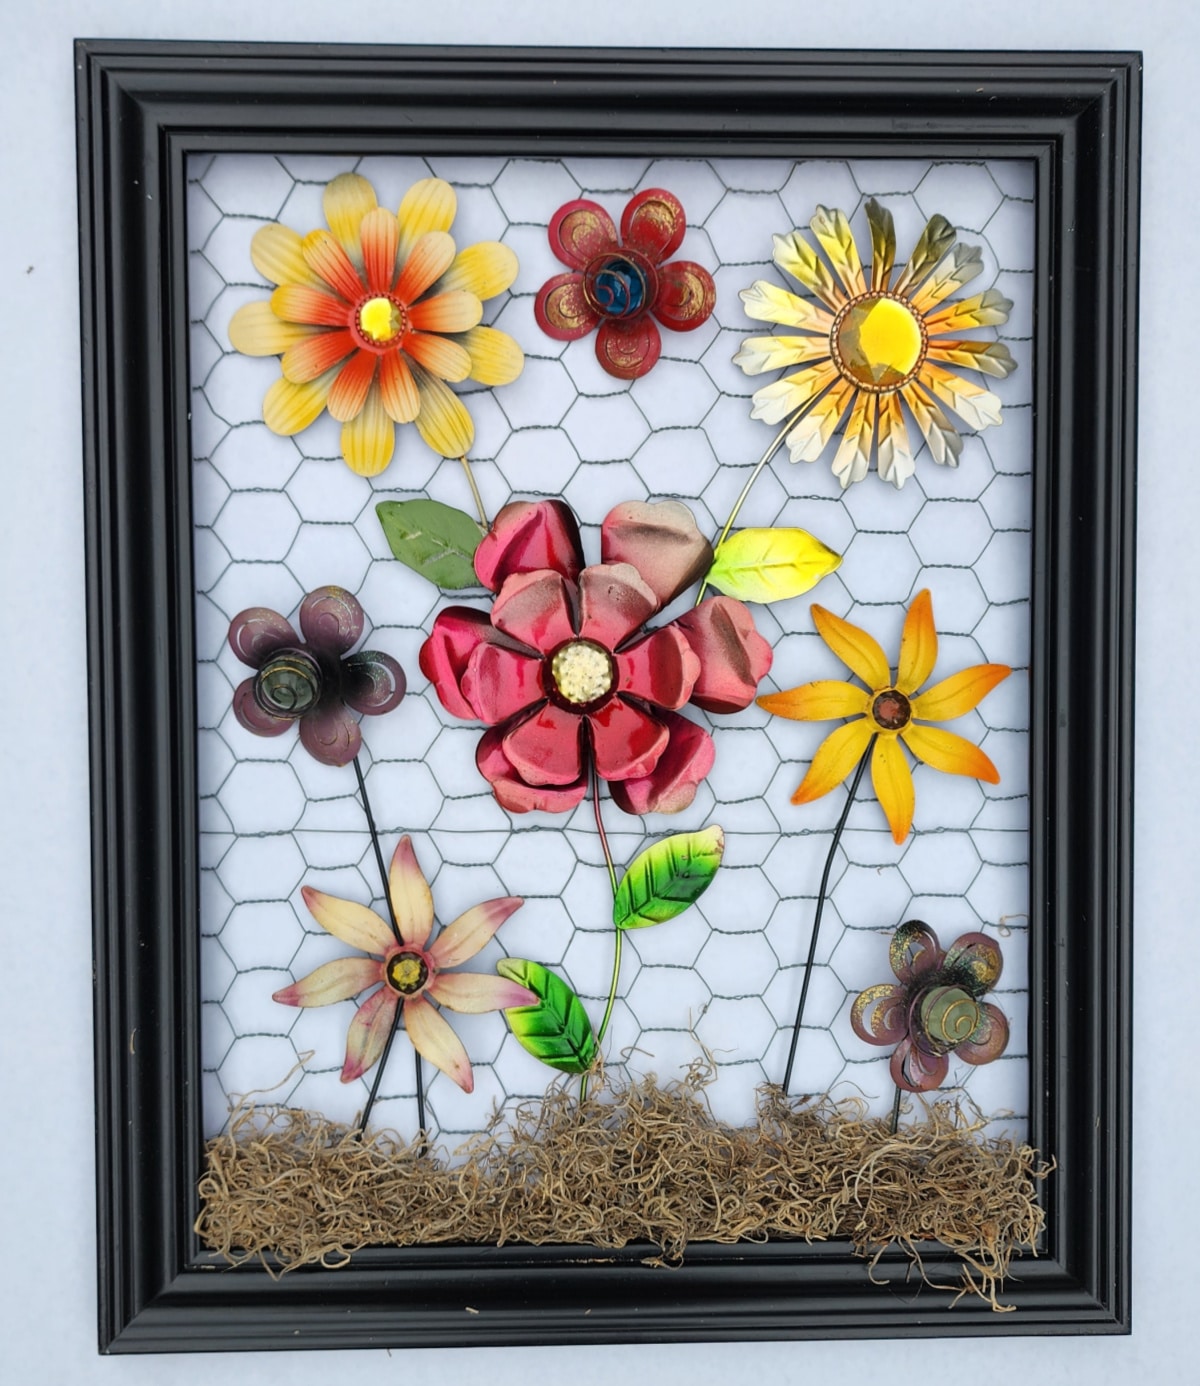
You may notice a few more smaller flowers added. It’s still up in the air if I want to use them. They are centers of old metal flowers from my hosta bed. My question to the friends was, “Should they have stems, or is it okay to leave them suspended in the air?”
One friend said it looked a little too busy.
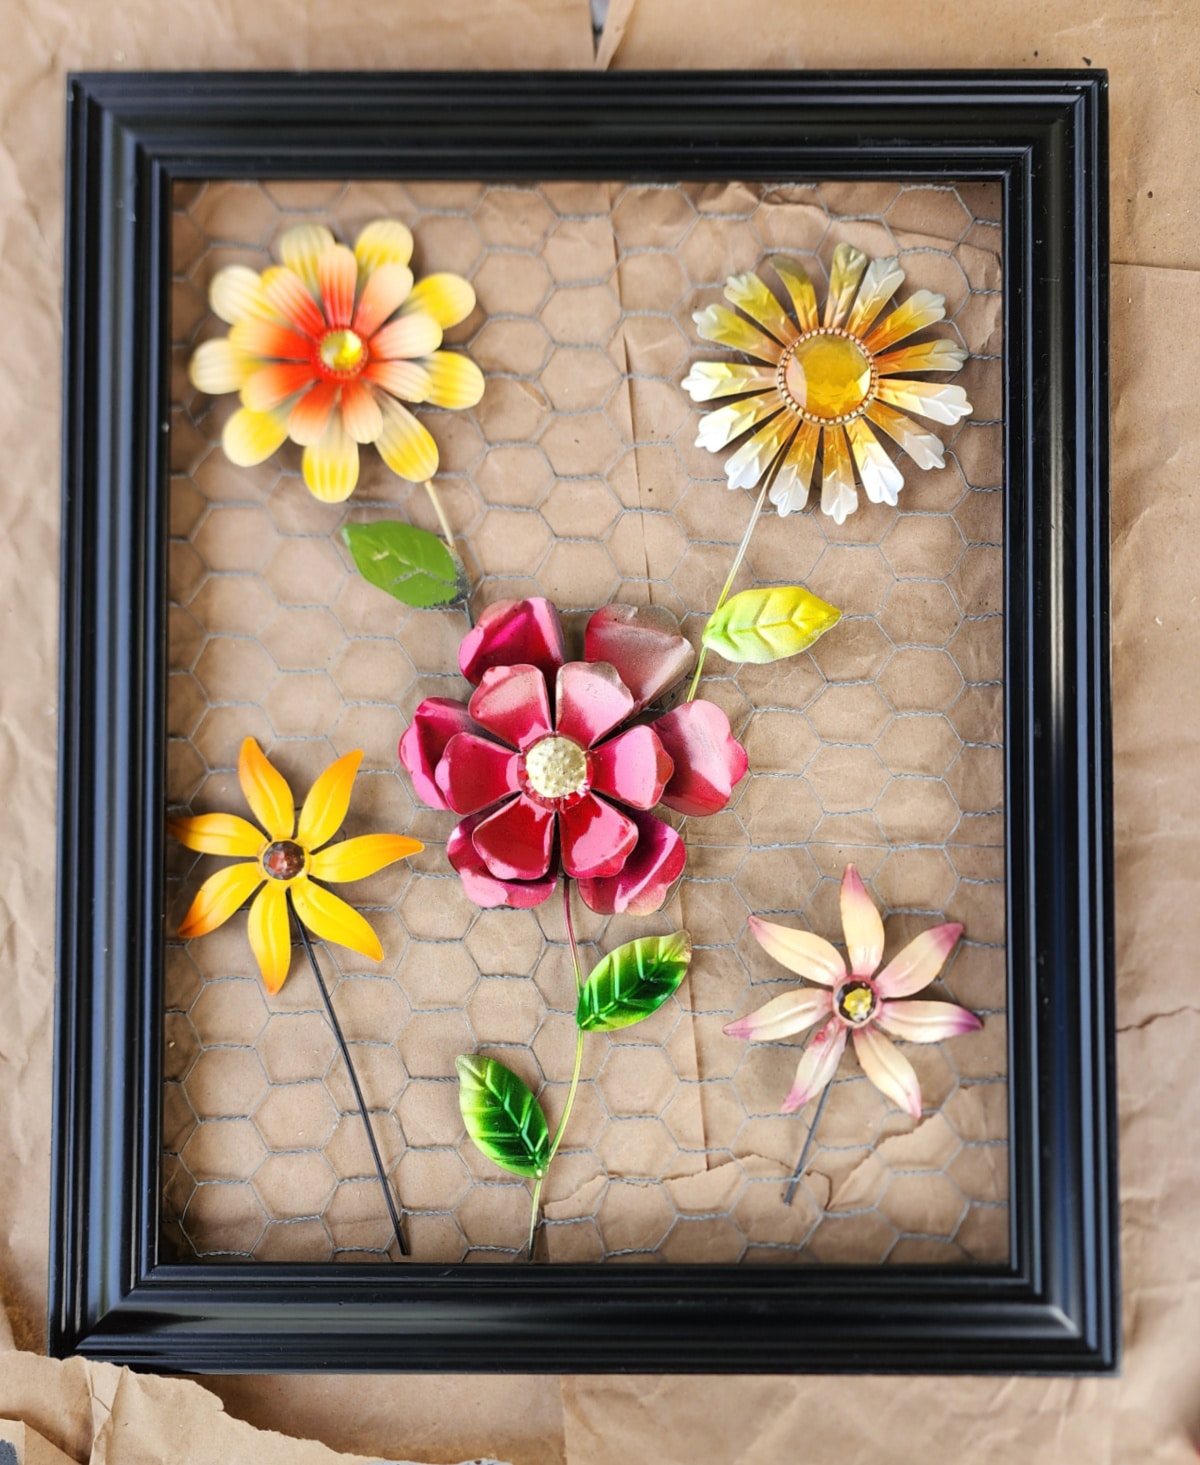
In any case, it was time to start attaching the Dollar Store metal flowers to the chicken wire.
Use Zip Ties to Secure Metal Flowers to Chicken Wire
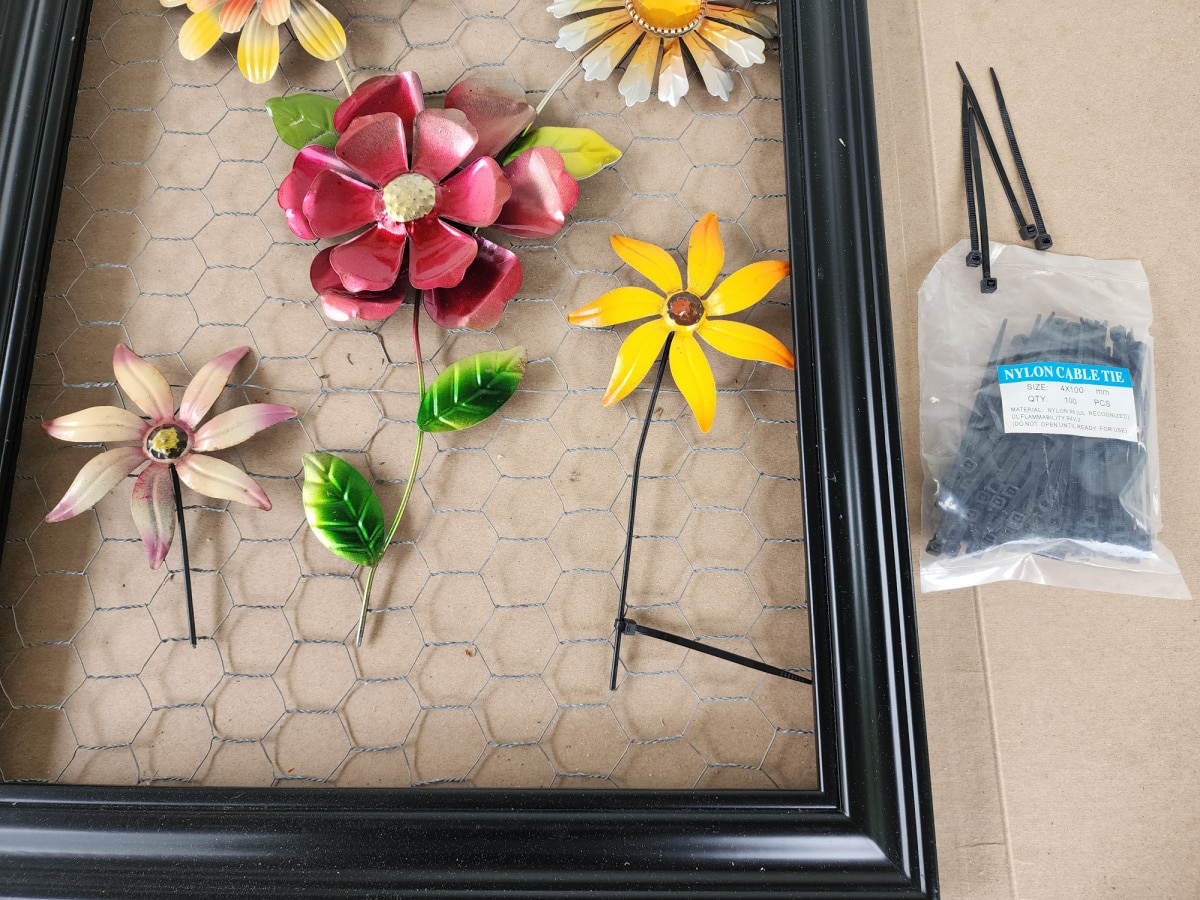
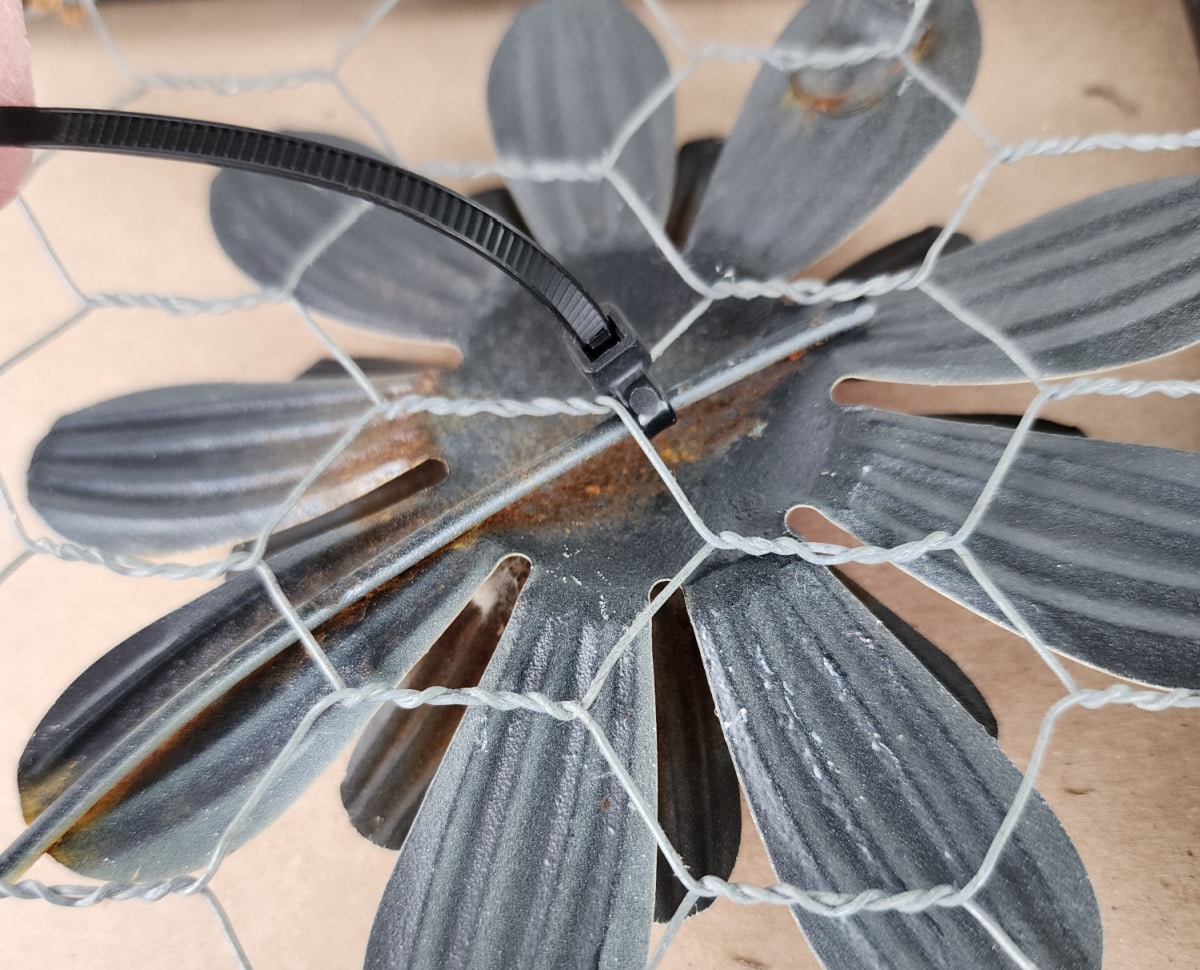
I gathered my stash of Zip Ties and used the smallest ones I have. It’s pretty much self-explanatory. Zip the tie, then cut it back, move on.
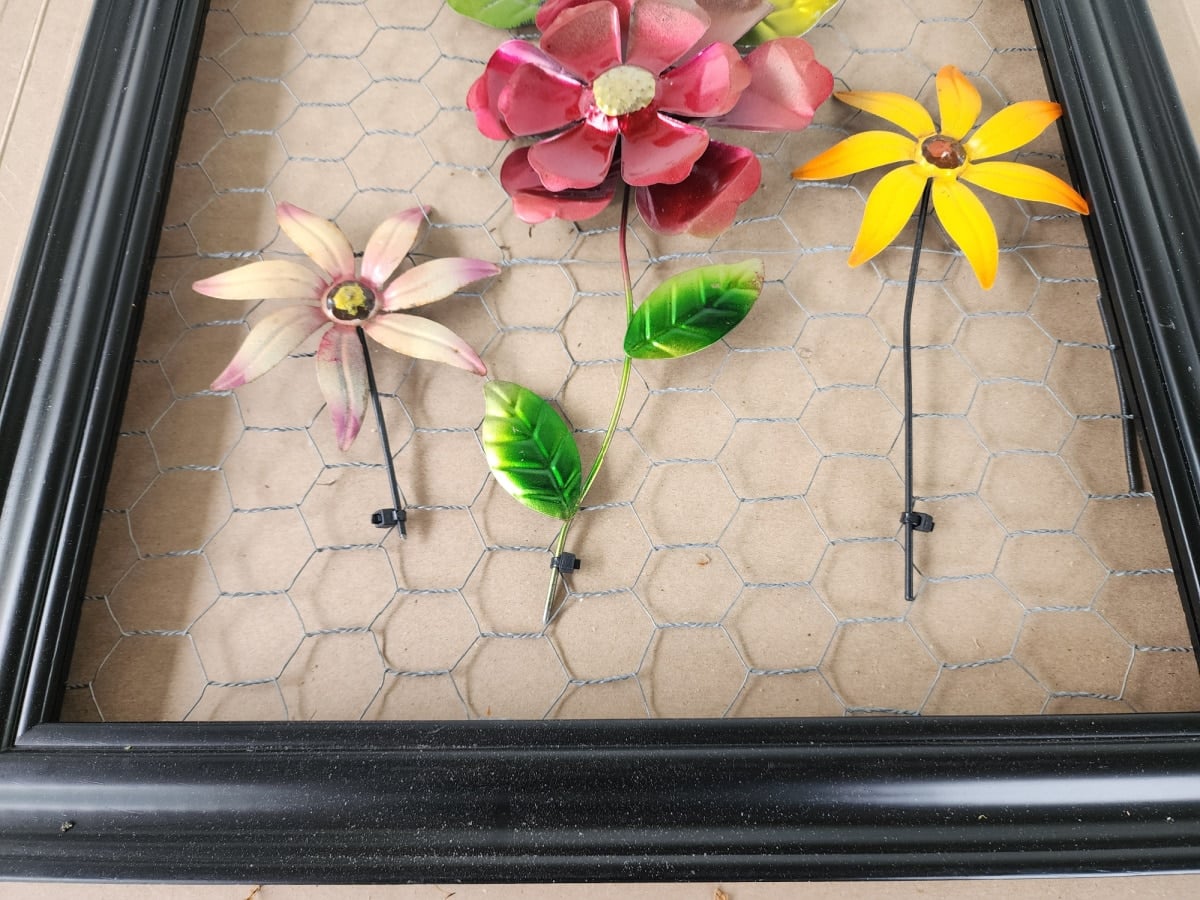
Doing this step from the front works best. You can rotate the “knot” of the twist tie to the back, but if you make creative placements, they won’t be noticeable.
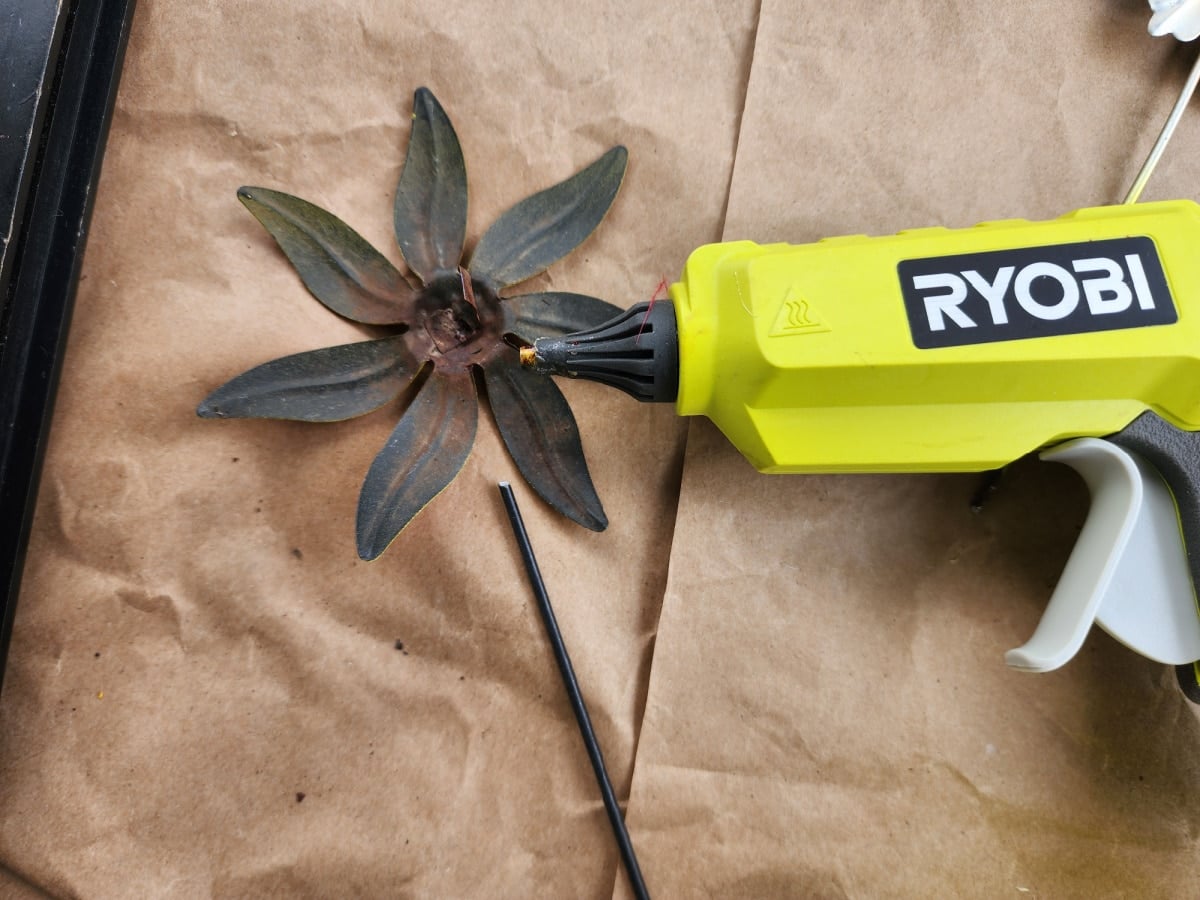
The smaller flower petals were attached to larger flowers with this metal piece, which I cut off. This small piece of metal is how they were attached to the chicken wire during the dry fit.
I gently turned the project over so that I could see how/where to add zip ties to hold the upper portion of the metal flowers in place.
Here’s a close-up of how I secured the flower from the back.
Do you struggle with zip ties the way I do? I’m always having to pay strict attention to make sure I’m putting the tail in the right way!
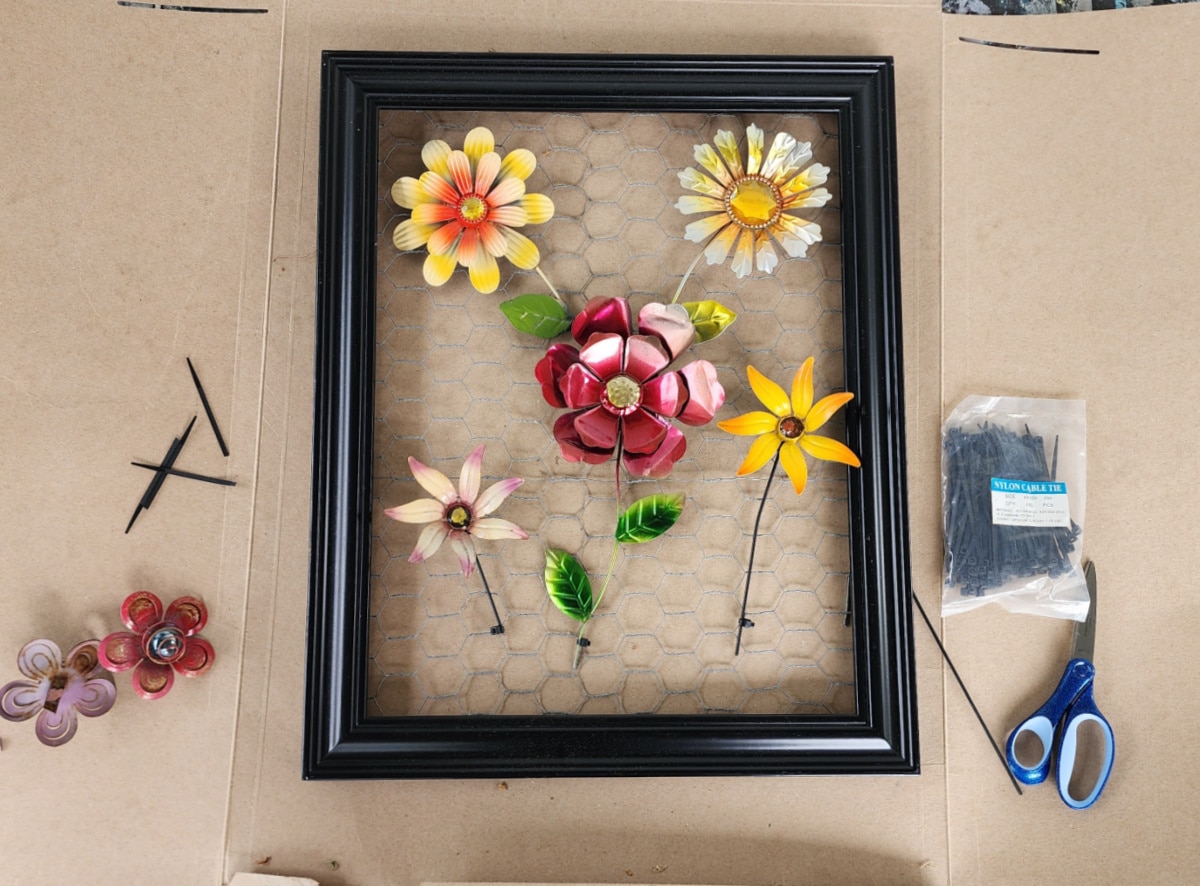
After flipping the project back over, it was time to make sure the metal flowers would stay in place when hung up.
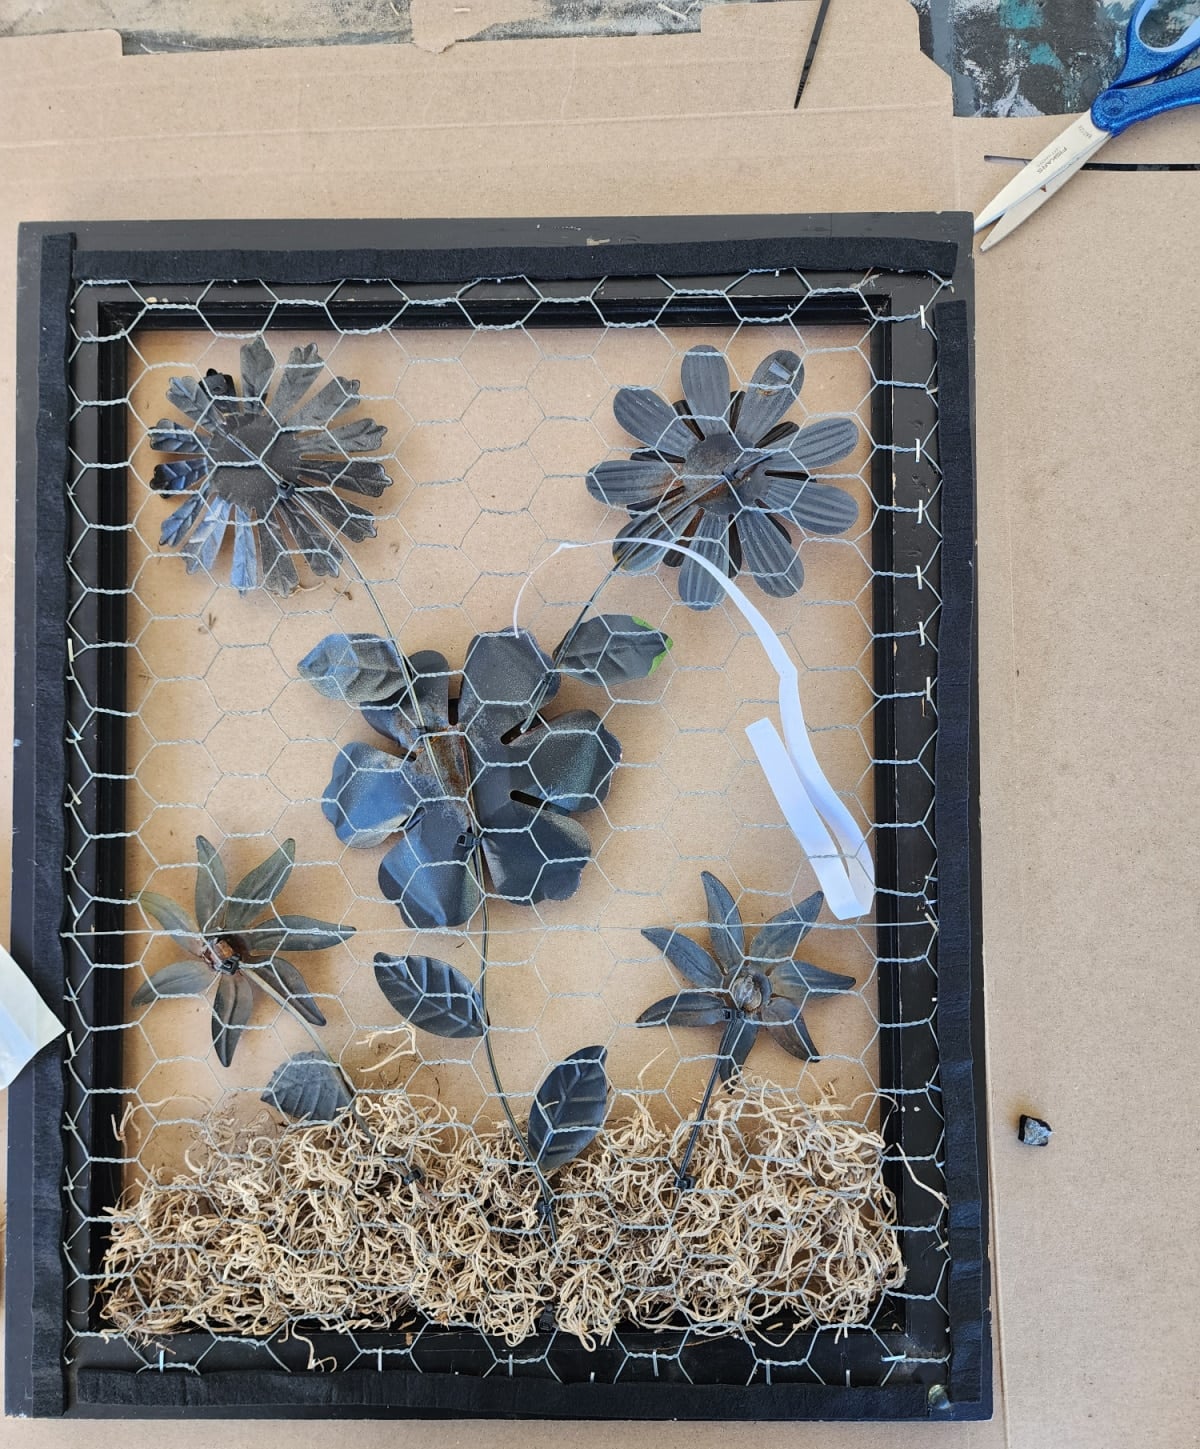
Somewhere along the way, I bent the flower petals so that it’s a little more three-dimensional.
Voila! Everything held in place.
Save this project to Pinterest
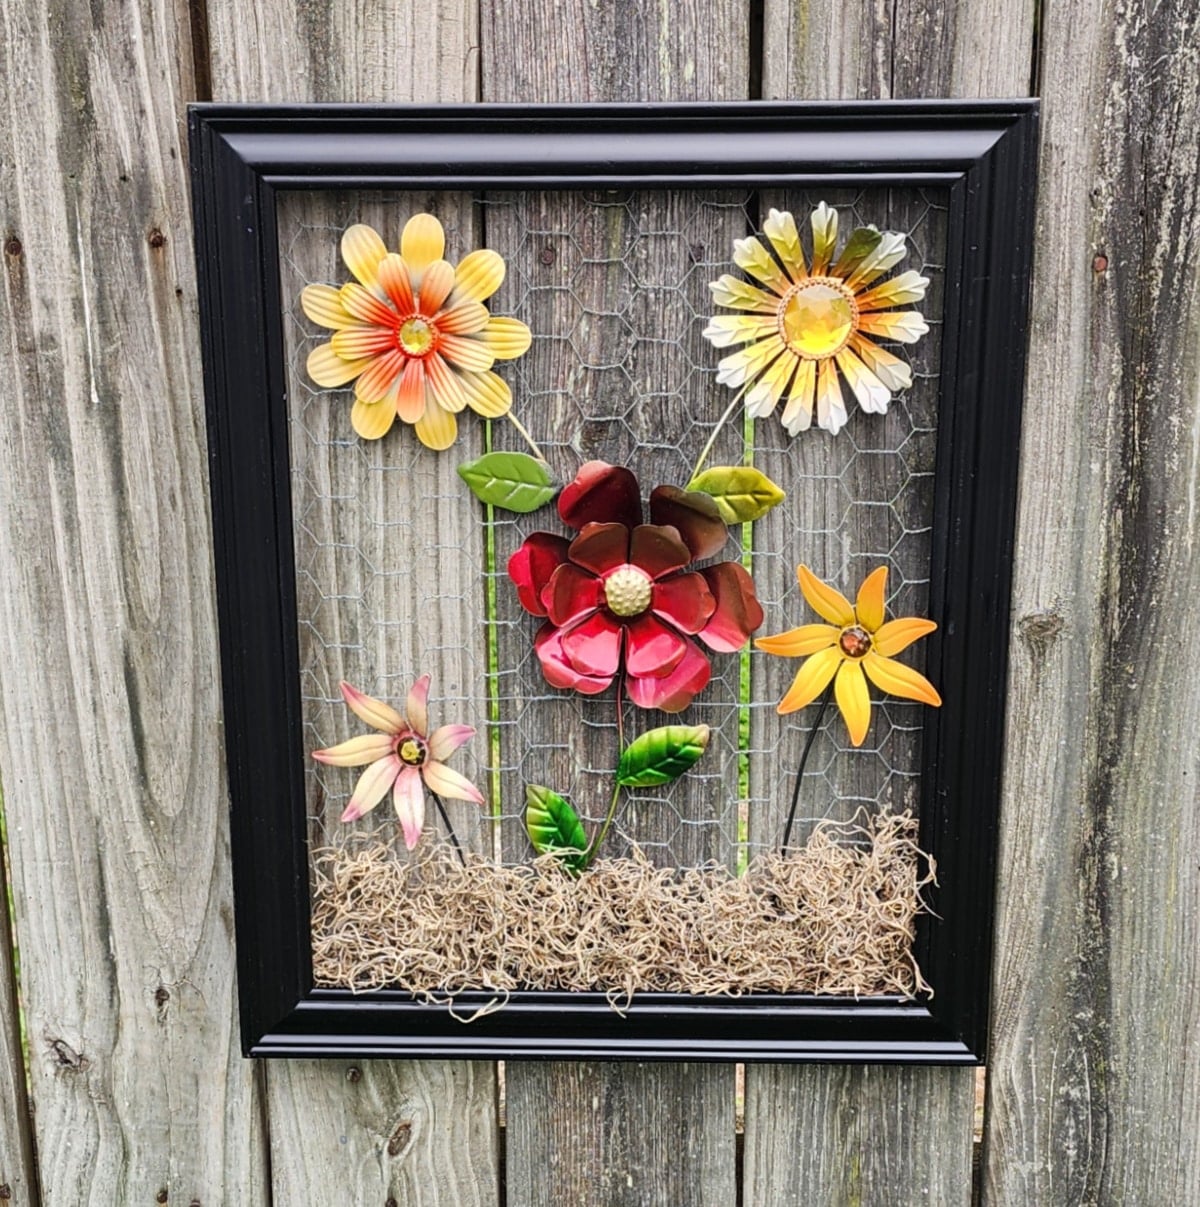
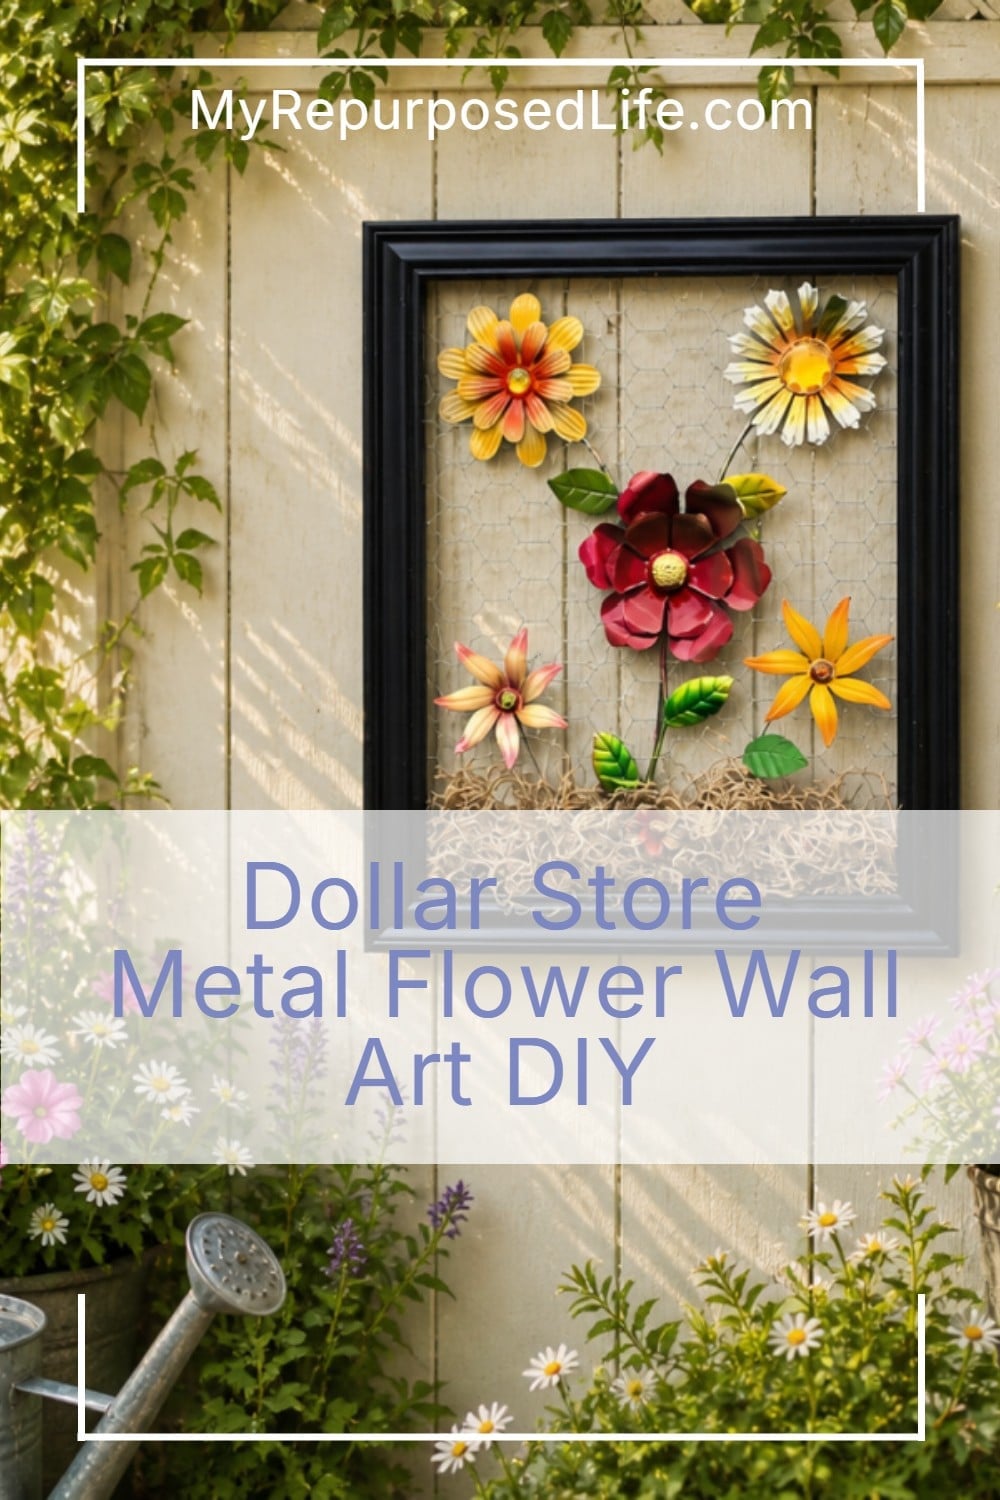
As I was adding the Spanish moss while the framed garden flower art was hanging on the fence, I wasn’t loving the long black wire stem on the right.
Back to the work table, I went to find a stem with leaves. I ended up cutting the damaged flower off and removing the lower leaf.
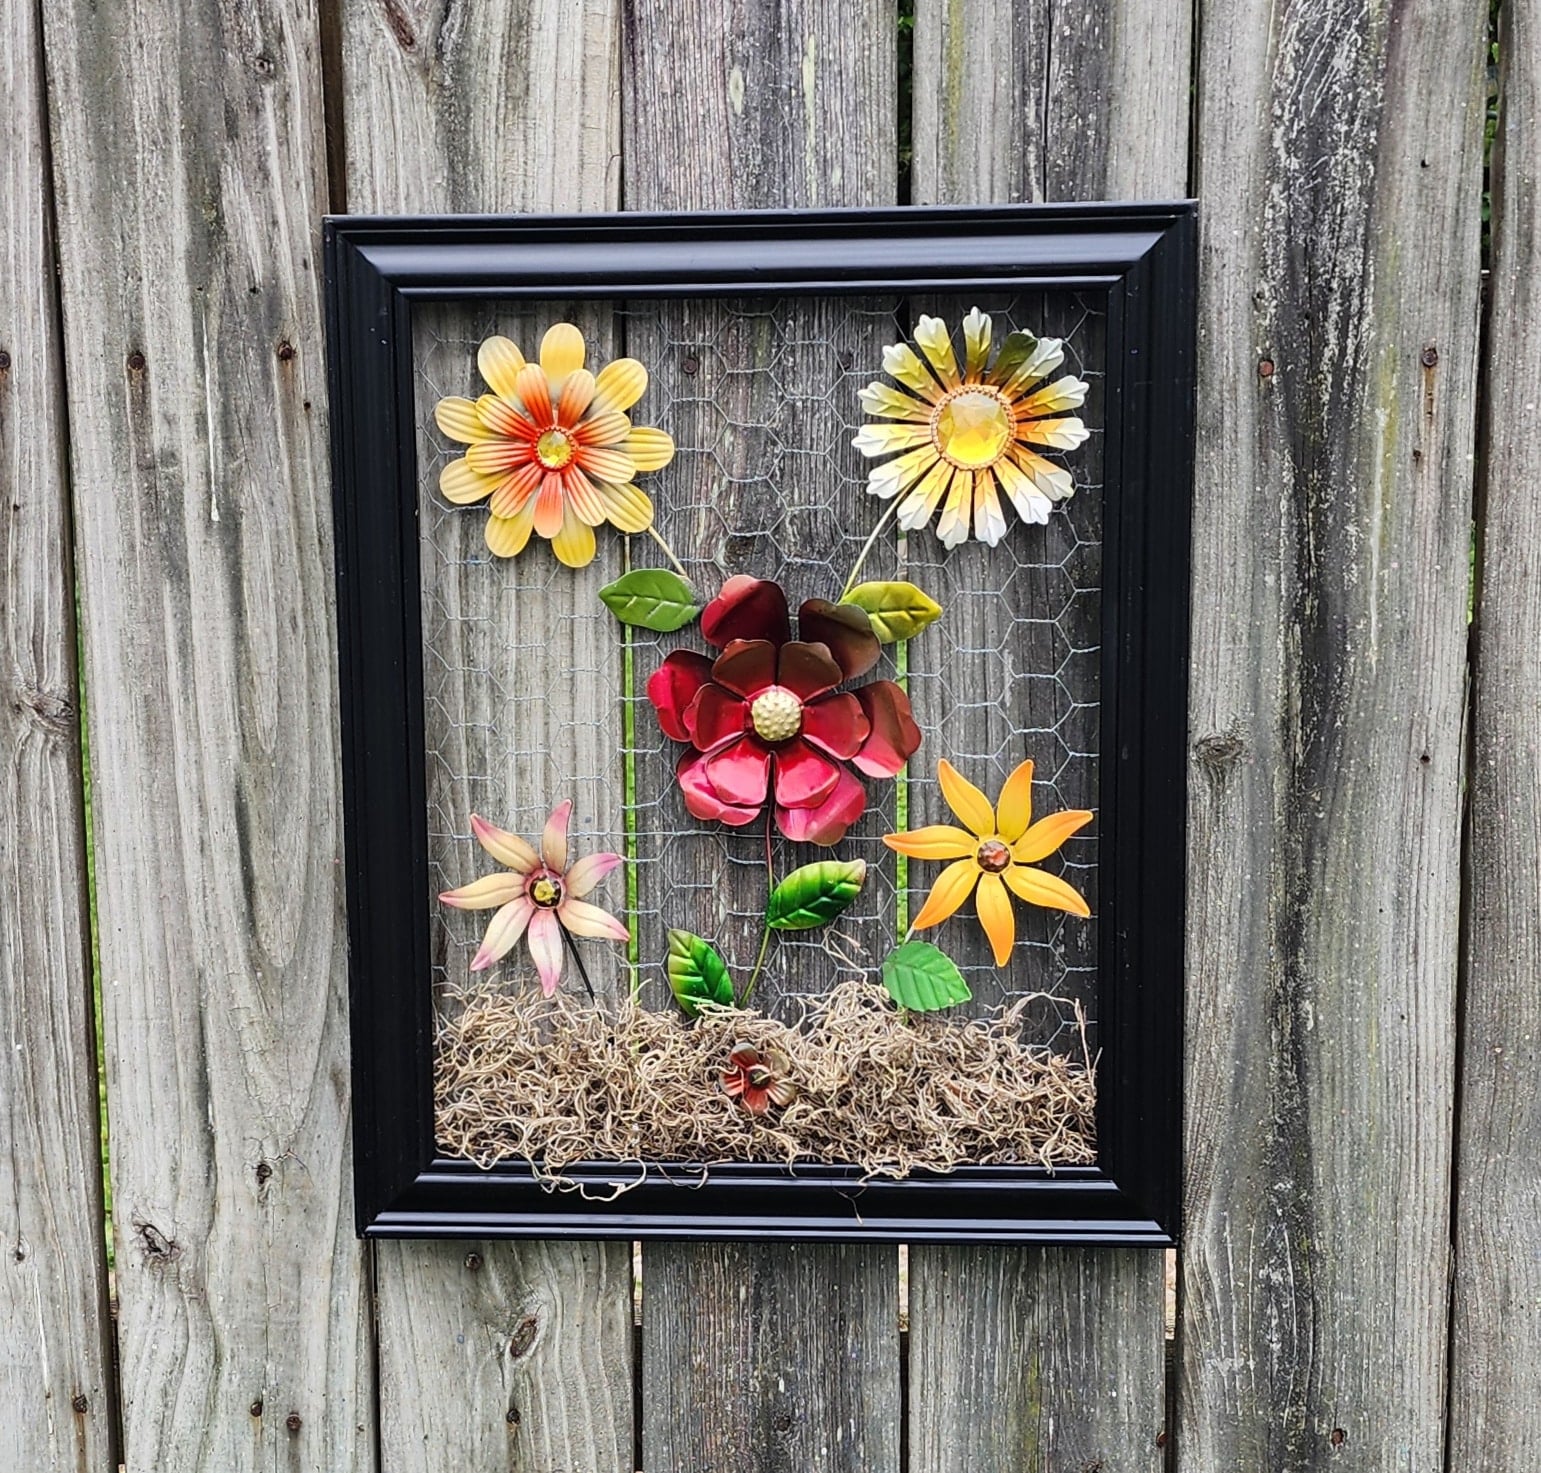
So, for now, the smaller flowers with the big marbles are not on the project. What do you think?
How to Make the Chicken Wire Safe for Hanging on a Wall
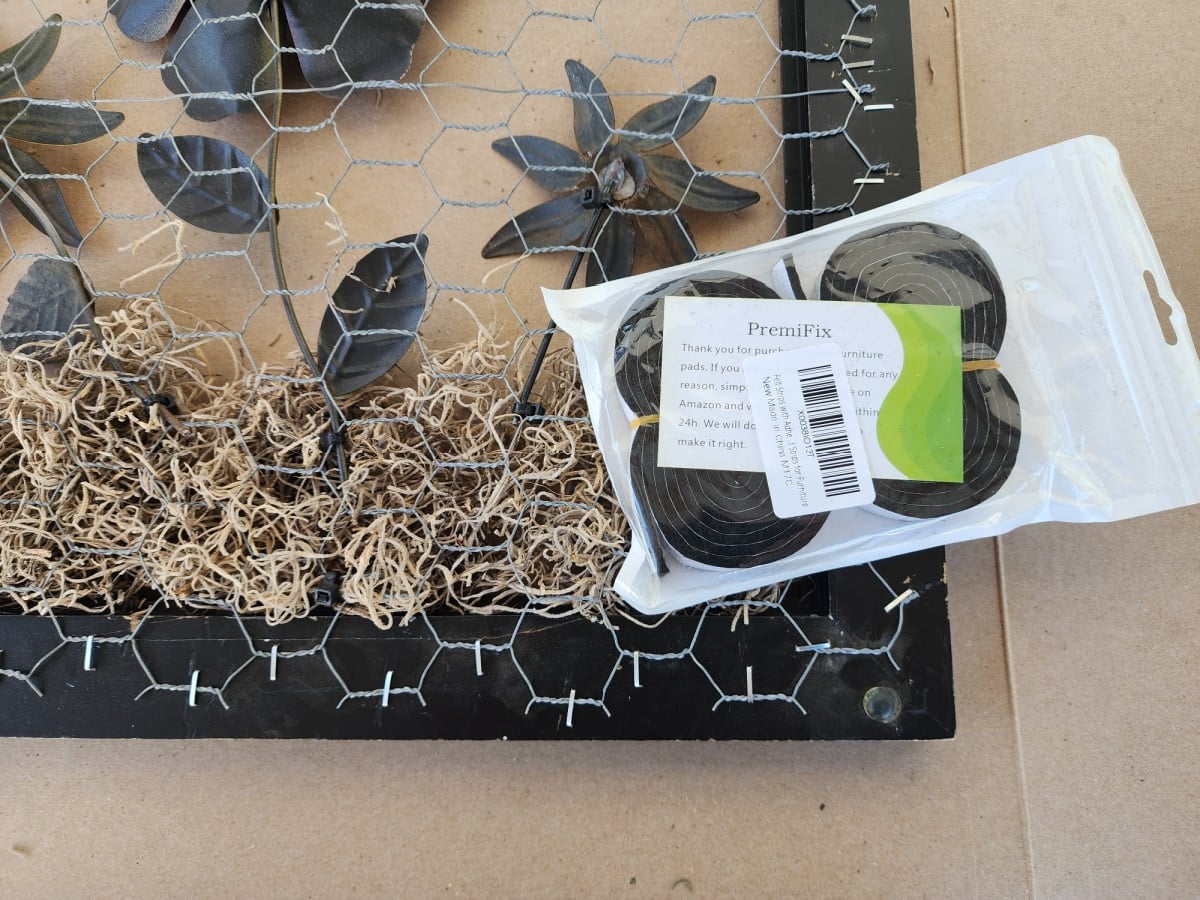
As I said earlier, I was inspired by a metal flower, framed artwork I bought at a local craft fair in Hardinsburg, Indiana. That lady glued felt to the back of her rustic frame. I found some furniture felt tape on Amazon, and it worked perfectly.
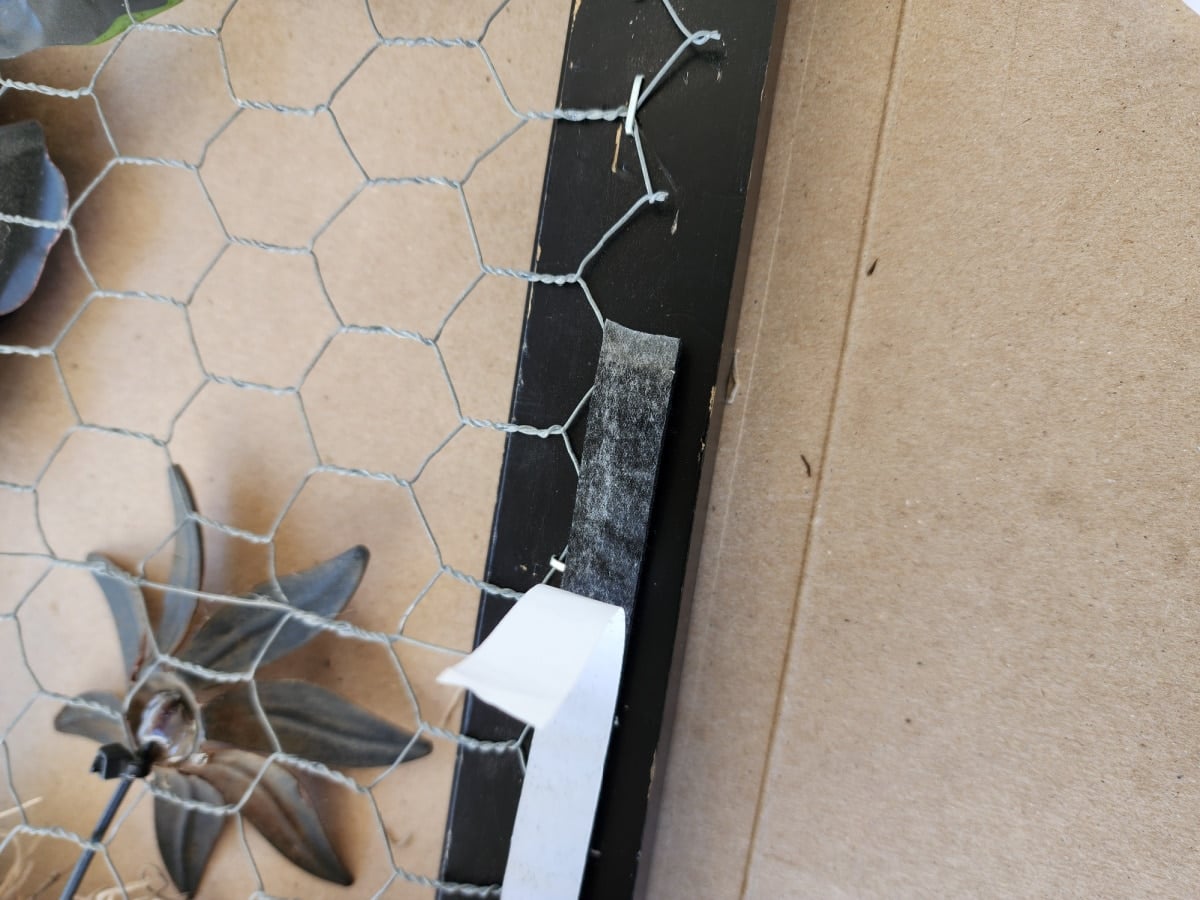
It’s very straightforward; simply remove the backing and stick the felt over the sharp ends of the chicken wire.
The adhesive felt has enough stickiness. The only thing left to do is to reinstall the sawtooth hanger!
Styling Suggestion for the Framed Metal Flower Decor
I love how this thrift store frame gave those old metal flowers a fresh place to bloom. The chicken wire makes it easy to attach and rearrange the flowers, while the moss softens the bottom and hides anything I don’t want showing. Now I just need to decide if the smaller flowers should stay off, or if this piece needs a few more blooms. What do you think?
Metal Flower Framed Artwork by Cooks Creations
This was my inspiration, a piece by Cook’s Creations. Her upcycled metal flowers were from a wall sculpture. It hangs in my bedroom at The Hideaway, my very humble vacation home.
If you were to do your own design, would you do bright flowers as I did, or more muted colors like Luann did here? Where would you hang yours?
Thank you for sharing this project!
Really Awesome Thrift Store Decor Projects From the Team
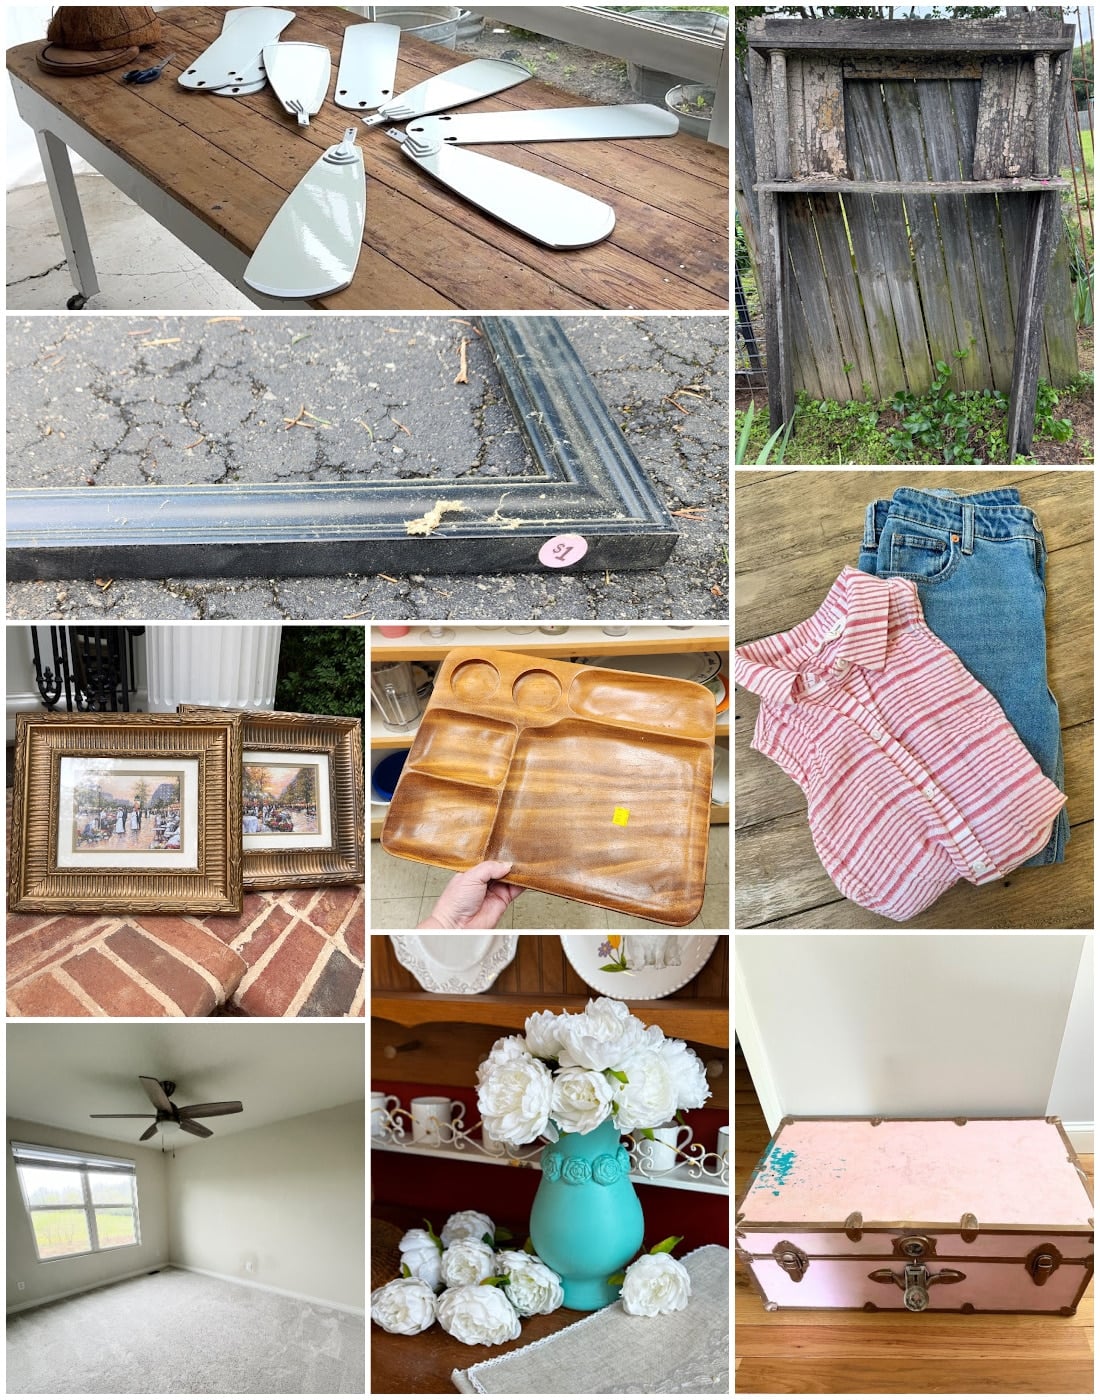
Upcycled Ceiling Fan Blade Flower Yard Art
Antique Mantle in the Garden – Why Not??
Unique Upcycle for a $1 Thrift Store Frame (You are here, thank you)
Easy European Wall Art with Thrift Store Frame
Upcycling a Wooden Cafeteria Tray (Without Paint!)
Rag Flag From Thrifted Clothes
How I Created a Beach House Guest Room Using Heirloom Furniture
Romantic Textured Vase Makeover
I am so excited to see the fantastic projects from the rest of the team, aren’t you?

This is such a great project to add a touch of whimsy to your outdoor areas. Love how you hung the flowers on the wire. I struggle sometimes as well with my staple gun. I do better when I get on my knees and add some body weight to it. That really gets the staples flush.
Christy,
Thanks so much for checking out my Thrift Store project! It was fun to do, and I have hung it outdoors at The Hideaway. I hope the birds don’t “borrom” my spanish moss. hahahah
gail
Gail, this is adorable. What a great way to create a new use for your picture frames. I love the metal flowers! I want a little hideaway 🙂
I do love my hideaway! Four acres of neverending work…. but it’s so quiet and peaceful there!
gail
I really love this project. Great Job.
Thank you so much Rebecca. It was fun, and now it’s hanging on the camper at The Hideaway!
gail
This is so cute, Gail! That last photo should be on a magazine cover!
Thank you Julie.
I wish I could take credit for the photo, but a “friend” photo shopped it for me.
gail
A black frame is such a perfect way to really let those metal flowers pop!! And the flowers remind me so much of vintage enamel brooches/pins. Love how this turned out!
Sarah,
thanks! I would like to try another one with painted flowers. We’ll see!
gail
That’s adorable, Gail! I love that pop of color and rustic chicken wire. What a great upcycle for summer!
Kim,
I had fun with this simple project. I’d like to make another one, maybe in the fall.
gail
Fabulous, Gail! I’m 2 for 2 right not on project from the team that would look great with my garden mantle!!! Pinned!
It would look great on your garden mantel! Thanks for pinning Sue.
gail